Registering a Reconciliation Compliance Transactions Application
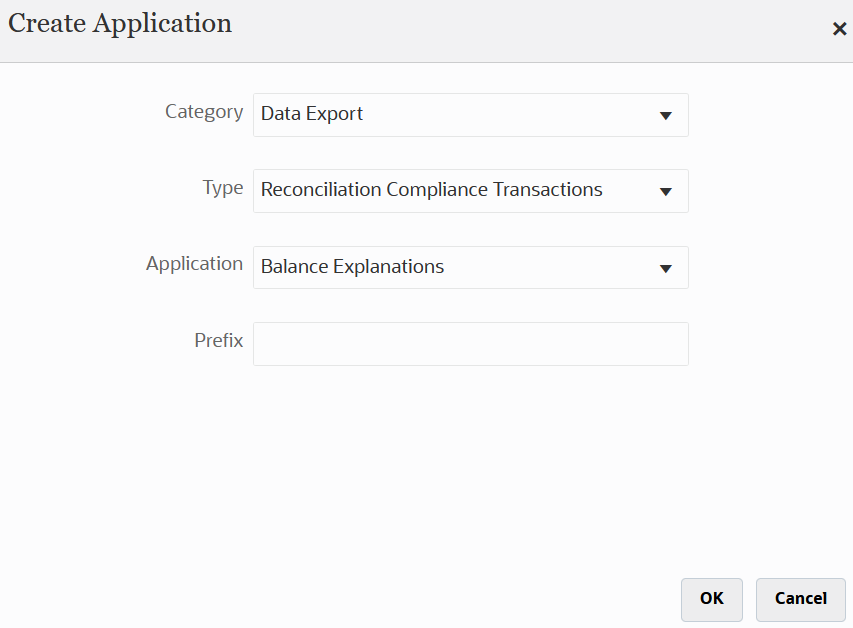
You register a Reconciliation Compliance Transaction application by selecting the "Data Export" category and "Reconciliation Compliance Transactions" as the application type, and then you select the application name.
To add a Reconciliation Compliance Transactions target application:
-
From the Data Integration home page, and then from the Actions menu, then from the Setup actions drop-down, select Applications.
-
On the Applications page, click
 (Add icon).
-
On the Create Application page, and then Category, select Data Export.
-
From Type, select Reconciliation Compliance Transactions.
-
From Application, select the Reconciliation Compliance Transactions application transaction type.
Application Name is a drop-down list with the following transaction types:
- Balance Explanations
- Source System Adjustments
- Subsystem Adjustments
- Variance Explanations

-
In Prefix, optionally specify a prefix to make the application name unique.
The prefix is concatenated with the application name to form a unique application name. For example, if you want to name an application with the same name as an existing one, you can assign your initials as the prefix.
-
Click OK.
-
From the Applications page, select the Reconciliation Compliance Transactions Application that you just registered above, then click
 to the right of the application, and then select
Application Details.
-
Select the Options tab.
Your selections on the Options tab apply to the target application.

-
From Data format
Available options:
- MM/dd/yyyy
- MM-dd-yyyy
- MMM d, yyyy
- d-M-yyyy
- dd-MMM-yy
- dd/MM/yyyy
By default, the date format is blank, which enables the system to use all date formats to parse date values.
-
From Use commas as decimal separator, select Yes to use a comma as the decimal separator.
Select No to use the user-locale for number parsing.
By default this option is set to No (the decimal separator is based on the user-locale and not a comma.)
-
Click Save.