Adding an Account Reconciliation Merge Balance Dimension

When loading data, Account Reconciliation customers can merge only changed balances and retain existing data for the same location. This option eliminates the need to run an entire data file load when only a few balances have changed since the last time data was loaded into Account Reconciliation. The process requires that customers set up a merge ID dimension for each new balance to be loaded to the target application. All the individual dimensions that make up the profile segments along with currency should be mapped to the Merge ID.

Note:

To ensure correct drill back results from Account Reconciliation to Data Integration, it is required to add a new merge ID for each new balance to load.

To map a merge balance dimension:

  1. From the Data Integration home page, click Image shows Select icon. to the right of the integration to which to add the merge balance, and then select Map Dimensions.
  2. From the Map Dimensions, select the name of the import format associated with the integration.

    You can also add a user defined import format name.

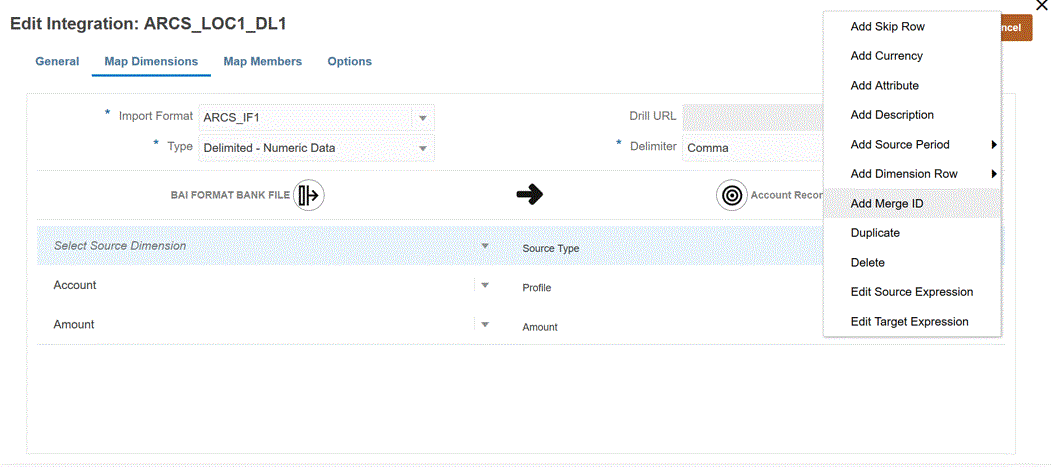
  3. Click Image shows the Add row icon. and click Add Merge ID.

    A blank source dimension row is added with a source type of Merge ID.

    Image shows the Map Dimensions page.

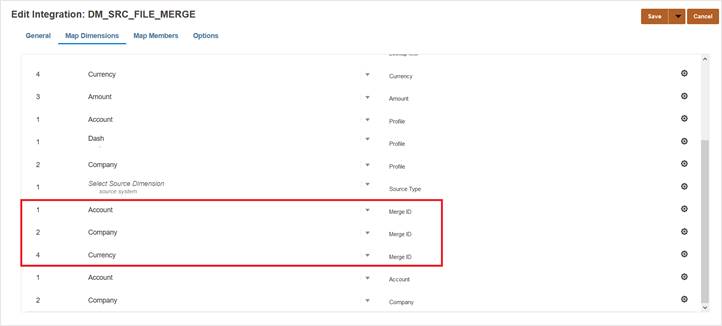
  4. From the Select Source Dimension drop-down, map all individual dimensions that make up the profile segments along with currency to Merge ID.

    For example if Account and Company make up the profile segments, add the Merge ID row 3 times and map Merge ID for 3 rows in total Account, Company and then again for Currency.

    Image shows the Map Dimensions page.

  5. Click Save.
  6. From the Data Integration home page, select the integration, and then click Image shows Run icon..
  7. On the Run Integration page, select the Options tab.
  8. From Import Mode drop-down, select Merge.
  9. From Export Mode drop-down, select No Export.
  10. Select periods as needed.
  11. Click Run.