Process Description for Integrating Oracle Cloud ERP Data Using a Custom Query
You can fetch data from the Oracle ERP Cloud using a custom query and then load it into Oracle Fusion Cloud Enterprise Performance Management. The custom query is run against any report from Oracle Business Intelligence Publisher that creates a CSV formatted data file and then loads the data to the Cloud EPM. In this case, Data Integration executes the report to extract the data and loads it to Cloud EPM.
These are the steps for loading data from the Oracle ERP Cloud into Cloud EPM using BI Publisher report extracts using a custom query.
Note:
To create a custom Oracle ERP Cloud integration definition with the Cloud EPM and register it as an ESS job, see Registering a BI Publisher Report as an Oracle Enterprise Scheduler (ESS) Job.- An Oracle ERP Cloud integration requires that you have privileges or user role and data access to all ERP ledgers to be integrated. For more information, see Oracle ERP Cloud security role requirements, see Oracle ERP Cloud Securing ERP.
-
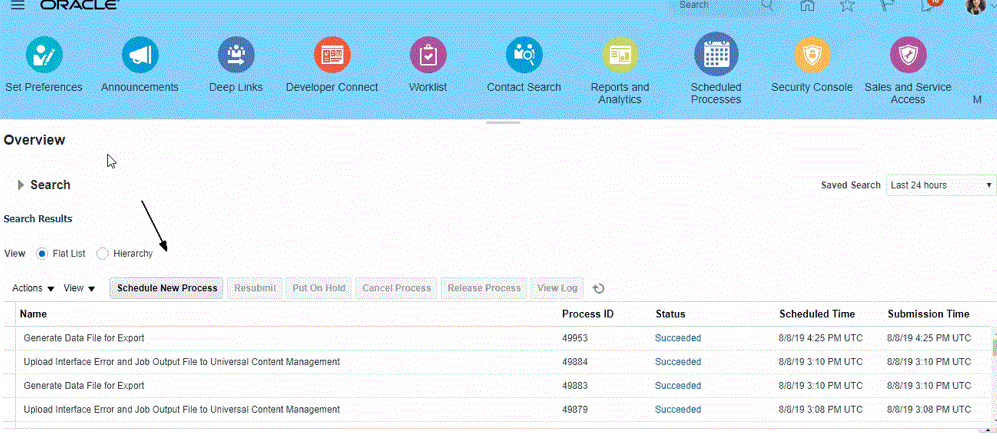
Navigate to the Oracle ERP Cloud and execute a BI Publisher report by clicking Schedule New Process.
-
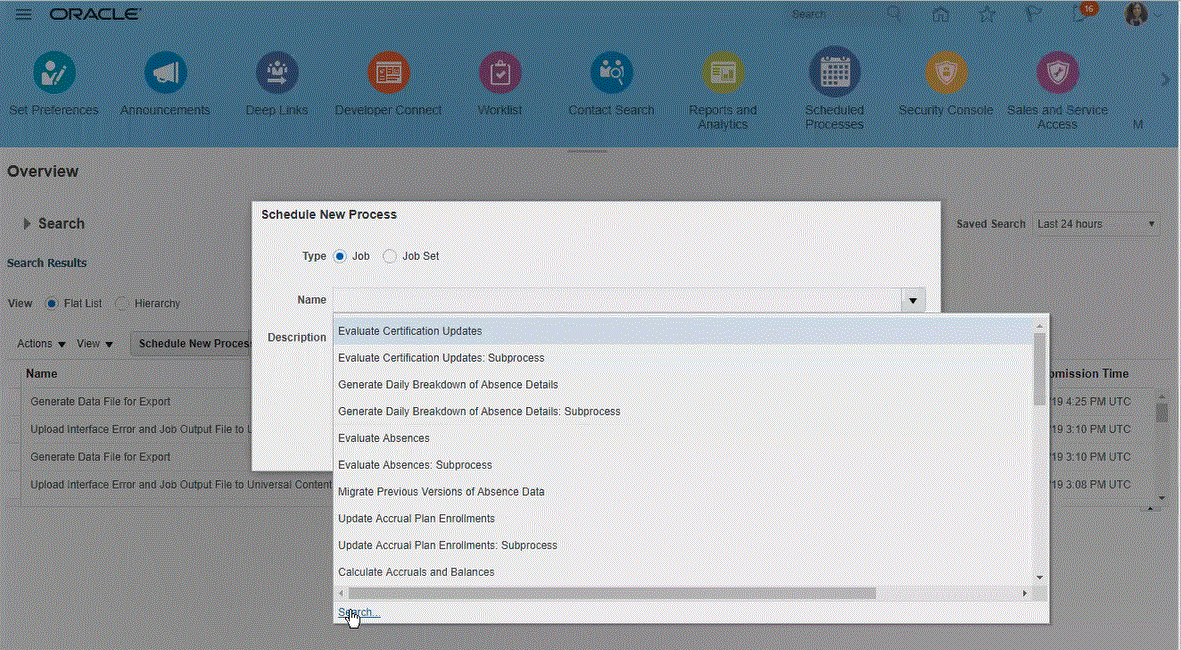
From the Search and Select page, in Name, select a report or extract, and click OK.
You can select any BI Publisher report if it produces an output file in a CSV format file. Not all reports in Fusion produce a CSV format file.
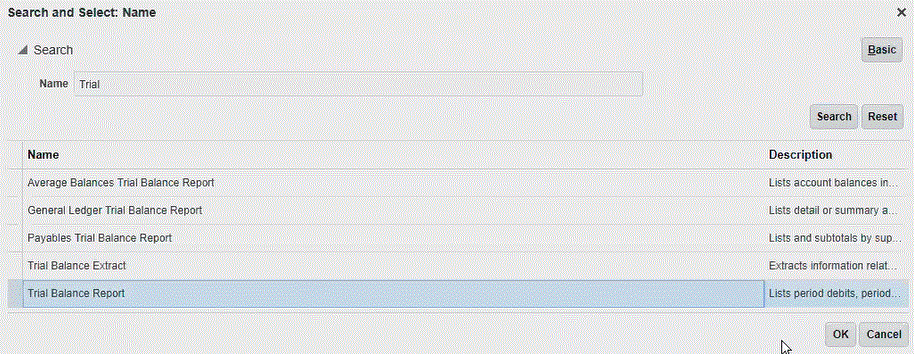
For example, enter Trial to search for a Trial Balance Report.
-
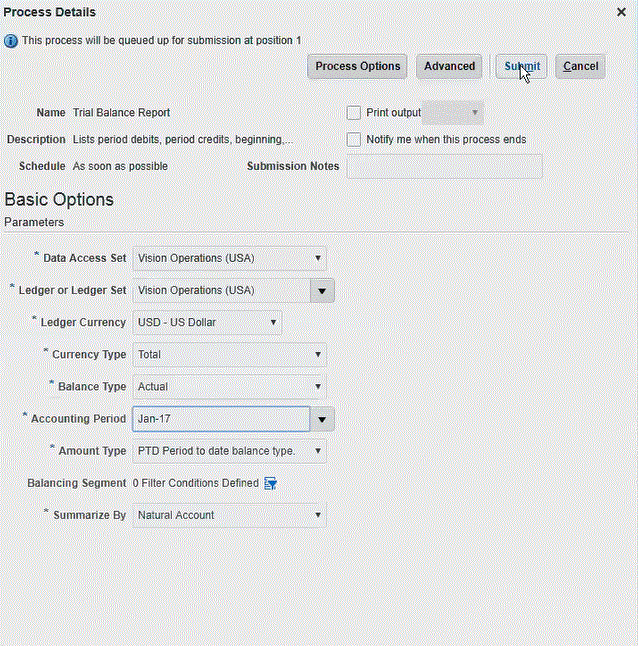
From Process Details, select the parameters for the extract or report, and click Submit.
In the following example, "Ledger" is Vision Operations and "Amount type" is YTD or PTD.
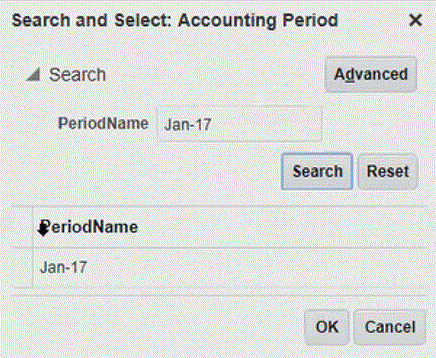
Be sure to specify the Accounting Period. The Accounting Period is the parameter that will be set up in Data Integration so that the report can be reused.
Note:
The Oracle ERP Cloud and Cloud EPM integration will fail unless the selected extract on the Oracle ERP Cloud side has one or more bind parameters passed from the Cloud EPM. The bind parameter is a placeholder for actual values in the SQL statement. Bind parameters must be enclosed in tilde (~~) characters. For example, to use "Period" as a bind parameter specify: ~PERIOD~. The name must exactly match the name specified in the SQL query.
To do this, create a bind parameter directly in the report, which is not referenced in the Data Model query. In Data Integration, specify a random string such as "ABC" in the Report Parameter List that will be passed to the bind parameter you created in the report definition.
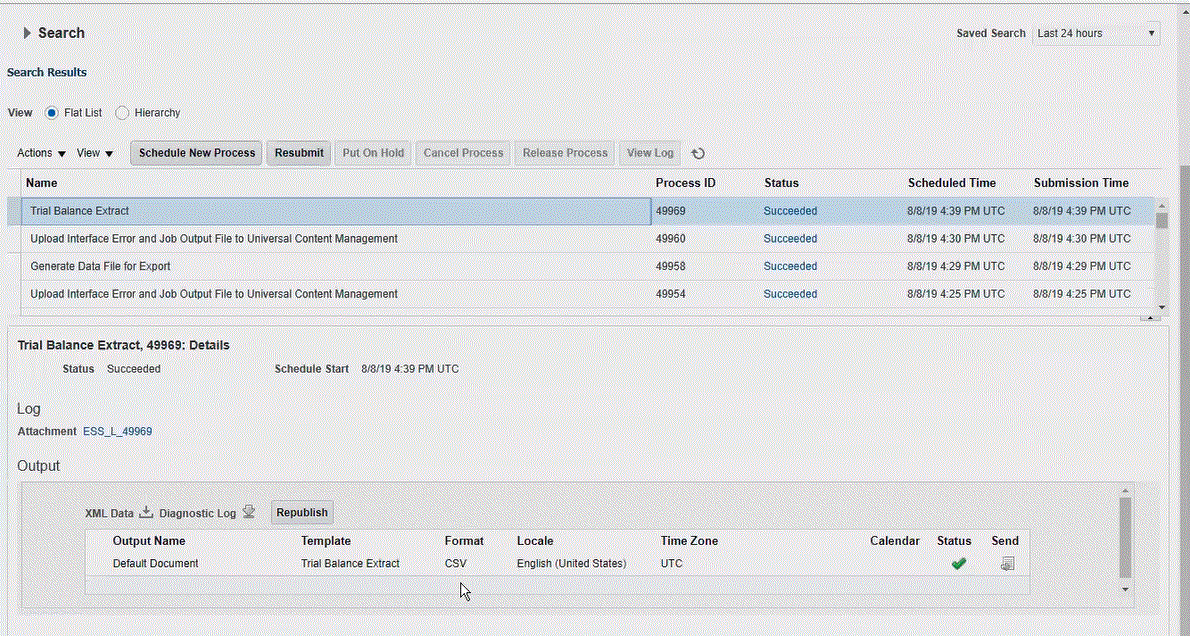
When the report has been generated, the Output section shows the results of the submission.
-
Click Republish, and then from the report output page, click csv.
-
Select the CSV output file, right click it, and then select Open.

-
Save the report locally to your file system.
Rename the downloaded output file as
Appname.csvwhereAppnamis the intended application name for the "Data Source" application in Data Integration, which represents the BI Publisher report extract. -
From the Data Integration home page, and then Actions, select Applications.
-
On the Applications page, click
 (Add icon).
-
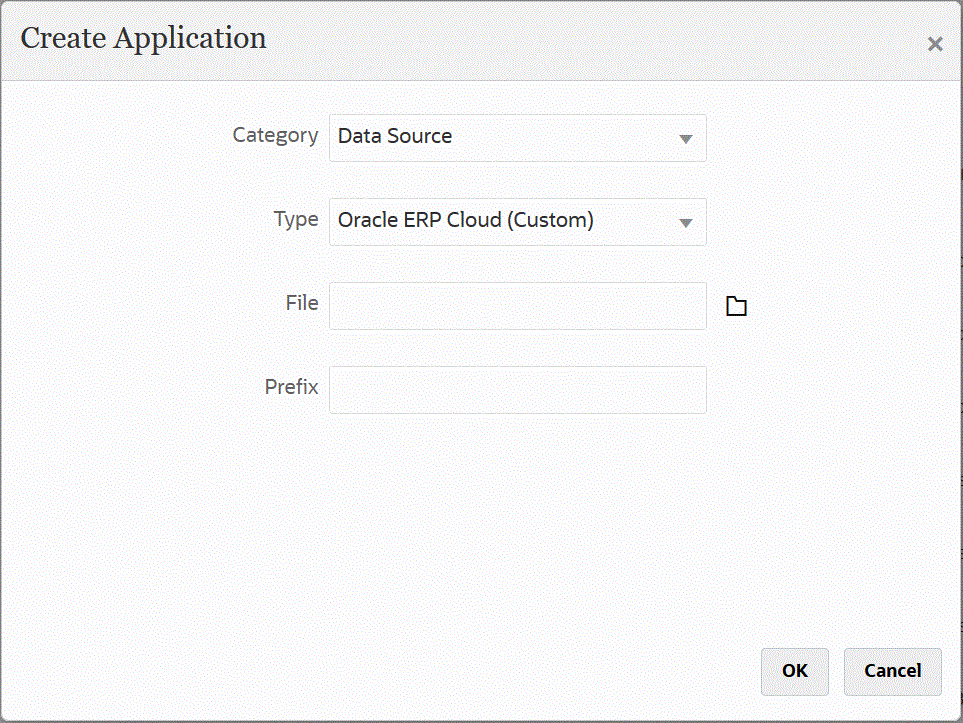
From Category, select Data Source.
-
From Type, select Oracle ERP Cloud (Custom).
-
From File, click
 and navigate to the folder where you saved the CSV file, select it
and then click OK.
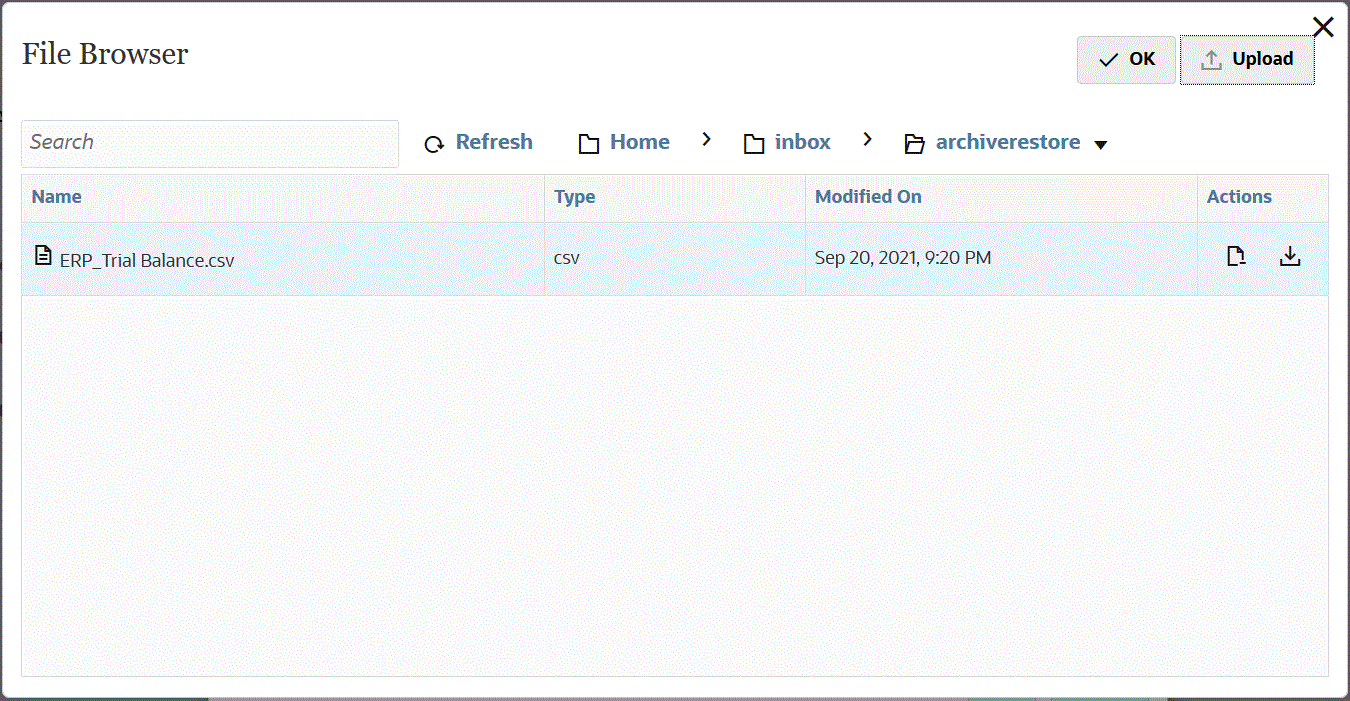
The report is saved as the target application and the Application Name is populated automatically.
-
In Prefix, specify a prefix to make the application name unique.
The prefix is concatenated with the file name to form a unique application name. For example, if you want to name an application with the same name as an existing one, you can assign your initials as the prefix.
-
Click OK.
-
Click Save.
Data Integration registers the application and returns all columns in Dimension Details.
-
On the Application page, click
 next to data source application and then select
Application Details.
-
In Connection Name, specify the name of the source system.
For example, if the name of your source system is "ERP Cloud," specify ERP Cloud.
You can also use an Oracle ERP Cloud or the GL source system name or define a new one.
-
Execution Method—Specify the method for executing the job.
Valid options:
-
BIP Report—Executes the BI Publisher report in synchronous mode, which has a timeout limit of about 5 minutes within the Oracle ERP Cloud instance. This method is suitable for smaller data sets or for queries that execute quickly.
-
ESS Job—Executes the BI Publisher report in asynchronous mode, which has no execution time restrictions.
-
-
Report Name—Enter the name of the report and the complete report path when the execution method is BIP Report. For example, enter /Custom/MyReport.xdo. Leave this field blank when the execution method is ESS Job.
If you need to find the name of the report in the Oracle ERP Cloud, complete the following steps:
-
Navigate to Oracle ERP Cloud, find the report, and select Reports and Analytics to retrieve the parameter information.

-
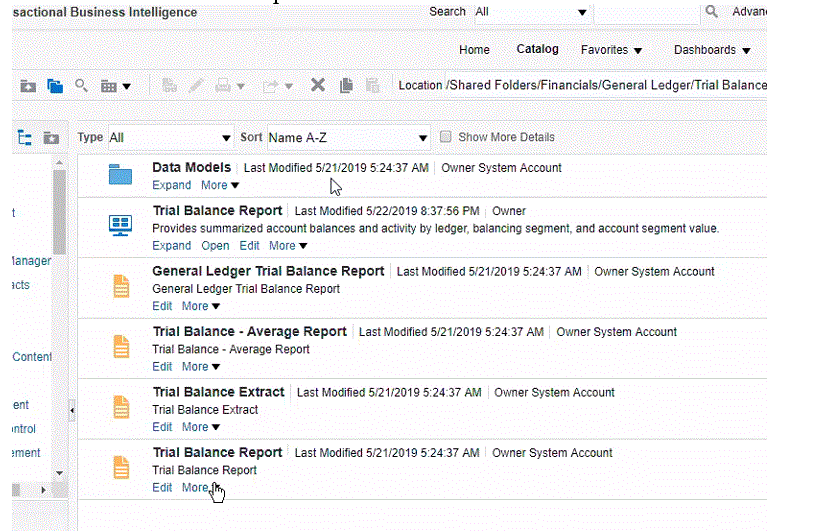
Click Browse Catalog.
-
Locate and select the extract or report.
-
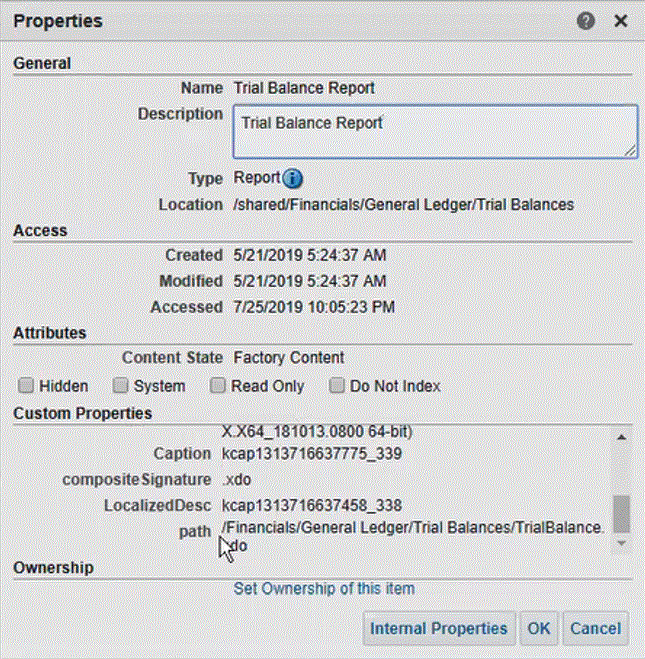
Click More and then Properties.
-
In the Custom Properties section, scroll down to the path field.
-
Copy the path (and name) and paste it to the Report Name field when registering the target application in Data Integration.
-
-
Return to Data Integration and in the Report Parameter list, specify the report parameters of the custom query.
If you need to identify report parameters, complete the following:
-
Navigate to Oracle ERP Cloud, and from the Overview page, select the report and click Resubmit.
This step enables you to view and capture the report parameters defined in the BI Publisher extract or report.
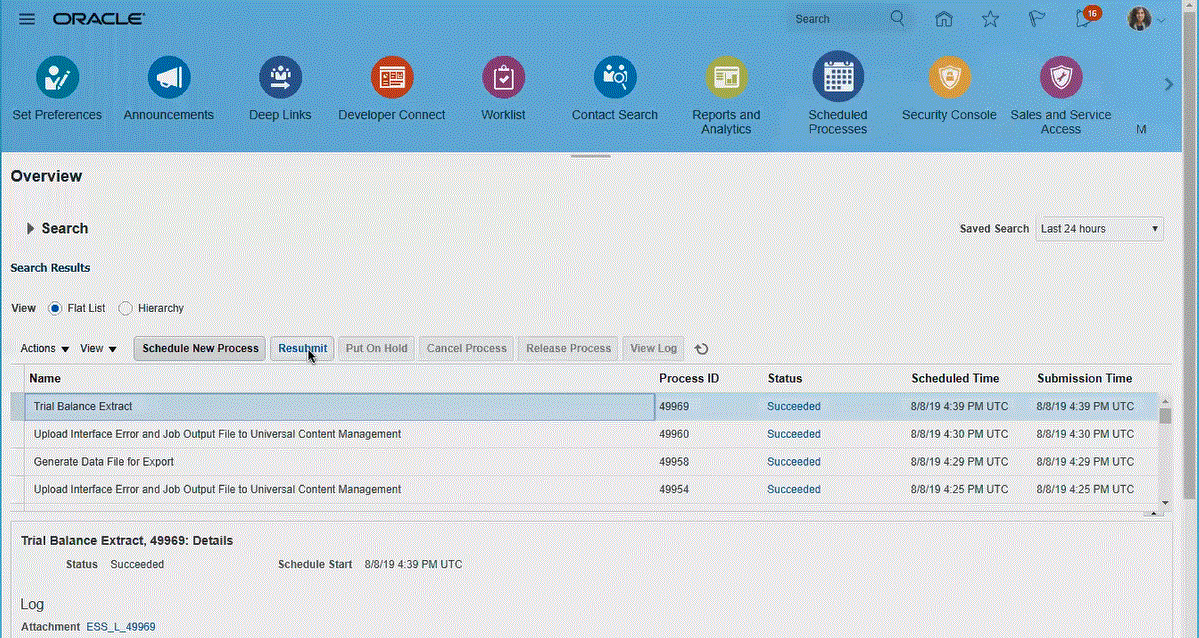
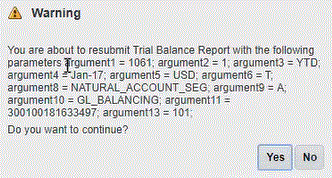
A list of report parameters is generated.
-
Copy the report parameters shown in the Warnings window.
Note:
If a #NULL (null) parameter is passed as a BI Publisher parameter from the Oracle ERP Cloud to the Cloud EPM, the #NULL parameter causes the ERP adapter-based framework to fail.
To fix this issue, remove any parameters that have a value of #NULL in the list of parameters, and just leave the value empty, and remove spaces.
Here’s an example:
If your current parameters show:
argument1=30029384;argument2=#NULL;argument3=01-JAN-2022Then change
argument2=#NULLto show:argument1=30029384;argument2=;argument3=01-JAN-2022 -
Navigate to Data Integration and paste the report parameter list from the Warnings window into the Report Parameter List field of your custom query.
Make sure you specify a random string such as "ABC" in the "Report Parameter List" that will be passed to the bind parameter you created in the report definition. If you create a report with a query that doesn’t have bind parameters passed from the Cloud EPM, the process will fail on the Cloud EPM side.
-
-
In Data Integration, set up the integration mapping between the Oracle ERP Cloud data source and the target application by building an import format.
See Mapping Dimensions.
-
Define the location used to associate the import format.
- Map members from the source to target.
See Mapping Members.
-
Select any source and target options.
-
Run the integration.