Creating a Note Format
This section describes how to create and maintain Note Formats.
To create a Note Format:
-
From the Narrative Reporting Home page, select
 .
.
-
In the Notes Manager Actions
 menu, select Note Format Manager.

-
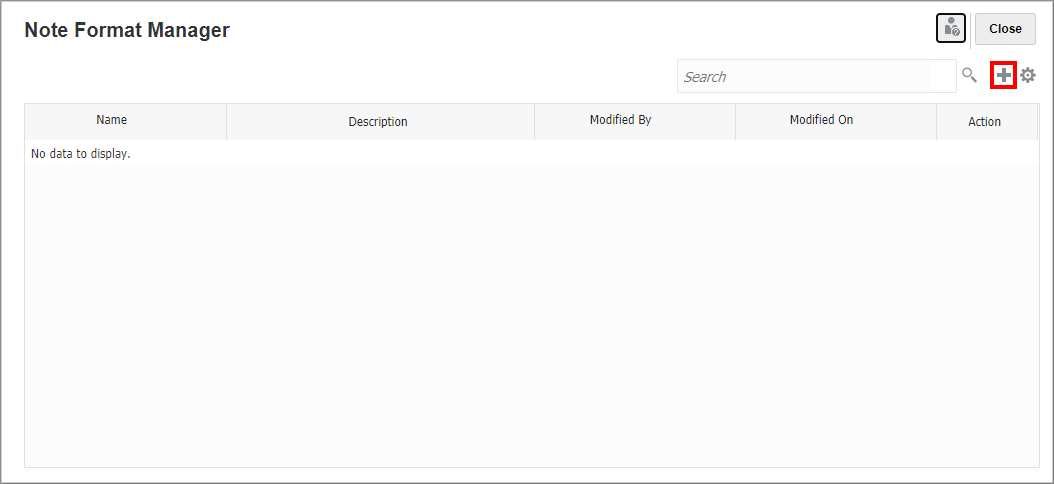
In the Note Format Manager, click
 to add a new format.
-
In Add Note Format:
-
Enter a unique Name for the Note Format.
Note:
Once a Note Format is created, you cannot change its Name.
-
Enter an optional Description.
-
Select a size for Indent, which is used when indenting Sections in the Note Format.

-
-
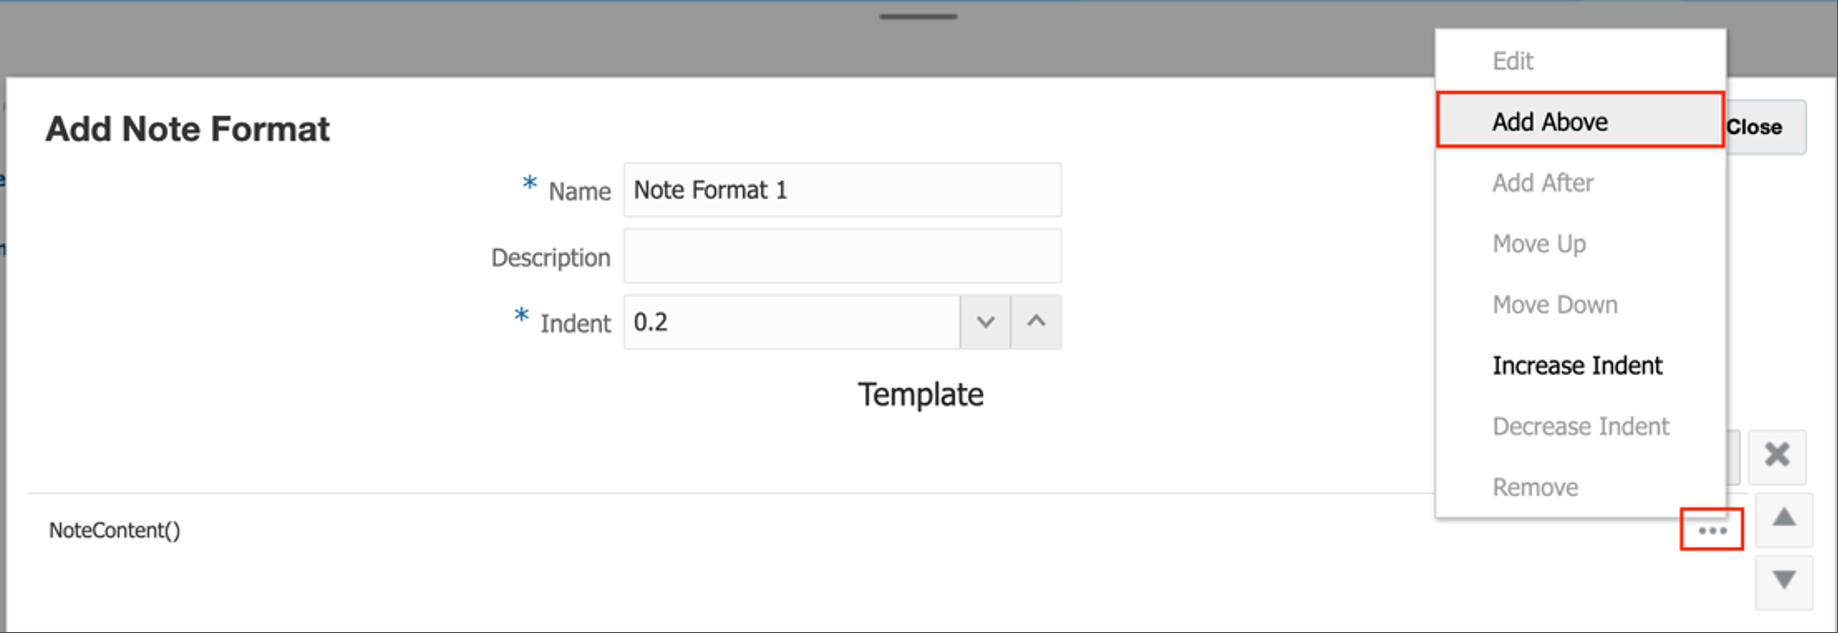
Click
 to add a Section to the Note Format.

You can click the Actions menu for a Section and select Add Above, where applicable.
Note:
The default
NoteContent()Section can only appear last in the Note Format, and you can only add a Section above it and not after it.The Add Note Format Section editor is displayed.
-
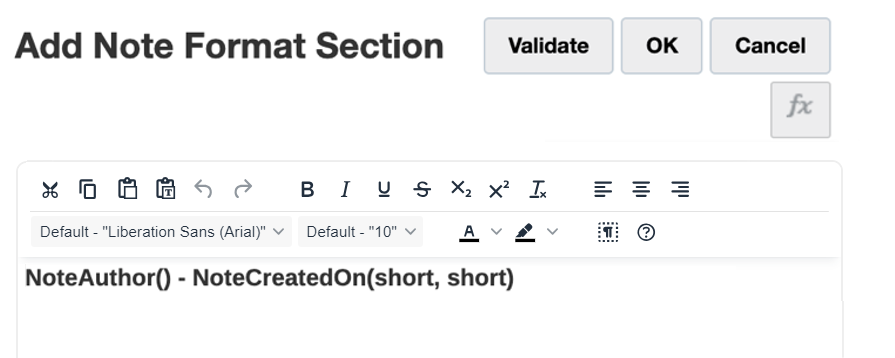
In the Add Note Format Section editor, you can manually enter text and select text functions to include in the Section by clicking the
 button and selecting a text function. You can apply formatting to the selected text, such as font type, size, and color, and so on.
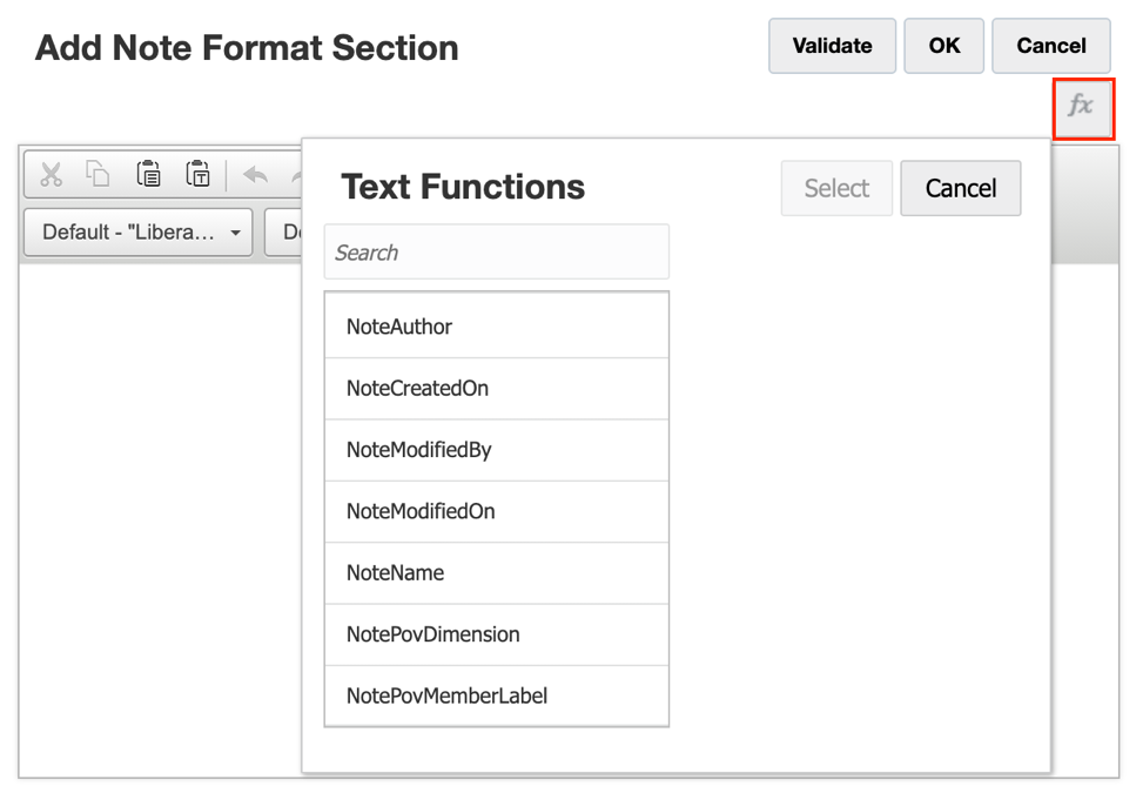
For more information on the available Text Functions for Note Format sections, see Using Note Format Text Functions.
-
Click Validate to check the text function syntax, and then click OK to close the Add Note Format Section dialog.
Note:
Repeat Steps 5 – 7 to add additional Sections as needed.
-
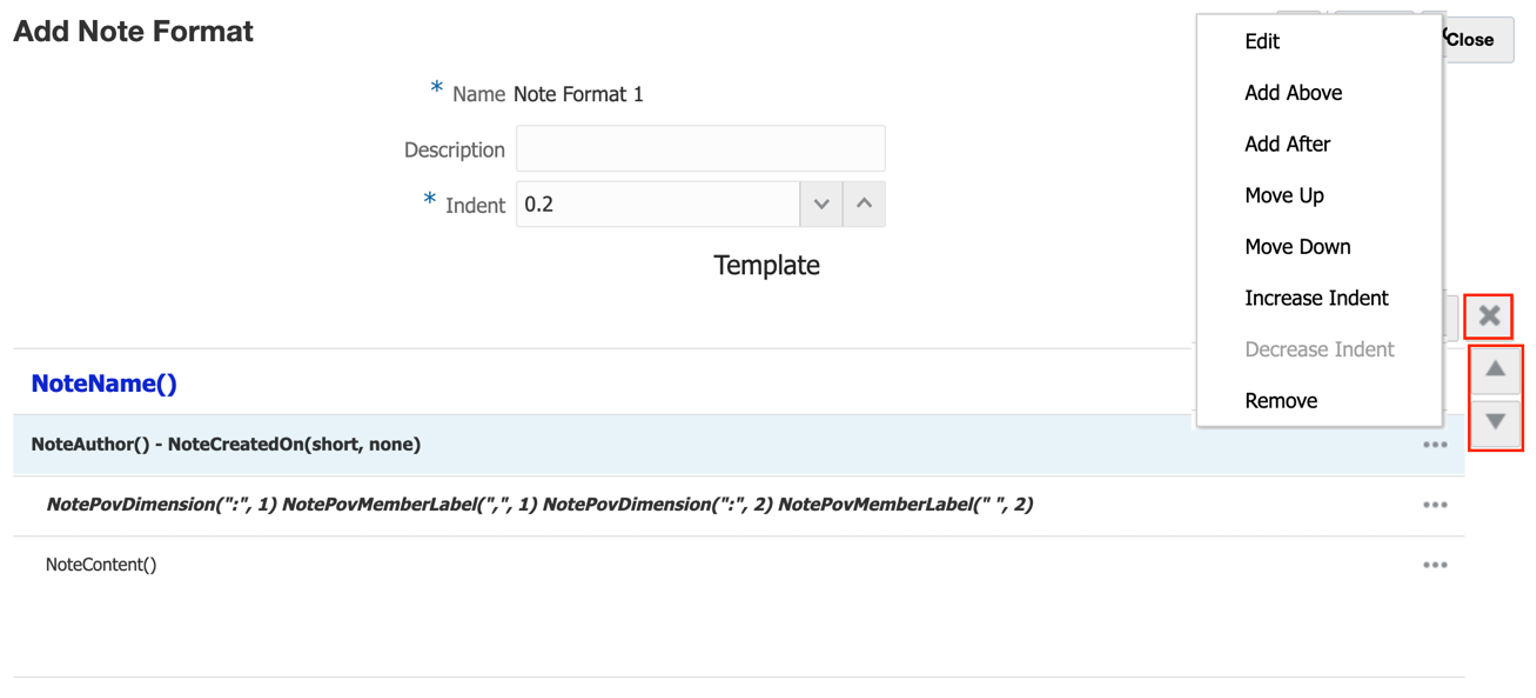
Select a Section, and you can:
-
Use Actions menu to Edit each Section.
-
Click Move up
 or Move down
  buttons for shifting the Sections, or you can use Actions menu to perform the same operation.
-
Click
 or you can use Actions menu to Remove each Section.
-
Use Actions menu to perform the Increase Indent or Decrease Indent, where applicable.
Note:
The indention amount is based on the Indent specified in the Add Note Format dialog.
-
-
Click Save, and then select Close to save the Note Format.
Example 12-1 Grouping and Sorting based on the Segment Member Name
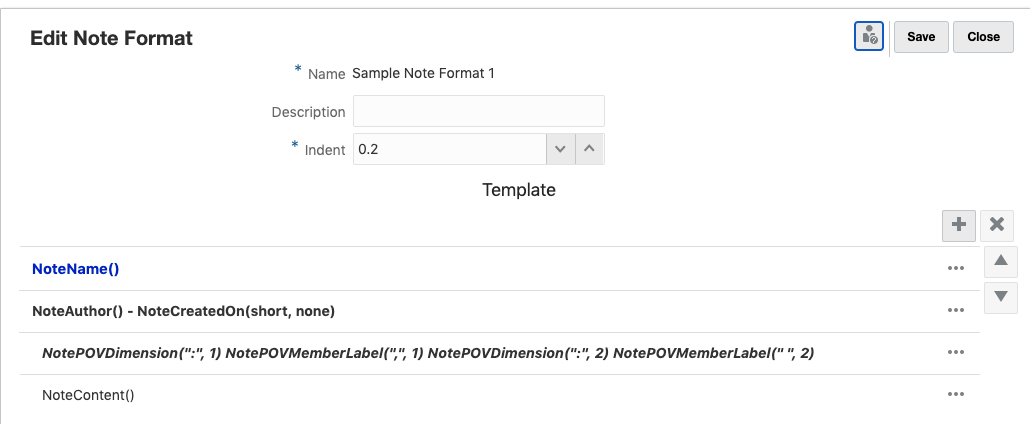
By default, there is one Section in the Note Format with the NoteContent() text function, which returns each Note’s text. You can insert additional Sections above the NoteContent() Section to display additional Note metadata.
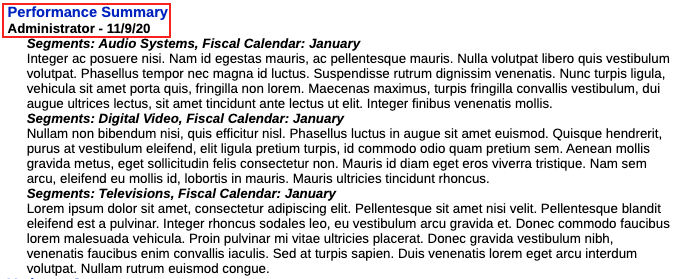
In the report preview, the results of the Note Format’s Sections are returned, grouped, and sorted based on the resulting Note output. The output for specific Sections are not repeated if the content is unique.
For example, let’s take a look at the following images, where the timestamp is not included in the text function, hence then information is not repeated for each of the three Notes, because it applies to all.
Note:
All the Notes for the three segments are sorted alphabetically based on the Segment member name.
The Note name is "Performance Summary" and the user, date, and date stamp details are "Administrator on 11/09/20".
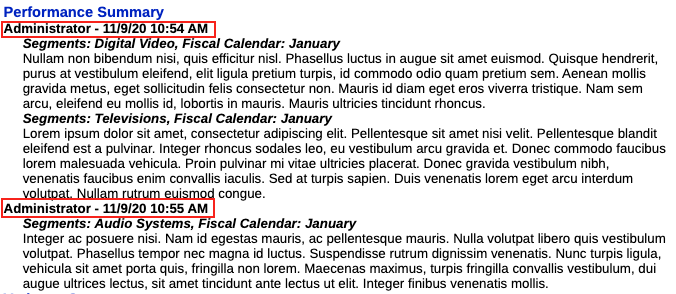
Example 12-2 Grouping and Sorting based on the Unique Timestamp
For example, let’s take a look at the following images, where the timestamp is included in the text function, the user details, date, and timestamp are repeated, because the Notes were created at different times.
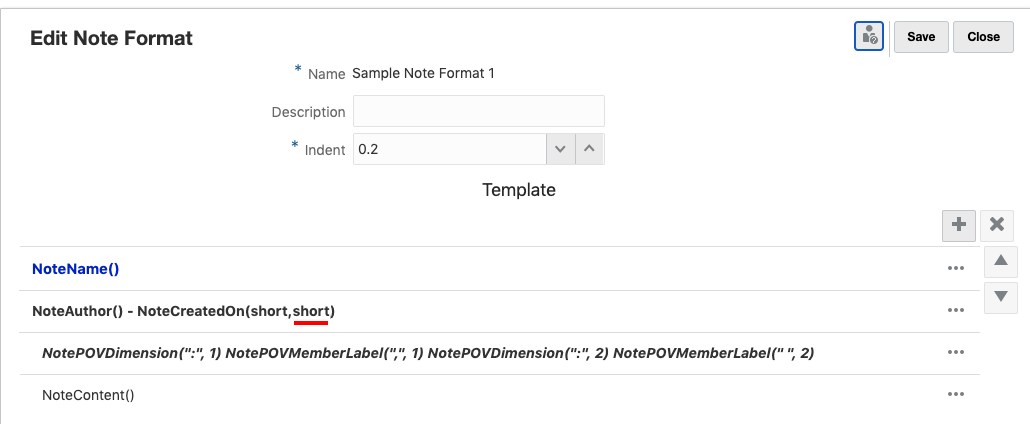
Note:
All the Notes for the three segments are sorted based on the unique timestamp and not sorted by the Segment member name.
The Note name is "Performance Summary" and the user, date, and timestamp details are "Administrator on 11/09/20 10:54 AM".
