Registering Oracle ERP Cloud Source Systems
When integrating applications, such as Oracle General Ledger or Budgetary Control created in the Oracle ERP Cloud with an Oracle Fusion Cloud Enterprise Performance Management application, you first create and register the source system specifying the application type Oracle ERP Cloud.
To add an Oracle ERP Cloud application as a source system:
- On the Setup tab, under Register, select Source System.
- In Source System, click Add.
- Enter the source system details:
- In Source System Name, enter the source system name.
Enter the name you want to use for the application, such as "General Ledger" or "Fusion Budgetary Control".
- In Source System Description, enter a description of the source system.
- In Source System Type, select Oracle ERP Cloud.
If you want to register an Oracle General Ledger application as a source system, leave the Fusion Budgetary Control field unchecked.
If you want to register an Budgetary Control application as a source system, check the Fusion Budgetary Control field.
- In Application Filter, specify any filter(s) conditions to limit the number of applications returned when you initialize the source system.
You can specify a single filter condition or multiple filter conditions. If you use multiple filter conditions, separate each filter by a comma (,).
When you specify an application name as a filter, you can use the full Oracle General Ledger or Budgetary Control application name, wild card, or a wild card for a single character as shown below.
- GeneralLedgerVision (Full Name)
- VF* (Wild Card)
- VF??COA (Wild Card for single char_)

When you run the initialize process, the system imports all the applications that match the filter condition. If no filter is provided, all applications are imported.
- In ODI Context Code, enter the context code.
The ODI context code refers to the context defined in Oracle Data Integrator. A context groups the source and target connection information.
The default context code is GLOBAL.
- In Source System Name, enter the source system name.
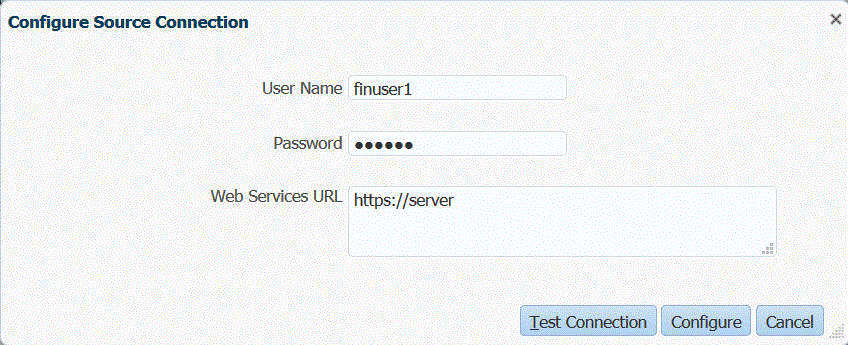
- Click Configure Source Connection.
The source connection configuration is used to store the Oracle ERP Cloud user name and password. It also stores the WSDL connection for the same.
- In User Name, enter the Oracle ERP Cloud user name.
Enter the name of the Oracle ERP Cloud user who launches the process requests to send information between the Cloud EPM and the General Ledger. This user must be assigned a General Ledger job role such as "Financial Analyst," "General Accountant," or "General Accounting Manager."
Note:
Web services requires that you use your native user name and password and not your single sign-on user name and password. - In Password, enter the Oracle ERP Cloud password.
You must update this password anytime you change your Oracle ERP Cloud password.
- In Web Services URL, enter the server information for the Fusion web service. For example, enter
https://server.
For customers using release 19.01 and earlier of the Oracle ERP Cloud, use the old WSDL to make the connection and then specify the URL in the following format:
If you are use a release URL format version earlier than R12, then replace the "fs" with fin in the URL from the one that is used to log on into the Web Services URL.
If you are use a release URL format version later than R12, replace the "fs" with "fa" in the URL from the one that is used to log or simply copy and paste the server from the one that is used to log on into Web Services URL.
- Click Configure.
The confirmation "Source system [source system name] has been configured successfully" is displayed.
- On the Source System screen, click Initialize.
Initializing the source system fetches all metadata needed in Data Management, such as ledgers, chart of accounts, and so on. It is also necessary to initialize the source system when there are new additions, such as chart of accounts, segments/chartfields, ledgers, and responsibilities in the source system.
The initialize process may take a while, and you can watch the progress in the job console.
- Click Save.
After you add a source system, select the source system in the table, and the details are displayed in the lower pane.