Introduction
This 20-minute tutorial shows you how to create a Groovy script to work with Planning metadata, in this case, adding a member to a dimension. The script includes RTPs to prompt users for input. You'll also learn how to create a right-click action menu with a menu item to call the script, and how to associate the action menu with a data form.
Background
The EPM object model in Groovy gives you tools to design interactive ways for users to work with metadata, such as adding new members, renaming existing members, moving members under new parents, updating other metadata properties, and so on. Including run time prompts, or RTPs, in your Groovy scripts lets you prompt users for relevant values during these operations.
Prerequisites
Cloud EPM Hands-on Tutorials may require you to import a snapshot into your Cloud EPM Enterprise Service instance. Before you can import a tutorial snapshot, you must request another Cloud EPM Enterprise Service instance or remove your current application and business process. The tutorial snapshot will not import over your existing application or business process, nor will it automatically replace or restore the application or business process you are currently working with.
Before starting this tutorial, you must:
- Have Service Administrator access to a Cloud EPM Enterprise Service instance.
- Upload and import this snapshot into your Planning instance. If you've previously uploaded the snapshot for another Groovy tutorial, you can continue using the same snapshot.
Note:
If you run into migration errors importing the snapshot, re-run the migration excluding the HSS-Shared Services component, as well as the Security and User Preferences artifacts in the Core component. For more information on uploading and importing snapshots, refer to the Administering Migration for Oracle Enterprise Performance Management Cloud documentation.Tip:
The scripts you need for this tutorial are linked as text files within each section.Loading Planning calculation variables
In this section, you upload calculation variables from an XML file for use in the Groovy script.
- Right-click the link for HP4_Plan2_Variables.xml, and save the file to your local drive.
- From the Home page, navigate to Rules (under Create and Manage) to open Calculation Manager. In the System View, expand EPM Cloud > HP4. Right-click Plan2 and select Import.
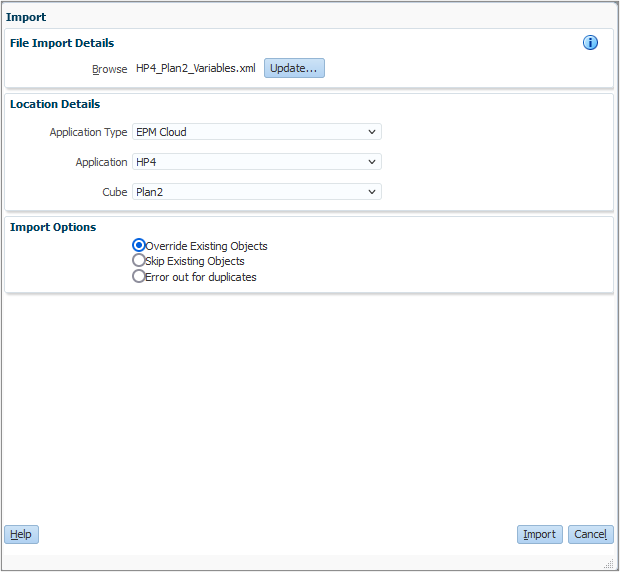
- Under File Import Details, browse to select HP4_Plan2_Variables.xml from your local drive.
- Under Location Details, make the following selections:
- Application Type: EPM Cloud
- Application: HP4
- Cube: Plan2
- Under Import Options, select Override Existing Objects.
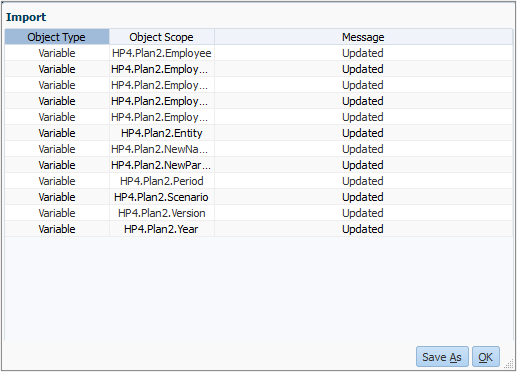
- Click Import. Review the import results (they may say Inserted or Updated), and then click OK.
- Click Cancel to close the Import dialog box.
Creating a Groovy Script to Add Dimension Members in Planning
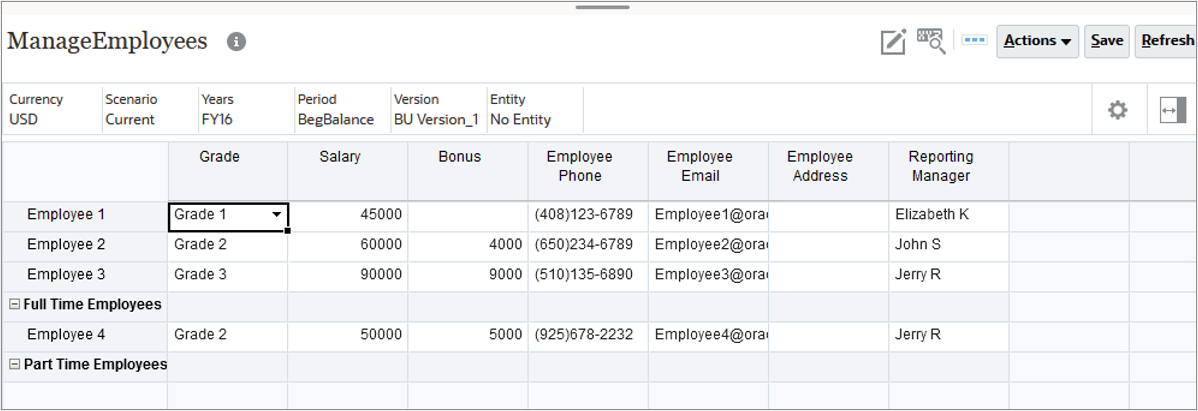
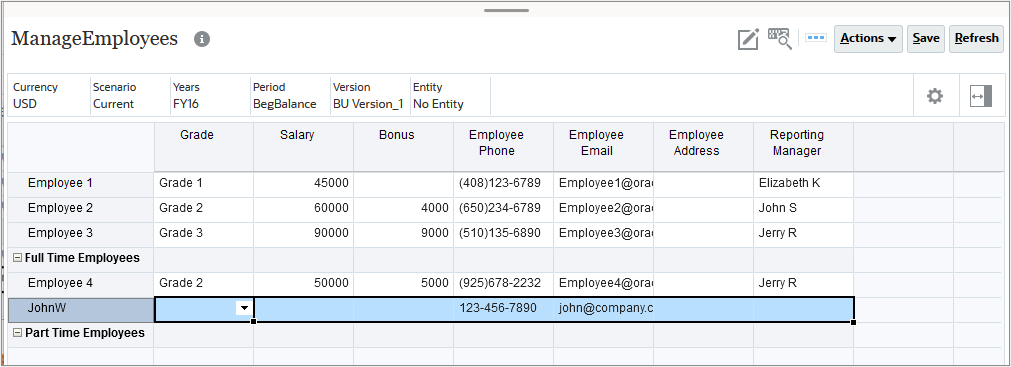
In this section, you implement a Groovy script to add an employee to the Employee dimension. We'll work with the predefined ManageEmployees form, which has been set up to capture employee information such as their Grade, Salary, Bonus, Phone, Email, Address, and Reporting Manager.
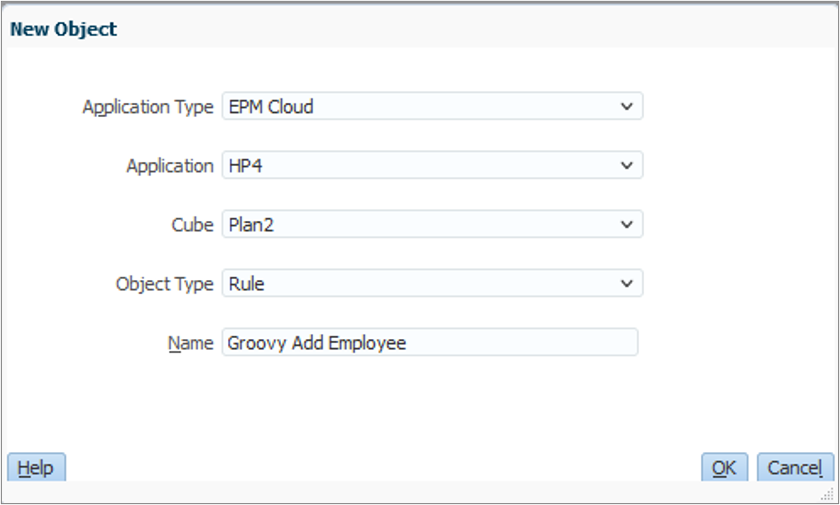
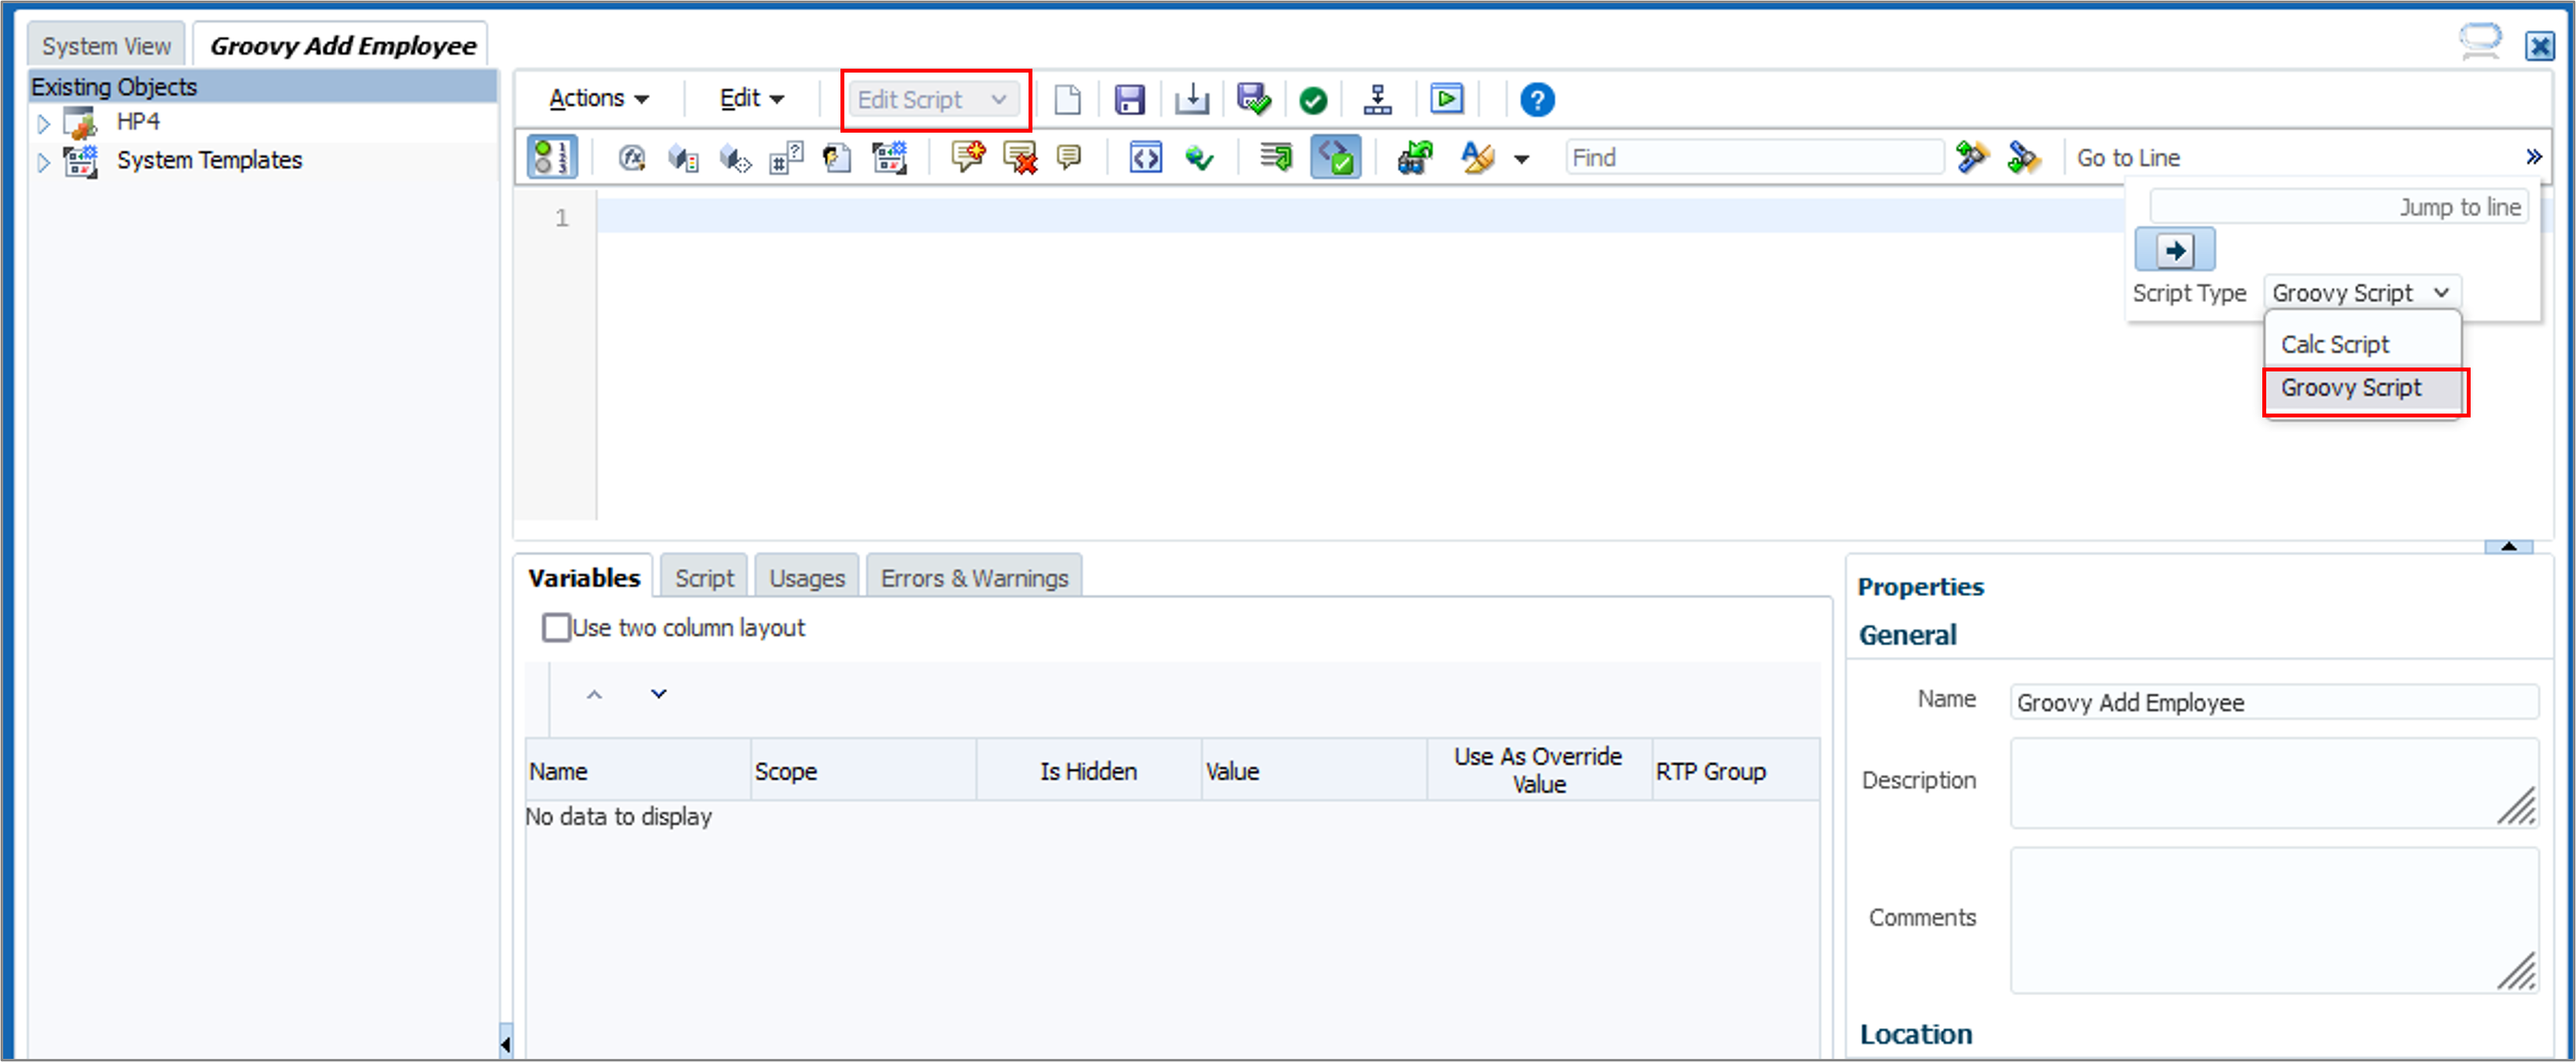
- In Calculation Manager, create a rule named Groovy Add Employee in the Plan2 cube.
- In the Rule Editor, change the Designer option to Edit Script and set the Script Type to Groovy Script.
- Copy this script and paste it into the editor:
- On the toolbar, click Save (
 ) to save the script.
 - We want users to enter values only for EmployeeEmail, EmployeeName, and EmployeePhone. In the Variables tab, select Is Hidden for Employee, Entity, Period, Scenario, Version, and Year.
- Save the script again.
- Click Validate and Deploy (
 ). Enter RTP values for validation purposes:
 - Employee:
"Full Time Employees" - Entity:
"No Entity" - Period:
Jun - Scenario:
OEP_Plan - Version:
OEP_Working - Year:
FY17 - Check Apply values to the rule to save these values as defaults for validation purposes, then click OK.
- Click OK when prompted, then close Calculation Manager.
/*RTPS: {EmployeeName} {EmployeePhone} {EmployeeEmail} {Employee} {Scenario} {Year} {Period} {Entity} {Version}*/
def mbUs = messageBundle(["validation.invalidemail":"Email address is invalid: {0}", "validation.invalidphone":"Phone number is invalid: {0}",
"validation.memberexists":"The member you have specified already exists and cannot be created: {0}.", "validation.invalidnamelength":"Employee name must be 5 to 40 characters: {0}"])
def mbl = messageBundleLoader(["en" : mbUs])

// Validate the Rtp values
Dimension employeeDim = operation.application.getDimension("Employee")
Member parentEmployee = rtps.Employee.member
if(parentEmployee.hasChild(rtps.EmployeeName))
    throwVetoException(mbl, "validation.memberexists", rtps.EmployeeName)

validateRtp(rtps.EmployeeName, {(5..40).contains(it.enteredValue.size()) }, mbl, "validation.invalidnamelength", rtps.EmployeeName)

validateRtp(rtps.EmployeeEmail, /^.+@.+/, mbl, "validation.invalidemail", rtps.EmployeeEmail.enteredValue)

validateRtp(rtps.EmployeePhone, /^(?:\+?1[- ]?)?\(?([0-9]{3})\)?[- ]?([0-9]{3})[- ]?([0-9]{4})$/, mbl, "validation.invalidphone", rtps.EmployeePhone)

// Save the new employee as a dynamic child member
Member employee = parentEmployee.addDynamicChild(rtps.EmployeeName)

// Generate the calc script to save employee email and phone property values
"""SET CREATENONMISSINGBLK ON;
FIX(${fixValues(rtps.Scenario, rtps.Year, rtps.Period, rtps.Entity, rtps.Version, employee)}, "USD")
    "Employee Phone" = $rtps.EmployeePhone;
    "Employee Email" = $rtps.EmployeeEmail;
ENDFIX;"""
Note:
Saving the script displays the variables in the Variables tab.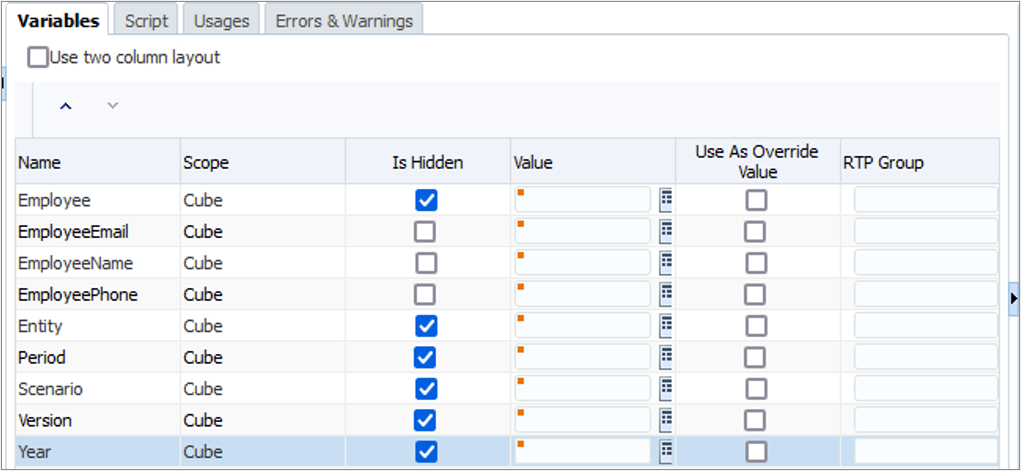
Note:
When users run the script from the form, these hidden variables are assigned values from the form context.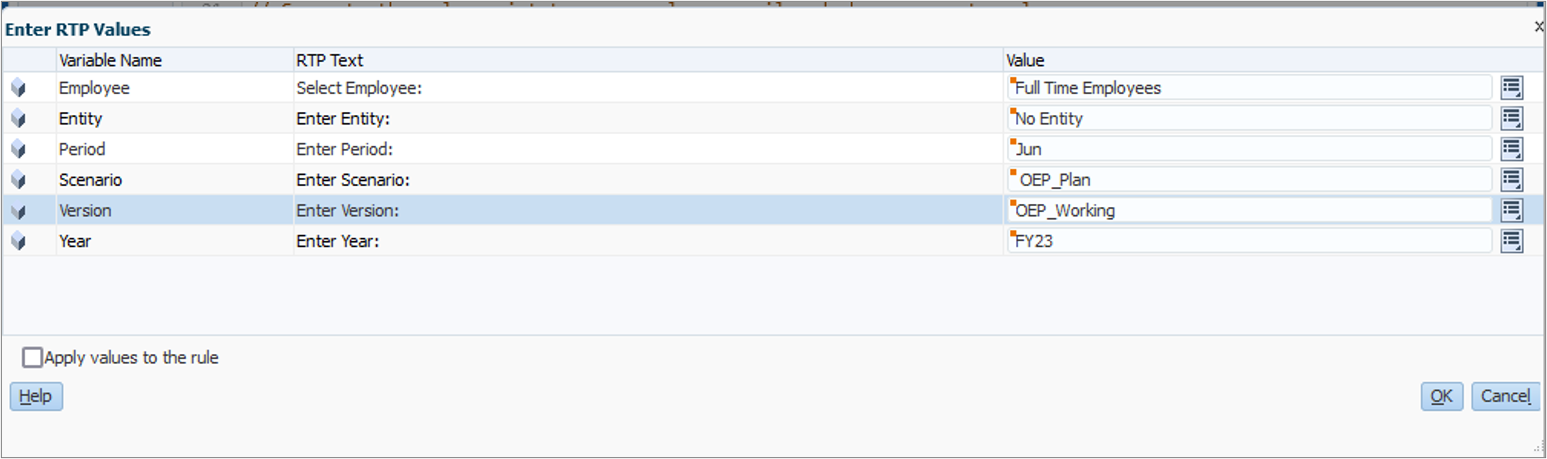
During this step, the rule is not executed; however, you must enter valid members for the validation process to succeed.
Explaining the Groovy Script Logic
In this section, we'll describe the script logic one section at a time.
- Define all the run time prompts used by this rule.
- Create a resource bundle loader containing localized messages needed by this rule.
- Validate the RTP values.
- Save the new employee as a dynamic child under the parent employee.
- Now that the new employee has been created in the outline, generate the calculation script to save the new employee email and phone number in the database.
/*RTPS: {EmployeeName} {EmployeePhone} {EmployeeEmail} {Employee} {Scenario}
{Year} {Period} {Entity} {Version}*/
def mbUs = messageBundle(["validation.invalidemail":"Email address is invalid: {0}",
"validation.invalidphone":"Phone number is invalid: {0}",
"validation.memberexists":"The member you have specified already exists and cannot be created: {0}.",
"validation.invalidnamelength":"Employee name must be 5 to 40 characters: {0}"])
def mbl = messageBundleLoader(["en" : mbUs])
Dimension employeeDim = operation.application.getDimension("Employee")  Member parentEmployee = rtps.Employee.member
  if(parentEmployee.hasChild(rtps.EmployeeName))
throwVetoException(mbl, "validation.memberexists", rtps.EmployeeName)
if(parentEmployee.hasChild(rtps.EmployeeName))
throwVetoException(mbl, "validation.memberexists", rtps.EmployeeName)  validateRtp(rtps.EmployeeName, {(5..40).contains(it.enteredValue.size()) },
mbl, "validation.invalidnamelength", rtps.EmployeeName)
validateRtp(rtps.EmployeeName, {(5..40).contains(it.enteredValue.size()) },
mbl, "validation.invalidnamelength", rtps.EmployeeName)  validateRtp(rtps.EmployeeEmail, /^.+@.+/, mbl, "validation.invalidemail",
rtps.EmployeeEmail.enteredValue)
validateRtp(rtps.EmployeeEmail, /^.+@.+/, mbl, "validation.invalidemail",
rtps.EmployeeEmail.enteredValue)  validateRtp(rtps.EmployeePhone, /^(?:\+?1[- ]?)?\(?([0-9]{3})\)?[-]?([0-9]{3})[- ]?([0-9]{4})$/,
mbl, "validation.invalidphone", rtps.EmployeePhone)
validateRtp(rtps.EmployeePhone, /^(?:\+?1[- ]?)?\(?([0-9]{3})\)?[-]?([0-9]{3})[- ]?([0-9]{4})$/,
mbl, "validation.invalidphone", rtps.EmployeePhone) 
Get the Employee dimension.
Get the Member object for the employee specified by the Employee run time prompt. This is the member that the user right-clicks on, and will be the parent under which the new employee will be added.
Check if a child with the name provided by the EmployeeName run time prompt already exists under the parent. If yes, throw a veto exception.
Validate and ensure that the name provided by the EmployeeName run time prompt is at least 5 to 40 characters long by validating against the specified predicate. If not, the validateRtp() API will throw a veto exception.
 Validate and ensure that the email provided by the
 EmployeeEmail run time prompt is of a valid format by validating against the specified regular expression pattern. If not, the validateRtp() API will throw a veto exception.
Validate and ensure that the phone number provided by the EmployeePhone run time prompt is of a valid format by validating against the specified regular expression pattern. If not, the validateRtp() API will throw a veto exception.
Member employee = parentEmployee.addDynamicChild(rtps.EmployeeName)
"""SET CREATENONMISSINGBLK ON;
FIX(${fixValues(rtps.Scenario, rtps.Year, rtps.Period, rtps.Entity, rtps.Version, employee)}, "USD")
    "Employee Phone" = $rtps.EmployeePhone;
    "Employee Email" = $rtps.EmployeeEmail;
ENDFIX;"""
Tip:
ThefixValues() API is a utility that returns a string value for the specified objects that can be plugged into a calculation script FIX command. In this example, the objects being passed into this utility are of type RtpValue and Member.
Creating Planning Action Menus to Run Groovy Scripts
In this section, you create an action menu called Manage Employees, with a right-click action menu item that runs the Groovy script.
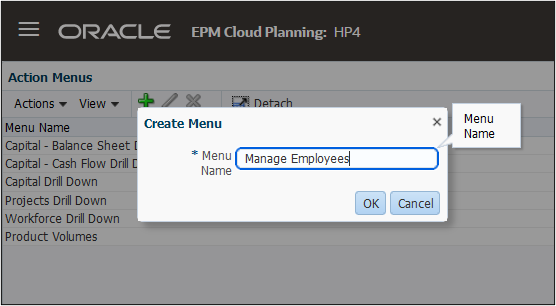
- From the Home page, navigate to Action Menus (located under Create and Manage) and create an action menu named Manage Employees.
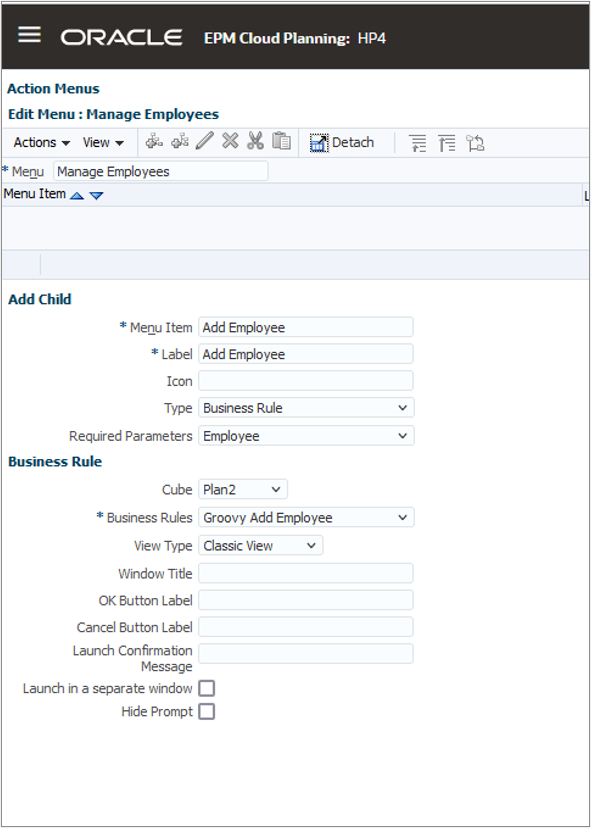
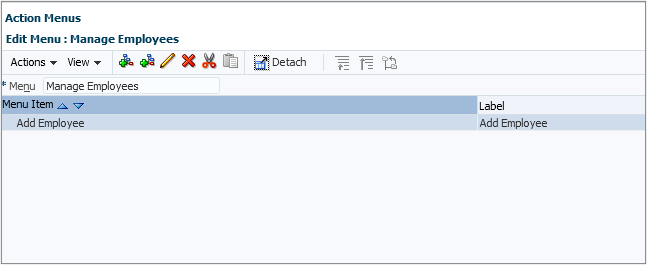
- Edit the Manage Employees action menu and add a child menu item named Add Employee. Enter or select the following options to define the menu item:
- Click Save, then click OK to save the menu item. Finally, click Save again to save the action menu.
| Option Field | Value to Enter or Select |
|---|---|
| Menu Item | Add Employee |
| Label | Add Employee |
| Type | Business Rule |
| Required Parameters | Employee |
| Cube | Plan2 |
| Business Rule | Groovy Add Employee |
Associating Planning Action Menus with Forms
In this step, you associate t9cfhe action menu with the ManageEmployees form and test your script.
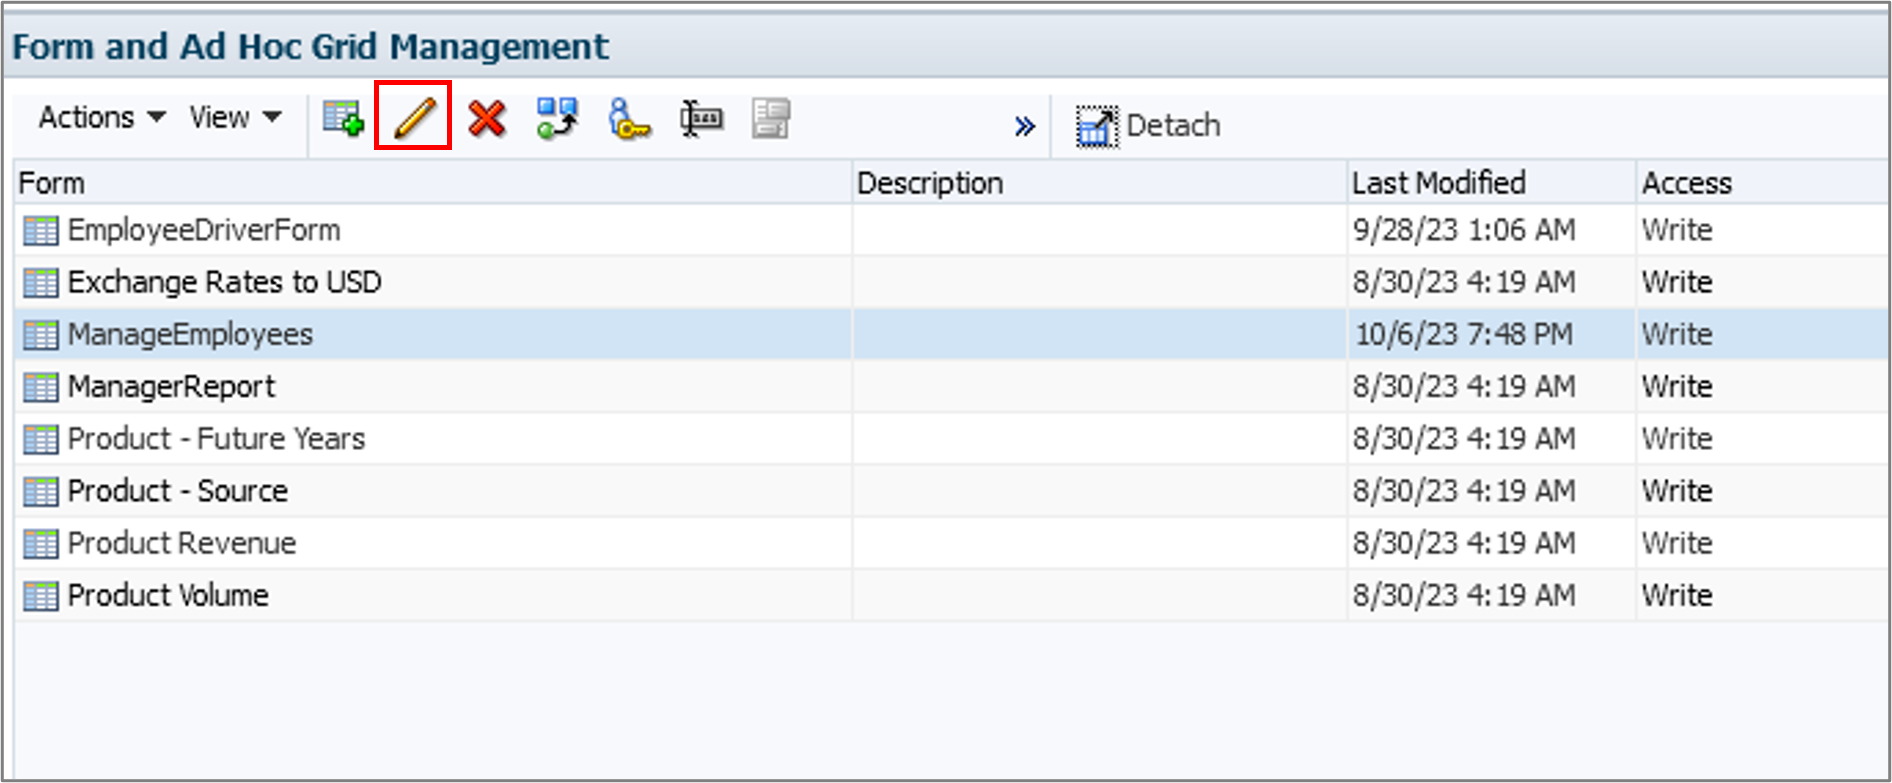
- Navigate to Forms (located under Create and Manage) and edit the ManageEmployees form.
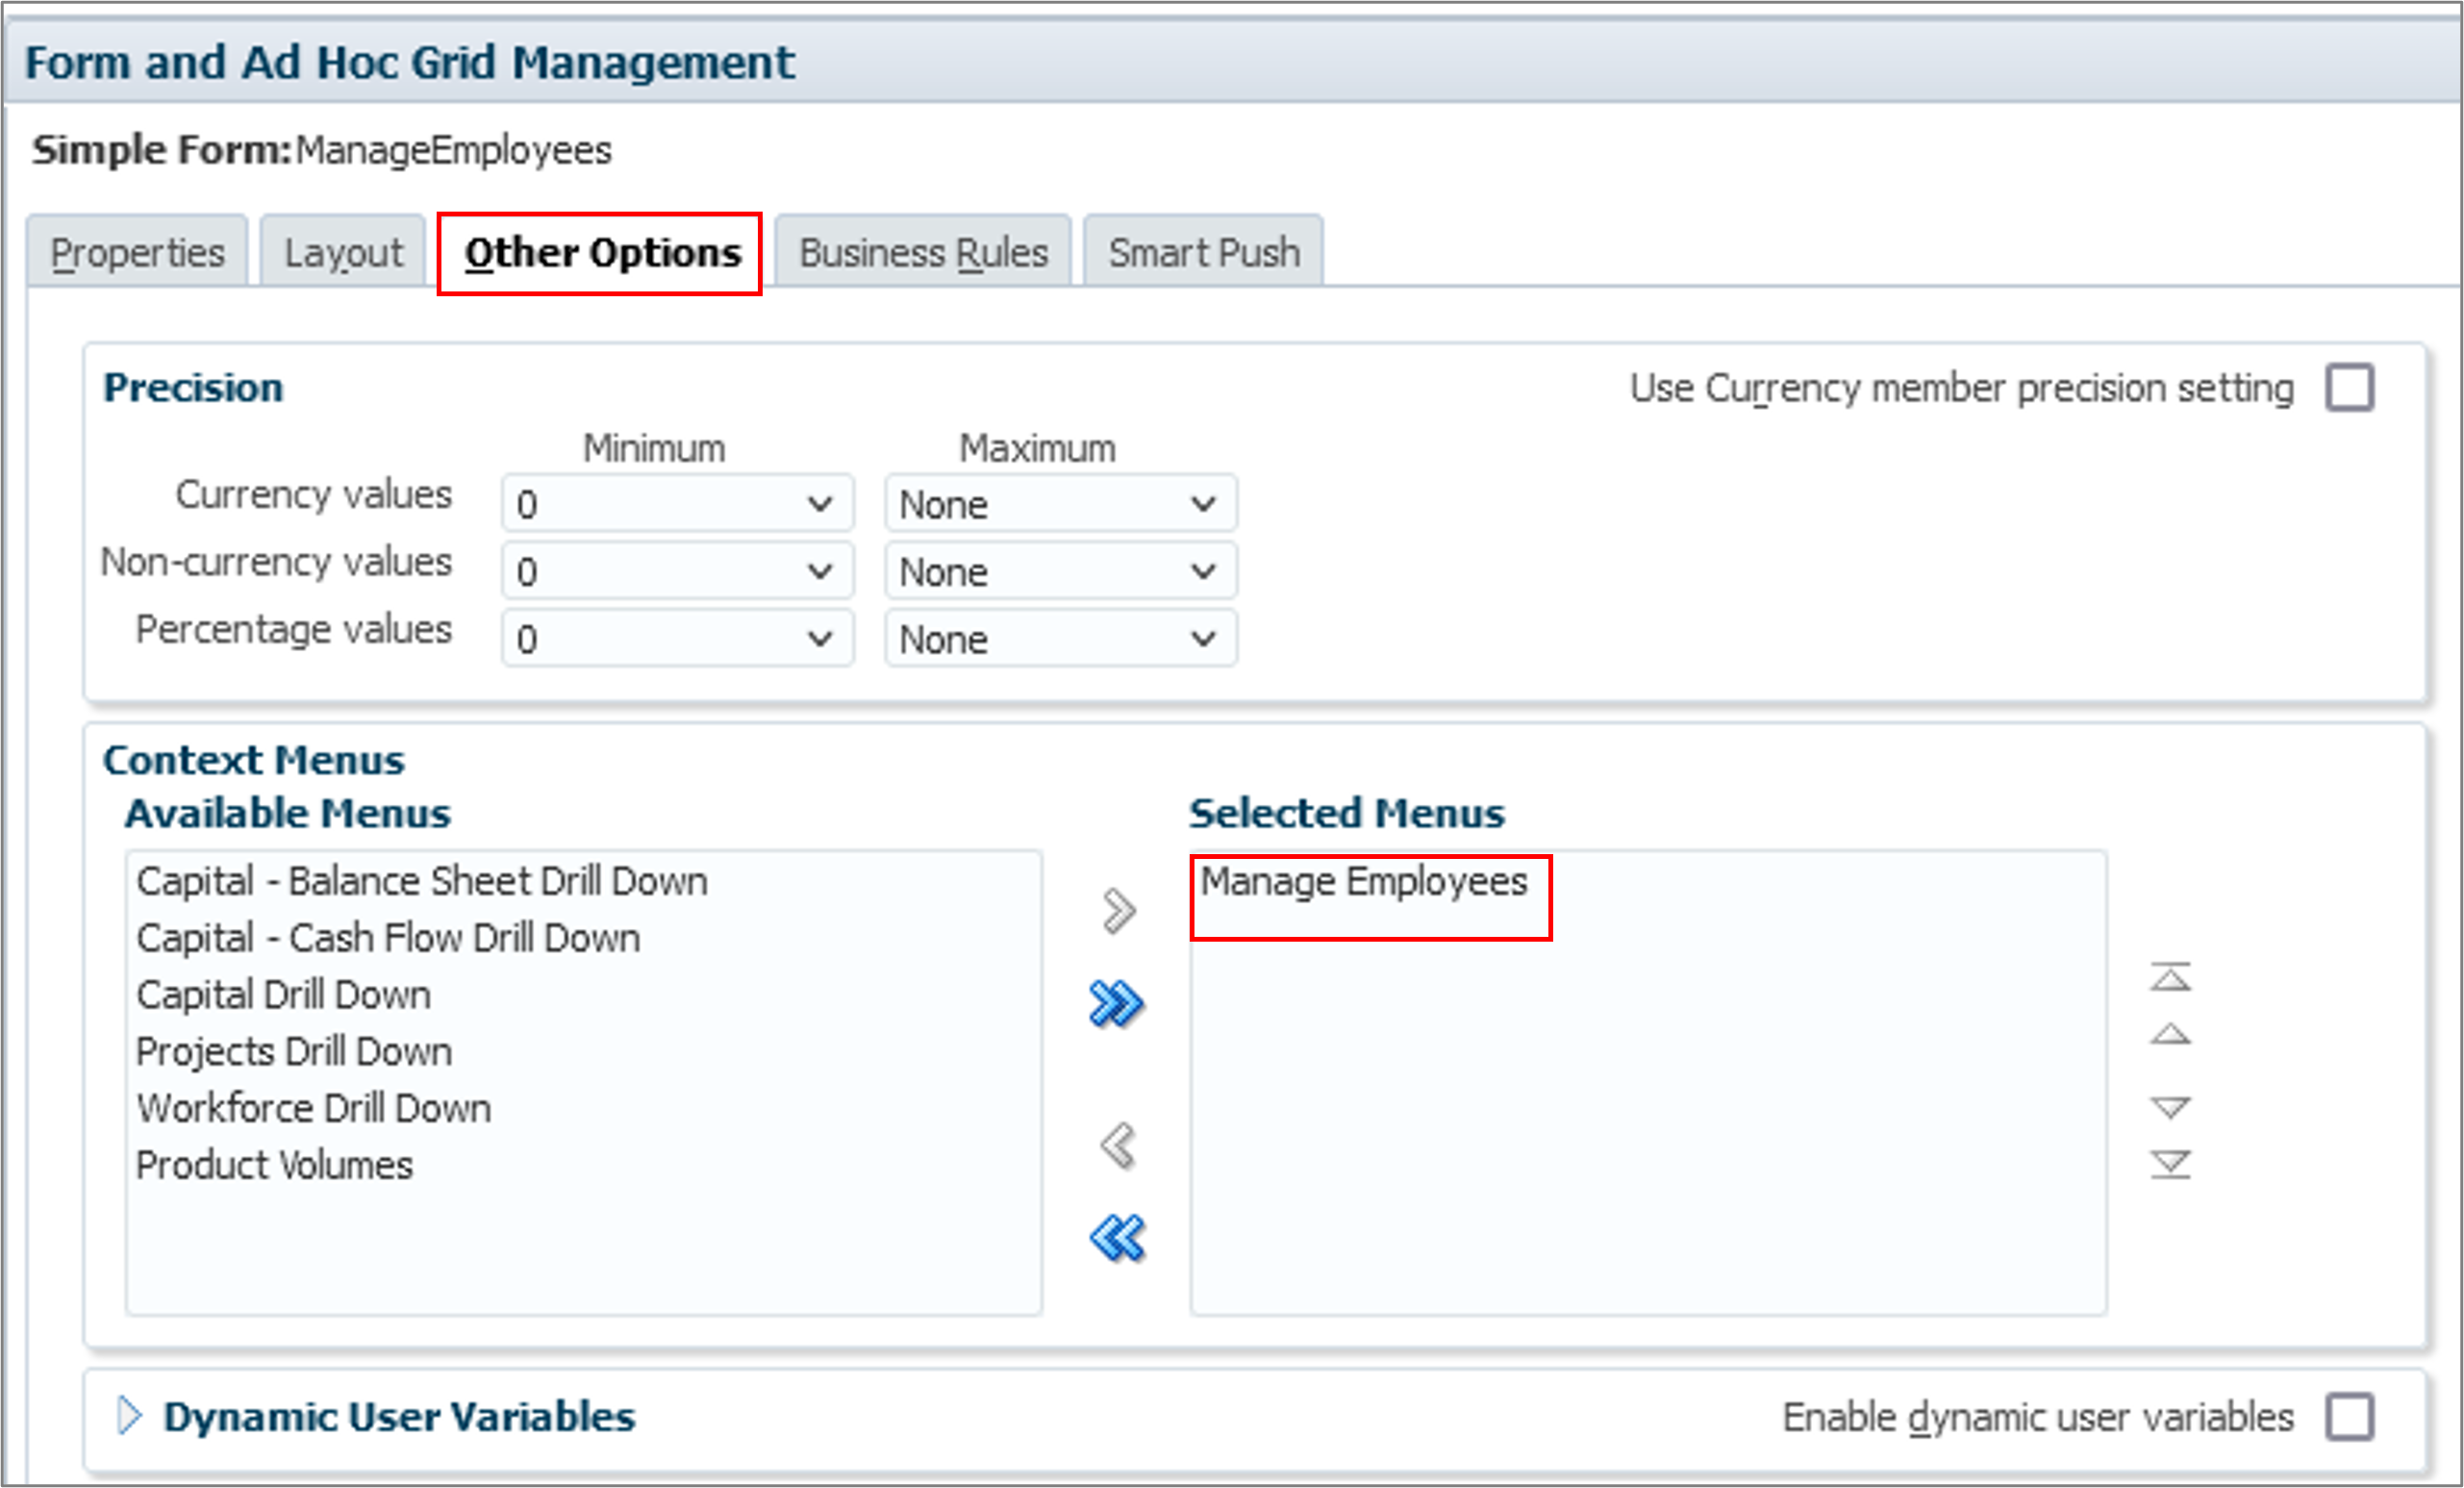
- On the Other Options tab, add the Manage Employees context menu to the Selected Menus list.
- Click Finish to save changes to the form.
- Close the form manager and return to the Home page.
Testing the Groovy Script
In this step, you test the script. The testing procedure includes entering invalid values for run time prompts to verify the validation section of the script.
Note:
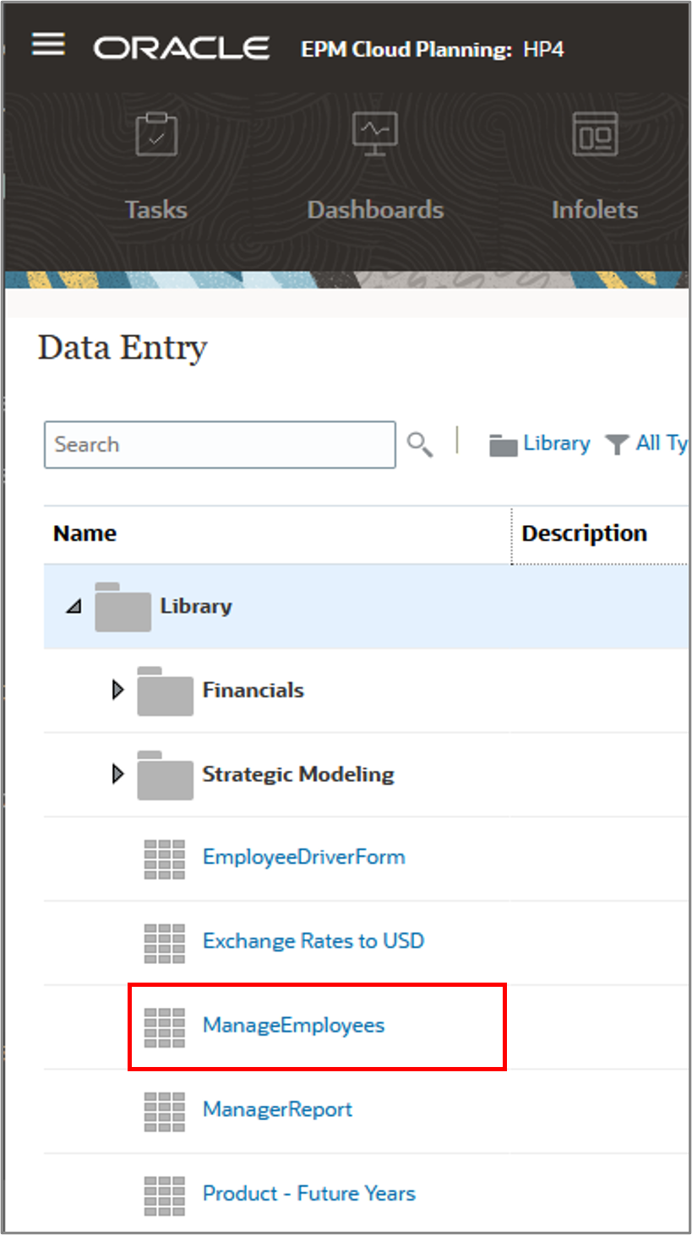
Non-administrators can execute this rule to add employees under a parent that is enabled for dynamic children.- From the Home page, click Data to display the list of data entry forms, then click ManageEmployees to open the Manage Employees form.
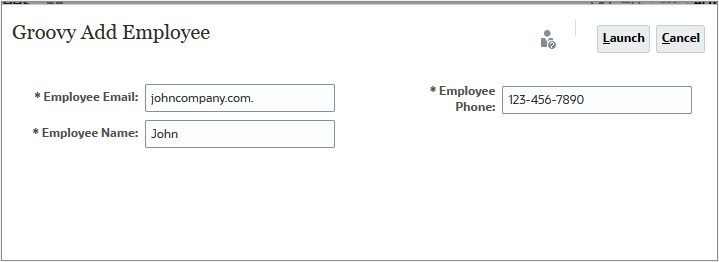
- To test the Groovy script, add an employee. To first test the RTP validation, create an employee with a name that's too short and use an invalid email address:
- Right-click Part Time Employees to display the context menu, and select Add Employee.
- For Employee Email, enter
johncompany.com. - For Employee Name, enter
John. - For Employee Phone, enter
123-456-7890. - Click Launch.
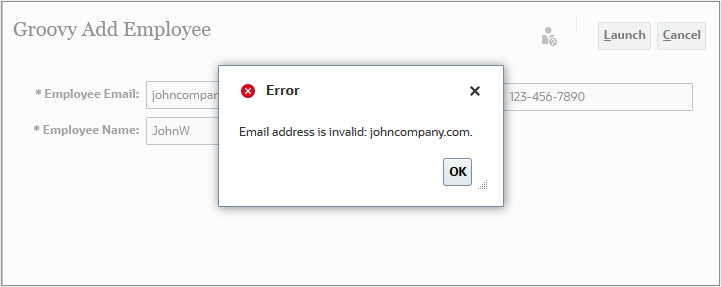
- Change the employee name to
JohnW, then click Launch again. This time, the employee name validates but the launch fails with a message that the email address is not valid. - Change the employee email to
john@company.com, then click Launch again. Click OK at the successful completion message. The employee JohnW is added to the list of employees, with a valid phone number and email address.
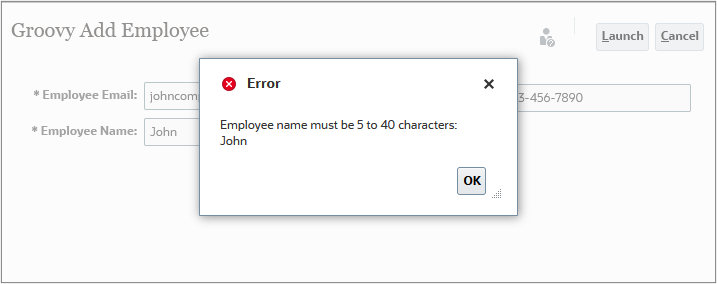
The launch fails with a message that the employee name is not valid. In the Groovy script, this is the first RTP value to be validated.
Related Links
Adding Dimension Members with Groovy
F87590-01
October, 2023
Copyright © 2023, Oracle and/or its affiliates.