You must create activity link types, before you can link activities. Activity link types
define how the activities are linked. For example, the minimum interval between activities, the
constraints for scheduling activities, constraints for assigning activities, and so
on.
-
Click the hamburger icon and then click Configuration.
-
Click Link Templates.
The Link Templates page appears.
-
Click Add Link Template.
The New Link Template dialog box displays.
-
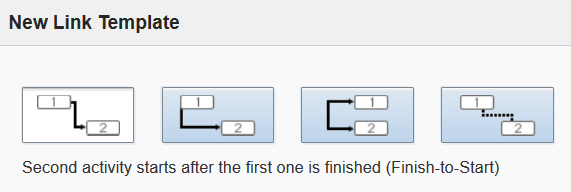
Select the graphic at the top of the dialog box that represents the way that you want to
link the two activities.
-
Enter the Minimal Interval of time between the two activities in
minutes (min).
-
Enter the Maximal Interval of time between the two activities.
For example, if the minimal interval is five minutes, the maximal might be ten or more
minutes.
-
Select one of these Assignment Constraints that you want to place on
assignments.
Different resources: This constraint requires that the linked
activities be assigned to two different resources. Same resource: This
constraint requires that both activities be assigned to the same resource.
-
Select one of these Scheduling Constraints that you want to place on
the days for which the activities are scheduled.
Different Days: This constraint requires the activities to be
scheduled for two different days. Same day: This constraint requires
they be scheduled for the same day.
-
Enter a Name and a Label for this link
type.
The name is what is displayed in the Web interface. The label is used by external systems
when they submit information through the API.
-
Check the Active box in the Status field to
make this link type available for use.
-
Click Save.