Create a VBCS Application for Oracle Fusion Field Service Plugin Integration
This topic provides the steps to create a VBCS (Visual Builder Cloud Service) application that can be used as an external plugin within Oracle Fusion Field Service to access a REST API.
Create a New VBCS Application
To create a new VBCS application:
- Open your VBCS environment.
- Create a new VBCS application and specify a suitable name and ID for your application.
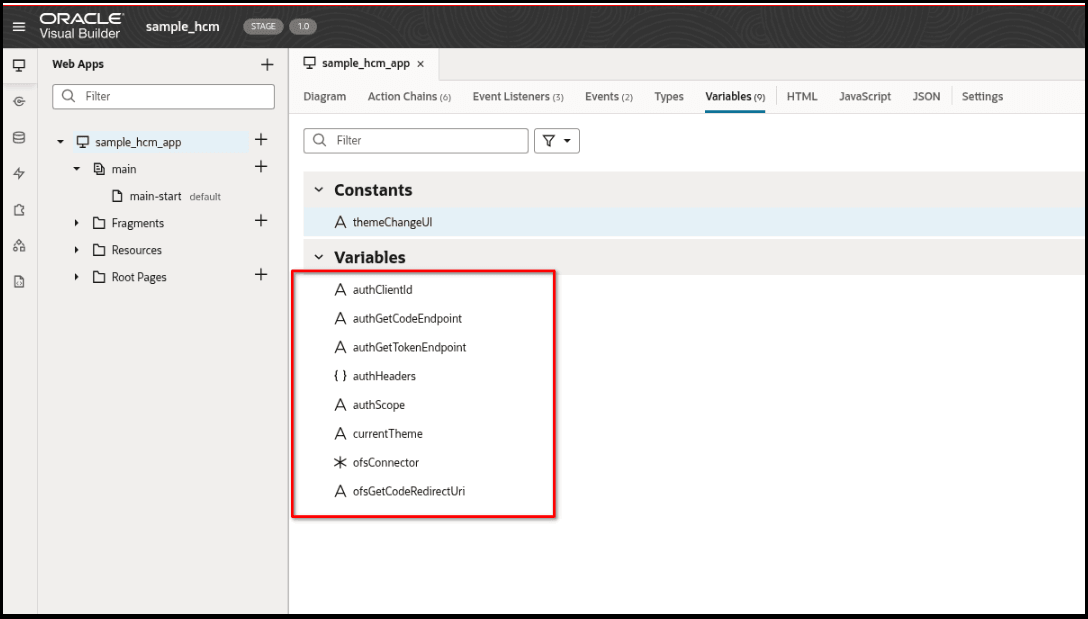
- Within your newly created VBCS application, navigate to the
Variables section.
- Create the necessary variables that your application will use during its operation. The specific variables you required depend on the logic of your plugin. You can use this code to add the required variables:
"variables": {
    "authClientId": {
      "type": "string"
    },
    "authGetCodeEndpoint": {
      "type": "string"
    },
    "authGetTokenEndpoint": {
      "type": "string"
    },
    "authHeaders": {
      "type": "object"
    },
    "authScope": {
      "type": "string"
    },
    "ofsGetCodeRedirectUri": {
      "type": "string"
    },
    "ofsConnector": {
      "type": "any"
    },
    ...}
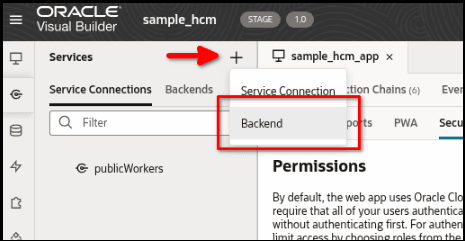
Add a Backend
- Navigate to the Backend section in VBCS.
- Click the button to create a new backend.
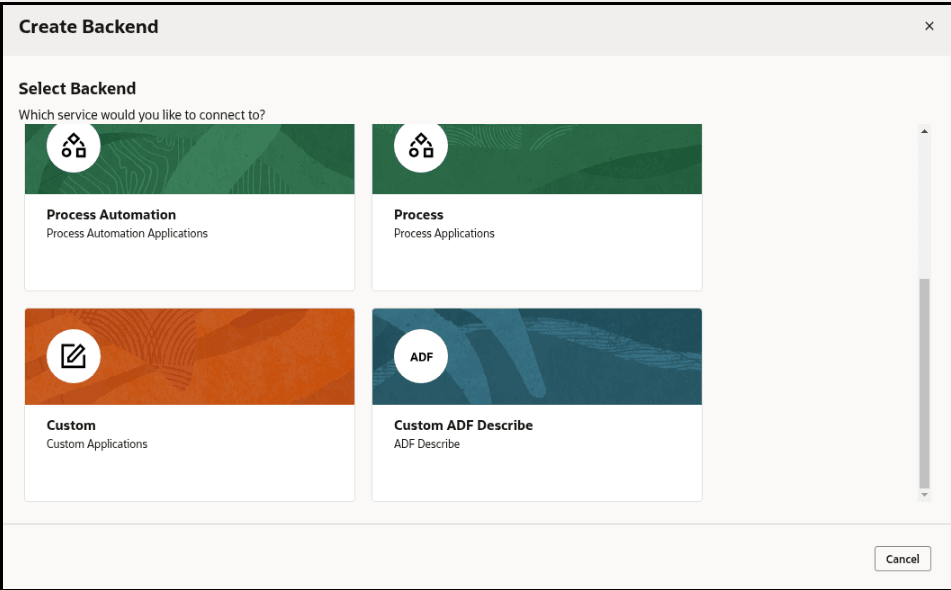
- Select Custom as the backend type.
- Enter a name for your custom backend. For example, hcm.
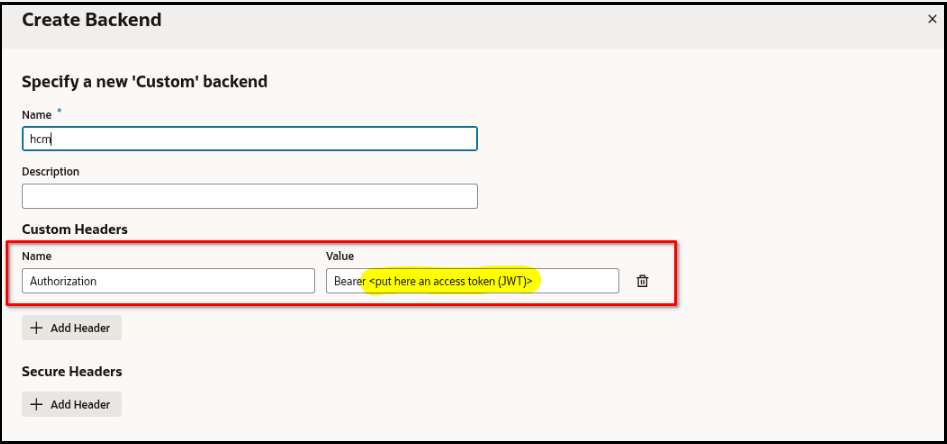
- To allow VBCS to understand the structure of the REST API during development:
- Add a custom header named Authorization.
- Set the Value of this header to Bearer xxxx, where xxxx is a valid JWT (obtained
through a tool like the Simple Authorization Plugin described in the earlier topic).
Note: This header serves a temporary function to facilitate the design process and will be removed in a subsequent phase. The JWTs have a finite lifespan and will require periodic updates during development.
Add a 'Public Workers' Service Connection
- Next, navigate to the Service Connections section.
- Click the button to add a new service connection.
- Click Select from Catalog.
- In the Custom section, select the custom backend you just created (for example, hcm).
- Select Define by endpoint.
- Set the Service Name and Title to
publicWorkers.

- Set the URL suffix to /publicWorkers. This will be appended to the base URL of your HCM backend. In our example, the plugin will request data from Public Workers HCM REST API https://docs.oracle.com/en/cloud/saas/human-resources/24c/farws/op-publicworkers-get.html
Implement Plugin Framework Initialization
- Navigate to the main page or the relevant flow where the plugin will be used.
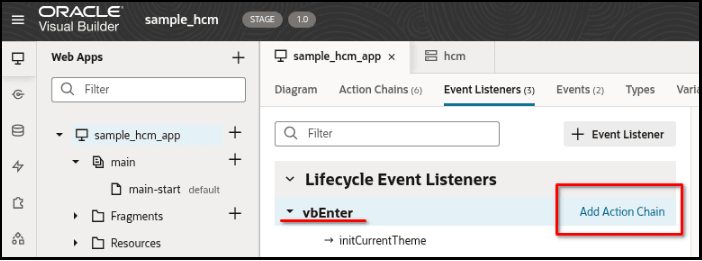
- Open the Event Listeners tab for the page.
- Select the vbEnter event.
- Click Add Action Chain to create a new Action Chain _init associated with this event.
- Within this _init Action Chain, add the following code:
This code helps you:define([ 'vb/action/actionChain', 'vb/action/actions', 'vb/action/actionUtils', ], ( ActionChain, Actions, ActionUtils ) => { 'use strict'; class _init extends ActionChain { /** * @param {Object} context */ async run(context) { const { $application, $constants, $variables } = context; //--------------------------------------- class OfsConnector { constructor(params) { const { apiVersion = 1, onInit = (jsonData) => {}, onOpen = (jsonData) => {}, onCallProcedureResult = (jsonData) => {}, onError = (jsonData) => { alert(jsonData); } } = params; this.API_VERSION = apiVersion; this.onInit = onInit.bind(this); this.onOpen = onOpen.bind(this); this.onCallProcedureResult = onCallProcedureResult.bind(this); this.onError = onError.bind(this); this.TRANSMIT_METHODS = { METHOD_READY: 'ready', METHOD_INIT_END: 'initEnd', METHOD_CLOSE: 'close', METHOD_UPDATE: 'update', METHOD_CALL_PROCEDURE: 'callProcedure', METHOD_SLEEP: 'sleep' }; this.RECEIVE_METHODS = { METHOD_ERROR: 'error', METHOD_INIT: 'init', METHOD_OPEN: 'open', METHOD_UPDATE_RESULT: 'updateResult', METHOD_CALL_PROCEDURE_RESULT: 'callProcedureResult', METHOD_WAKEUP: 'wakeup' }; window.addEventListener("message", this.onPostMessage.bind(this), false); } /** * @param {Object} dataToSend * @returns {void} */ sendMessage(dataToSend) { const originUrl = this.constructor._getOriginUrl(); const origin = originUrl ? this.constructor._getOrigin(originUrl) : '*'; dataToSend.apiVersion = this.API_VERSION; parent.postMessage(dataToSend, origin); } onPostMessage(event) { // Accept only external messages if (event.source === window) { return; } const jsonData = event.data; if (!jsonData) { this.onError('Received message without data: ' + jsonData); return; } switch (jsonData.method) { case this.RECEIVE_METHODS.METHOD_INIT: this.onInit(jsonData); break; case this.RECEIVE_METHODS.METHOD_OPEN: this.onOpen(jsonData); break; case this.RECEIVE_METHODS.METHOD_CALL_PROCEDURE_RESULT: this.onCallProcedureResult(jsonData); break; case this.RECEIVE_METHODS.METHOD_ERROR: this.onError('Received message with error method: ' + jsonData); break; default: this.onError('Received message with unsupported method: ' + jsonData); } } static generateRandomString (length) { return btoa(String.fromCharCode.apply(null, window.crypto.getRandomValues(new Uint8Array(length)))) .replaceAll('=', '') .replaceAll('/', '') .replaceAll('+', '').substr(0, length); } static _getOrigin(url) { if (typeof url === 'string' && url !== '') { if (url.indexOf("://") > -1) { return (window.location.protocol || 'https:') + url.split('/')[2]; } else { return (window.location.protocol || 'https:') + url.split('/')[0]; } } return ''; } static _getOriginUrl() { if (document.referrer) { return document.referrer; } if (document.location.ancestorOrigins && document.location.ancestorOrigins[0]) { return document.location.ancestorOrigins[0]; } return null; } } //--------------------------------------- const onInit = function(jsonData) { if (jsonData.origin) { localStorage.setItem('authRedirectOrigin', jsonData.origin || ''); } this.sendMessage({ method: this.TRANSMIT_METHODS.METHOD_INIT_END }); }; const onOpen = function(jsonData) { let openParams = jsonData.openParams || {}; let securedData = jsonData.securedData || {}; // getCodeEndpoint // Example: https://{idcsUrl}/oauth2/v1/authorize // getTokenEndpoint // Example: https://{idcsUrl}/oauth2/v1/token $application.variables.authClientId = openParams.clientId || securedData.clientId || ''; $application.variables.authScope = openParams.scope || securedData.scope || ''; $application.variables.authGetCodeEndpoint = openParams.getCodeEndpoint || securedData.getCodeEndpoint || ''; $application.variables.authGetTokenEndpoint = openParams.getTokenEndpoint || securedData.getTokenEndpoint || ''; $application.variables.ofsGetCodeRedirectUri = localStorage.getItem('authRedirectOrigin') + '/plugin-auth-redirect/'; }; $application.variables.ofsConnector = new OfsConnector({ onInit: onInit, onOpen: onOpen }); $application.variables.ofsConnector.sendMessage({ method: $application.variables.ofsConnector.TRANSMIT_METHODS.METHOD_READY, sendInitData: true, sendMessageAsJsObject: true }); //--------------------------------------- } } return _init; });- Include the Plugin Framework connector class into your VBCS application.
- Store this connector class in an application variable.
- Initiate the communication with the Field Service Plugin Framework.
Create Authorization and Data Retrieval
- On your VBCS page, place a Button with the label
'Authorize and get workers'.
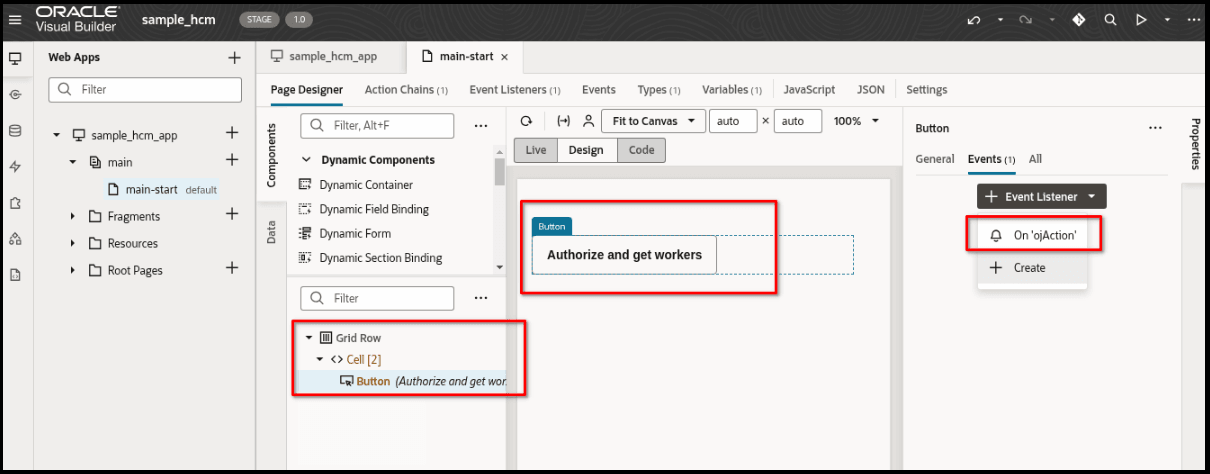
- Create a new Action Chain named
_authorizeand associate it with the button'sojActionevent listener. -
Change code of the '_authorize' Action Chain, and add the following:
define([ 'vb/action/actionChain', 'vb/action/actions', 'vb/action/actionUtils', ], ( ActionChain, Actions, ActionUtils ) => { 'use strict'; class _authorize extends ActionChain { /** * @param {Object} context */ async run(context) { const { $application, $constants, $variables } = context; //--------------------------------------- // const state = ''; // let authCodeChallenge = $application.variables.ofsConnector.constructor.generateRandomString(45); const callId = $application.variables.ofsConnector.constructor.generateRandomString(16); let authUrl = $application.variables.authGetCodeEndpoint + "?client_id=" + $application.variables.authClientId + '&response_type=code' // + '&challenge_method=plain' // + "&code_challenge=" + authCodeChallenge + "&scope=" + encodeURIComponent($application.variables.authScope) //+ "&state=" + JSON.stringify(state) + "&redirect_uri=" + encodeURIComponent($application.variables.ofsGetCodeRedirectUri); $application.variables.ofsConnector.onCallProcedureResult = async function(procedureResult) { if (!procedureResult.callId || procedureResult.callId !== callId) { return; } let code = procedureResult.resultData.code; const result = await fetch( $application.variables.authGetTokenEndpoint, { method: 'POST', headers: { 'Content-Type': 'application/x-www-form-urlencoded; charset=UTF-8' }, body: new URLSearchParams({ client_id: $application.variables.authClientId, grant_type: "authorization_code", redirect_uri: $application.variables.ofsGetCodeRedirectUri, // code_verifier: authCodeChallenge, code: code, }) } ); const jsonData = await result.json(); if (jsonData.access_token) { $application.variables.authHeaders = { 'Authorization': 'Bearer ' + jsonData.access_token }; } }; $application.variables.ofsConnector.sendMessage({ method: $application.variables.ofsConnector.TRANSMIT_METHODS.METHOD_CALL_PROCEDURE, callId: callId, procedure: "getAuthorizationCode", params: { url: authUrl } }); //--------------------------------------- } } return _authorize; }); - Click the Authorize button to trigger the Action chain. It calls the Plugin Framework function to get an authorization code. Next, by code it obtains a token and gets the REST API data into the table.
Display Data in a Table
- Drag a Table component onto your VBCS page layout.\
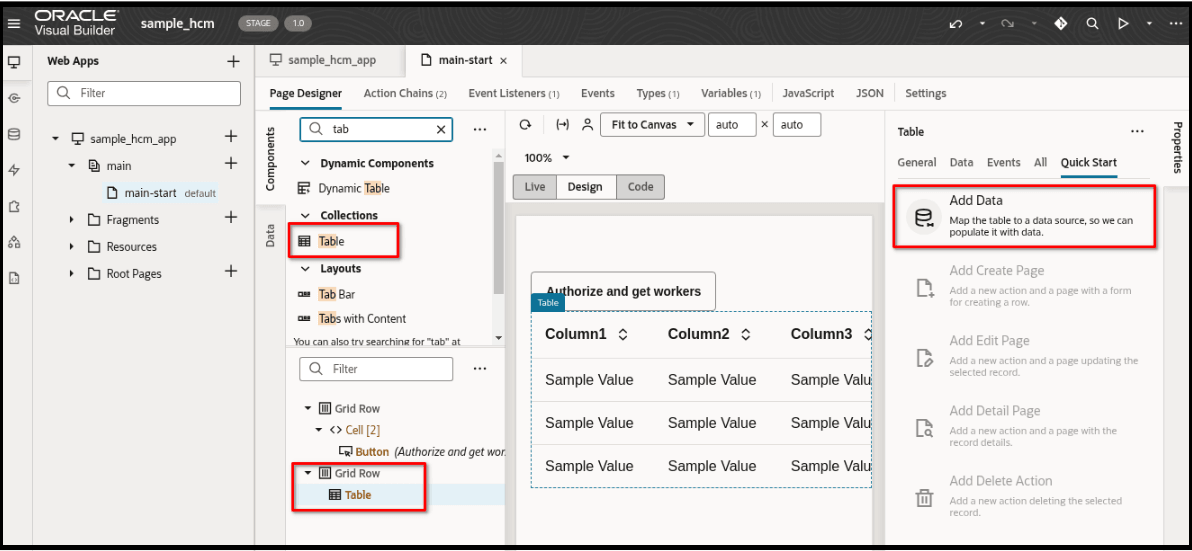
- As the data source for the table, select the Public Workers
service connection you created earlier.
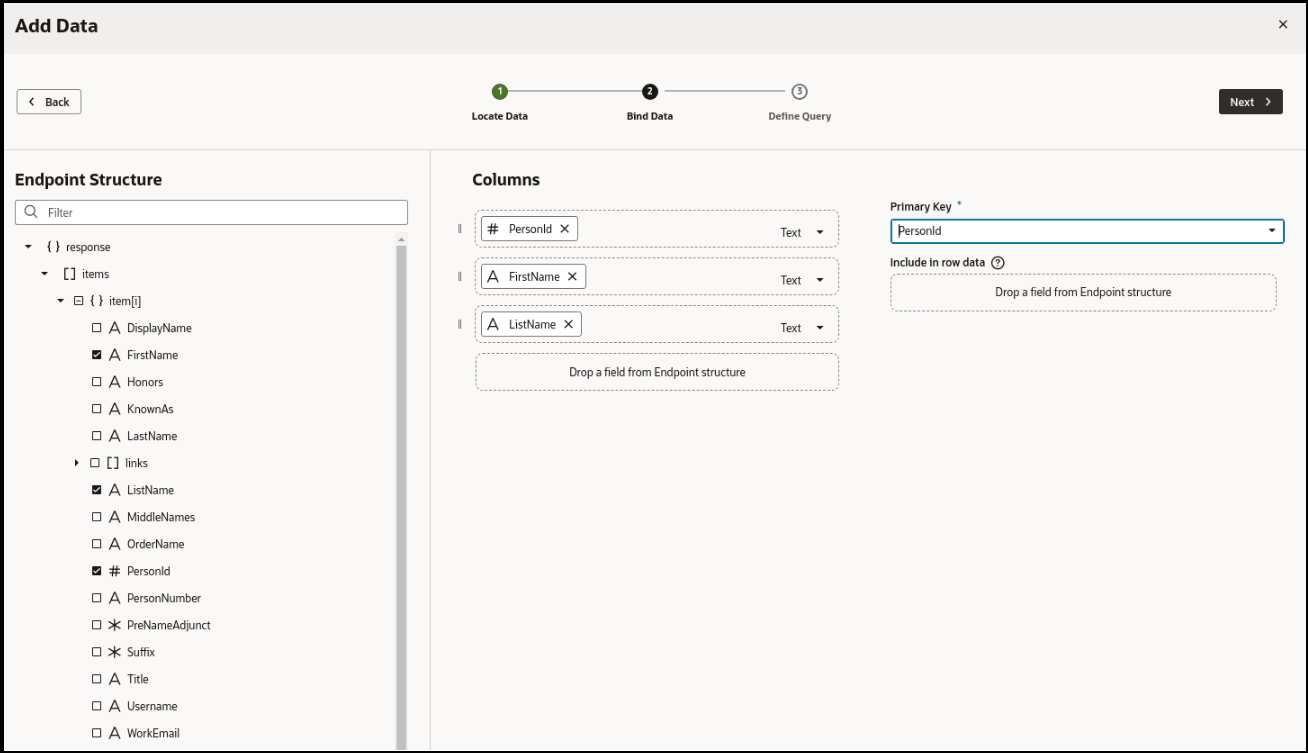
- Select the specific fields from the Public Workers endpoint structure that you want to display in the table. For example, PersonId, FirstName, LastName. Specify PersonId as the key field.
- Navigate to the automatically created Service Data Provider variable,
getPublicWorkersListSDP.
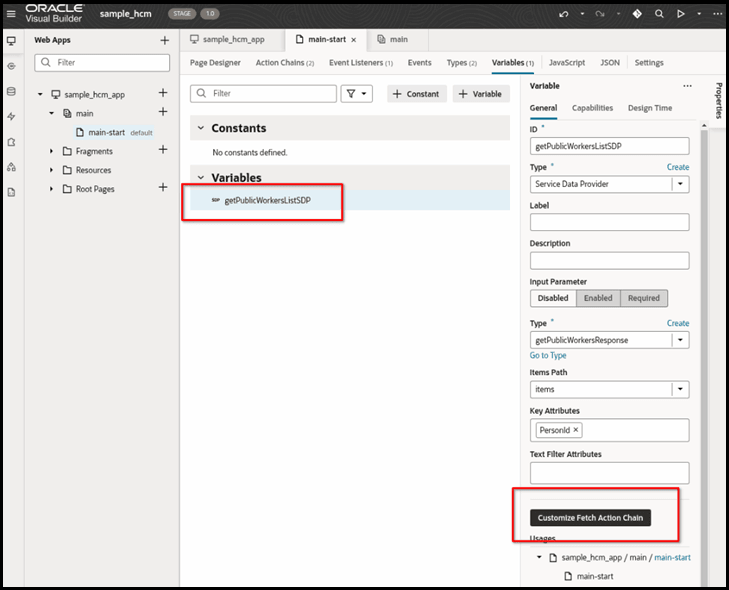
- Click Customize Fetch Action Chain.
- Within the getPublicWorkersFetch Action Chain, add the following code to the "Headers"
section:
headers: $application.variables.authHeaders,
This ensures that the authorization header (containing the JWT obtained via the Plugin Framework) is included when fetching data for the table. -
To list 'getPublicWorkersFetch' Action Chain, use the following code:
define([
  'vb/action/actionChain',
  'vb/action/actions',
  'vb/action/actionUtils',
], (
  ActionChain,
  Actions,
  ActionUtils
) => {
  'use strict';

  class getPublicWorkersFetch extends ActionChain {

    /**
     * @param {Object} context
     * @param {Object} params
     * @param {{hookHandler:'vb/RestHookHandler'}} params.configuration
     */
    async run(context, { configuration }) {
      const { $page, $flow, $application, $constants, $variables } = context;
      const callRestEndpoint1 = await Actions.callRest(context, {
        endpoint: 'publicWorkers/getPublicWorkers',
        responseType: 'getPublicWorkersResponse',
        hookHandler: configuration.hookHandler,
        requestType: 'json',
        //---------------------------------------------------------
        headers: $application.variables.authHeaders,
        //---------------------------------------------------------
      });

      return callRestEndpoint1;
    }
  }

  return getPublicWorkersFetch;
});
Configure Application Security
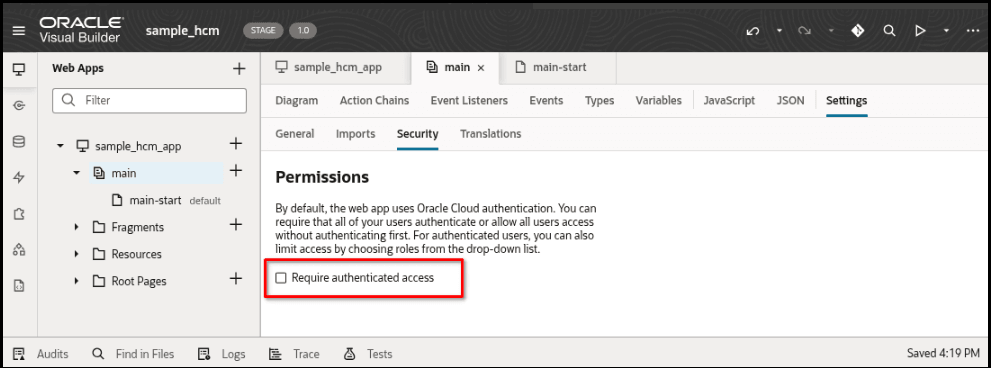
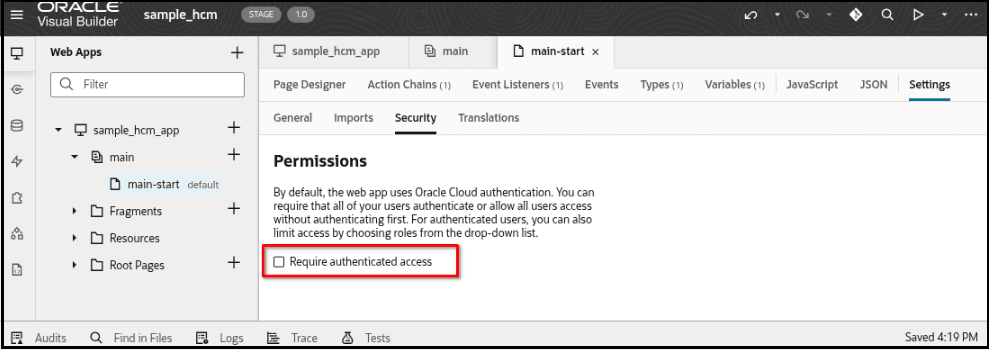
- Navigate to the Security tab of your VBCS application.
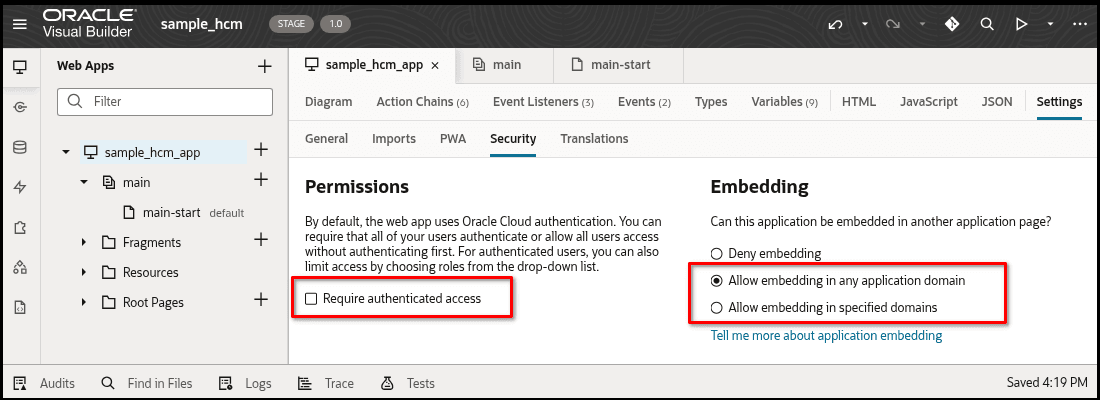
- Deselect the authentication access requirement at all three levels: Application,
Flows, and Pages. This is necessary because the plugin will be loaded in a context where
the user might not be directly authenticated with the VBCS application itself.
- On the Security tab, configure the Embedding settings to allow embedding from any domain. This is crucial for the VBCS application to function correctly when embedded as an external plugin in Oracle Fusion Field Service.
Remove Temporary Authorization Header
- Navigate to the Backend section and select the custom back-end (hcm in this scenario) you created.
- Remove the temporary Authorization header that you added in the Add an HCM Backend section. The authorization header is used only to help the VBCS wizard obtain data from the REST API and configure columns and primary key. This header is only for design-time assistance and is no longer needed as the authorization will be handled dynamically through the Plugin Framework at runtime.
Stage VBCS Application for Oracle Fusion Field Service
- Once your VBCS application is developed and tested, stage it to generate a URL that can be used as an external plugin in Oracle Fusion Field Service.
-
Next in Oracle Fusion Field Service, navigate to and open the external plugin that you've added.
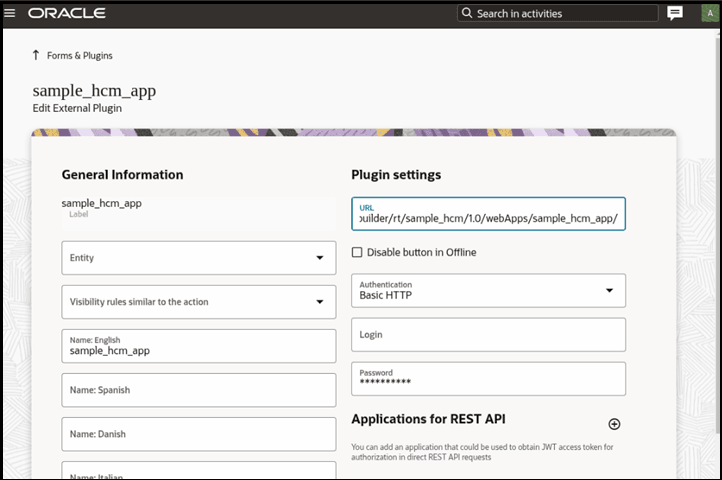
-
Configure the staged VBCS application as an external plugin within your Oracle Fusion Field Service environment. This involves providing the staged URL and configuring the necessary plugin parameters (for example,
getCodeEndpoint,getTokenEndpoint,clientId,scope).VBCS application supports both button parameters and plugin parameters:
- getCodeEndpoint Example for IDCS: https://{idcsUrl}/oauth2/v1/authorize
-
getTokenEndpoint Example for IDCS: https://{idcsUrl}/oauth2/v1/token
-
clientId
- scope