This topic describes how to configure an integrated application within Oracle
Identity Cloud Service (IDCS) to enable the OAuth User Assertion flow and issue access
tokens for use by Oracle Fusion Field Service.
-
Navigate to the identity domain configuration in IDCS.
-
Select the Integrated Applications section from the left
pane.
-
Click Add Application at the top of the page. The
Add application dialog box appears.
-
In the Add application dialog box, select Confidential
Application and click Launch Workflow.
The Add Confidential Application dialog box
appears.
-
Provide a name for your new application.
-
Click Submit.
-
Next, click Edit OAuth configuration to proceed to the
Edit OAuth configuration step.
-
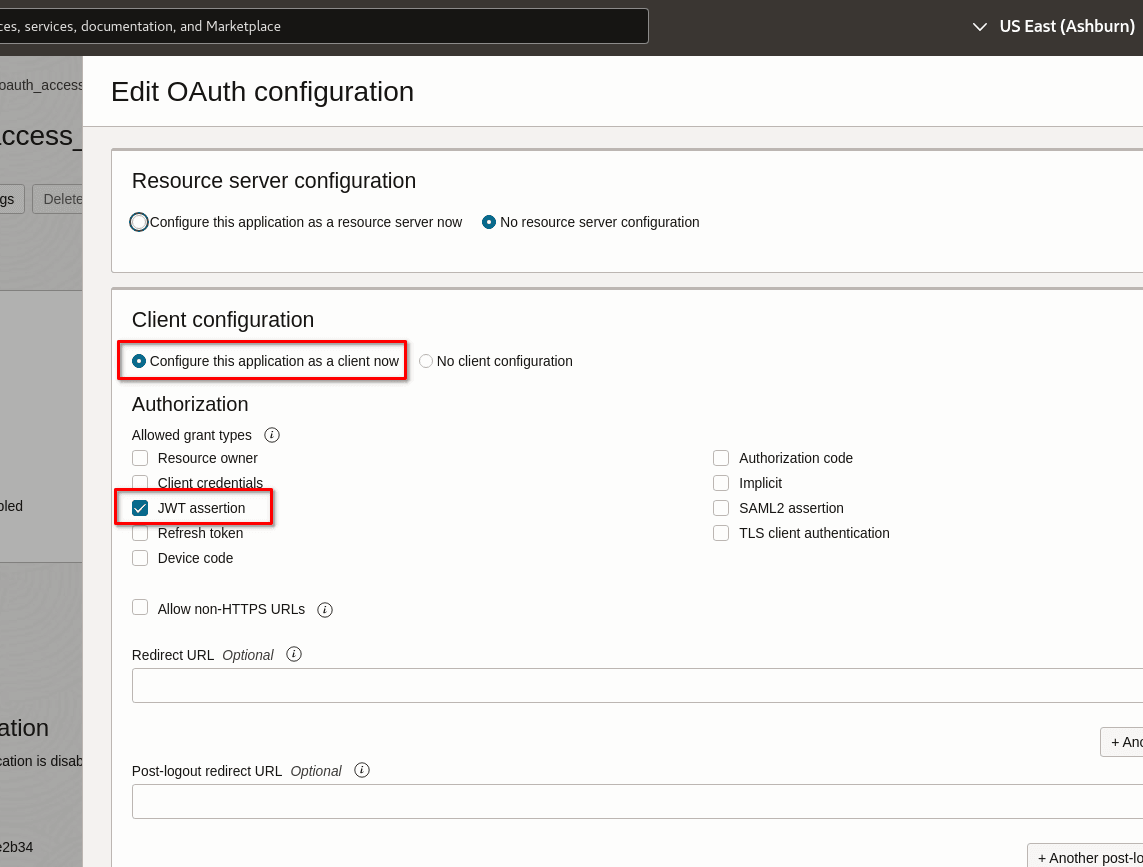
In the Client Configuration section, select Configure this
application as a client now.
-
Select the JWT Assertion grant type in the Authorization
section. Leave all other grant types unchecked. In this example, only one grant
type is used, but real integrations may involve multiple grant types for a
single application.
-
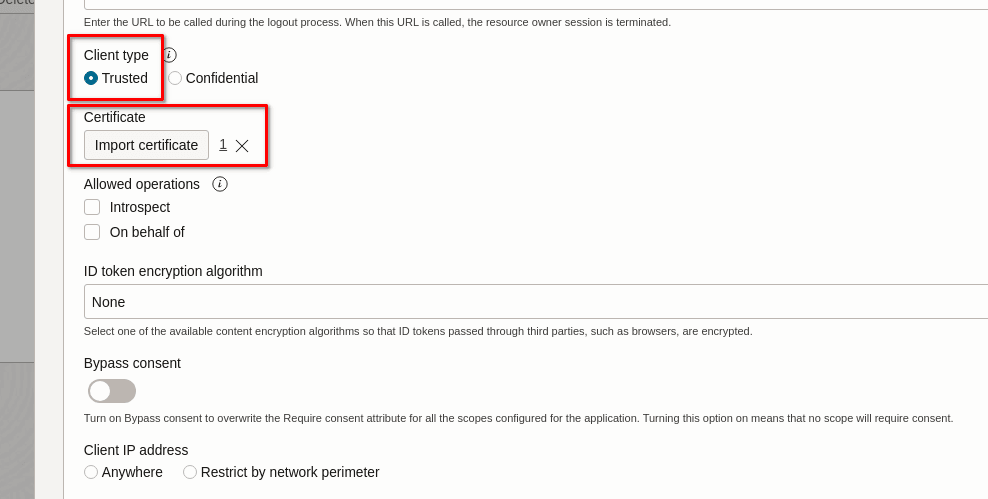
In the Client Type section, select
Trusted. Trusted clients can generate self-signed
user assertions using the Field Service certificate.
-
Import the Field Service signing certificate, which can be downloaded from:
-
In the Allowed Operations section, optionally select
On behalf of. This allows the client application to
access endpoints the user can access, even if the client doesn't have direct
access.
-
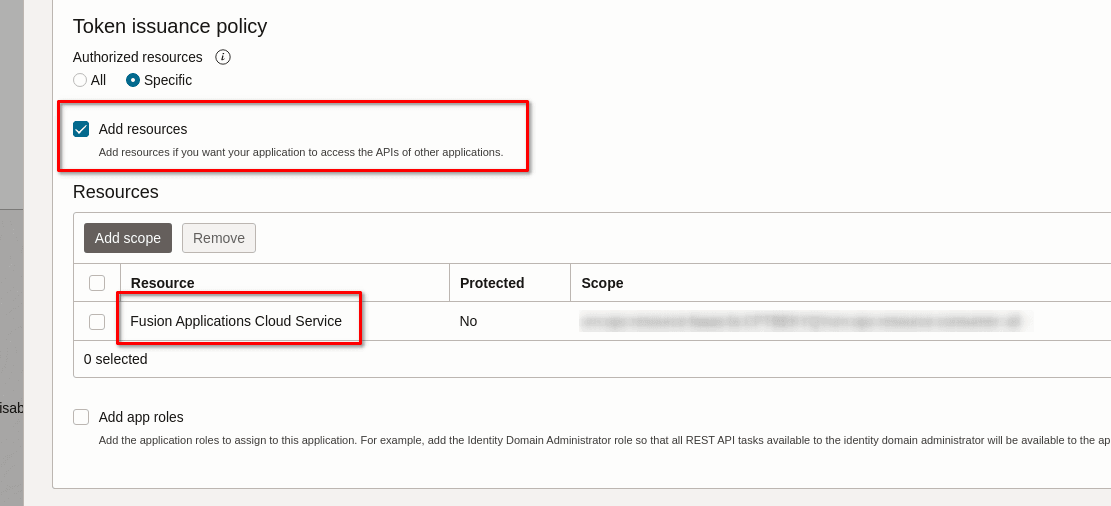
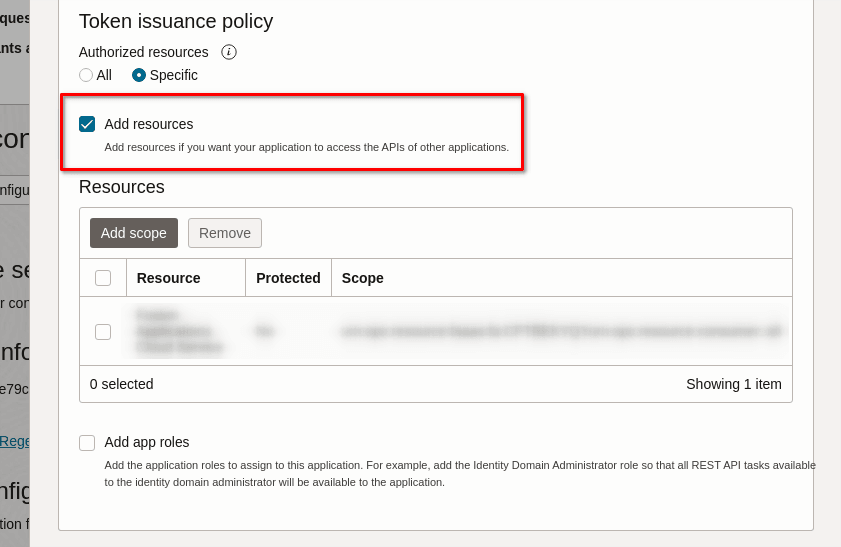
In the Token Issuance Policy section, select
Add resources if you want your application to access
the APIs of other applications.
-
In the Resources section, click Add
Scope. A list of applications appears in the Add scope dialog
box.
-
Select the scope of the target resource, such as Fusion Applications Cloud
Service, and then click Add.
The selected application is added to the Resource scope.
Note: If Fusion Applications Cloud Service is not listed as
a resource, it indicates that Fusion Service is not linked to the IDCS
domain. In this case, you must create the integrated application in the
domain linked to Fusion Service.
-
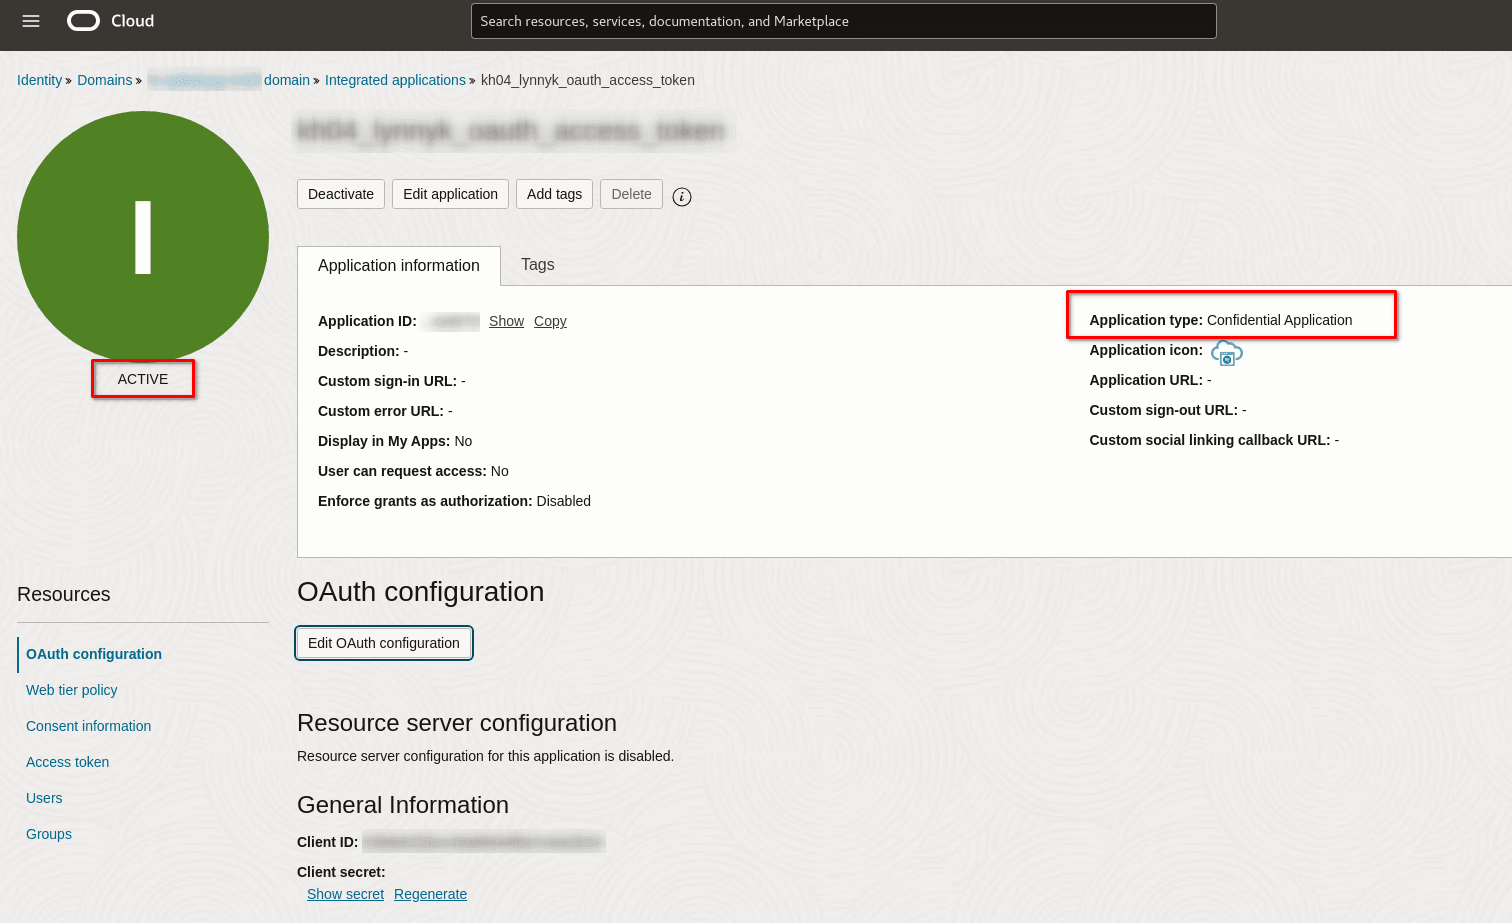
Click Finish to complete the creation of the integrated
application.
-
After creation, ensure that you activate the newly created IDCS application.
-
Once activated, your application appears as configured and ready for
integration.