IDCS Configuration for OAuth Authorization Code Flow

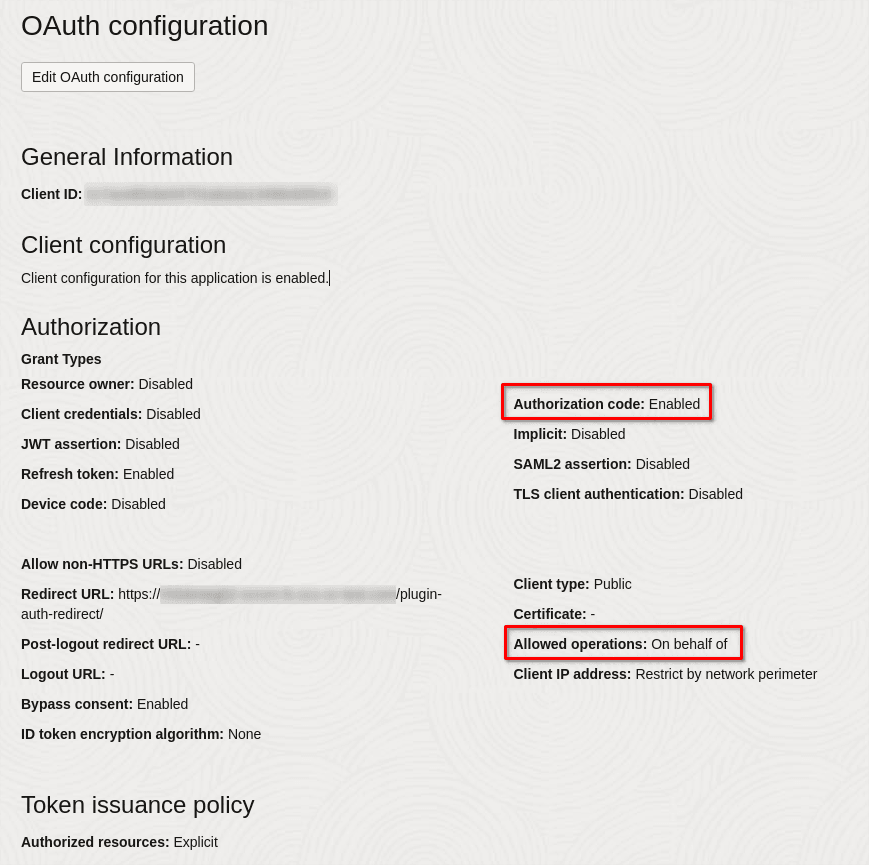
The setup aims to create an integrated application in IDCS that obtains an access token (JWT) using an authorization code to make authorized requests to REST APIs accessible through the application.

Steps to create an Integrated Application in IDCS:
  1. Navigate to the Identity Domain Configuration in IDCS.
  2. Select the Integrated Applications section from the left pane.
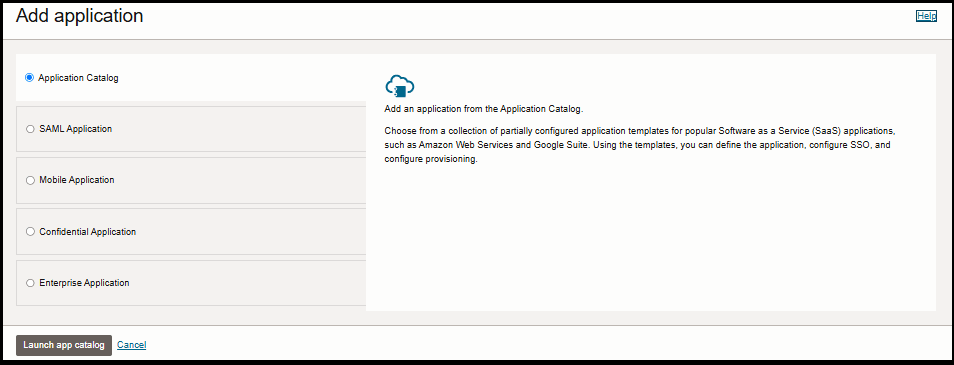
  3. Click Add application at the top of the page.
    The Add application dialog box appears.

    This screenshot shows the Add applications page.
  4. In the Add application dialog box, select Mobile Application and then click Launch Workflow. The Add Mobile Application page appears.

    This screenshot shows the Add Mobile application page.
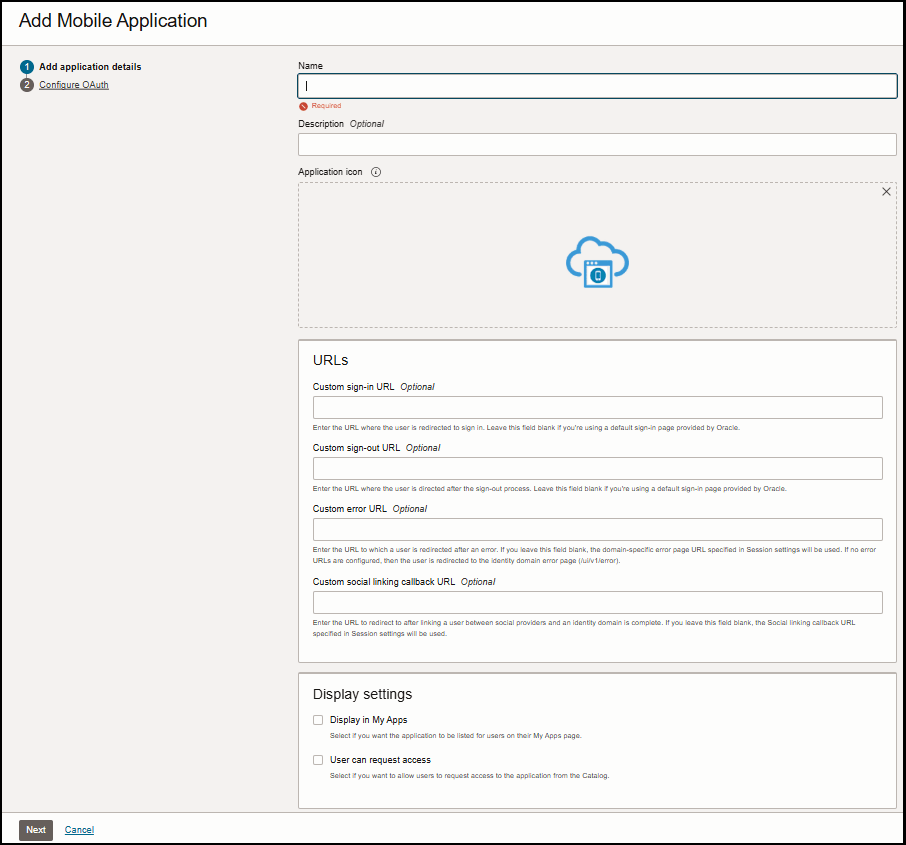
  5. Name your application and click Next to proceed to the Configure OAuth step.

    This screenshot shows the Add Mobile application page.
  6. In the Authorization section, enable the Authorization code grant type. Uncheck other grant types unless necessary.
    Note: Enable the Refresh Token grant type if the plugin uses refresh token functionality.
  7. In the Redirect URL field, enter the URL for redirection to your Field Service instance, appended with /plugin-auth-redirect/ For example: https://<your-field-service-instance-domain>/plugin-auth-redirect/.
  8. In the Allowed Operations section, enable the On behalf of checkbox. This allows the client application to access user-endpoints based on their privileges.
  9. In the Token Issuance Policy section, select Add resources if you want your application to access the APIs of other applications.
  10. In the Resources section, click Add Scope. A list of applications appears in the Add scope dialog box.
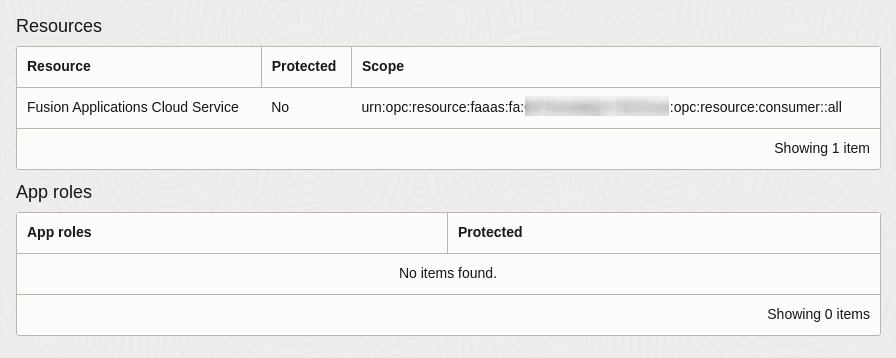
  11. Select Fusion Applications Cloud Service and then click Add.
    The selected application is added to the Resource scope.

    This screenshot shows the Add Mobile application page.
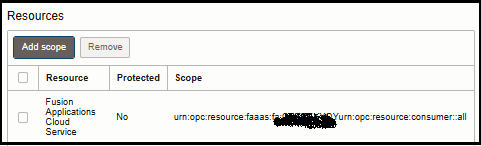
    Note: If Fusion Applications Cloud Service is not listed, it means Fusion Service is not linked with the IDCS domain. You need to create the application in the domain linked to Fusion Service.
  12. Click Finish. The newly created application is now listed on the Integrated Applications page and its status is Inactive.
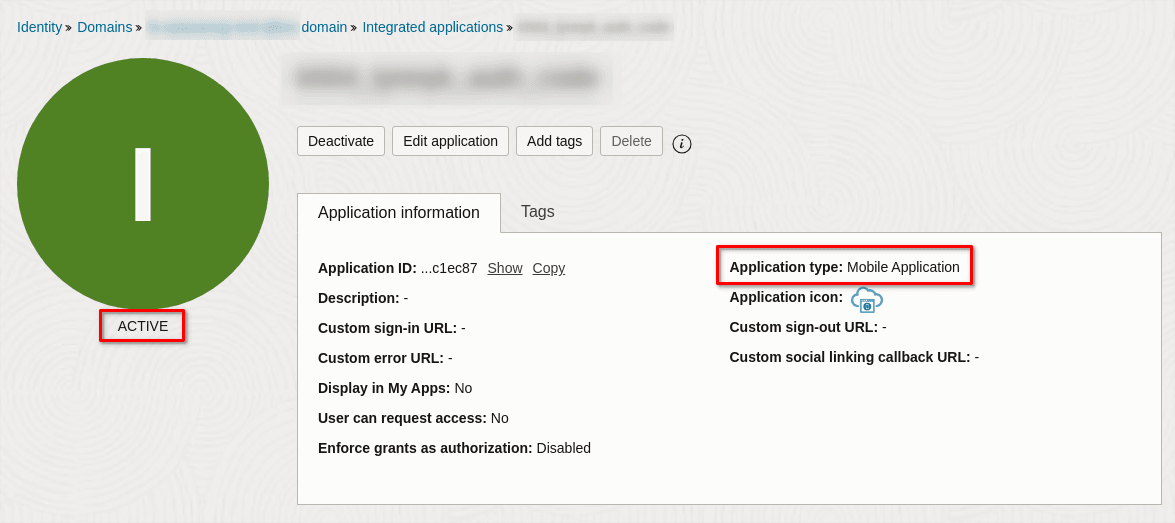
  13. Click the Activate icon to activate the application. Once activated, your application appears as follows:

    This screenshot shows the IDCS application.

    This screenshot shows the OAUTH application.

    This screenshot shows the Resources application.