You add a plugin to a context layout page, so that Mobile Workers can open it. You can
configure the parameters for a button to send the parameters to the plugin, or to open a specific
page, or another plugin.
-
Sign in to the application as a setup administrator.
-
Click . The Screens page appears.
-
In the left pane, select the user type for which you want to add the plugin.
-
Find and click the page to which you want to add the plugin.
The Visual Form Editor page appears. Plug-ins are available not
only on the Visual Form Editor, but on old context layout structures such as Parts Details as
well. On such pages, add an action and select a plugin from the list.
- Drag-and-drop the Button element
to the section from where you want to invoke the plugin.
Note: You cannot add buttons to context layout structures that are responsible for changing the
state of an activity, simultaneously with submitting data. Some of the context layout
structures where you cannot add buttons are Add activity, Not done activity, Install
inventory, End activity. Further, you cannot remove or change the visibility of the two
predefined buttons on these pages: Dismiss and Submit. This is to preserve the data integrity
within transitions between states.
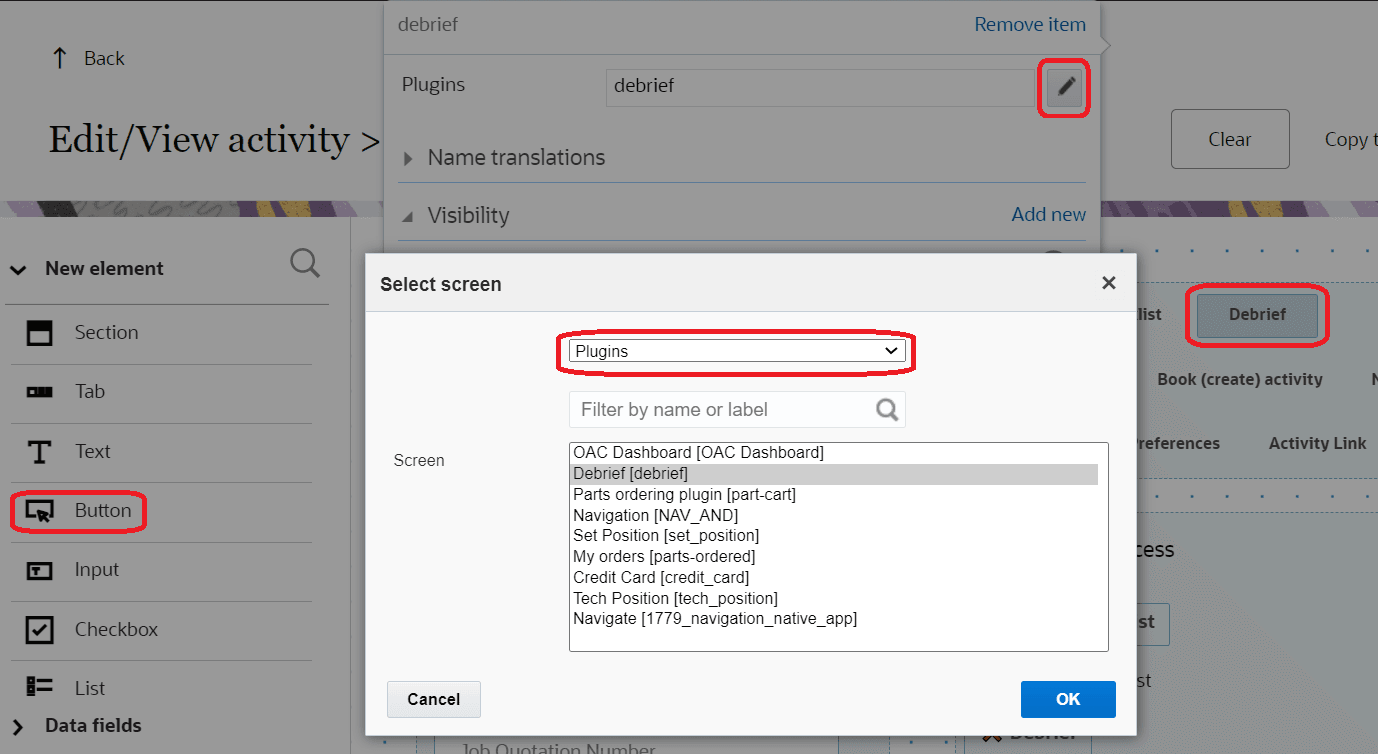
- Click the button.
- In the Standard action screen field,
click the pencil icon.
- Select Plug-ins.
- In the Screens list, select the
name of the plugin that you want to open and click OK.
The label of the plugin is displayed in the Plug-in field. By default all plugins have a visibility
of Read-only.
- In the Visibility section, add the
conditions based on which the plugin is visible.
-
In the Translations section, add a name for the plugin.
[Optional]
This name is displayed on the page from which the plugin will be invoked. This
screenshot shows the Visual Form Editor page where a plugin is added to a Button
element:
If you retain the default name and if you happen to change the name of the
plugin later, the new default name is populated automatically.
- To configure the parameters:
- Click Add new in the Parameters section.
- Enter a name for the parameter in the Name field.
For example, enter defaultScreen to define a page as the default page in the plugin.
The maximum length of the name that you can enter is 248 characters.
- Enter a value for the parameter.
For example, enter part_order to display the Part order page as the default page in the
plugin. The maximum length of the value that you can enter is 4000 characters.
- Click Save.
- Repeat the procedure for all the parameters that you
want to configure.
The total combined length of all parameter names and values
must not exceed 5000 characters. These parameters are not encrypted
when sent to the plugin.
-
Click Save on the Visual Form Editor
page.
The plugin is added to the selected page.