Use the calendar to choose the date range and the period
to view the forecast.
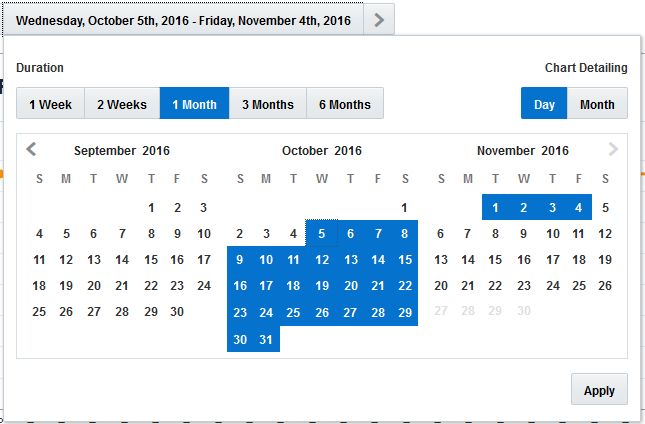
The date is displayed next to the bucket name. This screenshot
shows the calendar:
- Click
The Forecasting window opens.
- Use the forward and back arrows on the calendar, and select
the period for which you want to request data.
- Click the dates shown in the field to open a calendar that
provides five time-interval options:
1 Week
2 weeks
1 Month
3 months
6 months
- Select a time interval, and then click the start date on
the calendar to display the data for that period.
The left and right arrows in the date field move the
calendar to the selected period of time.
- Select either Day or Month depending on the unit of time
period that the data is to be displayed.