Configuring Inter Module Validations in Financial Consolidation and Close
You can configure an Inter Module validation to validate status across Financial Consolidation and Close modules such as Entity, Journals, and Approval status.
To configure an Inter Module validation:
-
On the Home page, click Financial Analysis Hub, then select Configuration
The Configuration page is displayed with a list of available configurations.
-
Click Create.
-
On the Types tab, from Analysis Type, select Validation.
-
From Validation Type select Inter Module.
-
Enter a Name, and a Description for the validation configuration, then click Next.
-
On the Settings tab, for POV Selection, click the Member Selector
 button and select members.
Note that the Consol cube is selected by default, and cannot be changed.
-
From Activity Trigger, select the type of activity that will trigger the generation of the analysis content:
-
Manual—You need to run the configuration manually.
-
Consolidation—If this is selected and the status of entities is Impacted, the analysis will be run after you run the Consolidate rule.
-
Translation—If this is selected and the status of entities is Impacted, the analysis will be run after you run the Translate rule.
-
Data Load/Delete (via Data Management, Forms, Smart View, or Journals)—If this is selected, the configuration will run with the Data Load or Data Delete process in the POV specified in the configuration through Data Management, Smart View, Forms, or Journals.
-
-
Click Next.
-
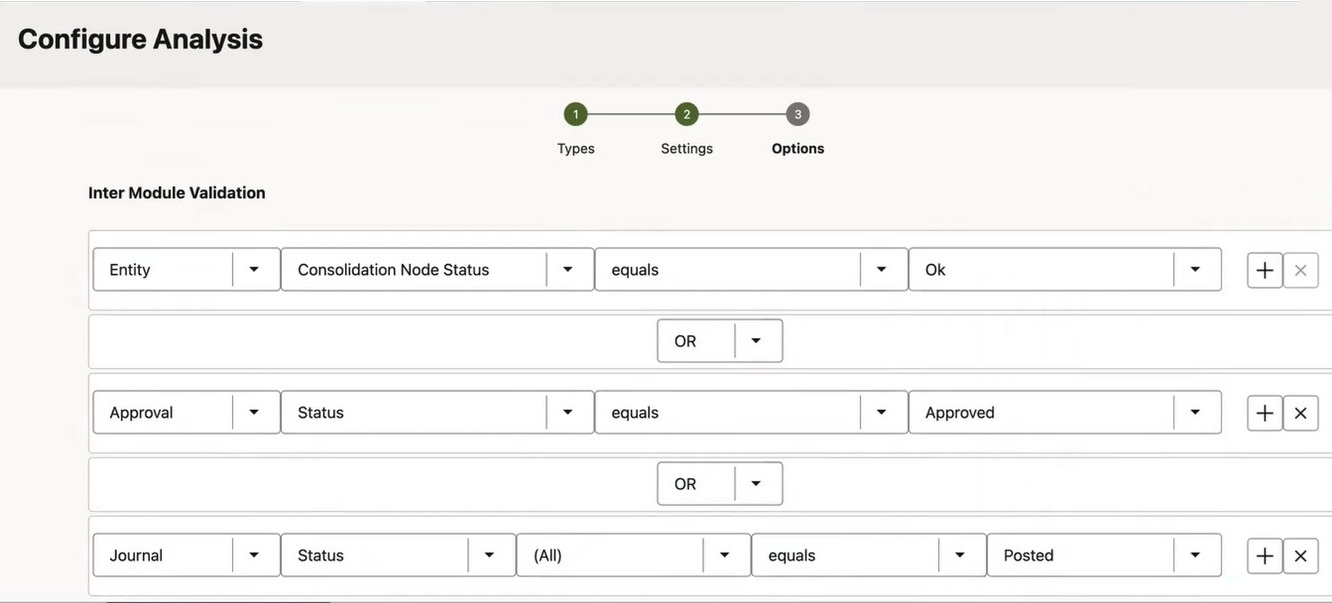
On the Options tab, from Type, select Entity, Journal, or Approval.
-
From Attribute , select an attribute. For example, if you selected Entity as the Type, you can select Consolidation Calc Status.
-
From Rational Operator, select an operator such as Equals or Not Equals.
-
From Status, select a status based on the module that you selected. For example, if you selected Entity as the Type, you can select No Data, or Impacted to view the Entity status.
-
Click the Add or OR button to add a new row and select more options.
For example, you can select Approval to view the Approval Status for the Entity you selected, such as Not Started, Approved, or Signed Off. You could also add another row for Journals to view the status of Journals associated with that entity.
-
When you have finished creating a configuration, click Save or Save and Run.
-
To save a configuration and run it later, click Save. The configuration is then displayed on the main Configurations list of available configurations, and you can run it at any time.
-
To run a configuration immediately after you create it, click Save and Run. The configuration is run and you can view the results of the generated validation on the Validation Hub page. The configuration is also saved and added to the main Configurations list of available configurations.
-