Before you Begin
This 20-minute hands-on tutorial shows you how to create year-to-date journals. The sections build on each other and should be completed sequentially.
Background
You can select the YTD_Input member for the View dimension in the Manage Journals point of view to create year-to-date (YTD) journals. When you select YTD_Input, you can post the journals as either YTD or Journal-to-Date (JTD).
If you post as YTD, you input journal line items as year-to-date values for movement rather than current period values. The system posts the YTD value to the movement member for the current period, and posts a reversal to the following period movement member. The values are posted to the Periodic member of the View dimension. For example, you enter a YTD value of 500 for Changes in Cash to your Jan FY20 Cash journal. When you post, 500 is posted to Changes in Cash, Jan, FY20, Periodic, and a reversal of -500 is posted to Changes in Cash, Feb, FY20, Periodic. When you post the YTD amount for Changes In Cash from your Feb FY20 Cash journal, the -500 reversal posted from Jan is applied, to calculate the current period movement for Feb. The value for the YTD member of the View dimension is aggregated from the Periodic values.
Note that if it it the last period of the year, a reversal in not posted to the first period of the following year.
If you post journals as JTD, you input in your line items the cumulative value for movement across all years, instead of the year-to-date movement for the current year. If it is the last period of the year, a reversal of the JTD value is posted to the first period movement of the following year. For example, if you post a JTD value of 1500 to Changes in Cash for Dec FY19 from the Dec, FY19 Cash journal, a reversal of -1500 is posted to Changes in Cash, Jan, FY20. This will be applied when the JTD value is posted from the Jan FY20 Cash journal, to calculate a correct periodic value for Jan FY20.
Note that YTD and JTD journals adopt a YTD "zero view" for periods for which journals are not posted; that is, if a journal is not posted to recognize the cumulative value for the current period, the cumulative value is assumed to be zero. The reversal posted to the current period by any prior period YTD or JYD journal aggregates with the prior period YTD value, resulting in a current period YTD value of zero.
If you post multiple journals to the same POV, the values are accumulated, not replaced, regardless whether the journals are YTD, JTD, or Periodic. For example, if you post 100 as the YTD value for Cash, Jan, FY20 from Journal A, and post 200 as the YTD value for Cash, Jan, FY20 from Journal B, the YTD value for the POV is 300.
What do you need?
- Have Service Administrator access to EPM Enterprise Cloud Service. The instance should not have a business process created.
- Upload and import this snapshot into your Financial Consolidation and Close instance.
- Upload and import this additional snapshot into your Financial Consolidation and Close instance to add the form used in this tutorial.
Note:
For more information on uploading and importing migration snapshots, refer to the Administering Migration for Oracle Enterprise Performance Management Cloud documentation. - Save this compressed file locally and extract the journal load file (.jlf).
Note:
An EPM Cloud Service instance allows you to deploy and use one of the supported business processes. To deploy another business process, you must request another EPM Enterprise Cloud Service instance or remove the current business process.Creating year-to-date journals
Opening Periods
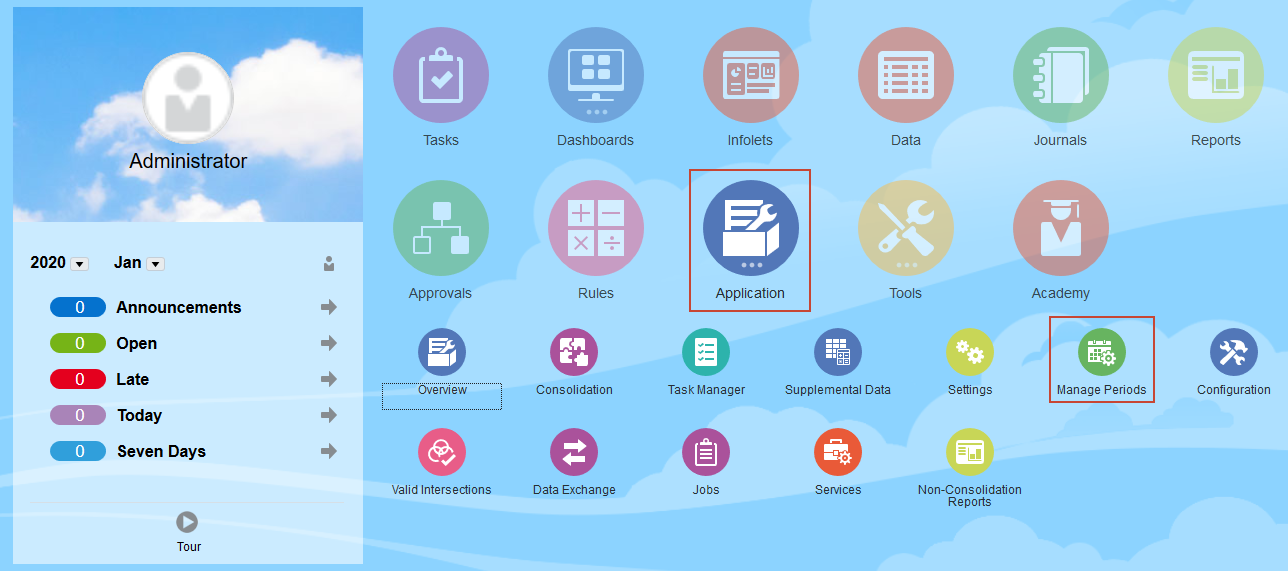
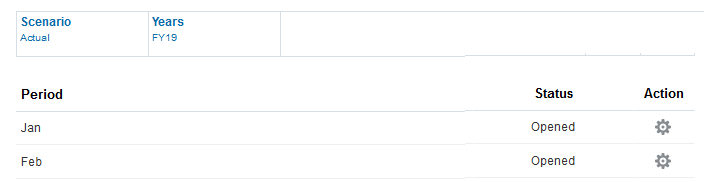
- From the Home page, click Application, and then Manage Periods.
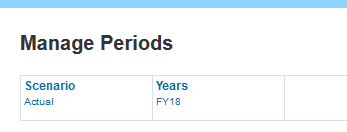
- In the POV, verify that Scenario is Actual and Year is FY18.
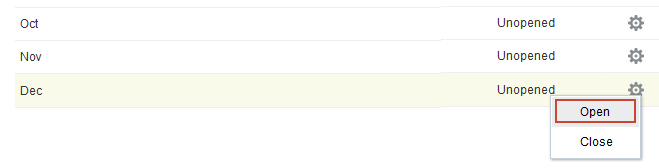
- In the Dec row, click the Actions icon and select Open to change the Period status to Opened.
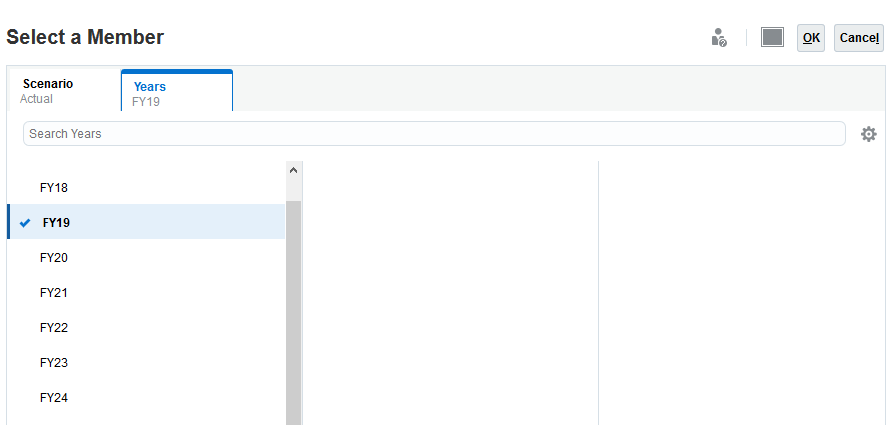
- In the POV, click Years and select FY19 in the Select a Member dialog box. Click OK.
- Click
 Go to update the POV.
 - Repeat step 3 to change the status of January and February to Opened.
- Click
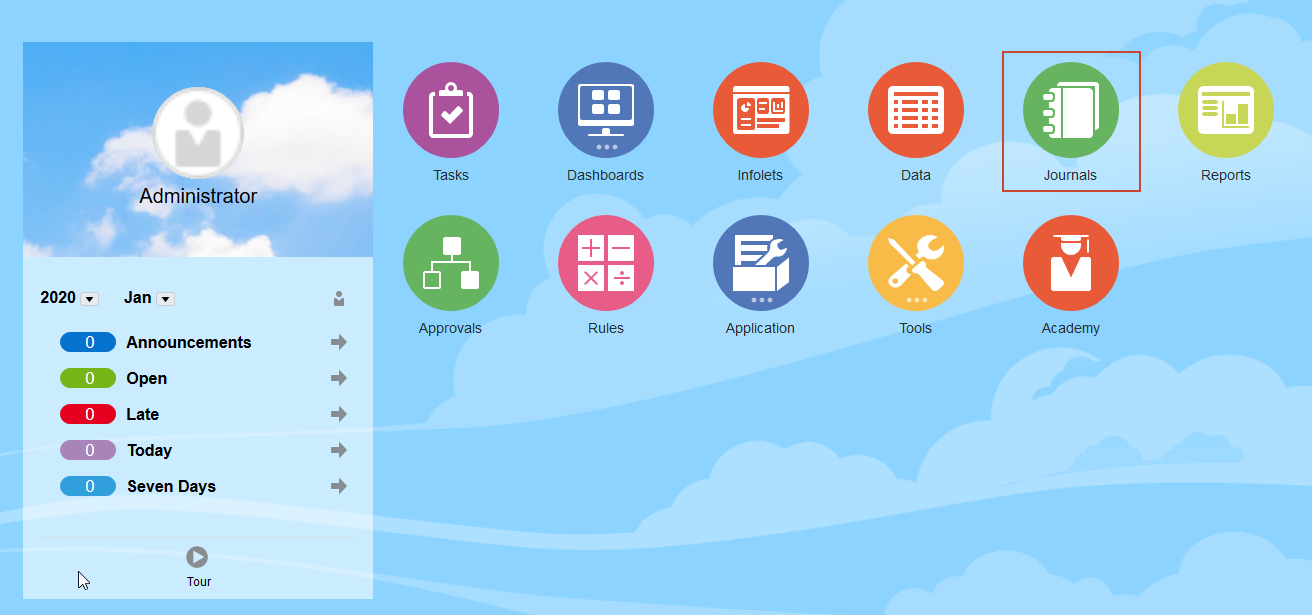
 (Home) to go to the home page.
Creating YTD journals
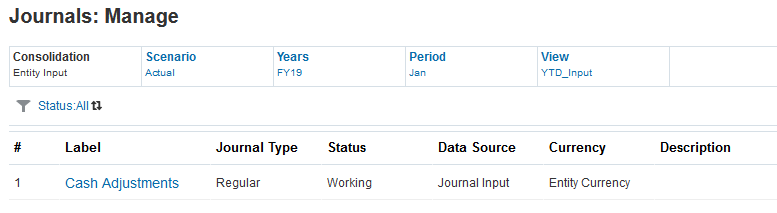
- Click Journals to open the Manage Journals page.
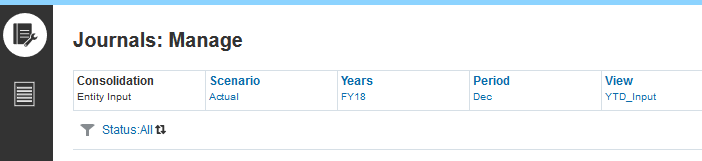
- Click View in the POV to open the Select a Member dialog box and select YTD_Input.

- Select FY18 for Year and Dec for Period and click OK to close the Select a Member dialog box. In the POV tool bar, click (Go).
The POV for Manage Journals should now be set to Actual, FY18, Dec, YTD_Input
- Click Create to start a new journal.

- Enter the following journal details:
- Label: Cash Adjustments
- Journal Type: Regular
- Data Source: Journal Input
- Post As: Year-to-date

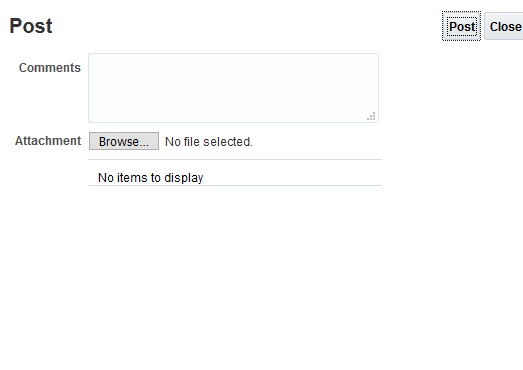
- Click Create to add a blank journal line item.

- Enter the following member information. You can type the member names in the field or click the Action menu for the row and select Pick Members to browse the member hierarchy.
- Entity: Legal Entity 0013 (GBP)
- Account: Cash
- Intercompany: No Intercompany
- Movement: Changes in Cash
- Multi-GAAP: Local GAAP
- Movement: No Product

- Click Create to add another journal line item. The member information is inherited from the existing line-item. Change the Account member in the new line-item from Cash to Bank1.
- Enter 100 in the Debit field for Cash and 100 in the Credit field for Bank1.

- Click Save, and then click Close.
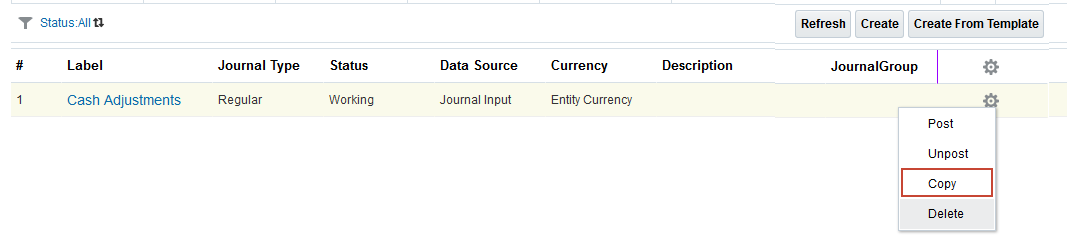
- In the row for the Cash Adjustments journal, click the Actions icon and select Copy from the menu.
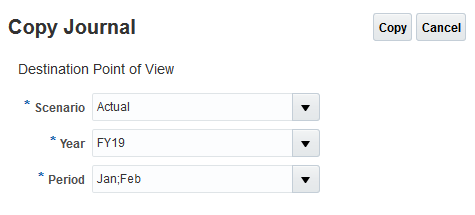
- In the Copy Journal dialog box, select Actual for Scenario, FY19 for Year, and Jan and Feb for periods. Click Copy.
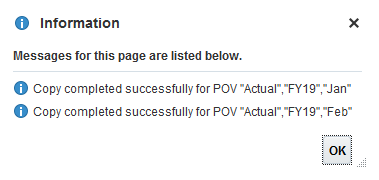
- At the Information dialog box, click OK.
Posting Journals
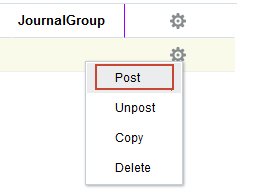
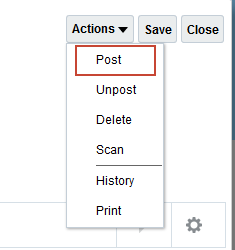
- In the row for the Cash Adjustments journal, click the Actions icon and select Post from the menu.
- In the Post dialog box, click Post.
The status of the Cash Adjustments Journal on the Manage Journals page changes to Posted.
- In the Manage Journal POV, click Years. In the Select A Member dialog box, select FY19 for Year and Jan for Period, and click OK. Click (Go) to update the POV.
The journal you copied to Jan FY19 displays in the list of journals.
- Click Cash Adjustments to open the journal. Enter 350 in both he Debit field for Cash and the Credit field for Bank1, replacing the existing values.
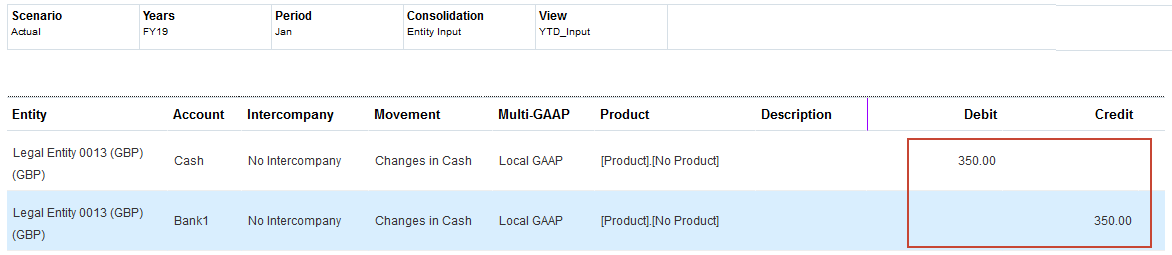
- Click Save.
- In the Actions menu in the upper right, select Post.
- In the Post dialog box, click Post.
- Click Close to close the journal and return to the Manage Journals page.
- Click Data.

- Open the Reference_Application folder and click YTD Journals.
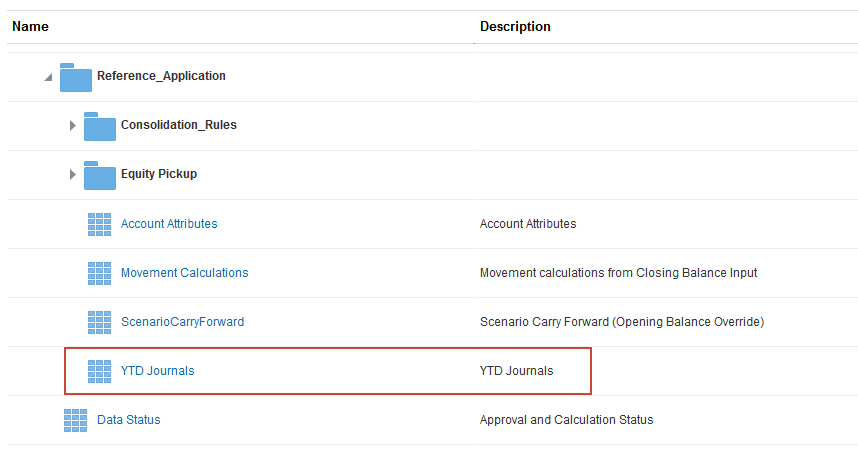
- Review the journal data.
The Periodic and YTD values for Jan FY19 are the same because it is the first period of the year. Notice that the YTD values entered for Jan were posted forward to Feb Periodic as reversals. YTD journals post a reversal to the following period if the following period is in the same year. The value for the YTD member for Feb is zero, due to the reversal posted to Feb from Jan. If YTD journal data has not been posted to a period, it is assumed the YTD value of journal data for that period is zero.

- Click the x on the YTD Journals tab at the bottom of the page to close the form.
- Click Journals to return to the Manage Journals page.

- In the Manage Journals POV, click Period. In the Select A Member dialog box, select Feb for Period and YTD_Input for View, and click OK. Click (Go) to update the POV.
The journal you copied to Feb FY19 displays in the list of journals.
- Click Cash Adjustments to open the journal. Enter 500 in both the Debit field for Cash and the Credit field for Bank1, replacing the existing values.
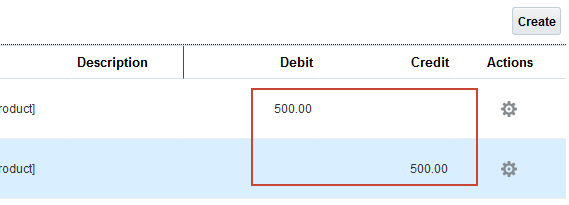
- Click Save.
- In the Actions menu in the upper right, select Post.
- In the Post dialog box, click Post.
- Click Close to close the journal and return to the Manage Journals page.
- Click Data.
- Open the Reference_Application folder and click YTD Journals.
The -350 reversal posted to Feb Cash from the Jan journal was applied to the 500 value posted to Feb Cash from the Feb journal to result in a Periodic value for Cash of 150 for Feb. The Jan and Feb Periodic values for Cash are aggregated to the 500 value in the Feb YTD member. Similar calculations were performed for Bank1.

- Click the x on the tab for YTD Journals to close the form.
Posting multiple journals
- Click Journals to return to the Manage Journals page.
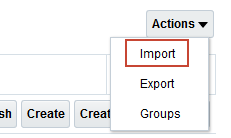
- Click Actions, and then select Import.
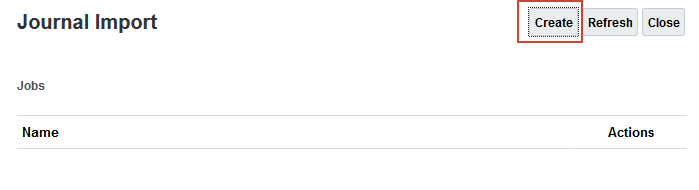
- In the Journal Import dialog box, click Create.
- Click Browse and browse to the location where you unzipped the journals import file. Select the file Journals Imports.jlf. Leave the other import options at their default values. Click Import.
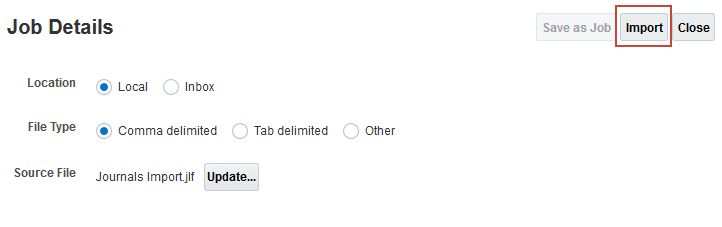
- At the Information dialog box, click OK.
- Click Close twice to return to the Manage Journals page.
- In the Manage Journals POV, click View. In the Select A Member dialog box, select YTD_Input for View, and then click OK. Click (Go) to update the POV.
The imported journal Feb Journal 2 YTD displays in the list.
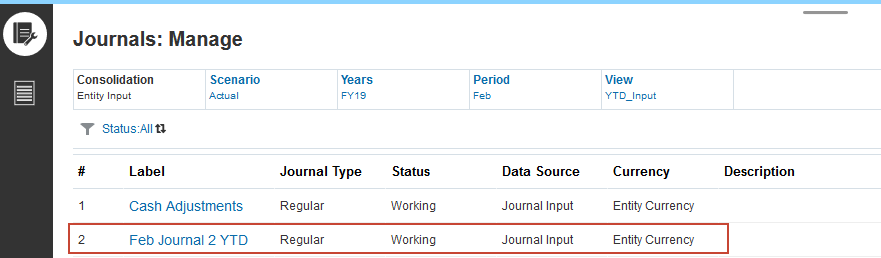
- Click Feb Journal 2 YTD to open the journal, and review the contents.
The Post As type is YTD, and the journal debits Cash 1000 and credits Bank1 1000.

- In the Actions menu in the upper right, select Post.
- In the Post dialog box, click Post.
- Click Close to close the journal and return to the Manage Journals page.
- Click Data.
- Open the Reference_Application folder and click YTD Journals.
- Review the data in the YTD Journals form.
The YTD value of 500 for Cash posted from the Cash Adjustments journal for Feb is combined with the YTD value of 1000 for Cash posted from Feb Journal 2 YTD, for a total value of 1500. The reversal of -350 that was posted to Feb Cash from the Jan journal is applied to the 1500 to calculate the periodic value of 1150. The value of 1500 for Feb YTD is aggregated from the Jan and Feb Periodic values. Similar calculations were performed for Bank1.

- Click x on the YTD Journals tab to close the form.
Posting journal-to-date journals
In this section you unpost the Dec FY18 and Jan FY19 YTD journals. You then enter JTD data in the Jan journal and re-post the journals as JTD.
- Click Journals to return to the Manage Journals page.
- In the Manage Journals POV, click Years. In the Select A Member dialog box, select FY18 for Year, Dec for Period, and YTD_Input for View, and then click OK. Click (Go) to update the POV.
- Click the Actions icon in the row for the Cash Adjustment journal and select Unpost.
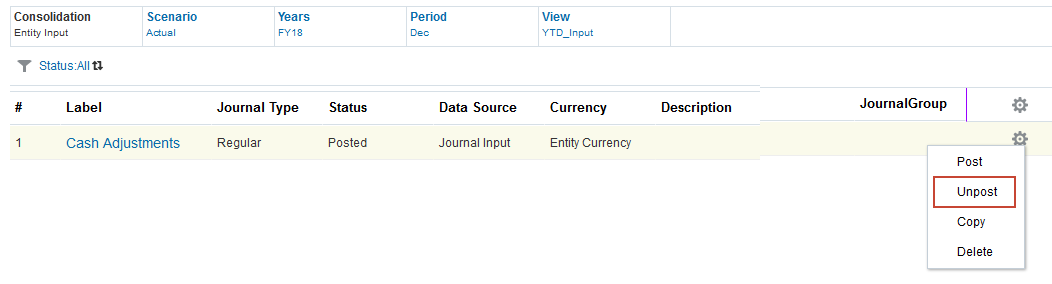
- In the Unpost dialog box, click Unpost to unpost the journal. The journal status changes to Working.
- Click Cash Adjustments to open the journal.
- For the Post As option, select Journal-to-date.
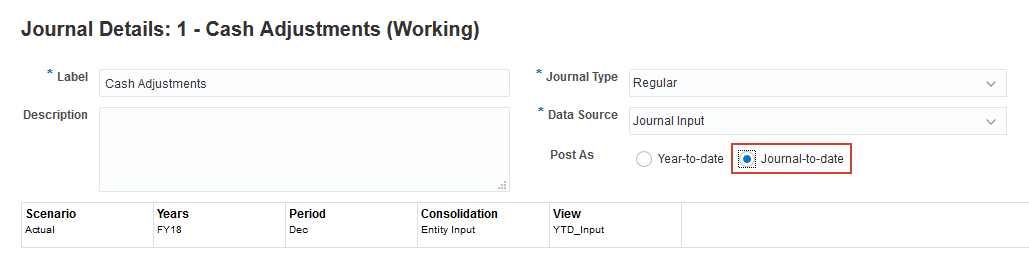
- Click Save.
- In the Actions menu in the upper right of the page, select Post.
- In the Post dialog box, click Post.
- Click Close to close the journal and return to the Manage Journals page.
- In the Manage Journal POV, click Years. In the Select A Member dialog box, select FY19 for Year and Jan for Period, and click OK. Click (Go) to update the POV.
- Click the Actions icon in the row for the Cash Adjustments journal and select Unpost.
- In the Unpost dialog box, click Unpost to unpost the journal. The journal status changes to Working.
- Click Cash Adjustments to open the journal. For the Post As option, select Journal-to-date.
- Change the year-to-date values to journal-to-date values by entering 450 in both he Debit field for Cash and the Credit field for Bank1, replacing the existing values.
- Click Save.
- In the Actions menu in the upper right, select Post.
- In the Post dialog box, click Post.
- Click Close to close the journal and return to the Manage Journals page.
- Click Data.
- Open the Reference_Application folder and click YTD Journals.
- Review the journal data.
The 100 for Cash posted by the Dec, FY18, JTD journal was also posted as a reversal of -100 for Cash to Jan, FY19. This was applied to the value of 450 posted from the Jan, FY19, JTD journal, for a Periodic value of 350. Because it is the first period in the year, the Periodic and YTD values for Jan FY19 are the same. Similar calculations were performed for Bank1.

Learn More
Creating Year-To-Date Journals in Financial Consolidation and Close
F48818-01
October 2021
Copyright © 2021, Oracle and/or its affiliates.
This 20-minute hands-on tutorial shows you how to create year-to-date journals.
This software and related documentation are provided under a license agreement containing restrictions on use and disclosure and are protected by intellectual property laws. Except as expressly permitted in your license agreement or allowed by law, you may not use, copy, reproduce, translate, broadcast, modify, license, transmit, distribute, exhibit, perform, publish, or display any part, in any form, or by any means. Reverse engineering, disassembly, or decompilation of this software, unless required by law for interoperability, is prohibited.
If this is software or related documentation that is delivered to the U.S. Government or anyone licensing it on behalf of the U.S. Government, then the following notice is applicable:
U.S. GOVERNMENT END USERS: Oracle programs (including any operating system, integrated software, any programs embedded, installed or activated on delivered hardware, and modifications of such programs) and Oracle computer documentation or other Oracle data delivered to or accessed by U.S. Government end users are "commercial computer software" or "commercial computer software documentation" pursuant to the applicable Federal Acquisition Regulation and agency-specific supplemental regulations. As such, the use, reproduction, duplication, release, display, disclosure, modification, preparation of derivative works, and/or adaptation of i) Oracle programs (including any operating system, integrated software, any programs embedded, installed or activated on delivered hardware, and modifications of such programs), ii) Oracle computer documentation and/or iii) other Oracle data, is subject to the rights and limitations specified in the license contained in the applicable contract. The terms governing the U.S. Government's use of Oracle cloud services are defined by the applicable contract for such services. No other rights are granted to the U.S. Government.
This software or hardware is developed for general use in a variety of information management applications. It is not developed or intended for use in any inherently dangerous applications, including applications that may create a risk of personal injury. If you use this software or hardware in dangerous applications, then you shall be responsible to take all appropriate fail-safe, backup, redundancy, and other measures to ensure its safe use. Oracle Corporation and its affiliates disclaim any liability for any damages caused by use of this software or hardware in dangerous applications.
Oracle and Java are registered trademarks of Oracle and/or its affiliates. Other names may be trademarks of their respective owners.
Intel and Intel Inside are trademarks or registered trademarks of Intel Corporation. All SPARC trademarks are used under license and are trademarks or registered trademarks of SPARC International, Inc. AMD, Epyc, and the AMD logo are trademarks or registered trademarks of Advanced Micro Devices. UNIX is a registered trademark of The Open Group.
This software or hardware and documentation may provide access to or information about content, products, and services from third parties. Oracle Corporation and its affiliates are not responsible for and expressly disclaim all warranties of any kind with respect to third-party content, products, and services unless otherwise set forth in an applicable agreement between you and Oracle. Oracle Corporation and its affiliates will not be responsible for any loss, costs, or damages incurred due to your access to or use of third-party content, products, or services, except as set forth in an applicable agreement between you and Oracle.