Create the proxy users
A proxy user account is used by multiple actual users to perform REST operations in Fusion Service.
We recommend you use the syntax shown in the following table when you create your proxy user accounts.
-
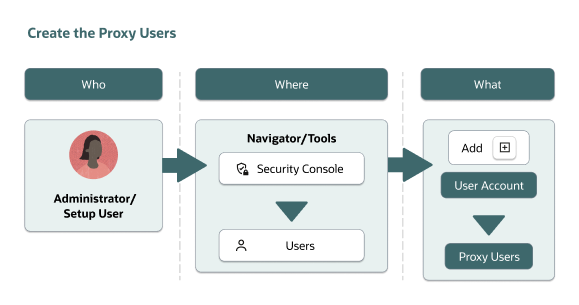
Sign in to Fusion Service as an administrator or setup user.
-
Click Navigator, then from the Tools menu, select Security Console.
-
In the Security Console work area, click the Users tab.
-
Click Add User Account.
-
Now, one at time, add three separate users and grant them roles by doing the following:
-
From the User Category drop-down list, select ProxyUsers.
-
Fill in the First Name, Last Name, and Email fields.
Note: The User Name field auto fills with the email address user name. Overwrite that in the following step. -
In the User Name field, choose one of the entries:
User
Roles Granted
Role Code
PUDS_CSS_USER
Customer Self-Service Proxy User
ORA_SVC_CUSTOMER_SELF_SERVICE_PROXY_USER_ABSTRACT
PUDS_CSS_ADMIN
Customer Self-Service Proxy Account Administrator
ORA_SVC_CUSTOMER_SELF_SERVICE_PROXY_ACCOUNT_ADMINISTRATOR
PUDS_ANONYMOUS_USER
Customer Self-Service Proxy Anonymous User
ORA_SVC_CUSTOMER_SELF_SERVICE_PROXY_ANONYMOUS_USER
-
Enter a password, then confirm the password.
Note: Passwords must be at least eight characters long. -
Click Add Role.
-
In the Search field, enter the value listed in the Roles Granted column of the following table that corresponds with the user you've created.
-
When the role is found, click Add Role Membership, and then click Done.
-
Click Save and Close and repeat these steps for each of the three users you must create.
-