Setup Approach
At a high level, here’s a diagram that shows you the main components that are
involved in setting up the 401k plans.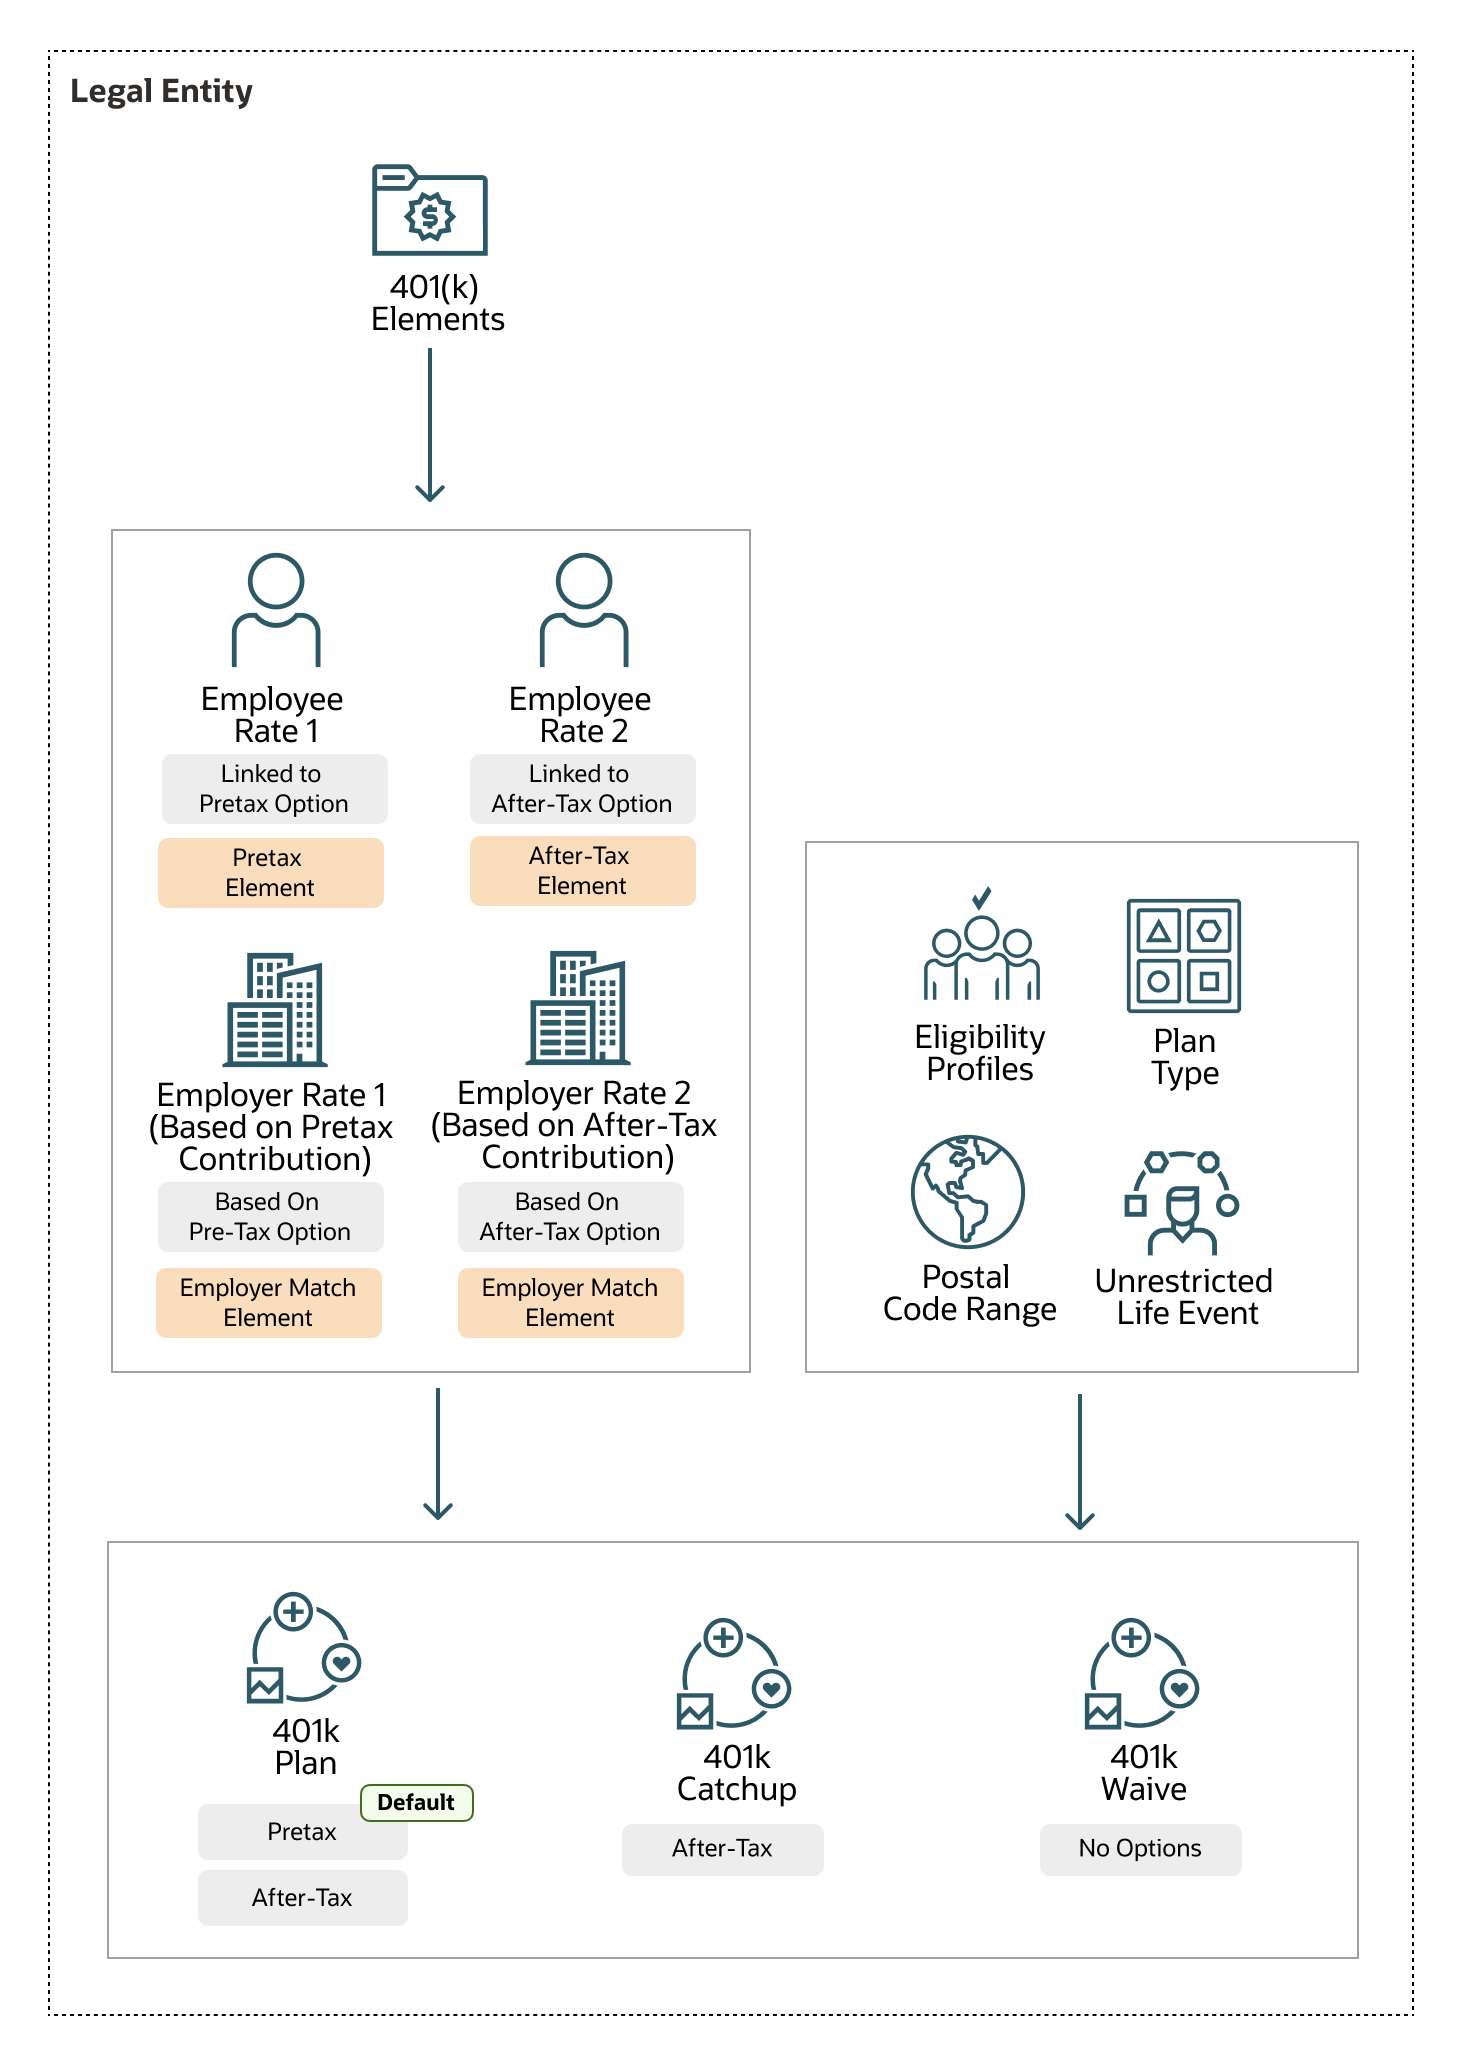
Here are the key setup steps to accomplish the scenario:
- In the Plan Configuration work area, use the Benefit Options task to create 2 options to accept pretax and after-tax contributions.
- Use the Benefit Service Area task to create a postal code range that covers all ZIP codes in the US. You’ll use this postal range to define an eligibility profile.
- In the Plan Configuration work area, use the Eligibility Profiles task to set up an eligibility profile to check for full-time regular employees residing in the US using the postal code range you created. You’ll link this profile to the main 401k plan and the Waive plan.
- Set up another eligibility profile that includes the criteria from the previous step, but with an additional criterion to check for employees older than 55 years. You’ll link this eligibility profile with the catchup plan.
- Use the Plan Types task to create a savings plan type.
- Use the Elements task in Payroll to create a Pretax deduction element (Deferred Compensation 401(k) secondary classification), at the Payroll Relationship level. Use the questionnaire to have Payroll create an employer match contribution element and enforce standard 401(k) compensation rules.
- Create an After-Tax deduction element (Voluntary Deductions, Benefits After Tax) at the Payroll Relationship level.
- For both the employee and employer elements, add element eligibility without any criteria. Deselect the automatic entry check box.
-
Create the main 401k plan. Add the pretax and after-tax options you created in
Step 1. Add the eligibility profile you created in step 3 and the unrestricted
life event. Make sure you set the pretax option as the default enrollment
rule.
Set a maximum limit of 1 option so that participants can select only 1 option during enrollment, not both.
- Create a waive plan and select the plan type you created in an earlier step. Select Waive as the plan function. Add the unrestricted life event to this plan.
- Create the 401(k)-catchup plan. Add the after-tax option you created in Step 1. Add the eligibility profile you created to check for employees older than 55 years. Add the unrestricted life event. Set the enrollment rule to Explicit.
- Create a primary parent rate for the pre-tax option. Link the pretax contribution element to this rate. Configure the calculation method so it accepts a flat amount from employees during enrollment.
- Create a secondary child rate for the employer matching contribution of the 401(k) plan. Link the after-tax employer matching contribution element to it. Configure a multiple-of-parent-rate calculation method so the employer matches 50% of the parent’s (employee) rate.
- Create a primary parent rate for the after-tax option of the 401(k) plan. Link the after-tax employee contribution element to this rate. Configure the calculation method so it accepts a flat amount from employees during enrollment.
- Create a secondary child rate for the after-tax option. Link the employer contribution element to this rate. Configure a multiple-of-parent-rate calculation method so the employer matches 50% of the parent’s (employee) after-tax rate.
- Create a primary rate for the after-tax option of the 401(k)-catchup plan. Link the after-tax employee contribution element to this rate. Configure the calculation method so it accepts a flat amount from employees during enrollment.
- Test your setup. Use the Benefits Service Center to search for your employee. Evaluate the unrestricted life event to see the savings plan enrollment opportunity. Make an enrollment and submit. Check whether the employer match amount appears accurately on the Confirmation page. In Payroll, use the Element Entries task for your employee to check if the benefits enrollment has recorded the 401(k) deduction entries accurately.