Introduction
This tutorial explains the steps to generate HCM Data Loader (HDL) and HCM Spreadsheet Data Loader (HSDL) formatted data files using HCM Extracts and how to automate the import and load of those files. It assumes you already have experience with HCM Extracts, HDL and HSDL.
You use HCM Extracts to retrieve the data you want to include in an HDL or HSDL file. To format the data into the required shape, you create a BI Publisher report with an eText Template layout and reference this in the Data Loader Interface delivery option you define on your extract.
On execution of the extract, the Data Loader Interface delivery option places the generated file on the Oracle WebCenter Content server. The delivery option defines parameter values that allow HCM Data Loader to correctly process the file.
A single extract can include multiple delivery options, both for HDL and HSDL processing. The following diagram describes a single HCM extract which includes two delivery options to generate two files. Each file is formatted by a separate eText Template delivered on the same BI Publisher report.

To automate the import and load of all generated files for an extract run, you can create a payroll flow pattern which:
- Submits your extract to generate the HDL and/or HSDL files.
- Initiates the Run HCM Data Loader task to:
- Read each delivery option configuration.
- Read the generated file(s) from the Oracle WebCenter Content server.
- Initiate HCM Spreadsheet Data Loader for each delivery option configured with a Spreadsheet Loader file type.
- Compress all files generated by all Data Loader file type delivery options into a single zip file.
- Initiate HCM Data Loader for the resulting zip file.

Note:
The Run HCM Data Loader task submits HCM Data Loader as the session user so it can be used with HCM Data Loader's security features enabled. For more information, review tutorial Configure Access to HCM Data Loader (HDL) and Understand HDL Security Options.Objectives
In this tutorial you will import a simple HCM Extract, create the BI Publisher report and delivery options to generate both HDL and HSDL files for the Suspend User Account use case. Next, you'll create a payroll flow pattern to submit your extract and initiate HDL and HSDL to process the generated files.
Prerequisites
- It's expected that you understand how to create HCM Extracts and how to form and load HCM Data Loader files.
- Extract Definitions
- HCM Data Loader
- HCM Spreadsheet Data Loader
- Reports and Analytics
- Payroll Flow Patterns
- Download and unzip the Suspend User Accounts resources.zip file.
- The HSDL solution requires the use of a spreadsheet template to suspend user accounts.
For the purposes of this tutorial you can suspend user accounts using the pre-configured HSDL template Activate / Deactivate an Existing User Account available on Cloud Customer Connect.
- Follow the instructions in the Importing HCM Spreadsheet Data Loader Templates tutorial to import this template, specifying a name of Suspend User Accounts and a code of SUSPEND_USER_ACCOUNTS.
- Edit the imported template to configure a default constant value of Y for the Deactivate attribute.
- Ensure the role used to execute the HCM Extract is assigned to the spreadsheet template.
You'll require access to the following functionality in the Oracle HCM Cloud:
Task 1: Create Your HCM Extract
In this step you'll import the Suspend User Accounts extract.
WARNING:
This extract is purely for the purposes of demonstrating delivery options. It's basic, just retrieving all records from the PER_EXT_SEC_PERSON_UE user entity where the person number is like '123%'.Import the Example Extract
To import the extract:
- Navigate to My Client Groups > Data Exchange.
- Click Extract Definitions.
- Click Import.
- Specify the Extract Name as Suspend User Accounts Extract.
- Import the XML file you downloaded from the Suspend User Accounts resources.zip file and click OK.
- Click OK on the Confirmation message. You're navigated back to the Extract Definitions page.
- Search for the Suspend User Accounts Extract imported extract.
- Click the extract name to edit the extract definition.
- Specify a Consumer for your extract and click Save.
Tip:
The extract name is referenced in the payroll flow pattern parameters defined in Task 5.
Auto Load Parameter
Create the Auto Load parameter, for the HCM Data Loader end-to-end flow to work.
- On the Define page, click Add in the Parameters table toolbar.
- Specify the following parameter definition:
- Click Save.

| Column | Value |
|---|---|
| Name | Auto Load |
| Tag Name | AUTO_LOAD |
| Data Type | Text |
| Display | Yes |
Review Extract Tags
Your rtf file used to create your eText Template will reference the tags defined in your HCM Extract to group and export data.
To find these tags:
- Edit your extract definition and click the Design tab.
- Click the record name within the Object Name hierarchy to review the tag name for the object.
- Click on the Attributes tab to review the list of attributes.
- Click the attribute name to review the tag for each attribute.


Task 2: Define your BI Publisher File Layout
In this step you would first create the rtf file to output the extracted data into the HCM Data Loader or HCM Spreadsheet Data Loader file format.
Refer to the HCM Extracts documentation and use the Template Builder for Word to create a rtf layout that formats your extracted data into the HDL file format.
HCM Data Loader
To suspend user accounts using HCM Data Loader, you need to generate a User file with this structure:
SET PURGE_FUTURE_CHANGES Y
METADATA|User|PersonNumber|Suspended
MERGE|User|{person_number}|Y
For the purposes of this tutorial, review the SuspendUserAccounts.rtf file you downloaded from the Suspend User Accounts resources.zip file.
- First the
SET PURGE_FUTURE_CHANGES Yinstruction is generated. - The METADATA line is generated once for the User object, specifying the HDL field names PersonNumber and Suspended. The METADATA instruction, object and attribute names are delimited by the '|' pipe character.
- For each record found in the Person_Record HCM Extracts record, a MERGE line is generated.
- The External_Person_Number tag is used to output the person number from the extract. The Suspended value is generated from a constant defined in the rtf.
HCM Spreadsheet Data Loader
You can generate a HSDL file layout in the same way as for HDL. The column headers and attribute delimiter will differ though.
For the purposes of this tutorial, review the SuspendUserAccounts HSDL.rtf file you downloaded from the Suspend User Accounts resources.zip file.
- Only one column is generated by this rtf file with a header of
User_PersonNumber. - The External_Person_Number tag is used to extract the person number of the user to suspend.
- There is no value required for the Deactivate column in the HSDL spreadsheet as the value is defaulted by the HSDL template itself.
Tip:
The Import Files into HCM Spreadsheet Data Loader Spreadsheets tutorial explains how to download the csv template which includes the attribute names you'll need for your file header.Task 3: Define the BI Publisher Report
In this step you’ll create a report to generate the data extracted using the rtf files created in Task 2.
Create the BI Publisher Report
- Navigate to Tools > Reports and Analytics
- Click Browse Catalog.
- Click Create > Report.
- In the Create Report dialog, select Use Data Model.
- Click the Search icon to open the Data Model browser.
- Navigate to the folder Shared Folders > Human Capital Management > Payroll > Data Models.
- Select the globalReportsDataModel and click OK.
- Select Use Report Editor for how to create your report and click Finish.
- Save your report to the Shared Folders > Custom > Human Capital Management > HDL folder, with a name of SuspendUserAccounts.


Tip:
The report name and path need to be provided to your HCM Extract delivery option so make a note of them.Note:
The HDL sub-directory may not exist so you may need to create it.Upload the Report Layout
In this step you'll upload your rtf file as the layout for the BI Publisher report. The process is the same for both HDL and HSDL.
- Click Upload under the Upload or Generate Layout header.
- Specify a Layout Name of Suspend User Accounts HDL.
- Click Choose File to search for and select the HCM Data Loader SuspendUserAccounts.rtf file you reviewed in Task 2.
- Specify a Type of eText Template.
- Specify the Locale.
- Click Upload.

Tip:
The layout name needs to be provided to your HCM Extract delivery option so make a note of it.
Your report is automatically saved.
Repeat the Upload the Report Layout steps to create a Suspend User Accounts HSDL layout using the SuspendUserAccounts HSDL.rtf file.
Task 4: Define the HCM Extract Delivery Option
In this step you’ll create delivery options on your HCM Extract to use your BI Publisher report to format the extract output and post that output to the Oracle WebCenter Content server.
Define the Delivery Option
- Navigate to My Client Groups > Data Exchange > Extract Definitions
- Search for the Suspend User Accounts Extract extract and click the extract name to edit it.
- Click on the Deliver tab.
- Click Add on the Extract Delivery Options table toolbar.
- Specify the Delivery Option Name as Suspend User Account HDL and specify a Delivery Type of Data Loader Interface.
- Click OK to define the delivery option.
The Data Loader Interface delivery option provides parameters you'll need to specify for HDL and/or HSDL to be able to process the file generated by the delivery option:
Field Description Output Type 'Text' Report The path and filename of the BI Publisher report created in Task 3. Template Name The layout name in the BI Publisher report named by the Report field. Output Name The name to use for the generated file, without the file extension. For HDL files this must be the business object specific file name. Encryption Mode The type of encryption for the generated file. Specify PGP - Unsigned to encrypt your file. Note:
Only leave your files unencrypted on your test environment whilst developing your integration. Files generated are posted to the Oracle WebCenter where anyone with access to the hcm/dataloader/import account can download and read them. You're recommended to always encrypt files posted here.Integration Name A value to identify output files on the Oracle WebCenter Content server. It's concatenated with the process ID to form the Content ID. Specify a short unique value for each delivery option in the same extract. The value may be truncated to ensure the content ID includes the full process ID.
File Type The type of output file. Compressed Delivery Group File Type: Data Loader The zip file name that all Data Loader generated files will be compressed together in. You must supply the same value, with a .zip extension, for all Data Loader delivery options within the same extract.
File Type: Spreadsheet Loader
Not required.
Compress Specify No if you don't want to zip the file generated by the delivery option. Specify Yes - Compress First if you want to zip the file generated by the delivery option, this can be useful for larger volume files. If you are also encrypting the file, it will be compressed first, then encrypted.
Note:
HCM Data Loader is not impacted by this setting. The Run HCM Data Loader process will first decrypt encrypted files, unzip compressed files, then alter file extensions before compressing all files generated with the same Compress Delivery Group parameter value. The compressed file is then submitted to HDL.Spreadsheet Template Code The code of the HSDL template to upload data with. Spreadsheet File Date Format Date format used for attributes with the date data type. The default format is YYYY/MM/DD. Spreadsheet File Delimiter Characters used to separate values in the file. The default is comma. Spreadsheet File Escape Indicator Characters used to escape the delimiter characters within an attribute value. The default is backslash. Spreadsheet File Header Included Indicates if a header is included in the source file to name the attributes included in the file. The default value is Y. Spreadsheet New Line Indicator Characters used to indicate a new line. The default value is n, prefixed with the escape character. Tip:
The Override File Extension parameter isn't used. - Specify these parameter values for the HDL delivery option:
Output Type Text Report /Custom/Human Capital Management/HDL/SuspendUserAccounts.xdo Template Name Suspend User Accounts HDL Output Name User Encryption Mode None Tip:
You'll need to change this to PGP - Unsigned once you've confirmed the generated file shape is correct.Integration Name SUA File Type Data Loader Compressed Delivery Group User.zip Compress No Tip:
Consider changing this to Yes - Compress First once you've confirmed the generated file shape is correct.
- Click OK.
- Repeat the above steps to create the Suspend User Accounts HSDL delivery option.
For the HCM Spreadsheet Data Loader Delivery Option specify these parameter values:
Output Type Text Report /Custom/Human Capital Management/HDL/SuspendUserAccounts.xdo Template Name Suspend User Accounts HSDL Output Name Suspend User Accounts HSDL Encryption Mode None Tip:
You'll need to change this to PGP - Unsigned once you've confirmed the generated file shape is correct.Integration Name SUAHSDL File Type Spreadsheet Loader Compressed Delivery Group Compress No Spreadsheet Template Code SUSPEND_USER_ACCOUNTS
- Click Validate to navigate to the Extract Execution Tree.
- Click Validate on the table toolbar.
- Review and resolve any validation errors.


Tip:
You may need to refresh the table.Test the File Generation
In this step you'll confirm that the files are generated in the shape you require.
From the Extract Definitions page:
- Search for your extract and click Submit Extract.
- Specify an Extract Instance Name and provide the Effective Date parameter with today's date.
- Click Submit. This navigates you to the View Extract Results page.
- Click Refresh until your extract instance has completed.
- Click the name of your extract flow instance to display more information.
- Expand the Extract Delivery Options section.
- Click the file download icon against the output file and review the output.
- Make any changes necessary to your rtf layout file for your BI Publisher report, until the generated output file can be successfully loaded with HCM Data Loader.
- Once you're happy with the file shape, remember to update the delivery option to set Encryption Mode to PGP - Unsigned.


Tip:
The file name is generated from the Output Name defined on each delivery option.Tip:
Once encrypted you'll not be able to review the file content.Task 5: Define the Payroll Flow Pattern
In this step you'll define a payroll flow pattern to submit your HCM Extract and initiate the Run HCM Data Loader task to process the files your extract generates.
Create the Payroll Flow Pattern
- Navigate to My Client Groups > Payroll > Payroll Flow Patterns.
- Create a new flow.
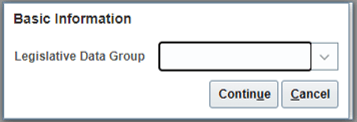
- Optionally specify a Legislative Data Group and click Continue.
- Specify the Suspend User Accounts name for the Flow Pattern, optionally provide a description and set the LDG Required value.
- Check both the HCM Extracts and Preparations checkboxes for the Activities to Include value.
- Scroll and select the Suspend User Accounts Extract and Run HCM Data Loader tasks.
- Click Next to navigate to the Task Sequence page.
- Edit the Following Task values to ensure the tasks are in this order:


| Task | Following Task |
|---|---|
| Start Flow | Suspend User Accounts Extract |
| Suspend User Accounts Extract | Run HCM Data Loader |
| Run HCM Data Loader | End Flow |
Define the Process Flow Parameters
- Click Next to navigate to the Parameters page. Create the following parameters: Effective Date
| Field | Value |
|---|---|
| Flow Parameter | Effective Date |
| Display | Yes |
| Display Format | Date |
| Sequence | 10 |
| Key Parameter | Process Date |
Process Configuration Group
| Field | Value |
|---|---|
| Flow Parameter | Process Configuration Group |
| Display | Yes |
| Display Format | Smart LOV |
| Lookup | Process Configuration Group|ActionParameterGroupPVO |
| Sequence | 20 |
Start Date
| Field | Value |
|---|---|
| Flow Parameter | Start Date |
| Display | Yes |
| Display Format | Date |
| Sequence | 30 |
Auto Load
| Field | Value |
|---|---|
| Flow Parameter | Auto Load |
| Display | Yes |
| Display Format | Text |
| Sequence | 40 |
| Parameter Basis | Constant Bind |
| Basis Value | Y |
Base Extract Name
| Field | Value |
|---|---|
| Flow Parameter | Base Extract Name |
| Display | No |
| Display Format | Text |
| Sequence | 50 |
| Parameter Basis | Constant Bind |
| Basis Value | Suspend User Accounts Extract |
Report Category
| Field | Value |
|---|---|
| Flow Parameter | Report Category |
| Display | No |
| Display Format | Smart LOV |
| Lookup | Report Category|OverridingReportCategoryPVO |
| Sequence | 60 |
| Parameter Basis | Post SQL Bind |
| Basis Value | select to_char(report_category_id) from pay_report_categories where base_category_name='Suspend User Accounts Extract' |
Configure the Task Parameters
- Click Next to navigate to the Task Parameters page.
- Select the Suspend User Accounts Extract HCM extract record.
- Update the Effective Date parameter, setting the Basis Value to Effective Date. This task parameter will now accept the value of the Effective Date parameter from the payroll flow.
- Update the Auto Load parameter, ensuring the Parameter Basis is Bind to Flow and setting the Basis Value to Auto Load. This task parameter will now accept the value of the Auto Load parameter from the payroll flow.
- Update the Process Configuration Group parameter, ensuring the Parameter Basis is Bind to Flow and setting the Basis Value to Process Configuration Group. This task parameter will now accept the value of the Process Configuration Group parameter from the payroll flow.
- Update the Start Date parameter, ensuring the Parameter Basis is Bind to Flow and setting the Basis Value to Start Date. This task parameter will now accept the value of the Start Date parameter from the payroll flow.
- Select the Run HCM Data Loader task in the Tasks table.
- Click Next to navigate to the Review page and click Submit.
- Search for your new payroll flow task and click Edit.
- In the Tasks panel, click Go to Task on the Run HCM Data Loader task.
- Edit the Extract Process Flow Name parameter ensuring the Parameter Basis is Bind to Flow Task and setting the Basis Value to Suspend User Accounts Extract , Submit , Payroll Process.
- Click Submit.


Note:
You need to define the basis value for the Extract Process Flow Name, but the list of values isn't available until the process flow pattern is saved. You'll edit this parameter after creating the flow.You're returned to the Payroll Flow Patterns page.


Task 6: Submit the Payroll Flow
In this step you'll submit your flow and monitor the results.
- Navigate to My Client Groups > Data Exchange
- Click Submit a Flow.
- Search for the Suspend User Accounts flow.
- Click the flow name to navigate to the Submit a Payroll Flow page.
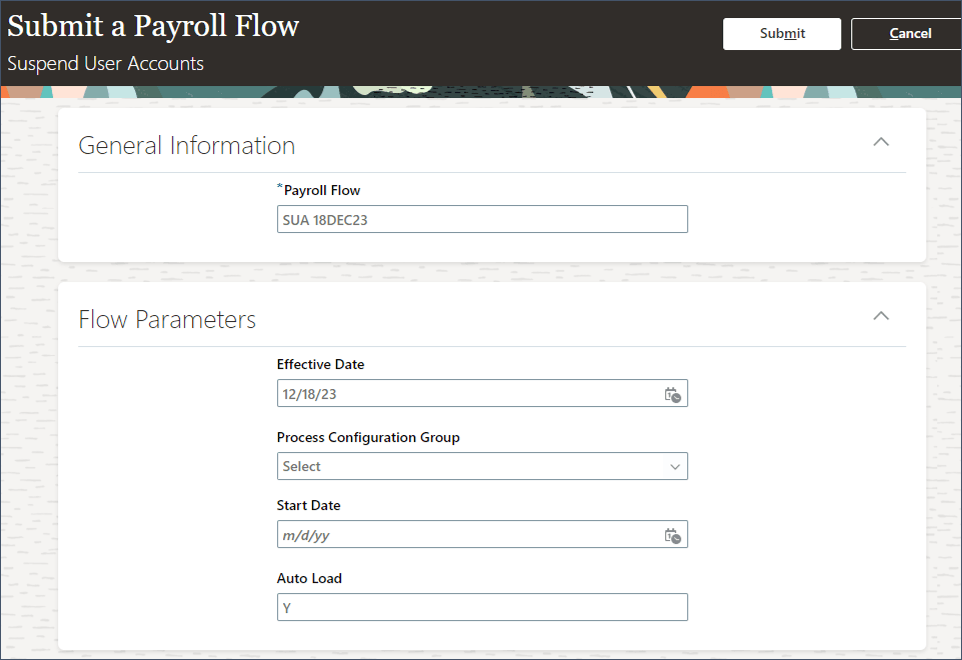
- Specify a name for the payroll flow. This can be any unique value.
- Specify an Effective Date.
- Click Submit which will navigate you to the Payroll Checklist page.
- Periodically click Refresh until both the extract and Run HCM Data Loader process are complete.
- Click the Run HCM Data Loader task name to navigate to the Import and Load Data task where you can review the data set status and any messages raised.


Tip:
The default HDL behavior is to delete the source file from the Oracle WebCenter once the data is retrieved, which is why it's important to validate the file shape by calling the extract directly as described in Task 4.Related Links
The latest tutorials for HDL and HSDL are published in this topic on Cloud Customer Connect:
Refer to this help topic for further information:
More Learning Resources
Explore other labs on docs.oracle.com/learn or access more free learning content on the Oracle Learning YouTube channel. Additionally, visit education.oracle.com/learning-explorer to become an Oracle Learning Explorer.
For product documentation, visit Oracle Help Center.
Initiate HCM Data Loader for HCM Extract Generated Files
F91208-10
October 2025