Change the Horizontal Alignment of an Image Control
By default, when an image is added to a screen, it is left-aligned on that screen. You can change the alignment of an image to be center-aligned or right-aligned. (Note that there is no option to change the vertical alignment of an image on the Policy Modeling Interview tab. If you wish to move an image to above or below its current location, consider placing it further up or down in the order of controls on the screen.)
To change the horizontal alignment of an image control:
- Select the image in the screen list or the screen layout view.
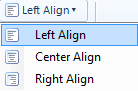
- Click the alignment button in the Image Control section of the Interview tab.

The label appearing on the alignment button will reflect the current alignment of the image, either Left Align, Center Align or Right Align. - Select the desired alignment (Left Align, Center Align or Right Align) from the drop-down list.
The screen layout view will change to show the new alignment for the image.
Tip: You can align images side-by-side with, or directly underneath, other controls (including other images) by placing them in a container together. For more information, see Change Control Layout for a Screen.