Enter Temporal Data
In order to debug temporal rules and data, you specify change points in the Debugger for the input attributes that you are setting values for. A change point represents a value for an attribute applying from a specified date until the next change point (if there is one). To add a change point for an attribute in the Debugger:
- Launch the Debugger.
- Select the Data view or Decision view.
- Select the attribute, right-click and select Set Value. (Alternatively, if the attribute is an input attribute, you can just double-click the attribute.) Note that if you have the Debug unsubmitted interview values checkbox selected in the Debugger, you will not be able to set attribute values manually in the Data or Decision views.
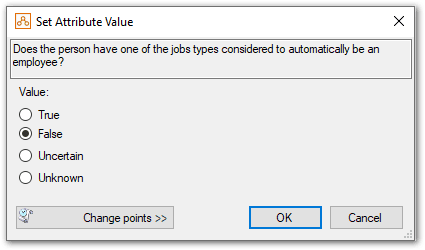
- In the Set Attribute Value dialog box, specify the initial value for the attribute. This is the value that the attribute takes up until the first change point.
- Select the Change points button. This expands the dialog box so that you can add change points for the attribute.
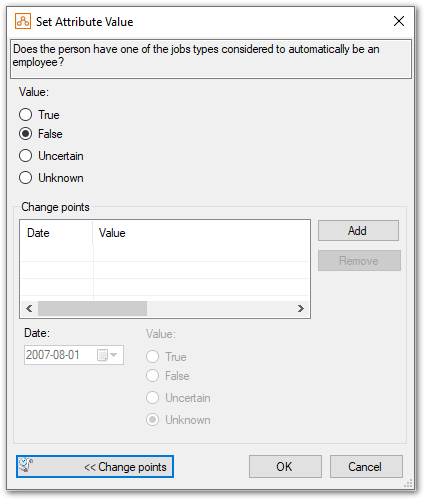
- Click the Add button to add a new change point. A change point will be added. (By default this will have the current date and a value of unknown.)
- From the Date field, select the desired date (or type a new date). Then select the check box for the Value that applies from that date.
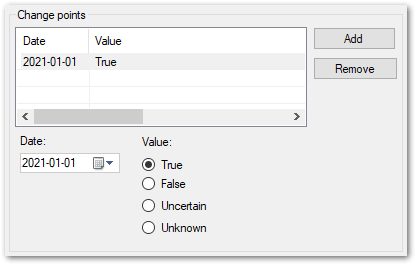
- To add additional change points, repeat steps 5 and 6.
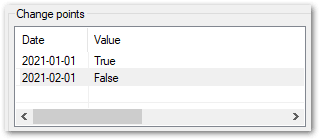
- When you have created all the change points, click OK. In the Data view you can now see the values you set for the attribute.

Tip: To delete change points, select the desired row or rows in the Change points table (from the Set Attributes Value dialog) and click the Remove button.