- Using Oracle Internet of Things Production Monitoring Cloud Service
- Configure Oracle Internet of Things Production Monitoring Cloud Service
- Upload Your Data
- Use Direct Data Ingestion for Your Sensor Attributes
- Demonstration: Ingest Data Through a Connector Using Certificate-Based Authentication
Demonstration: Ingest Data Through a Connector Using Certificate-Based Authentication
We create a connecter, and ingest data for a machine that connects through this connector. We create and use the leaf certificate of the connector to authenticate with the IoT server. We use the MQTTS protocol to publish data.
- Use the Create Connector option to create a connector from the Menu >Settings > IoT Organizations > Organization Name > Device Connections > Connectors page.
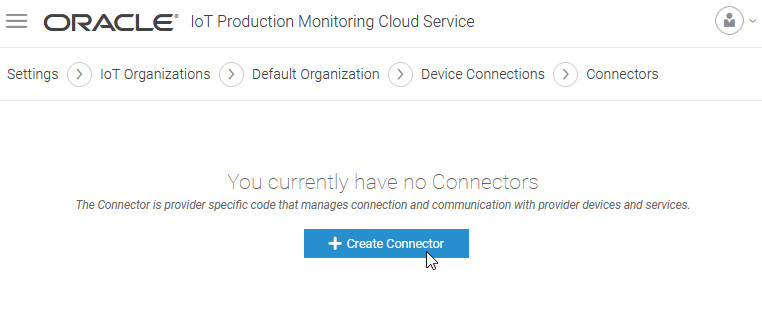
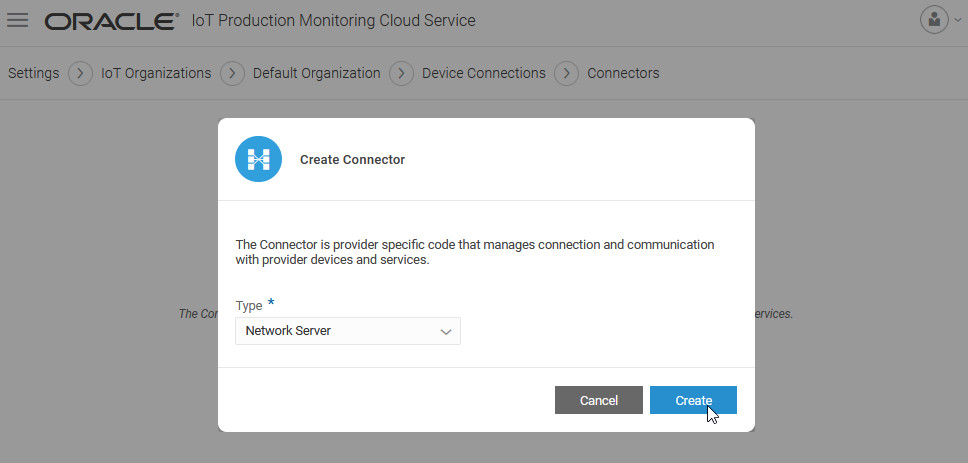
We create a Network Server connector here. You could also create a gateway connector.
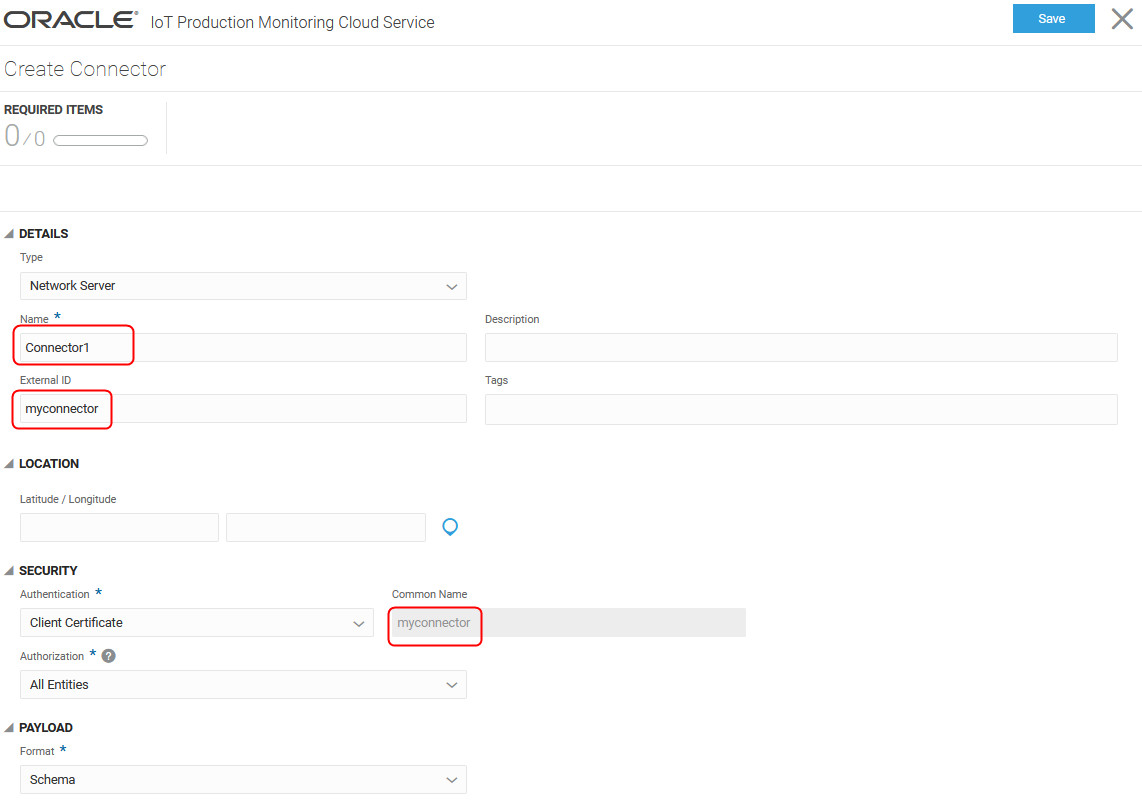
We specify a connector Name (
Connector1) and External ID (myconnector). We choose Client Certificate authentication. The External ID of the connector is used as the Common Name for client certificate authentication. When creating a leaf certificate for the connector, we must use the same common name. - Create the machine type.
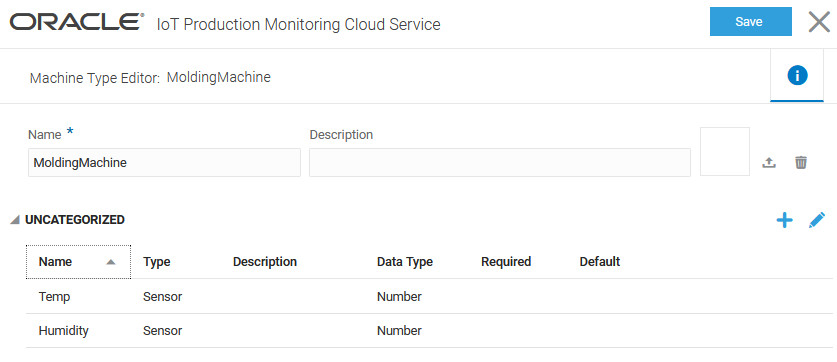
We create a machine type,
MoldingMachinewith sensor attributes for temperature and humidity. - Create a machine for the machine type, and set the data source for the sensor attributes to Direct.
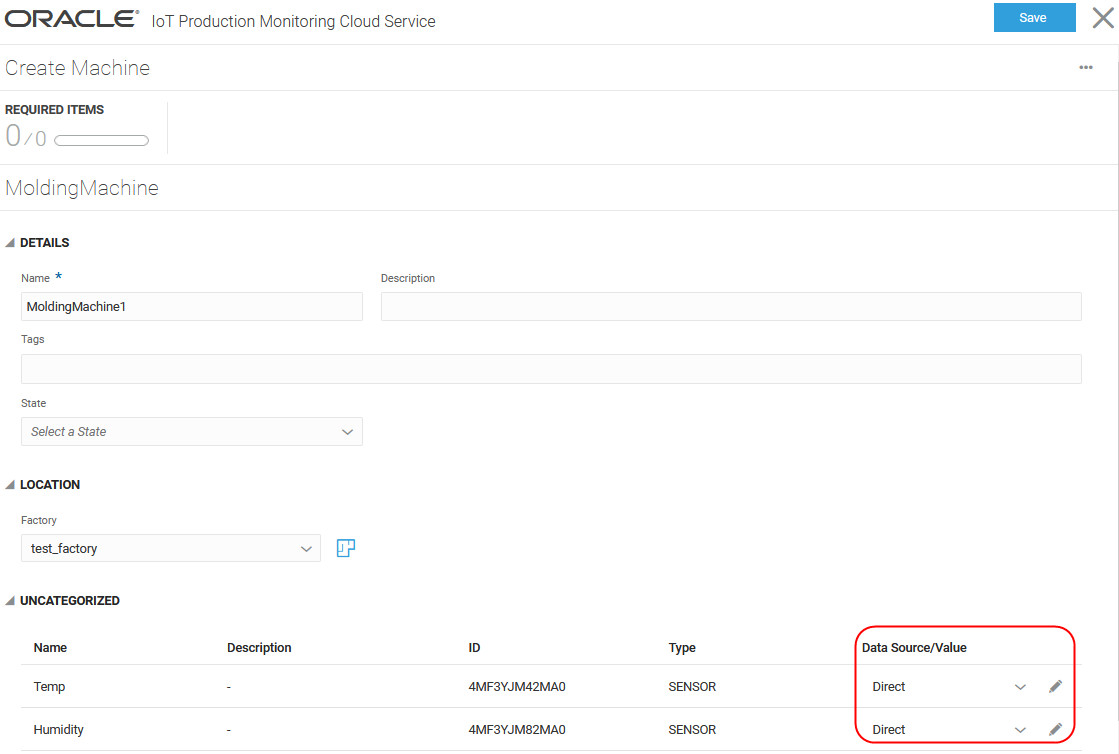
We create a machine,
MoldingMachine1for the machine type, and set the Data Source value for the sensor attributesTempandHumidityto Direct. - Set the Direct Data Source Options for the machine in the Machine Editor.
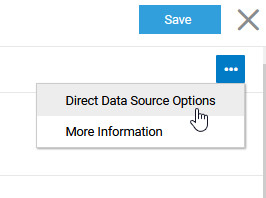
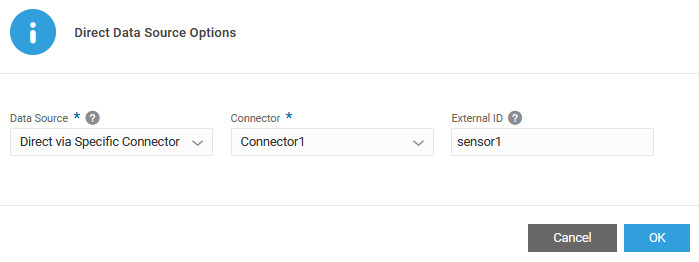
We configure the machine sensor attributes to use the connector that we created. We specify an external ID,
sensor1to identify the sensor device in the MQTT topic. - Create the certificate hierarchy in IoT and create the leaf certificate for the connector.
We create an intermediate certificate for the verified root certificate and upload it to the IoT server. Next, we create a leaf certificate with the intermediate certificate as its parent. The leaf certificate uses the common name of the connector. The leaf certificate is used by the connector when connecting to the IoT server to send data for the machine.
- Create an intermediate certificate for the verified root certificate.
We run the
gencert.shutility to generate the intermediate certificate:./gencert.sh intermediate intermediate-common-name --parent parent-common-name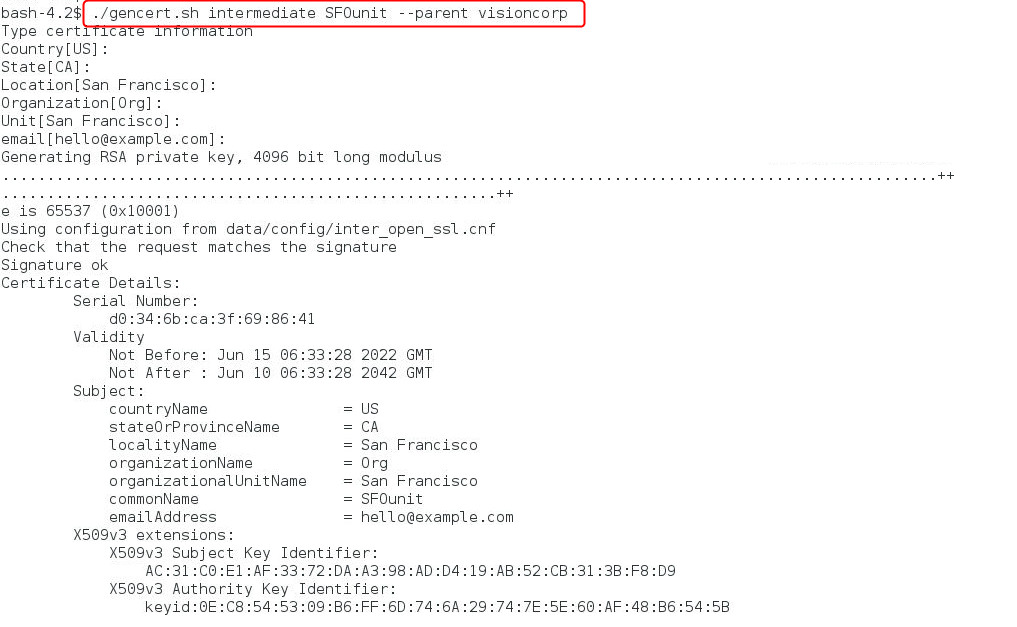
We use the common name
SFOunitfor the intermediate certificate and create it under the verifiedvisioncorproot certificate. We use the default options for other parameters, such as Country and State. Press Enter when the command prompts for these options, so as to accept the default option.The tool generates files, such as the intermediate certificate file (
SFOunit-cert.pem) and the private key (SFOunit-key.pem) under thecerts\visioncorp\SFOunitdirectory.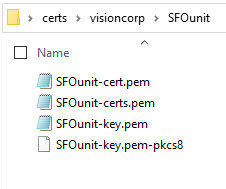
- Upload the intermediate certificate to the IoT server.
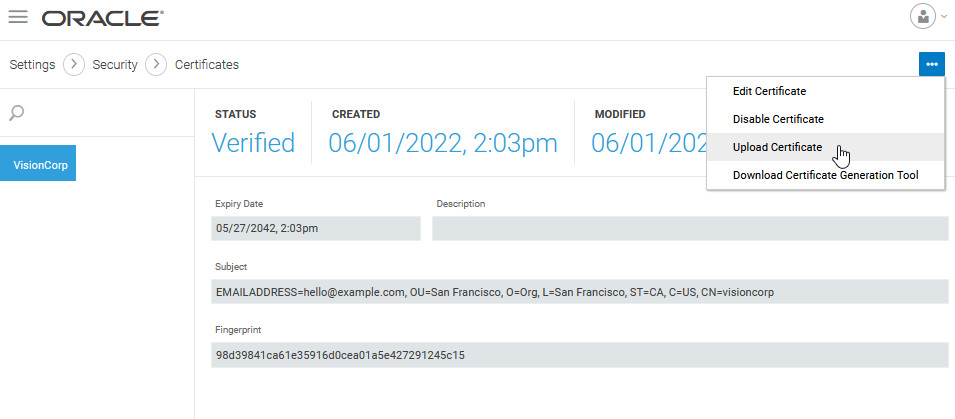
We upload the certificate from the Settings > Security > Certificates page.
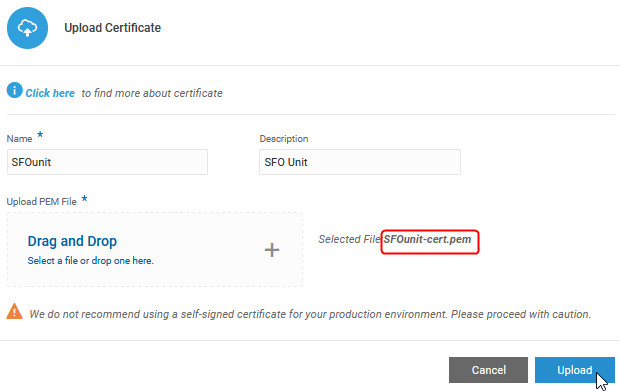
We specify a name and description for the certificate and upload the
SFOunit-cert.pemcertificate file.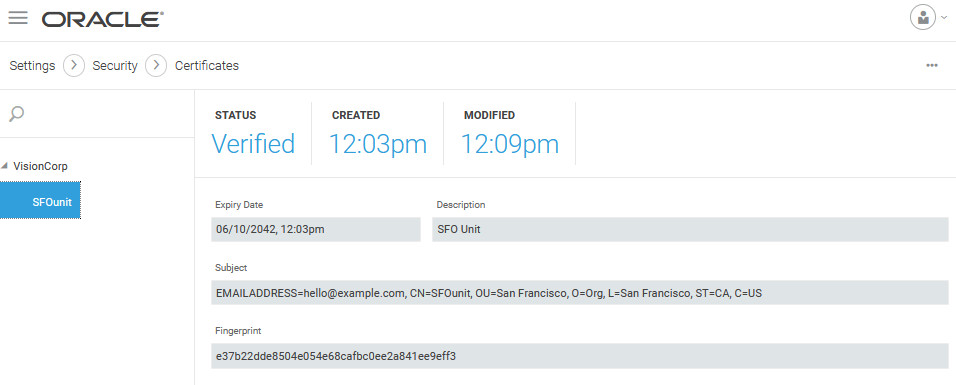
The uploaded intermediate certificate appears on the Certificates page under the root certificate. Note that the SFOunit certificate is already verified, as it was created under the verified root certificate.
- Create a leaf certificate for the connector.
We run the
gencert.shutility to generate the leaf certificate:./gencert.sh leaf leaf-common-name --parent parent-common-name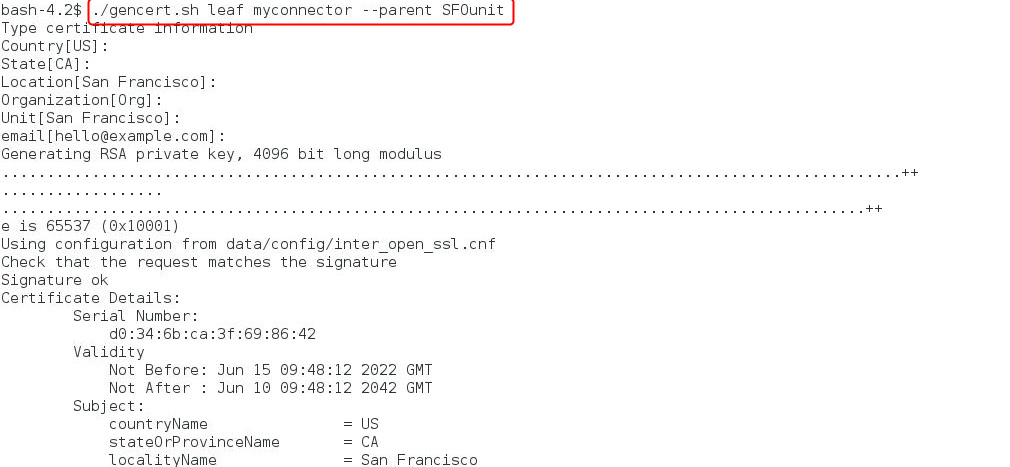
Note that the common name for the connector leaf certificate (
myconnector) is the same as the external ID that we specified for our connector. The leaf certificate is created with the intermediate certificate as its parent.The tool generates files, such as the leaf certificate file (
myconnector-cert.pem) and the private key (myconnector-key.pem) under thecerts\visioncorp\SFOunit\myconnectordirectory.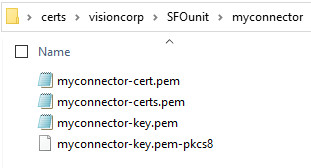
We use the leaf certificate of the connector when sending data for the IoT device connected through the connector.
- Create an intermediate certificate for the verified root certificate.
- Generate a sample schema for the machine from the Machine Inventory page.

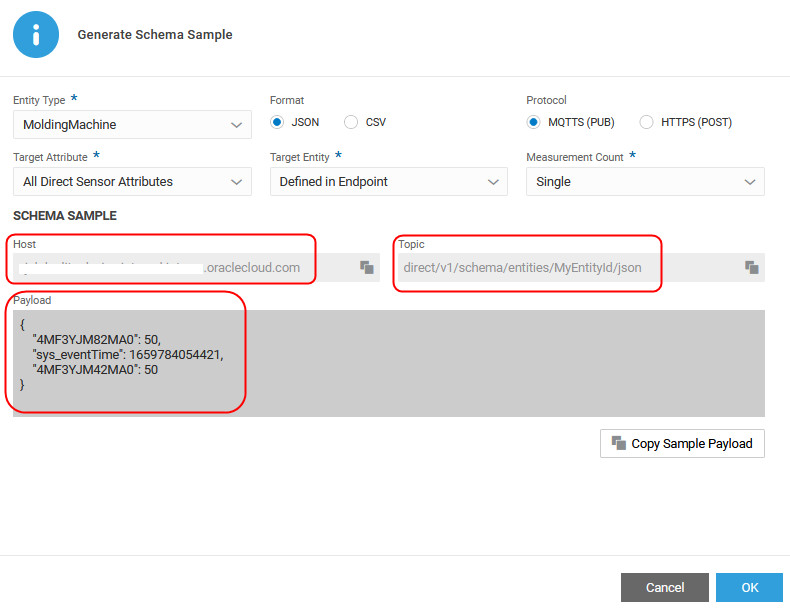
We choose a JSON schema and the MQTTS (PUB) protocol. We choose to generate a sample payload for all the machine sensor attributes. The entity ID is included in the endpoint here, but you could also choose to include it as part of payload. We generate a sample schema for a single measurement.
The payload contains sample values for the sensor attributes. Note that the sensor attribute IDs that appear in the payload can be traced to their respective sensor names in the machine editor.
When sending data, say using MQTT Explorer, copy the host, topic, and payload from the Sample Schema dialog. Replace
MyEntityIDin the topic with the external ID for the machine (sensor1). Use the connector leaf certificate to authenticate. Edit the payload, as required. - Send data for the device connected through the connector using an MQTT client.
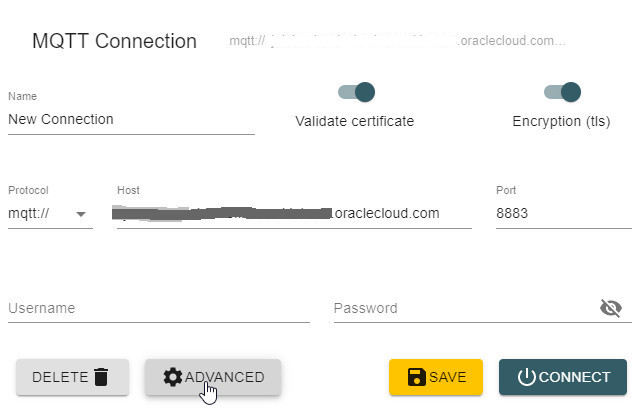
We use the host info that we copied from the sample schema dialog. Make sure that the encryption switch is ON, and use the secure port 8883.
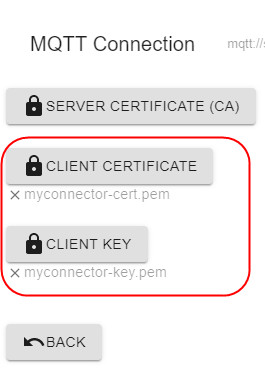
We upload the connector leaf certificate and key under the Advanced section. If you were using a directly connected device, you would use the leaf certificate for the device itself.
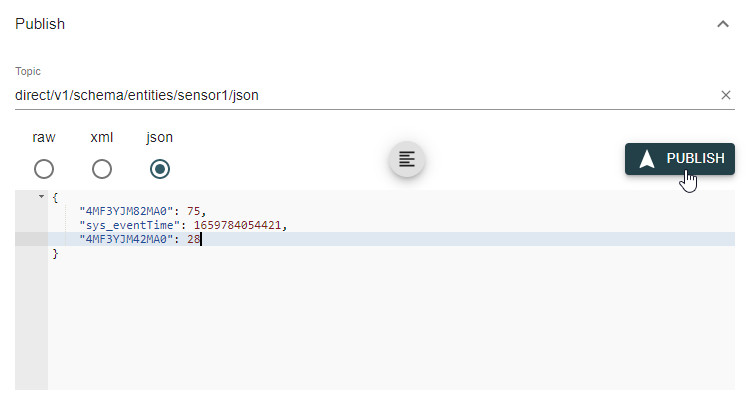
Once connected to the IoT server, we use the topic and payload information copied from the Sample Schema dialog. We replace
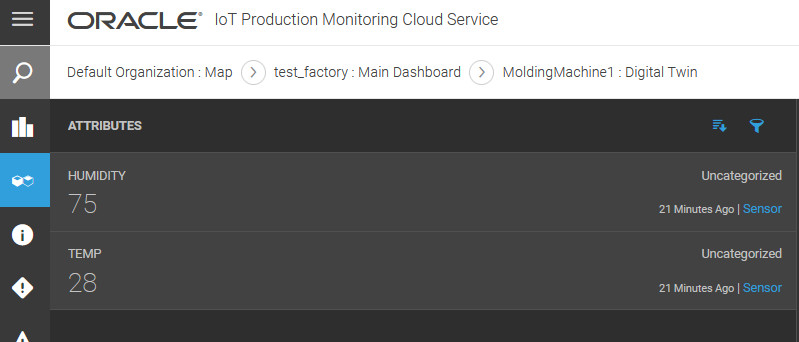
MyEntityIDin the topic with the external ID for the machine:sensor1. We edit the payload values as necessary, and publish. - Verify that the published data appears in Operations Center.
