Authenticate with Live Experience for iOS
Set up User Authentication and Live Experience Authentication, which are two necessary steps for adding Live Experience to your iOS app.
The following graphic shows the flow if you're using your own
SSO/LDAP workflow. 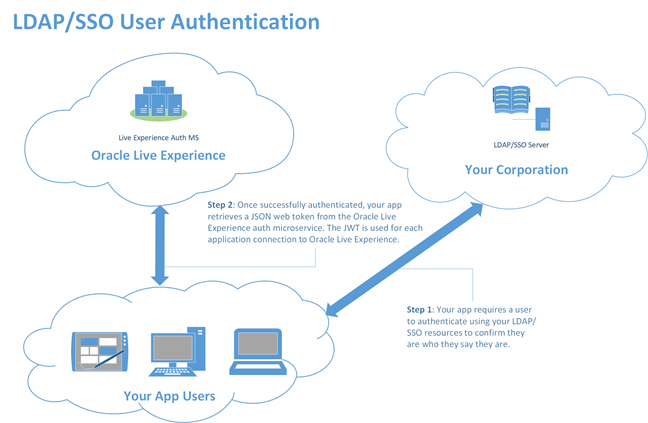
The following graphic shows the flow if you're using a third party
OAuth platform such as Facebook, Google, or Yahoo. 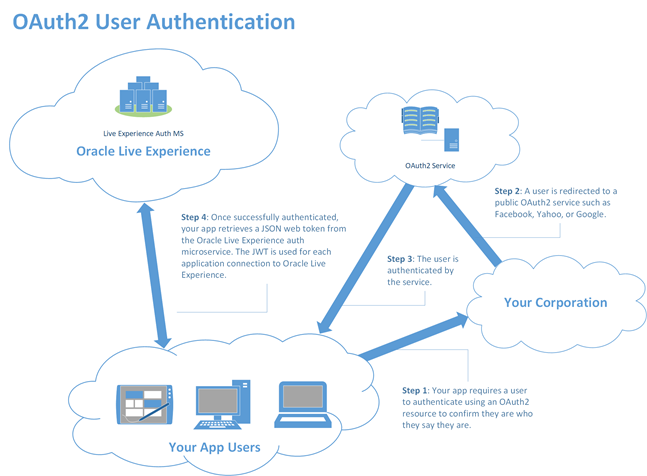
After you authenticate a user, assuming it's required for your application, you then need to handle Live Experience Authentication. To authenticate with Live Experience, you obtain a JSON Web Token (JWT) from Live Experience which you use when opening any connection. You use standard Swift APIs to communicate with a simple script that you deploy on a web server in your own domain. See Deploy the Sample JWT Script. While the supplied script is sufficient for development, you'll want to create something more secure for a production environment using the REST call described in Retrieve a JWT Access Token Using the Auth REST Call.
Follow the steps below to obtain a JWT from Live Experience.
Results:
After you obtain the JWTaccess_token, you
can use it to authenticate with Live Experience. See Adding and Configuring the Live Experience Widget for your iOS App.