Setup and Installation
Important: Oracle Guided Campaigns is only available if you have purchased licenses. For Standard and Enterprise Eloqua trims, you are entitled to 5 and 10 free licenses respectively. If you require additional licenses, or are on Eloqua Basic, please contact your account representative for more information.
Oracle Guided Campaigns is powered by Oracle Eloqua and requires the Oracle CX Sales Integration app app for CRM integration.
The following steps describe how to install and configure these apps and platforms.
Oracle Guided Campaigns security group
As part of the set-up and provisioning, your Eloqua instance will get a new security group created called 'Guided Campaigns'.
Your Eloqua admin should add this security group to any users who need to access the Oracle Guided Campaigns app.
This security group gives access to the application along with edit access to the necessary Oracle Eloqua assets that Oracle Guided Campaigns creates or edits.
Important: Prior to app installation, add the Eloqua installation user to the Guided Campaigns security group and the Guided Campaign application license. The installation user must then log out and back in again to initiate the permissions. The App installation will fail with a No license error if you do not do this.

Installing the Oracle Guided Campaigns app
Important: Because deleting or deactivating the installer user account will impact installed apps, we recommend installing apps using a user account that is not tied to a specific person. The user account must have customer administrator rights.
After you have added the security group, and checked the License box you will be able to install the app.
To do this, the Eloqua installation user should login to Eloqua and go to Settings > Apps > Get more apps at the marketplace. Then search for Oracle Guided Campaigns.
You will now be able to access & install the app to your Eloqua Instance.
Audience viewing in Guided Campaigns
To ensure that your users, and the Guided campaigns app, has access to display your contacts in the audience previewer you will need to add additional permissions to the default contact view for that user in Eloqua.
Typically this will be the Contact view: Standard, but this may differ if you have customizations in your instance
To verify, you can check the default contact view for specific users
Once you have ascertained the correct view, you'll need to allow it for Guided Campaigns access.
-
Click Settings
 , then click Manage Fields and Views
 -
Click on the tab for Views
-
Expand the section for Contact views
-
Right click on the appropriate view and choose Permissions.
-
Click on the '+' icon to add a new security group.
-
Add the Guided Campaigns security group and include at least View permissions (the others are not necessary).
Email template usage
If you wish for your Guided Campaign users to have access to email templates, you will need to grant the Template permissions to be seen by your Guided Campaigns security group.
To update your Template's permissions,
-
Go to Assets > Emails
-
Click Manage Templates.
-
Choose the template that you wish to permit
-
Go to Actions > Permissions.
-
Click on the '+' icon to add a new security group
-
Add the Guided Campaigns security group and include at least View permissions (the others are not necessary).
Editing your Guided campaigns in Eloqua
After creation of a campaign canvas through Guided Campaigns, there may be situations where an Eloqua power-user might need to alter the campaign flow to support unique use-cases.
Please note: this is supported, but upon saving in Eloqua you will see an alert such as below:
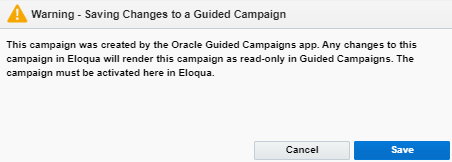
Important: After a campaign is saved in Eloqua, it will no longer be editable in or able to be activated through the Guided Campaigns UI. After saving in Eloqua all further edits and activation must be done in Oracle Eloqua.