Add Engage to Oracle Sales Redwood User Experience
To add Oracle Eloqua Engage in Oracle Sales in the Redwood User Experience, you can create custom smart actions that navigate users to Eloqua Engage.
There are three steps to launching Engage in Oracle Sales Redwood User Experience:
Step 1: Create a Sandbox
- Log in to Oracle Sales with your Administrator credentials.
- Click Navigator at the top of the page, and under Configuration click Sandboxes.
- Click Create Sandbox.
- Ensure Application Composer is checked as Active, give your sandbox a name, and ensure that Publishable is set to Yes.
- Click Create and Enter.
You'll be redirected to the Available Sandboxes page.
Step 2: Create a smart action
-
In Application Composer, click Smart Actions, available under Common Setup.
-
On the Smart Actions page, click Create. Application Composer displays the Create Smart Action guided process in a new browser tab.
-
On the Kind of Action page:
-
Click UI-based action.
-
Click Continue.
-
-
On the Basic Details page:
-
In the Name field, enter a display name Eloqua Engage for the action
-
In the Object field, select the Contact object for which you're creating the action. If you are embedding Engage for Leads, then select the Sales Lead object
-
In the Action ID field, accept the automatically generated value or enter a unique value. This value must be unique across all smart actions
-
Click Continue.
-
-
On the Availability page:
-
In the Application field, select the Sales application where the action will display
-
In the UI Availability field, select the List Page where the action will display in addition to the Action Bar
-
Optional - In the Role Filter field, optionally select the custom roles that can view the action. (If you don't select a role, then the action will be available to all roles). For details see Create UI-Based Smart Actions
-
Optional - In the Condition region, optionally set conditions for the action to appear, such as only if a certain field's value is set to a particular value. For example, show a smart action only if a lead's status is Hot. For details see Create UI-Based Smart Actions.
-
-
On the Action Type Page:
-
In the Type field, specify the type of action, Navigate to URL.
-
In the URL field, insert the following URL:
https://login.eloqua.com/siteLogin?SiteName={EloquaCompanyName}&ReturnUrl=/apps/salesTools/engage/compose?emailAddress=${EmailAddress}
-
If you are adding Eloqua Engage to Contacts:
In the Value column for EmailAddress in the Field Mapping section, select Email (EmailAddress)
-
If you are adding Eloqua Engage to Sales Leads:
In the Value column for EmailAddress in the Field Mapping section, select ContactEmail (PrimaryContactEmailAddress).
-
In the Browser Window Target field, specify New tab.
-
-
On the Action Details page, leave it blank and click Continue.
-
On the Confirmation Message page, leave it blank and click Continue.
-
On the Review and Submit page, review the action's configuration and click Submit when ready.
Step 3: Publish a Sandbox
-
Click Sandboxes, then click on your sandbox's name.
-
Click Publish.
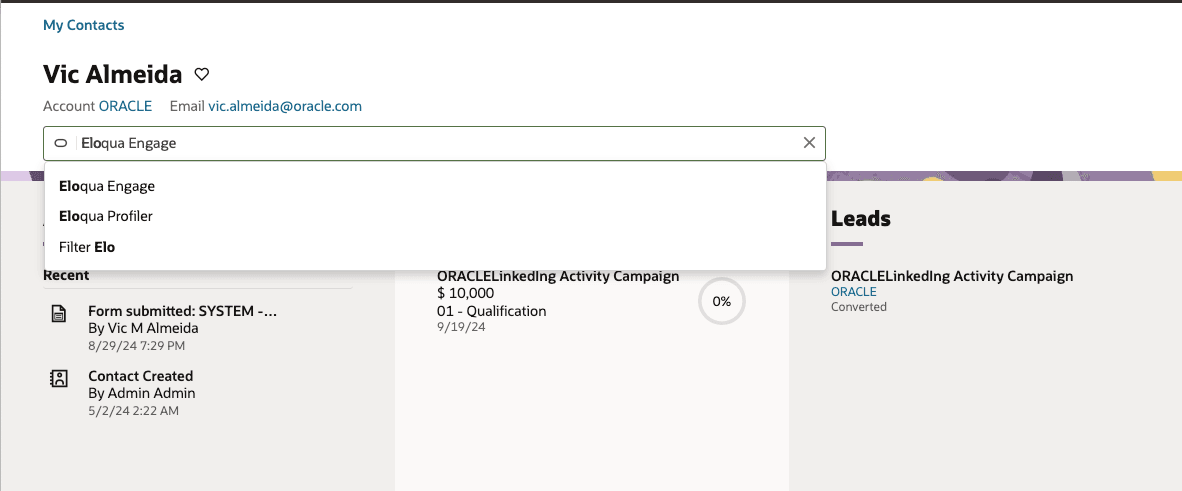
After following these steps for Engage, you will now be able to see Engage from the object list in the action drop down menu. For example, if you we created a Smart Action for the Sales Lead object, then you will be able to see Engage for a Sales Lead from the action menu when a specific lead is selected.
After Completion, you should find the smart Action available for selection.
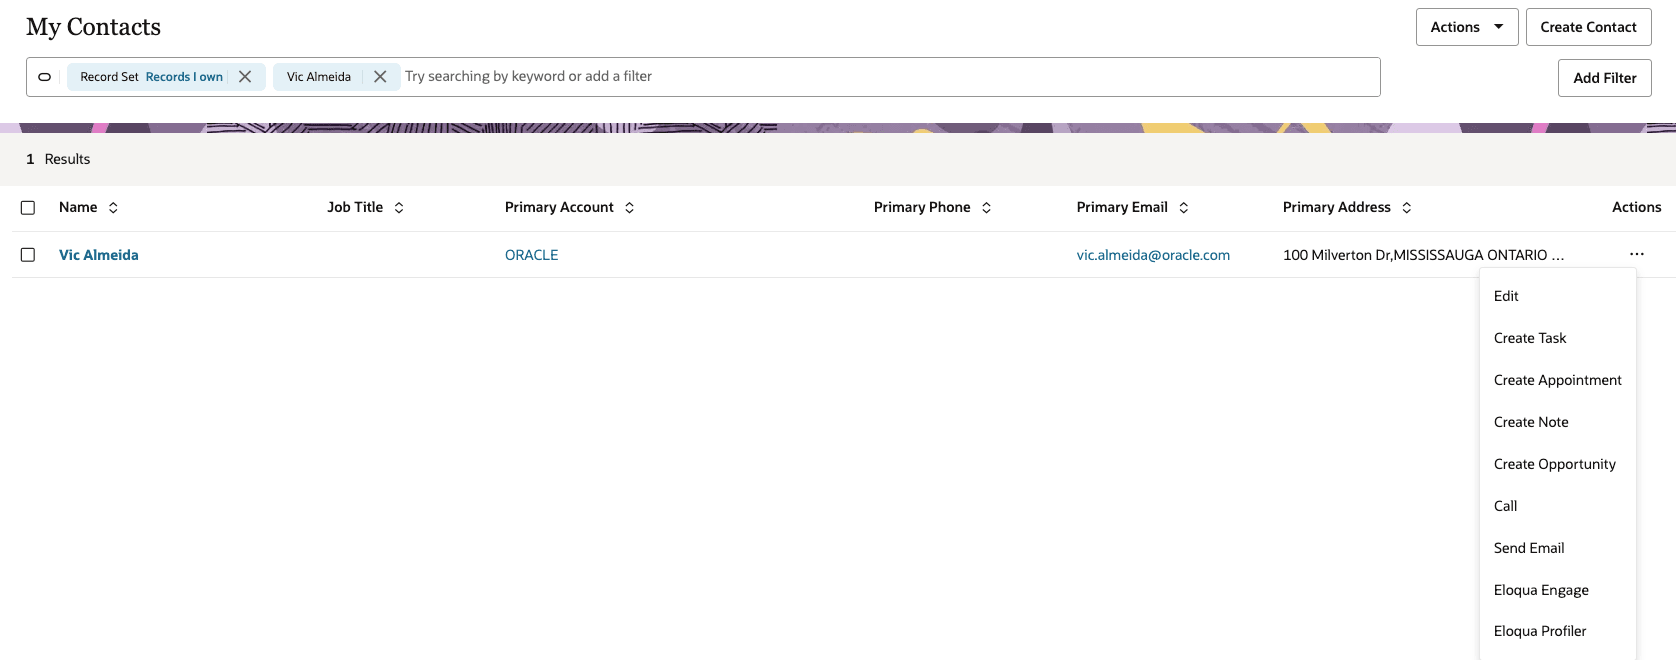
Additionally the Smart Actions would be available to launch from a contact record.