Configuring when a form processing step runs
By default, a form processing step always runs when a form is submitted. You can optionally run the step when certain conditions are met or to never run the step.

While using the Redwood experience:
Tip: Warnings are displayed for probable errors due to misconfigurations for form processing steps caused by data type mismatch. For example, an error notification will appear if your form processing step relies on an email address, but the email address field is not validated on your form. We recommend you review and resolve the warnings before activating your form.
How Oracle Eloqua determines the processing order
After you add form processing steps to a form, you cannot change the order of the steps. Some form processing steps must be performed before others and Oracle Eloqua will reorder the steps accordingly. For example, Oracle Eloqua must add a contact to your contact database before it can add the contact to a campaign. As a result, the Update Contacts - With Form Data step must be processed before the Add to Campaign step. To view the order that Oracle Eloqua processes the steps, reload the form after adding the steps.
The following processing steps are performed before any other form processing step:
- Update Contacts - With Form Data
- Update Contacts - With Custom Values
- Update Account - With Form Data
- Update Account - With Custom Values
- Update Custom Data Object - With Form Data
- Update Custom Data Object - With Custom Value
Creating a conditional form processing step
You can configure the step to occur only when certain conditions are met. For example, you could use a condition to subscribe a contact to a mailing list if they selected the applicable option in the form. You can create conditions that evaluate against the following data:
- Contact fields
- Custom objects
- Form fields
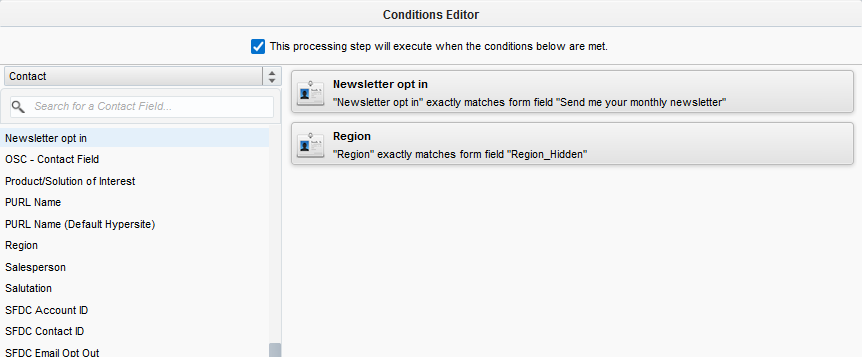
If you add multiple conditions to a form processing step, they are joined together using a Boolean AND operator. This means that all of the conditions must be met in order to run the processing step. In the following example, two conditions have been set up for the Send Submitter an Email processing step. The first condition ensures the submitter opts in to receive the newsletter, and the second condition ensures that the submitter is in the correct region.
Classic UI
Redwood experience
To create a conditional form processing step using the Classic UI:
- Add the form processing step to your form.
- At the bottom of the window, click
 .
. - In the Conditions Editor, click the type of information you want to evaluate against in the drop-down list. You can use contact fields, custom objects, or form fields.
- Double-click the field that you want to test against in the condition.
- In the right pane, double-click the field you added and configure the condition. Consider the following when configuring the condition:
- You can configure the condition to match exactly what you specify or not.
- You can compare to a form field value or a value you provide.
- Click Close and save your changes.
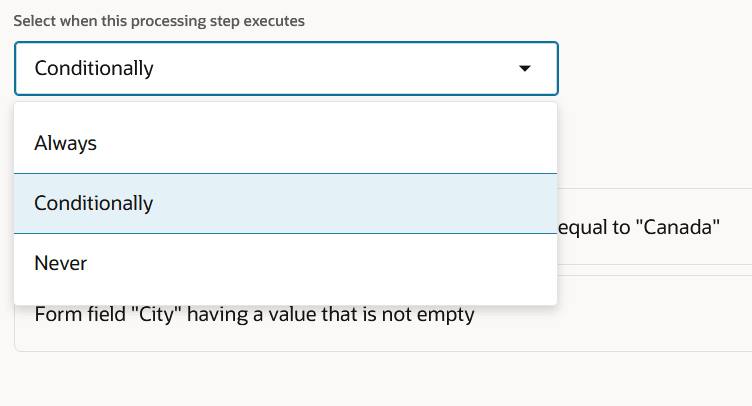
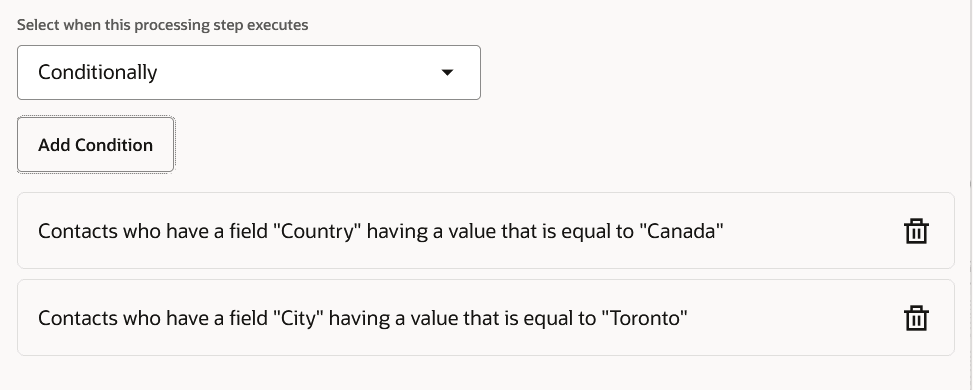
To create a conditional form processing step using the Redwood Experience:
- Add the form processing step to your form.
- Select the drop-down to choose "Always, Conditionally, Never", and select "Conditionally". You can then select
 to open the conditions editor.
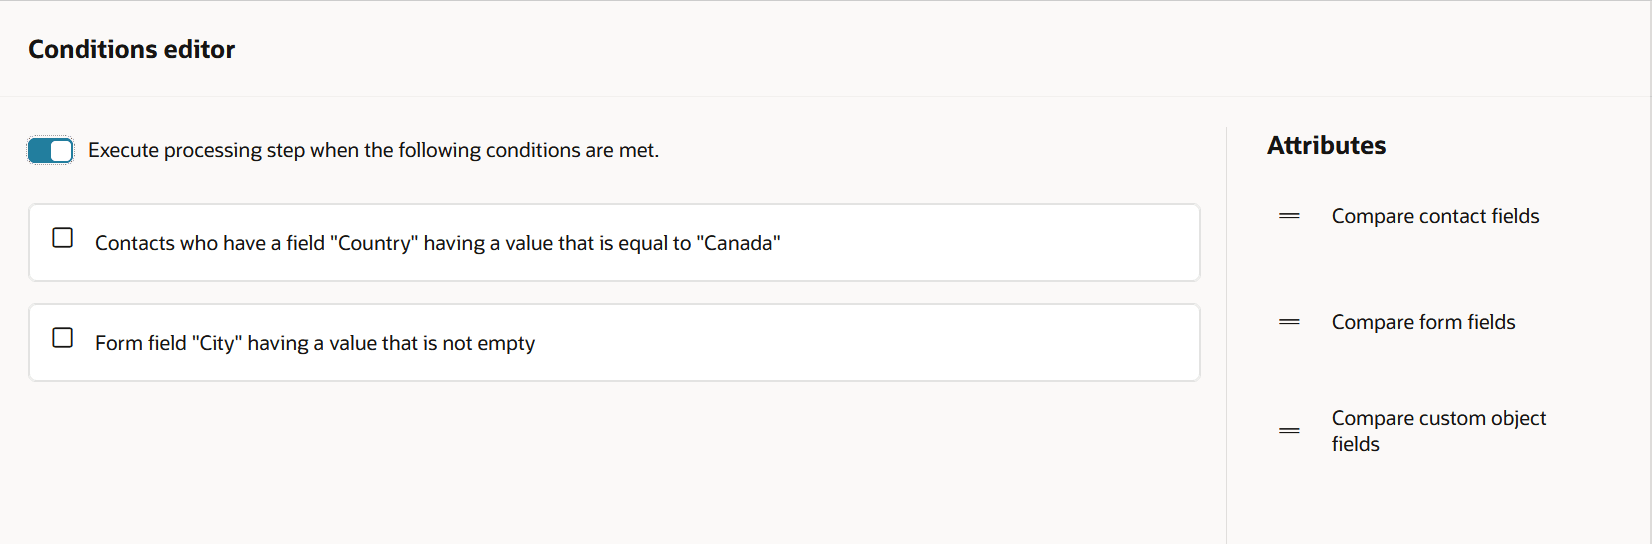
- In the Conditions Editor drag the type of information you want to evaluate against onto the editor. You can use contact fields, custom objects, or form fields.
- Choose the form, contact, or custom object and custom object field you want to test against the condition.
- Choose the operator that will be used to compare in the criteria.
- Select the value type for the criteria:
- You can configure the condition to match exactly what you specify or not.
- You can compare to a form field value or a value you provide.
- Click Apply to confirm your changes.
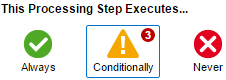
After you close the window, a small badge appears indicating the number of conditions. Hover over the icon to quickly view the configured conditions.
While using the Redwood experience, the conditions will be listed at the bottom of the processing step settings panel.
Disabling or removing a form processing step
You can remove a form processing step that you previously added or you can disable it to prevent Oracle Eloqua from using it.
To disable or remove a form processing step in the Classic UI:
- Open the form and click Processing.
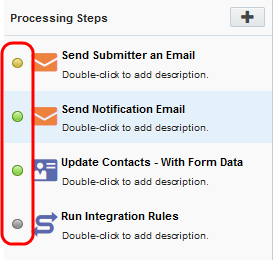
- Click the step and select one of the following options:
- To delete the step from the form, right-click the step and click Remove step.
- To disable the step, click
 .
.Disabled steps are indicated by a gray circle beside their name.
- Click Save.
To disable or remove a form processing step in the Redwood experience:
- Open the form and click Processing.
- Click the step and select one of the following options:
- To delete the step from the form, select Delete from the action menu
 .
. - To disable the step, click and select Disable.
Disabled steps are indicated by the status of "Never" beside the processing step name.
- To delete the step from the form, select Delete from the action menu
- Click Save.