Uploading page tags
There may be times when you want to tag several web sites, each with more than one tag. Doing this manually for each tag and each web site could be a labor-intensive process. Eloqua provides the option for creating a file and uploading the tags directly to the application using the wizard paradigm.
To upload page tags using a file:
- Create an upload file (.xls, .xlsx, .csv) with two columns. Column A must be labeled URL and column B must be labeled Tags in order for the upload to function correctly.
- Enter one URL per row in the URL column (A).
-
Enter the tags that you want applied to each website, separated by commas.
Example: In this example, www.eloqua.com and www.google.com will be tagged with the values in Column B (Tags):

-
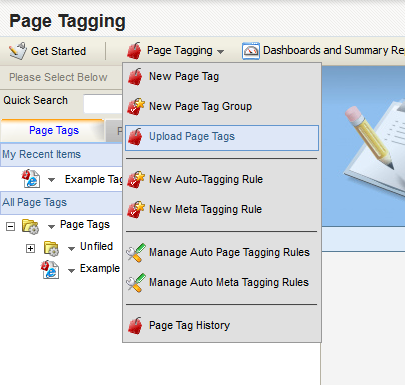
Once your upload file is created and saved, navigate to Assets
 > Website Setup, then click Page Tagging.
 -
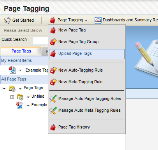
Click the Page Tagging drop-down menu, then click Upload Page Tags to launch the Page Tag Upload wizard.
-
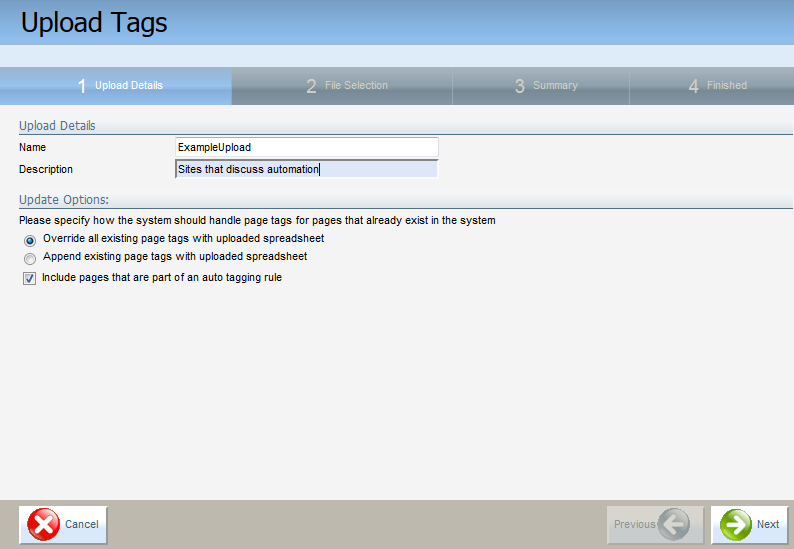
Enter a name for the upload, and a description if needed.

-
Specify how Eloqua will apply the page tags being uploaded to pages that already exist in the site map. Your options include:
- Override all existing page tags with uploaded spreadsheet: selecting this option will override whatever tags are currently associated with the websites that are already tagged in Eloqua.
- Append existing page tags with uploaded spreadsheet: tags that are currently associated with websites in the Eloqua site map will not be overwritten (the new tags will be added to the list of tags).
- Include pages that are part of an auto-tagging rule: If a page that already exists in Eloqua is part of an Auto Tagging rule, do not exclude them during the upload process (if checked). The default is to exclude any pages that are part of an auto-tagging rule. See Creating Auto Tagging Rules for information on how to create an Auto Tagging Rule.
- Click Next to proceed to File Selection tab.
-
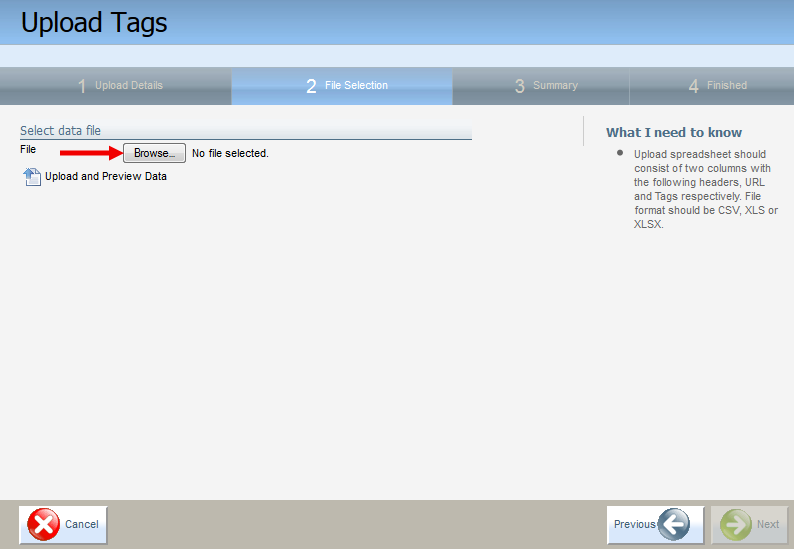
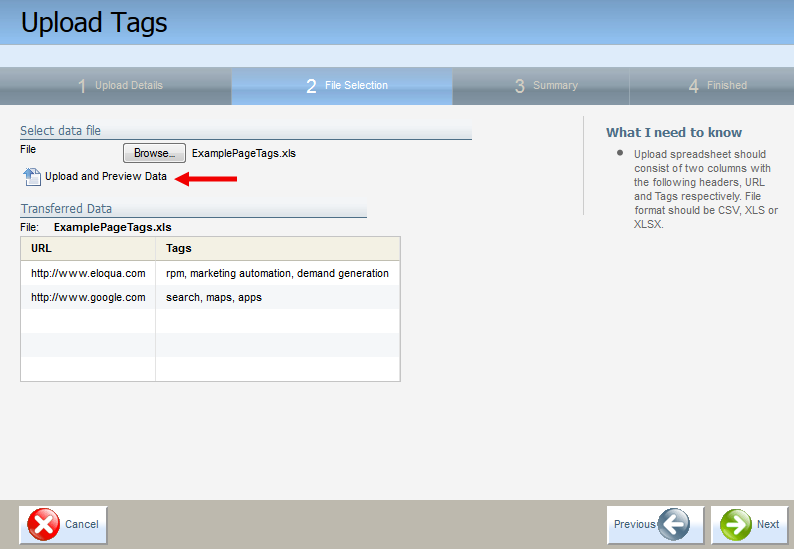
Click Browse and locate your file to upload.

-
Click Upload and Preview Data. Data from the file upload is then displayed.

Note:

You must edit your spreadsheet file to reflect the proper column (heading) names before proceeding with the upload. -
Click Next to proceed to the Summary tab. Eloqua presents a summary of what you have configured in the previous steps, and asks you to enter an email address to which the results will be sent after the upload is complete
-
Enter the appropriate email address to which the results should be sent to after the upload is complete.

- Click Finish to complete the wizard and initiate the upload.
-
Check the email address that you provided to confirm that the upload was successful. Both successful and unsuccessful results will be included in the email.

If any of the tags included in the spreadsheet are reported as being unsuccessful during the upload, go back to your spreadsheet and make sure that the URLs are valid. Make any necessary corrections and attempt the upload again.


Your tags have been created and saved in the system, and are ready for use.