Adding users to security groups
To add a user to a security group:
-
Click Settings
 .
. -
Click Users in the Users and Security area.
-
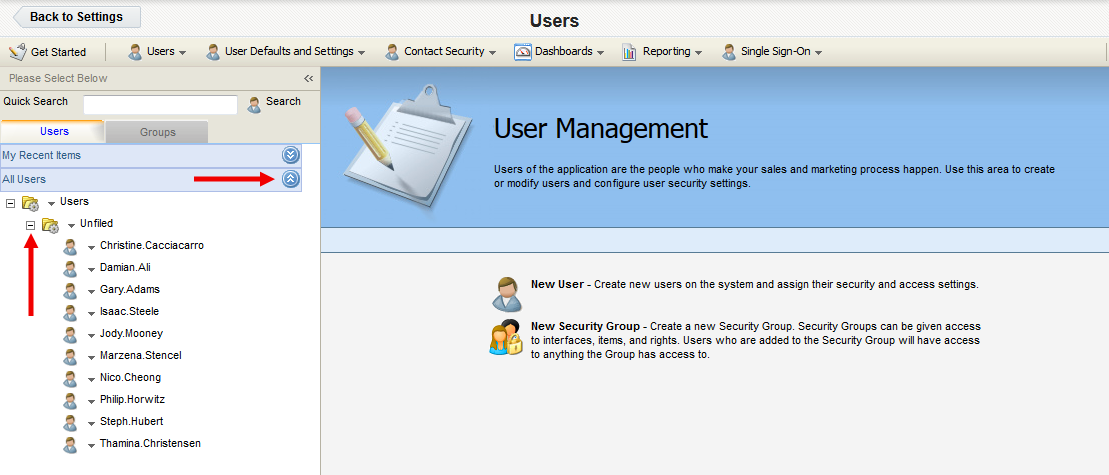
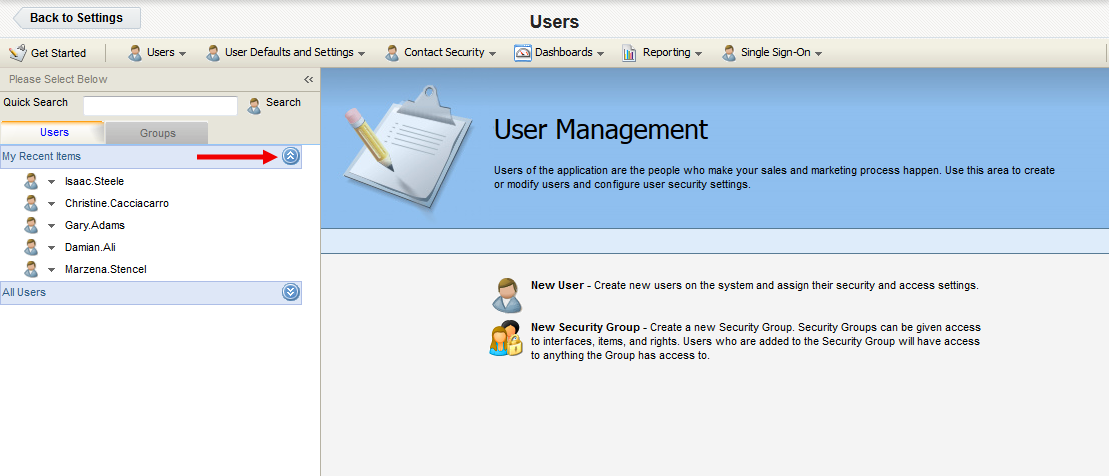
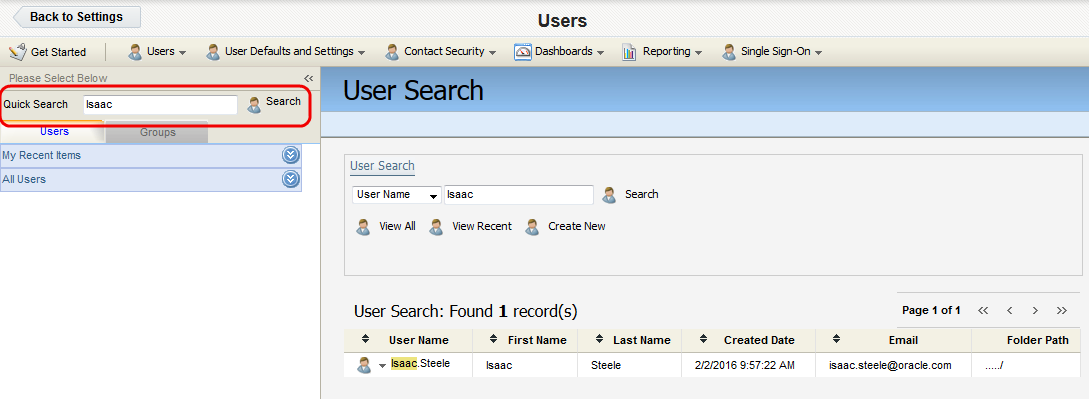
Under the Users tab on the left panel, locate the user account you want to modify. You have three options to achieve this:
-
Expand the All Users drop-down, then click the + symbol next to a folder in order to navigate into that folder.
-
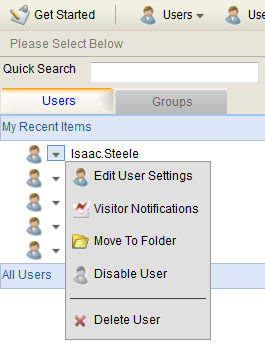
Expand the My Recent Items drop-down to access a list of recently created or accessed user profiles available to you.
-
Type the first few letters of a user profile into the Quick Search field, then press Enter.
-
-
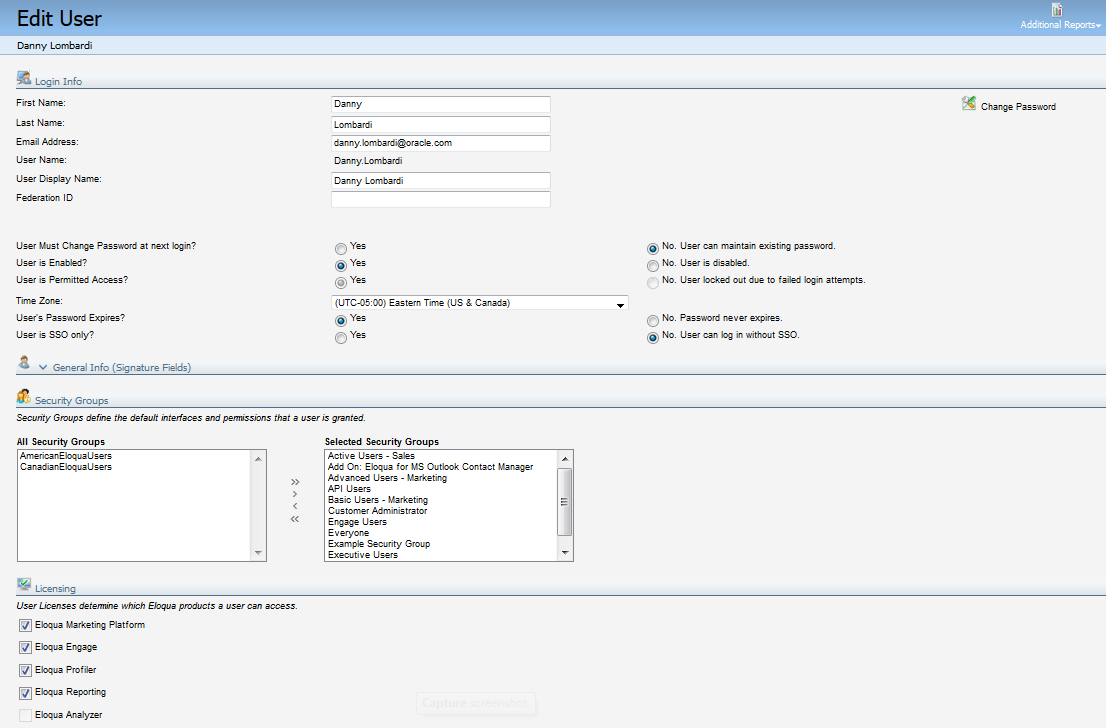
Click the username. The user profile then opens in the right panel.
Note: Alternatively, you can click the drop-down arrow next to a user profile, then click Edit User Settings to open the profile.
-
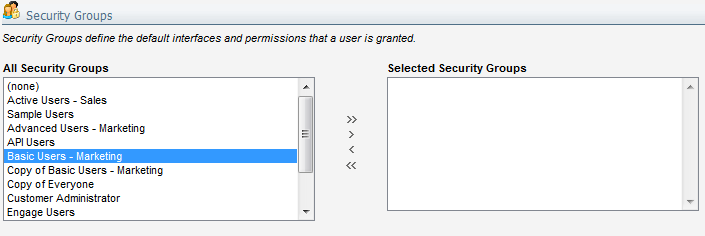
Under the Security Groups section, in the left All Security Groups field, click the name of the security group you to which you want to add the user.
-
Click the > button. The user is added to the security group, and the name of the group appears in the right Selected Security Groups field.
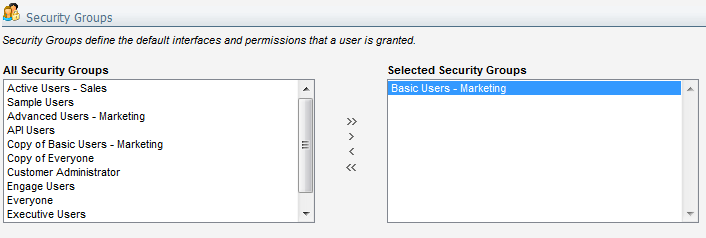
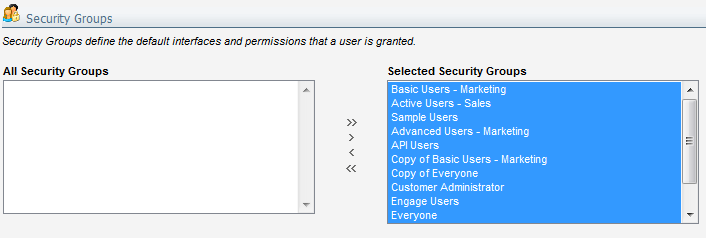
Note: You can also double-click a group to add the user to the group. Additionally, clicking the double arrow >> button will add the user to all security groups, and all groups will appear in the right Selected Security Groups field.
To remove a user from a group, select the group in the right Selected Security Groups column and click the < button. The user is removed from the group, and the name of the group appears in the left All Security Groups field. Clicking the double arrow << button will remove the user from all security groups, and all groups will appear in the left All Security Groups field. - Click Save.
The user has been added to the selected security groups. Repeat this process to add different users to different groups as needed.
Note: A user with the Asset Manager setting enabled is granted View, Edit, Delete, Set Security, and Activate permission to all assets, bypassing asset permissions granted by security groups.