Android App Links
Overview
This guide is for Responsys Customers who would like to link from a Responsys email campaign directly into their Android mobile app (if installed), using Android App Links.
Implementing this solution will enable you to achieve email-to-app deep linking in Android, while preserving click tracking and selective app deep linking (that is, you choose which links in the email will open the app).
Important: If you currently use the Responsys SDK, Apps must integrate with the 19C Responsys Push SDK (SDK version 6.42.0) onwards to use this feature.
Solution Description
The solution works by declaring the Responsys link tracking URLs that are embedded in Responsys emails to be Android App Links, to be opened in your app.
To differentiate between links that should open in your app (if installed), and those that should not, Responsys will generate a slightly different link for both scenarios:
Example App Link: https://news.example.com/pub/acc?ri=…
Example Non-App Link: https://news.example.com/pub/cc?_ri_=…
Your namespace server may also be a unique global routing URL if your account is set up for global routing. See the Responsys Developer Help Center for more information.
Email-to-app deep linking can be achieved on both Android and iOS devices by specifying Android link URLs and iOS link URLs. Marketers specify these URLs when creating link tables for email campaigns. The URL links must be in the format that the mobile app understands, for example, example-app://products/1234. For more information about Link Tables, refer to the Responsys online help.
![]()
Note: When Android App Links and iOS Universal Links are both implemented, you must provide a URL for both iOS and Android platforms when creating link tables. If either of these columns are blank, your app users may encounter a sub-optimal user experience. To learn how to develop your app to handle this scenario, see Troubleshooting.
When a user on an Android device with your app installed taps on an app link in a Responsys email, your app will be opened right away, without going through a browser.
SDK Integrated Flow
In this scenario, the app must call the SDK's helper function to resolve the link. Your app can then use that information to route the user to the appropriate screen in your app.
SDK Independent Flow
If the SDK has not been integrated, your app needs to call the Responsys Response Handler server to:
-
Ensure the click is tracked.
-
Resolve the Responsys App Link into information your app can understand.
Both of these are accomplished through an HTTPS call, which tracks the click and returns the resolved link information.
Specifically, your app will make an HTTPS GET request to the Responsys App Link URL, with an Accept header of application/json. For example:
Request
GET
https://news.example.com/pub/acc?_ri_=X0Gzc2X%3DYQLgnSQGjW1zaW3I39bSeeTLTzc17JkzgM0jGLwhp37NW3DPyepOVXtpKX%3DSWRB&_ei_=Eq2tf9zs59idfPO1Sc_9BbmHzQ63AEdx_2H8ivyA7Qye6ocZmXBu9lX1DXT3ZU_be2kmoPhtBXC5ybqhCg.

Accept: application/json
User-Agent: ResponsysPubWebResolver (CPU Android OS like Android 10 Q)
Response
HTTP/1.1 200 OK
Content-Type: application/json

{
  "webLinkUrl": "https://www.example.com/products/1234",
  "mobileDeepLinkUrl": "example-app://products/1234"
}
Once your app has the resolved link information, it can then use that information to route the user to the appropriate screen in your app.
Implementation
Overview
There are several pre-requisites that need to be put in place before you can use Responsys App Links.
Those pre-requisites are:
- Have a branded domain set up with Responsys for link tracking (e.g.
news.yourcompany.com) - The branded domain needs to be HTTPS-enabled and the certificate needs to comply with Android’s App Security guidelines
- Get a Digital Asset Links JSON file on your branded domain
- Declare in your app that it will handle App Links for the branded domain and the pub web path (
/pub/acc) - Resolve the App Link by calling the SDK’s helper function or implementing resolver code in your app
We’ll cover each of these pre-requisites in more details in the following sections.
Step 1: Set up a Branded Domain
To use Responsys App Links, your account must be set up with a branded domain.
Domain branding gives your account the ability to use a domain/sub-domain branded for your corporate entity vs. using a standard Oracle Responsys sub-domain. The domain is the portion after the @ symbol in from addresses and reply to addresses, and is the base location in a Response Handler URL.
The branded sub-domain is used to brand your From Address, Responsys-hosted Reply To Address, and the Response Handler URL. The Response Handler URL is used for redirection links, click-tracking URLs, HTML Open Tracking URLs, Conversion Tracking URLs, and the URL of forms hosted by Oracle Responsys.
Customer with a Branded Domain
You can check that your Responsys Link Tracking branded domain is set up properly by creating a test campaign, and verifying that the links in your test email are using your branded domain.
Customer without a Branded Domain
If your Responsys account has not been converted from a non-branded to branded domain yet, complete the steps in this section.
NOTES:
- The non-branded to branded conversion is allowed only once.
- You may convert to a branded domain once after your account is created.
- The domain/sub-domain you choose to delegate to Oracle Responsys must be one that no other entity is using, as we will manage all traffic for the domain/sub-domain.
Step 1.1: Delegate your sub-domains to the Responsys Name Servers
To use Domain Branding, your IT system administrator must delegate your sub-domains (e.g. news.example.com) to Oracle Responsys nameservers, ns1.responsys.net or ns2.responsys.net. Your namespace server may also be a unique global routing URL. See the Responsys Developer Help Center for more information.
To delegate a sub-domain to the Responsys nameservers: Add the two (NS) records below to the master zone file. Do not create a separate zone file for the sub-domain you are delegating.
subdomain     IN NS     ns1.responsys.net.
subdomain     IN NS     ns2.responsys.net.
For example, if you are delegating a sub-domain called news.example.com, you would add two (2) NS records to the example.com zone file:
news     IN NS     ns1.responsys.net.
                IN NS     ns2.responsys.net.
Step 1.2: Convert to a Branded Domain in Responsys
To convert to a branded domain in Responsys:
- Log in to Responsys as a user with the Account Admin role.
-
From the Responsys home page, click the menu icon and select Account.
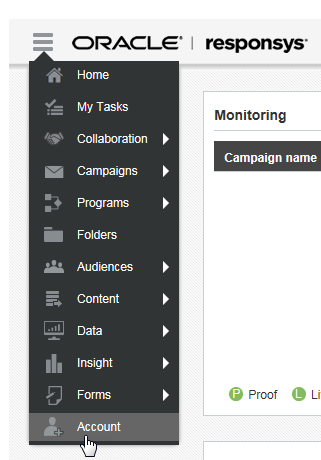
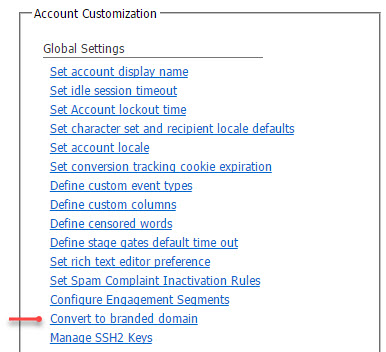
-
In the Account Customization section’s Global Settings list, locate and click Convert to branded domain. Note that not all customers will see this option. If you do not, please create a My Oracle Support (MOS) Service Request at https://support.oracle.com.
-
Complete the following fields:
- Delegated branded domain: Enter the branded domain name, for example,
news.example.com. - From address: Enter the user name to use as the default “from” user. For example, if you enter
admin, the From address will beadmin@news.example.com. - Notification email: Enter the email address that should receive the notification when the conversion is completed.
- Delegated branded domain: Enter the branded domain name, for example,
-
Click Submit.
After branded domain delegation is successfully completed, the account administrator and notification email address will receive a notification email. You can continue to the SSL enablement.
Step 2: Enable SSL for a Branded Domain
To use Responsys Android App Links, your branded domain needs to be SSL-enabled, and the certificate used needs to comply with Android’s App Security requirements.
SSL (Secure Socket Layer) protocol is a process where data passed between the user and server is encrypted/decrypted so that external third party cannot hijack the connection.
SSL behaves as a digital passport which verifies your and the end web server credentials using public and private keys. When both identities are verified, SSL grants a secured connection through HTTPS. This process is performed using SSL certificates.
Enabling SSL in Responsys allows for HTTPS support for all form, landing page, link tracking, and conversion tracking URLs generated by Oracle Responsys. SSL is possible because an SSL certificate is associated with the given domain and web server. In this case, the Response Handler URL requires SSL support so that app links are accessible over HTTPS.
Set up SSL for a Branded Domain
To set up SSL in Responsys for your branded domain(s):
-
Log in to Responsys as a user with the Account Admin role.
-
From the Responsys home page, click the menu icon and select Account.
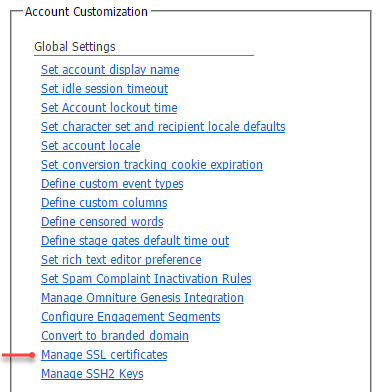
-
In the Account Customization section’s Global Settings list, locate and click Manage SSL certificates. Note that the Manage SSL certificates option will not be visible until the branded domain setup is completed. If you do not see this option, create a My Oracle Support (MOS) Service Request at https://support.oracle.com.
-
Click Add SSL. A new row is inserted into the table.
-
In the Handler column, select the response handler for which the SSL needs to be set up. Status column is set to “Processing”.
-
Below the table, enter the notification email address and click Save.
-
From the Actions column, select Generate CSR. The Generate CSR dialog is displayed.
-
From the Generate CSR dialog, complete the fields as follows:
- Generate CSR For: Domain(s) for which to generate the CSR. If you wish to use multiple domains instead of the response handler domain, select either the wild card or SAN option. Wild card domains are set up with leading (*). Separate SAN domain names with a comma (,).
- Country code: ISO-2 country code of the country where your organization is legally registered.
- State or Province Name: Name of the state or province where your organization is located. Do not abbreviate the name.
- Locality or City Name: Name of the city where your organization is registered/located. Do not abbreviate the name.
- Organization Name: Legal name of your organization. Do not abbreviate the name. Include suffixes such as Inc, Corp, or LLC.
- Organization unit name: If applicable. Use the DBA name of your organization.
- SSL contact email address: Optional.
-
Click Submit.
The system generates the CSR.
-
From the Actions column, choose Download CSR.
-
Using the CSR that you downloaded, purchase the SSL certificate from your preferred SSL certificate vendor.
- After you have the SSL certificate, return to the Manage SSL Certificates page in Responsys.
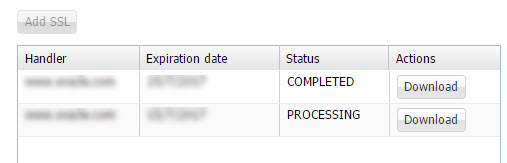
- From the Actions column, choose Upload SSL for the row you added in the previous steps.
- Browse to the SSL files on your system, and click Upload. All uploaded files are displayed as a list. Select one as the main SSL certificate. The others are treated as intermediate CA certificates. After you add the SSL certificate and it is successfully installed, the status changes to “Active”, and the certificate expiration date is shown in the list.
Step 3: Set up the Digital Asset Links JSON File
To associate your app with your branded domain(s), Oracle Responsys must place the file on each of the branded domains that will be included in the links in the email campaign content. Contact your Customer Success Manager or Oracle Responsys Support to complete this task.
Here is an example file, set up for Responsys Android App Links:
 [{
  "relation": ["delegate_permission/common.handle_all_urls"],
  "target": {
    "namespace": "android_app",
    "package_name": "com.mycompany.app1",
    "sha256_cert_fingerprints":
    ["14:6D:E9:83:C5:73:06:50:D8:EE:B9:95:2F:34:FC:64:16:A0:83:42:E6:1D:BE:A8:8A:04:96:B2:3F:CF:44:E5"]
  }
}]
Every app must provide the package_name and the sha256_cert_fingerprints in the file. The file can be generated using the Android Studio AppLinks Assisstant tool.
When your app is installed on the user’s device, Android will try to fetch the file on your branded domain in order to verify the association. Android makes a request to:
https://news.example.com/.well-known/assetlinks.json
Step 4: Configure your Android App
Follow Android’s steps to add Android App Links.
Step 4.1: Adding Intent Filters
Apps must declare an Intent Filter in their app manifest file to handle all http and https URIs with the /pub/acc path for their Responsys domain.
For example if an app sets up the domain news.example.com in Responsys, the manifest must be set up to intercept all URIs of the following two forms:
Add the following Intent filter in your AppManifest.xml file to ensure all App Links open within the app.
<activity ...>
    <intent-filter
        android:autoVerify="true">
        <action android:name="android.intent.action.VIEW" />
        <category android:name="android.intent.category.DEFAULT" />
        <category android:name="android.intent.category.BROWSABLE" />
        <data
            android:host="<preferred host url>"
            android:pathPrefix="/pub/acc"
            android:scheme="http" />
        <data
            android:host="<preferred host url>"
            android:pathPrefix="/pub/acc"
            android:scheme="https" />
    </intent-filter>
</activity>
Step 5: Resolve the Android App Link
Resolve the Android App Links using one of the methods below.
Step 5.1 Call the SDK's Helper Function (SDK Integrated Flow)
This step is required when your app is integrated with the Responsys SDK. Call the SDK's helper function:
                    Intent appLinkIntent = getIntent();
                    String appLinkAction = appLinkIntent.getAction();
                    Uri appLinkData = appLinkIntent.getData();
                    appLinkData.getHost().endsWith("<your app link host>"){
                        mPushIOManager.trackEmailConversion(appLinkIntent, new PIODeepLinkListener(){});
                    }
                    var appLinkIntent: Intent = intent

                    @Throws(IOException::class)
                    fun openUrl(appLinkIntent: Intent) {
                        val appLinkAction = appLinkIntent.action
                        val appLinkData: Uri? = appLinkIntent.data

                        if (appLinkData != null) {
                            appLinkData.host?.endsWith("<your app link host>")
                            PushIOManager.getInstance(applicationContext).trackEmailConversion(appLinkIntent,
                                object: PIODeepLinkListener{
                                    override fun onDeepLinkReceived(deepLinkUrl: String?, webLinkUrl: String?) {

                                    }

                                })

                        }
Step 5.2 Implement Resolver Code in your Android App (SDK Independent Flow)
This step is required when your app has not integrated the Responsys SDK.
Your app must resolve the Responsys App Link into information that your app can understand. The details about the request that your app should make to resolve the link are explained above, and you can make this call in any way you see fit. Here is an example implementation:
                    Intent  appLinkIntent = getIntent();

                        public void openUrl(Intent appLinkIntent) throws IOException {

                            String appLinkAction = appLinkIntent.getAction();
                            Uri appLinkData = appLinkIntent.getData();
                            String path = appLinkData.getPath();

                            if(path.contains("<App Link Domain>") && path.contains("/pub/acc")) {
                                PIOLogger.d("Resolving Responsys AppLink :" + appLinkData.toString());

                                // TODO:: resolving the App Link will involve a network call which may take a few seconds, time out, fail, etc, so you might want to show a spinner

                                // make request to Responsys to track click & resolve the AppLink

                                //Set Request UserAgent
                                String userAgent = null;
                                if (android.os.Build.VERSION.SDK_INT >= android.os.Build.VERSION_CODES.JELLY_BEAN_MR1) {
                                    userAgent = WebSettings.getDefaultUserAgent(mContext);
                                } else {
                                    userAgent = System.getProperty("http.agent");
                                }

                                //Set request parameters
                                URL lUrl = new URL(appLinkData.toString());
                                HttpURLConnection urlConnection = (HttpURLConnection) lUrl.openConnection();
                                urlConnection.setRequestMethod("GET");
                                urlConnection.setConnectTimeout(PushIOConstants.HTTP_REQUEST_TIMEOUT);
                                urlConnection.setRequestProperty(PushIOConstants.HTTP_HEADER_CONTENT_TYPE, "application/json");
                                urlConnection.setRequestProperty(PushIOConstants.HTTP_HEADER_ACCEPT, "application/json");
                                urlConnection.setRequestProperty(PushIOConstants.HTTP_USER_AGENT, userAgent);

                                responseReceived(urlConnection);
                            }
                        }

                        private void responseReceived(HttpURLConnection urlConnection) throws IOException {
                            int responseCode = urlConnection.getResponseCode();

                            switch (responseCode) {
                                case HttpURLConnection.HTTP_OK:
                                case HttpURLConnection.HTTP_ACCEPTED:
                                    //TODO :: add your code that would use the resolved Responsys App Link info
                                    break;
                                default:

                                    Log.i("LOG_TAG", "Error in resolving the responsys App Link url ");
                                    //TODO :: Add the code to handle the error on resolving the responsys App Link
                                    break;
                            }

                            urlConnection.disconnect();
                        }
                   var appLinkIntent: Intent = intent

                    @Throws(IOException::class)
                    fun openUrl(appLinkIntent: Intent) {
                        val appLinkAction = appLinkIntent.action
                        val appLinkData: Uri? = appLinkIntent.data
                        val path: String? = appLinkData?.path

                        var userAgent: String? = if (Build.VERSION.SDK_INT >= Build.VERSION_CODES.JELLY_BEAN_MR1) {
                            WebSettings.getDefaultUserAgent(applicationContext)
                        } else {
                            System.getProperty("http.agent")
                        }

                        val url = URL(appLinkData.toString())
                        val urlConnection: HttpURLConnection = url.openConnection() as HttpURLConnection
                        urlConnection.requestMethod = "GET"
                        urlConnection.connectTimeout = PushIOConstants.HTTP_REQUEST_TIMEOUT
                        urlConnection.setRequestProperty(
                            PushIOConstants.HTTP_HEADER_CONTENT_TYPE,
                            "application/json"
                        )
                        urlConnection.setRequestProperty(PushIOConstants.HTTP_HEADER_ACCEPT, "application/json")
                        urlConnection.setRequestProperty(PushIOConstants.HTTP_USER_AGENT, userAgent)

                        responseReceived(urlConnection)
                    }

                    @Throws(IOException::class)
                    private fun responseReceived(urlConnection: HttpURLConnection) {
                        val responseCode = urlConnection.responseCode

                        when (responseCode) {
                            HttpURLConnection.HTTP_OK, HttpURLConnection.HTTP_ACCEPTED -> {
                                //TODO :: add your code that would use the resolved Responsys App Link info
                            }
                            else -> {
                                Log.i("LOG_TAG", "Error in resolving the responsys App Link url ")
                                //TODO :: Add the code to handle the error on resolving the responsys App Link
                            }
                        }

                        urlConnection.disconnect()
                    }
Troubleshooting
Handling null values
When your app is resolving the link information, it is possible to receive a null value for mobileDeepLinkUrl. This is problematic because it can cause a sub-optimal experience for your users.
{
  "webLinkUrl": "https://www.example.com/products/1234",
  "mobileDeepLinkUrl": null
}
This can happen if you have a blank value for iOS link URL in a link table in an email campaign. As shown in the link table example below, both the iOS link URL and Android link URL columns must contain an app link URL to prevent mobileDeepLinkUrl returning a null value.
![]()
Apps must be developed to handle a scenario where mobileDeepLinkUrl returns a null value ensure an optimal user experience.
Implementation with Cross-channel Conversion Tracking
If Cross-channel Conversion Tracking is enabled, Android apps must be updated to ensure:
- Declare an intent filter for your domain and the path
android:pathPrefix="/pub/acc" - Do not declare an intent filter for your domain and the path
android:pathPrefix="/pub/cc"
This is explained in detail in Cross-channel Conversion Tracking.