Generating an APNs Auth Key
NOTE: For security reasons - never e-mail APNs Authentication Key Files (.P8). Unauthorized access to APNs Auth Key can leave your app(s) vulnerable. Secure file transferring is preferred.
APNs Auth Key Overview
This guide provides steps for generating the APNs Auth Key. In order to send Push Notifications to your iOS device, you need APNs Push Certificate, or an APNs Auth Key file for your application and upload it to the Responsys Mobile App Developer Console. See Apple's instructions for more information about generating Authentication Key Files.
We recommend that you use an APNs Auth Key for the following reasons:
- You can use one Auth Key file for sending push notifications to all your apps including development test apps. This removes the complication of maintaining different certificates.
- Authentication Keys do not expire. Alleviating the need to re-generate one every year like push certificates.
To configure your app on Responsys Mobile App Developer Console with APNs Auth Key, you require the following:
- APNs Authentication Key File
- App Bundle ID
- Team ID
- Key ID
APNs Auth Key - Step By Step Guide
To create an APNs auth key, follow the steps below.
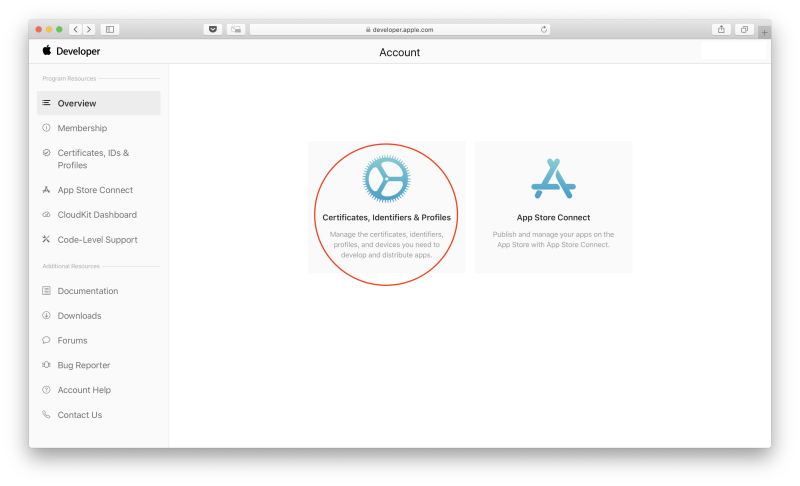
[1] To begin, visit the Apple Developer Member Center and log in with your credentials.
[2] Click Certificates, Identifiers & Profiles.
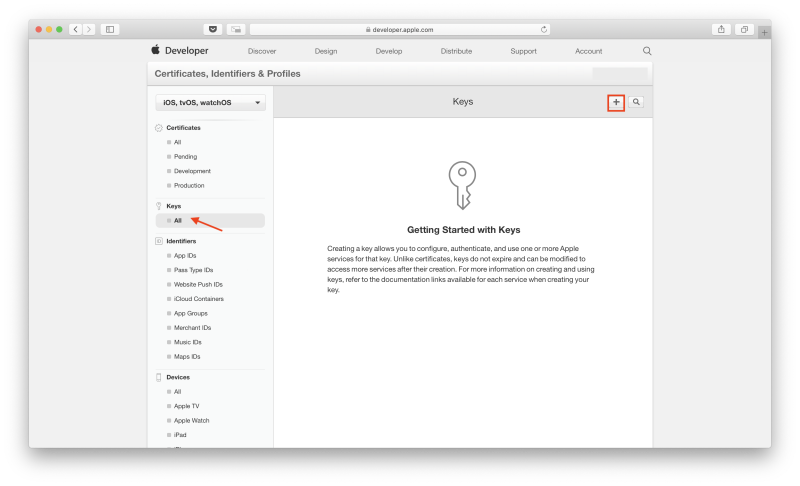
[3] Click Keys then the “+” button in the top right corner to create a new key.
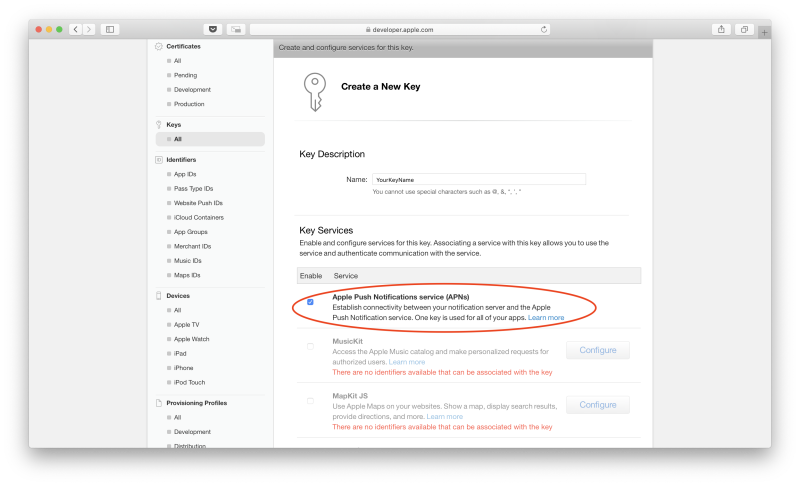
[4] Enter a descriptive name for your APNS Auth Key, then select Apple Push Notification Service (APNs).
[5] Click Continue.
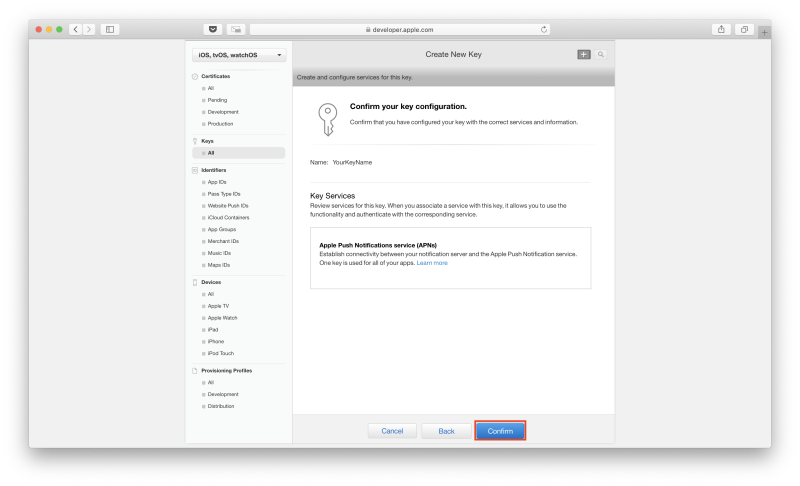
[6] Verfiy the information and click Confirm.
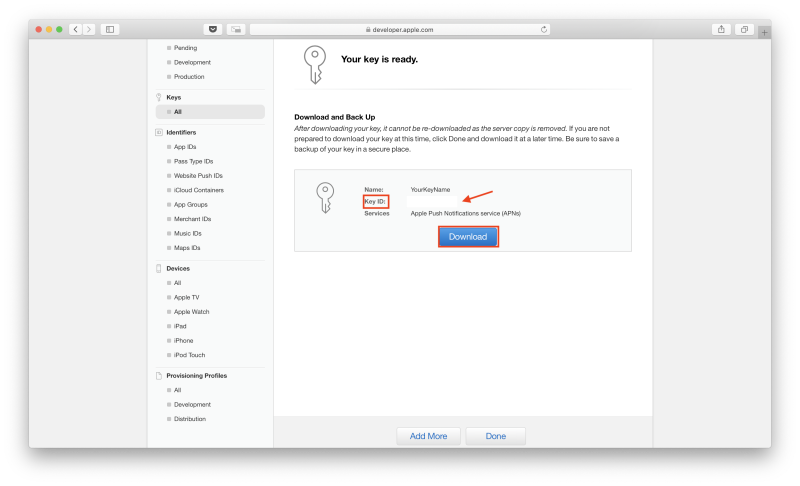
[7] Click Download to download your auth key file. Copy and save the Key ID which you'll need later. Note that you can only download the file once. Make sure you save this file properly and create a backup for later. Do not rename the file.
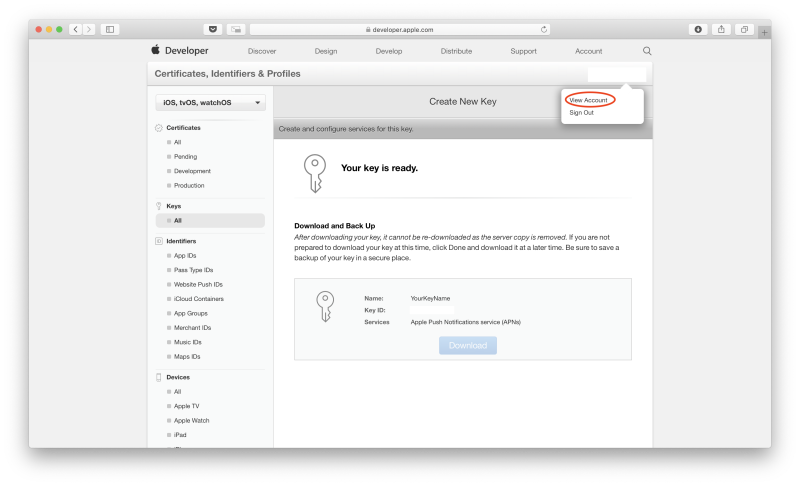
[8] Click on your account name on the top right corner, then select View Account.
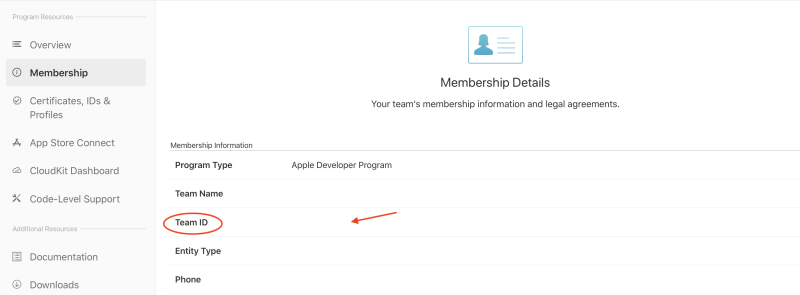
[8] Copy and save your Team ID.
[9] In Responsys, navigate to Account > Access Mobile App Developer Console.
[10] Click Edit for the app for which you want to add the authentication key file.
[11] Click Platform > Edit for the iOS Development Platform row.
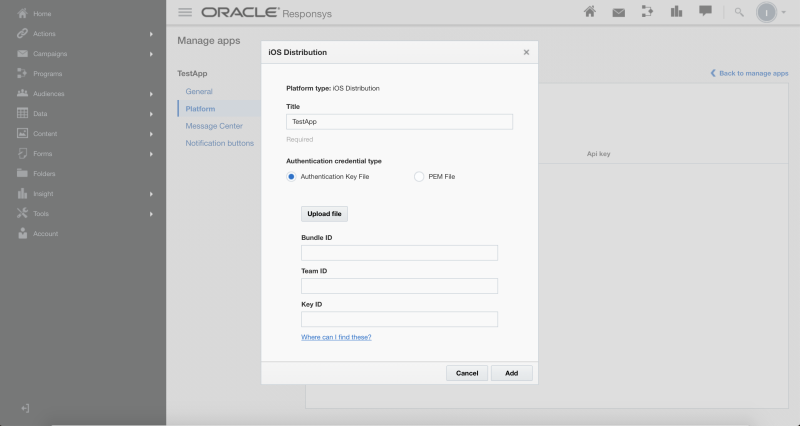
[12] Select Authentication Key File > Upload file and upload your Authentication Key File (.P8).
[13] Enter your Authentication key file details:
-
Team ID – Enter your Team ID from Step 8.
-
Key ID – Enter your Key ID from Step 7.
-
Bundle ID – Enter your App Bundle ID.
Note: The Bundle ID is case sensitive – be sure to input the Bundle ID exactly as it reads in Xcode (see screenshot below on where to find the Bundle ID in Xcode). Furthermore, there are best practices/naming conventions for Bundle IDs as well – Apple recommends using a reverse-domain name style string.

