Carousel Push
This topic provides detailed instructions for enabling the Carousel Push Notifications functionality as a part of push services. To enable Carousel Push notifications you need to implement the iOS content extension in your project.
Important: This feature is currently available under our Early Access program. Request access to the "Image Carousel in Push Notifications” feature by contacting your Customer Success Manager or logging in to My Oracle Support and creating a service request.
Integrating the Content Extension into Your Mobile Application for Carousel Push
Before You Begin:
-
This feature is available with PushIO SDK version 6.43.1 and later.
Step 1: Create a Content Extension target
[1.1] Open your Xcode project.
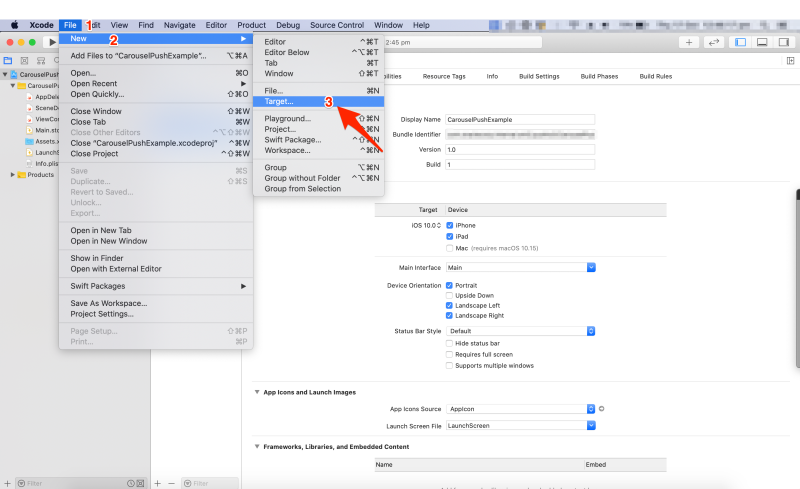
[1.2] From the task bar, click File > New > Target.
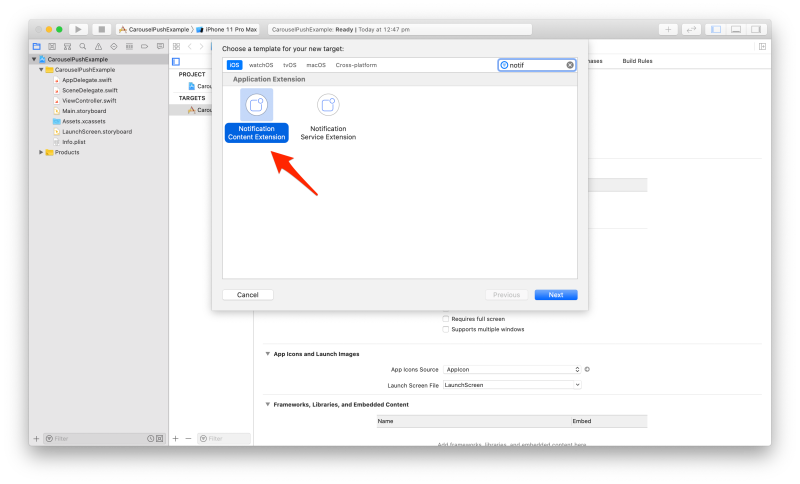
[1.3] Select Notification Content Extension as a template for your target and click Next.
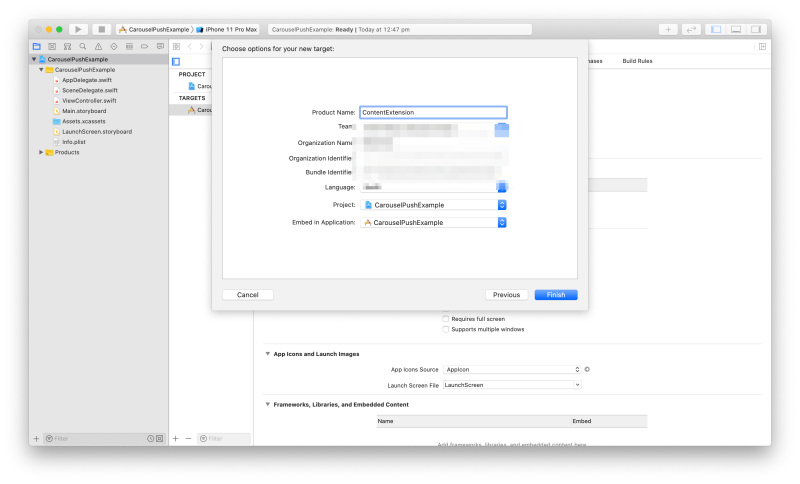
[1.4] Enter a name for your target, set the other options as appropriate, and then click Finish to create the target. (In the following example, the target name is ContentExtension.)
[1.5] After you have created the target, a slide-down alert is displayed. Select the Activate option.
Step 2: Add Pushio Content Extension framework
In addition to the PushIOManager framework, you must also add the PIOContentExtension framework to your project file.
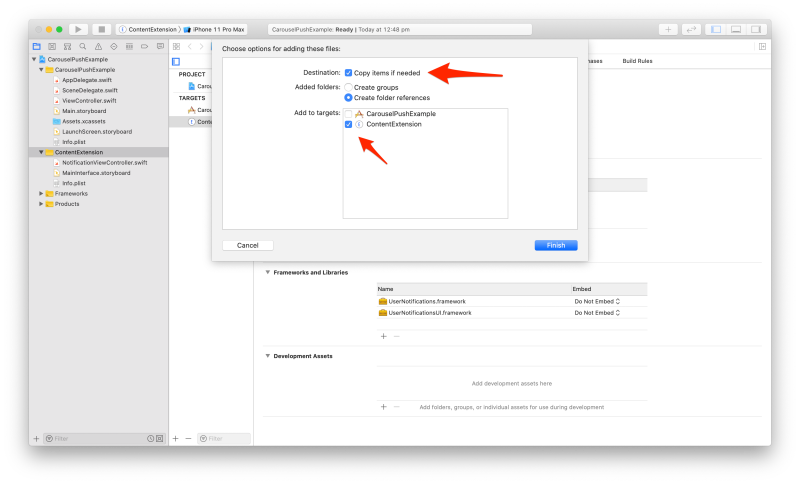
[2.1] Locate the PIOContentExtension framework and drag it into your project. Be sure to click “Copy items into destination group’s folder and choose the target created” in Xcode when adding files to your project (see screenshot below).
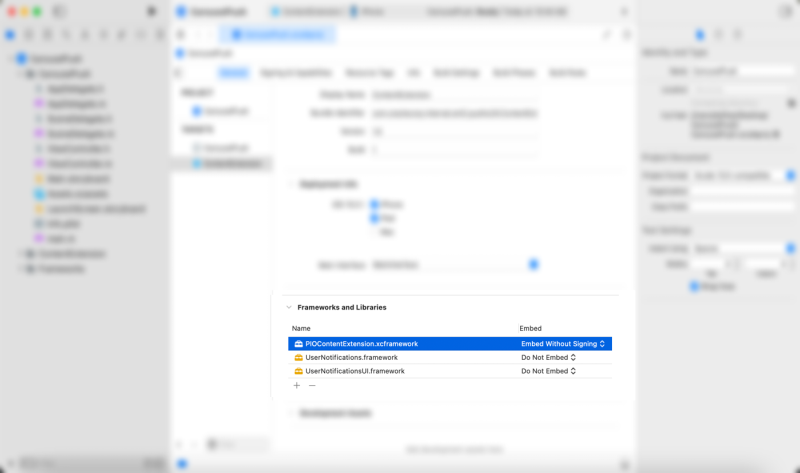
[2.2]: Navigate to ContentExtension Target and on the General tab, under Frameworks and Libraries, ensure that the embed type for PIOContentExtension.xcframework is set to "Embed Without Signing" (see screenshot below). Incase of PIOContentExtension.framework the embed type should be set as "Do Not Embed"
Step 3: Change Default Settings
[3.1] Select the folder named after your created target (in our previous example, ContentExtension is the target name).
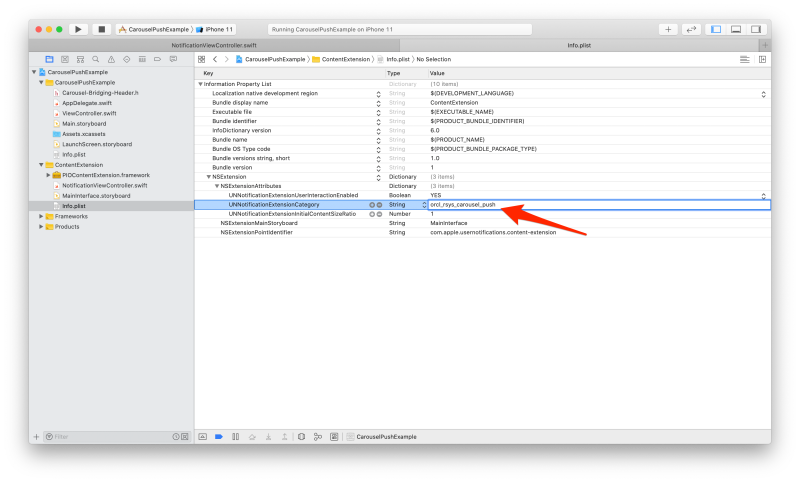
[3.2] Select the Info.plist of your content extension from the left pane.
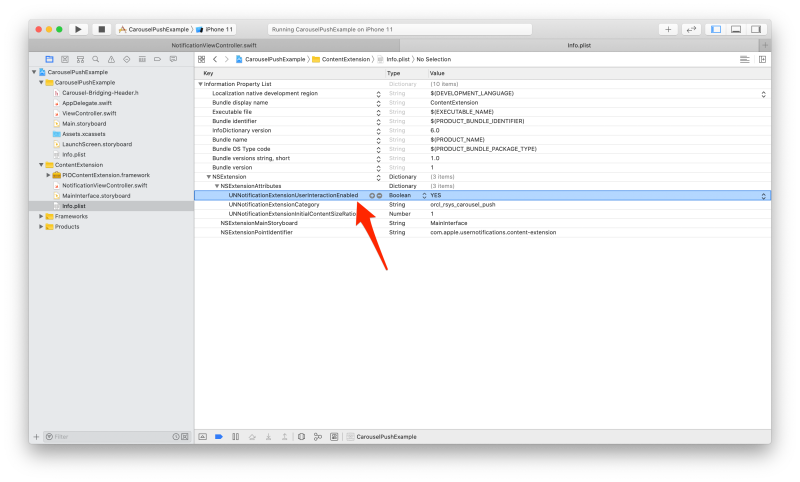
[3.3] Expand NSExtension and NSExtensionAttributes in Info.plist.
[3.4] Change the UNNotificationExtensionCategory to orcl_rsys_carousel_push.
[3.5] Under NSExtensionAttributes add a key value pair. Change the key to UNNotificationExtensionUserInteractionEnabled and change the value to YES
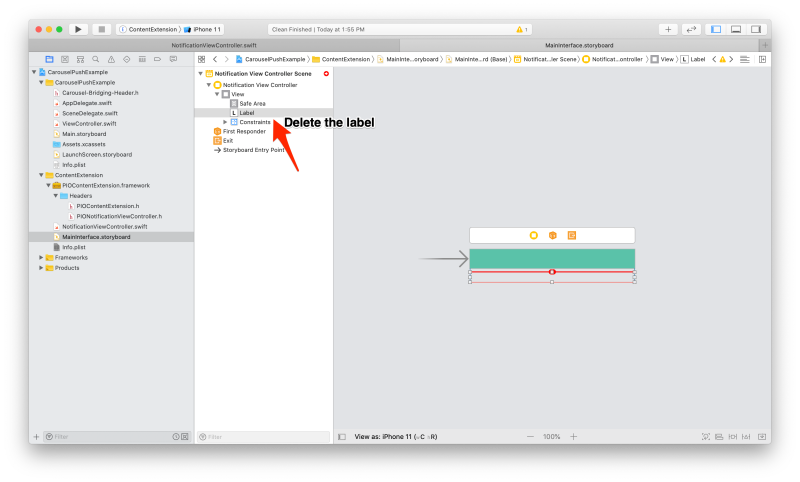
[3.6] Select the MainInterface.storyboard of your content extension from the left pane.
[3.7] Select the Label and press Delete on your keyboard to delete the label from storyboard.
Step 4: Implement code
[4.1] Select your project from the left pane.
[4.2] Select the folder named after your created target (in our previous example, ContentExtension is the target name).
[4.3] In the NotificationViewController.h file make the following changes:
[4.3.1] Import the PIOContentExtension framework:
#import <PIOContentExtension/PIOContentExtension.h>
import PIOContentExtension
[4.3.2] Inherit NotificationViewController from PIONotificationViewController class:
//  NotificationViewController.h
@interface NotificationViewController : PIONotificationViewController

@end
class NotificationViewController: PIONotificationViewController {
[4.4] In the NotificationViewController.m file make the following changes:
Override the didReceiveNotification:(UNNotification *)notification method as:
- (void)didReceiveNotification:(UNNotification *)notification {
    [super didReceiveNotification:notification];
}
override func didReceive(_ notification: UNNotification) {
    super.didReceive(notification)
}
[4.5] Build the extension to make sure there is no error.
Your application is now ready to receive carousel push notifications.
