Media Attachments
This topic provides detailed instructions for integrating the Media Attachments feature as a part of push services.
How Media Attachments Work
-
iOS 10 provides a rich multimedia interface to push notifications by enabling display of images, audio, or video in an expanded view of the push notifications.
-
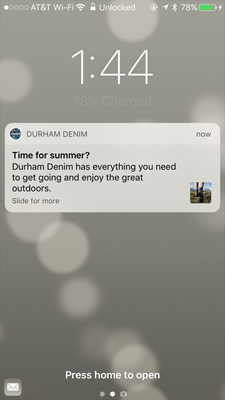
The pushes that arrive with a media attachment appear in the notification drawer as shown in the figure below, which illustrates an image push.
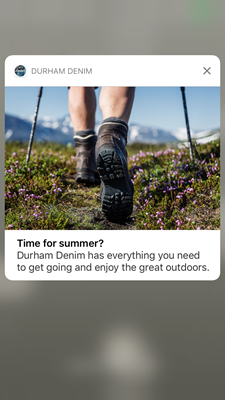
- To view the media attachment in its intended flavour, a long press is needed to be done on the push notification. It then appears as shown in the figure below.
For mobile app users to receive push notifications with media attachments, the following tasks must be done:
-
Mobile app developers must integrate the media attachments framework into their mobile app, as described in the section below.
-
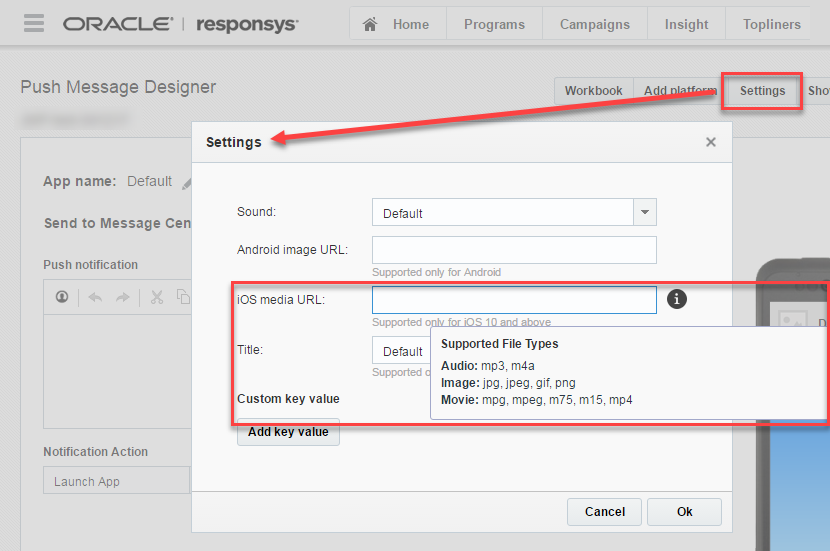
Marketers must use the Push Message Designer in Responsys to specify the media attachment URL. More details about that task may be found in the Responsys online help.
Integrating the Media Attachments Framework into Your Mobile Application
Before You Begin:
-
This feature is available with PushIO SDK version 6.32 and later.
Step 1: Create a target
[1.1]: Open the Xcode project (Example: HelloMedia is the name of the project shown in the following screenshot).
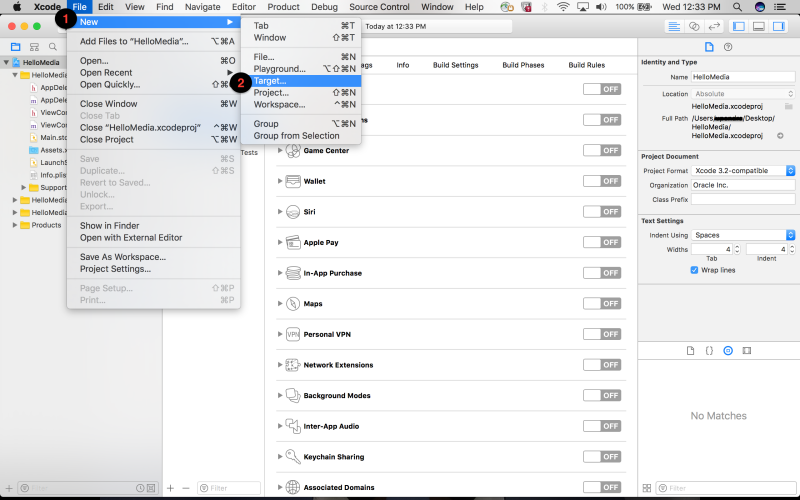
[1.2]: From the Xcode task bar, select File, then select New, then select Target.
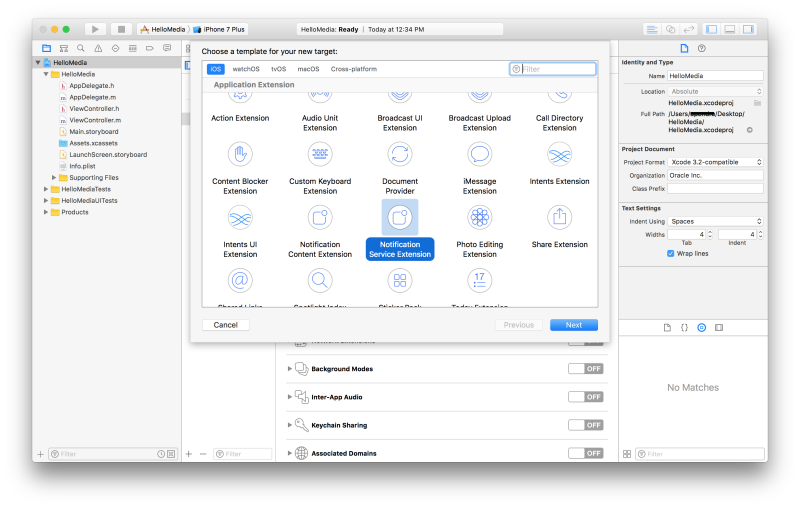
[1.3]: From the pop up, select Notification Service Extension as a template for your target.
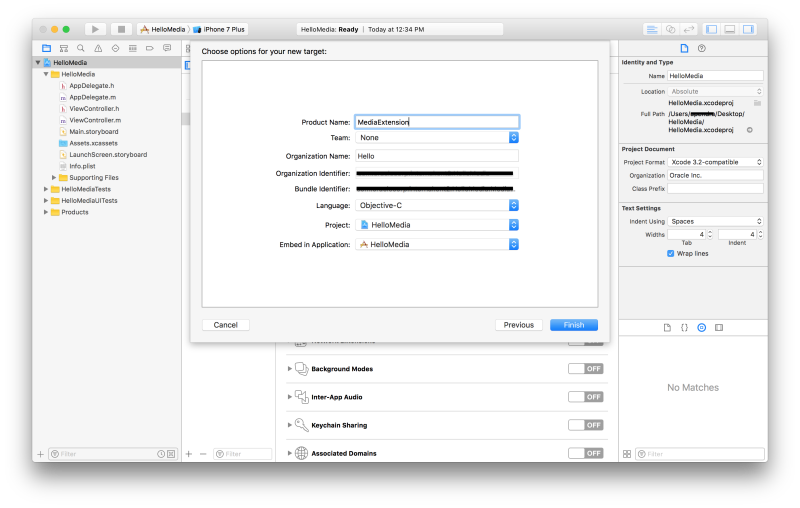
[1.4]: Enter a name for your target, set the other options as appropriate, and then click Finish to create the target. (In the following example, the user has typed MediaExtension for the target name.)
[1.5] After you have created the target, a slide-down alert is displayed. Select the Activate option.
Step 2: Add a framework
In addition to the PushIOManager framework, you must also add the PIOMediaAttachmentExtension framework to your project file.
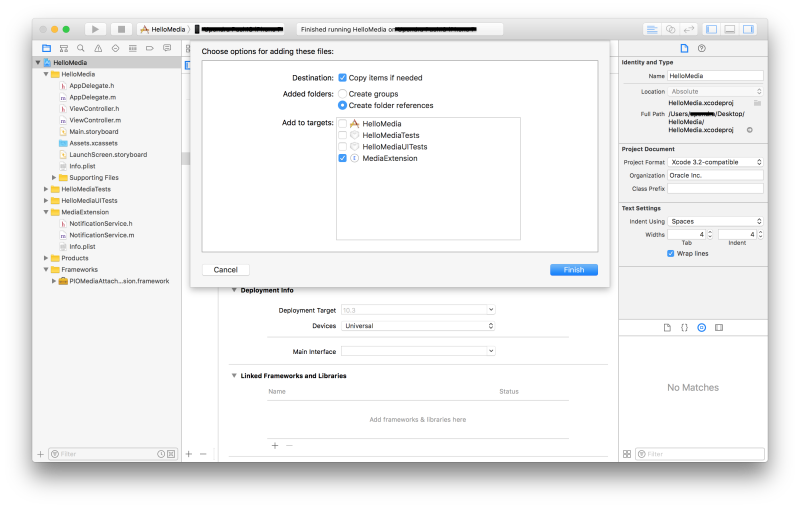
[2.1]: Locate the Media Attachments framework and drag it into your project. Be sure to click “Copy items into destination group’s folder and choose the target created” in Xcode when adding files to your project (see screenshot below).
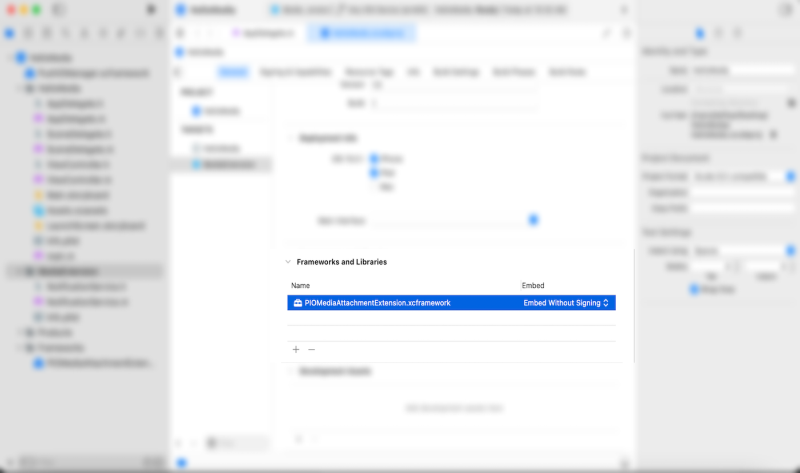
[2.2]: Navigate to MediaExtension Target and on the General tab, under Frameworks and Libraries, ensure that the embed type for PIOMediaAttachmentExtension.xcframework is set to "Embed Without Signing" (see screenshot below). Incase of PIOMediaAttachmentExtension.framework the embed type should be set as "Do Not Embed"
Step 3: Implement code
[3.1]: Select your project from the left pane.
[3.2]: Select the folder named after your created target (in our previous example, 'MediaExtension' is the target name).
[3.3]: In the NotificationService.h file make the following changes:
1) Import the PIOMediaAttachmentExtension framework:
#import <PIOMediaAttachmentExtension/PIOMediaAttachmentServiceExtension.h>
import PIOMediaAttachmentExtension
2) Inherit PIOMediaAttachmentServiceExtension into NotificationService class:
@interface NotificationService : PIOMediaAttachmentServiceExtension
class NotificationService: PIOMediaAttachmentServiceExtension
[3.4]: In the NotificationService.m file make the following changes
1) Override the didReceiveNotificationRequest: withContentHandler method as :
- (void)didReceiveNotificationRequest:(UNNotificationRequest *)request withContentHandler:(void (^)(UNNotificationContent * _Nonnull))contentHandler
{
    [super didReceiveNotificationRequest:request withContentHandler:contentHandler];
}
override func didReceive(_ request: UNNotificationRequest, withContentHandler contentHandler: @escaping (UNNotificationContent) -> Void) {
    super.didReceive(request, withContentHandler: contentHandler)
}
2) Override the serviceExtensionTimeWillExpire method as : -
- (void)serviceExtensionTimeWillExpire
  {
      [super serviceExtensionTimeWillExpire];
  }
override func serviceExtensionTimeWillExpire() {
    super.serviceExtensionTimeWillExpire()
}
Step 4: Run the application and the extension
[4.1]: Run the application on your device (assuming your device is connected to the system). Once the application is launched on the device, stop the application from Xcode.
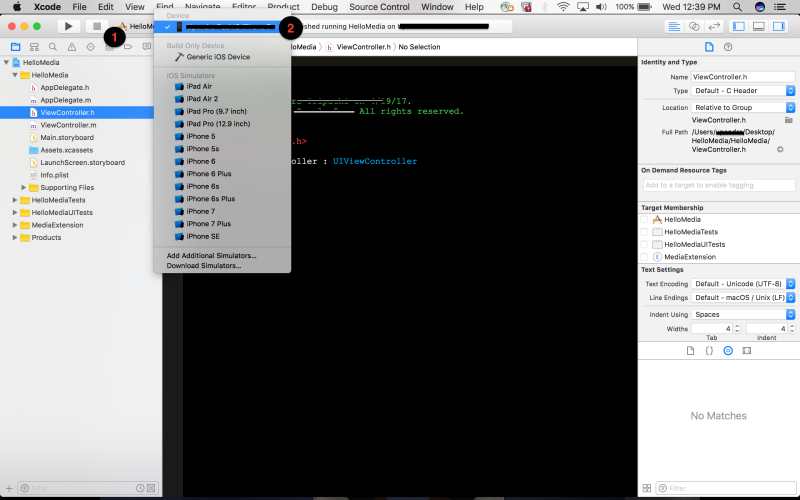
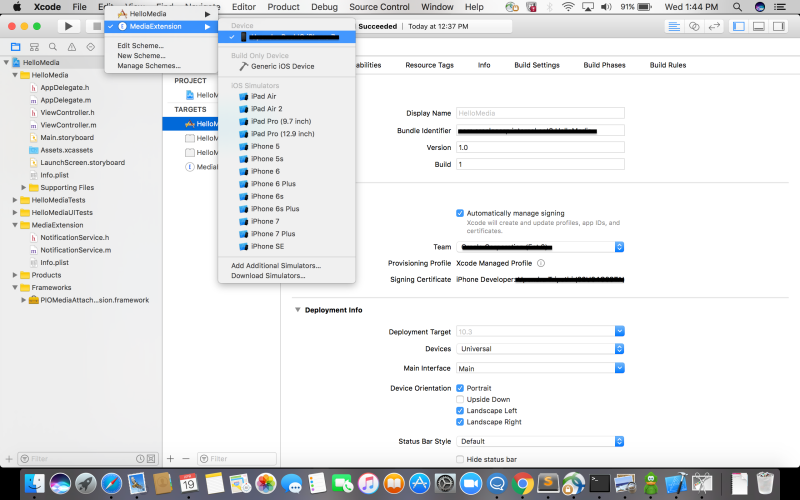
[4.2]: Select the target you had created (in our example, this was MediaExtension). Select the device you want to run it on (assuming your device is connected to the system).
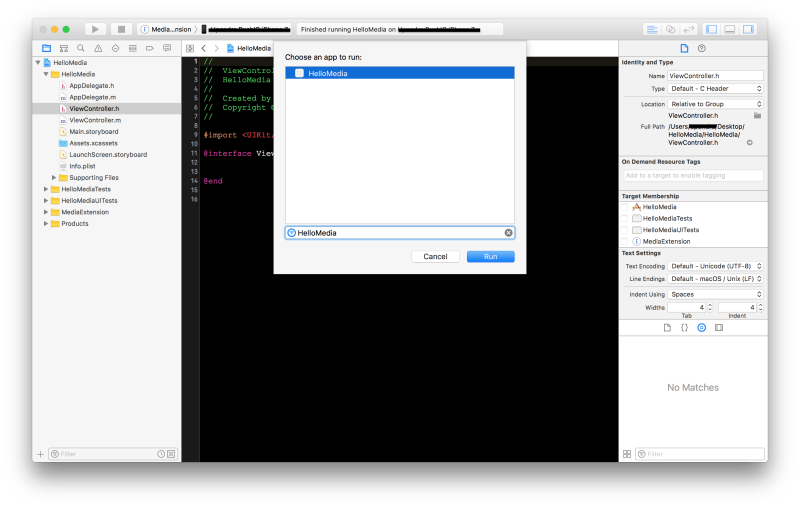
[4.3]: With the target selected, select build and choose your application from the dialog.
Step 5: Logging
- Enable logging
To enable logging in PIOMediaAttachmentExtension:
// add the following code in the - (void)didReceiveNotificationRequest:(UNNotificationRequest *)request withContentHandler:(void (^)(UNNotificationContent * _Nonnull))contentHandler function:

[self enableLogging];
// add the following code in the override func didReceive(_ request: UNNotificationRequest, withContentHandler contentHandler: @escaping (UNNotificationContent) -> Void) function:

self.enableLogging()
- Disable logging
To disable logging in PIOMediaAttachmentExtension:
// add the following code in the - (void)didReceiveNotificationRequest:(UNNotificationRequest *)request withContentHandler:(void (^)(UNNotificationContent * _Nonnull))contentHandler  function :

[self disableLogging];
// add the following code in the override func didReceive(_ request: UNNotificationRequest, withContentHandler contentHandler: @escaping (UNNotificationContent) -> Void) function:

self.disableLogging()
Your application is now ready to receive notifications with media attachments.
If you encounter issues, please refer to the iOS FAQ topic.
