Manage Connect Jobs
After you create Connect jobs and groups, you can use the Manage Connect page to manage your jobs.
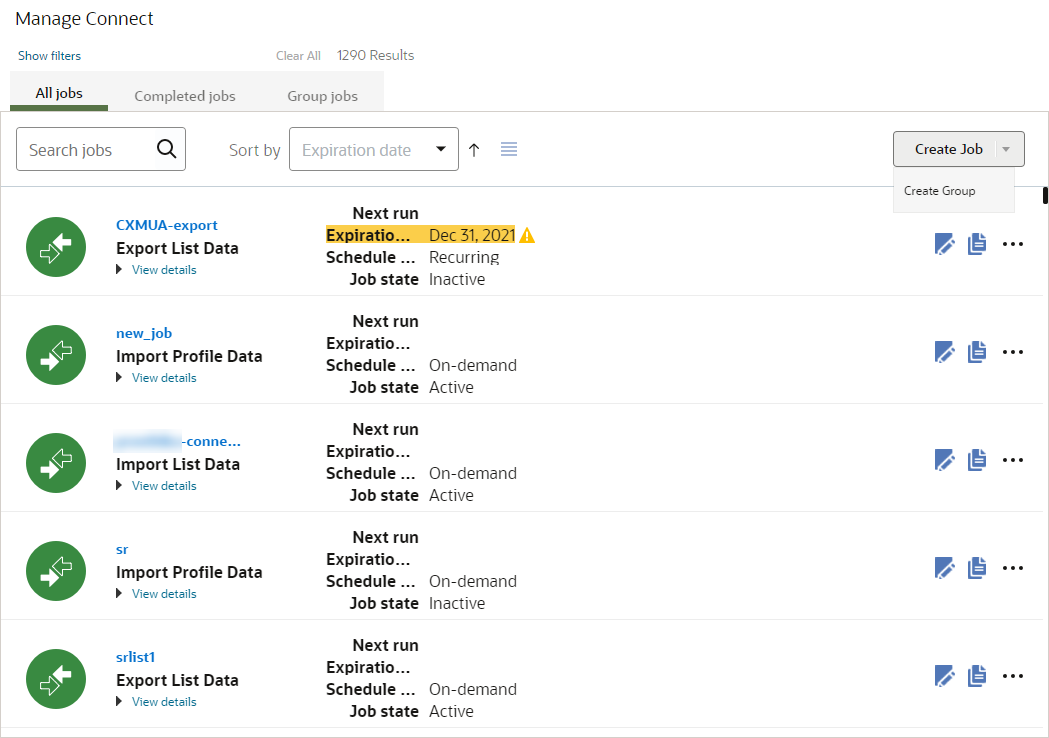
From the Manage Connect page, you can:
- View all jobs, completed jobs, and group jobs
- Change jobs
- Change a job expiration date
- Copy jobs
- Deactivate jobs
- Delete jobs
- Run jobs on demand
- Re-run an Export Feed Data job
- Stop active jobs
- View completed job logs
View all jobs, completed jobs, and group jobs
To view jobs:
- Click
 from any page in Responsys Express.
 -
Use the search to find the Connect option, or click Connect from the menu.
- Choose an action:
Use the tabs to access different lists of job: All jobs, Completed jobs, and Group jobs
- To filter jobs on the All Jobs tab, click Show Filters. You can filter by job type, group, and schedule. Selected filters appear above the list of jobs. The list of job type filters shows only the types where one or more jobs exist for those types.

- To sort the list of jobs on the All Jobs tab, choose a field to Sort by. You can sort by expiration date, name, type, date created on, who created by, previous run date, and next run date. Use the arrow to toggle between ascending and descending order.
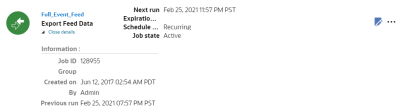
- To view the details of a job, click View Details. This includes the job ID, group, creation information, and previous run information.


Change jobs
To change a job:
- Click from any page in Responsys Express.
-
Use the search to find the Connect option, or click Connect from the menu.
- Click Edit
 next to the job or group you want to change.
 - Make your changes and save the job.
Change a job expiration date
Note: There is no longer a default expiration date for Connect jobs. When creating a Connect job, you will now have to either set an expiration date or set the job to never expire before you can save the job. Export Feed Data jobs, however, are set to never expire by default.
After an expiration date, Connect deletes the job. You can change the expiration date or you can set the job to never expire.

To change a job expiration date:
- Click from any page in Responsys Express.
-
Use the search to find the Connect option, or click Connect from the menu.
- Click Edit next to the job or group you want to change.
- In the Connect job page, click Edit
 next to the Expiration date.
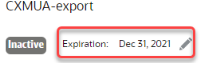
- Set the new expiration date and save your changes.

Copy jobs
You can copy inactive import or export jobs. The copied job will be inactive.
You cannot copy the following jobs:
- Export Event Data Feed jobs
- Group jobs
- Active jobs
To copy a job:
- Click from any page in Responsys Express.
-
Use the search to find the Connect option, or click Connect from the menu.
- Click Copy
 next to the job you want to copy.
 - Provide a name for the new job and click Save.
After you copy a job, it is inactive. You can activate it by opening the job and clicking Activate.
Deactivate jobs
You can deactivate an active Connect job or group.
To deactivate a job:
- Click from any page in Responsys Express.
-
Use the search to find the Connect option, or click Connect from the menu.
- Click Edit next to the job you want to deactivate.
- In the Connect job page, click Deactivate.
Delete jobs
You can delete a job at any time. When you delete a job, Connect does not delete any loaded records that were previously successfully processed.
To delete a job:
- Click from any page in Responsys Express.
-
Use the search to find the Connect option, or click Connect from the menu.
- Click More Options
 next to the job you want to delete.
 - Click Delete.
To delete multiple jobs:
- Hold down the Shift key and click on all the jobs you want to delete.
The jobs you've selected will be highlighted in blue.
- Click Delete.
Run jobs on demand
If a job is not scheduled, you can run it on demand.
Note: You cannot run the Export Feed Data job on demand, but you can re-run an Export Feed Data job.
To run a job immediately:
- Click from any page in Responsys Express.
-
Use the search to find the Connect option, or click Connect from the menu.
- Click More Options next to the job you want to run.
- Click Run.
Re-run an Export Feed Data job
Important: To enable or disable the Reexport Data Feeds feature, contact Oracle Support.
You can re-run an Export Feed Data job for event data within the past 30 days. You may need to do this if an Export Feed Data job has not run due to network issues, technical issues, processing issues, and so on.
To re-run an Export Feed Data job:
- Click from any page in Responsys Express.
-
Use the search to find the Connect option, or click Connect from the menu.
- Click More Options next to an Export Feed Data job.
- In the Recreate Feeds pop-up, enter a date range or an Execution ID to generate feed files. The date range must be within the last 30 days. Date range will be converted to server time zone. Execution ID must be for jobs run within the last 30 days.

- Click Run.
Stop active jobs
You can stop a job that is actively running.
To stop an active job:
- Click from any page in Responsys Express.
-
Use the search to find the Connect option, or click Connect from the menu.
- Click More Options next to the job you want to run.
- Click Stop.
View completed job logs
Completed jobs appear on the Completed Jobs tab. You can quickly view the run status, start time, and duration. To view more details about the completed run, you can open the job's log. The log provides details about the run including any error messages.
To view a completed job's log:
- Click from any page in Responsys Express.
-
Use the search to find the Connect option, or click Connect from the menu.
- Click the Completed Jobs tab.
- Locate the job run you want to view.
- Click the job name to view the log.