Editing Integration Manager Shortcuts
You can edit Integration Manager shortcuts at any time, to change your OpenAir sign-in details (account type, company ID, user ID, or password), or to modify the configuration as your integration requirements change.
To edit an Integration Manager shortcut, you must open the shortcut using the same version of Integration Manager as the shortcut bundle instance. To open a shortcut for edit, do either of the following:
-
Launch the Integration Manager shortcut bundle instance — Locate the shortcut bundle folder corresponding to the shortcut you want to edit and double-click the EXE file
C:\im_shortcuts\<shortcutFilename>_oabundle\OpenAirManager.exe, where<shortcutFilename>is the name you entered when creating the shortcut. -
Launch the main Integration Manager application instance and upgrade the shortcut to the same version, before you can open the shortcut for edit. See Upgrading Integration Manager Shortcuts.
Do not edit a shortcut in a different version of Integration Manager than the one used with the shortcut. If you do so, Integration Manager prompts you to exit the application and then to launch the version stored in C:\im_shortcuts\<shortcutFilename>_oabundle\OpenAirManager.exe.
To edit an Integration Manager shortcut:
-
Launch the Integration Manager shortcut bundle instance —
C:\im_shortcuts\<shortcutFilename>_oabundle\OpenAirManager.exe, where<shortcutFilename>is the name you entered when creating the shortcut.Note:You cannot have two different instances of Integration Manager running at the same time. To launch either the main application instance or the shortcut bundle instance, you must exit the other first.
-
In the main Integration Manager window, go to File > Open Shortcut.
A File Selector window appears.
-
Locate and select the shortcut you would like to edit, then click Open.
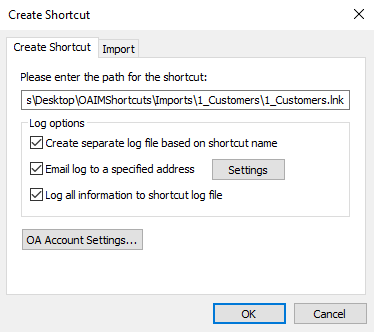
The Create Shortcut window appears.
-
To change your OpenAir password or any other sign-in details, click OA Account Settings.
The Account Settings window appears.
Enter your new password or any other sign-in details. See also Connecting Integration Manager with your OpenAir Account.
-
Change other shortcut settings as required. For more information about the shortcut configuration settings, see Creating an Export or Import Shortcut.
-
Click OK.
A confirmation message appears.
-
Click OK.
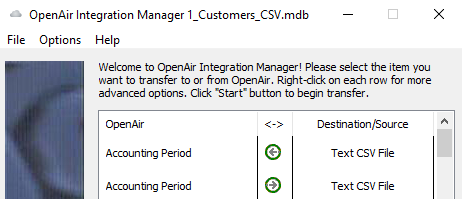
The OpenAir Integration Manager window appears with the name of the shortcut in the title.
-
To change the character encoding scheme of the CSV file you are importing information from or exporting information to, use the following steps:
-
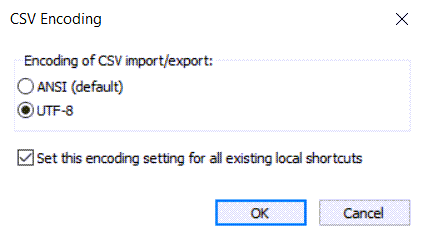
Go to Options > CSV Encoding
The CSV Encoding window appears.
-
Choose ANSI or UTF-8.
-
Click OK.
Important:Review the following guidelines:
-
The files you provide for import must be encoded using the character encoding scheme selected in Integration Manager. For example, if CSV Encoding is set to UTF-8, CSV files you provide for import must be UTF-8 encoded — If the CSV files is not UTF-8 encoded, data may be corrupted during import.
-
The CSV Encoding menu option is available only if you the shortcut uses a version of Integration Manager 6.6 or later version.
-
Previous versions of Integration Manager use ANSI encoding exclusively. UTF-8 is not supported in Integration Manager 6.5.3 or earlier version.
-
ANSI (codepage 1252, Western Europe) is the default character encoding scheme for CSV imports and exports to ensure backward compatibility with existing infrastructures.
-
When editing a shortcut, you can only change the CSV character encoding scheme for this shortcut. The Set this encoding setting for all existing local shortcuts box has no effect. To update all your existing Integration Manager shortcuts at the same time, change the CSV encoding option in the main Integration Manager application instance, and check the Set this encoding setting for all existing local shortcuts box box. See CSV Character Encoding.
-
-
For all other changes, use the following steps:
-
Locate the row corresponding to the record type and the direction corresponding to your shortcut from the table listing the record types available for import
 from and export
  to a CSV file.Important:
Be sure to select the same record type and direction that the shortcut was created for.
-
Follow the usual steps to change any of the field mapping, filtering, formatting, and accounting settings. For more information, see the following topics:
-
Click Exit to save your changes and exit the application.
-