Introduction
This tutorial shows you how to plan for capital assets using capital projects in Cloud EPM Planning Capital Projects. The sections build on each other and should be completed sequentially.
Background
Module-based Planning provides complete, planning and budgeting solutions for Financials, Workforce, Capital, Projects, and Strategic Modeling. They include built-in best practice predefined content including forms, calculations, dashboards, drivers, and key performance indicators (KPIs).
With Capital, you can manage, prioritize, and plan for capital expenses. Capital helps decision-makers and front-line managers communicate throughout the request, justification, review, and approval process.
With Projects, you can bridge the gap between project planning systems and the financial planning process. You can assess the impact organizational projects and initiatives have on overall corporate resources and ensure they align with short and long term financial targets.
With Capital and Projects, you can:
- Create Capital Projects that manage capital investments; used by companies that invest in capital assets. For example, a company building a new facility can manage costs, labor, equipment, and so on to manage capitalization of assets.
- Create single or multiple assets from projects.
- Manage detailed cost in Projects and asset cost pushed to Capital.
- Assign equipment to Projects from Capital assets.
- Review Capital Work In Progress values from the project.
You can plan for Capital Assets with Capital Projects using one of the following options:
- Create a Capital Project, load costs and Expenses in Projects, and plan for asset capitalization in Projects.
- Create a Capital Project, assign and manage assets for the project in Capital.
In this tutorial, you perform Capital Asset Planning with Capital Projects using both options.
Prerequisites
Cloud EPM Hands-on Tutorials may require you to import a snapshot into your Cloud EPM Enterprise Service instance. Before you can import a tutorial snapshot, you must request another Cloud EPM Enterprise Service instance or remove your current application and business process. The tutorial snapshot will not import over your existing application or business process, nor will it automatically replace or restore the application or business process you are currently working with.
Before starting this tutorial, you must:
- Have Service Administrator access to a Cloud EPM Enterprise Service instance. The instance should not have a business process created.
- If you haven't already, register for a free Oracle Cloud Customer Connect account so you can access the required files.
- Download the latest EPBCS Sample Application LCM snapshot from this idea page.
- Upload and import the latest EPBCS Sample Application LCM snapshot into your Planning instance.
- Download this file (sample_doc.docx) and save it to a local folder.
Note:
If you run into migration errors importing the snapshot, re-run the migration excluding the HSS-Shared Services component, as well as the Security and User Preferences artifacts in the Core component. For more information on uploading and importing snapshots, refer to the Administering Migration for Oracle Enterprise Performance Management Cloud documentation.Creating Capital Projects
To plan for Capital Assets with Capital Projects, you create two (2) Capital Projects to facilitate the two (2) options.
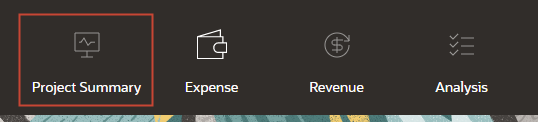
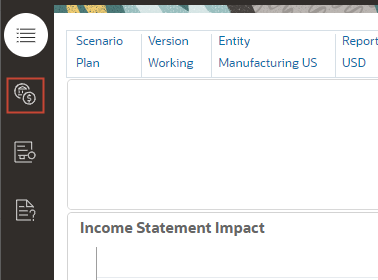
- From the home page, click Projects, and then Project Summary.
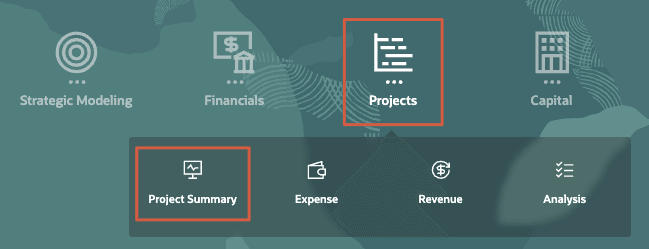
The Contracts Projects Overview dashboard is displayed.
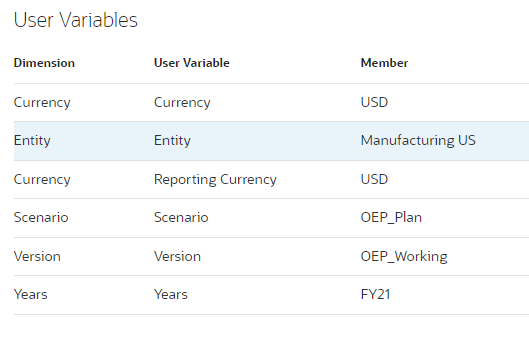
- In the POV, set Entity to Manufacturing US.
The dashboard displays data for the updated point-of-view.
- From the vertical tabs on the left, click
 (Capital).
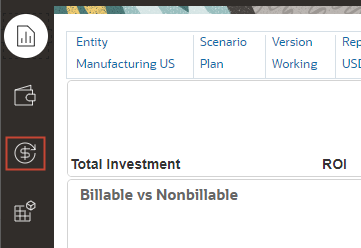
The Capital Projects Overview dashboard is displayed.
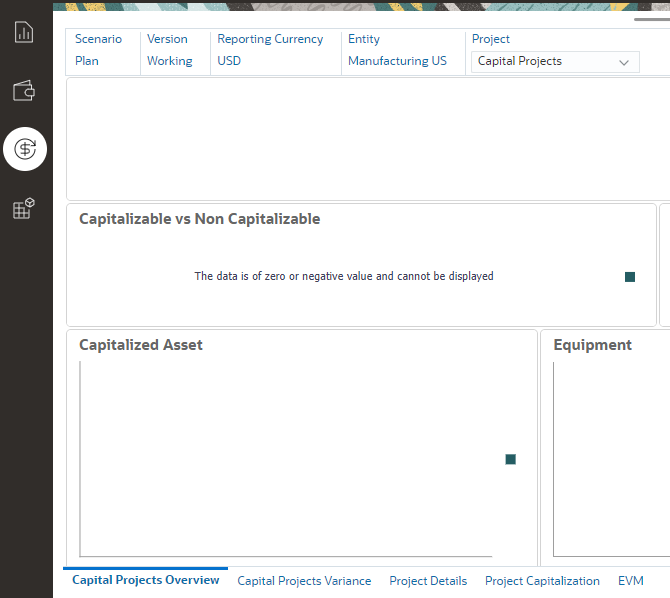
- In the POV, for Project, verify that Capital Projects is selected.
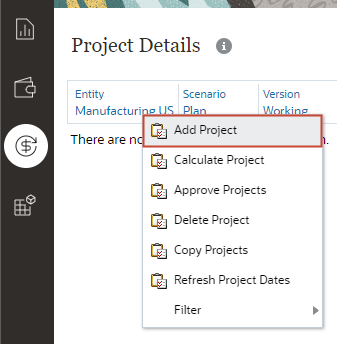
- From the horizontal tabs at the bottom, click Project Details.
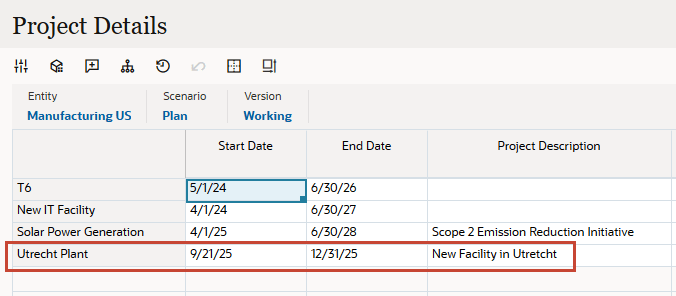
Project Details lists existing capital projects.
- In the data grid, right-click the top left empty header cell to display menu options, and then select Add Project.
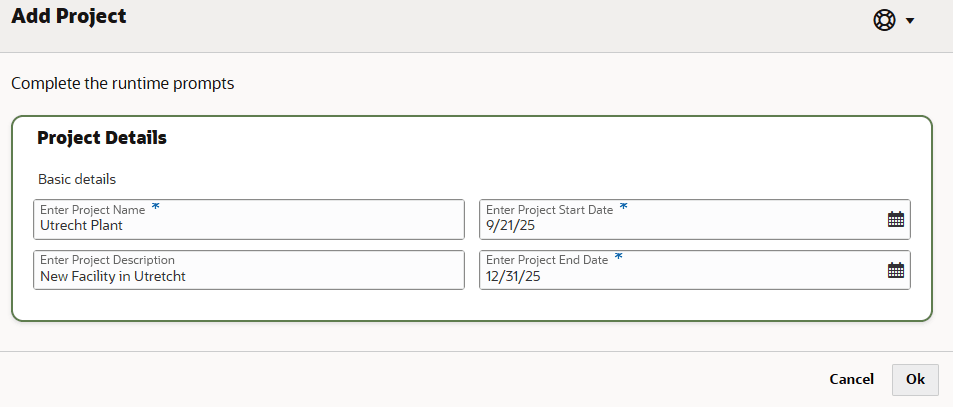
- In Add Project, enter the following details:
Property Value Enter Project Name Utrecht Plant Enter Project Description New Facility in Utretcht Enter Project Start Date 9/21/25 Enter Project End Date 12/31/25 - Verify your entries and click Ok.
- At the information message, click OK.
The project is listed on the form.
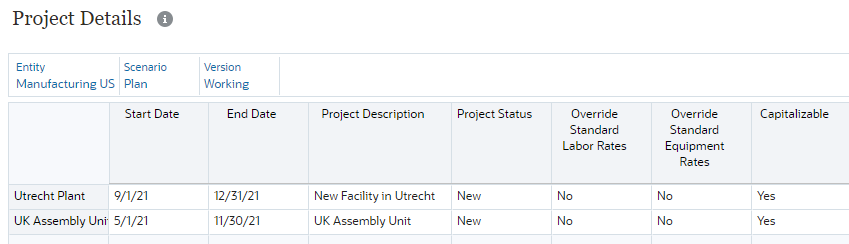
- Add another project. In the data grid, right-click the top left empty header cell to display menu options, and then select Add Project.
- On the next row, right-click and select Add Project.
- In Add Project, enter the following details:
Property Value Enter Project Name UK Assembly Unit Enter Project Description UK Assembly Unit Enter Project Start Date 5/1/25 Enter Project End Date 11/30/25 - Verify your entries and click Ok.
- At the information message, click OK.
The added project is listed on the form.
Capital Asset Planning in Projects
In this section, you plan for capital assets in Projects.
Entering Project Expenses
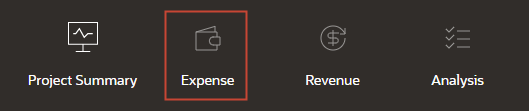
- From the navigation options on the top of the page, click Expense.
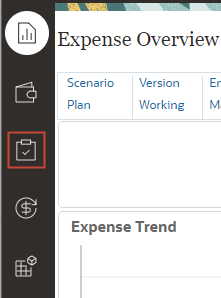
- In Expense Overview, for Project in the POV, select Utrecht Plant.

- From the vertical tabs on the left, click
 (Direct Input).
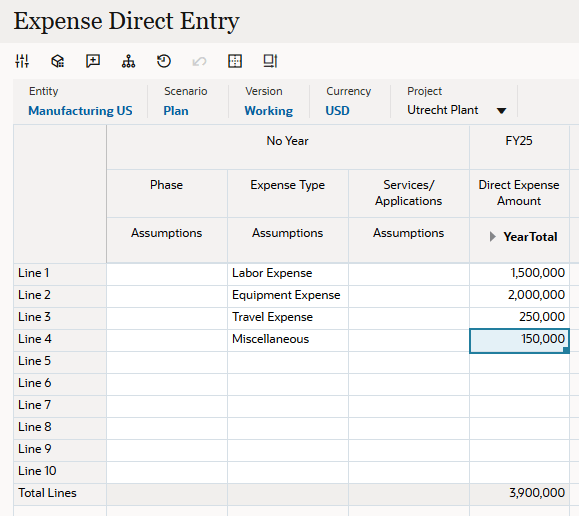
 - In Expense Direct Entry, for Project in the POV, verify that Utrecht Plant is selected.
- In the grid area, select or enter the following assumptions and expense amounts:
Expense Type
AssumptionsDirect Expense Amount
Year TotalLine 1 Labor Expense 1,500,000 Line 2 Equipment Expense 2,000,000 Line 3 Travel Expense 250,000 Line 4 Miscellaneous Expense 150,000 - Verify your entries and click Save.
- At the information message, click OK.
Data is saved to the application.
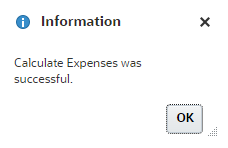
- In the data grid, right-click the top left empty header cell to display menu options, and then select Calculate Expenses.
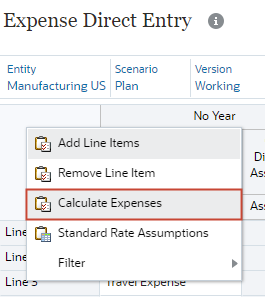
The calculation takes a moment to complete.
- At the information message, click OK.
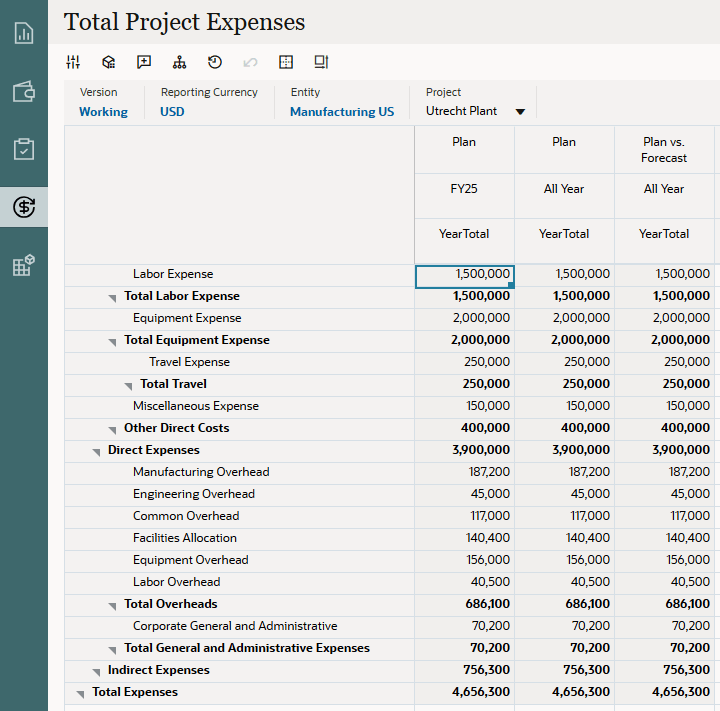
- From the vertical tabs on the left, click (Review Project Expense).
- From the horizontal tabs at the bottom, click Project Expense.
- Review the expense summary for the Utrecht Plant project.
Capitalizing Expenses
For capital projects, you can allocate project expenses either partially or in full to one or more assets.
The capitalized assets are then pushed from Projects to Capital.
- From the navigation options on the top of the page, click Project Summary.
- From the vertical tabs on the left, click (Capital).
- From the horizontal tabs at the bottom, click Project Capitalization.
- In the POV, verify or set Project to Utrecht Plant.

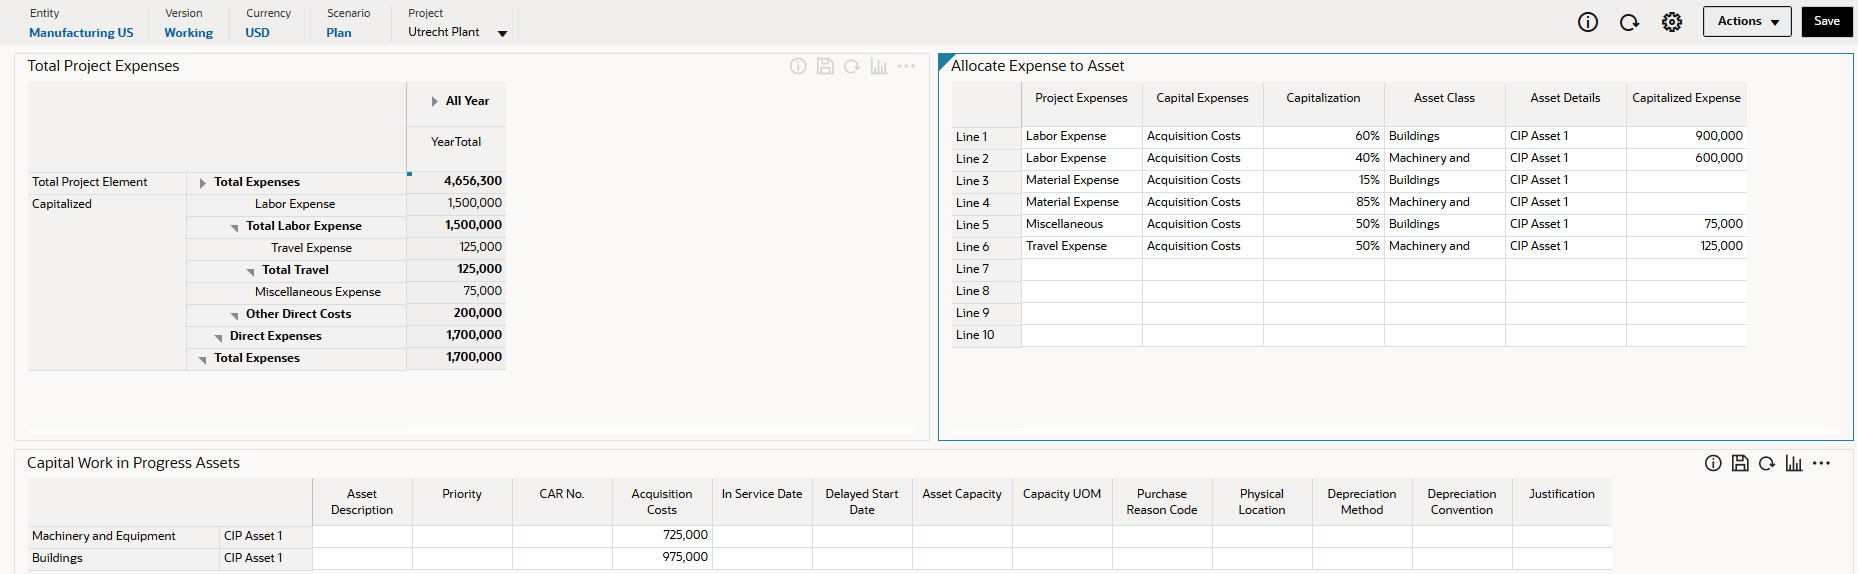
- Review the Project Capitalization dashboard.
- In Total Project Expenses, expand members to display detailed expenses.
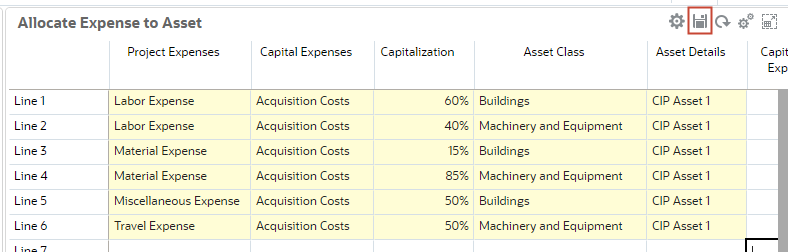
- In Allocate Expense to Asset, notice that the form is editable. You can select a project expense you want to capitalize, and then select the corresponding capital expense account. Also select the asset class where you plan the expense to be capitalized.
- The Capital Work in Progress Assets form is updated with the capitalized projects. You can add details for each capitalized asset and specify the planned in service date, which drives the depreciation and other expense calculations.
- In Allocate Expense to Asset, select or enter the following details:
Project Expenses Capital Expenses Capitalization Asset Class Asset Details Line 1 Labor Expense Acquisition Costs 60% Buildings CIP Asset 1 Line 2 Labor Expense Acquisition Costs 40% Machinery and Equipment CIP Asset 1 Line 3 Material Expense Acquisition Costs 15% Buildings CIP Asset 1 Line 4 Material Expense Acquisition Costs 85% Machinery and Equipment CIP Asset 1 Line 5 Miscellaneous Expense Acquisition Costs 50% Buildings CIP Asset 1 Line 6 Travel Expense Acquisition Costs 50% Machinery and Equipment CIP Asset 1
In this step, you allocate project expenses, partially or fully, to multiple asset classes. For example, labor expense is distributed between two asset classes to fully allocate the acquisition costs: 60% for Buildings, and 40% for Machinery and Equipment. In the case of travel expenses, a partial allocation of 50% is set for Machinery and Equipment.
- Verify your selections, and then click the form's Save (
 ) icon.
- At the information message, click OK.
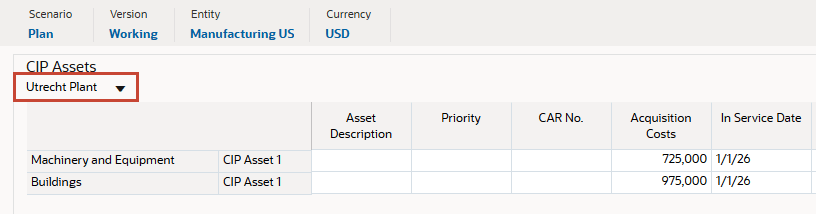
After saving, the Capital Work in Progress Assets form now includes the two (2) new assets: Machinery and Equipment, and Buildings. The Acquisition Costs are based on the allocated amount to these assets.
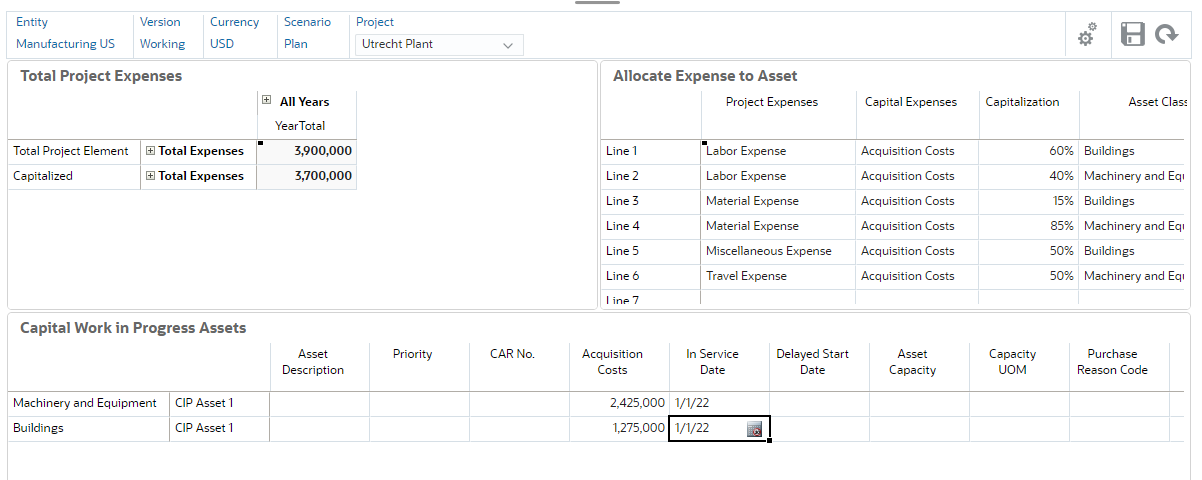
- For both assets in the Capital Work in Progress Assets form, enter a planned In Service Date:
Asset In Service Date Machinery and Equipment 1/1/26 Buildings 1/1/26
Data on the Capital Work in Progress Assets form is from the Capital module. The In Service Date refers to when an asset is first placed in use, and included in capital asset calculations. The In Service Date also determines the point when an asset is ready for use and depreciation on the asset begins.
- Verify your selections, and then click the form's Save () icon.

- At the information message, click OK.
- On the upper-right of the dashboard, click Save.
- At the information message, click OK.
The updated data in the forms is saved.
- Return to the home page. On the upper-right, click
 (Home).
Calculating Depreciation
- From the home page, click Capital, and then Investments.
- From the vertical tabs on the left, click
 (New Asset Planning).
- From the horizontal tabs at the bottom, click New Assets from Projects.
- In CIP Assets, verify that Utrecht Plant is selected from the dropdown.
- In the CIP Assets grid, review the two (2) Capital in Progress assets displayed on the form.
- In the grid, right-click Machinery and Equipment, then select Calculate Depreciation.
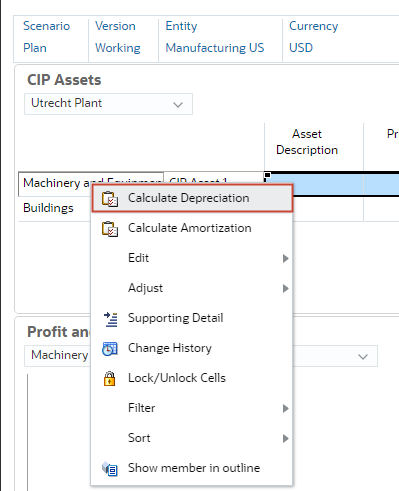
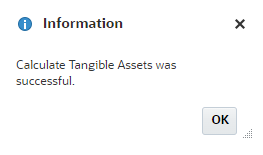
- At the information message, click OK.
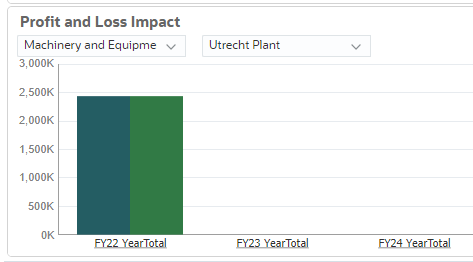
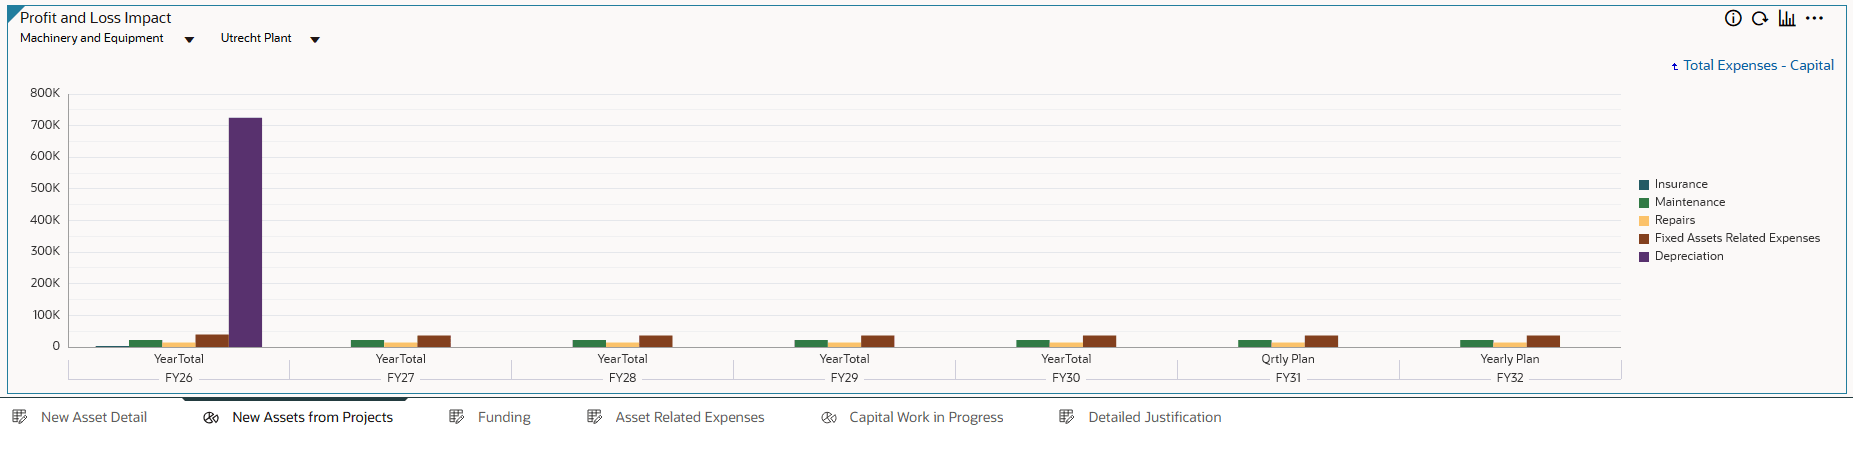
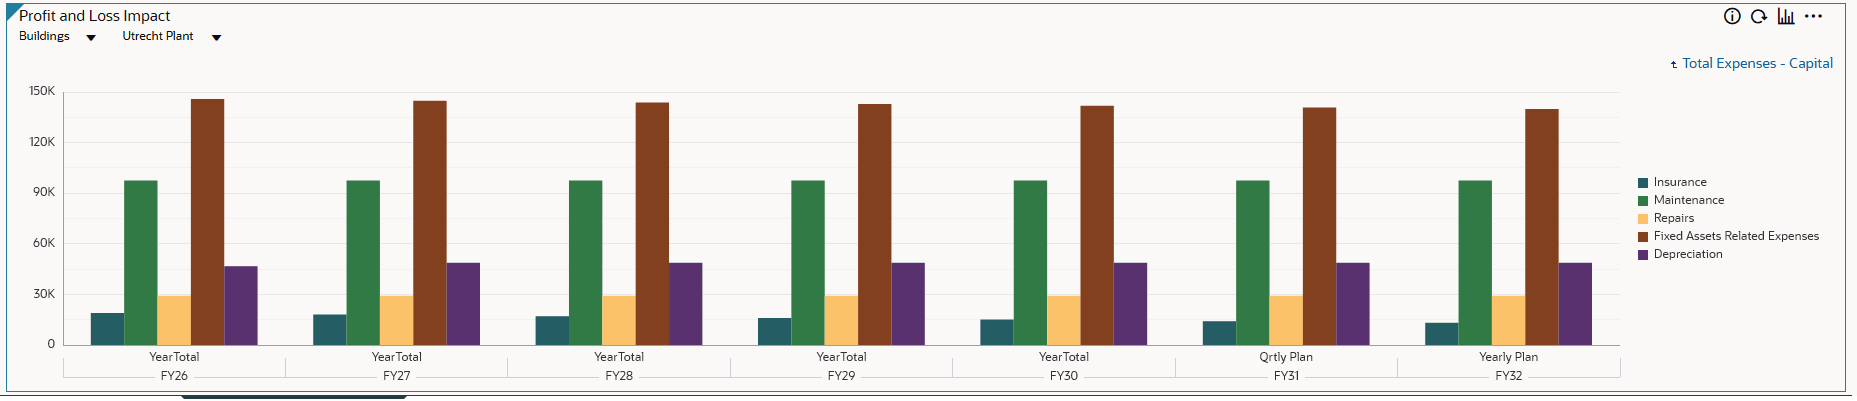
- In the Profit and Loss Impact section of the page, select Machinery and Equipment and Utrecht Plant.
- In the chart's legend, click Total Expenses - Capital.
You can view the profit and loss impact of depreciation and other expenses from the selected asset class and project in the form's chart.
- After reviewing the Profit and Loss Impact chart, select the following from its dropdowns:
- Buildings as the Asset Class
- Utrecht Plant as the Project
- In the CIP Assets grid, right-click Buildings, then select Calculate Depreciation.
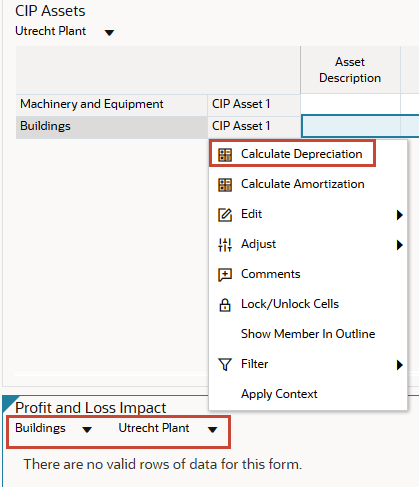
- At the information message, click OK.
- In the legend of the Profit and Loss chart, click Total Expenses - Capital.
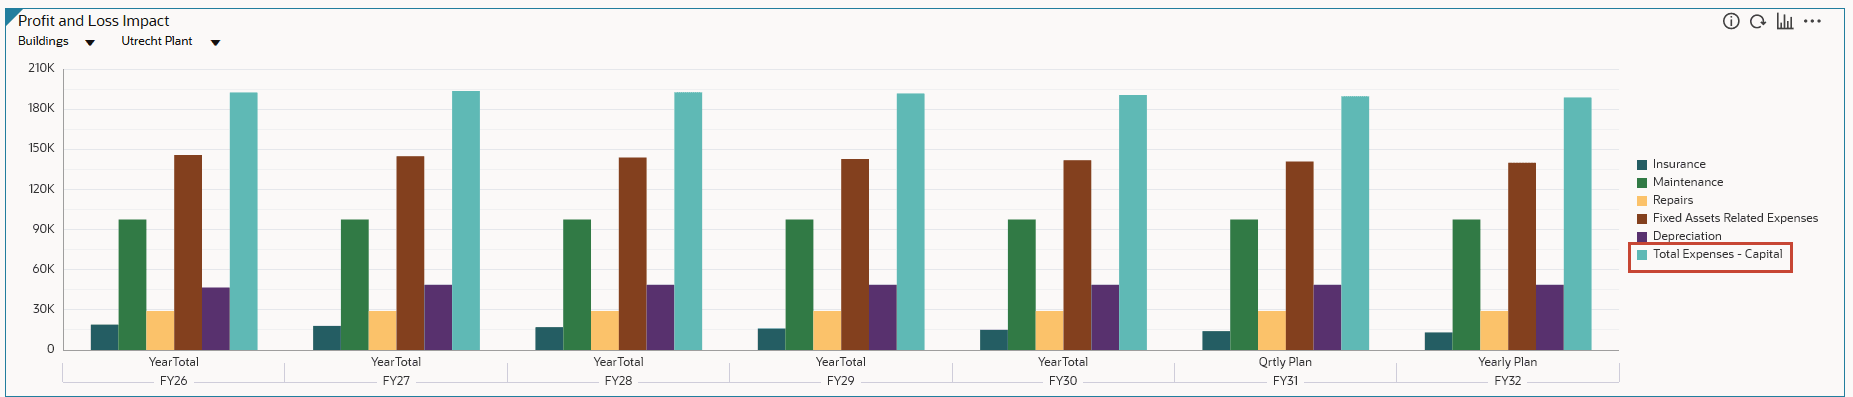
You can review the profit and loss impact of depreciation and other expenses from the selected asset class and project in the Profit and Loss Impact dashboard.
- From the horizontal tabs at the bottom, click Capital Work in Progress.
- In Capital Work in Progress, review the dashboard for information on capitalized projects.
You can click the member names in the chart's legend to drill down to more detailed data.

Capital Asset Planning in Capital
Adding Assets to a Capital Project
- From the horizontal tabs at the bottom, click New Asset Detail.
- In the POV, select the following:
- Machinery and Equipment as the Asset Class
- UK Assembly Unit as the Project

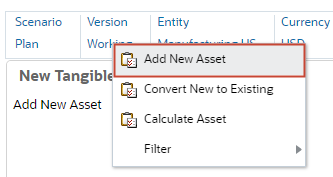
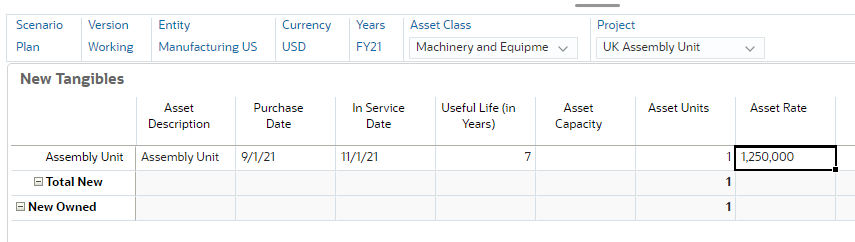
- In the grid's whitespace, right-click and select Add New Asset.
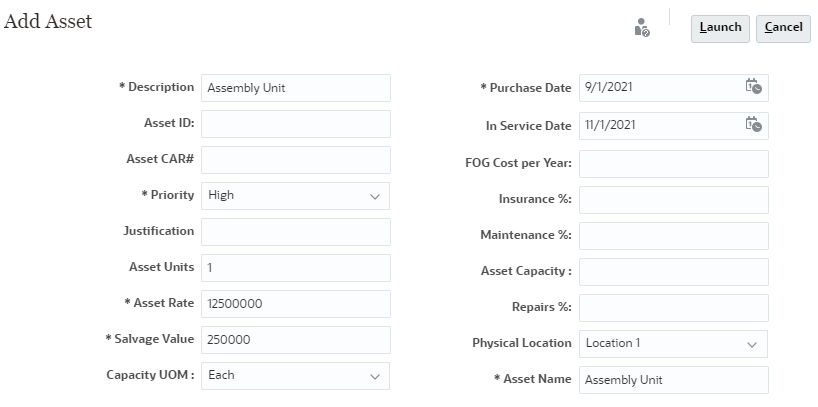
- In Add New Asset, select or enter the following asset details:
Detail Value Description Assembly Unit Priority High Asset Units 1 Asset Rate 12500000 Salvage Value 250000 Capacity UOM Each Purchase Date 9/1/2025 In Service Date 11/1/2025 Physical Location Location 1 Asset Name Assembly Unit - Verify your selections and click OK.
- At the information message, click OK.
The asset is displayed on the form.

You can modify asset details directly on the form.
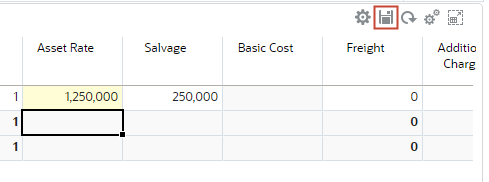
- For the Assembly Unit, modify the Asset Rate. Set the value to 1,250,000 and click the form's Save () icon.
- At the information message, click OK.
- On the upper-right area of the dashboard, click Save.
- At the information message, click OK.
The updated data is saved.
Calculating Asset Costs
- In the grid, right-click Assembly Unit and select Calculate Asset.
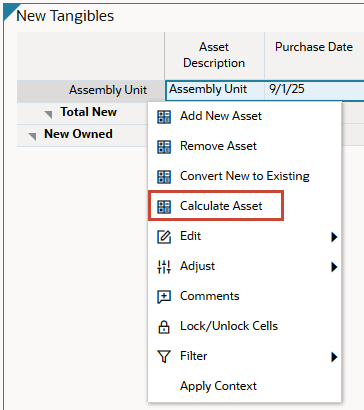
- At the information message, click OK.
The Profit and Loss Impact and Cash Flow Impact charts are updated on the dashboard.
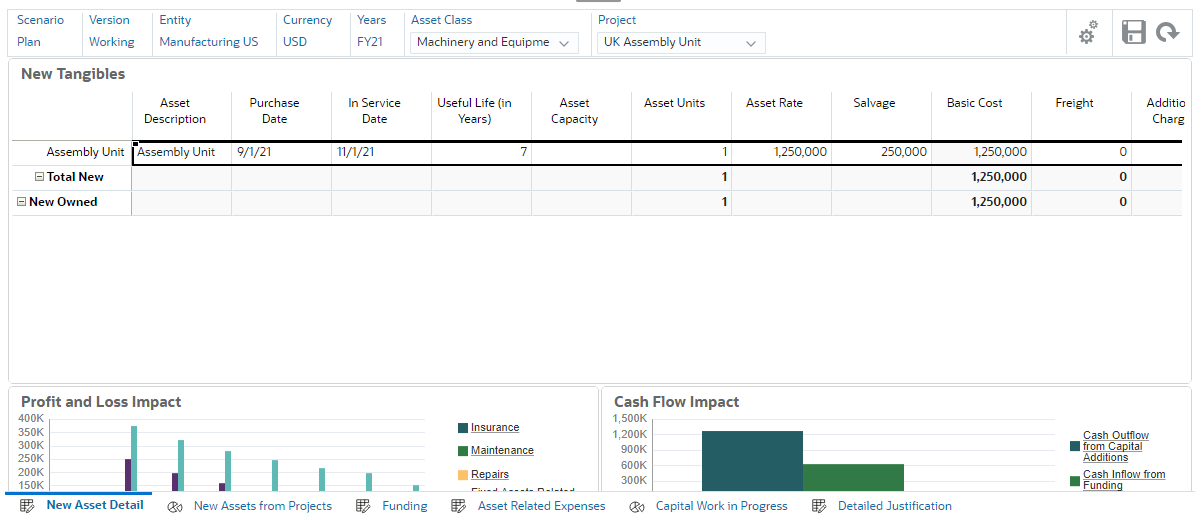
Running Calculate Asset runs calculations for asset cost, depreciation, cash flow, and other asset-related expenses based on the assumptions. You can drill-down to review how the asset expenses affect multiple years or how it impacts cash flow.
Adding Justification and Attachments
- From the horizontal tabs at the bottom, click Detailed Justification.
- Set the POV to the following:

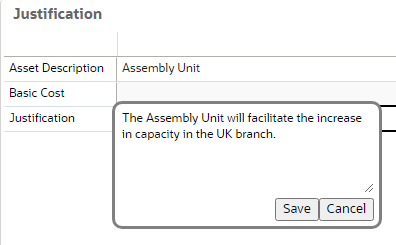
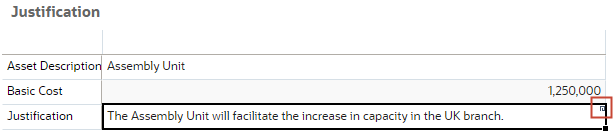
- In Justification, click in the cell next to the Justification field.
A dialog box displays.
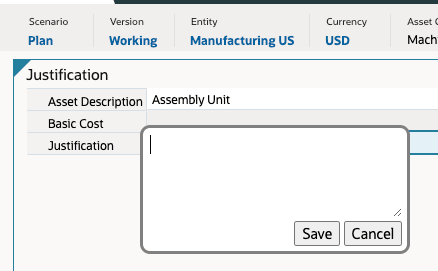
- In the Justification dialog, enter The Assembly Unit will facilitate the increase in capacity in the UK branch. and click Save.
- On the upper-right area of the dashboard, click Save.
- At the information message, click OK.
- Right-click the data entry cell for Justification and select Comments.
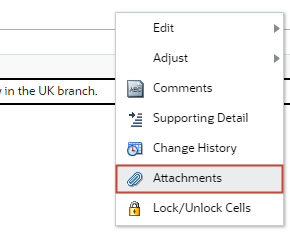
- In the dialog click
 (Add Attachments).
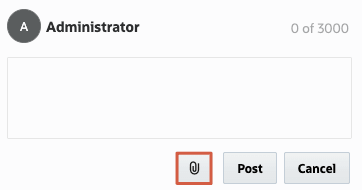
- Navigate to where you saved sample_doc.docx locally, then select and open it.
- In the dialog, click Post.
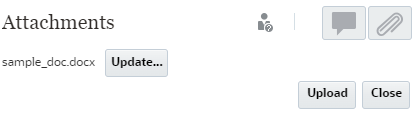
- When the file is listed in the dialog, click Cancel.
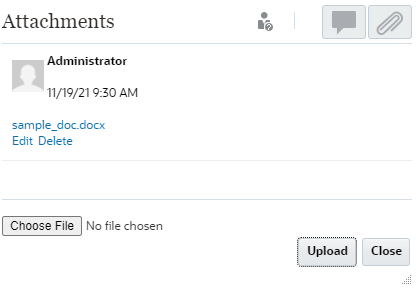
A visual cue (triangle) is displayed on the upper-right to identify that the cell includes a comment or attachment.
- On the upper-right area of the dashboard, click Save.
- At the information message, click OK.
Analyzing Capital Expenditure
- From the navigation options on the top of the page, click Analysis.

- In Capital Expenses Summary, verify the POV and review the Capital Expenditure in the dashboard.
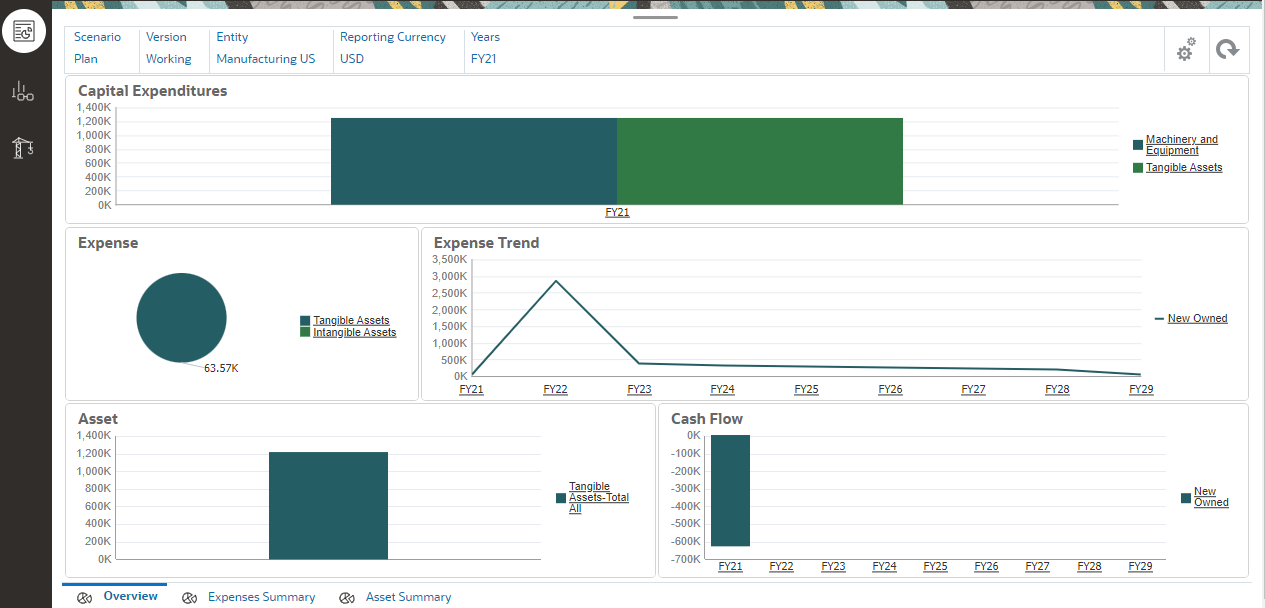
- Browse through the Expenses Summary and Asset Summary horizontal tabs. Change the POV as necessary to review and update the contents of the dashboard.
Related Links
More Learning Resources
Explore other labs on docs.oracle.com/learn or access more free learning content on the Oracle Learning YouTube channel. Additionally, visit Oracle University to view training resources available.
For product documentation, visit Oracle Help Center.
Capital Asset Planning with Capital Projects
F50627-04
September 2025