Before you Begin
This 60-minute tutorial shows you how to configure and enable features in Capital. The sections build on each other and should be completed sequentially.
Background
Planning provides five complete, planning and budgeting solutions for Financials, Workforce, Capital, Projects, and Strategic Modeling. They include built-in best practice predefined content including forms, calculations, dashboards, drivers, and key performance indicators (KPIs).
In this tutorial, you configure and enable features in Capital.
With Capital, you can manage, prioritize, and plan for capital expenses. Capital helps decision-makers and front-line managers communicate throughout the request, justification, review, and approval process.
You can perform the following tasks in Capital:
- Perform driver-based calculations to assess the impact of changes and additions on profit, cash flow, and funding
- Request and approve capital expense plans
- Anticipate the impact to financial statement given transfers, impairments, retirements, and replacement
Before you can start planning capital assets, you must enable Capital features. Enable only the features you want to use. You can incrementally enable components to best meet your capital planning needs; however you must enable all the dimensions you want to include in the application the first time you enable features.
Caution:
After you enable a feature, you can’t later disable it.What Do You Need?
An EPM Cloud Service instance allows you to deploy and use one of the supported business processes. To deploy another business process, you must request another EPM Enterprise Cloud Service instance or remove the current business process.
- Have Service Administrator access to an EPM Enterprise Cloud Service instance. The instance should not have a business process created.
- Upload and import this snapshot into your instance.
- Download this file (CPX_Entity.csv) to a local folder.
Note:
If you run into migration errors importing the snapshot, re-run the migration excluding the HSS-Shared Services component, as well as the Security and User Preferences artifacts in the Core component. For more information on uploading and importing snapshots, refer to the Administering Migration for Oracle Enterprise Performance Management Cloud documentation.Enabling Capital
In this section, you configure and enable features for Capital.
Navigating to the Configure Page for Capital
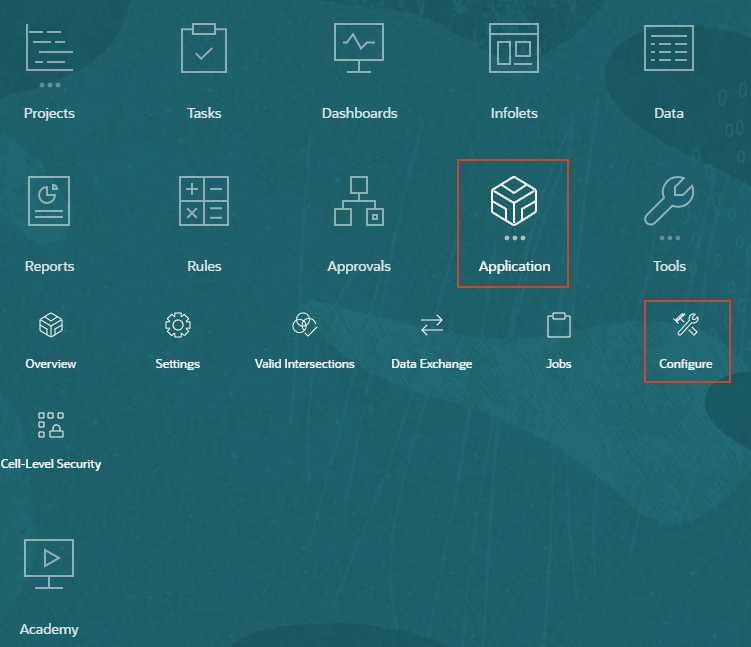
- On the home page, click Application, and then Configure.
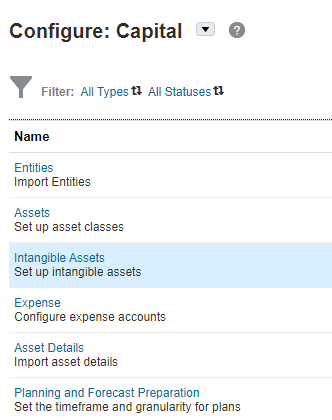
- On the Configure page, select Capital from the dropdown list.
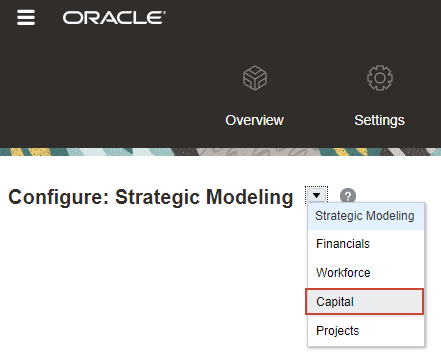
The Configure page for Capital is displayed.
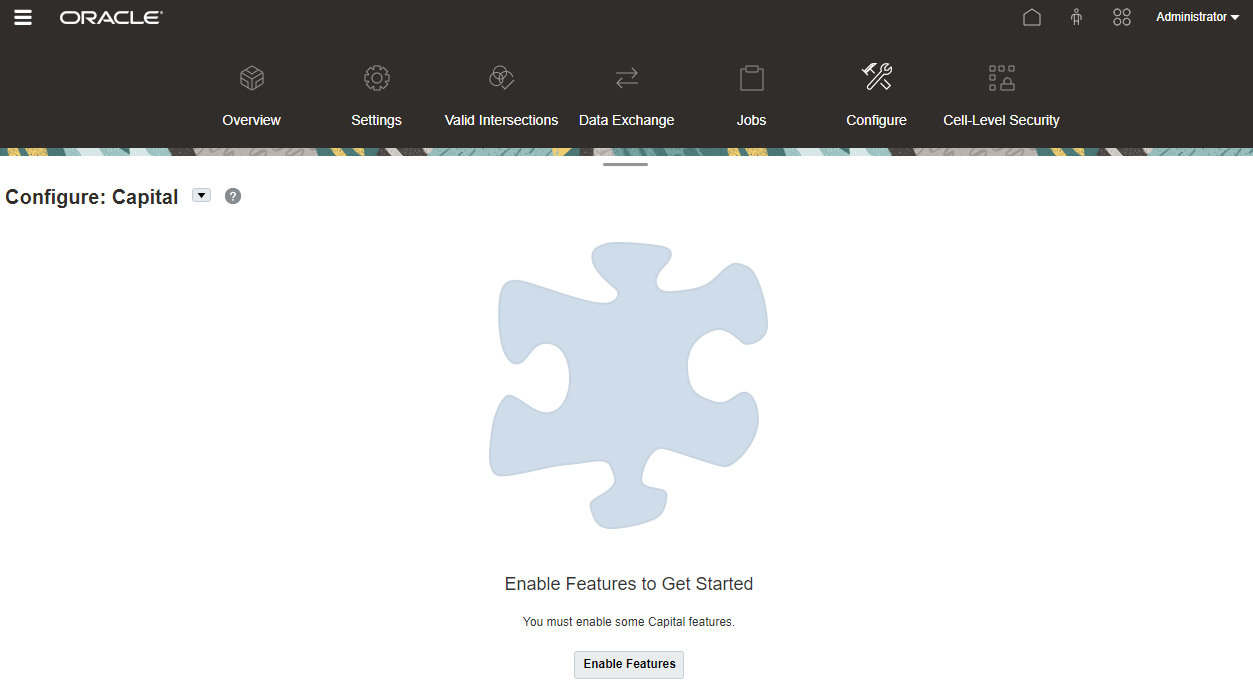
Selecting Features and Components
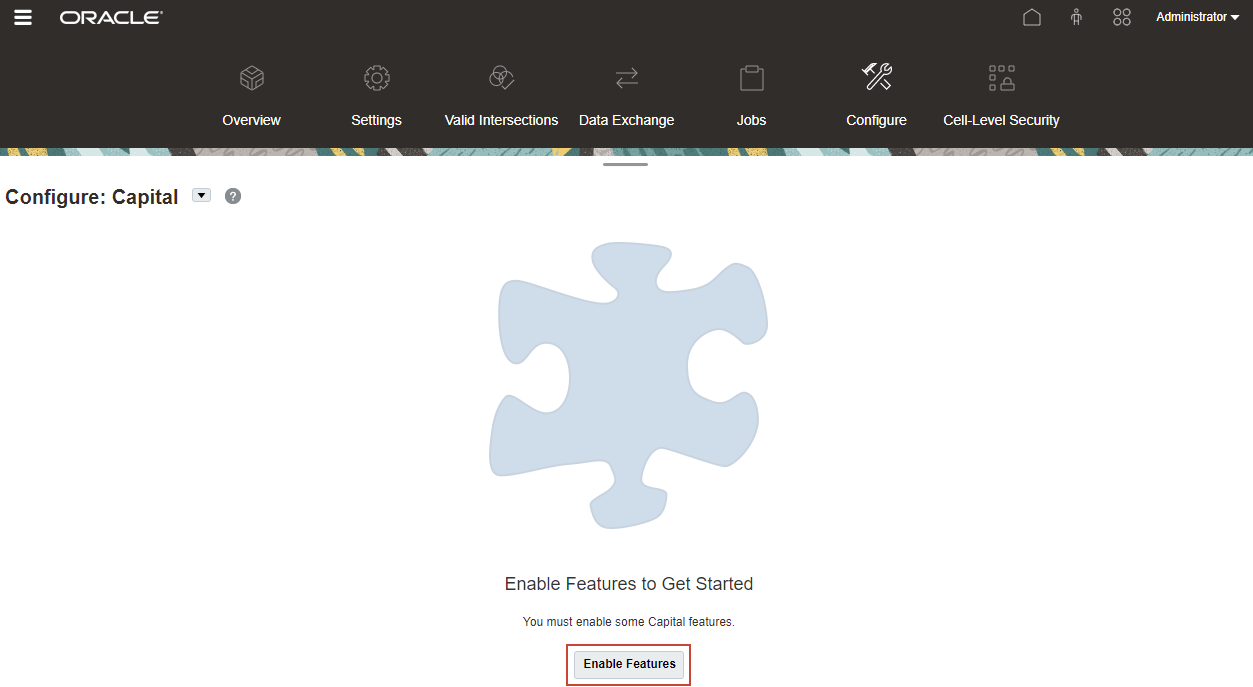
- On the Configure page for Capital, click Enable Features.
- In Enable Features, select New Capital Investment.
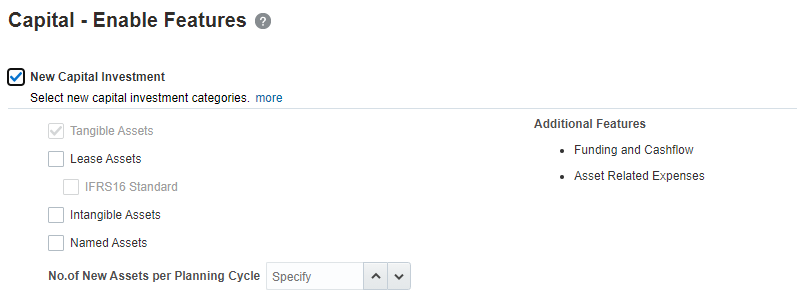
Enabling New Capital Investment allows you to plan for tangible assets, lease assets, and intangible assets. You can also add the names of assets to plan at a detailed level.
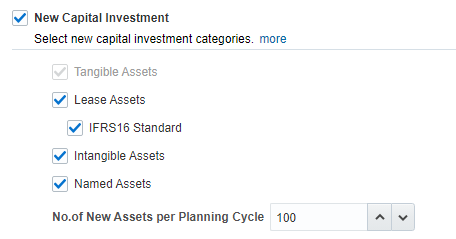
- Under New Capital Investment, select the following components:
- Lease Assets
- Intangible Assets
- Named Assets
- Under Lease Assets, select IFRS16 Standard.
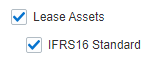
If you are performing lease asset planning, you can incrementally enable IFRS16 support by selecting IFRS16 Standard under Lease Assets.
Tip:
To learn more about how IFRS Standard features are implemented in Capital, see the Enabling New Capital Investment section of the Administering Planning Module documentation. - Under Named Assets, set the number of New Assets per Planning Cycle to 100.
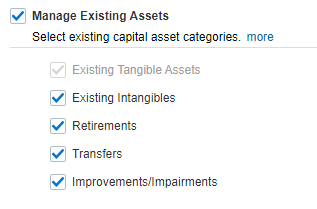
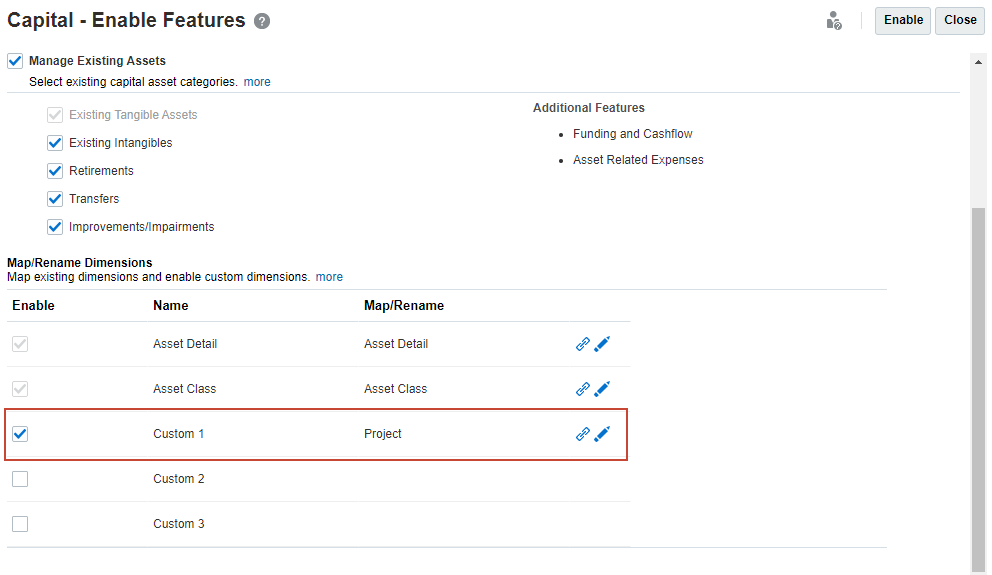
- Select Manage Existing Assets.
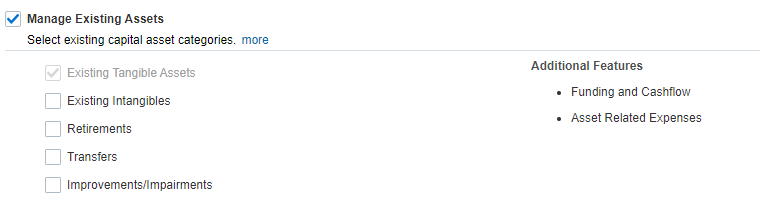
Enabling Manage Existing Assets allow you to plan for asset-related expenses, retirement, transfers, and improvements. You can also plan for existing intangible assets.
-
Select the following components:
- Existing Intangibles
- Retirements
- Transfers
- Improvements/Impairments
Mapping Existing and Custom Dimensions
- In Map/Rename Dimensions, review the preselected dimensions for Capital.
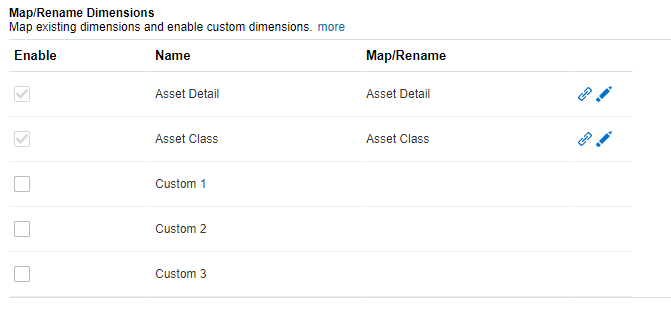
- Select Custom 1.
Once selected, two options are enabled:
 (Rename Target Dimension) and
  (Clear Target Dimension).
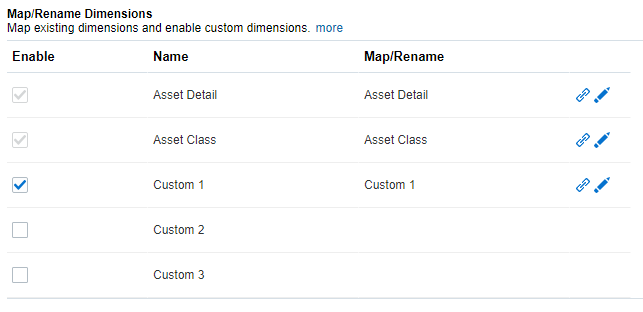
- For Custom 1, click (Rename Target Dimension).
- In the Map/Rename Dimension dialog, select Project from the Map from existing dimensions list.
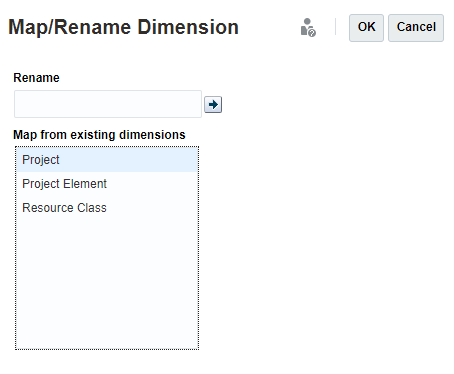
- Click OK.
Custom 1 is mapped to the Project dimension.
- In Enable Features, click Enable.
- At the confirmation message, click Yes.
The enable process takes a moment to complete.

- At the information message, click OK.

- Sign out and sign back into Planning.
Adding Asset Class Members
You can add or import tangible asset class members. You can select from the provided list of asset class members or add your own custom asset class.
In this section, you add tangible asset class members by selecting from a predefined list.
- On the home page, click Application, and then Configure.
- On the Configure page, select Capital from the dropdown list.
The Configure page for Capital displays enabled features. You can now start configuring and adding components.

- Click Assets.
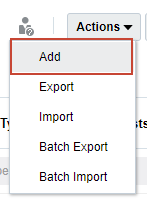
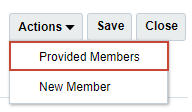
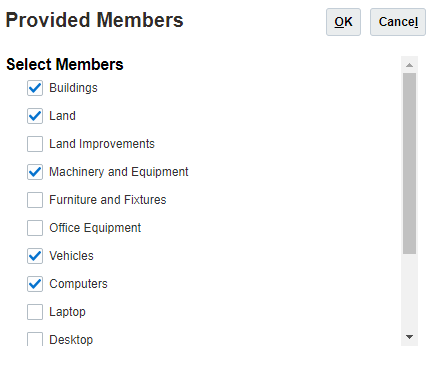
- In the Assets dialog, click Actions, select Add, and then Provided Members.
- From the Provided Members list, select the following and click OK:
- Buildings
- Land
- Machinery and Equipment
- Vehicles
- Computers
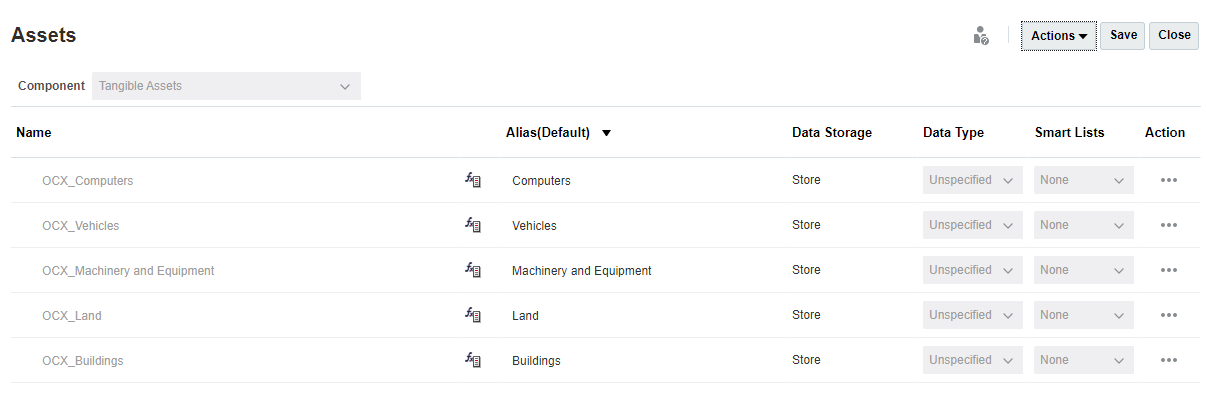
- In the Asset dialog, review and verify the asset class members you selected and click Save.
- At the information message, click OK.
- Click Close.
Setting the Timeframe and Granularity for Plans
In this section, you configure the time frame and granularity for Capital plans.
- On the Configure page for Capital, click Planning and Forecast Preparation.
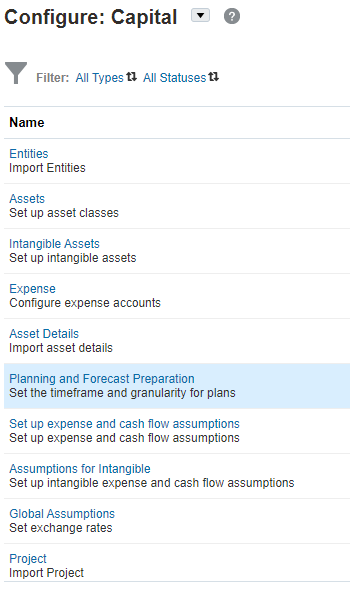
The Planning and Forecast Preparation dialog is displayed.
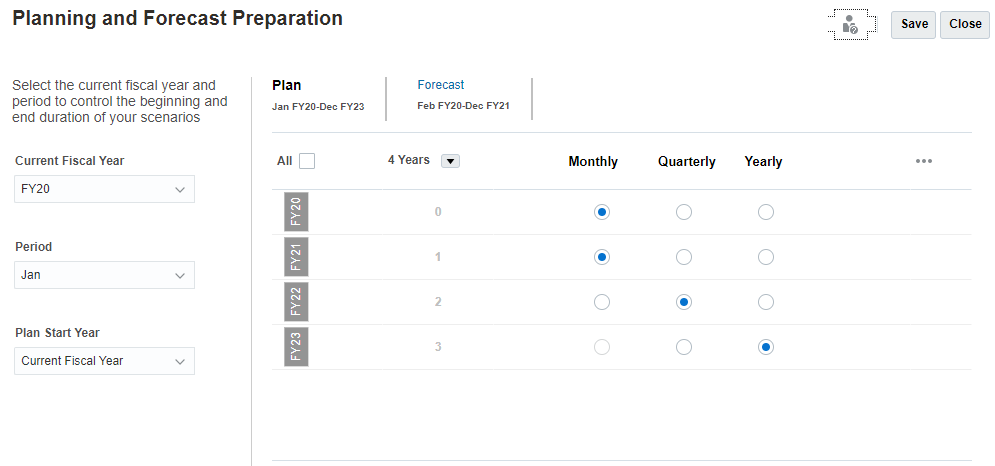
- Set the Current Fiscal Year to FY21.
- For Plan, set the Years to 9 Years.
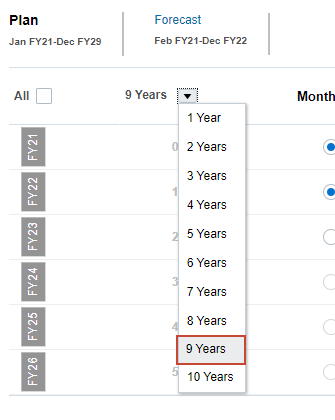
Note:
The application you imported includes years from FY20 to FY29. With FY21 selected as the Current Fiscal Year, that leaves nine (9) years left. You can add years to the beginning or end of the calendar, but you can't reduce the number of calendar years without creating a database. See the Adding Years to the Calendar section of the Administering Planning documentation. - Select All, and then click
 (Planning Basis) and select Monthly.
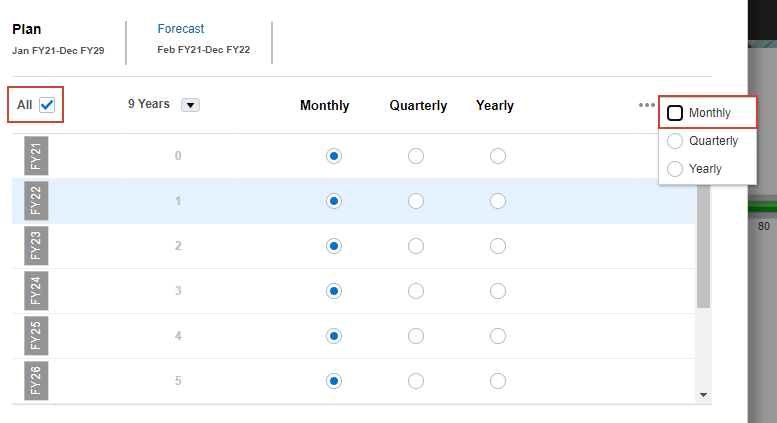
Tip:
Select the planning basis for each year that you are configuring. If plans will be prepared at the same frequency each year, click All, and then select the frequency (for example, Monthly). If plans will be prepared at different frequencies in certain years, select the frequency in each year’s row. For example, to plan monthly in FY20 but quarterly in FY21, select Monthly in the row for FY20 and Quarterly in the row for FY21. For 13- period applications, you select 13 Periods instead of Monthly. - Click Save.
- At the validation message, click OK.
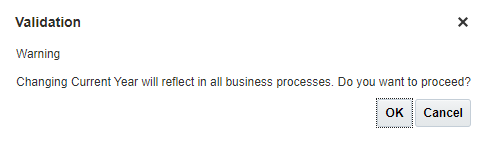
- Click Close.
Adding Intangible Assets
- On the Configure page for Capital, click Intangible Assets.
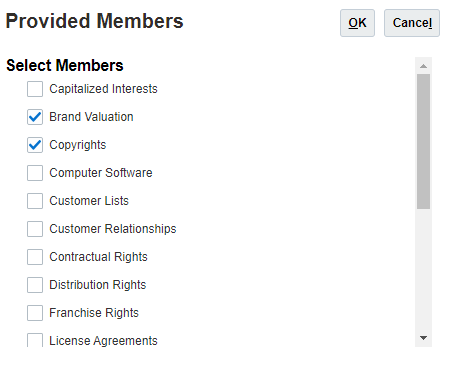
- In the Intangible Assets dialog, click Actions, select Add, and then Provided Members.
- From the Provided Members list, select the following and click OK:
- Brand Valuation
- Copyrights
- In the Intangible Asset dialog, review and verify the intangible asset class members you selected and click Save.
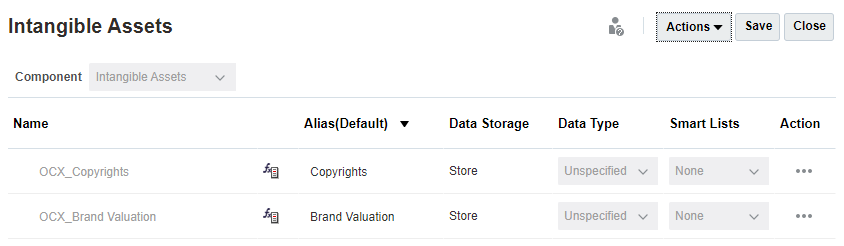
- At the information message, click OK.
- Click Close.
Setting Up the Entity Hierarchy
In this section, you import entities to the OEP_CPX cube using a data file.
- From the cards on the top, click Overview.

The Application page is opened with the Overview tab displayed.
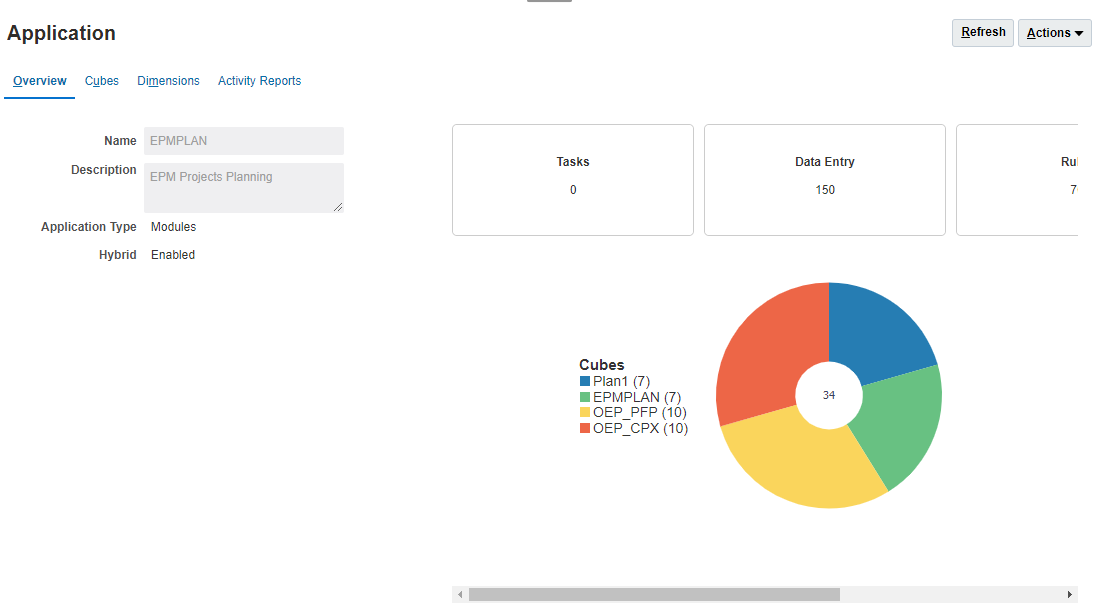
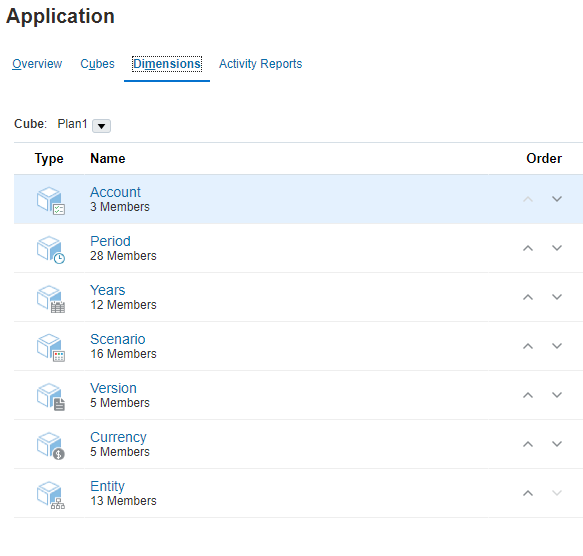
- Click the Dimensions tab.
The Dimensions tab displays the dimensions in the Plan1 cube.
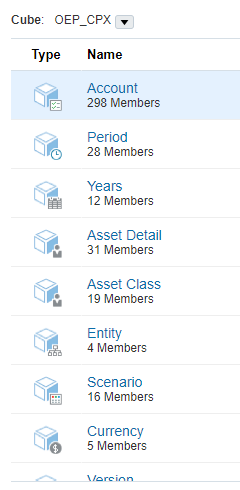
- From the Cube dropdown list, select OEP_CPX.

Dimensions in the OEP_CPX cube are now listed on the page.
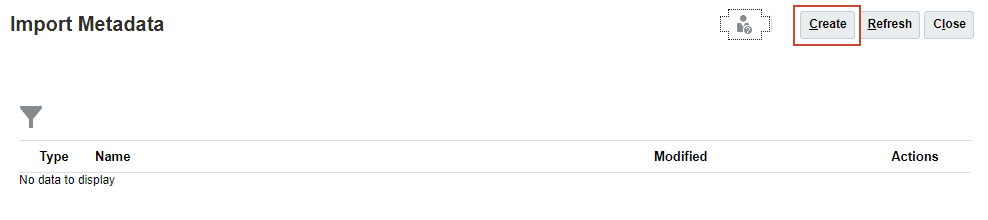
- Click Import.

- In Import Metadata, click Create.
- From the list of dimensions, locate Entity and click Choose File.
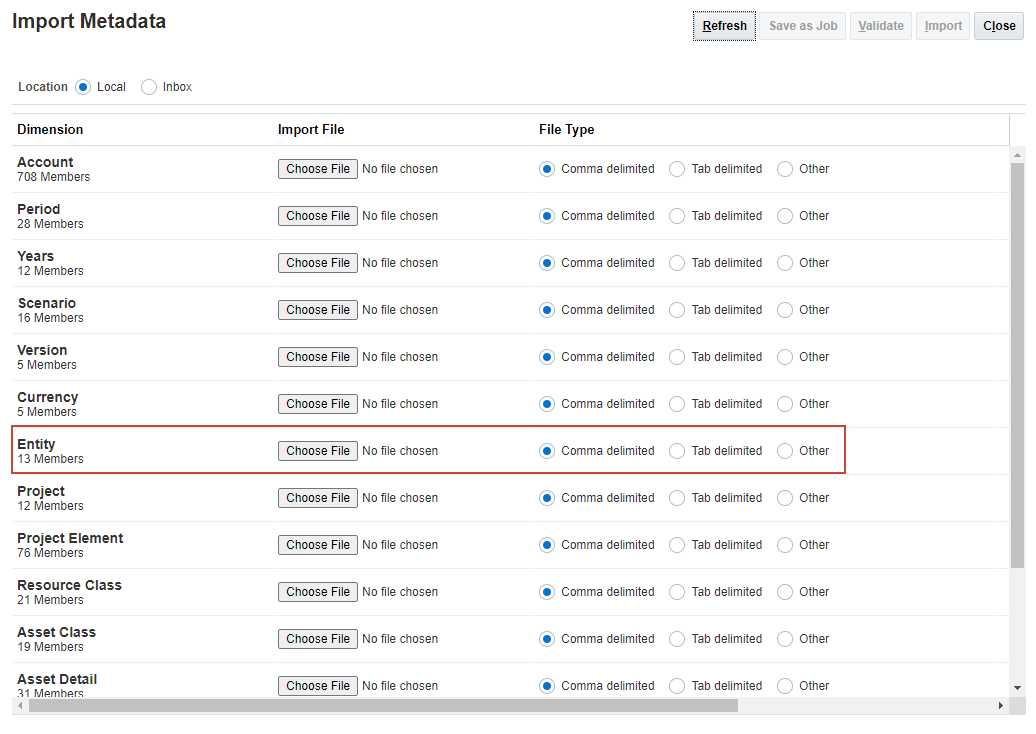
Note:
Depending on your browser, the button label may display Choose File or Browse. - Navigate to where you saved CPX_Entity.csv, then select or open it.
Once selected, it displays as:

- At the top of the dialog, click Import.
Tip:
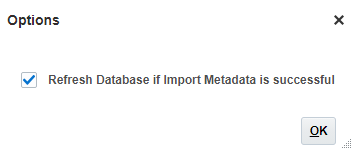
Oracle recommends validating your import file before running the import process. The import file included in this tutorial has been tested and validated. - In Options, select Refresh Database if Import Metadata is successful and click OK.
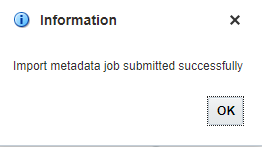
- At the information message, click OK.
- Click Close, twice to close both Import Metadata dialogs.
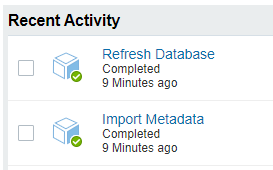
- From the cards at the top, click Jobs.

- In Jobs, locate the following jobs and verify that they completed successfully:
Enabling Capital Projects
In this section, you enable Capital Projects.
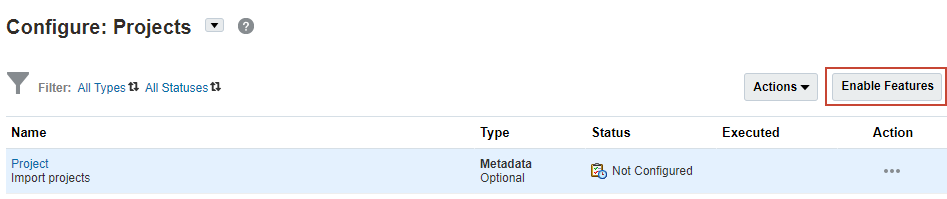
- From the cards on top, click Configure.

- On the Configure page, select Projects from the dropdown list.
- On the Configure page for Projects, click Enable Features.
- In Enable Features, under Project Type - Internal Projects, select Capital.
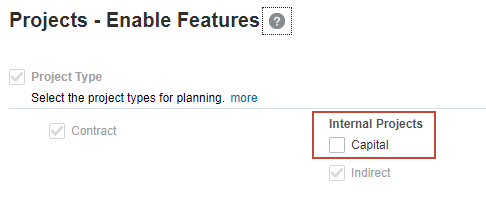
Caution:
Both Projects and Capital must be enabled before you enable Capital Projects. - In Enable Features, click Enable.
- At the confirmation message, click Yes.
The enable process takes a moment to complete.
- At the information message, click OK.

- Sign out and sign back into Planning.
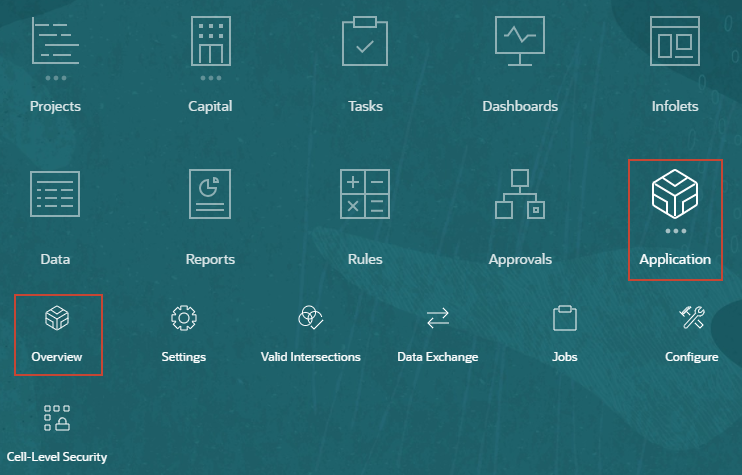
- On the home page, click Application, and then Overview.
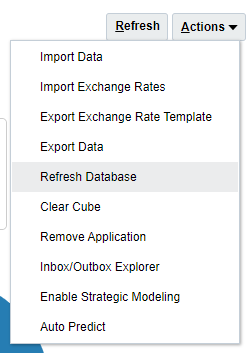
- In Application - Overview, click Actions, then select Refresh Database.
- In Refresh Database, click Create.
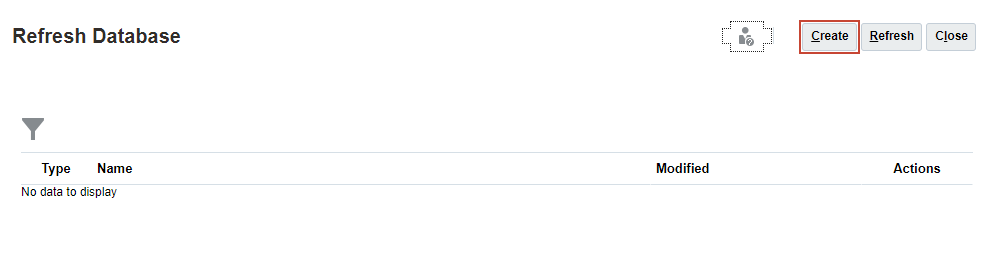
- Accept all default selections and click Refresh Database.
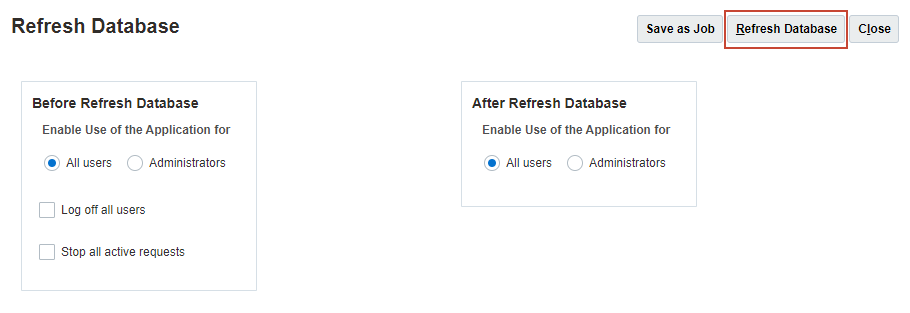
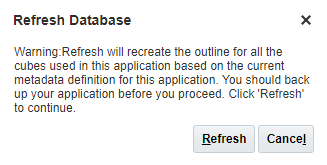
- Click Refresh.
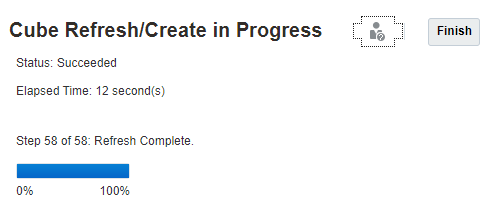
- When the cube refresh progress completes, click Finish.
- Click Close, twice to close both Refresh Database dialogs.
- On the upper-right of the page, click
 (Home).
Setting Up Assumptions
Assigning Values to User Variables
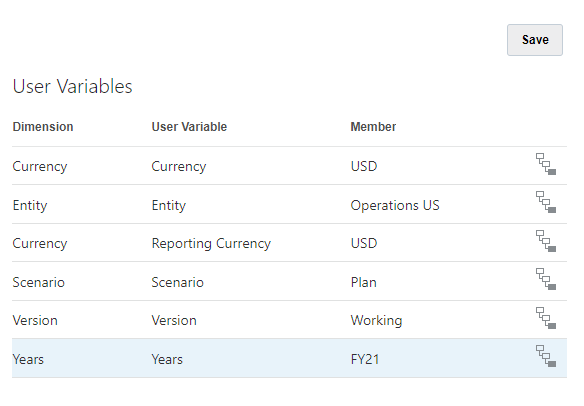
User Variables were added when the business process was created. User variables act as filters in forms, enabling planners to focus only on certain members. In this section, you set values for user variables.
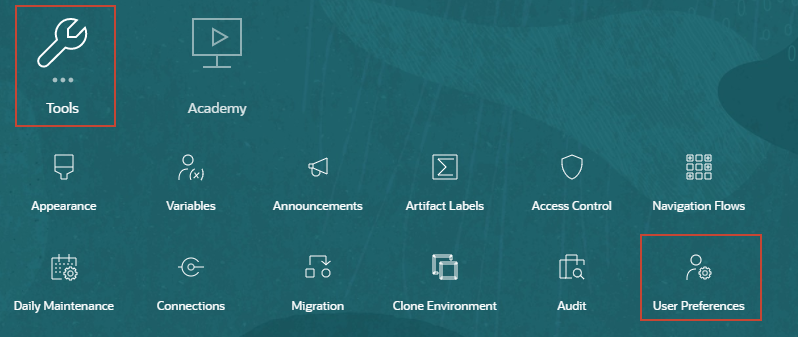
- On the home page, click Tools, and then User Preferences.
- On the left, click User Variables.

- For each variable, click its
 (Member Selector) to select a member as the variable's value:
User Variable Member Currency USD Entity Operations US Reporting Currency USD Scenario Plan Version Working Years FY21 - Verify your selections and click Save.
- At the information message, click OK.
- On the upper-right of the page, click (Home).
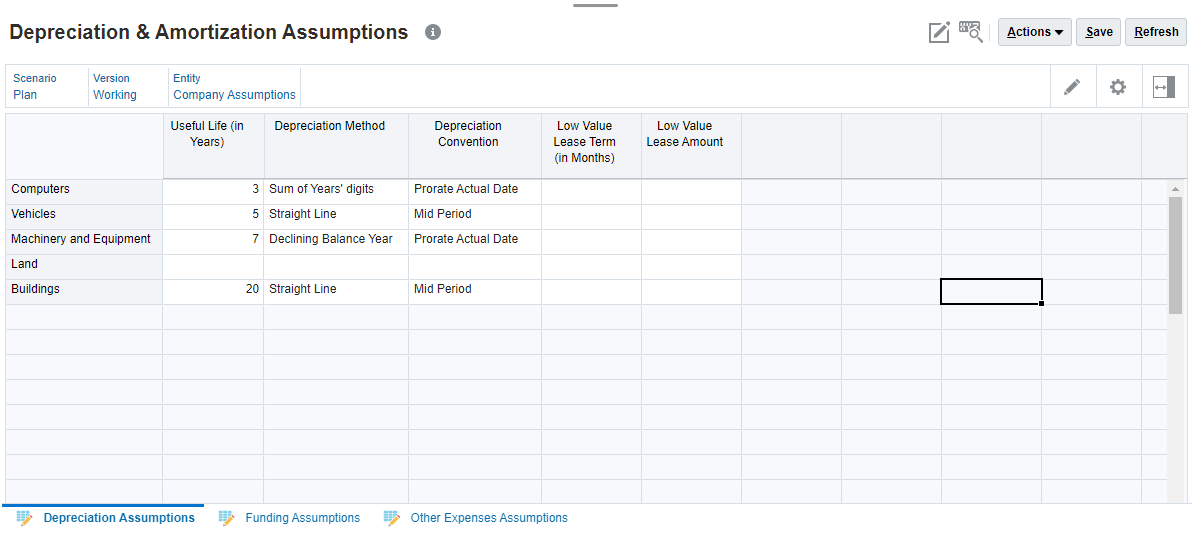
Setting Up Depreciation Assumptions
In this section, you set global assumptions for an asset's depreciation value.
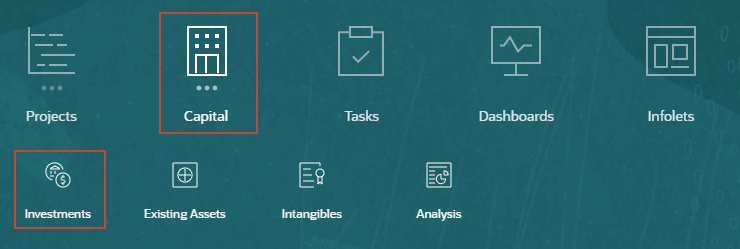
- On the home page, click Capital, and then Investments.
- From the vertical tabs on the left, click
 (Assumptions).
 - In Depreciation Assumptions, enter or select the following and click Save:
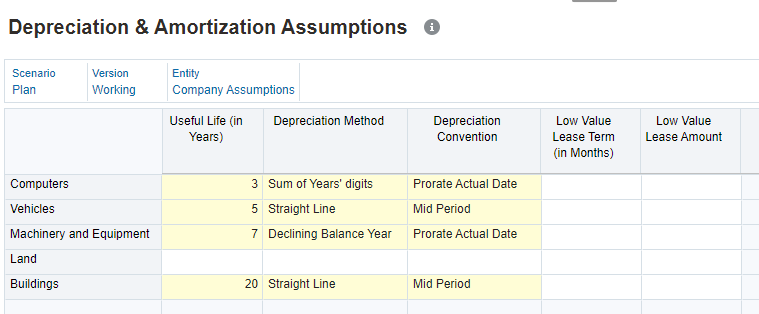
After saving, the "dirty" (yellow) cells turn white.
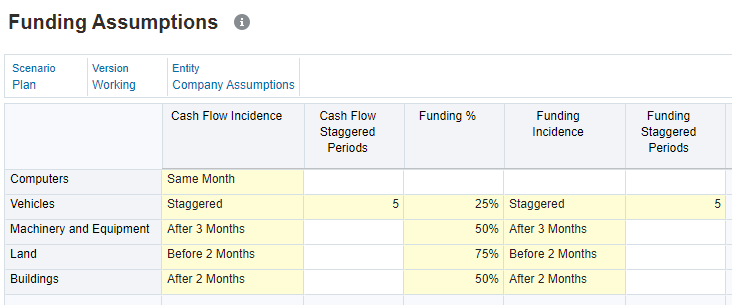
Setting Funding Assumptions
In this section, you set up funding and cash flow assumptions.
- From the horizontal tabs, click Funding Assumptions.
- Enter or select the following and click Save:
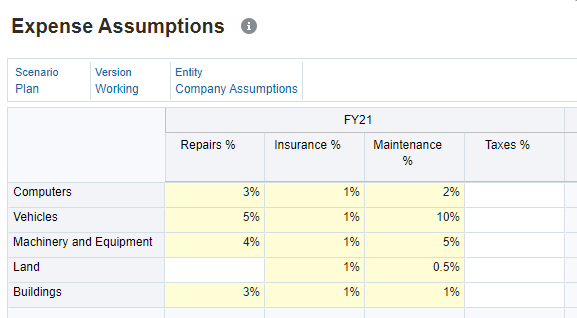
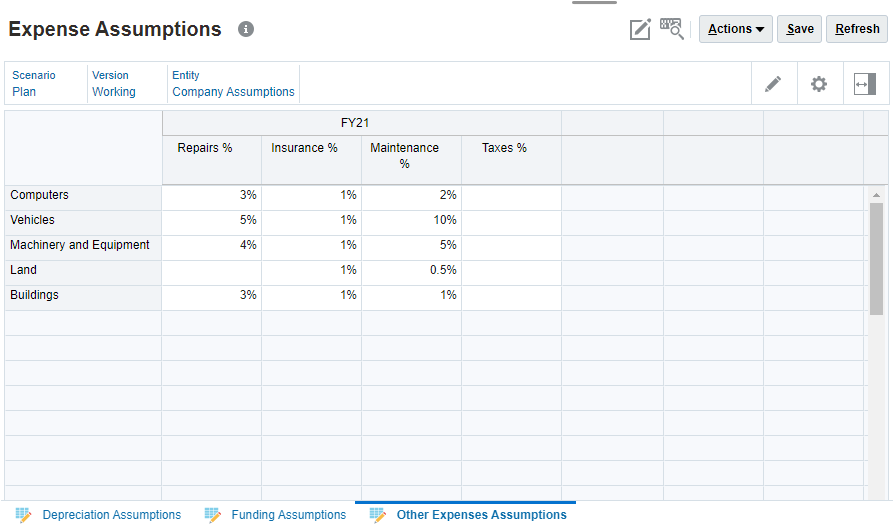
Setting Assumptions for Other Expenses
In this section, you enter assumptions for other expenses such as the percentage for Repairs, Insurance, Maintenance, and Taxes.
- From the horizontal tabs, click Other Expenses Assumptions.
- Enter the following values and click Save:
- At the information message, click OK.
Assumptions were saved to the application.
Learn More
Configuring Capital
F45962-02
April 2022
Copyright © 2022, Oracle and/or its affiliates.
This 60-minute tutorial shows you how to configure and enable features in Capital.
This software and related documentation are provided under a license agreement containing restrictions on use and disclosure and are protected by intellectual property laws. Except as expressly permitted in your license agreement or allowed by law, you may not use, copy, reproduce, translate, broadcast, modify, license, transmit, distribute, exhibit, perform, publish, or display any part, in any form, or by any means. Reverse engineering, disassembly, or decompilation of this software, unless required by law for interoperability, is prohibited.
If this is software or related documentation that is delivered to the U.S. Government or anyone licensing it on behalf of the U.S. Government, then the following notice is applicable:
U.S. GOVERNMENT END USERS: Oracle programs (including any operating system, integrated software, any programs embedded, installed or activated on delivered hardware, and modifications of such programs) and Oracle computer documentation or other Oracle data delivered to or accessed by U.S. Government end users are "commercial computer software" or "commercial computer software documentation" pursuant to the applicable Federal Acquisition Regulation and agency-specific supplemental regulations. As such, the use, reproduction, duplication, release, display, disclosure, modification, preparation of derivative works, and/or adaptation of i) Oracle programs (including any operating system, integrated software, any programs embedded, installed or activated on delivered hardware, and modifications of such programs), ii) Oracle computer documentation and/or iii) other Oracle data, is subject to the rights and limitations specified in the license contained in the applicable contract. The terms governing the U.S. Government's use of Oracle cloud services are defined by the applicable contract for such services. No other rights are granted to the U.S. Government.
This software or hardware is developed for general use in a variety of information management applications. It is not developed or intended for use in any inherently dangerous applications, including applications that may create a risk of personal injury. If you use this software or hardware in dangerous applications, then you shall be responsible to take all appropriate fail-safe, backup, redundancy, and other measures to ensure its safe use. Oracle Corporation and its affiliates disclaim any liability for any damages caused by use of this software or hardware in dangerous applications.
Oracle and Java are registered trademarks of Oracle and/or its affiliates. Other names may be trademarks of their respective owners.
Intel and Intel Inside are trademarks or registered trademarks of Intel Corporation. All SPARC trademarks are used under license and are trademarks or registered trademarks of SPARC International, Inc. AMD, Epyc, and the AMD logo are trademarks or registered trademarks of Advanced Micro Devices. UNIX is a registered trademark of The Open Group.
This software or hardware and documentation may provide access to or information about content, products, and services from third parties. Oracle Corporation and its affiliates are not responsible for and expressly disclaim all warranties of any kind with respect to third-party content, products, and services unless otherwise set forth in an applicable agreement between you and Oracle. Oracle Corporation and its affiliates will not be responsible for any loss, costs, or damages incurred due to your access to or use of third-party content, products, or services, except as set forth in an applicable agreement between you and Oracle.