Before you Begin
This 40-minute tutorial shows you how to load and manage existing assets. You import assets using a modified data load template, and then perform tasks used to plan for capital expenses, such as Calculate Assets, Transfer Assets, and Add Improvements. The sections build on each other and should be completed sequentially.
Background
With Capital, you can manage, prioritize, and plan for capital expenses. Capital helps decision-makers and front-line managers communicate throughout the request, justification, review, and approval process.
In general, you plan capital assets in this order:
- Set user variables.
- Review or enter capital assumptions, including driver-based assumptions for depreciation and amortization, funding assumptions, and other expense assumptions.
- Add new capital assets and new asset details, and manage new assets.
- Manage existing assets and intangible assets.
- Get an overview of Capital financials with dashboards.
- Review the financial impact of Capital assets.
The tasks and features you need to perform will depend on what you, the Administrator, enabled.
In this tutorial, you load and manage existing assets. You import assets using a modified data load template, and then perform tasks used to plan for capital expenses, such as Calculate Assets, Transfer Assets, and Add Improvements.
What Do You Need?
An EPM Cloud Service instance allows you to deploy and use one of the supported business processes. To deploy another business process, you must request another EPM Enterprise Cloud Service instance or remove the current business process.
- Have Service Administrator access to an EPM Enterprise Cloud Service instance. The instance should not have a business process created.
- Upload and import this snapshot into your instance.
- Download this file (CPX_Existing Asset Load.csv) to a local folder.
Note:
If you run into migration errors importing the snapshot, re-run the migration excluding the HSS-Shared Services component, as well as the Security and User Preferences artifacts in the Core component. For more information on uploading and importing snapshots, refer to the Administering Migration for Oracle Enterprise Performance Management Cloud documentation.Reviewing User Variables
User Variables were added when the business process was created. User variables act as filters in forms, enabling planners to focus only on certain members. In this section, you review and set values for user variables.
- On the home page, click Tools, and then User Preferences.

- On the left, click User Variables.
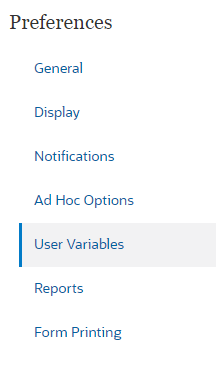
- Review the selected members for each user variable:
User Variable Member Currency USD Entity Manufacturing US Reporting Currency USD Scenario Plan Version Working Years FY21 - On the upper-right of the page, click
 (Home).
Importing Asset Details
In this section, you import asset details into the Asset Detail dimension, which is used to track the details of an asset as an individual asset or a group of assets, depending on the requirement. An asset can be New Owned, Existing Owned, New Leased, or Existing Leased.
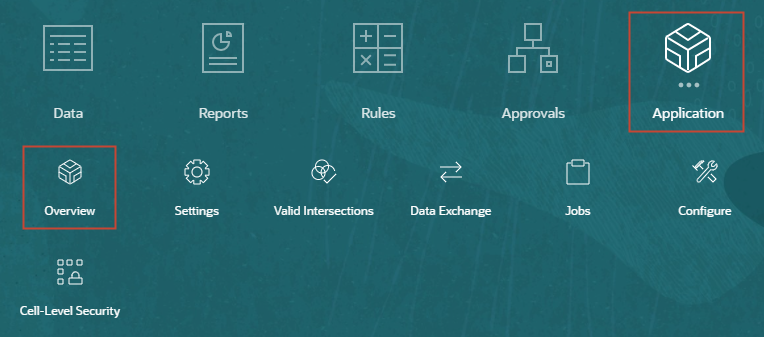
- On the home page, click Application, and the Overview.
- Click Dimensions.
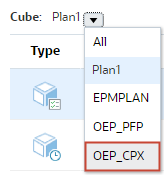
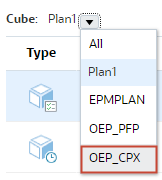
- From the Cube dropdown, select OEP_CPX.
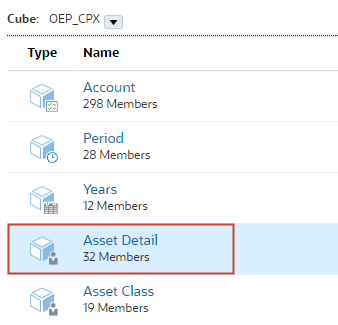
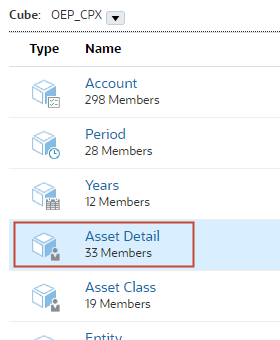
- Click Asset Detail.
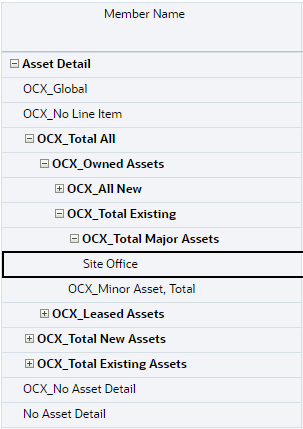
- In Edit Member Properties for Asset Detail, under Asset Detail, expand OCX_Total All, then OCX_Owned Assets and all descendants until level zero members are displayed.
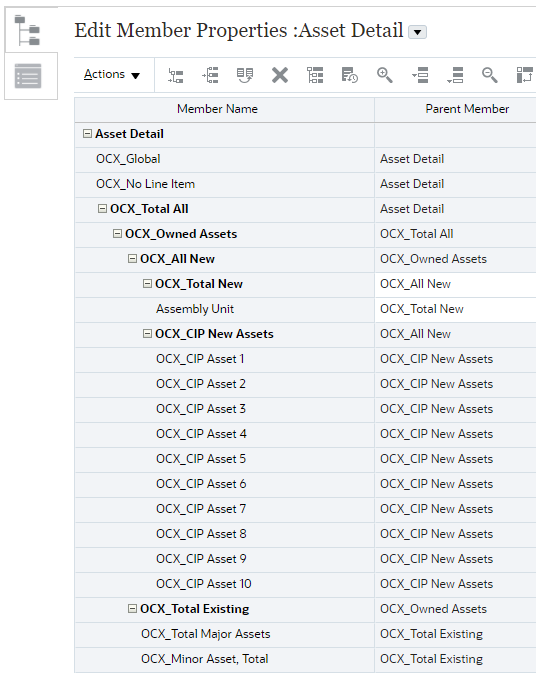
- Review all level zero members for new and existing assets. Note that there are no assets listed under OCX_Total Existing > OCX_Total Major Assets.
- In Edit Member Properties for Asset Detail, click Cancel.
- In Dimensions, click Import.
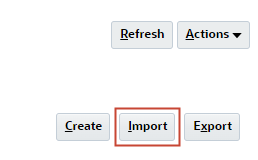
- In Import Metadata, click Create.
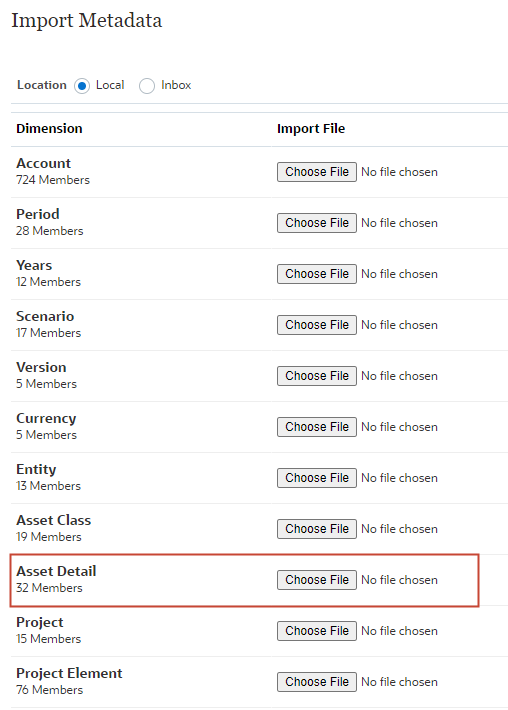
- In the next Import Metadata dialog, for Asset Detail click Choose File.
Note:
Depending on your browser, the button label may display Choose File or Browse. - Navigate to where you saved CPX_Assets.csv, then select or open it.
Once selected, it displays as:

- At the top of the dialog, click Import.
Tip:
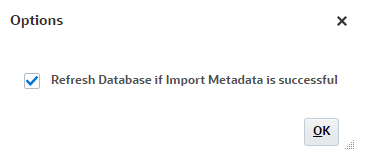
Oracle recommends validating your import file before running the import process. The import file included in this tutorial has been tested and validated. - In Options, select Refresh Database if Import Metadata is successful and click OK.
- At the information message, click OK.
- Click Close, twice to close both Import Metadata dialogs.
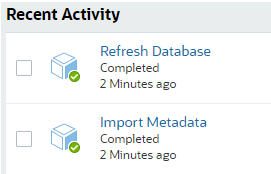
- From the cards at the top, click Jobs.

- In Jobs, locate the following jobs and verify that they completed successfully:
Importing Assets
You can download data import templates from within the application. The templates are generated based on the features you’ve enabled and the custom dimensions that were added.
In this section, you import assets using a data load file.
Reviewing Data Load Templates
- From the cards on top, click Configure.

- On the Configure page, select Capital from the dropdown list.
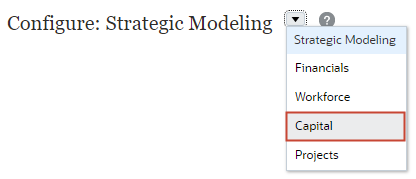
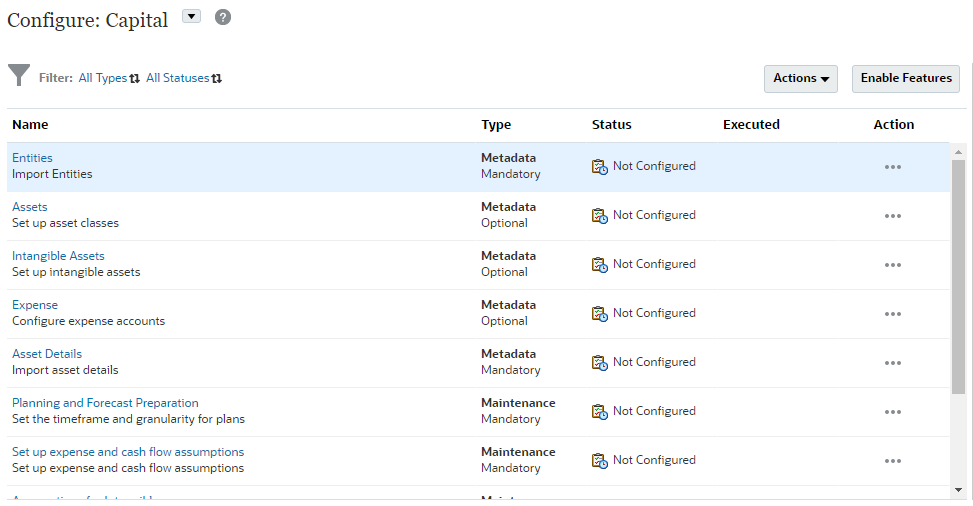
The Configure page for Capital is displayed.
- Click Actions and select Download Data Load Templates.
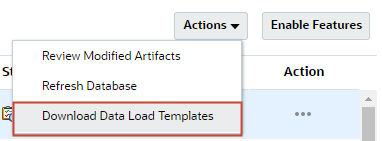
- Save the zip file locally and extract its contents.
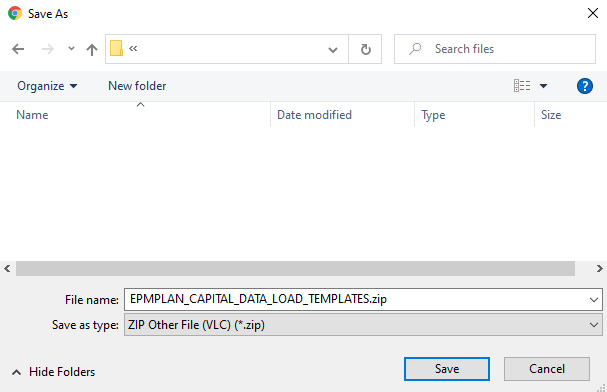
You open the templates in Microsoft Excel and can customize them to specify your business data.
Tip:
When customizing templates:- Don’t enter zeros.
- To import data, you must have at least one member from all dimensions in the file to import.
- Remove columns for which you have no data. For example, if your periodocity is monthly, you can delete columns for Qtrly 1 - 4.
- If member names start with zeros (0), change numeric columns to text.
- For 13-period applications, you can customize the templates to include a row for the 13th period.
- To ensure that your data will import and calculate correctly, import it into a test application first.
Importing Existing Assets
- From the cards at the top, click Overview.

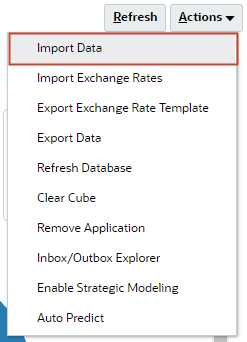
- In Application Overview, click Actions and select Import Data.
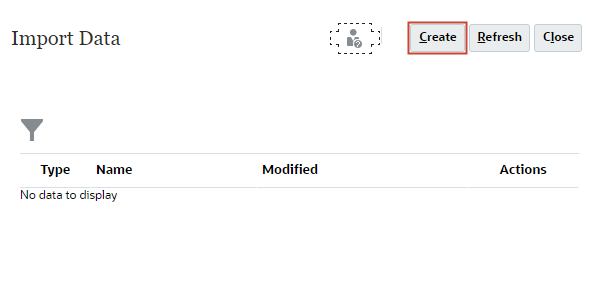
- In Import Data, click Create.
- In the next Import Data dialog, accept or select the following options:
Option Value Location Local Source Type Default File Type Comma Delimited - For Source File, click Choose File.
Note:
Depending on your browser, the button label may display Choose File or Browse. - Navigate to where you saved CPX_Existing Asset Load.csv, then select or open it.
Once selected, it displays as:

- Accept default selections for the following:
Option Value Include Metadata Selected Date Format MM-DD-YYYY - At the top of dialog, click Import.
Tip:
Oracle recommends validating your import file before running the import process. The import file included in this tutorial has been tested and validated. - At the information message, click OK.
- Click Close, twice to close both Import Data dialogs.
- From the cards at the top, click Jobs.
- In Jobs, locate the Import Data job and verify that it completed successfully:

- On the upper-right of the page, click (Home).
Managing Existing Assets
Calculating Assets
In this section, you review the assets you imported and launch Calculate Assets to calculate asset costs, as well as depreciation.
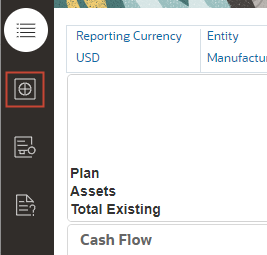
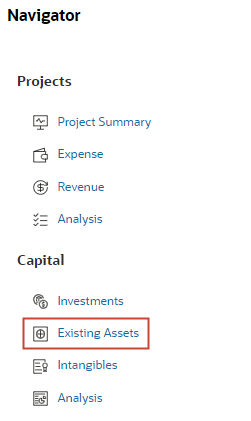
- On the home page, click Capital, and then Existing Assets.

- From the vertical tabs on the left, click
 (Manage Assets).
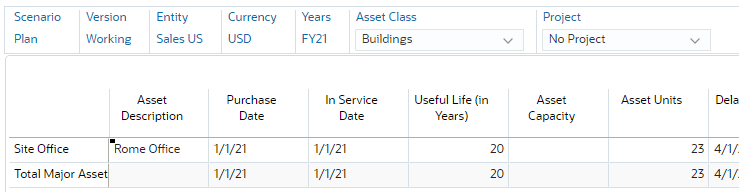
- In the POV, select the following and click
 (Go).
(Go).
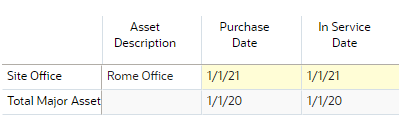
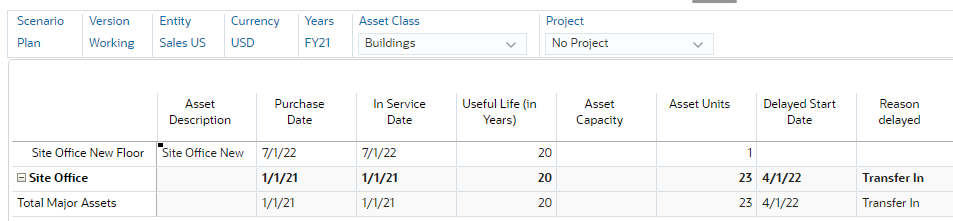
Dimension Member Asset Class Buildings Project No Project

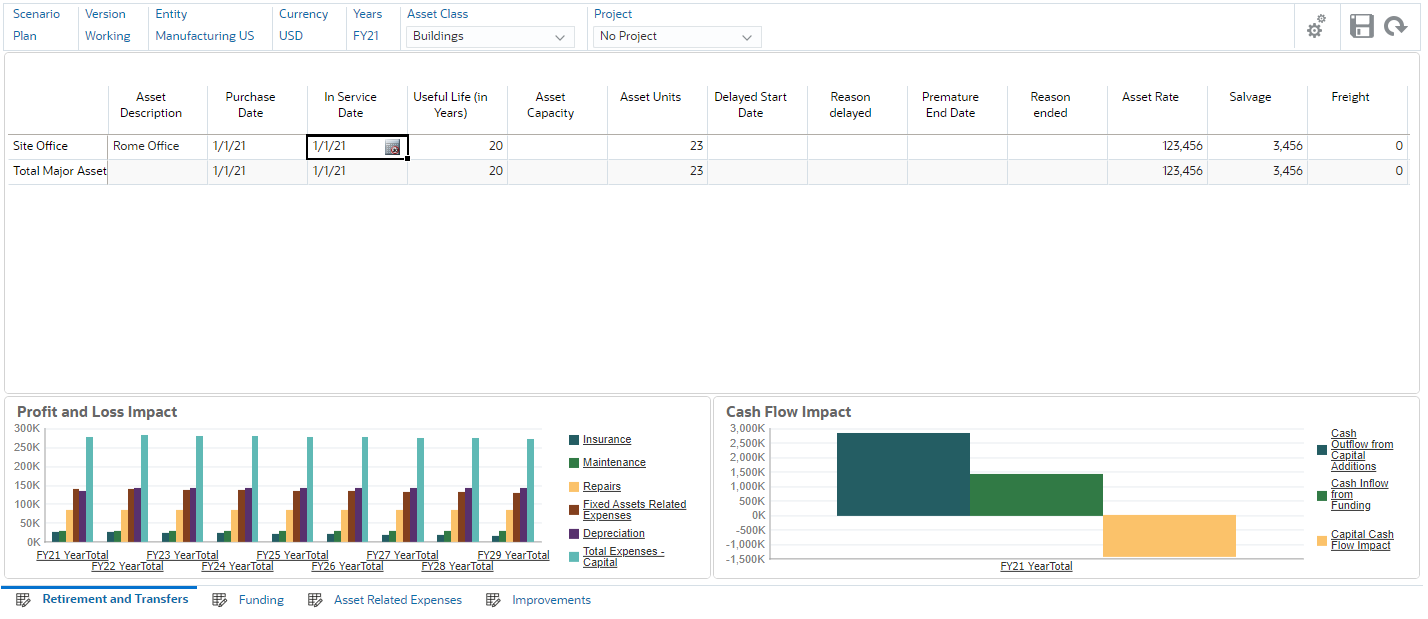
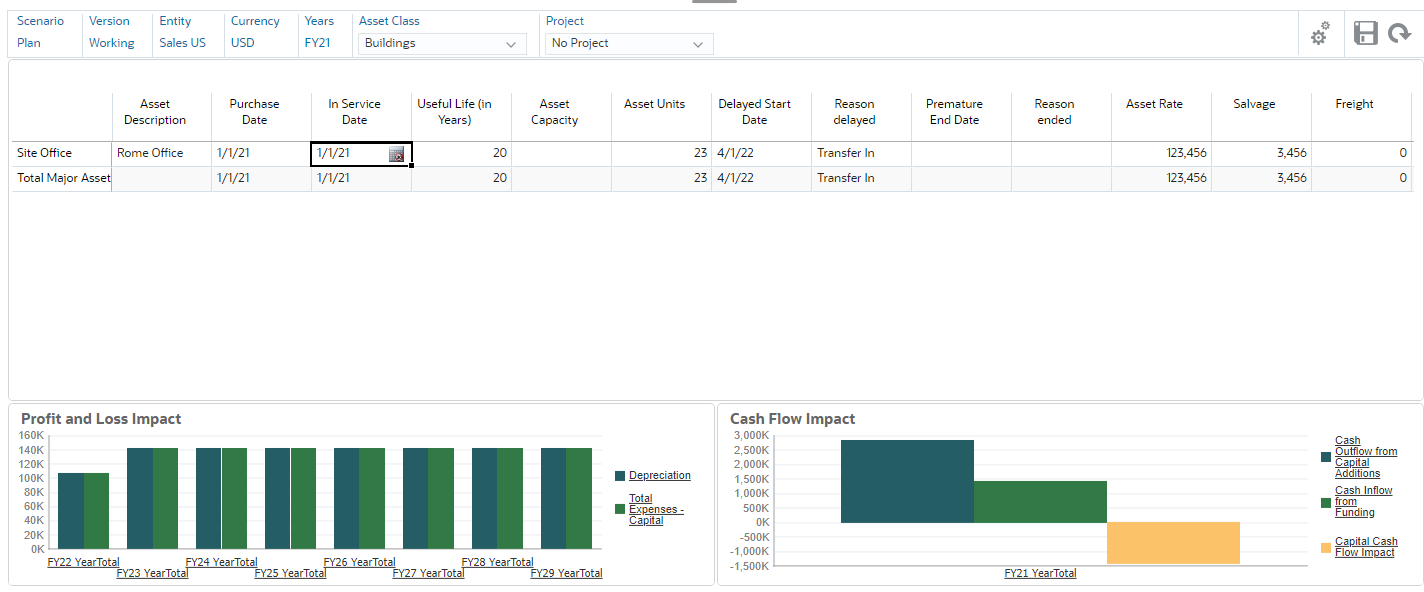
The imported Site Office asset is listed on the form.

- Change the Purchase Date and In Service Date year to 2021:
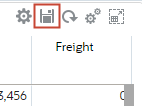
- On the upper-right area of the form, click
 (Save).
- At the information message, click OK.
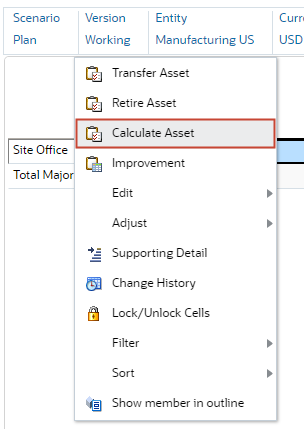
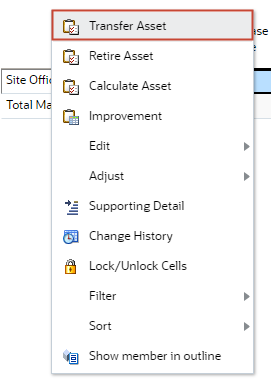
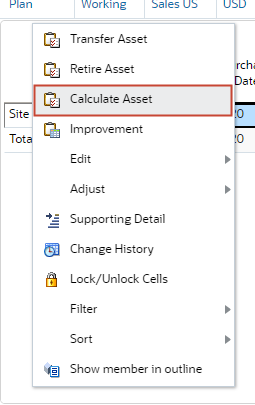
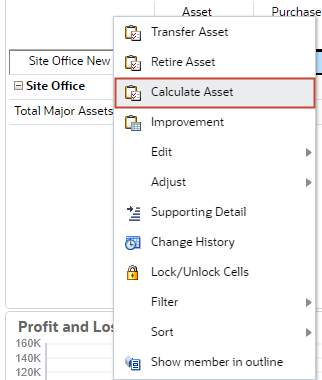
- Right-click Site Office and select Calculate Asset.
Launching Calculate Asset runs asset calculations, including depreciation.
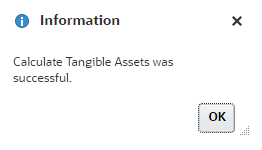
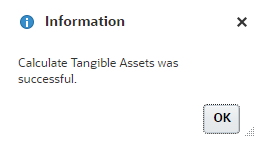
- At the information message, click OK.
As you add more assets and run calculations, the charts on the dashboard are updated to display how the assets impact Profit and Loss, as well as Cash Flow.
You can load existing assets and forecast their depreciation for the remaining years.
Transferring Assets
In this section, you transfer an asset from one entity to another.
- Right-click Site Office and select Transfer Asset.
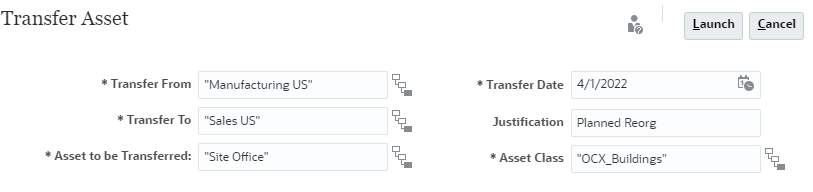
- In Transfer Asset, verify or set the following values:
Detail Value Transfer From "Manufacturing US" Transfer To "Sales US" Asset to be Transferred "Site Office" Transfer Date 4/1/2022 Justification Planned Reorg Asset Class "OCX_Buildings" - Verify your selections and click Launch.
- At the information message, click OK.
Notice that, for Site Office, Premature End Date includes the Transfer Date, and Reason Ended states Transfer Out.

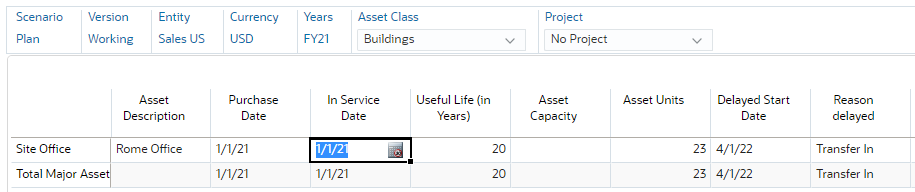
- In the POV, set Entity to Sales US and click (Go).
- Verify that Site Office was moved to Sales US.
- Right-click Site Office and select Calculate Asset.
- At the information message, click OK.
- Review the calculation results on the dashboard.
Enabling Users to Create Children for an Asset Detail Member
Before you improve an asset, you must select the Enable for Dynamic Children member property for the Asset Detail and specify the Number of Possible Dynamic Children, and then refresh the application.
Enabling an asset for dynamic children splits the asset from one asset to multiple assets. The asset becomes a parent asset. The existing asset detail is loaded to a child under this parent to represent the base asset. All other improvements will be captured as a sibling to this base asset.
In this section, you enable dynamic children for an asset to allow users to create children for that asset.
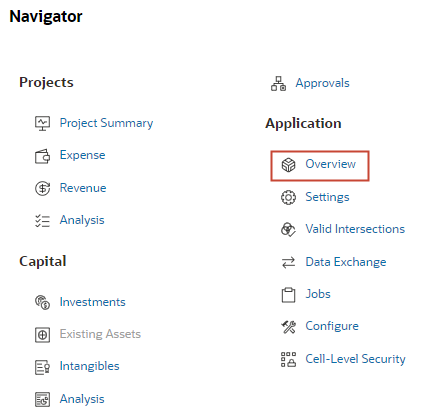
- Click
 (Navigator), then under Application, click Overview.
- In Application Overview, click Dimensions.
- For Cube, select OEP_CPX.
- Click Asset Detail.
- In Edit Member Properties for Asset Detail, right-click the Member Name column header and clear the checkbox for Default Mode.
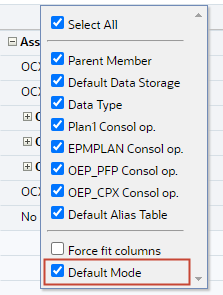
Clearing Default Mode displays all columns in the grid.
- In the Search area, verify that Name is selected in the dropdown, enter Site Office in the textbox, and click
 (Search Down).

Site Office is displayed in the grid.
- Scroll to the right until the Enable for Dynamic Children column is displayed.
- For Site Office, set Enable for Dynamic Children to Yes.
Tip:
Site Office is the only level zero member displayed, which allows for modifying the value of Enable for Dynamic Children. The cell color for the Enable for Dynamic Children column for Site Office is white. - Click Save.
- Click
 (Refresh Database).
 - In Refresh Database, under After Refresh Database, set Enable Use of the Application for All Users.
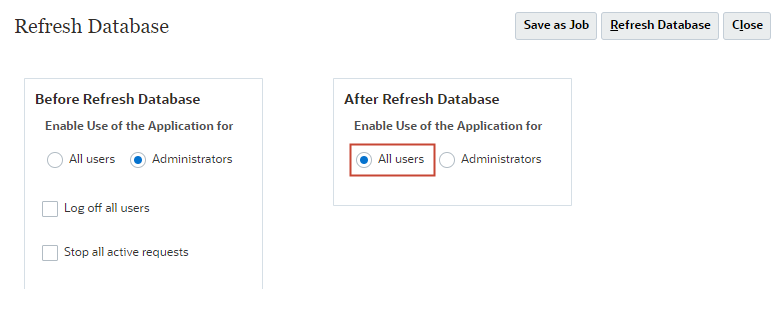
- Click Refresh Database.
- In the next Refresh Database dialog, click Refresh.
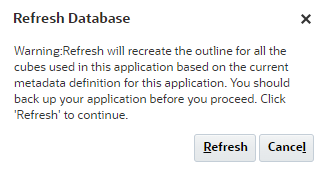
Cube refresh takes a moment to complete.
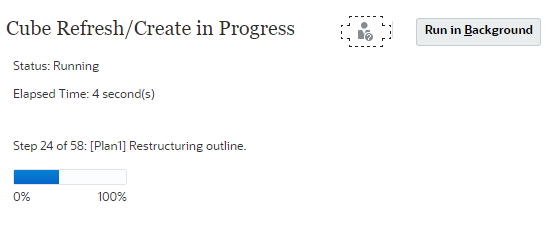
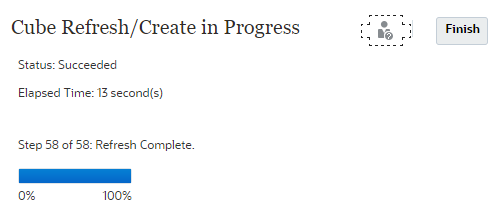
- When the status displays as Succeeded, click Finish.
- In Refresh Database, click Close.
- In Edit Member Properties for Asset Detail, click Cancel.
Adding Improvements to Existing Assets
You can plan for improving assets, such as upgrading an asset, adding floor space, and so on. In this section, you add improvements to the Site Office asset.
- Click (Navigator), then under Capital, click Existing Assets.
- From the vertical tabs on the left, click (Manage Assets).
- Verify the POV, and that Site Office is displayed on the form.
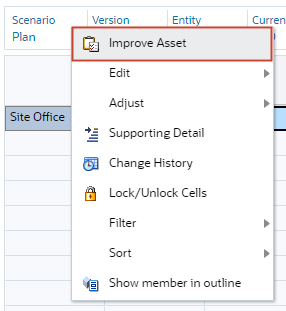
- Right-click Site Office and select Improvement.
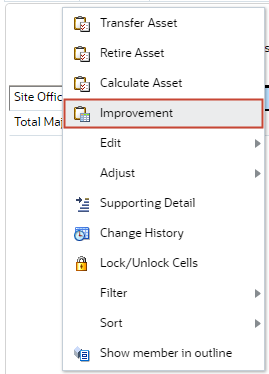
The Improve Asset form is opened with Site Office listed in the grid.
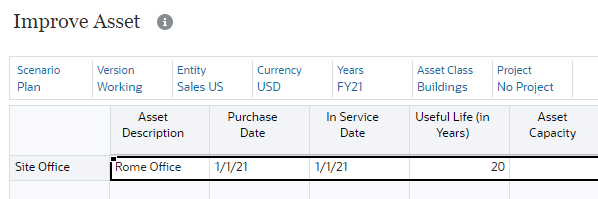
- Right-click Site Office and select Improve Asset.
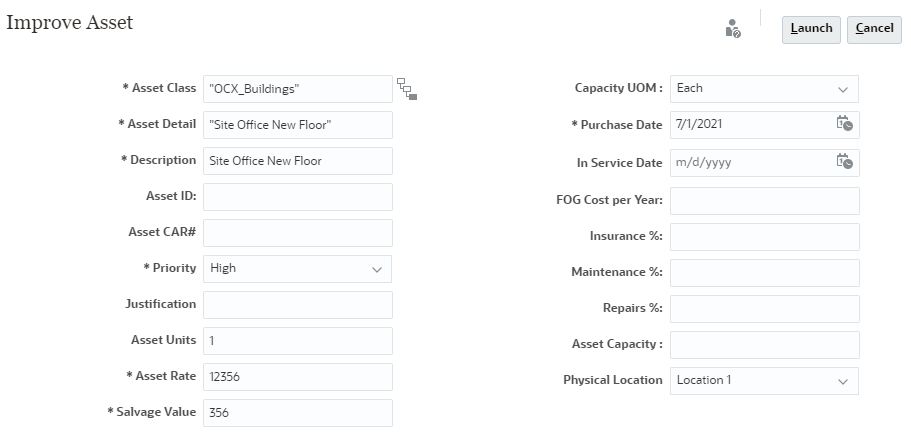
- In Improve Asset, select or enter the following:
Detail Value Asset Class "OCX_Buildings" Asset Detail "Site Office New Floor" Description Site Office New Floor Priority High Asset Units 1 Asset Rate 12356 Salvage Value 356 Capacity UOM Each Purchase Date 7/1/2022 Physical Location Location 1 - Verify your selections, and click Launch.
- At the information message, click OK.
The improvement is displayed on the form.
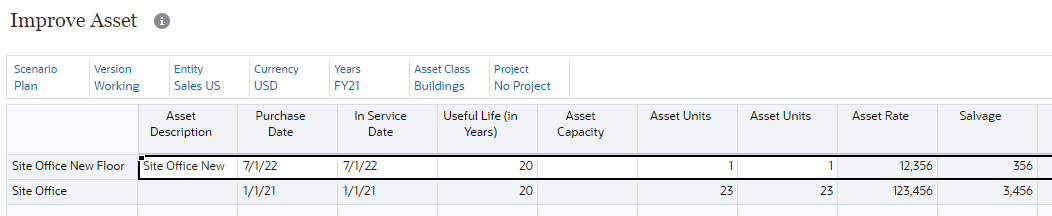
- Close the Improve Asset tab and return to Retirement and Transfers.
In Retirement and Transfers, the improvement is listed as a child asset of the parent Site Office asset.
- Right-click Site Office New Floor and select Calculate Asset.
- At the information message, click OK.
The dashboard is updated to include the planned asset improvement.

Reviewing the Balance Sheet
- From the cards on top, click Analysis.

- From the vertical tabs on the left, click
 (Financial Statements).

- In Balance Sheet Summary Analysis, set the Years to FY22.
The Balance Sheet Summary Analysis is displayed.
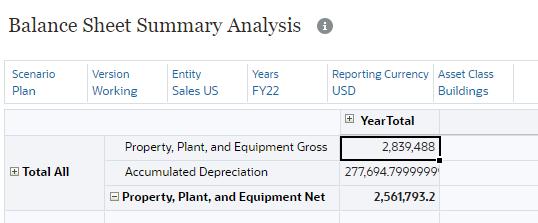
- Review the calculated expenses for the Site Office New Floor asset on this form. Set the POV dimensions to:
POV Dimension Value Entity Manufacturing US Years FY21 - From the horizontal tabs at the bottom, click Cash Flow Impacts.
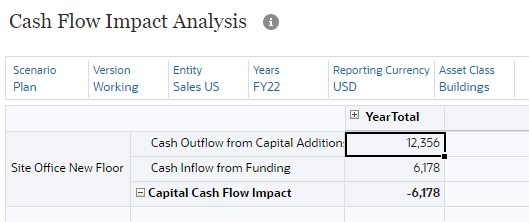
- Set the POV dimensions to:
POV Dimension Value Entity Sales US Years FY22 - Review the Cash Flow Impact Analysis for the Site Office New Floor asset.
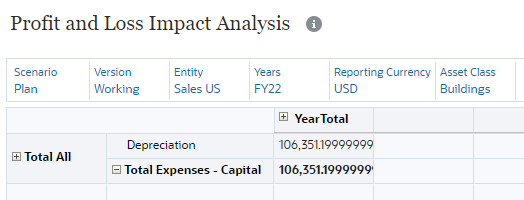
- From the horizontal tabs at the bottom, click Profit and Loss Impacts.
- Review the Profit and Loss Impact Analysis on this page.
Learn More
Loading and Managing Assets
F51545-03
April 2022
Copyright © 2022, Oracle and/or its affiliates.
This 40-minute tutorial shows you how to load and manage existing assets. You import assets using a modified data load template, and then perform tasks used to plan for capital expenses, such as Calculate Assets, Transfer Assets, and Add Improvements.
This software and related documentation are provided under a license agreement containing restrictions on use and disclosure and are protected by intellectual property laws. Except as expressly permitted in your license agreement or allowed by law, you may not use, copy, reproduce, translate, broadcast, modify, license, transmit, distribute, exhibit, perform, publish, or display any part, in any form, or by any means. Reverse engineering, disassembly, or decompilation of this software, unless required by law for interoperability, is prohibited.
If this is software or related documentation that is delivered to the U.S. Government or anyone licensing it on behalf of the U.S. Government, then the following notice is applicable:
U.S. GOVERNMENT END USERS: Oracle programs (including any operating system, integrated software, any programs embedded, installed or activated on delivered hardware, and modifications of such programs) and Oracle computer documentation or other Oracle data delivered to or accessed by U.S. Government end users are "commercial computer software" or "commercial computer software documentation" pursuant to the applicable Federal Acquisition Regulation and agency-specific supplemental regulations. As such, the use, reproduction, duplication, release, display, disclosure, modification, preparation of derivative works, and/or adaptation of i) Oracle programs (including any operating system, integrated software, any programs embedded, installed or activated on delivered hardware, and modifications of such programs), ii) Oracle computer documentation and/or iii) other Oracle data, is subject to the rights and limitations specified in the license contained in the applicable contract. The terms governing the U.S. Government's use of Oracle cloud services are defined by the applicable contract for such services. No other rights are granted to the U.S. Government.
This software or hardware is developed for general use in a variety of information management applications. It is not developed or intended for use in any inherently dangerous applications, including applications that may create a risk of personal injury. If you use this software or hardware in dangerous applications, then you shall be responsible to take all appropriate fail-safe, backup, redundancy, and other measures to ensure its safe use. Oracle Corporation and its affiliates disclaim any liability for any damages caused by use of this software or hardware in dangerous applications.
Oracle and Java are registered trademarks of Oracle and/or its affiliates. Other names may be trademarks of their respective owners.
Intel and Intel Inside are trademarks or registered trademarks of Intel Corporation. All SPARC trademarks are used under license and are trademarks or registered trademarks of SPARC International, Inc. AMD, Epyc, and the AMD logo are trademarks or registered trademarks of Advanced Micro Devices. UNIX is a registered trademark of The Open Group.
This software or hardware and documentation may provide access to or information about content, products, and services from third parties. Oracle Corporation and its affiliates are not responsible for and expressly disclaim all warranties of any kind with respect to third-party content, products, and services unless otherwise set forth in an applicable agreement between you and Oracle. Oracle Corporation and its affiliates will not be responsible for any loss, costs, or damages incurred due to your access to or use of third-party content, products, or services, except as set forth in an applicable agreement between you and Oracle.