Introduction
This 20-minute tutorial introduces you to the Design Time Formatting (DTF) options in Smart View. You will review the differences in runtime on applying the available style options. You will see the order of precedence for the different types of Rules and Cell Styles in Smart View. The sections build on each other and should be completed sequentially.
Background
Design Time Formatting (DTF) enables you to combine form design Validation Rules on the web to provide robust formatting capabilities in data forms. You can also combine these with end user formatting capabilities for forms rendered in Oracle Smart View. Both data and metadata can be formatted.
Data source types: Enterprise Profitability and Cost Management, Financial Consolidation and Close, FreeForm, Planning, Tax Reporting
With Design Time Format Rules, forms will now:
- Support most of the formatting capabilities from Smart View client such as borders, colors, font sizes, fonts, numeric formats, and so on
- Allow Rules to be created for pure formatting purposes in addition to today’s data Validation Rules
- Allow Format Rules to be applied to header and metadata cells in addition to data cells
Prerequisites
Cloud EPM Hands-on Tutorials may require you to import a snapshot into your Cloud EPM Enterprise Service instance. Before you can import a tutorial snapshot, you must request another Cloud EPM Enterprise Service instance or remove your current application and business process. The tutorial snapshot will not import over your existing application or business process, nor will it automatically replace or restore the application or business process you are currently working with.
Before starting this tutorial, you must:
- Have Service Administrator access to a Cloud EPM Enterprise Service instance 24.11+.
- Import this snapshot into your instance. The examples provided in this tutorial use the snapshot.
- Forms 2.0 enabled in the application.
- Have Microsoft Excel installed.
- Have Smart View 24.200+ installed.
Note:
If you run into migration errors importing the snapshot, re-run the migration excluding the HSS-Shared Services component, as well as the Security and User Preferences artifacts in the Core component. For more information on uploading and importing snapshots, refer to the Administering Migration for Oracle Enterprise Performance Management Cloud documentation.Assigning values to User Variables
User Variables were added when the business process was created. User variables act as filters in forms, enabling planners to focus only on certain members. In this section, you set values for user variables.
- On the home page, click
 (Navigator), and under Tools, click User Preferences.
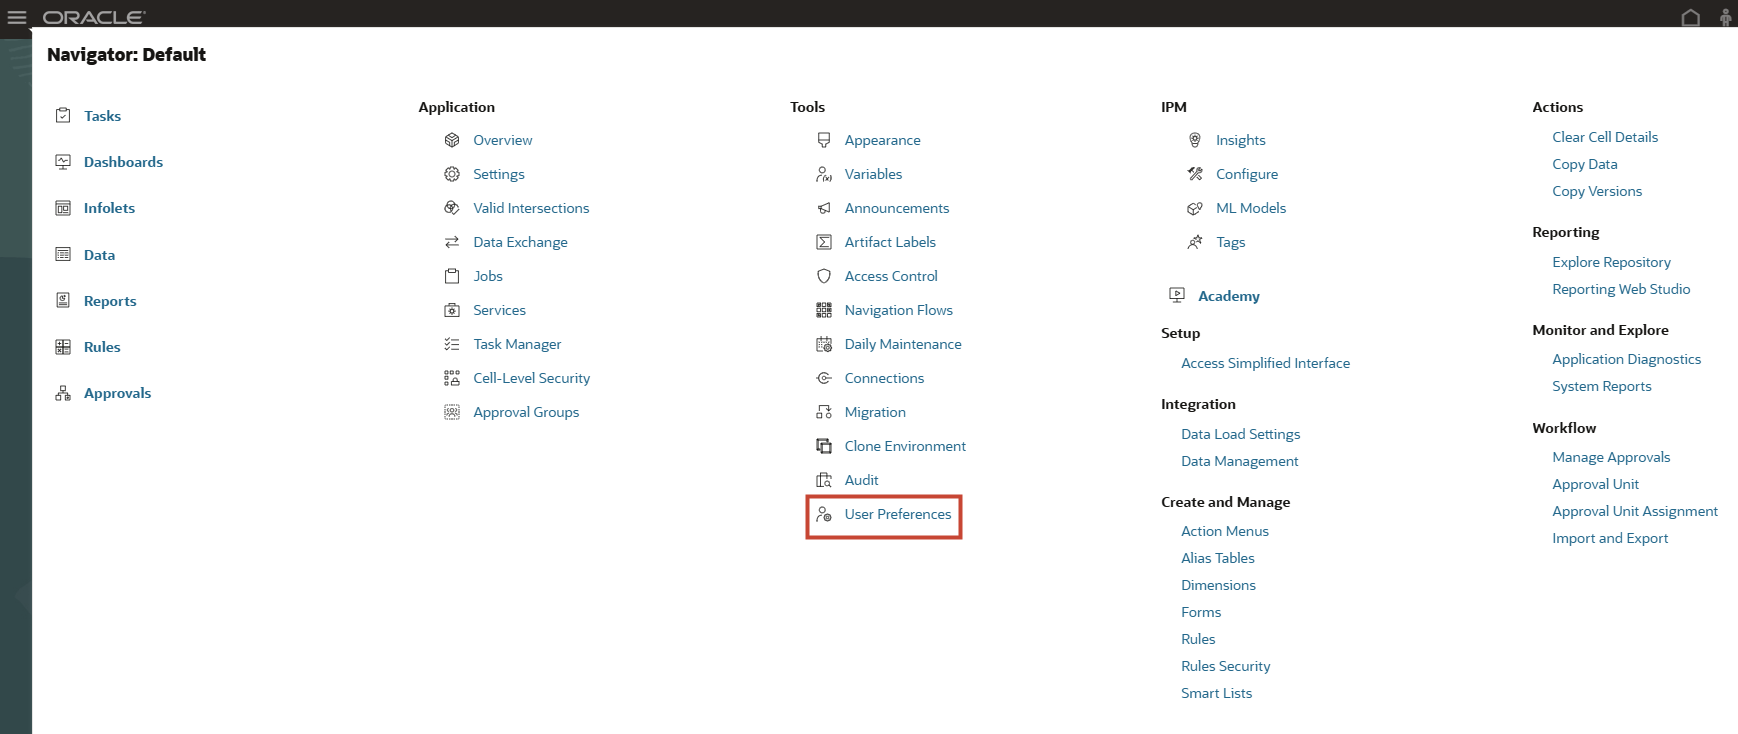
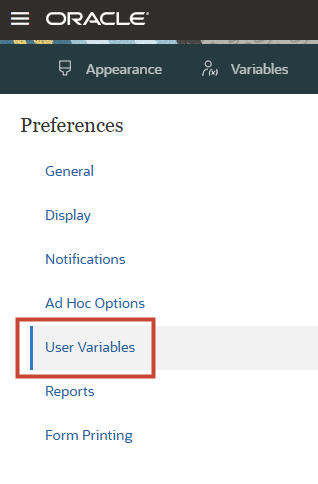
- Under Preferences, click User Variables.
- Click
 (Member Selector) to select each variable's value.
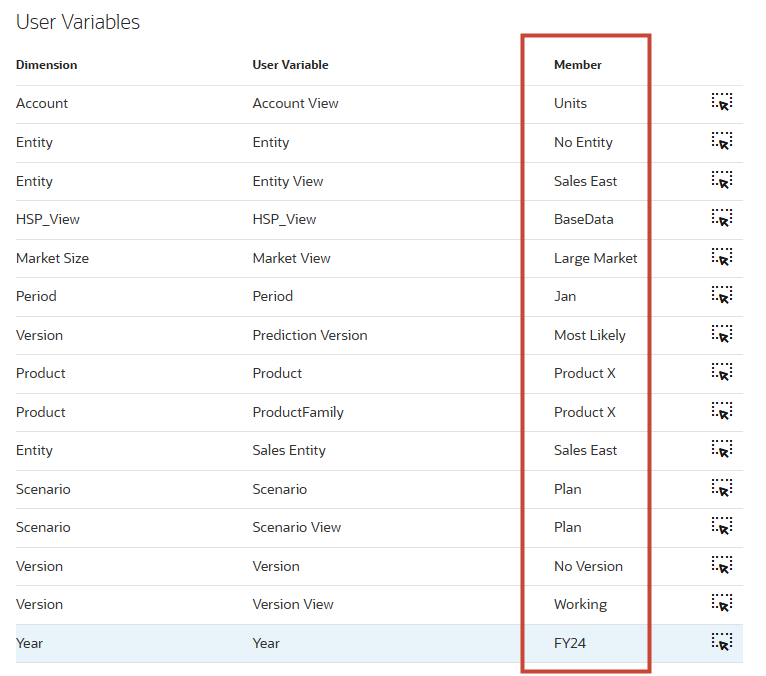
Tip:
You can also type and enter the values under Member for each Dimension. - Verify your selections and click Save.
- At the information message, click OK.
Opening a form in Smart View
In this section, you browse to a form in your application and then open it in Smart View.
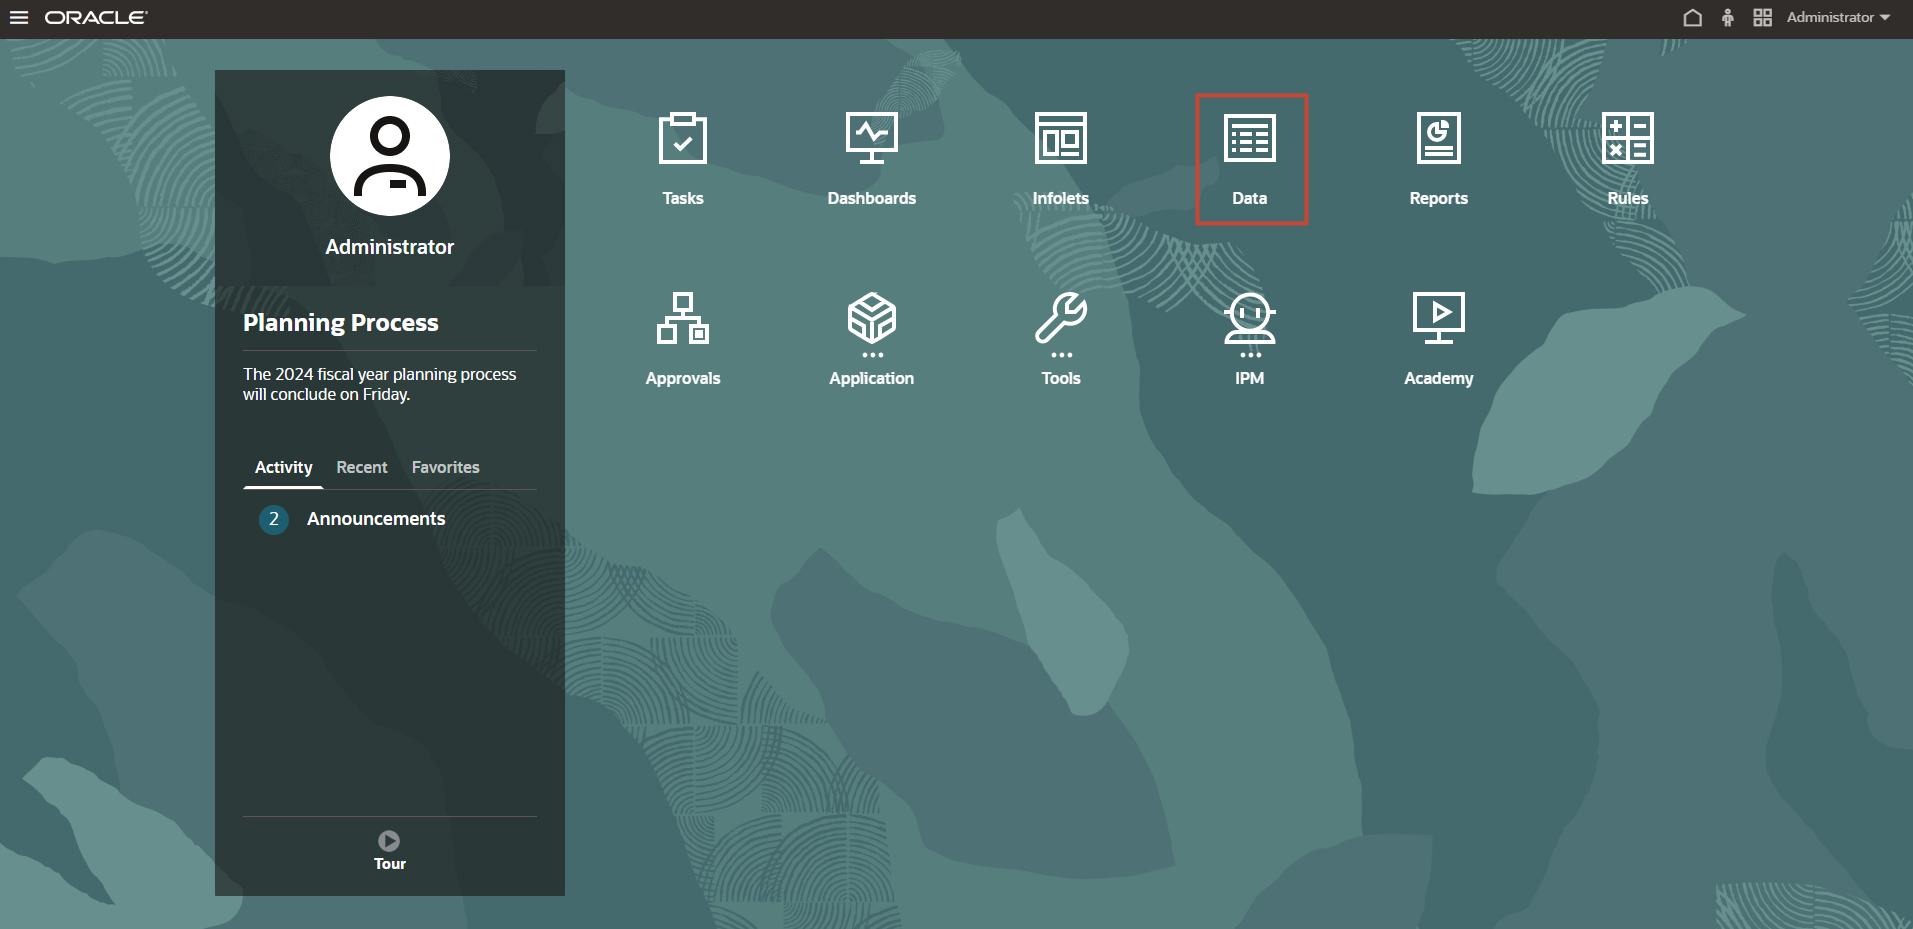
-
On the home page, click Data.
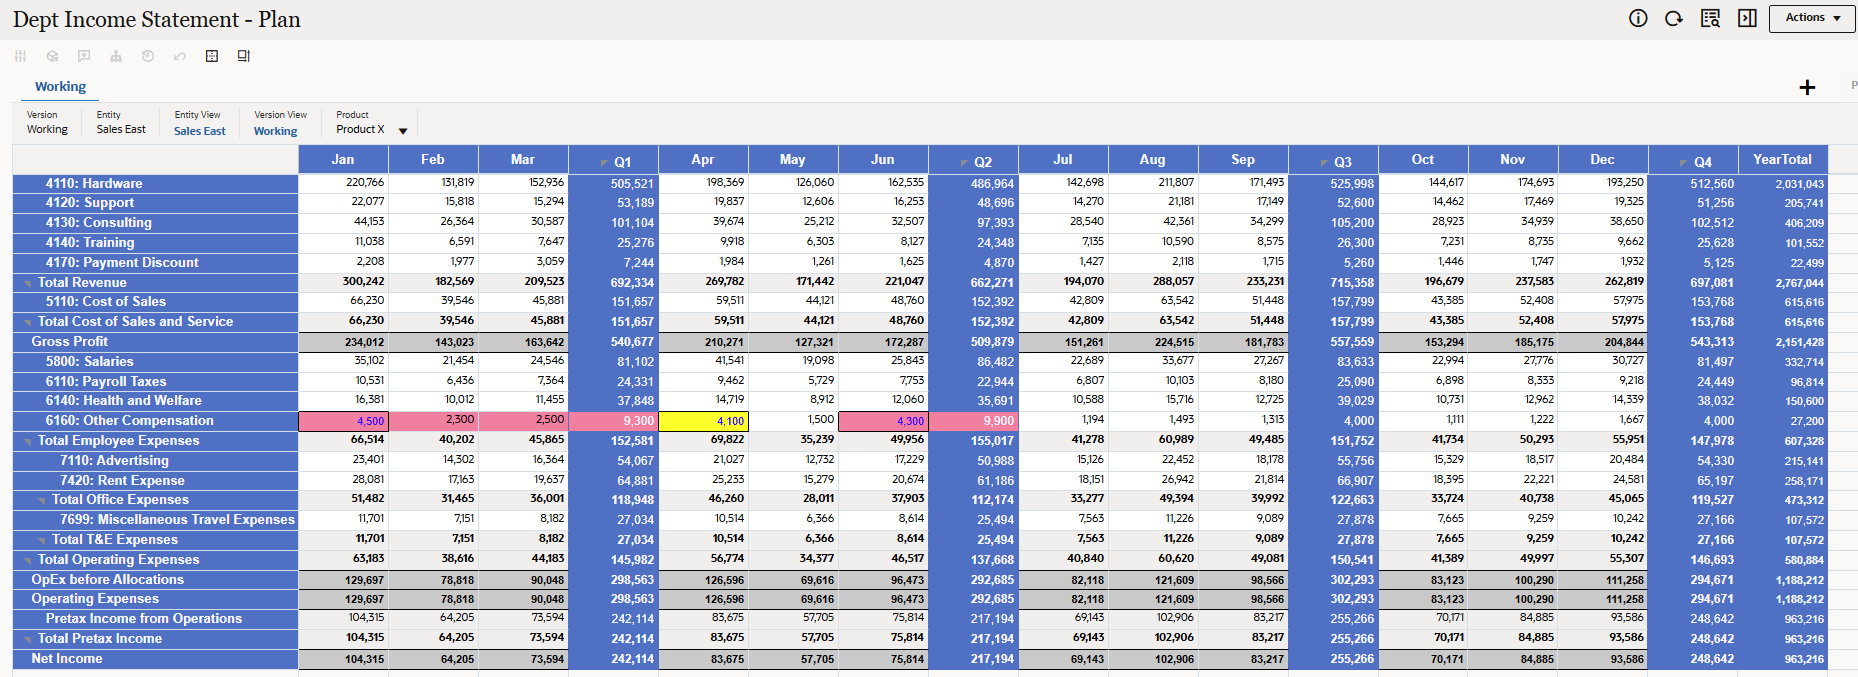
- In Data Entry, under Library, click Dept Income Statement – Plan.

In this example, the forms displayed are part of the application provided in the Prerequisites section of this tutorial. When you create your business process, the cubes do not contain data.
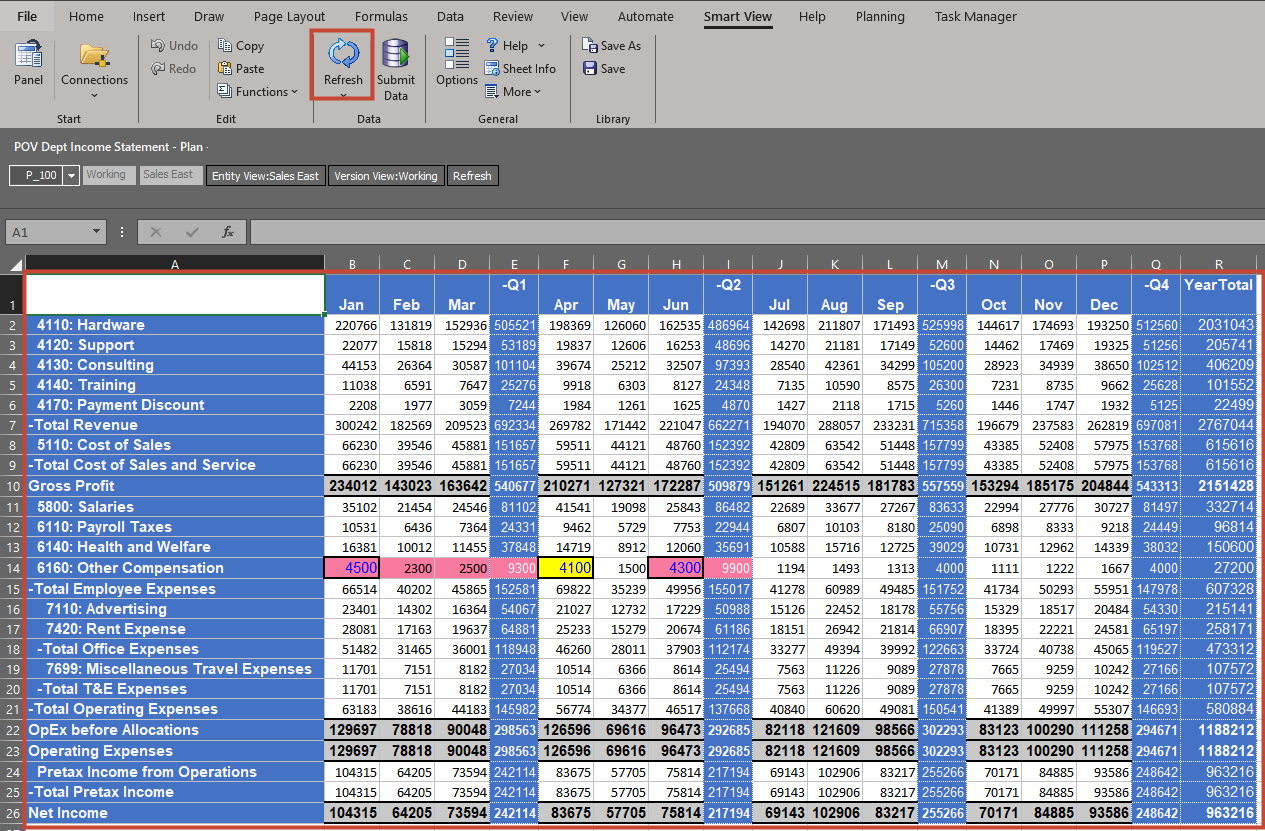
The form with duly formatted Data Grid is displayed.
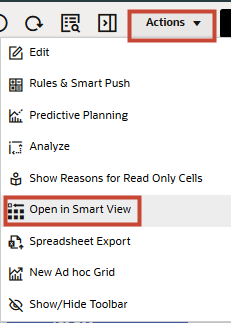
- On the right, click Actions, then click Open in Smart View.
Depending on how your browser is set up, you may be prompted to save the file (filename ending in file extension .svlnk) or the file may download directly to the downloads folder set in your browser.
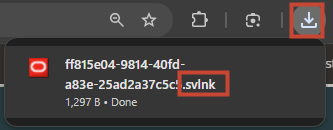
- On your local computer, navigate to where the exported filename ending in .svlnk was downloaded and open it. This file is a one-time use file and disappears after it has been used once.
Microsoft Excel should launch and open the form (Dept Income Statement – Plan). If prompted to log on, sign back in using your Service Administrator credentials.
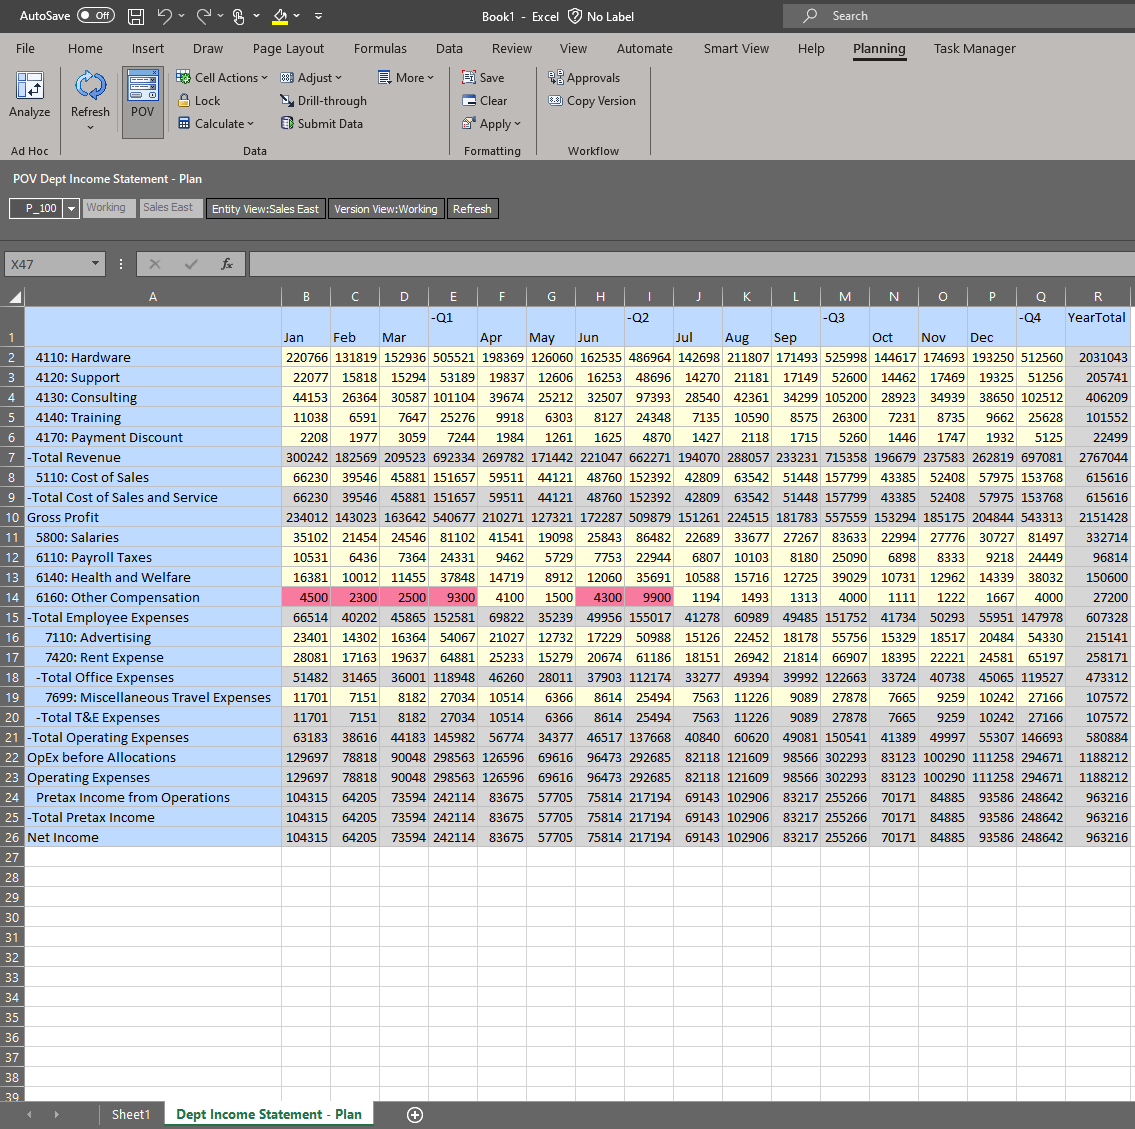
Note:
As a default, Smart View Cell Styles are applied.
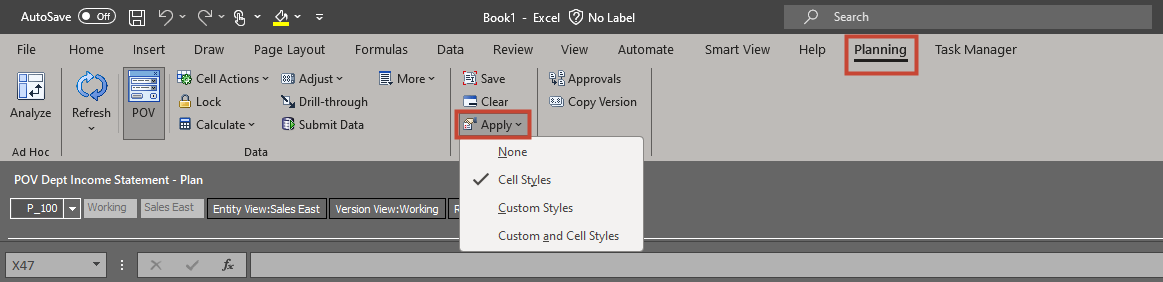
Applying the formatting Rules to form at runtime
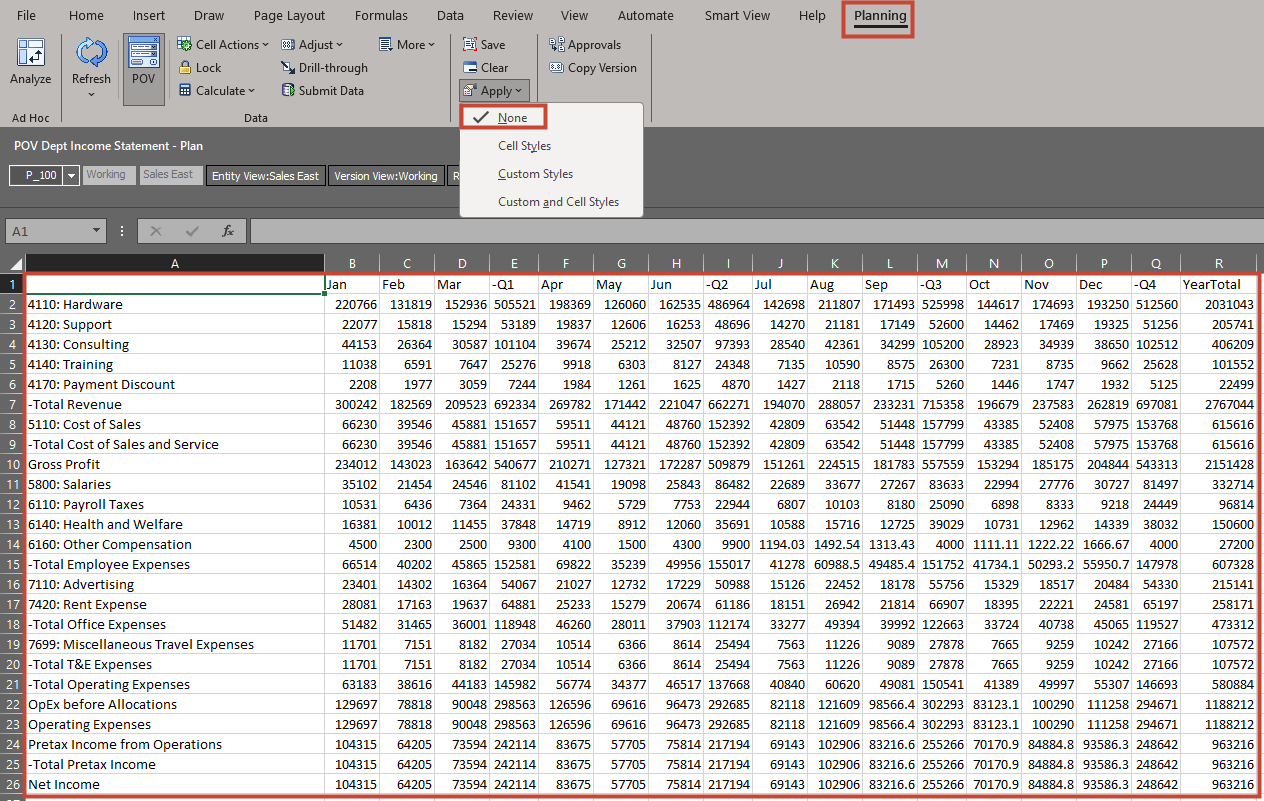
In Smart View, you can apply the formatting Rules to forms at runtime using the Apply options in the provider ribbon (for example, in the Planning ribbon). These options control how formatting Rules are displayed on the form:
- None: Applies no styles (Excel formatting or Smart View cell styles) to the sheet. Though cell styles or custom styles may exist on the sheet, neither are shown when selecting this option. However, you can display them later using the Cell Styles, Custom Styles, or Custom and Cell Styles options.
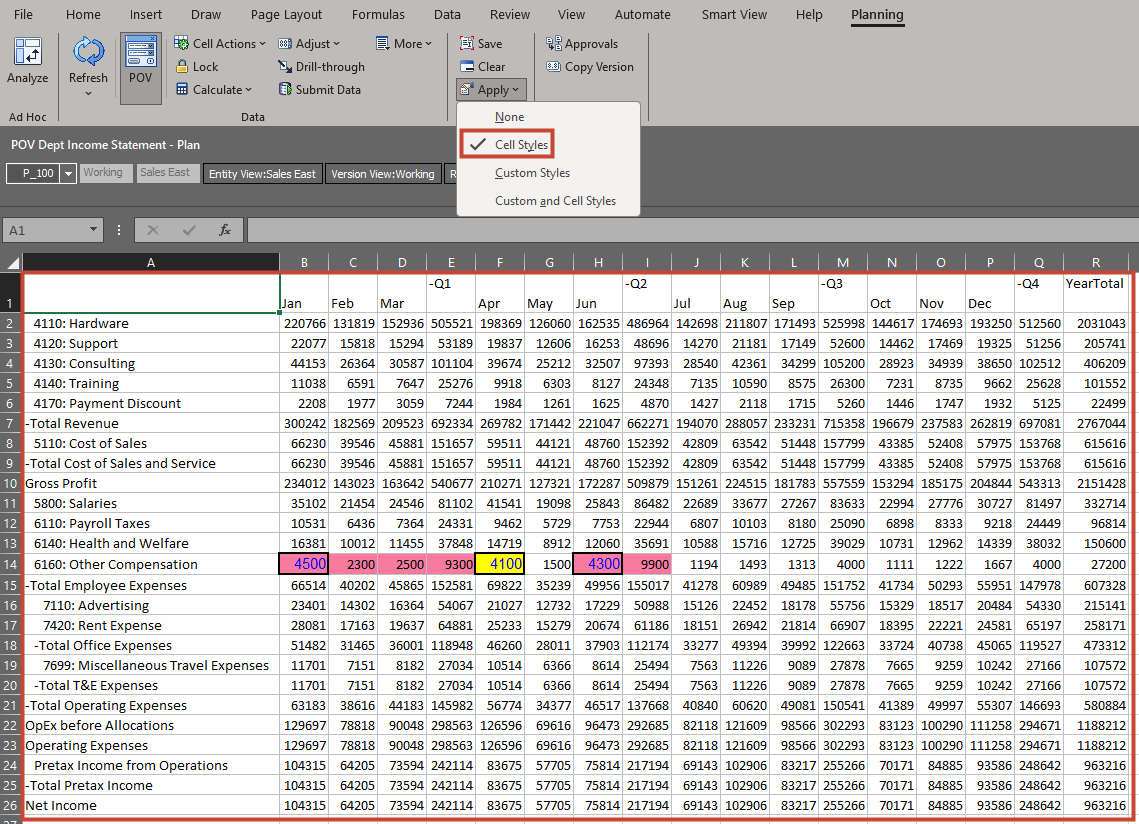
- Cell Styles: Applies cell styles defined in Smart View, Data Validation Rules, and Groovy Rules. No Format-only Rules or Excel custom formatting are applied.
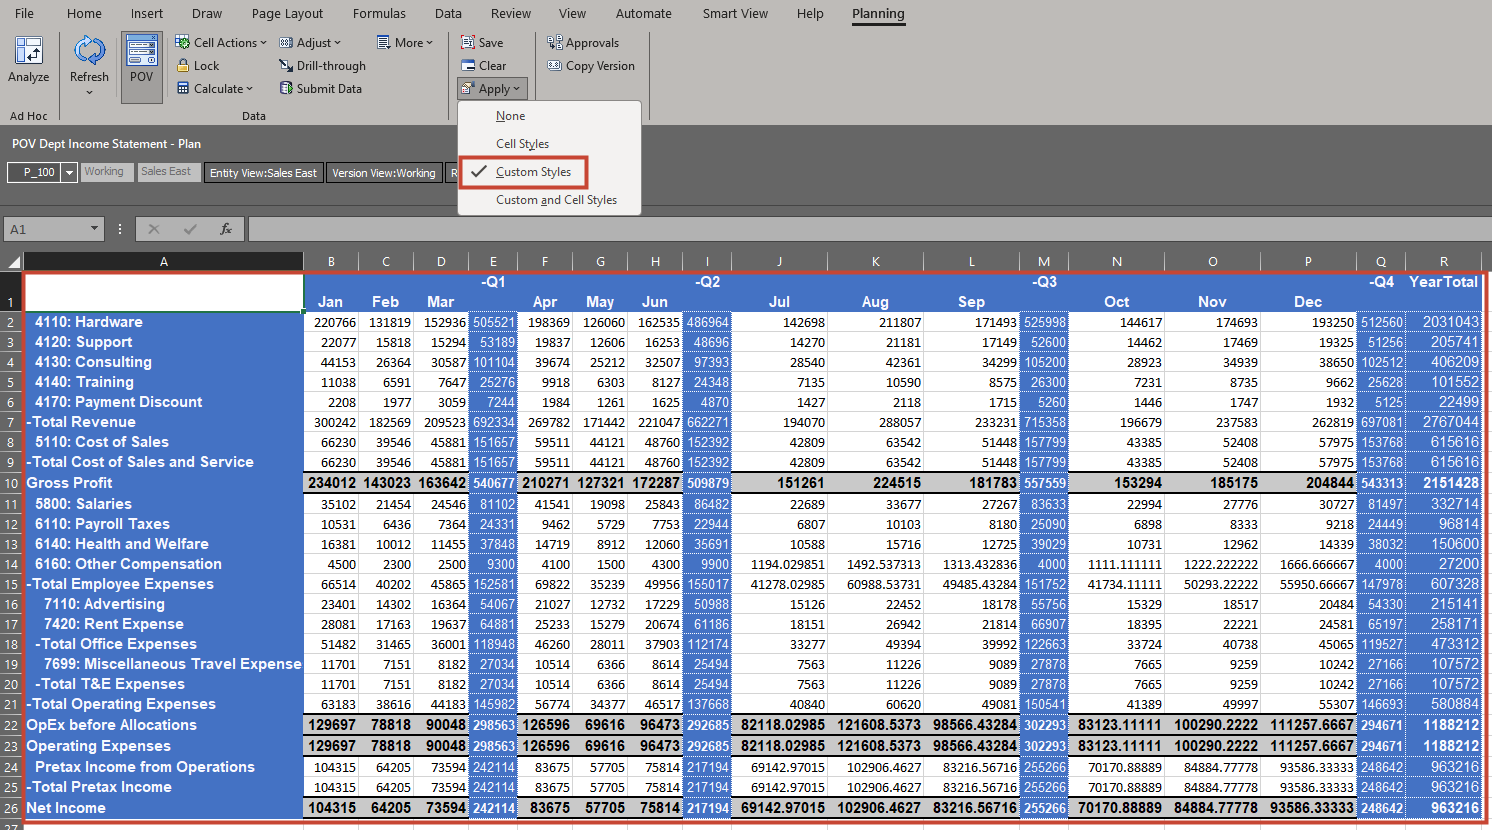
- Custom Styles: Applies formatting Rules that were defined in the Format/Validation Rule Builder at design-time, and any Excel custom formatting that was added in Smart View. Cell styles, Groovy Rule formatting, and Data Validation Rule formatting are not applied.
- Custom and Cell Styles: Applies Groovy Rules, design-time formatting Rules (data validation and format-only), all cell styles, and custom Excel formatting to the form.
- From the Planning Tab, click Apply.
Note:
As a default, Smart View Cell Styles are applied. - From the menu, click Custom Styles.
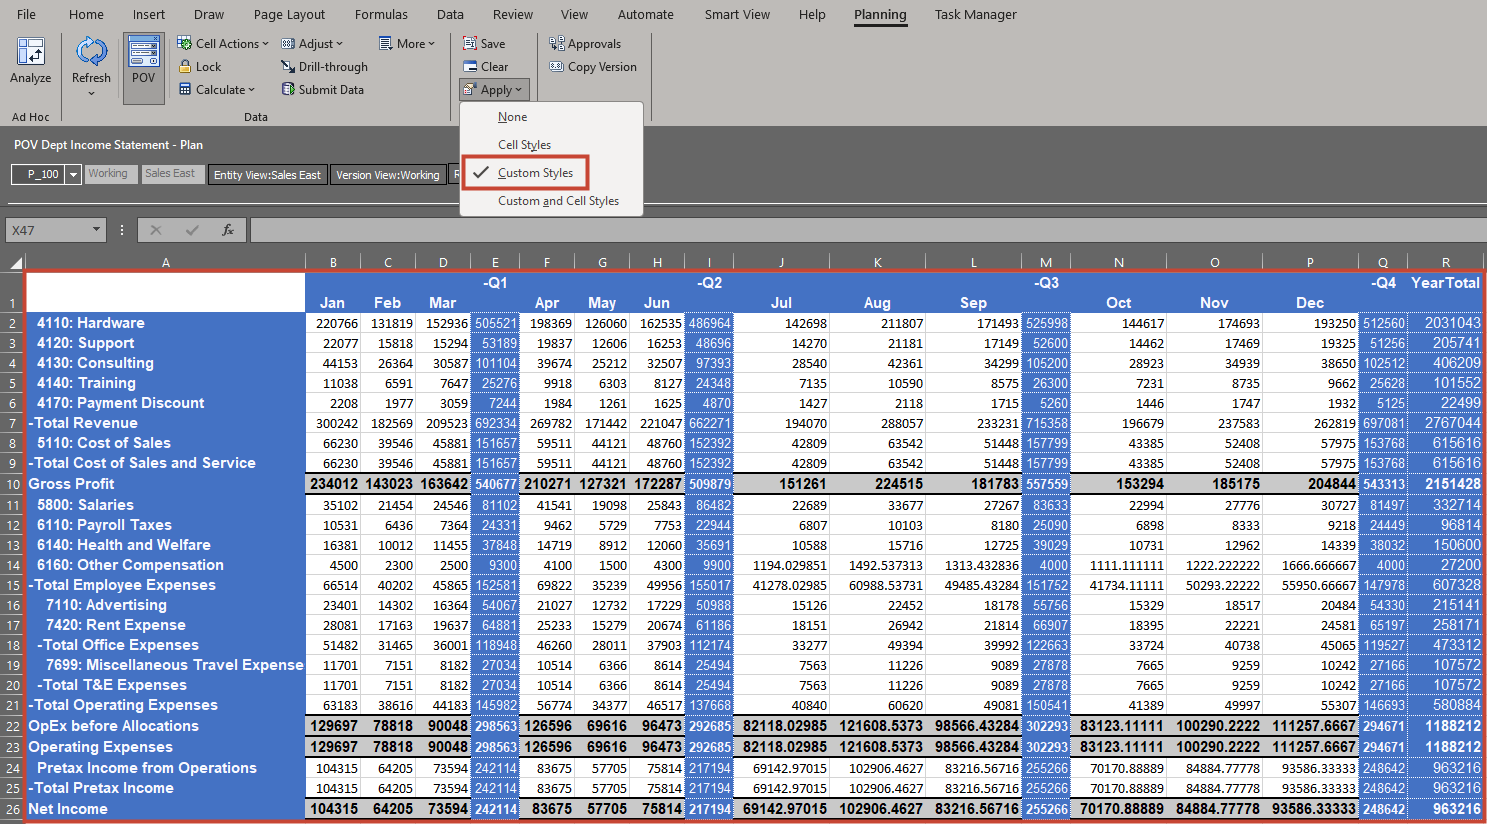
Note:
When Custom Styles is selected – only Format Rules are applied. - From the menu, click Custom and Cell Styles.
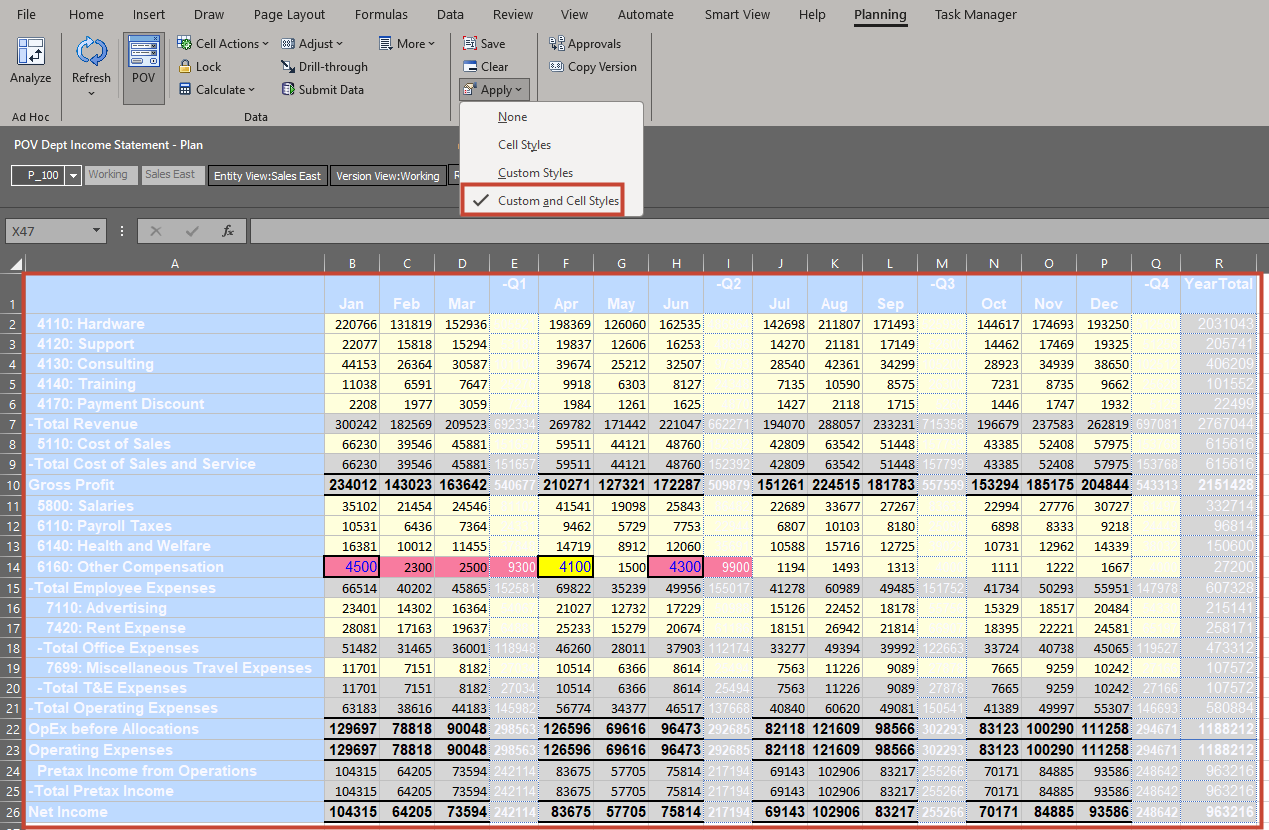
Note:
When Custom and Cell Styles is selected – Smart View displays Grids after applying following Styles:- Groovy Business Rules (Selected in Forms Designer)
- Data Validation Rules (Defined in Forms Designer)
- Cell Styles defined/selected in Smart View - Options – Cell Styles. (You will disable this in the following section of this tutorial.)
- Format Rules (Defined in Forms Designer)
Disabling the Cell Styles from Smart View Options
In this section, you will disable the Cell Styles defined/selected in Smart View - Options – Cell Styles.
- From top menu options, click Smart View then click Options.
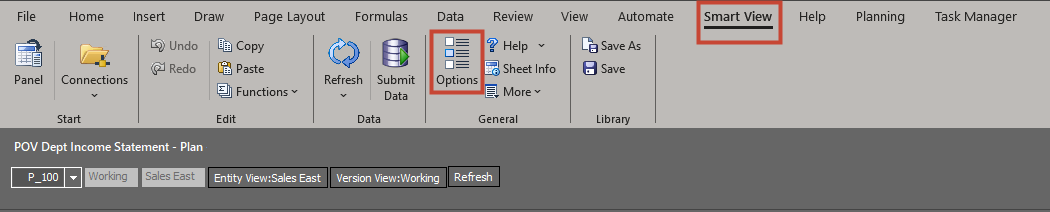
- In Options, click Cell Styles.
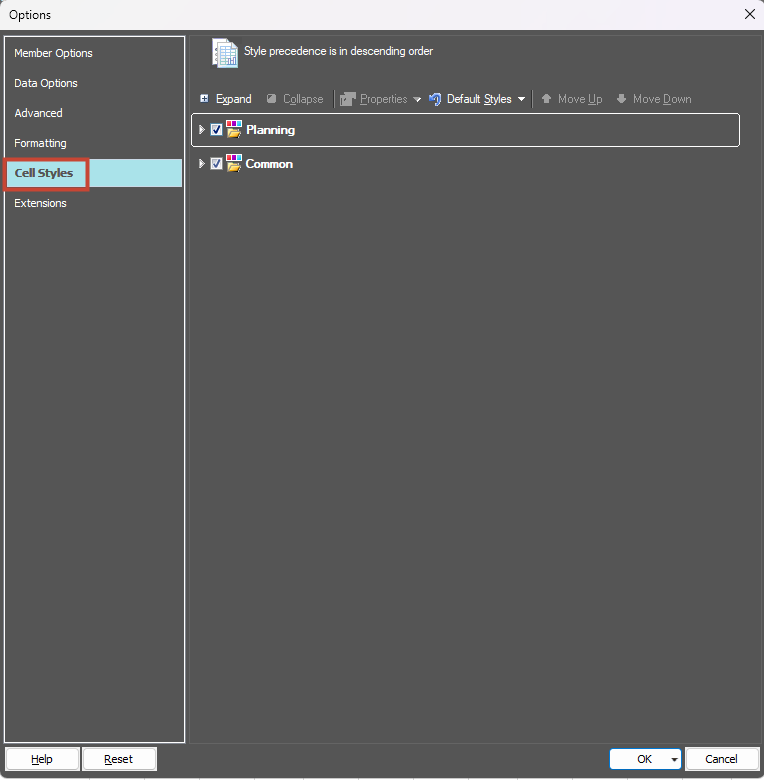
- Expand Cell Styles and review the Cell Styles defined.

Note:
Note the colors for the Member cells and Data cells. You will disable them in this section of the tutorial. - For Planning and Common disable the Cell Styles:
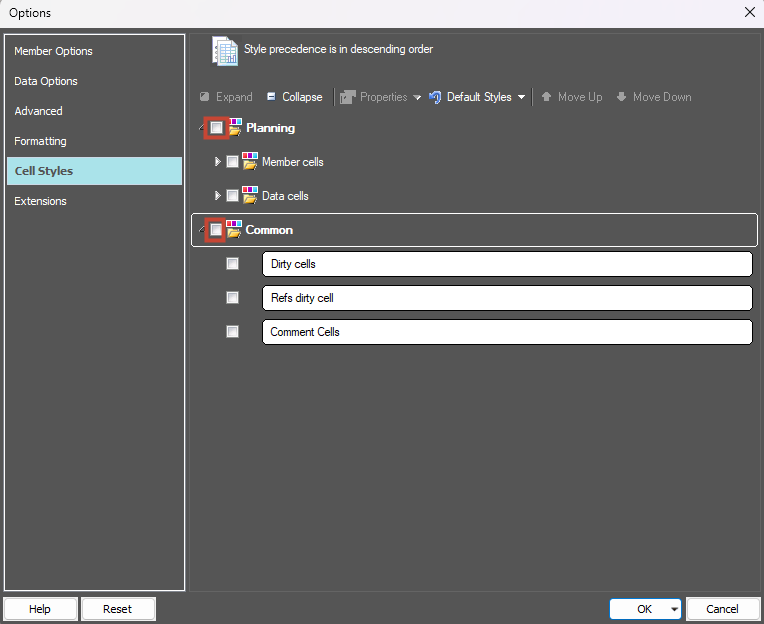
- Click OK.
- In the Tool Bar Menu, click Refresh.
Cell Styles (defined in Smart View) are not considered in the form and only the Groovy Rules, Data Validation Rules and Format Rules are applied and shown (currently applied style is the default - Custom and Cell Styles)
Validating impact of disabled Smart View Cell Styles
It's possible to have multiple Rules specified in the same location on a form which could impact how formatting is displayed. For example, a form could include a Groovy Rule, a Data Validation Rule, and custom Excel formatting all at the same location. Therefore, there's an order of precedence for displaying Rules in forms. The order of precedence, where P=Priority, is as follows:
- (P1) Groovy Rule
- (P2) Data Validation Rule in the Format/Data Validation Rule Builder
- (P3) Smart View cell styles (such as read-only cells, locked cells, supporting detail, and attachments)
- (P4) Format Rule in the Format/Data Validation Rule Builder
- (P5) Smart View Custom formatting (sometimes referred to as "native" Excel formatting; not applicable on Web forms)
Note:
For a cell that inherits data validation Rules that are defined in multiple places (grid, row, column, or cell level), the Rule that is closest to the location of the Rule definition wins priority. So if there is a Rule applied at the cell level, that Rule wins. Next is column level, then row level, and then grid level.- From the Planning Tab, click Apply then None.
No Styles are applied, and the Data is shown without applying any Styles.
- From the menu, click Cell Styles.
Grid is shown after applying Groovy Business Rule and then Data Validation Rule. This is as per the order of precedence. Cell Styles defined in Smart View are not shown since we have already disabled them.
- From the menu, click Custom Styles.
Grid is shown after applying only the Format Rules.
- From the menu, click Custom and Cell Styles.
Grid is shown after applying Groovy Business Rule, then Data Validation Rule and then Format Rules. This is as per the order of precedence. Cell Styles defined in Smart View are not shown since we have already disabled them.

Note:
This Cell Styles disabled in the section - Disabling the Cell Styles from Smart View Options will remain in the disabled state for future forms in Smart View. You can enable them again by going to the settings mentioned in the section - Disabling the Cell Styles from Smart View Options.Related Links
Data Forms in Smart View - Format Display Options
G24815-01
January 2025