Introduction
This tutorial shows you how to import and export data with the Import/Export utility in FreeForm Business Process. You import data from data files stored locally, and you export data from your application. You can also import data from the server, and you can export data to the server. You learn how to validate data files, view the status of your data import and export jobs, and schedule data import and export jobs. The sections build on each other and should be completed sequentially.
Background
You can import data from another Cloud Enterprise Performance Management (EPM) business process and external systems into your application. You can use the following methods to load data:
- Import/Export Utility: Use the Import/Export utility within the application. This method is covered in this tutorial.
- REST APIs: Use the REST API URL and run a sequence of commands or use REST APIs to load data. For more information see REST API for Oracle Enterprise Performance Management Cloud.
- EPM Automate: Use the EPM Automate Utility on top of REST APIs to load data to the application. For more information, see Working with EPM Automate for Oracle Enterprise Performance Management Cloud.
- Migrations, using snapshots that include Essbase Data: Use migrations that include Essbase data for business processes other than Narrative Reporting.
- Data Integration: Use Data Integration for complex data mappings to map metadata for data loads. For more information, see Loading Data Using Data Integration.
Before importing data, you must:
- Define or load metadata and refresh the database.
- Prepare the data load file. Source data must be in a business process-specific data file format or in an Essbase data file format.
- Ensure the data load files do not contain any thousands separators, quotes, and so on, around data values. Up to one single . (decimal point) character is supported.
- Ensure the data import file type is .csv, .txt, or .zip.
You can create a data import file based on a template, or you can generate one based on the source system. To use a template, run the export data process in your business process and use the exported file as a template.
Note:
When importing data, no validation is performed on intersections to determine which are valid, and data is loaded to all intersections. To review data that has been loaded into invalid intersections, run the Invalid Intersection report before importing data to see and clear invalid intersections.The snapshot and import files are included in the Prerequisites section of this tutorial.
Prerequisites
Cloud EPM Hands-on Tutorials may require you to import a snapshot into your Cloud EPM Enterprise Service instance. Before you can import a tutorial snapshot, you must request another Cloud EPM Enterprise Service instance or remove your current application and business process. The tutorial snapshot will not import over your existing application or business process, nor will it automatically replace or restore the application or business process you are currently working with.
Before starting this tutorial, you must:
- Have Service Administrator access to a Cloud EPM Enterprise Service instance.
- Import this FreeForm snapshot into your instance. The examples provided in this tutorial use the snapshot.
- Download the following data load files:
Note:
If you run into migration errors importing the snapshot, re-run the migration excluding the HSS-Shared Services component, as well as the Security and User Preferences artifacts in the Core component. For more information on uploading and importing snapshots, refer to the Administering Migration for Oracle Enterprise Performance Management Cloud documentation.Assigning Values to User Variables
User Variables were added when the business process was created. User variables act as filters in forms, enabling planners to focus only on certain members. In this section, you set values for user variables.
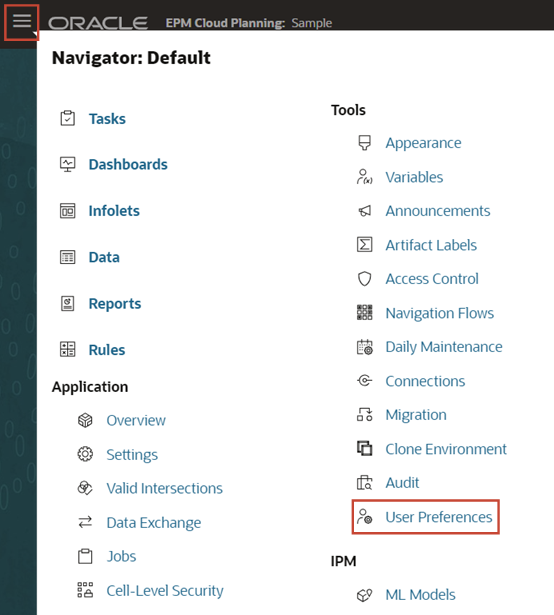
- On the home page, click
 (Navigator), and under Tools, click User Preferences.
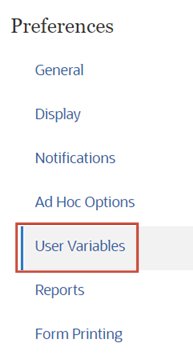
- Under Preferences, click User Variables.
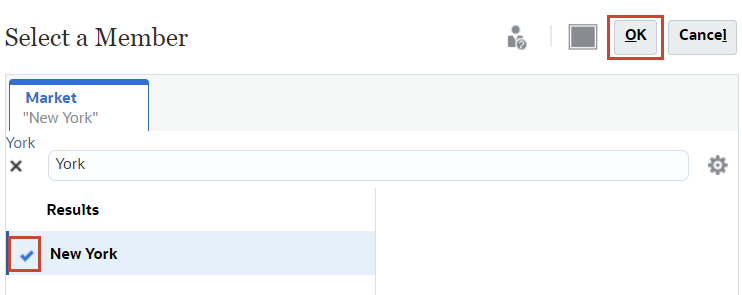
- For Market, click its
 (Member Selector) to select New York as the variable's value.
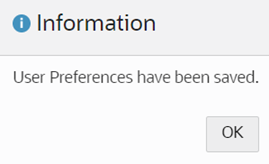
- Verify your selection and click Save.
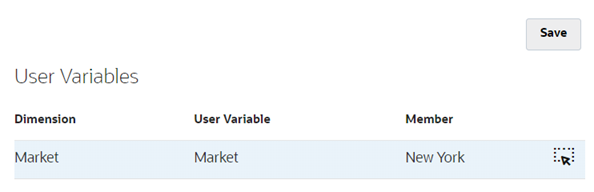
- At the information message, click OK.
Reviewing the Data Point of View
In this section, before importing data, you review the data point-of-view (POV) in the form and the contents of the import file used in this tutorial.
Reviewing Form Data
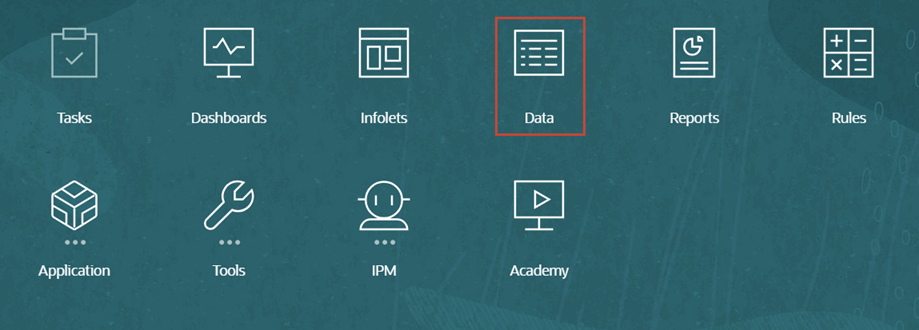
-
On the home page, click Data.
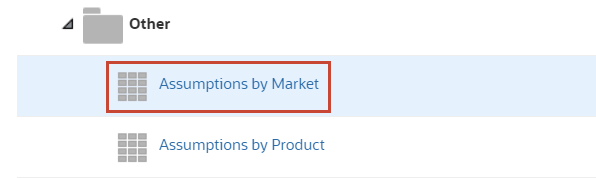
- In Data Entry, under Library, expand Other.
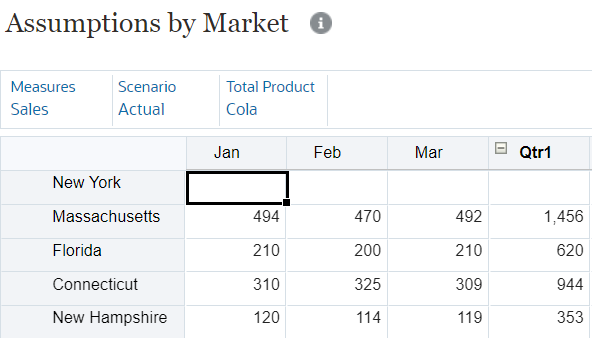
- Click Assumptions by Market.
In this example, the forms displayed are part of the sample FreeForm application provided in the Prerequisites section of this tutorial. When you create your business process, the cubes do not contain data.
An empty form for actual monthly sales of Cola product for all markets is displayed.

- At the bottom, close the form by clicking
 on the tab.
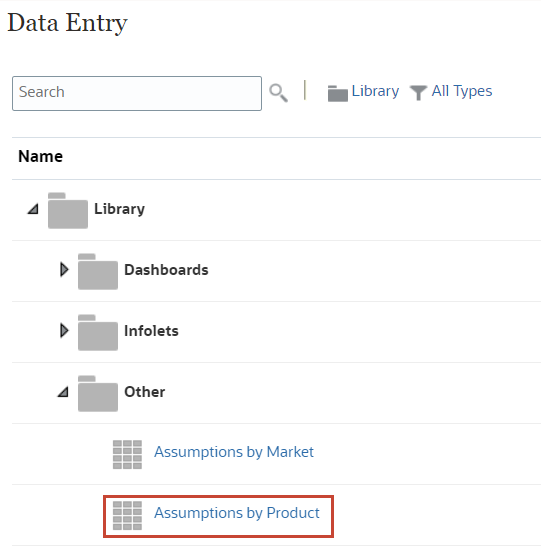
 - In Data Entry, under Library, expand Other.
-
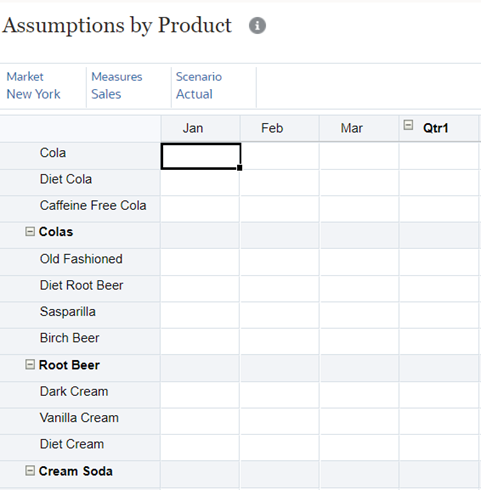
Click Assumptions by Product.
An empty form for actual sales data of New York is displayed.
- At the bottom, close the form by clicking on the tab.
Reviewing the Import Files
- On your local computer, navigate to where you saved NY_actual.csv and open it.
Caution:
Do not make any changes. - Review the contents of the file.
This file has the actual sales data for New York.
- On your local computer, navigate to where you saved All_markets_products.csv and open it.
Caution:
Do not make any changes. - Review the contents of the file.
This file has the actual as well as budgeted sales data of all the markets, except New York's actuals.
- Close the files without making any changes.
Navigating to the Import/Export Utility
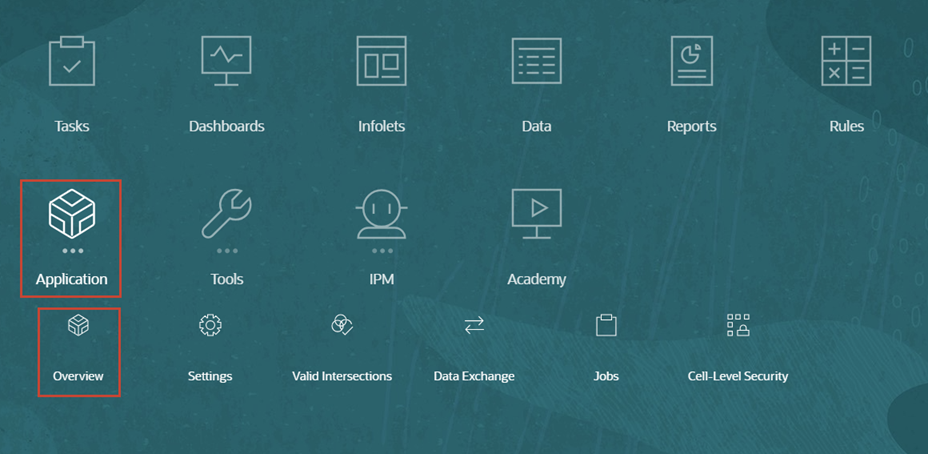
-
On the home page, click Application, then Overview.
-
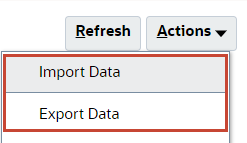
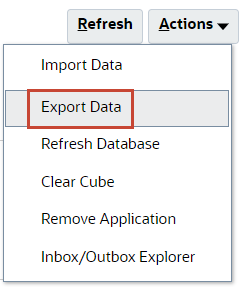
On the right, click Actions to display your data import and export options.
Validating Import Files
Before you import data, you validate the data file to test whether the import file format is correct.
-
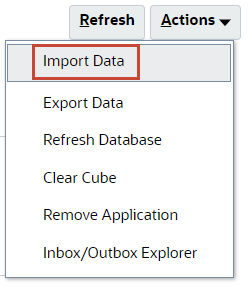
On the right, click Actions, then click Import Data.
-
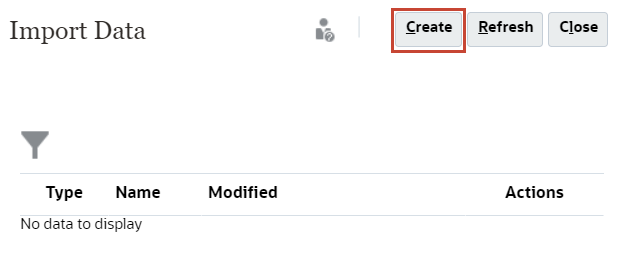
In Import Data, click Create.
-
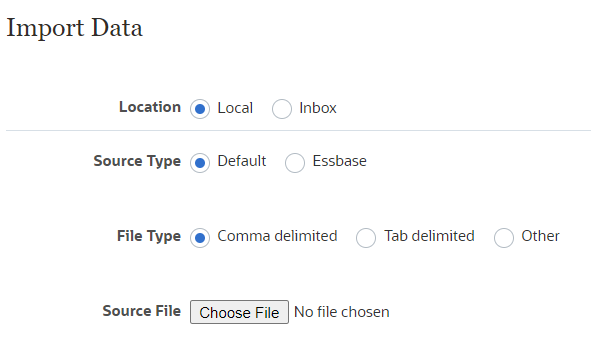
Ensure your selections match the following:
Location Local Source Type Default File Type Comma delimited -
Click Choose File.
Note:
Depending on your browser, the button label may display Choose File or Browse. - On your local computer, navigate to where you saved NY_actual.csv and open it.
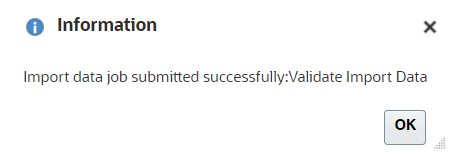
- Click Validate.
-
In the Information dialog, click OK.
- Click Close twice.
-
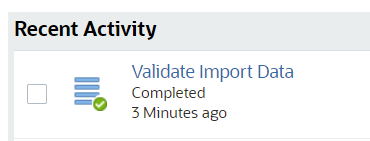
From the cards on the top of the page, click Jobs.

-
Under Recent Activity, click Validate Import Data.
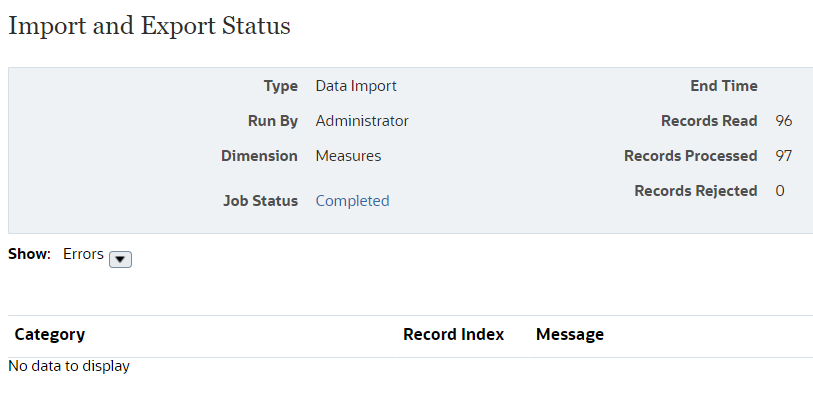
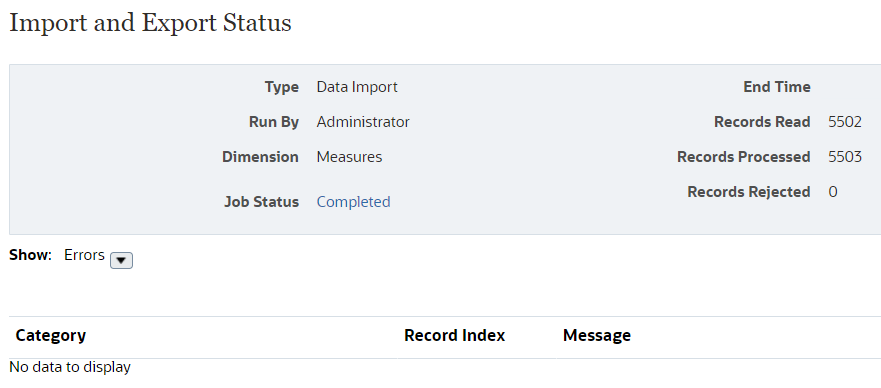
Import and Export Status shows that the job completed without any errors.
- Click Close.
- Repeat steps 1 - 11 to validate the second file: All_markets_products.csv.
The import file specific to the FreeForm application snapshot is provided in the Prerequisites section of this tutorial.
Uploading Data Files to Inbox/Outbox Explorer
In this section, you use the Inbox/Outbox Explorer to upload a file to the server.
-
From the cards on the top of the page, click Overview.

- On the right, click Actions, then Inbox/Outbox Explorer.
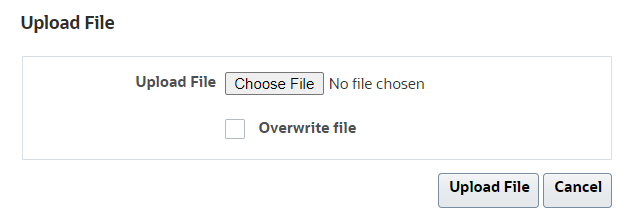
- In Inbox/Outbox Explorer, click Upload.
-
In Upload File, click Choose File.
Note:
Depending on your browser, the button label may display Choose File or Browse. - On your local computer, navigate to where you saved NY_actual.csv and open it.
- In Upload File, click Upload File.
-
In the Information dialog, click OK.
- In Inbox/Outbox Explorer, click Close.
The import file is uploaded and listed in the Inbox/Outbox Explorer.
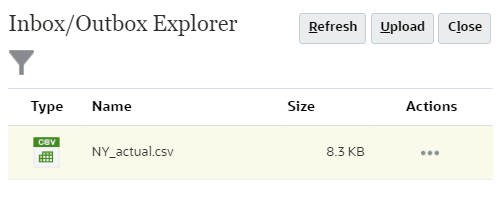
- Click Close.
Importing Data
When you create your application, the cubes do not contain any data. You can load data using a data load file using the Import Utility.
Importing Data from a Local File
-
On the right, click Actions, then click Import Data.
- In Import Data, click Create.
-
Ensure your selections match the following:
Location Local Source Type Default File Type Comma delimited -
Click Choose File.
Note:
Depending on your browser, the button label may display Choose File or Browse. - On your local computer, navigate to where you saved All_markets_products.csv and open it.
- In Import Data, click Import.
-
In the Information dialog, click OK.
- Click Close twice.
Verifying the Data Load
-
From the cards on the top of the page, click Jobs.
-
Under Recent Activity, click Import Data.
Import and Export Status shows that the job completed without any errors. A total of 5503 records were processed. Those records include both actual and budget sales data for all markets.
- Click Close.
-
On the top left, click
(Navigator), then click Data.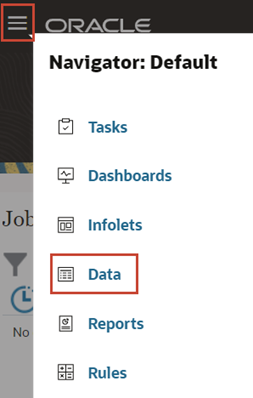
- In Data Entry, under Library, expand Other.
-
Click Assumptions by Market.
The imported data is displayed on the form. Missing data for New York will be imported from NY_actual.csv.
- At the bottom, close the form by clicking on the tab.
Importing Data from a File in the Inbox
You import data from a file in the Inbox by running a job.
-
On the top left, click
(Navigator), and under Application, click Overview.
-
On the right, click Actions, then click Import Data.
-
In Import Data, click Create.
-
Ensure your selections match the following:
Location Inbox Source Type Default File Type Comma delimited 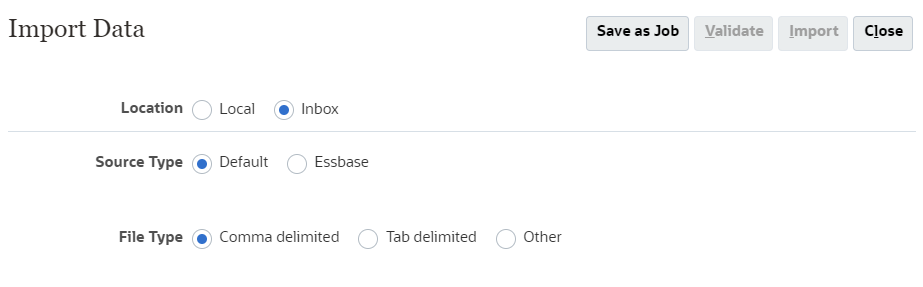
- In Source File, enter NY_actual.csv.
You previously uploaded this file to the Inbox in the Uploading Data Files to Inbox/Outbox Explorer section of this tutorial. This file was uploaded to the inbox, earlier in this tutorial.
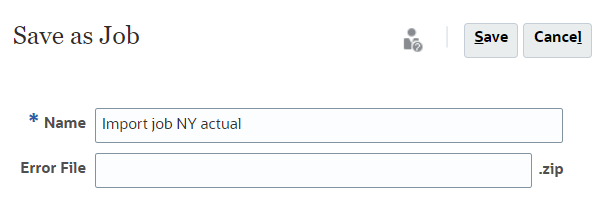
- Click Save as Job.
- In Save as Job, enter Import job NY actual, then click Save.
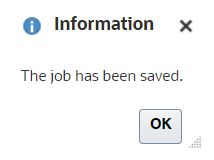
-
In the Information dialog, click OK.
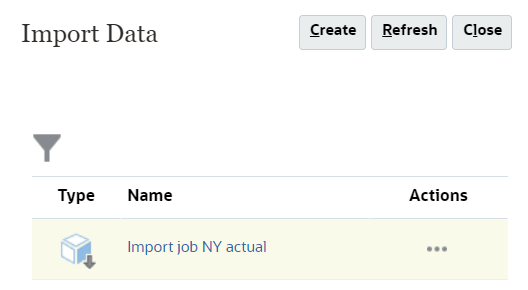
- In Import Data, click Close.
- In Import Data, click Refresh.
Import Data displays the Import job NY actual job. The job was created but not run yet.
-
Click
 (Actions) and review the job actions. If you select Submit the job runs immediately. You will run the job later.
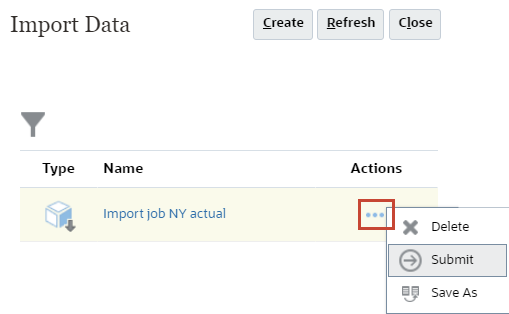
- In Import Data, click Close.
Scheduling and Running the Import Job
-
From the cards on the top of the page, click Jobs.

- On the right, click Schedule Jobs.
- In Schedule Job, under What type of job is this?, select Import Data.
-
Under When do you want to run this job?, select Run Now, then click Next.
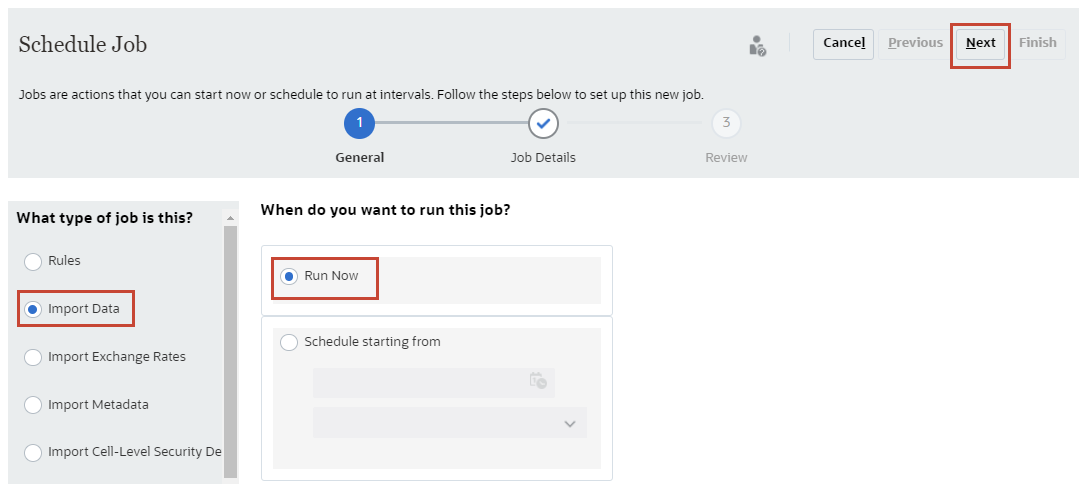
Tip:
You can schedule the job to run later. -
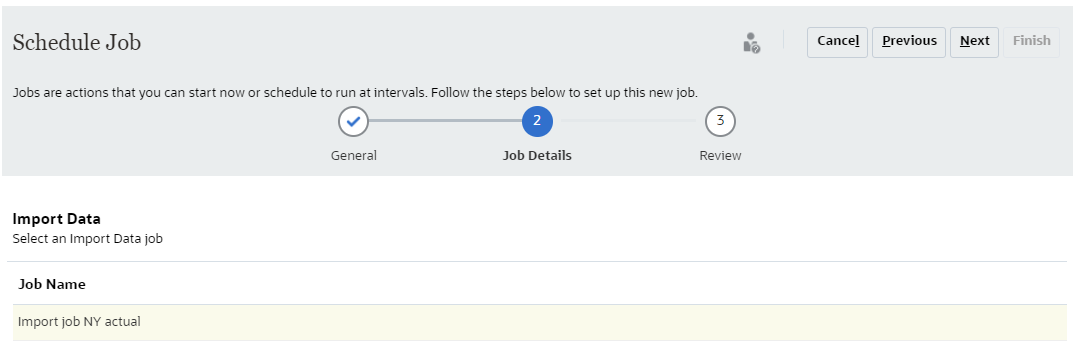
Select Import job NY actual, then click Next.
-
Click Finish.
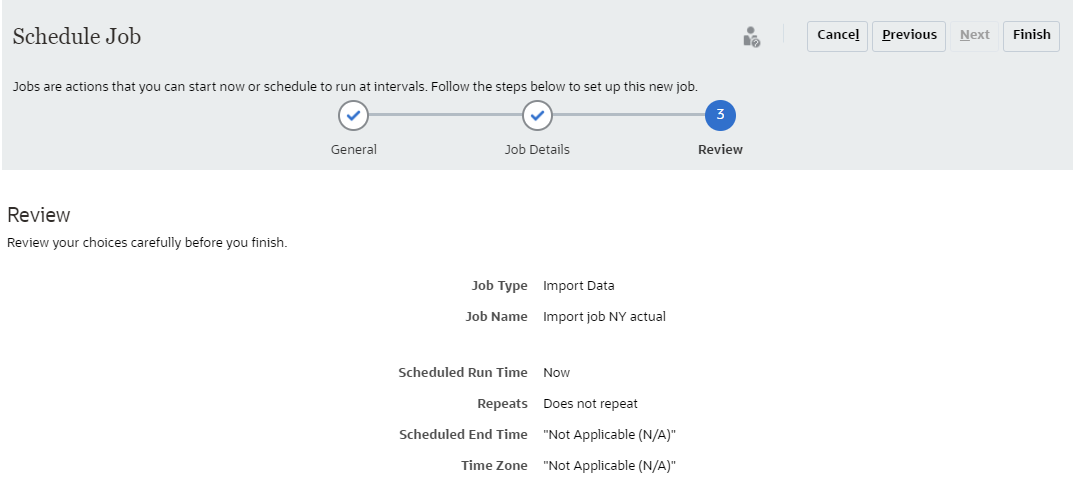
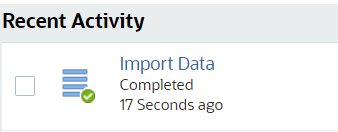
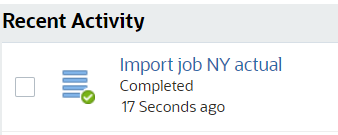
The Import job NY actual job is displayed in Recent Activity.

Viewing the Data Import Status
-
Under Recent Activity, click Import job NY actual.
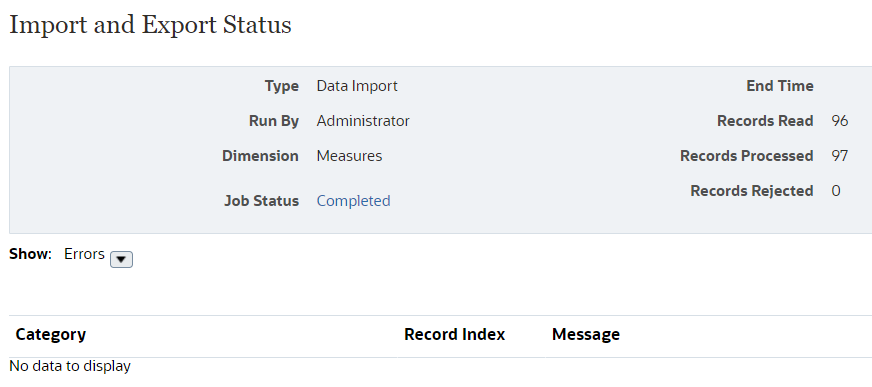
Import and Export Status shows that the job completed without any errors.
- Click Close.
Reviewing the Data Load
-
On the top left, click
(Navigator), then click Data. - In Data Entry, under Library, expand Other.
-
Click Assumptions by Product.
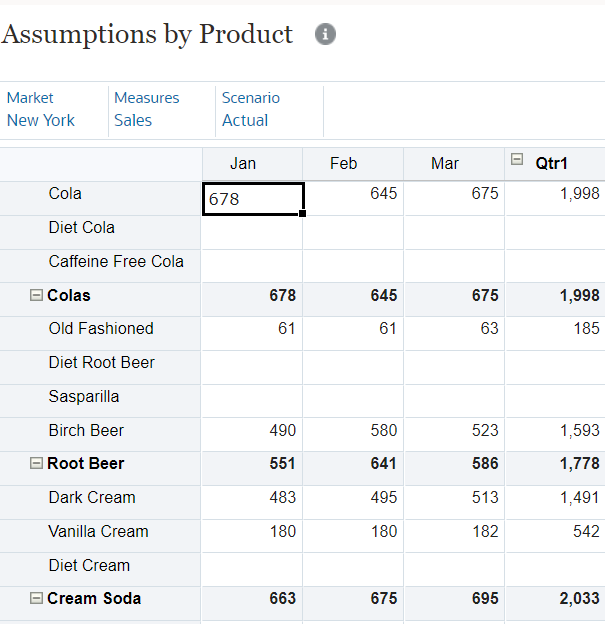
The imported data is displayed on the form.
- At the bottom, close the form by clicking on the tab.
- In Data Entry, under Library, expand Other.
-
Click Assumptions by Market.
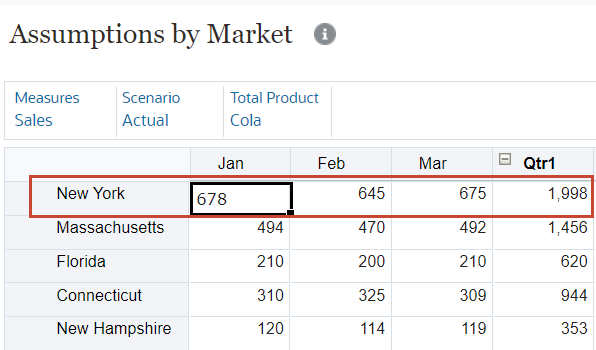
New York data was added.
- At the bottom, close the form by clicking on the tab.
Exporting Data
You export data into a flat file. You can use the exported file:
- When you need to load data to a migrated or new business process
- As a backup of your application data
- As a template for importing data into multiple dimensions
Exporting Data to a Local File
-
On the top left, click
(Navigator), and under Application, click Overview. -
On the right, click Actions, then click Export Data.
- In Export Data, click Create.
-
Ensure your selections match the following:
Location Local Cube Basic File Type Comma delimited Smart Lists Export Names Dynamic Members Include Decimals None 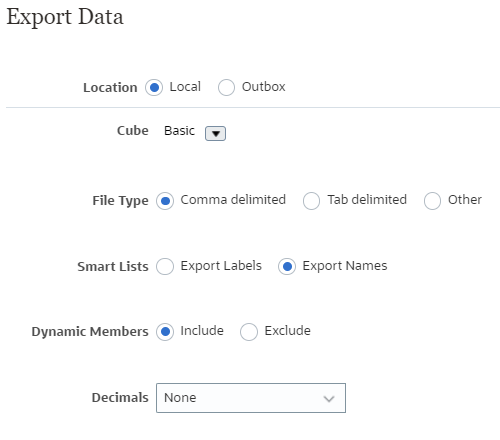
-
Under Slice Definition, for Row, from the drop-down, select Measures.

-
For Measures, click
 (Member Selector).
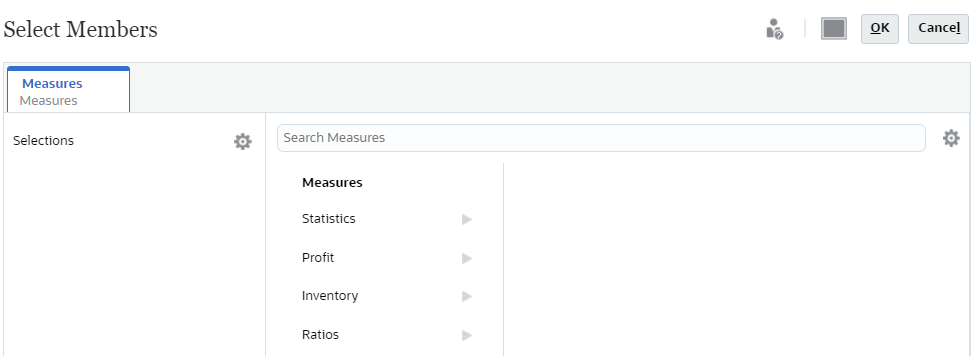
-
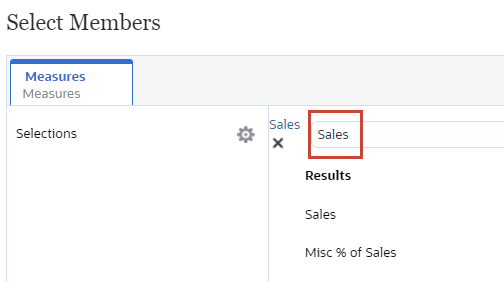
In Member Selector, for Search Measures, enter Sales.
-
In the displayed results, for Sales, click
 (Function Selector), and select Children.
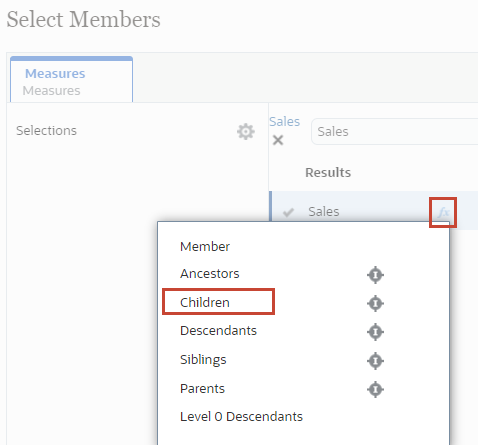
-
In Select Members, click OK.

- Under Slice Definition, for Column select Year from the drop-down.
- For Year, click (Member Selector).
- For Year, click (Function Selector) and select Descendants.
-
In Select Members, click OK.

-
Under Slice Definition, for Point of View, click
(Member Selector).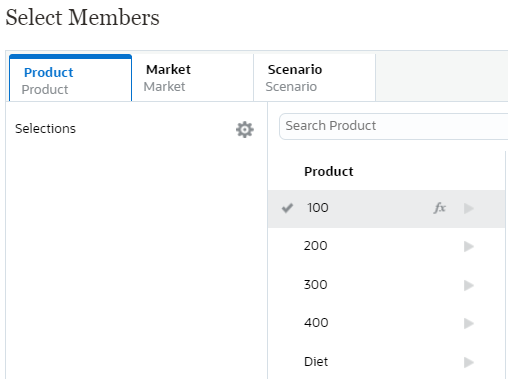
- For 100, click (Function Selector) and select Level 0 Descendants.
- In Select Members, from the tabs at the top, click Market.
- For Search Market, enter New York.
- For New York, click (Function Selector) and select Level 0 Descendants.
- In Select Members, from the tabs at the top, click Scenario.
- For Actual, click (Function Selector) and select Level 0 Descendants.
- In Select Members, click OK.
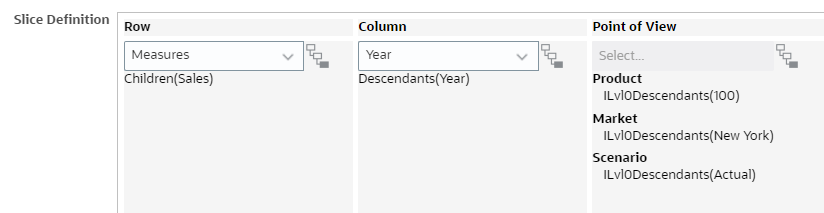
-
Ensure your selections match the following Slice Definition:
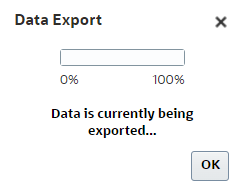
- In Export Data, click Export.
- In the Data Export, click OK.
Depending on how your browser is set up, you may be prompted to save the file (filename ending in ExportedData_Measures.zip) or the file may download directly to the downloads folder set in your browser.
- Click Close twice.
Viewing the Exported Data File
- On your local computer, navigate to where the exported filename ending in ExportedData_Measures.zip was downloaded and open it.
- In the open zip file, open the filename ending in ExportedData_Measures.1-1.csv.
- Review the contents of the file.
The file contains the members you selected when you exported the file.

- Close the files without making any changes.
Exporting Data to the Outbox
You export data to the Outbox by running a job.
-
On the right, click Actions, then click Export Data.
- In Export Data, click Create.
-
Ensure your selections match the following:
Location Outbox Cube Basic File Type Comma delimited Smart Lists Export Names Dynamic Members Include Decimals None 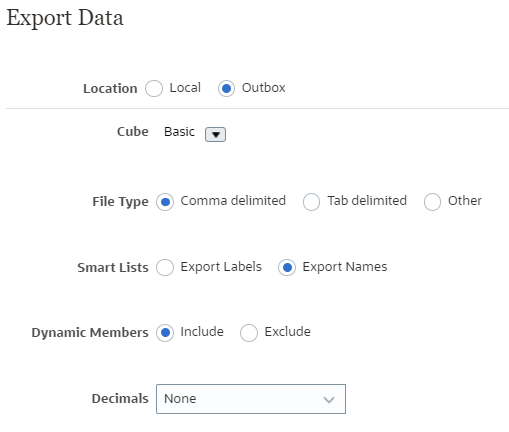
-
For Slice Definition, select the dimensions and members for row, column and point of view based on the following:

For more detailed steps, see Exporting Data to a Local File.
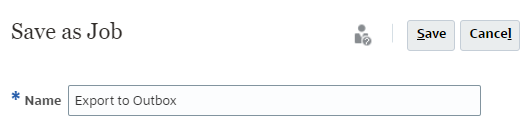
- In Export Data, click Save as Job.
-
In Save as Job, enter Export to Outbox, and click Save.
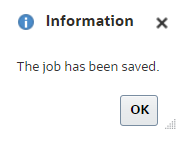
-
In the Information dialog, click OK.
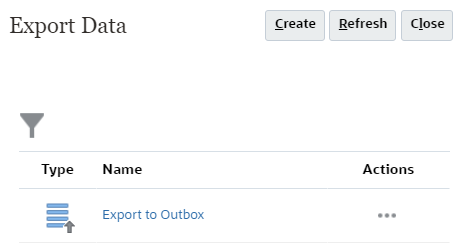
- Click Close.
Export Data displays the Export to Outbox job. The job was created but not run yet.
-
Click
(Actions) and review the job actions. If you select Submit the job runs immediately. You will run the job later.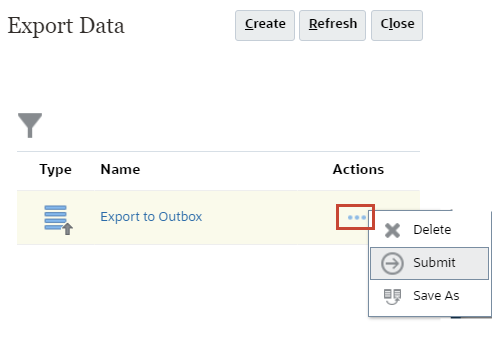
- Click outside to close the menu.
- In Export Data, click Close.
Scheduling and Running the Export Job
-
From the cards on the top of the page, click Jobs.
- On the right, click Schedule Jobs.
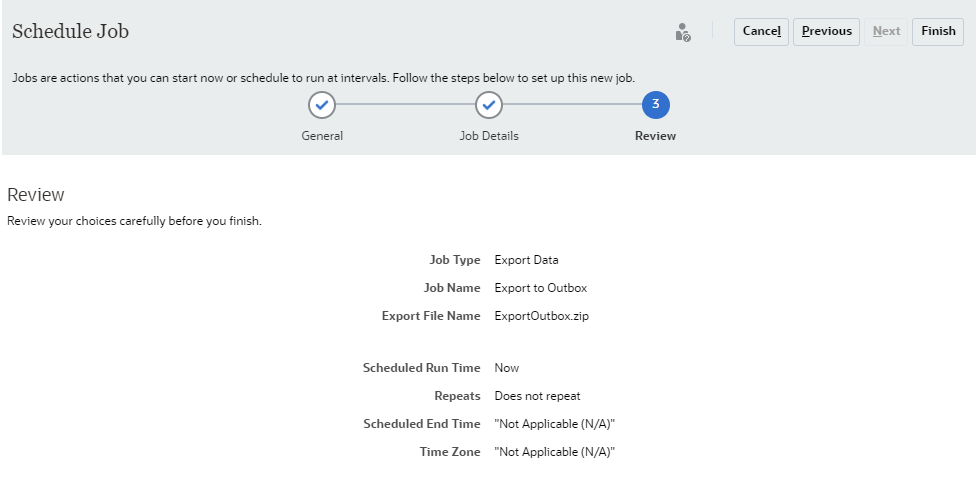
- In Schedule Job, under What type of job is this?, select Export Data.
-
Under When do you want to run this job?, select Run Now and then click Next.
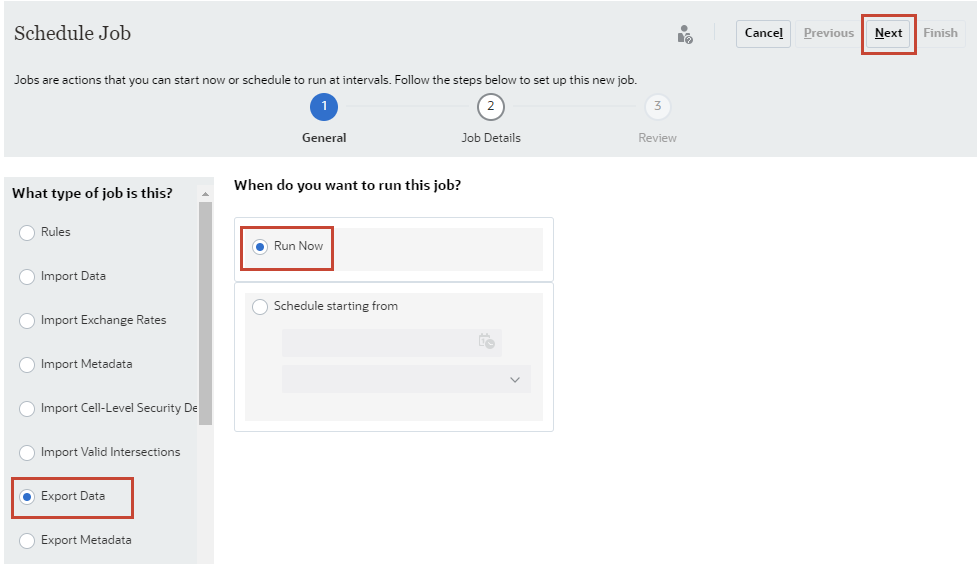
Tip:
You can schedule the job to run later. -
For the Export to Outbox, click
 (Edit).
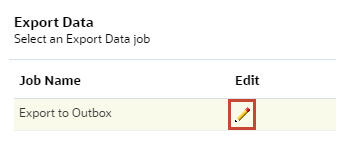
-
In Export Data to File, enter ExportOutbox and click OK.
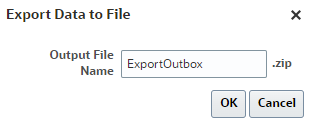
- Click Next.
-
Click Finish.
The Export to Outbox job is displayed in Recent Activity.
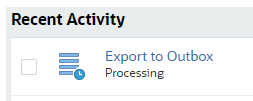
Viewing the Data Export Status
- In Jobs, click Refresh.
The Export to Outbox job displays as Completed under Recent Activity.
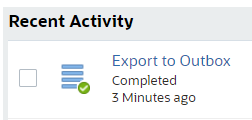
- Click Export to Outbox.
Import and Export Status shows that the job completed without any errors.
Tip:
You can optionally download the exported data file from this page. You can also download the data file from Inbox/Outbox Explorer.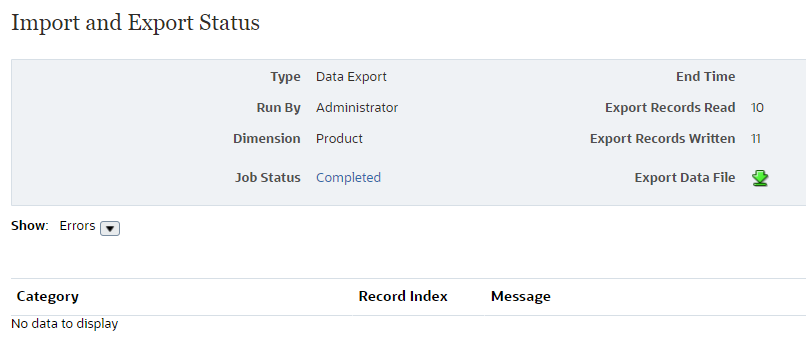
- Click Close.
Downloading your Exported Data File from Inbox/Outbox Explorer
-
From the cards on the top of the page, click Overview.
- On the right, click Actions, then Inbox/Outbox Explorer.
Inbox/Outbox Explorer displays the zip file created from Scheduling and Running the Export Job.

-
For ExportOutbox.zip, click
(Actions) and select Download File.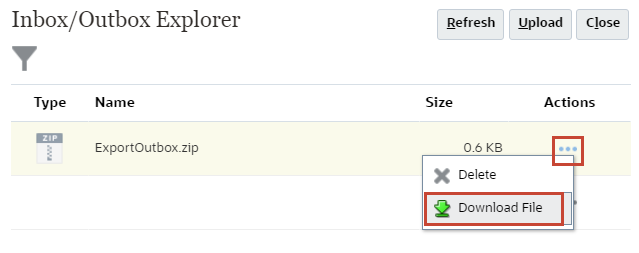
Depending on how your browser is set up, you may be prompted to save the file (ExportOutbox.zip) or the file may download directly to the downloads folder set in your browser. Refer to Viewing the Exported Data File for the steps to view the file.
- In Inbox/Outbox Explorer, click Close.