Introduction
This tutorial is the second in a series on how to configure Predictive Cash Forecasting (PCF) and expects the application to be in the state as the preceding tutorial. This tutorial shows you how to import and load metadata and data in PCF. First you load the Metadata (Dimension Members) into PCF and perform line items setup. Then with the Import/Export utility, you import the historical actual data as well as the forecast data from the sample data load template files. Once the data gets imported into the cash forecasting application, you run the associated business rules in sequence. Finally, you push the daily and periodic data into the reporting cube to generate dashboards and reports. The sections build on each other and should be completed sequentially.
Background
You can import data from another Cloud Enterprise Performance Management (EPM) business process and external systems into your application. You can use the following methods to load data:
- Import/Export Utility: Use the Import/Export utility within the application. This method is covered in this tutorial.
- REST APIs: Use the REST API URL and run a sequence of commands or use REST APIs to load data. For more information see REST API for Oracle Enterprise Performance Management Cloud.
- EPM Automate: Use the EPM Automate Utility on top of REST APIs to load data to the application. For more information, see Working with EPM Automate for Oracle Enterprise Performance Management Cloud.
- Migrations, using snapshots that include Essbase Data: Use migrations that include Essbase data for business processes other than Narrative Reporting.
- Data Integration: Use Data Integration for complex data mappings to map metadata for data loads. For more information, see Loading Data Using Data Integration.
Before importing data, you must:
- Define or load metadata and refresh the database.
- Configure the application and enable the required features.
- Prepare the data load file. Source data must be in a business process-specific data file format or in an Essbase data file format.
- Ensure the data load files do not contain any thousands separators, quotes, and so on, around data values. Up to one single . (decimal point) character is supported.
- Ensure the data import file type is .csv, .txt, or .zip.
The import files are included in the Prerequisites section of this tutorial.
Prerequisites
Cloud EPM Hands-on Tutorials may require you to import a snapshot into your Cloud EPM Enterprise Service instance. Before you can import a tutorial snapshot, you must request another Cloud EPM Enterprise Service instance or remove your current application and business process. The tutorial snapshot will not import over your existing application or business process, nor will it automatically replace or restore the application or business process you are currently working with.
Before starting this tutorial, you must:
- Have Service Administrator access to a Cloud EPM Enterprise Service instance.
- Either complete the preceding tutorial or download the LCM snapshot from here - FirstTutorialCompleted.zip. Upload and import this LCM snapshot into your Planning instance.
- Download the following data load files with sample data:
- Zip file with all the Metadata import files - All_metadata.zip
- Data load files:
The Rule (Reset Dates) will have to be run once the AMW (Daily Maintenance) runs in your environment. You can schedule to run it daily after your AMW (Daily Maintenance).
Note:
If you run into migration errors importing the snapshot, re-run the migration excluding the HSS-Shared Services component, as well as the Security and User Preferences artifacts in the Core component. For more information on uploading and importing snapshots, refer to the Administering Migration for Oracle Enterprise Performance Management Cloud documentation.Loading Metadata(Dimension Members)
Dimensions in PCF App
| # | Dimensions | Fusion ERP | Description | Standard, PCF Specific or Optional |
|---|---|---|---|---|
| 1 | Line Item | Yes | Covers the cash flow structure | Standard |
| 2 | Entity | Yes | Entity structure – maps to Fusion ERP Legal Entity | Standard |
| 3 | Period | Yes | Covers the daily, weekly and monthly periods | Standard |
| 4 | Year | Yes | Covers the multiple calendar or fiscal years | Standard |
| 5 | Scenario | Yes | Covers Forecast, Actual, Variance, Reporting Scenarios and more can be added | Standard |
| 6 | Version | Yes | Covers Working, Whatif and more can be added | Standard |
| 7 | Currency | Yes | PCF is always multi currency – Input and Reporting currencies | Standard |
| 8 | Forecast Method | Yes | Multiple Forecast Methods and also covers sources | PCF Specific |
| 9 | Business Unit | Yes | Business Units is dimension that maps to Fusion ERP BU | PCF Specific Optional for Non-Fusion ERP* |
| 10 | Bank | Yes | Bank is a seeded dimension, covers Banks and Bank Accounts under it | PCF Specific |
| 11 | Party | Yes | Represents the Customers and Suppliers – maps to Fusion ERP. Party Covers Top N Customers / Suppliers and rest are bucketed into others | PCF Specific - Optional for Non-Fusion ERP* |
| 12 | Category | Yes | Generic custom dimension used for driver based or can be used for multiple purposes – source details from Fusion ERP | PCF Specific |
| 13 | Custom | No | Additional custom dimension required for business | Optional |
Metadata Load Files
Metadata(Dimension members) for cash forecasting application can be integrated from ERP system through Data integration or it can also be loaded through .csv files using native metadata import method. If you are planning to load it through flat files, the files are provided in the Prerequisites section of this tutorial. Please ensure that the metadata are loaded for all the cubes in the application.
Note:
Download and extract (unzip) the metadata zip file, so that you can use each of the individual .csv files for the later sections.Copying Metadata files to EPM Inbox/Outbox folder
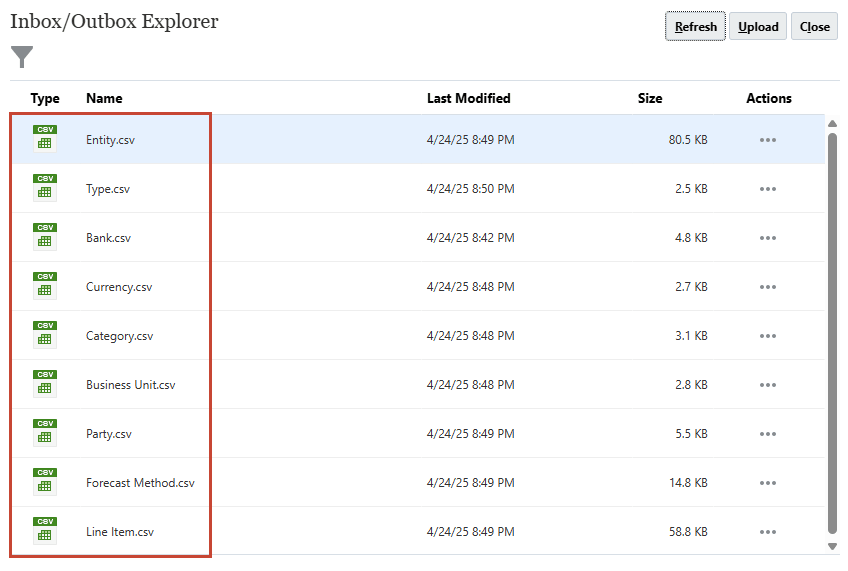
Once the metadata files are ready, next step is to upload the flat files into EPM Inbox/Outbox Explorer. You can create separate folders for metadata and data respectively and upload the files there. EPM Automate can be leveraged to automate the file upload into EPM Inbox/Outbox folder.
Once all the metadata files are uploaded into Inbox/Outbox folder, you should be able to see the files there before kick starting the metadata import job.
Create Job Schedule for Metadata Import
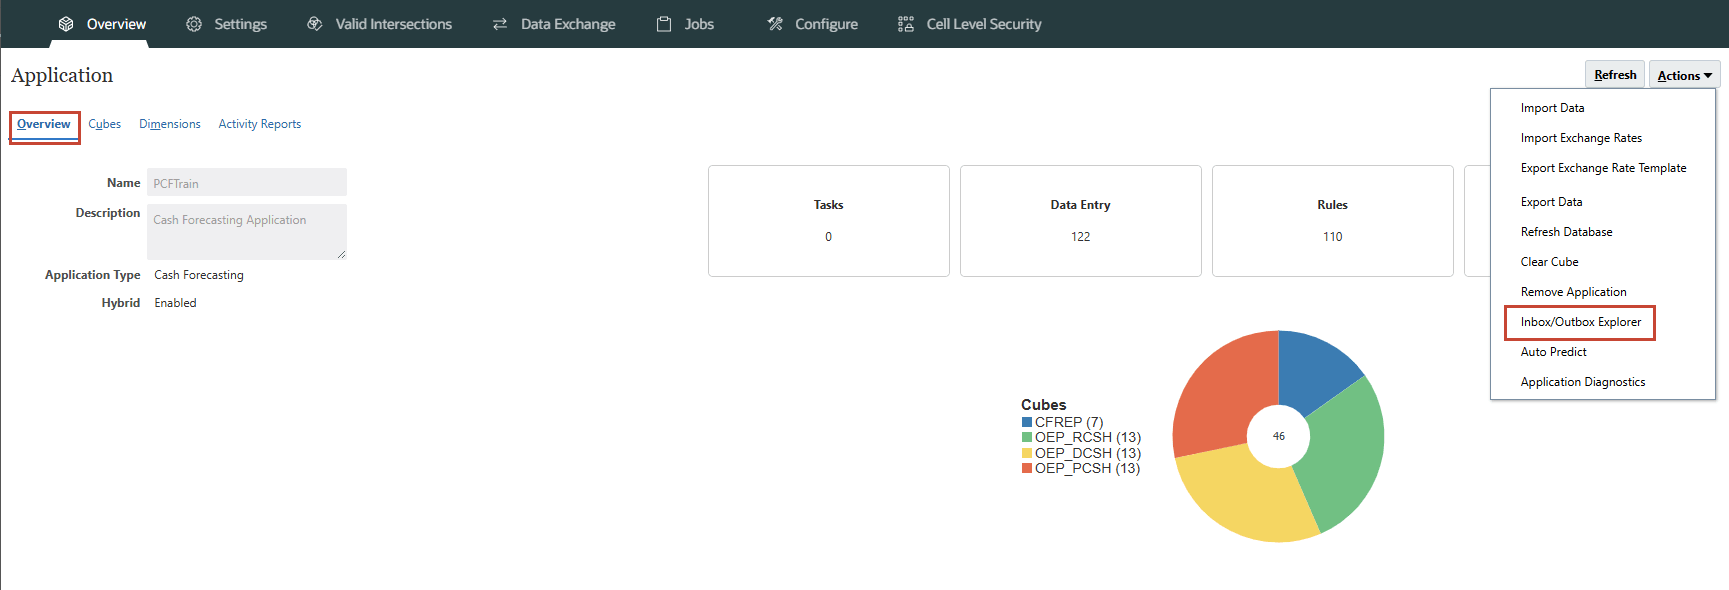
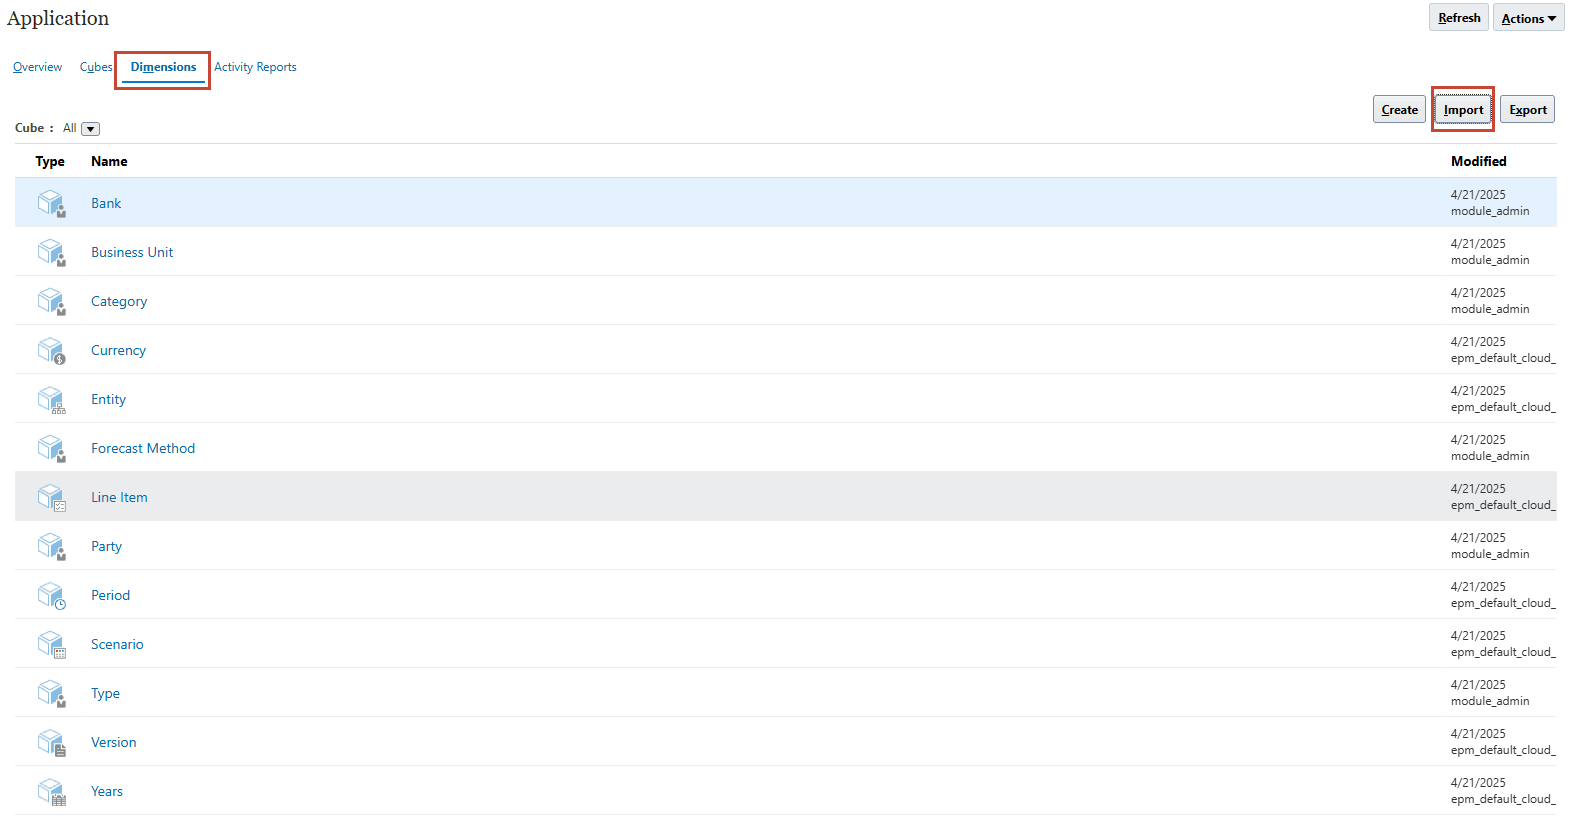
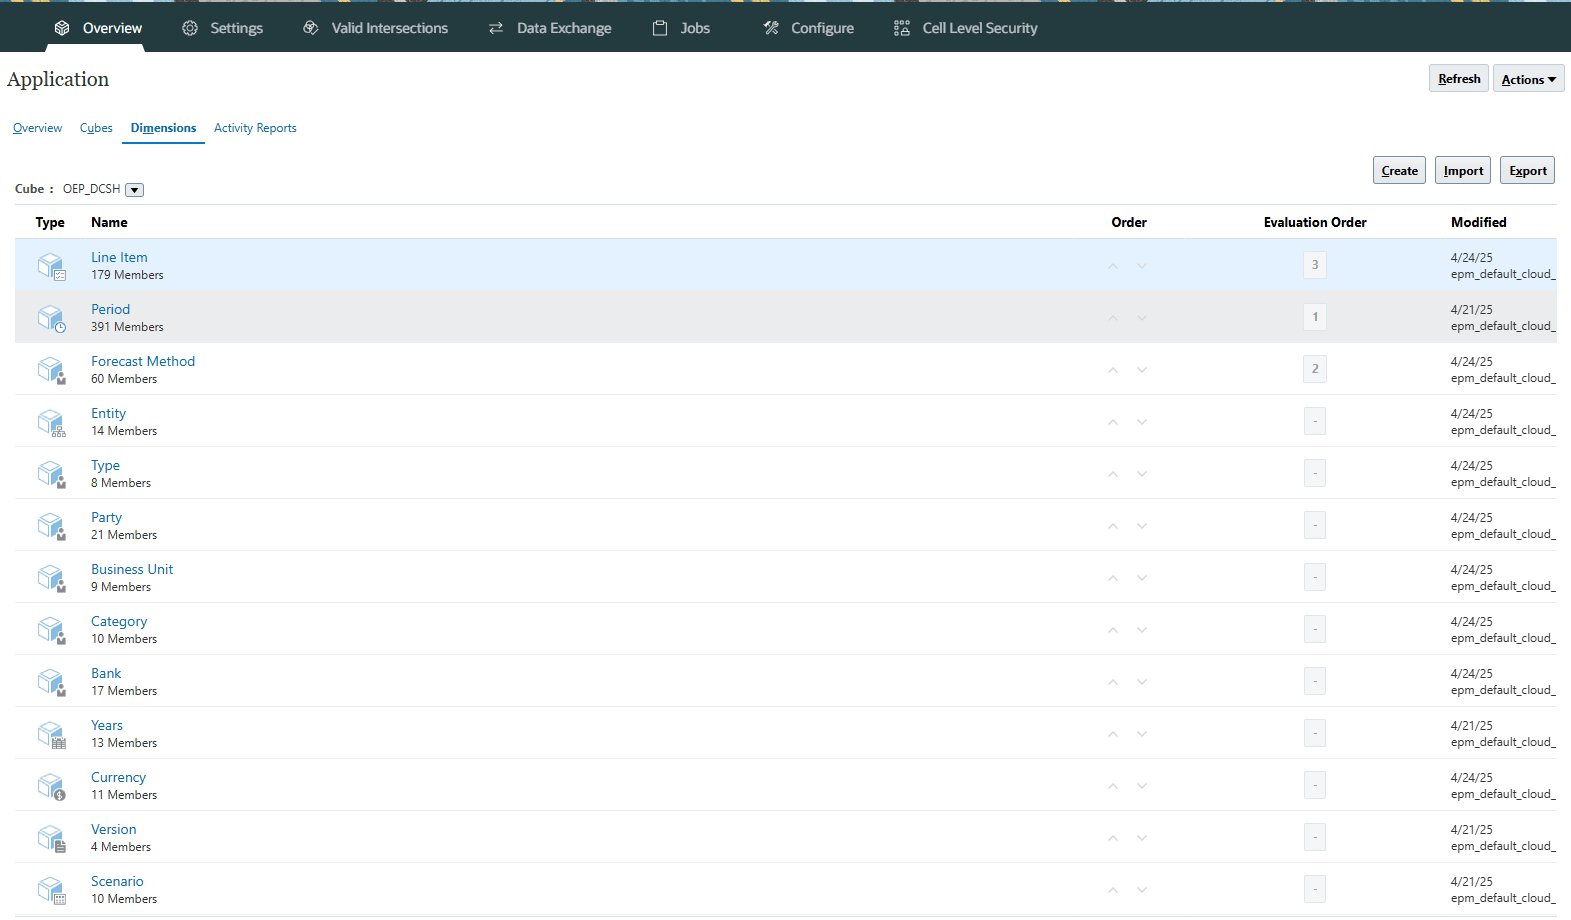
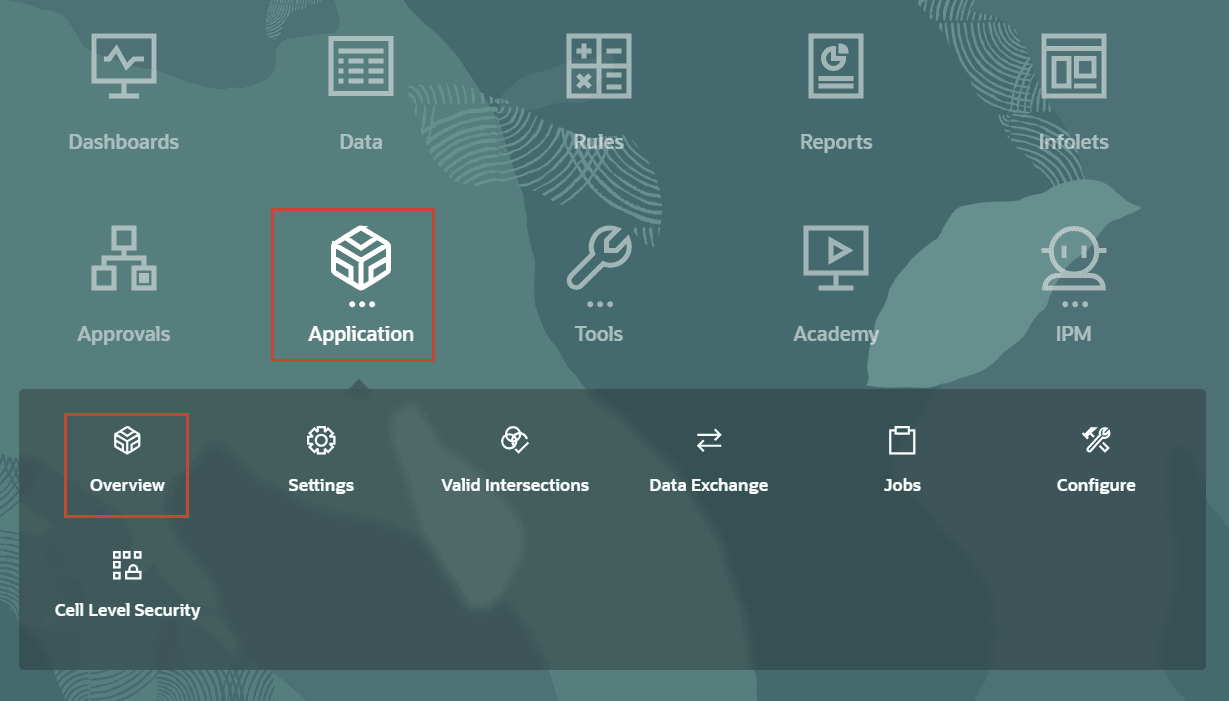
Next step is to create separate job schedules for Metadata & Data import into Cash forecasting application. Go to Application -> Overview -> Dimensions tab and click on Import button to schedule metadata import job.
Note:
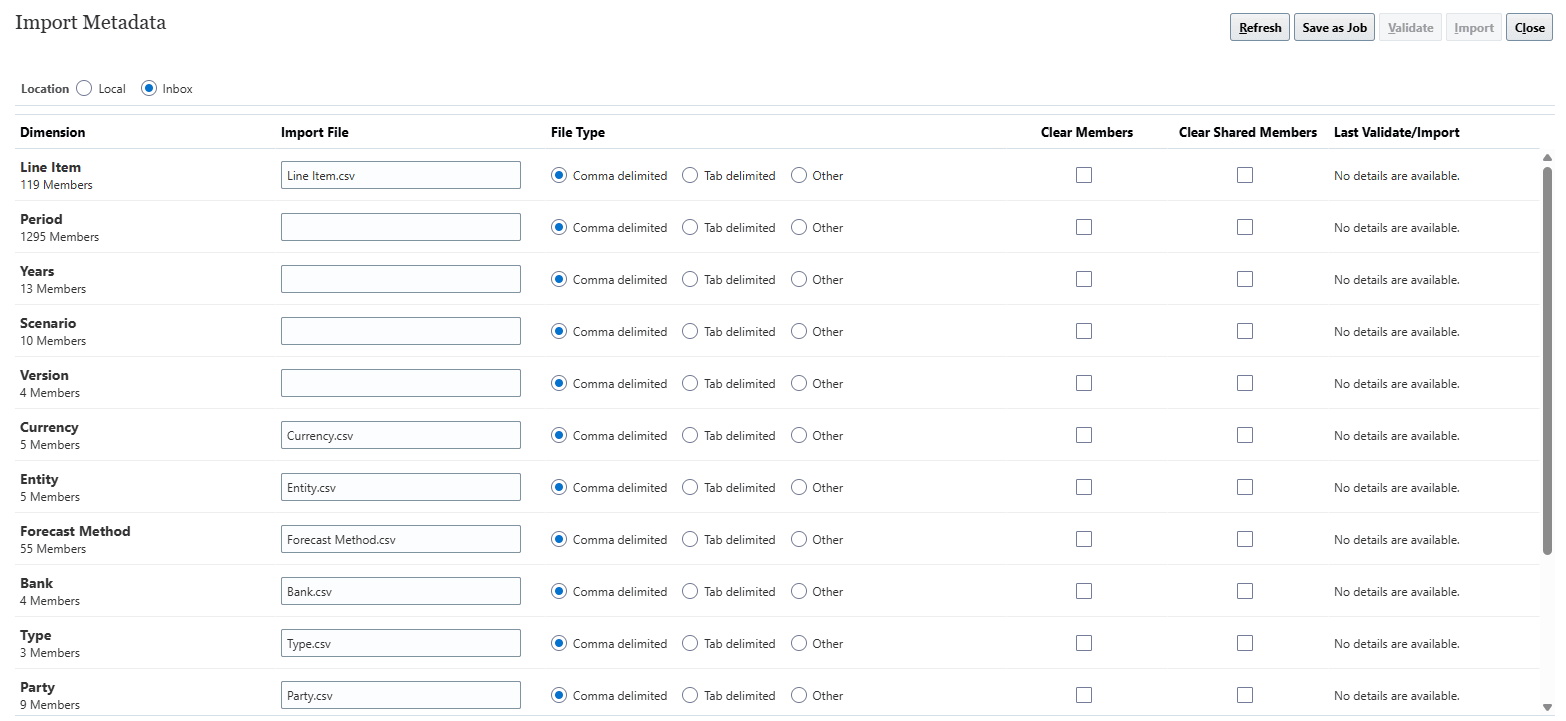
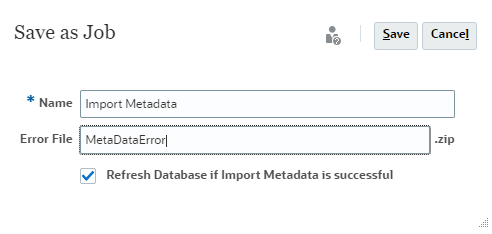
Select Location as 'Inbox'.Create and Save Import Metadata job schedule and upload all the required metadata files as shown below. You need to also provide an error file name(For e.g., “MetadataError.zip” file). If the Metadata import job completes with error, this error file will contain all the metadata import errors to enable you to analyse and fix it.
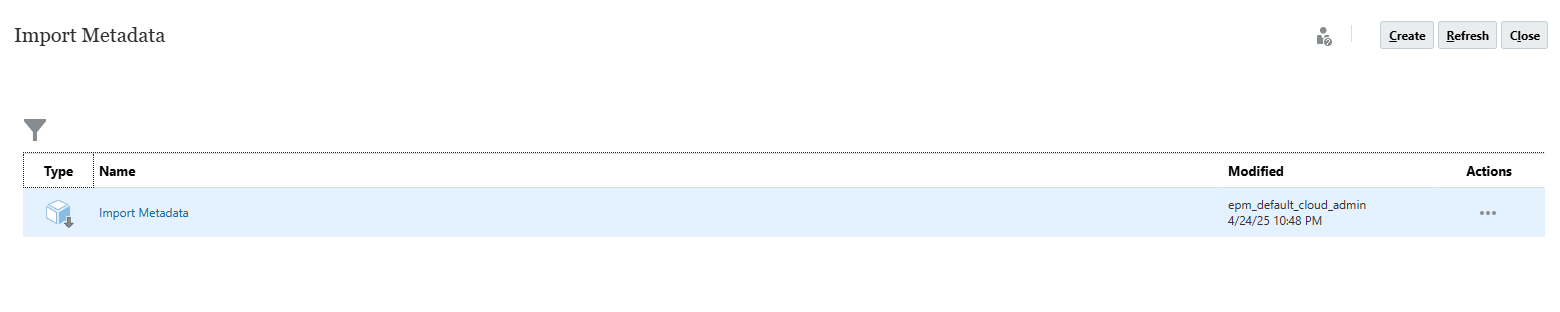
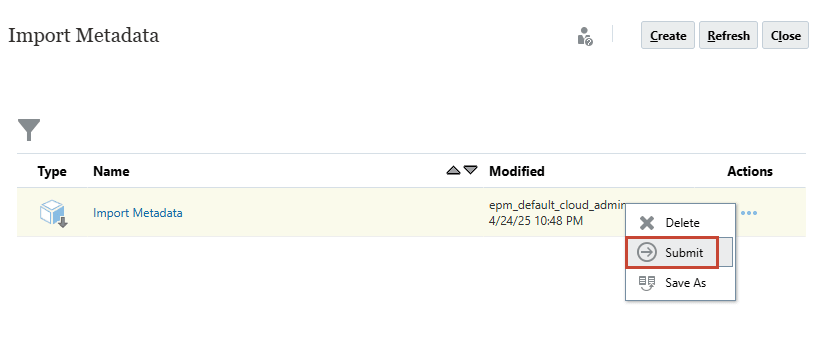
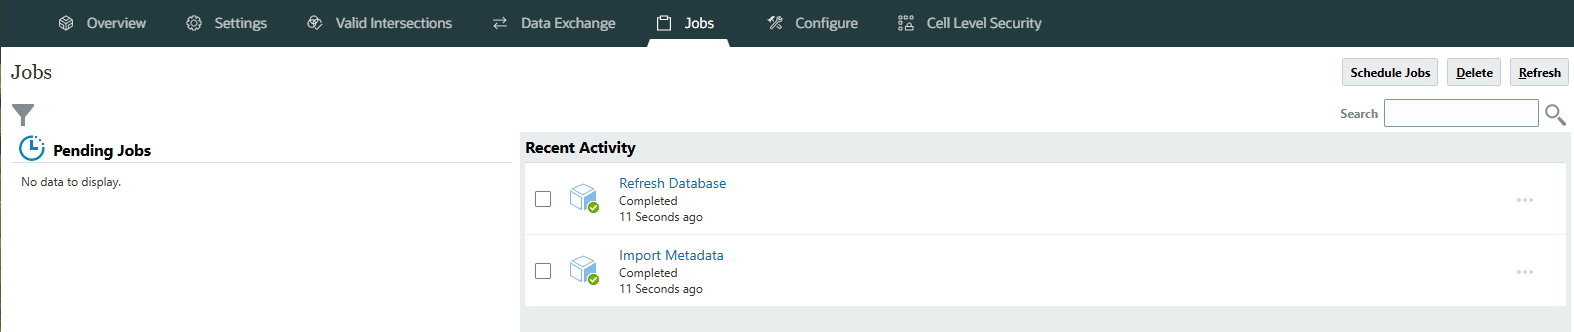
Once the import metadata job is created, we can either run the job manually or submit it through scheduled process on a periodic basis. Once you execute the import metadata job, system will trigger import metadata and refresh data base jobs. You can monitor the job status from Application -> Jobs screen.
Verify the dimension members loaded into the cube through metadata import process to ensure successful metadata import.
Setting up Line Items
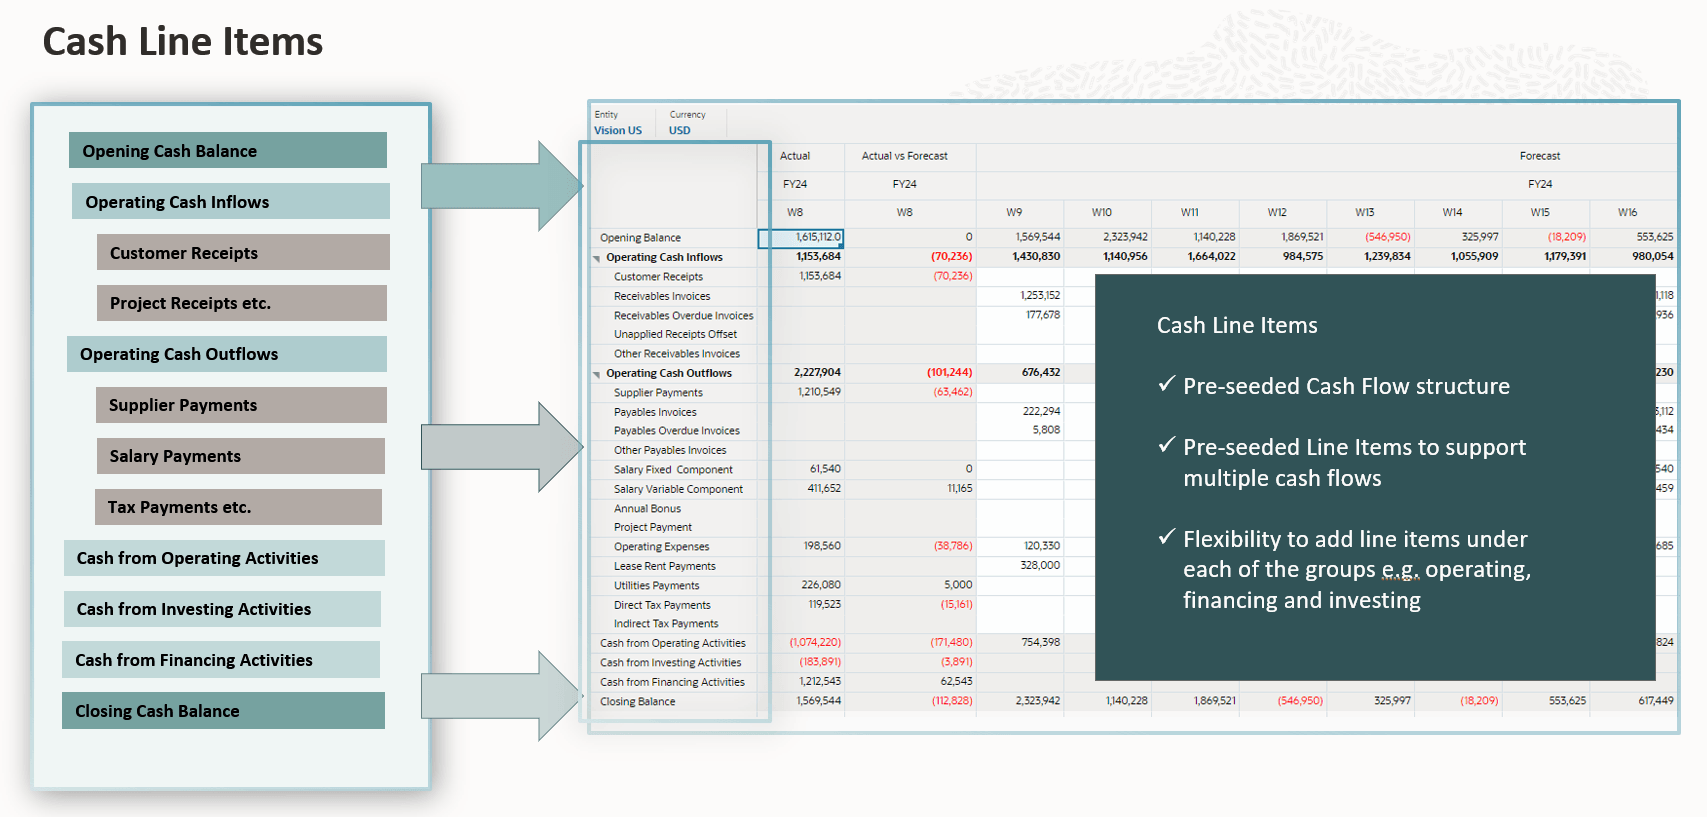
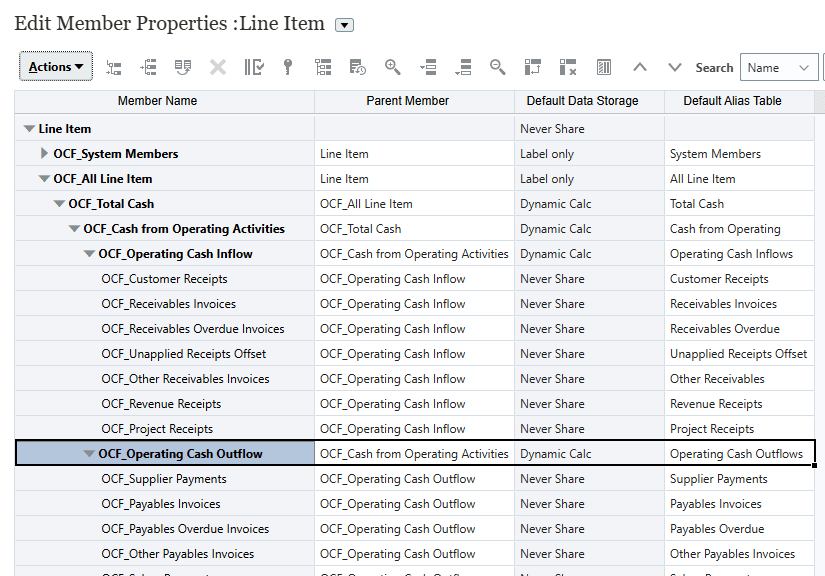
Line Items are the core foundation of the cash forecast with a defined structure of opening balance, operating, financing, investing cash inflows and outflows and closing balance. There are certain seeded line items for inflows and outflows, but customers can additionally add line items. Oracle recommends that customers add line items under appropriate operating, financing and investing inflows and outflows in order for the same to reflect in the cash flow rolling forecasts.
Predictive Cash Forecasting provides cash metrics, but you can add any additional metrics you need for your organization. All the seeded Line Item dimension members/ Cash metrics will start with “OCF_” prefix. We have seeded line item hierarchies for operating, investing and financing activities of cash flow. However, customers can go ahead and rename the alias / line item description as required by making changes in the Default Alias Table column.
Note:
You can also make changes to line item alias from Application->Overview->Dimensions, select Line Item dimension and go ahead with your changes.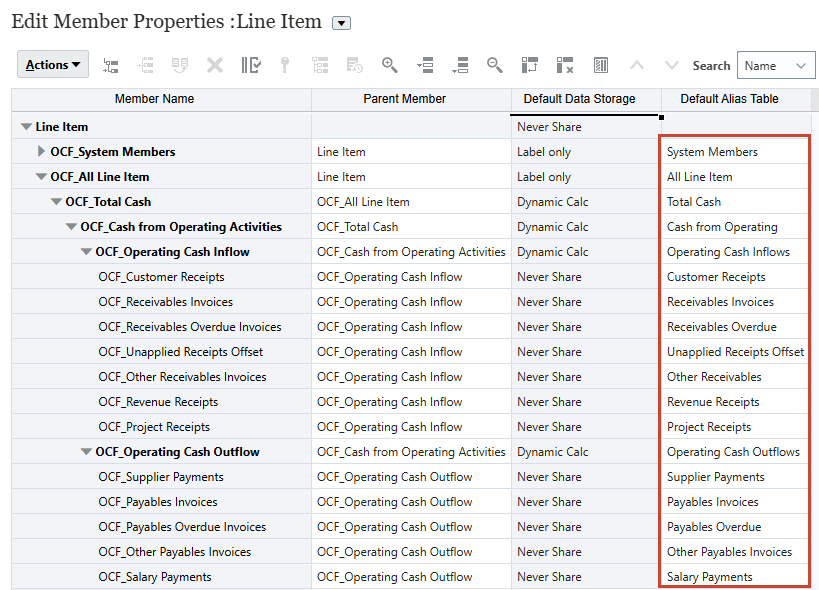
Adding Line Items to Driver Groups
Line items can be created for supporting different driver based methods. Each driver method can be picked appropriately for respective line items and necessary cash forecast will be determined based on the underlying calculations for those methods. The data for the source can come from any ERP system or Planning system.
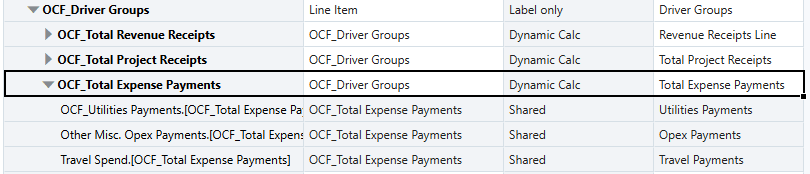
In order to add a line item to a particular driver method, you need to add that as a shared member in the respective seeded Driver Groups. We have a seeded hierarchy in Line Item dimension called “OCF_Driver Groups” and each Driver is created as a parent member under which the line item needs to be added.
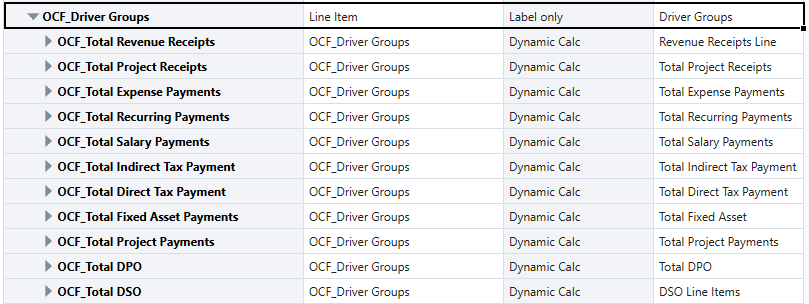
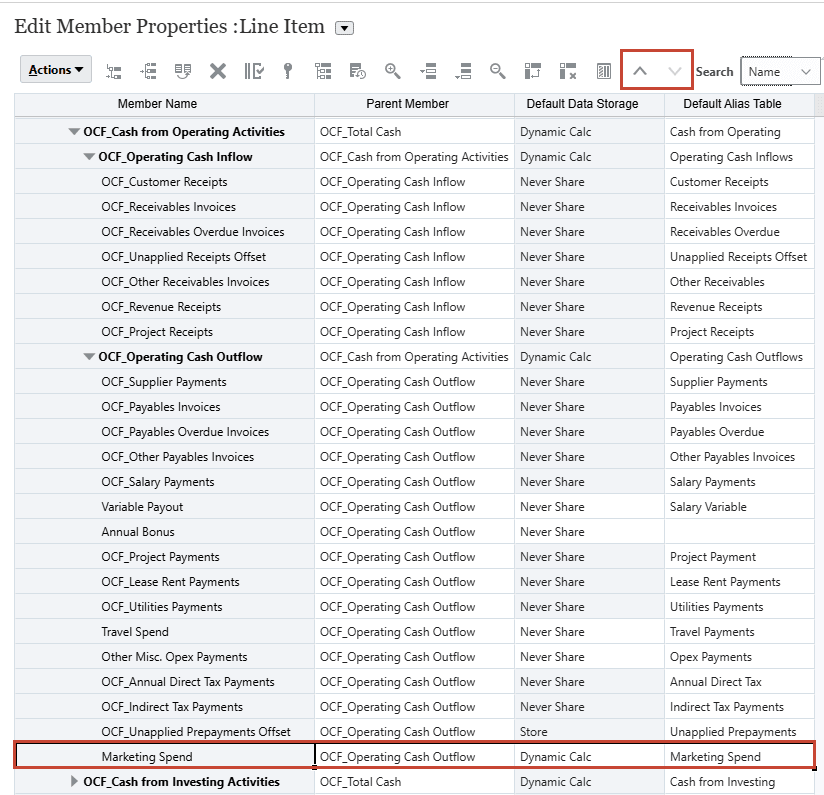
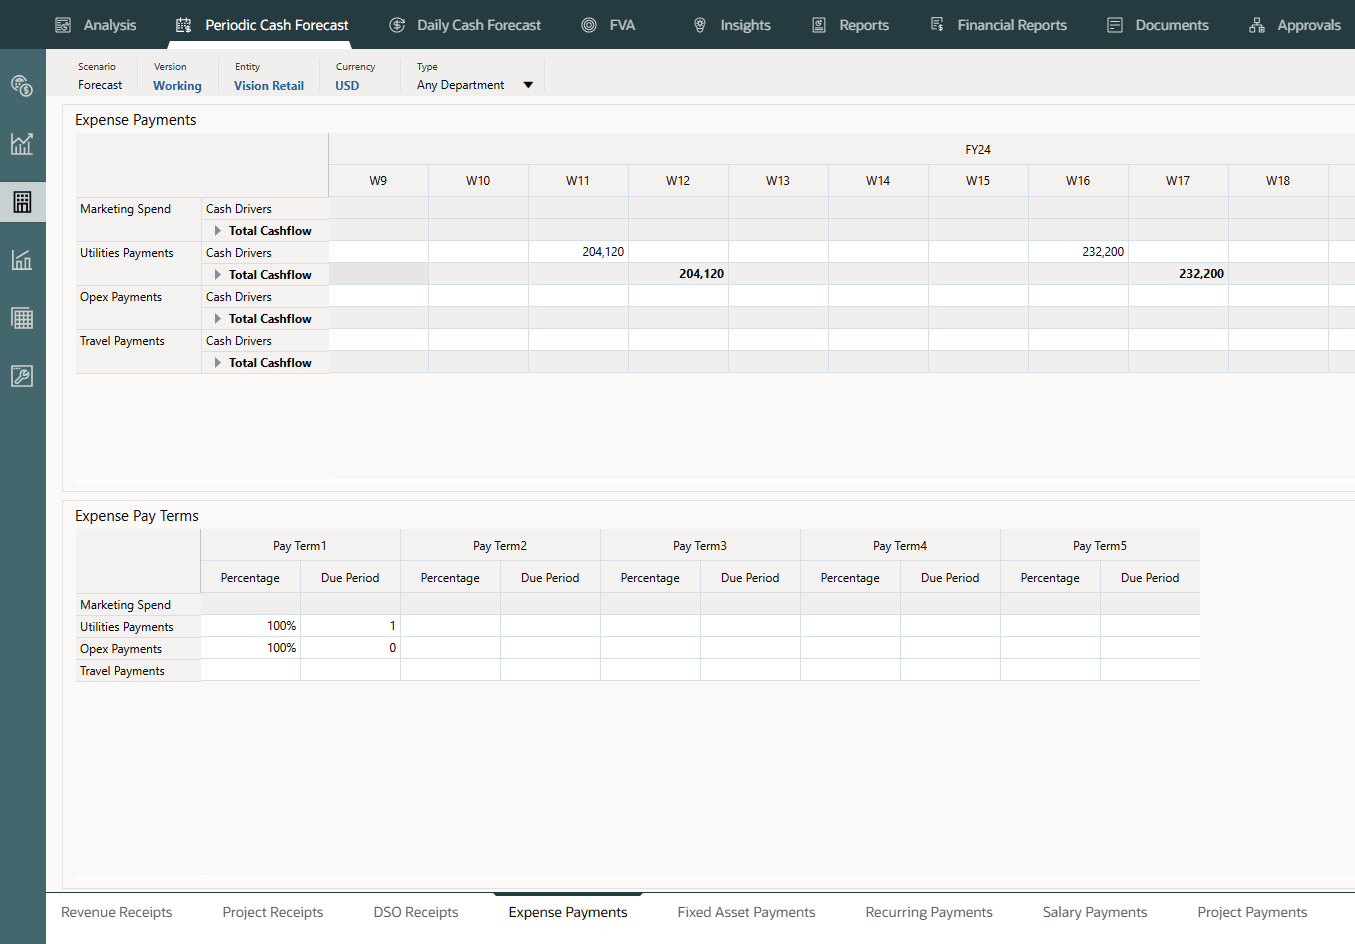
Let’s explore one of the driver methods – Expense Payment, where you would like to use pay terms against expense drivers to arrive at the cash outflows for expenses. Based on the metadata load few lines such as Utilities payments, Other Misc. Opex Payments and Travel Spend line items are added as shared member under dynamic calc parent “OCF_Total Expense Payments”. If you want to add another line item for this driver group, you need to first create that line item under Operating Cash Outflow and then add that particular line item as a shared member under “OCF_Total Expense Payments” as shown below.
Same steps need to be repeated for adding other line items to respective seeded driver groups as per cash forecasting requirements. Once the line items are added as a shared member, Cash Manager can set the driver assumptions / pay term assumptions and go ahead with Cash flow forecasting process. Below is the Expense payments driver & pay terms assumption form which Cash Manager will use to enter the assumptions for forecasting the expense payments.
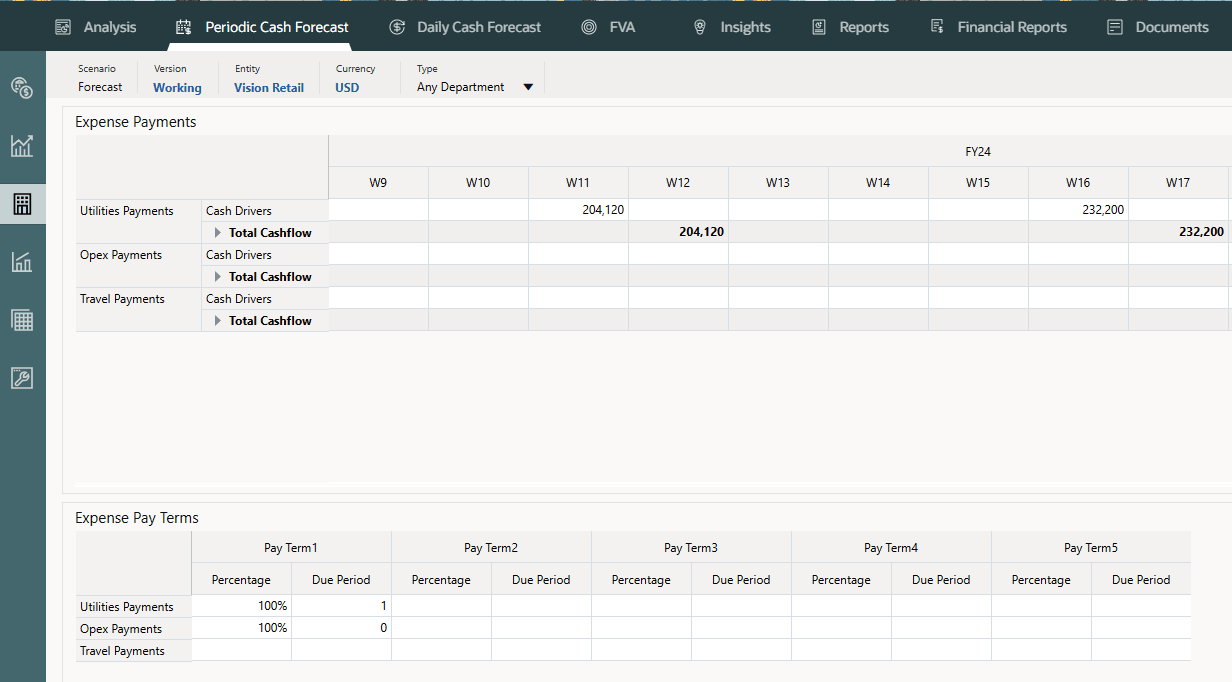
Note:
You will be setting up the Cash Manager account and all dependencies in the upcoming tutorials. This image is for reference. However, if you get error while trying to launch the form, you can refer the steps in the Assigning Values to User Variables section.Adding a New Line Item
In this section, you add a new Line item to Expense Payments Driver group.
- Go to Application -> Overview -> Dimensions and select Line Item Dimension.
- Select Operating Cash Outflow and click on Action -> Add Child.
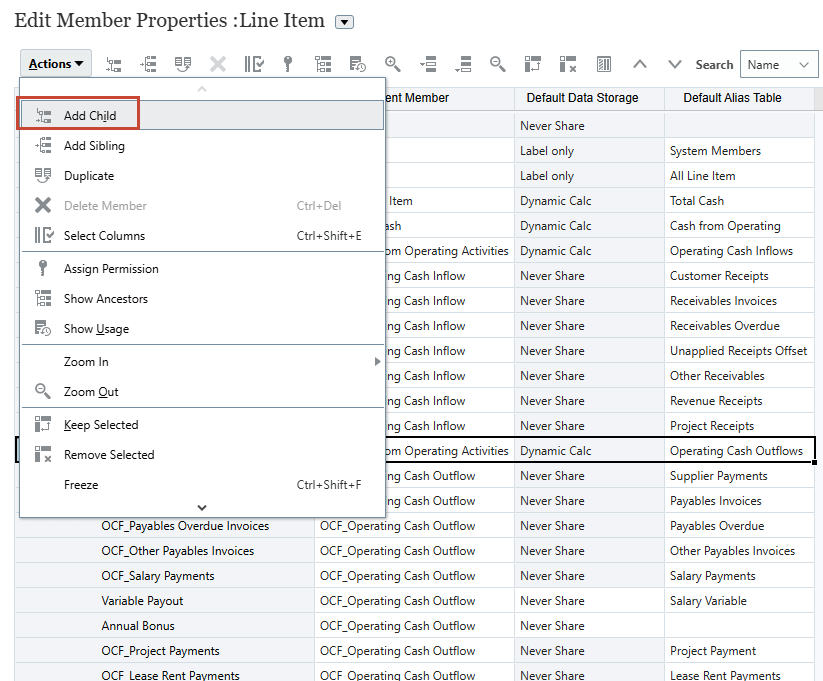
- Provide the number of child members to be added and click Apply.
- Let us add a new Line Item called “Marketing Spend”.

- Click Save.
- You can use the Arrows highlighted below to move the member to last in the hierarchy.
Tip:
Alternatively, you can also click on the last member and from Action -> Add Sibling. This will add the member next to selected line item and there is no need to move it manually to the last. - Click on Action -> Refresh Database.
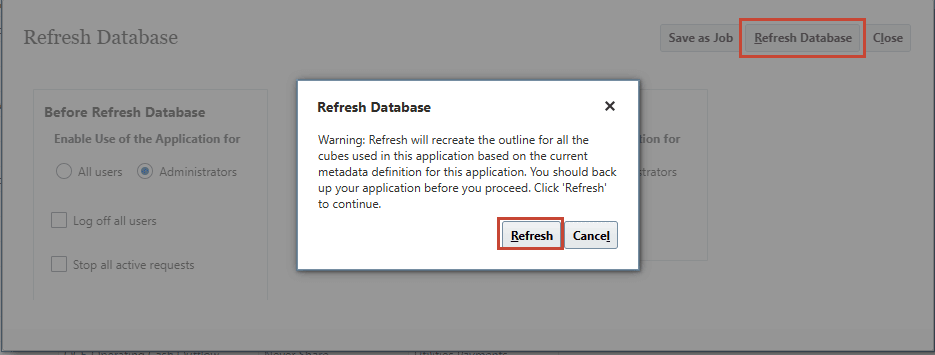
- Click Save then Close.
- Once Refresh Database is completed, you need to add this “Marketing Spend” line item as a shared member under Expense Payments Driver group.
- Expand OCF_Total Expense Payments hierarchy and click on last member which is Travel spend. Click on Action -> Add Sibling.
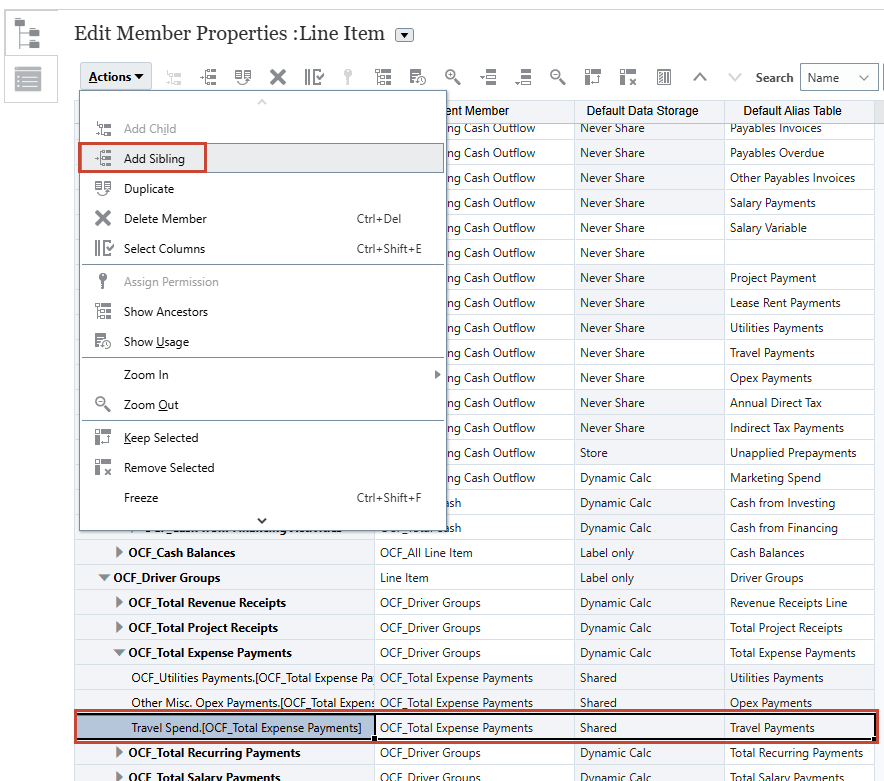
- Provide the number of sibling members to be added and click on Apply.
- Add Marketing Spend as a shared member next to Travel Spend member.
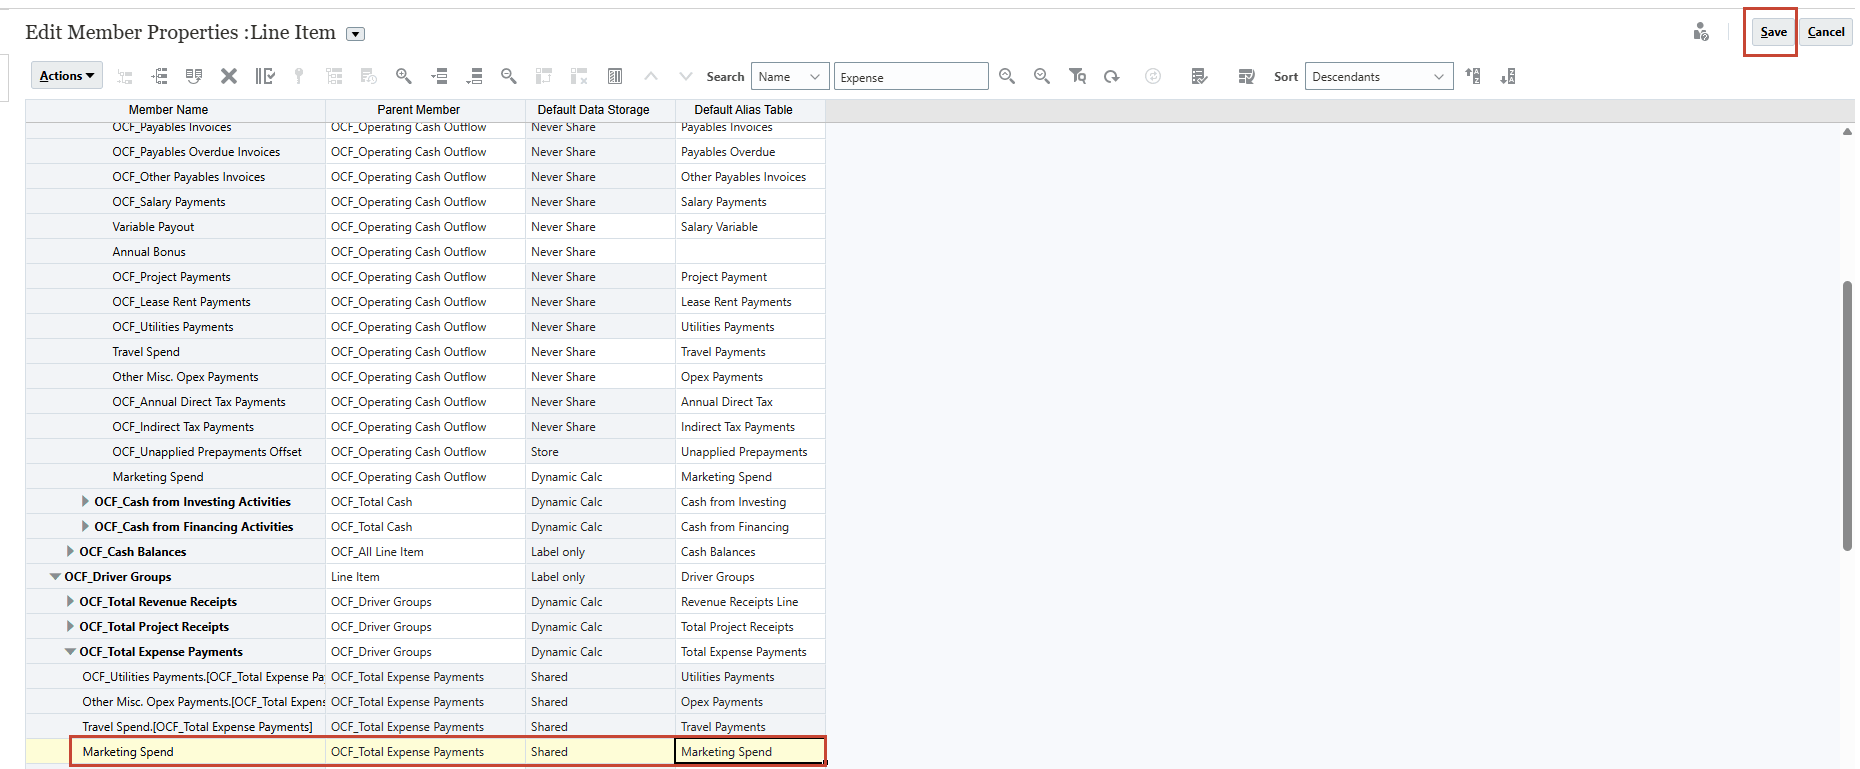
- Click on Save and “Refresh Database”.
- Repeat the same steps if you want to add a new line item to any of those 11 driver groups.
Once Refresh Database is completed, you should be able to see this new line item under “Expense Payments” Driver form and pay terms assumption form.
Note:
You will be setting up the Cash Manager account and all dependencies in the upcoming tutorials. This image is for reference. However, if you get error while trying to launch the form, you can refer the steps in the Assigning Values to User Variables section.Accessing the Sample Data Import Templates
Predictive Cash Forecasting provides data load templates within the application as guidance. The templates are generated based on the features you have enabled and the custom dimensions that were added. However, Oracle recommends that you use Data Integration as the preferred choice of integration with external sources. Use the templates as guidance, and use Data Integration to configure your data load rules.
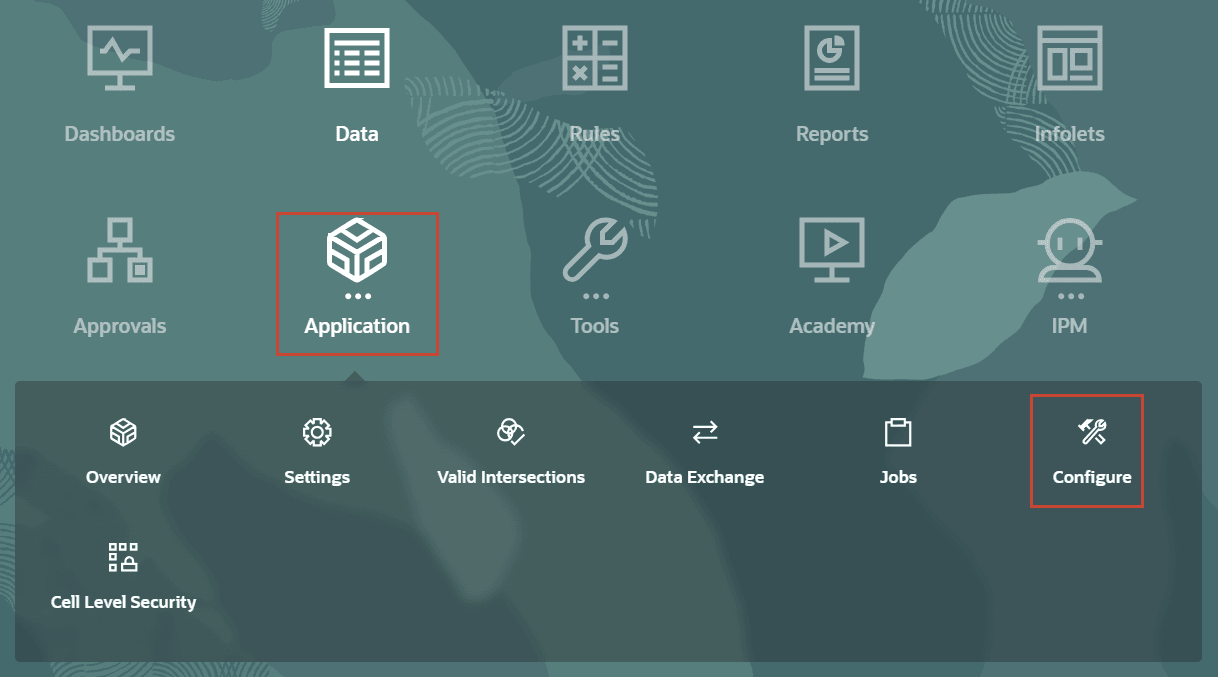
- On the home page, click Application, then Configure.
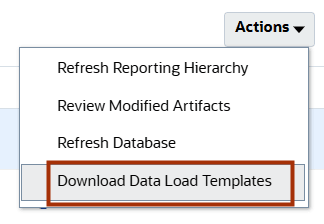
- On the right, click Actions then Download Data Load Templates.
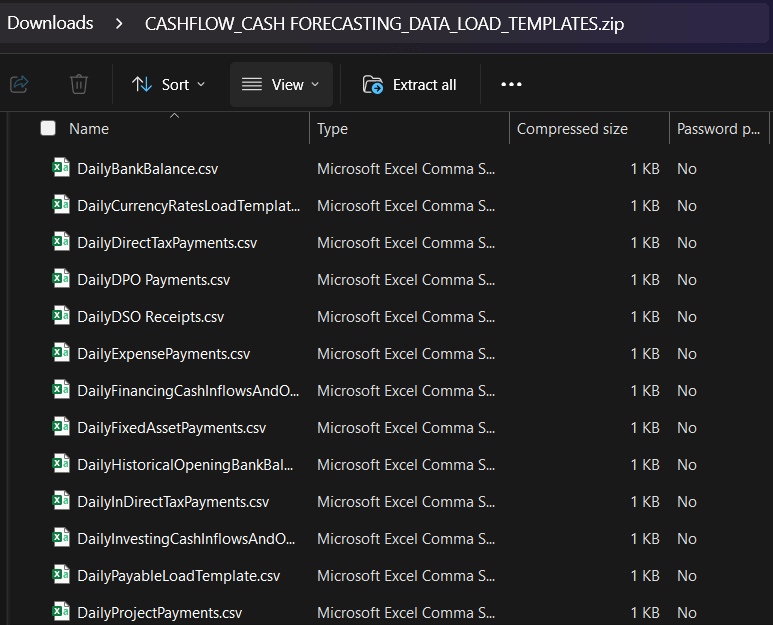
Depending on how your browser is set up, you may be prompted to save the file (File name: <ApplicationName>_CASH FORECASTING_DATA_LOAD_TEMPLATES.zip) or the file may download directly to the downloads folder set in your browser. The zip file (example image below) contains all the data load files.
Note:
The templates are generated based on the features you have enabled and the custom dimensions. We will use the data load files with sample data (Prerequisites section).
Assigning Values to User Variables
User Variables were added when the business process was created. User variables act as filters in forms, enabling planners to focus only on certain members. In this section, you set values for user variables.
- On the home page, click
 (Navigator), and under Tools, click User Preferences.
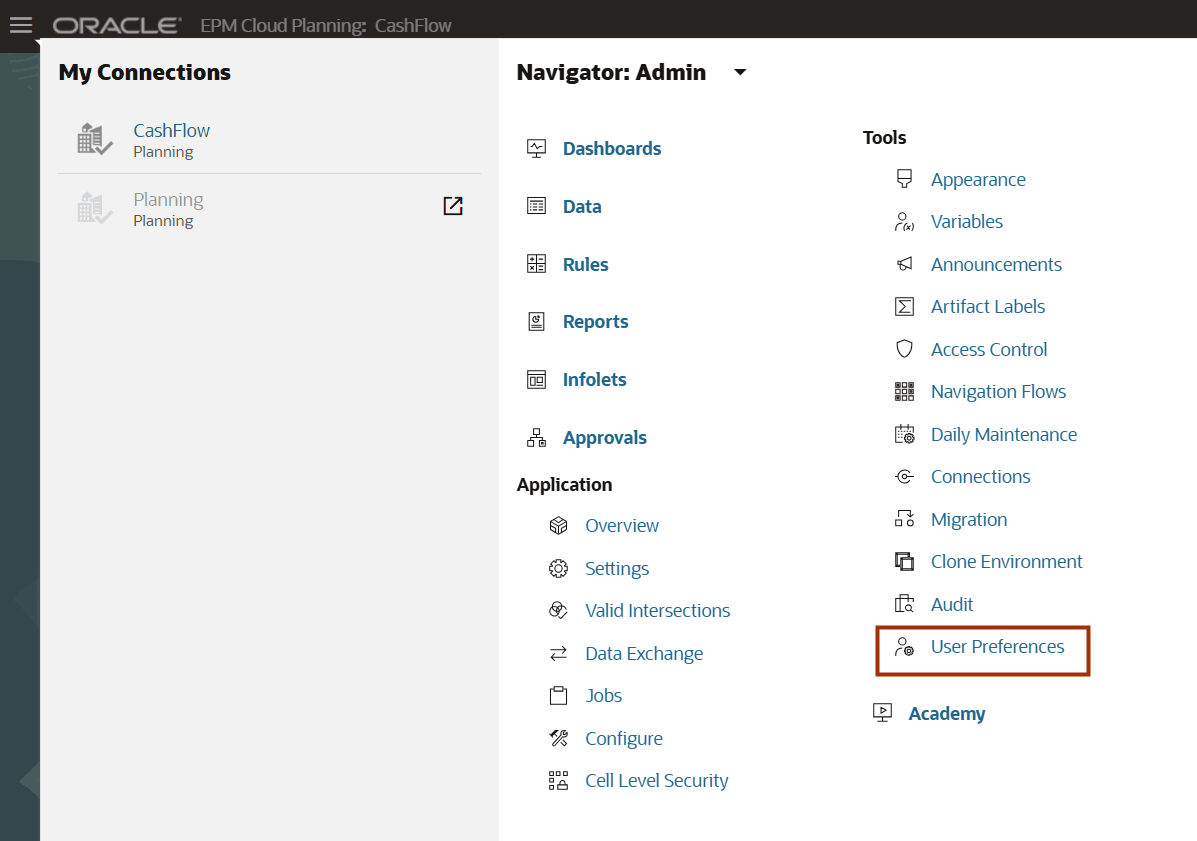
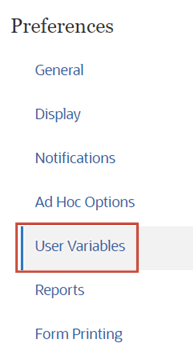
- Under Preferences, click User Variables.
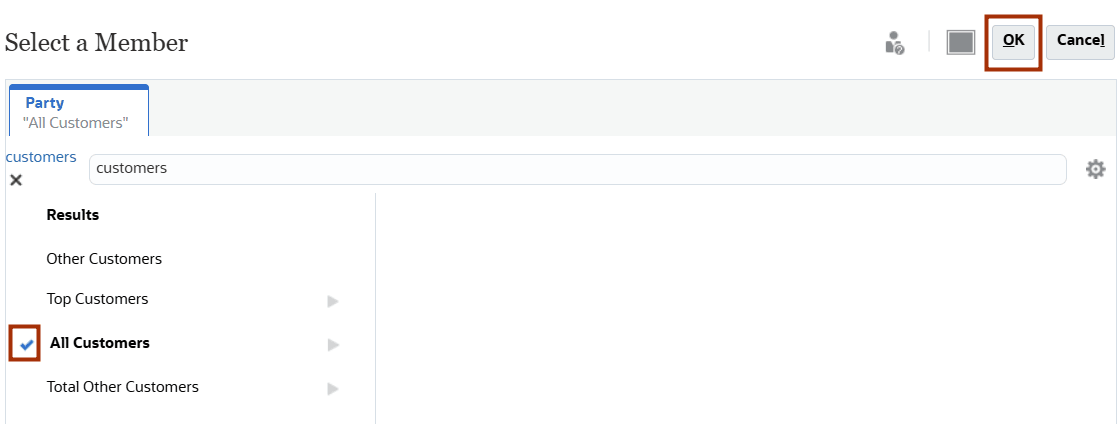
- Click
 (Member Selector) to select each variable's value.
Tip:
You can type and enter the values as well. - Verify your selection and click Save as in the examples below:
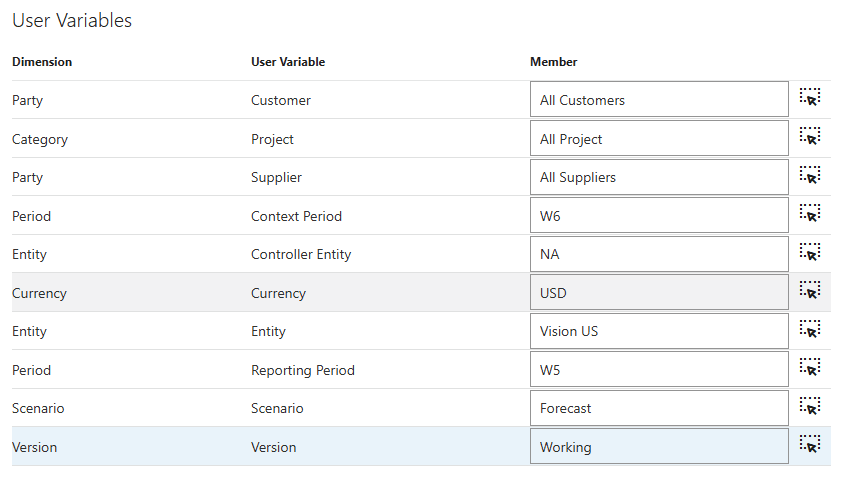
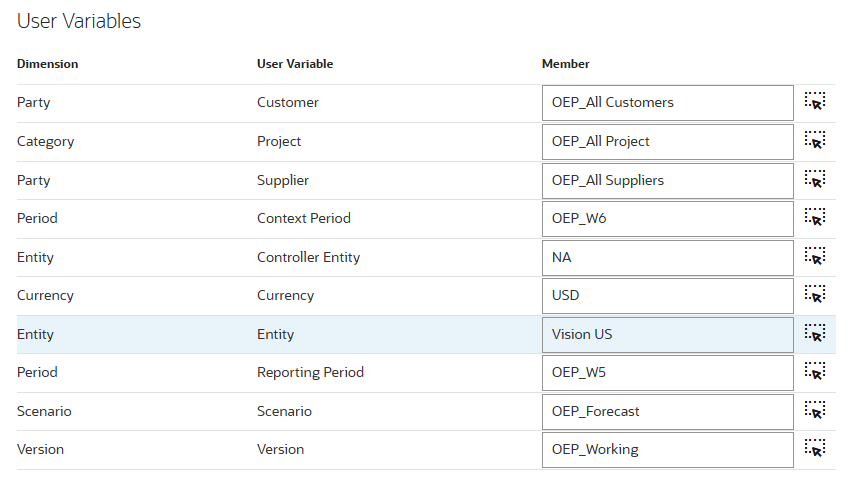
Note:
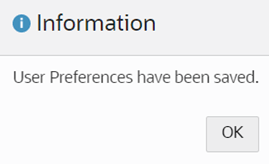
In your application, the member names for dimensions maybe OEP_All customers, OEP_All Projects, OEP_All Suppliers, OEP_W6, OEP_W5, OEP_Forecast, OEP_Working. Also Entity -> controller entity, 'NA' may have to be manually typed. Hence the two example images above. - At the information message, click OK.
Loading Actual Data
Historical actual data can be loaded into the Cash forecasting application using the Native import method or Data integration with data mappings. Actual customer receipts, Revenue receipts, Project receipts, Supplier payments, Opex payments can all be imported using the provided data load templates for cash forecasting. In this section, you will load historical actual data into Daily and Periodic cubes of the cash forecasting application.
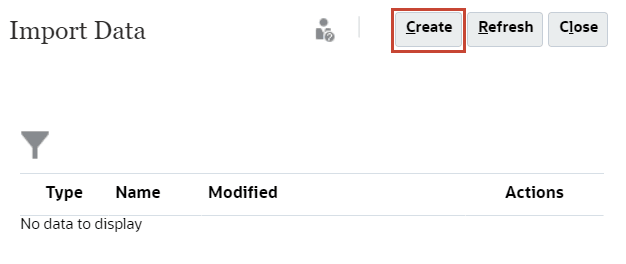
- On the home page, click Application, then Overview.
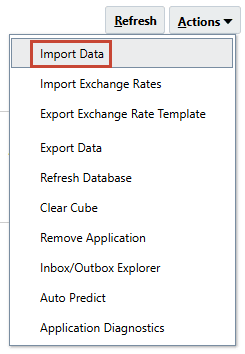
- On the right, click Actions then Import Data.
- In Import Data, click Create.
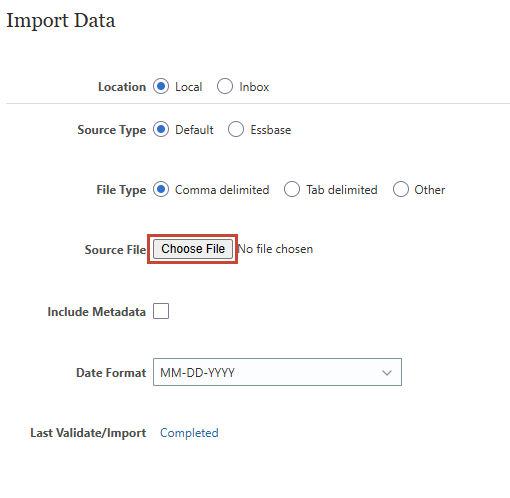
- Ensure your selections match the following:
Location Local Source Type Default File Type Comma delimited Note:
You can also import the files to Inbox (Location) and then save all the import data jobs, so that they can be scheduled to run automatically or can also be used in Pipeline jobs. - In Import Data, for Source File click Choose File.
Note:
Depending on your browser, the button label may display Choose File or Browse. - On your local computer, navigate to where you saved DailyActualDataLoad.csv and open it.
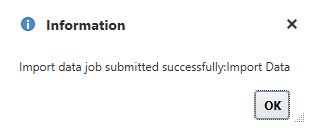
- On the right, click Import.

- In the Information dialog, click OK.
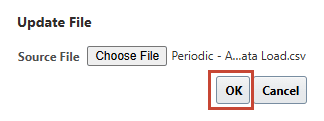
- In Import Data, for Source File click Update.
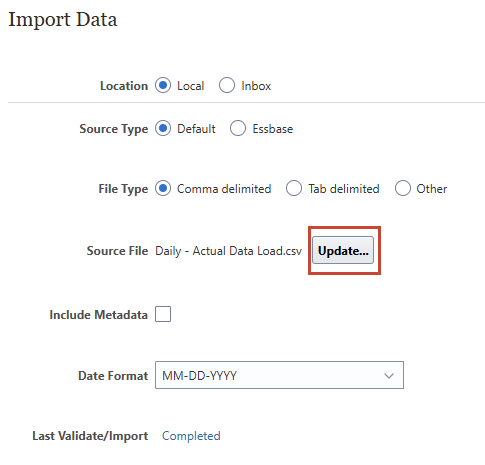
- In Update File, click Choose File.
Note:
Depending on your browser, the button label may display Choose File or Browse. - On your local computer, navigate to where you saved PeriodicActualDataLoad.csv and open it.
- In Update File, click OK.
- On the right, click Import.
- In the Information dialog, click OK.
Tip:
You can stay on this screen to upload more files in the next sections.
Loading Forecast Data
You can also import the forecast data required for the Smart Drivers method. You can extract the aggregated data from source ERP subledger systems for Receivables invoices, Receivables invoices overdue, Payables invoices, Payables invoices overdue, Tax payments, Variable payout, Opex payments, Fixed asset payments, etc. In this section, you will load forecast data into the Daily and Periodic cubes of the application.
- In Import Data, for Source File click Update.
Tip:
You can continue on the screen from previous section to upload more files. - In Update File, click Choose File.
Note:
Depending on your browser, the button label may display Choose File or Browse. - On your local computer, navigate to where you saved DailyForecastDataLoad.csv and open it.
- In Update File, click OK.
- On the right, click Import.
- In the Information dialog, click OK.
- In Import Data, for Source File click Update.
Tip:
You can continue on the screen from previous section to upload more files. - In Update File, click Choose File.
Note:
Depending on your browser, the button label may display Choose File or Browse. - On your local computer, navigate to where you saved PeriodicForecastDataLoad.csv and open it.
- In Update File, click OK.
- On the right, click Import.
- In the Information dialog, click OK.
Tip:
You can stay on this screen to upload more files in the next section.
Loading Bank Opening Balance
Opening balances by bank as per bank statement need to be loaded for the first day of forecast which is the previous day closing balance. This has to be loaded for both daily and periodic cash forecast models. In this section, you will load the latest opening balance into the Daily and Periodic cubes of the application.
- In Import Data, for Source File click Update.
Tip:
You can continue on the screen from previous section to upload more files. - In Update File, click Choose File.
Note:
Depending on your browser, the button label may display Choose File or Browse. - On your local computer, navigate to where you saved DailyBankBalances.csv and open it.
- In Update File, click OK.
- On the right, click Import.
- In the Information dialog, click OK.
- In Import Data, for Source File click Update.
Tip:
You can continue on the screen from previous section to upload more files. - In Update File, click Choose File.
Note:
Depending on your browser, the button label may display Choose File or Browse. - On your local computer, navigate to where you saved PeriodicBankBalances.csv and open it.
- In Update File, click OK.
- On the right, click Import.
- In the Information dialog, click OK.
- Click Close twice.
Validating Data Imports
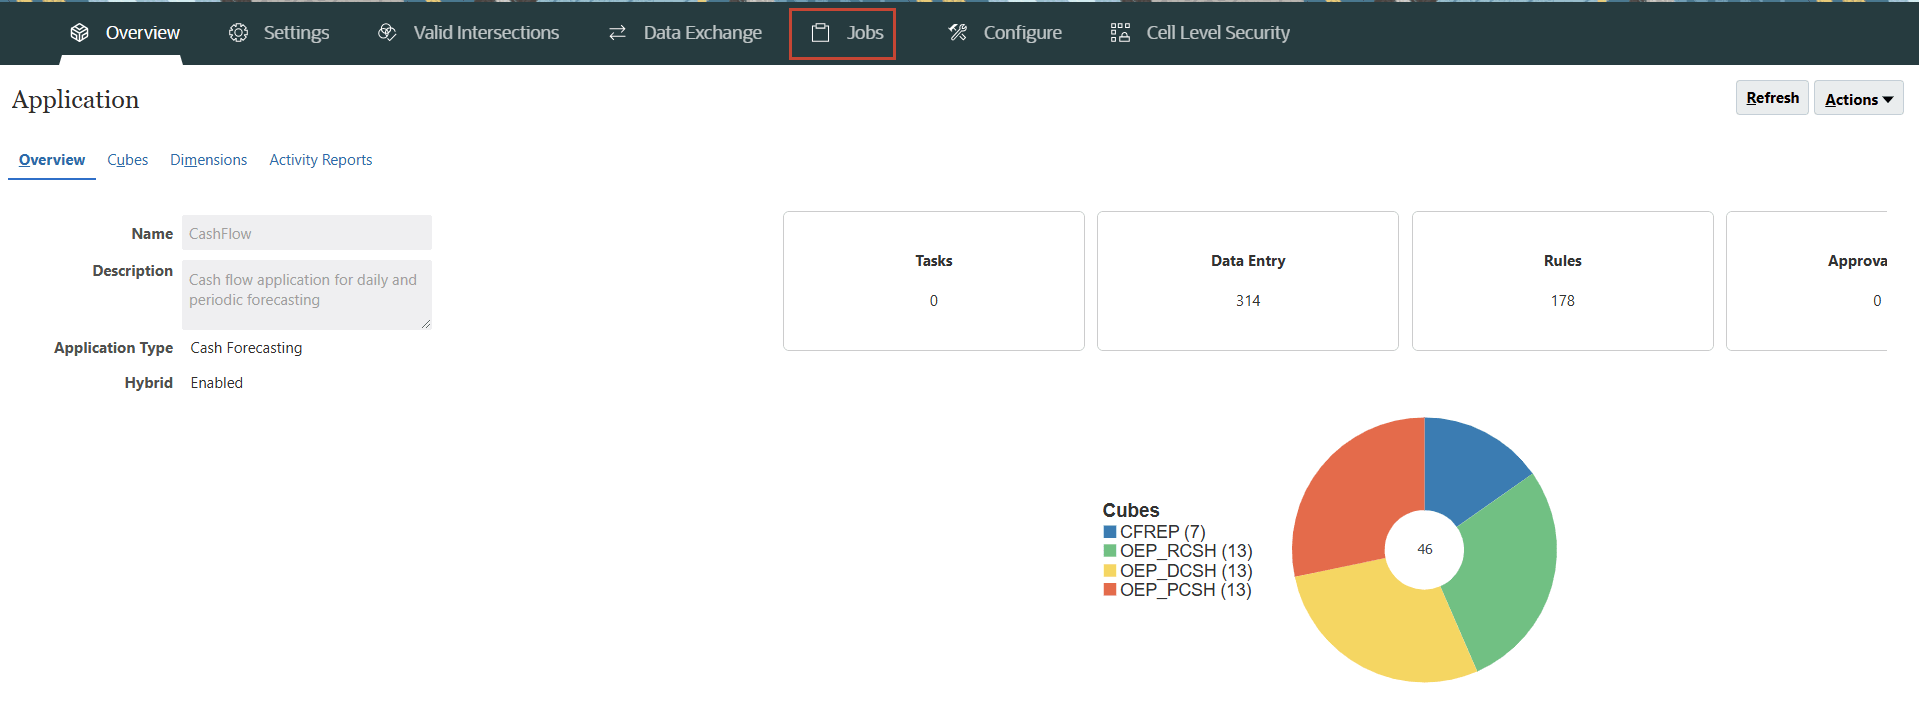
In this section, you will validate the successful import of all the imported data load files.
-
From the cards on the top of the page, click Jobs.
-
Under Recent Activity, click Import Data.
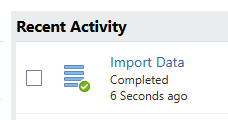
Tip:
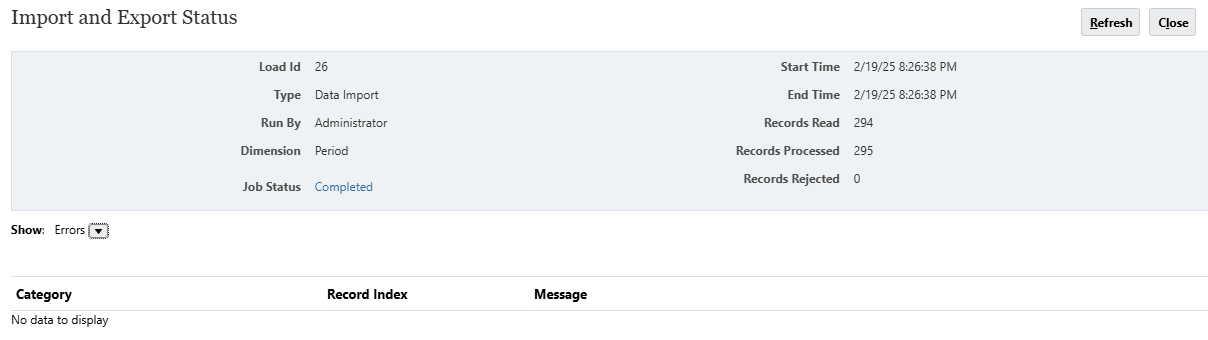
There should be total six Import Data jobs listed for the six files imported till this section.Import and Export Status shows that the job completed without any errors.
- Click Close.
Running Rules for Cash Forecasting Models
Once the data is imported into the cash forecasting application, you run the following three rules for both the Daily and Periodic cubes:
Process Actual Rule:
- Calculates Closing / Opening Balances of bank using opening balance + Cash inflows – Cash outflows of actuals of historical periods.
- Aggregates across the Category dimension.
Process Forecast Rule:
- Actual Opening balance loaded by bank is posted as forecasted opening balance (Ensure parent bank members are dynamic calc).
- Assigns the Forecast Method set for each line as Forecasted Method for overall forecast. Uses default forecast method if no method is defined.
- Calculates the Rolling forecast values based on the forecasted method assigned.
- KPIs for Cash Metrics are calculated.
Rollup Entity Rule:
- Roll up the values to all the parent level members so that the values can be seen at summary level in reports and dashboards.
In this section, you will run six seeded Rules for Cash Forecasting Models.
Running the Rules for Daily Cube
In this section, you run the three mentioned rules for the Daily Cube (OEP_DCSH).
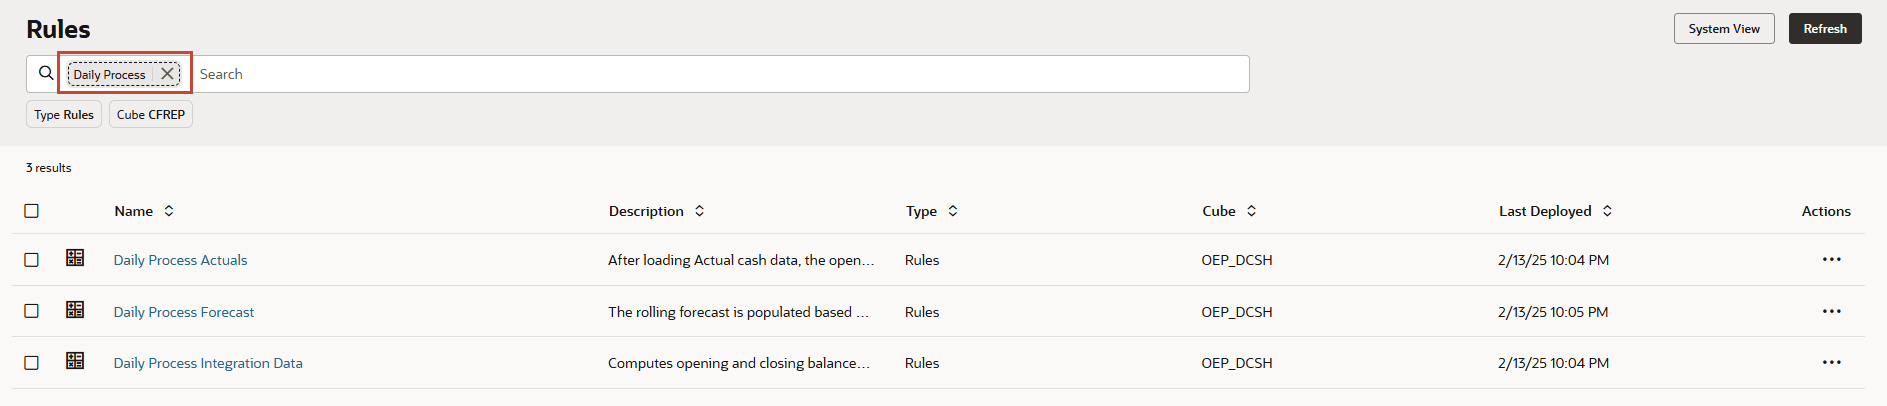
- On the home page, click Rules.
- In the search box, enter Daily Process and press Enter key.
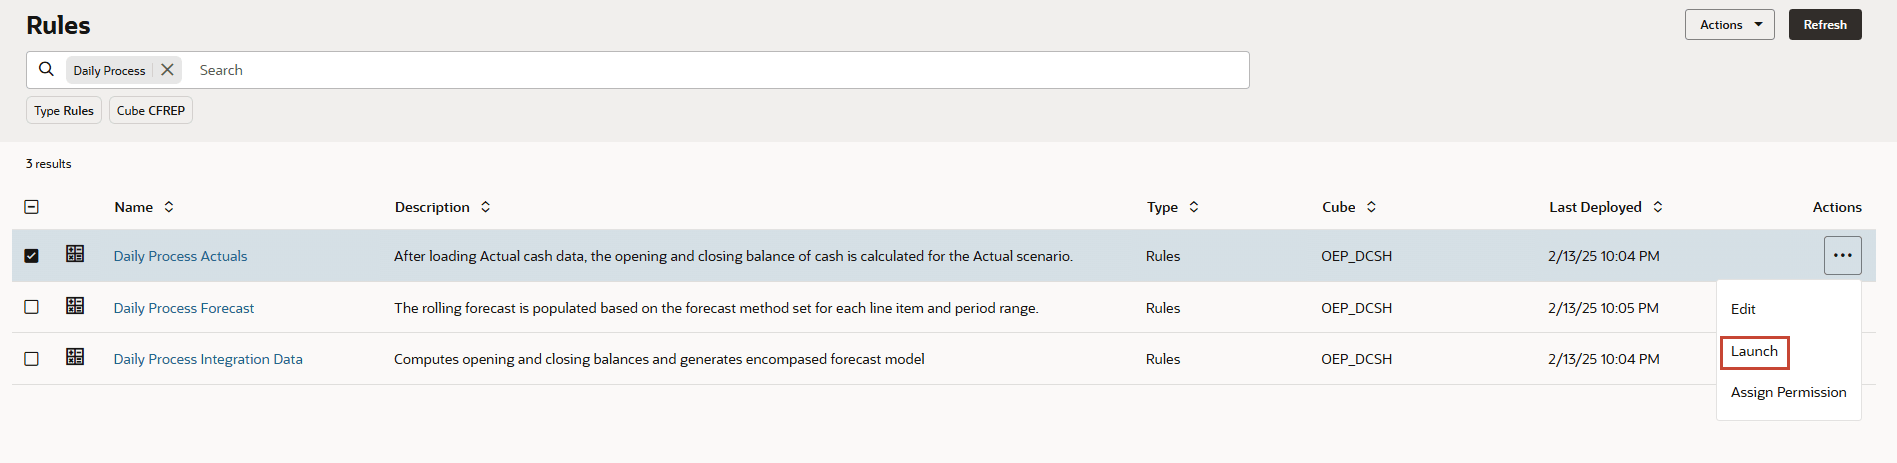
- Under Actions, for Daily Process Actuals, click
 (Actions) and then Launch.
- In Daily Process Actuals, for Enter Entity select or type NA(C_100).
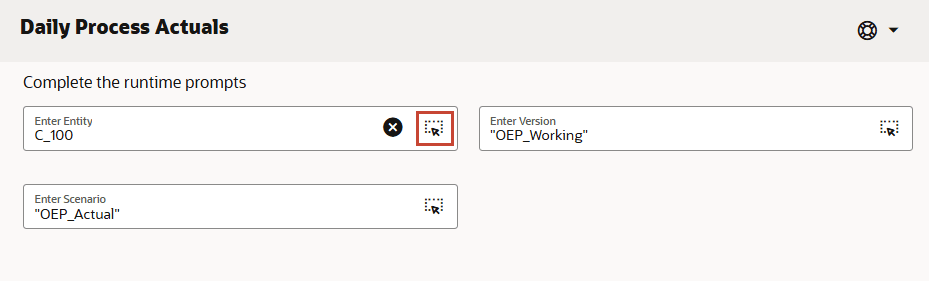
Tip:
You can use the (Member Selector) to search the values. - Verify your selection and click Launch.
- In Information, click OK.
- Under Actions, for Daily Process Forecast, click (Actions) and then Launch.
- In Daily Process Forecast, for Enter Entity select or type NA(C_100).
Tip:
You can use the (Member Selector) to search the values. - Verify your selection and click Launch.
- In Information, click OK.
- In the search box, enter Rollup and press Enter key.

- Under Actions, for Daily Rollup Entity, click (Actions) and then Launch.
- In Daily Rollup Entity, for Enter Currency select or type USD and for Enter Parent Entity select or type NA(C_100).
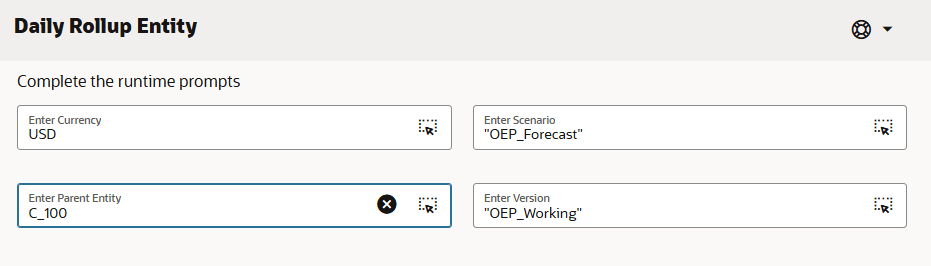
Tip:
You can use the (Member Selector) to search the values. - Verify your selection and click Launch.
- In Information, click OK.
Running the Rules for Periodic Cube
In this section, you run the three mentioned rules for the Periodic Cube (OEP_PCSH).
- In the search box, enter Periodic Process and press Enter key.
- Under Actions, for Periodic Process Actuals, click (Actions) and then Launch.
- In Periodic Process Actuals, for Enter Entity select or type NA(C_100).
Tip:
You can use the (Member Selector) to search the values. - Verify your selection and click Launch.
- In Information, click OK.
- Under Actions, for Periodic Process Forecast, click (Actions) and then Launch.
- In Periodic Process Forecast, for Enter Entity select or type NA(C_100).
Tip:
You can use the (Member Selector) to search the values. - Verify your selection and click Launch.
- In Information, click OK.
- In the search box, enter Rollup and press Enter key.
- Under Actions, for Periodic Rollup Entity, click (Actions) and then Launch.
- In Periodic Rollup Entity, for Enter Currency select or type USD and for Enter Parent Entity select or type NA(C_100).
Tip:
You can use the (Member Selector) to search the values. - Verify your selection and click Launch.
- In Information, click OK.
Note:
You can validate the successful completion of the Rules from Jobs section. Refer Validating Data Imports.Running Data Maps to Push Data to Reporting Cube
Once the daily and periodic cash forecasting process is completed, you can push the daily and periodic data into the ASO reporting cube to generate dashboards and reports.
In this section, you will run the seeded data maps “Daily Cash to Reporting” and “Periodic Cash to Reporting” to push the entire forecast data into the reporting cube.
- On the home page, click Application, then Data Exchange.
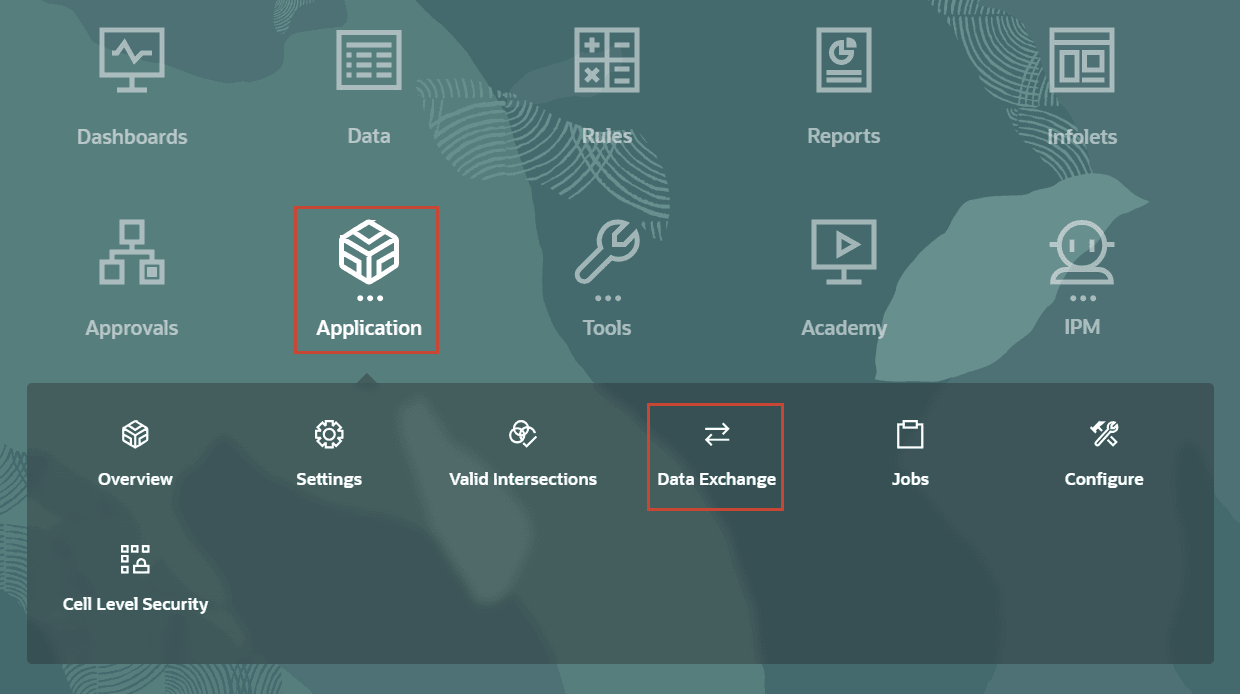
- In the bottom, click Data Maps.

- Under Actions, for Daily Cash To Reporting, click (Actions) and then Push Data.

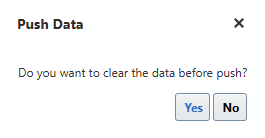
- In Push Data, click Yes.
- In Information, click OK.
- Under Actions, for Periodic Weekly Cash To Reporting, click (Actions) and then Push Data.
- In Push Data, click Yes.
- In Information, click OK.
Note:
The below images are for reference and you may be setting up the accounts, users and related settings only in the upcoming tutorials in the series. Once the setup is complete you will be able to launch the forms and see the loaded data in them.Example image of the form without data before data load exercise.

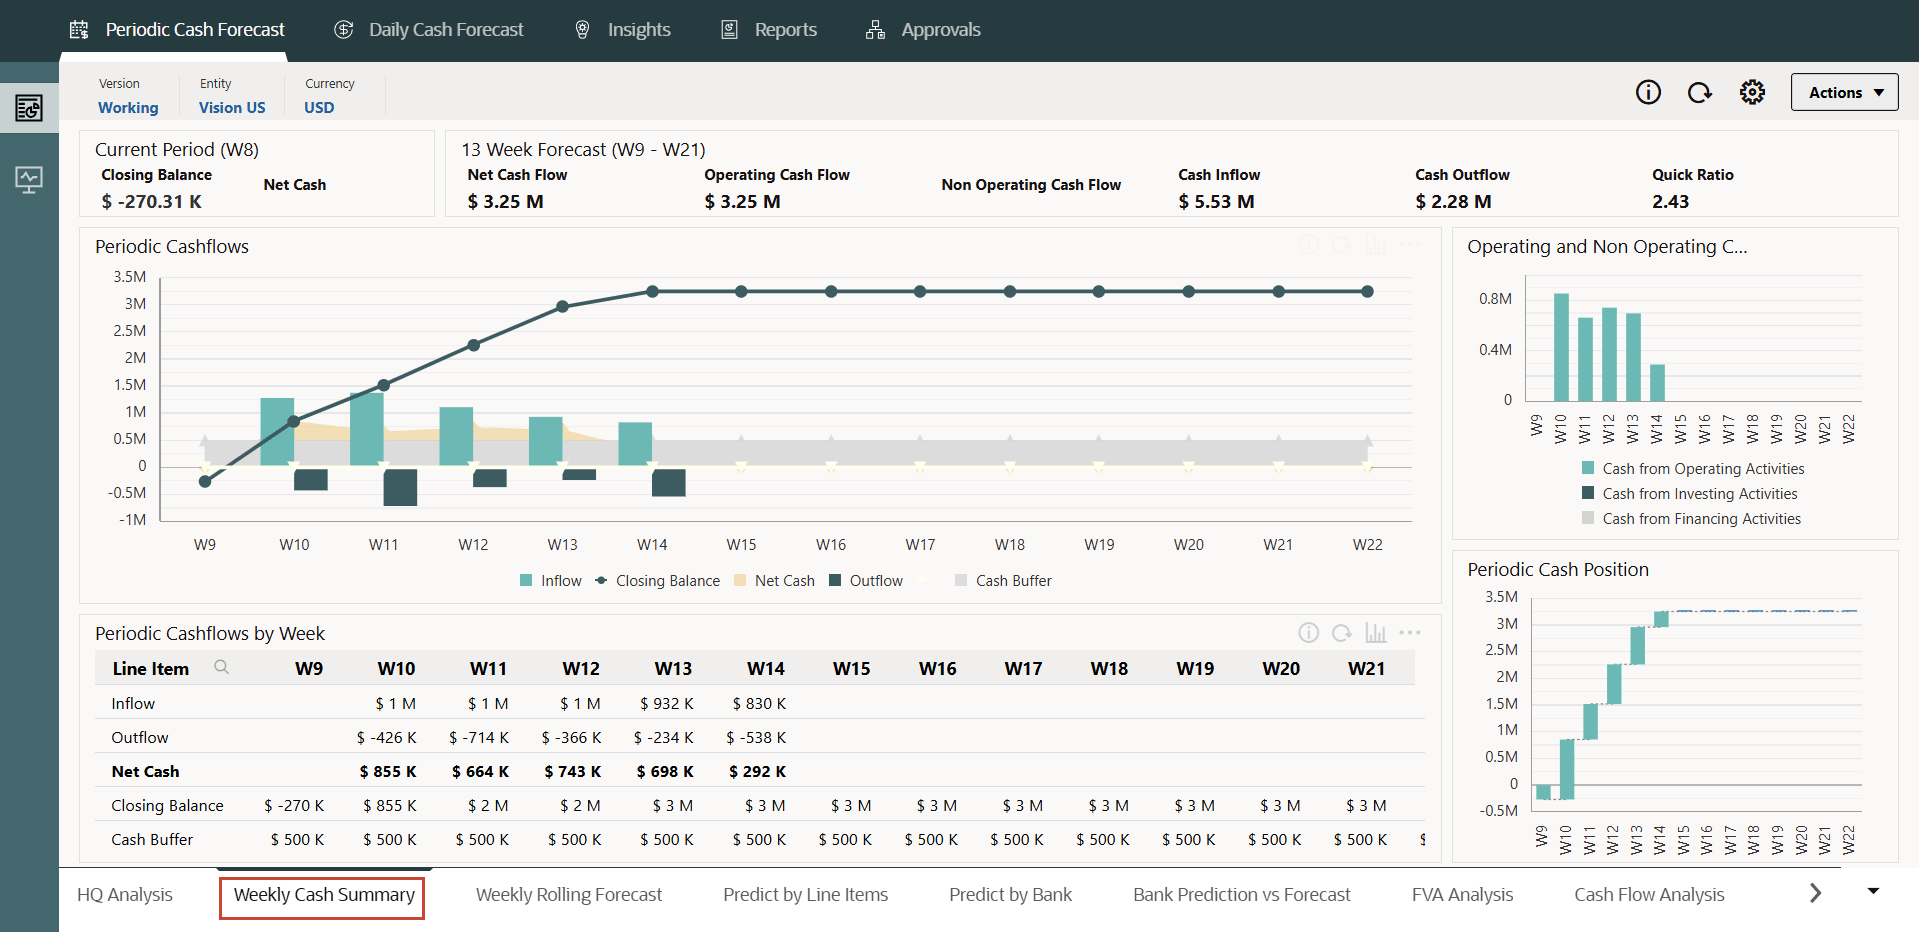
Example image of the form with data after data load exercise..
Related Links
- Documentation: Administering Predictive Cash Forecasting
- Oracle EPM Tutorials YouTube Channel
- Video: Loading Metadata and Adding Line Items for Predictive Cash Forecasting
- Video: Loading Data Files in Predictive Cash Forecasting
- First tutorial: Creating PCF Applications
- Other tutorials in the series (in sequence):
- Third tutorial: Setting up Users, User Groups, Roles and Security in Predictive Cash Forecasting
- Fourth tutorial: Setting up Forecast Methods and Configuring Driver Methods in Predictive Cash Forecasting
- Fifth tutorial: Setting up User Preferences and Verifying as End User in Predictive Cash Forecasting
- Sixth (last) tutorial: Setting up Multi-currency in Predictive Cash Forecasting
Loading Metadata and Data in Predictive Cash Forecasting
G32651-02
March 2026