JavaScript must be enabled to correctly display this content
Introduction
This tutorial shows you how to allocate Planning and Budgeting costs using the Allocation System Templates in Calculation Manager. This is a no-script-needed approach to allocating costs. The sections build on each other and should be completed sequentially.
Background
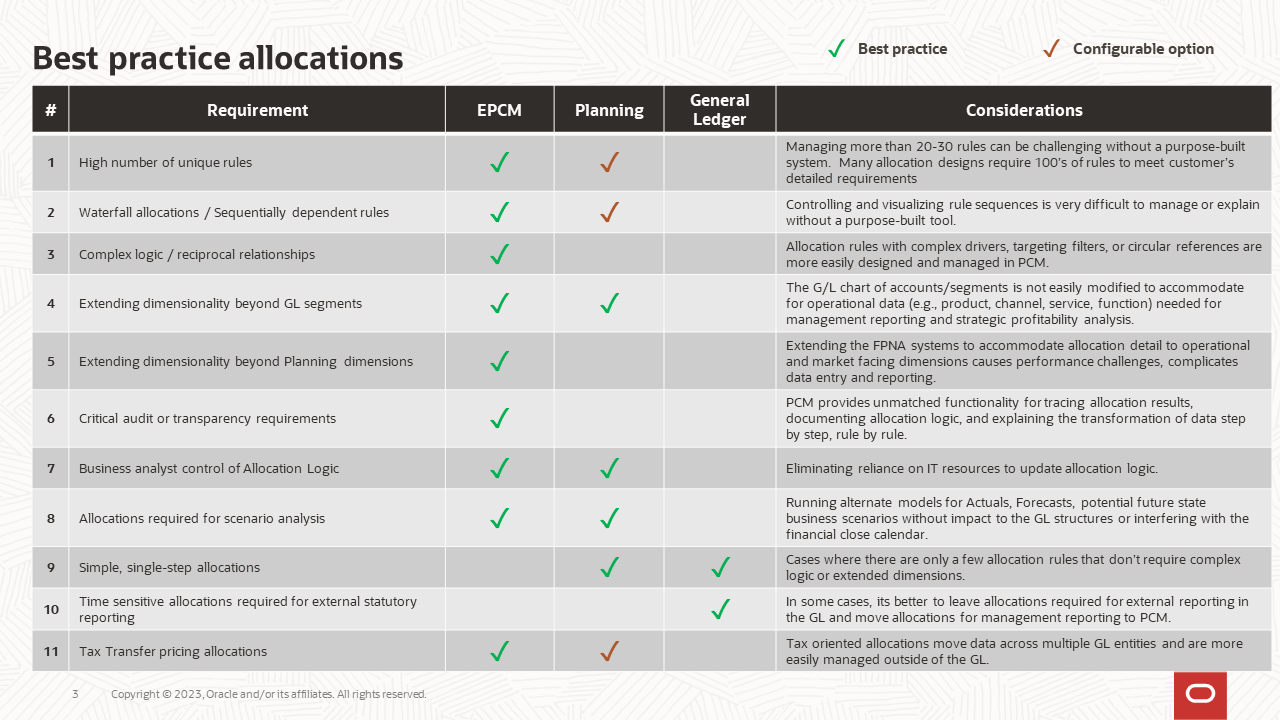
The chart below compares allocation options within EPM. In the context of your planning and budgeting cycle, you may need to allocate data. If you need to use top-down allocations, or allocate expenses based on revenue of the products, or allocations based on certain dimensionality, these are viable use cases for Planning. More complex requirements are better suited to ePCM. Planning is focused on planning and budgeting data and doing allocations comparing plan versus actuals, and similar use cases.
Note:
This tutorial illustrates a specific Planning use case for using the Allocation System Templates in Calculation Manager (part of the EPM Platform) in Cloud EPM. System templates are also available in Enterprise Profitability and Cost Management, Financial Consolidation and Close, and Tax Reporting.
Prerequisites
Cloud EPM Hands-on Tutorials may require you to import a snapshot into your Cloud EPM Enterprise Service instance. Before you can import a tutorial snapshot, you must request another Cloud EPM Enterprise Service instance or remove your current application and business process. The tutorial snapshot will not import over your existing application or business process, nor will it automatically replace or restore the application or business process you are currently working with.
Before starting this tutorial, you must:
Have Service Administrator access to a Cloud EPM Enterprise Service instance.
Smart View installed and configured to connect to your instance.
Note:
If you run into migration errors importing the snapshot, re-run the migration excluding the HSS-Shared Services component, as well as the Security and User Preferences artifacts in the Core component. For more information on uploading and importing snapshots, refer to the Administering Migration for Oracle Enterprise Performance Management Cloud documentation.
Overview
Use Cases
In the first use case, Revenue planning is done at the product and market level for each account. OpEx (operational expense) planning is done at the Entity / Cost Center level, but not at the Product / Market (No Product and No Market) level. The business requirement is to allocate OpEx to Markets and Products using revenue as the driver. You can meet this requirement by using the seeded Allocation Template.
In the 2nd use case, data for last year's Actual OpEx is available by Product for each GL account. Annual budgeting for the new year is done at the Parent Product level for all the OpEx accounts. Departments Managers would like to allocate the budget to all the products, using last year's actuals as the driver. This requirement can be met by using the seeded Allocation - Level To Level Template.
Cost Allocation Steps (Best Practice)
Prepare a Smart View Adhoc report or form for revenue by product and market.
Prepare another Smart View Adhoc report or form for Opex budgets to be allocated.
Use the reports to identify the source, destination and cost drivers required for allocations.
Use the seeded Allocation Template in Calc Manager to define the source, destination and cost driver for allocations.
Prepare end user forms, reports, right click menus and dashboards to perform and review the allocation results and profitability reports.
Seeded Allocation Template
Use the Allocation template to allocate values from a source to a destination, either evenly or based on a specified driver. When you add the template to a rule, a wizard guides you through the steps to create the allocation. There is no coding needed. The steps are listed below:
Activating the Financials Navigation Flow
Navigation flows enable designers to control how roles or groups interact with the business process. In this section, you activate the Financials navigation flow.
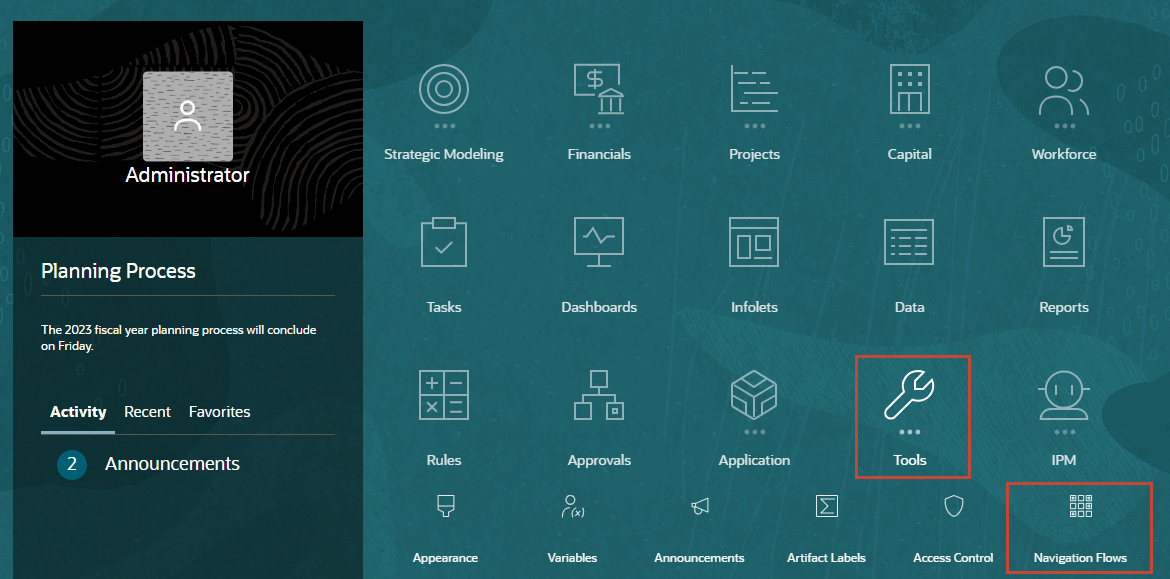
On the home page, click Tools, then Navigation Flows.
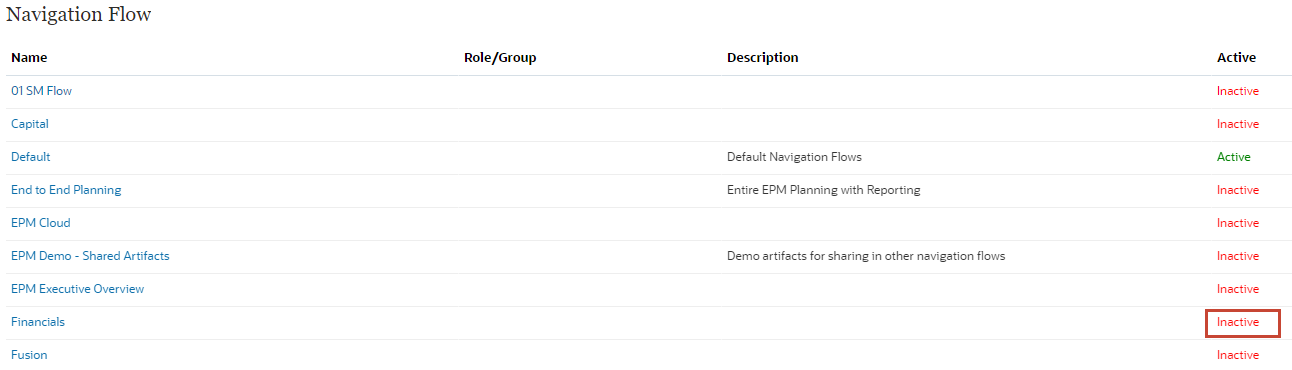
For the Financials navigation flow, under Active, click Inactive.
Click (Home).
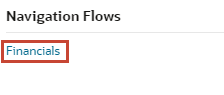
Click (Navigation Flow), and select Financials.
Assigning Values to User Variables
User Variables were added when the forms were created in this application. User variables act as filters in forms, enabling planners to focus only on certain members. In this section, you set values for user variables.
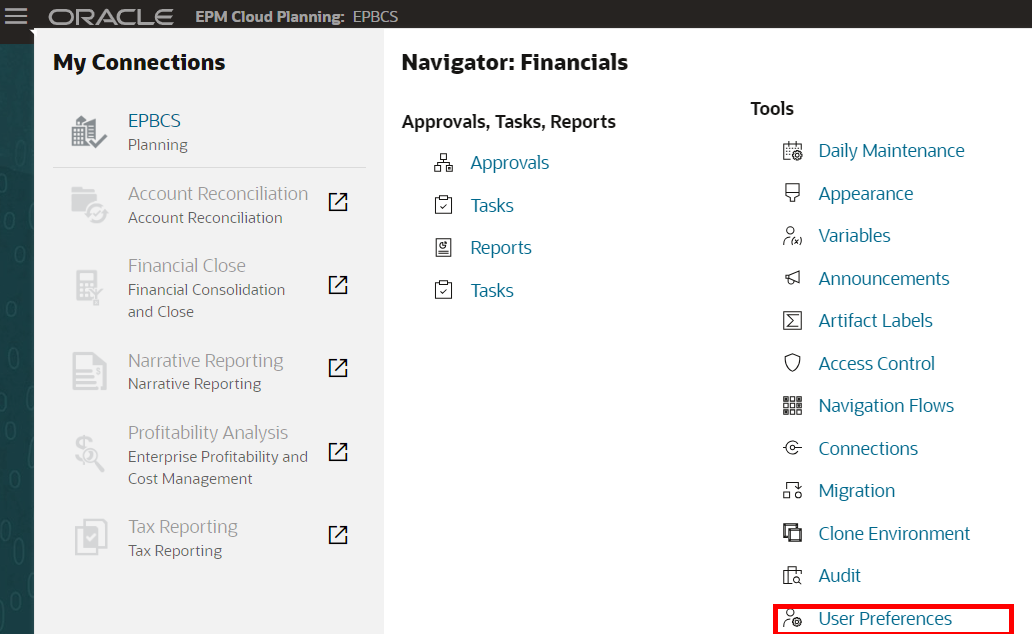
On the home page, click (Navigator), and under Tools, click User Preferences.
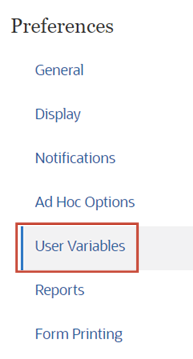
Under Preferences, click User Variables.
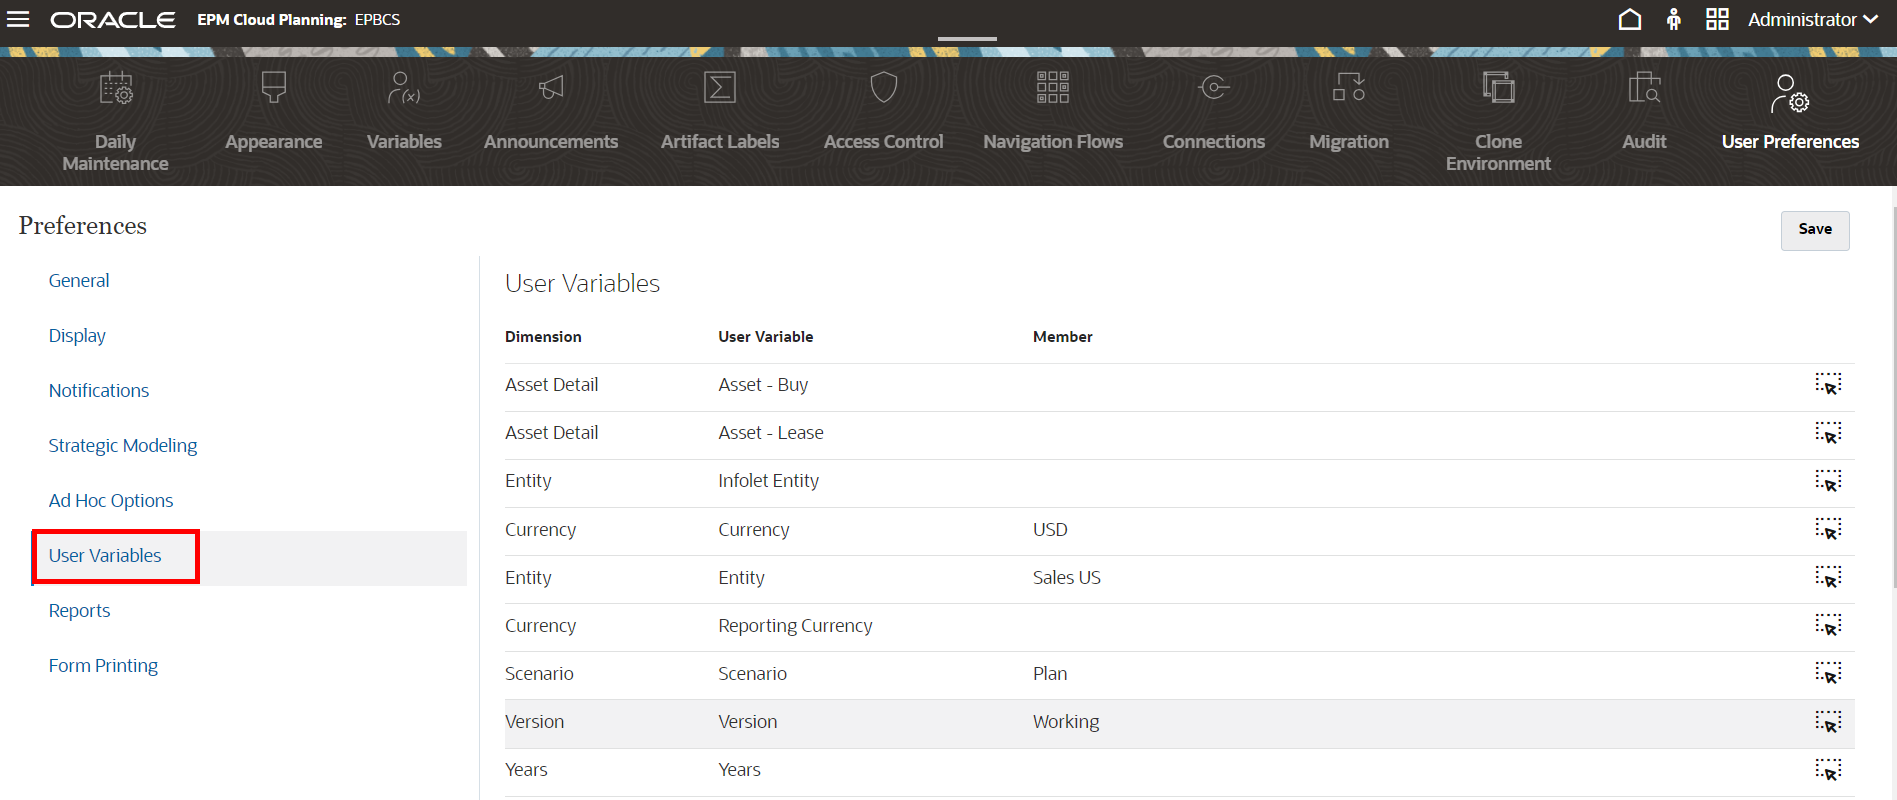
Select the Currency, Entity, Scenario, and Version members as noted in the screenshot below. Click the Member Selector, on the right side, to make the selections.
Verify your selections and click Save.
At the information message, click OK.
Use Case 1 - Allocating Expenses to Markets and Products
In this first use case, revenue planning is done at the product and market levels for each account. Operational expense (OPEX) planning is done at the Entity and Cost center level, but not by Product or Market (using No Product and No Market members). The business need is to allocate the operational expenses to Markets and Products using product revenue as the driver. You can perform this task by creating a business rule using the seeded Allocation Template.
Allocating Expenses to Markets (Market level allocation)
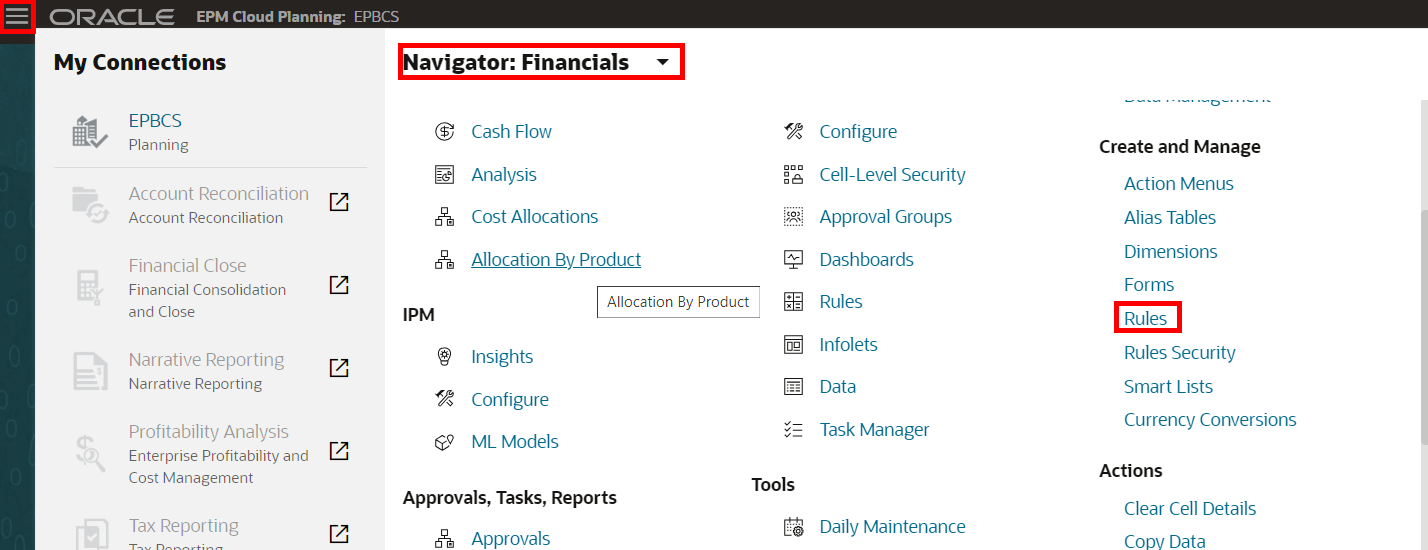
Click (Navigator). Verify the Financials navigation flow is selected. Then, under Create and Manage, select Rules.
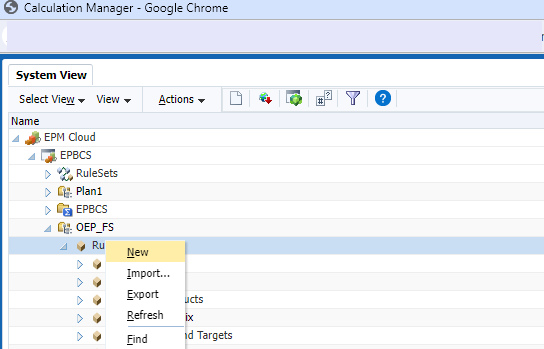
In the System View tab of Calculation Manager expand EPM Cloud, then EPBCS, then OEP_FS, then Rules. Right click Rules, and select New.
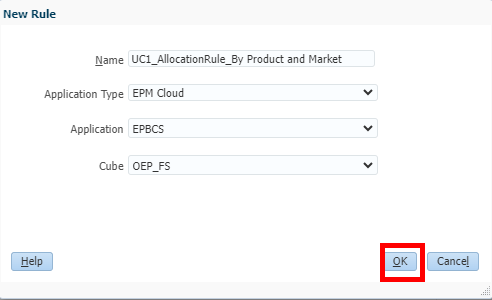
In the New Rule dialog, enter UC1_AllocationRule_By Product and Market in the Name field and click OK.
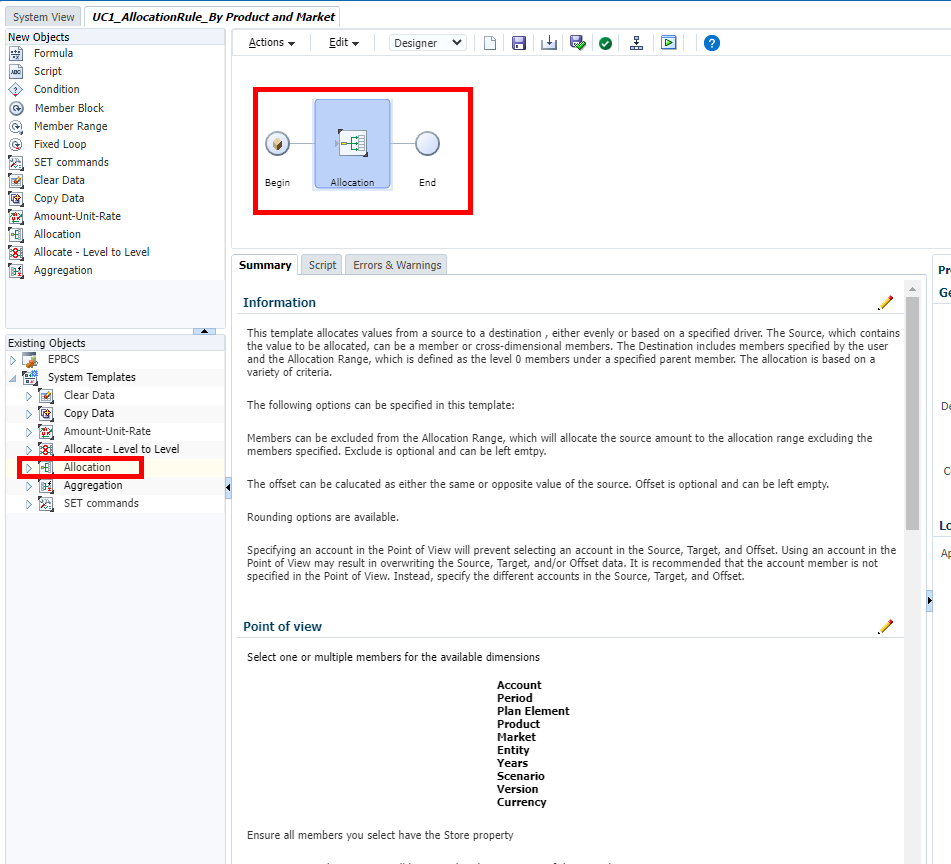
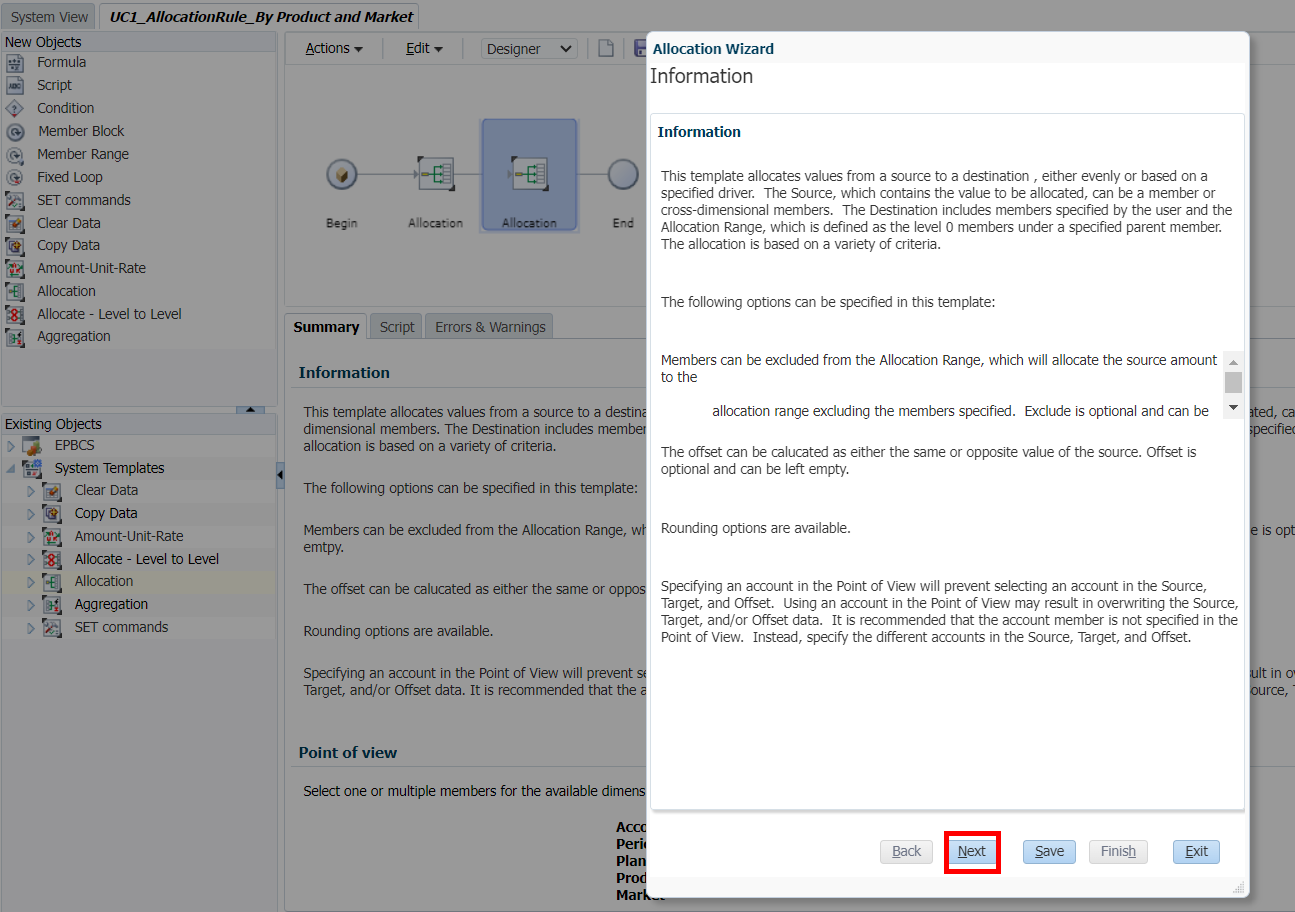
In the Existing Objects section, expand System Templates. Drag the Allocation template and drop it between the Begin and End objects.
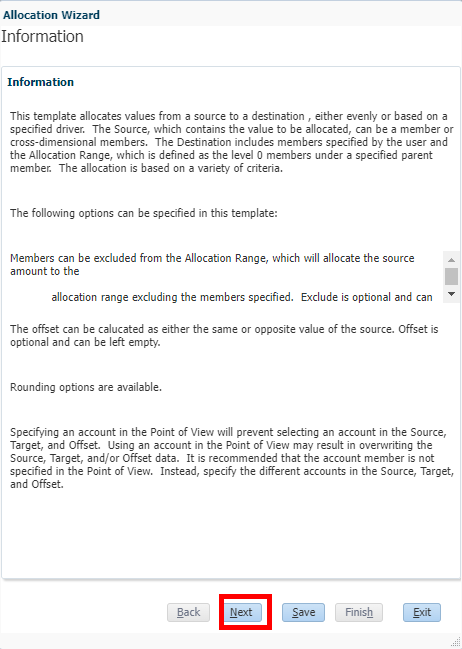
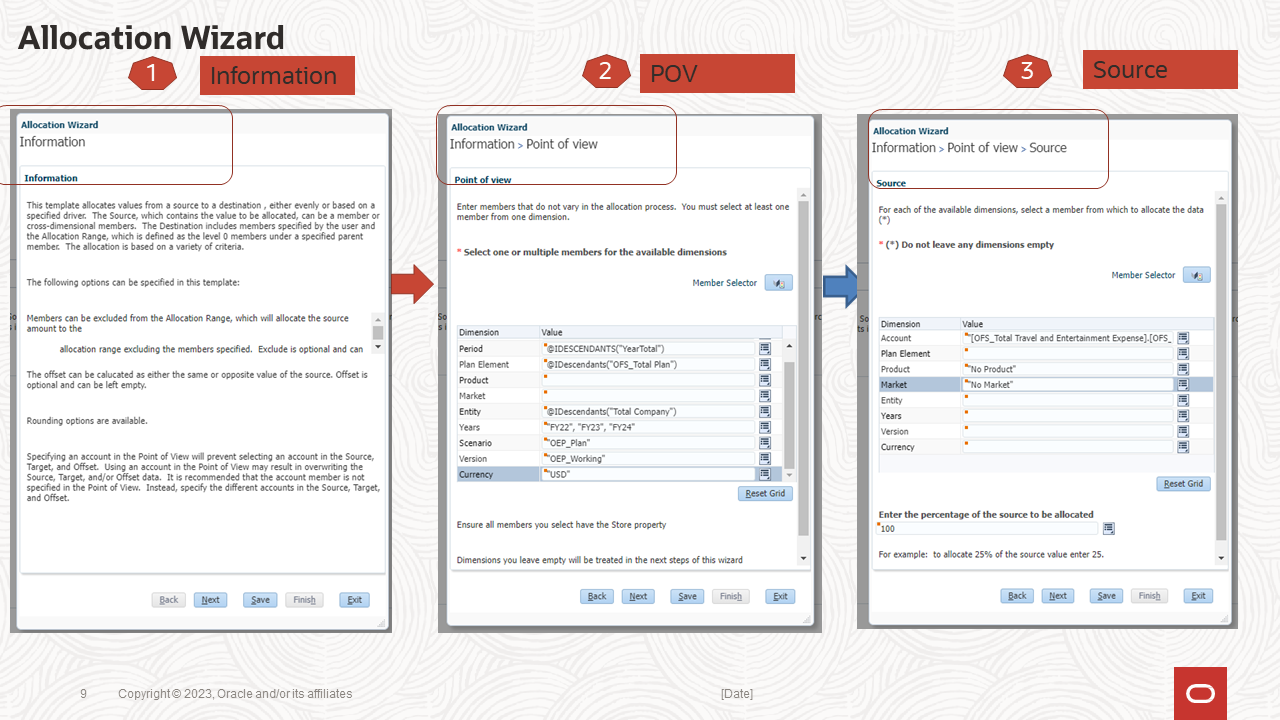
In the Information dialog, view the information then click Next.
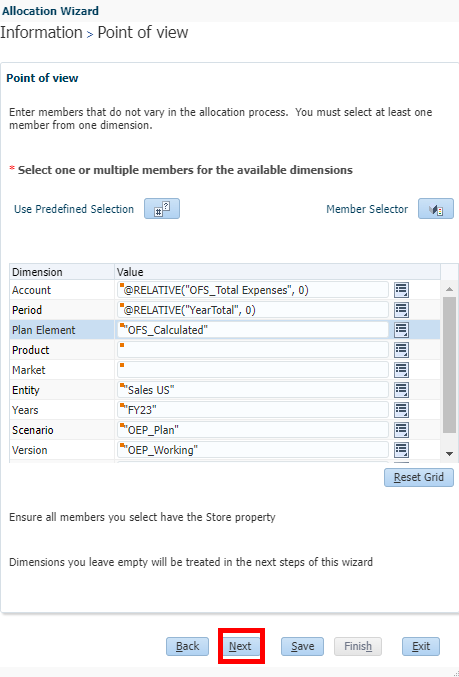
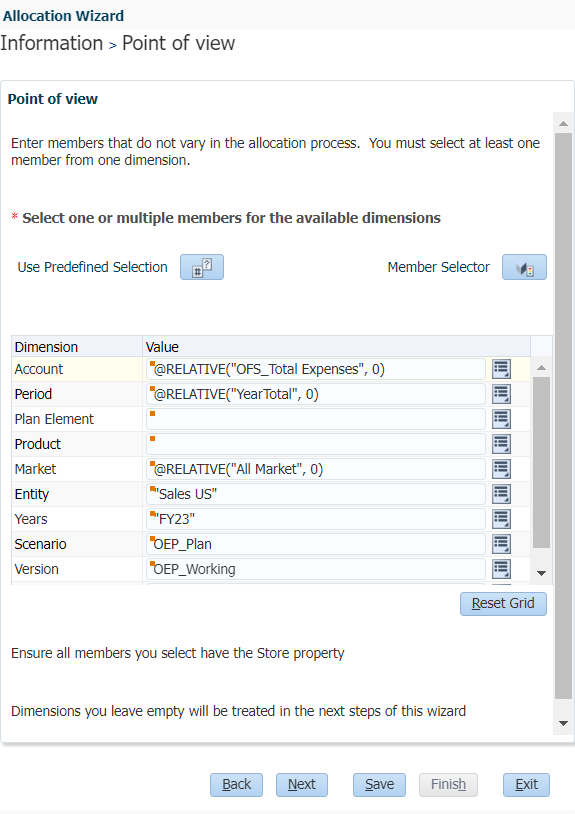
Select the Point of View dimension members for each dimension that are common between Source and Destination.
In the Information > Point of view dialog, enter the following data, then click Next:
Dimension
Value
Account
@RELATIVE("OFS_Total Expenses", 0)
Period
@RELATIVE("YearTotal", 0)
Plan Element
"OFS_Calculated"
Product
Market
Entity
"Sales US"
Years
"FY23"
Scenario
"OEP_Plan"
Version
"OEP_Working"
Currency
"USD"
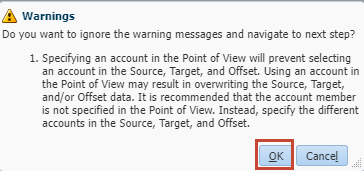
In this case, Account, Period, Plan Element, Entity, Years, Scenario, Version and Currency dimensions are common. Leave Product and Market dimensions empty. They will be addressed in the next step of this allocation wizard.
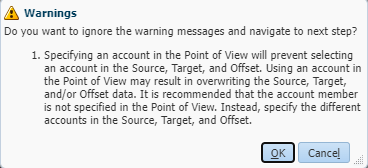
For the Warnings message, click OK.
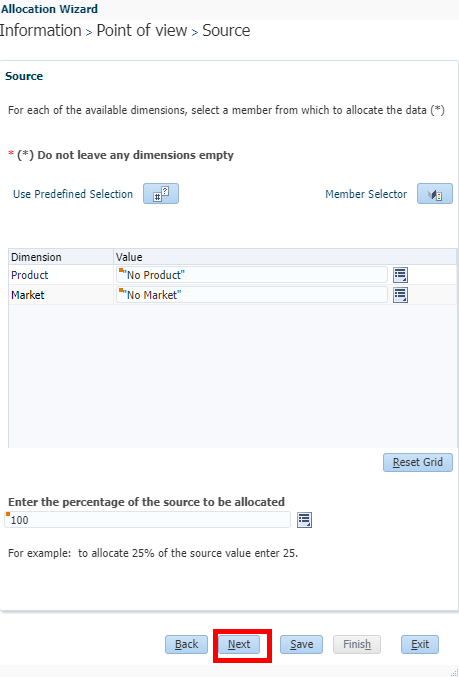
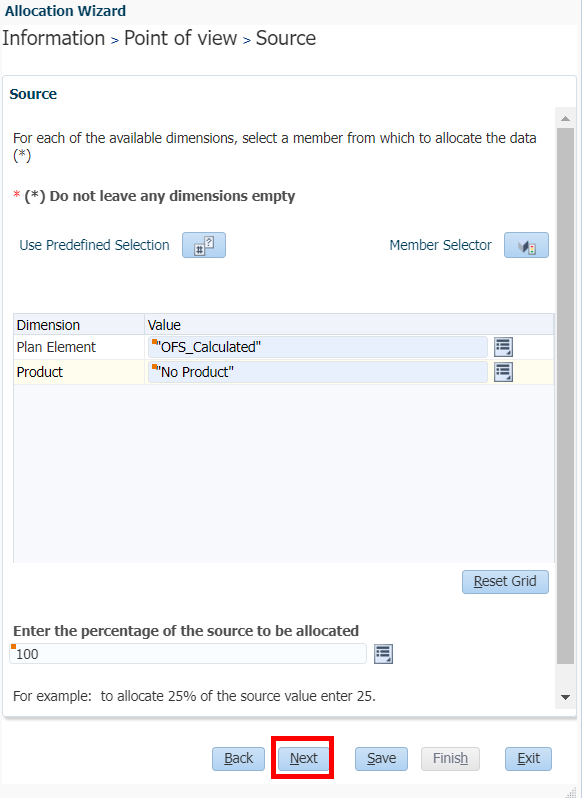
In the Information > Point of View > Source dialog, enter the source dimension members (noted below) from which to allocate the data, and click Next.
Dimension
Value
Product
"No Product"
Market
"No Market"
In our case, we're going to allocate from No Product -> No Market.
You can also enter a percentage of the amount from the source that needs to be allocated. Default value is 100%. In our use case, allocate 100% of expense to markets.
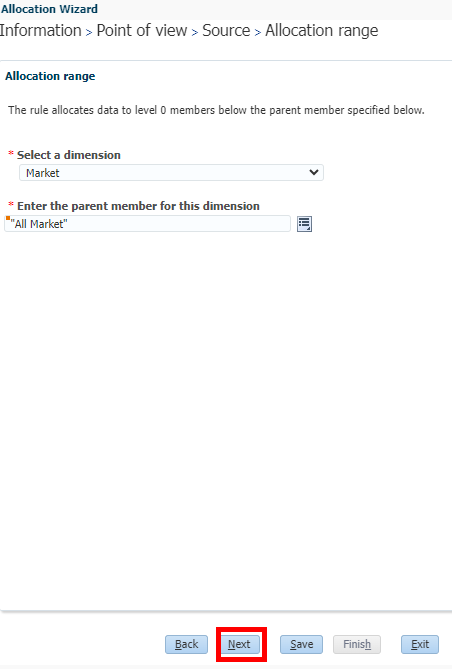
In the Information > Point of View > Source > Allocation Range dialog, select Market, then All Market, and click Next.
The rule allocates data to level 0 members below the parent member specified.
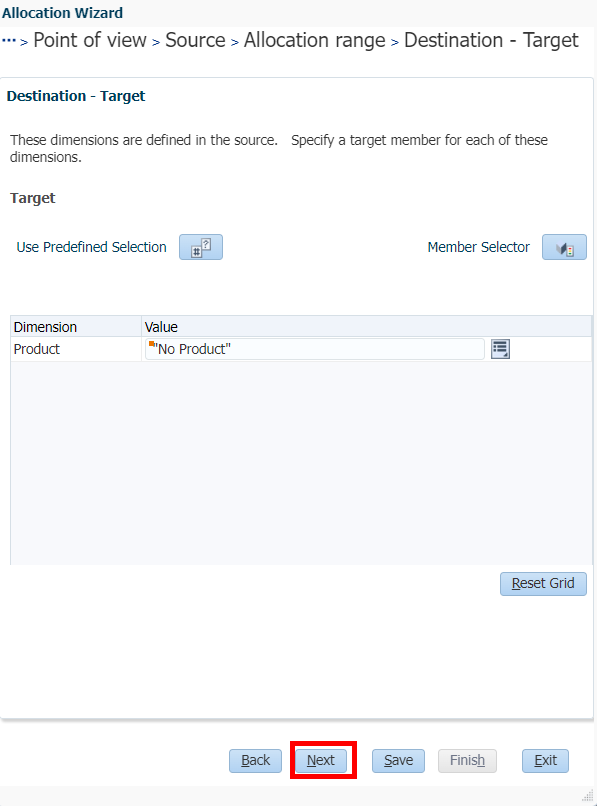
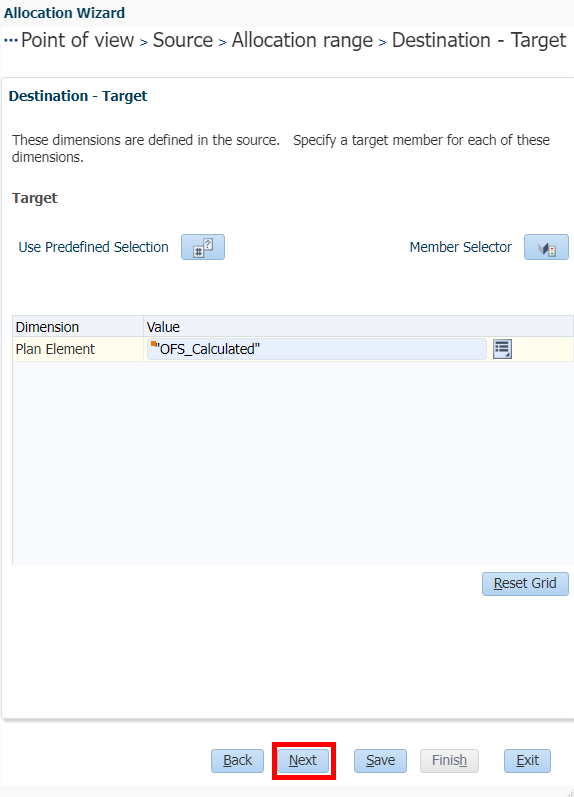
In the Destination - Target dialog, specify the product to which the cost needs to be allocated, and click Next. In our use case, destination is the same expense account as the source and No Product member. In the earlier step, we already mentioned level 0 markets as the destination and hence the cost allocation will go to all the markets at No Product -> OpEx Account specified.
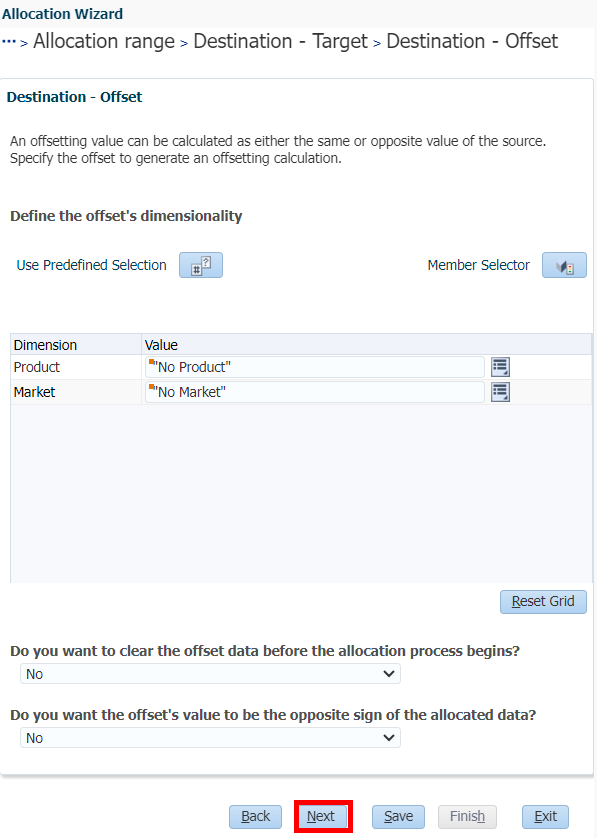
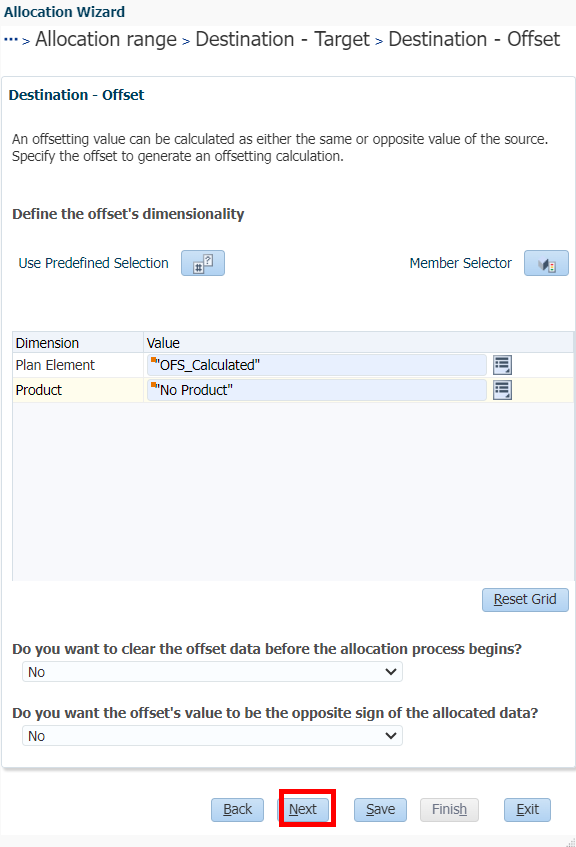
In the Destination-Offset dialog, select No Product and No Market for the Product and Market dimension members. Answer No to both questions at the bottom of the dialog. Click Next.
You can specify the offsetting value, that can be calculated as either the same value of the source, or the opposite value. You also have the option to clear the offset data before the allocation process begins. If “Yes” is selected, the system will clear the data at the source level before allocation. Also, there is an option to make the offset value to be in the opposite sign of the allocated data. Select “yes”/ “no” from the drop down list.
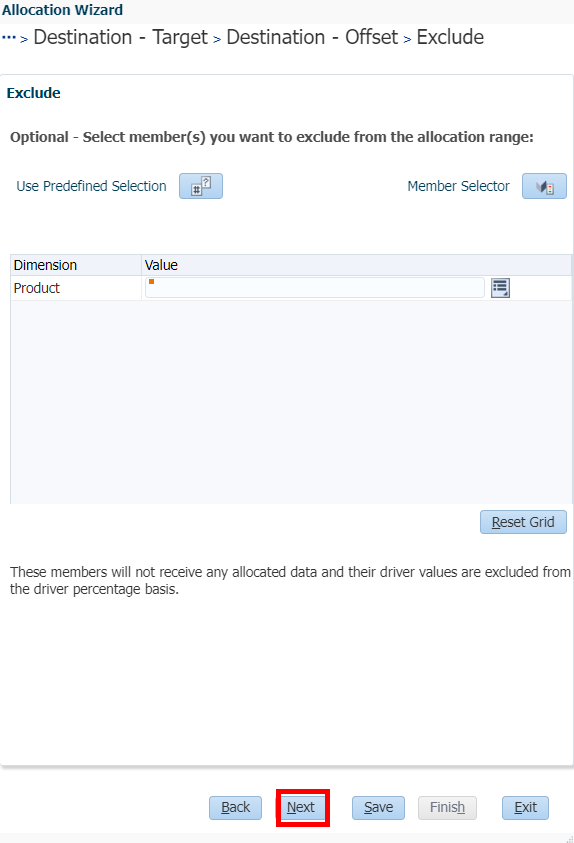
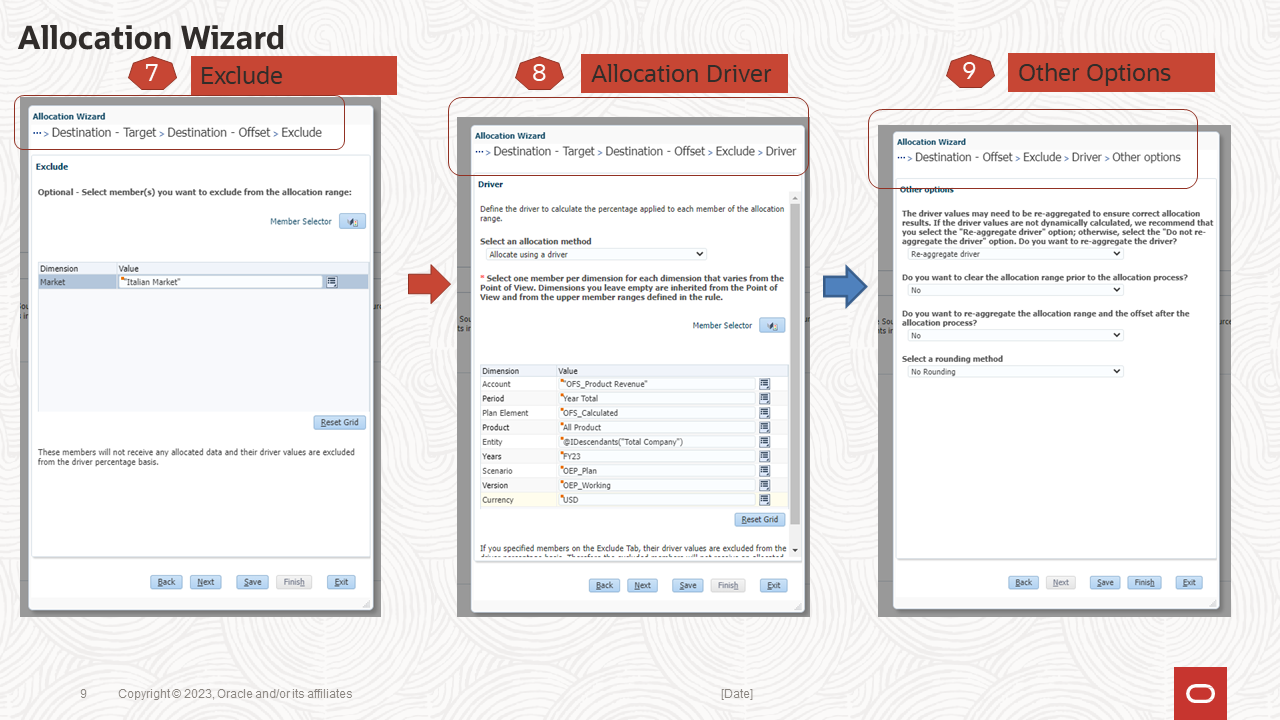
Optional: If there are certain members that should not receive any allocated data and their driver values are to be excluded from the driver percentage basis, you specify in this step. In our use case, there are no excluded members from the allocation range, so it's left blank. Click Next.
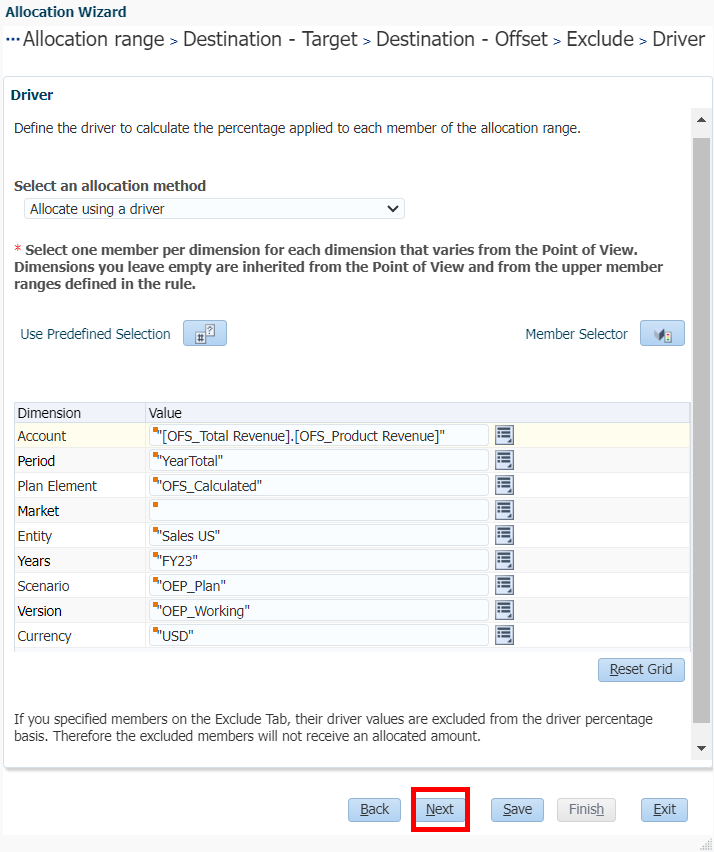
In the Driver Dialog, specify the slice where the cost driver data resides. Select one member per dimension for each dimension that varies from the Point of View. Dimensions you leave empty are inherited from the Point of View, and from the upper member ranges defined in the rule. In the use case, you are using product revenue by market as cost driver to allocate the expenses to each market. Based on the Smart View report that we prepared earlier for cost driver data, specify the driver information intersection points for all the dimensions. Select the following information, then click Next.
Dimension
Value
Account
"[OFS_Total Revenue].[OFS_Product Revenue]"
Period
"YearTotal"
Plan Element
"OFS_Calculated"
Product
"All Product"
Entity
"Sales US"
Years
"FY23"
Scenario
"OEP_Plan"
Version
"OEP_Working"
Currency
"USD"
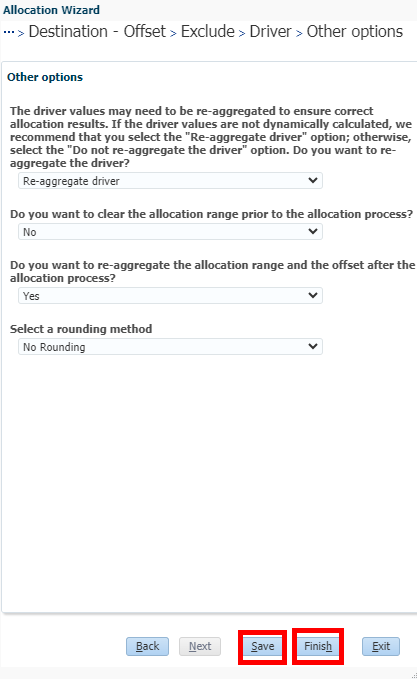
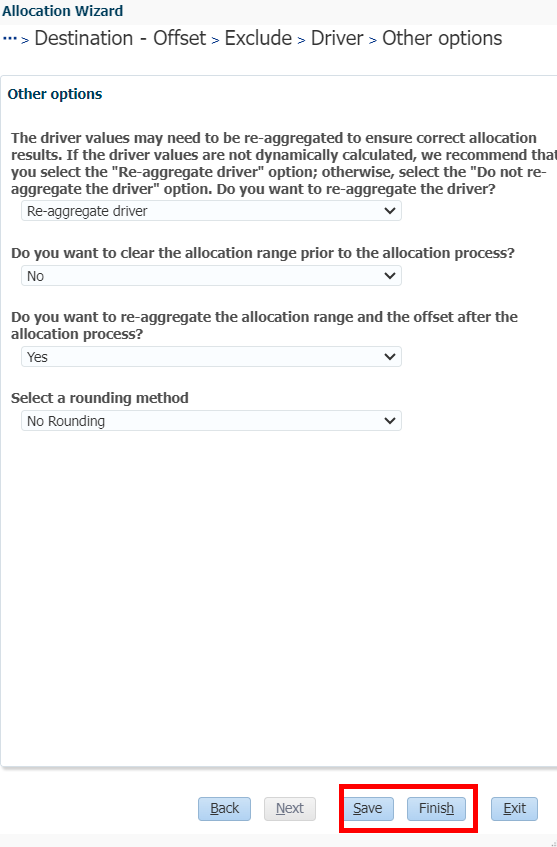
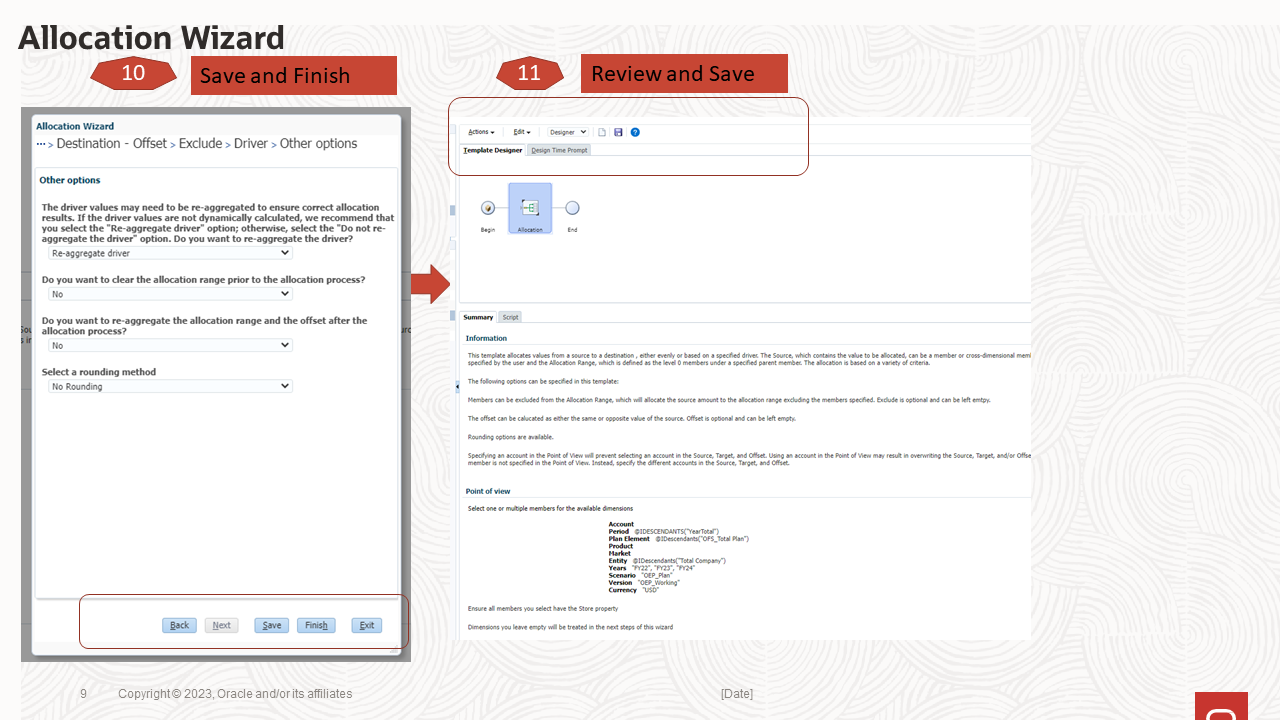
In the Other options dialog, specify if the driver values need to be re-aggregated to ensure correct allocation results. If the driver values are not dynamically calculated, we can select the “Re-aggregate driver” option. Otherwise, select the “Do not Re-aggregate” option from the drop down. If you want to clear the allocation range prior to the allocation process, you can specify it here as Yes or No. You also have the option to select the rounding method. In our use case, select the “No Rounding” option from the drop down. This is the last step in the allocation template wizard. Click Save, then click Finish.
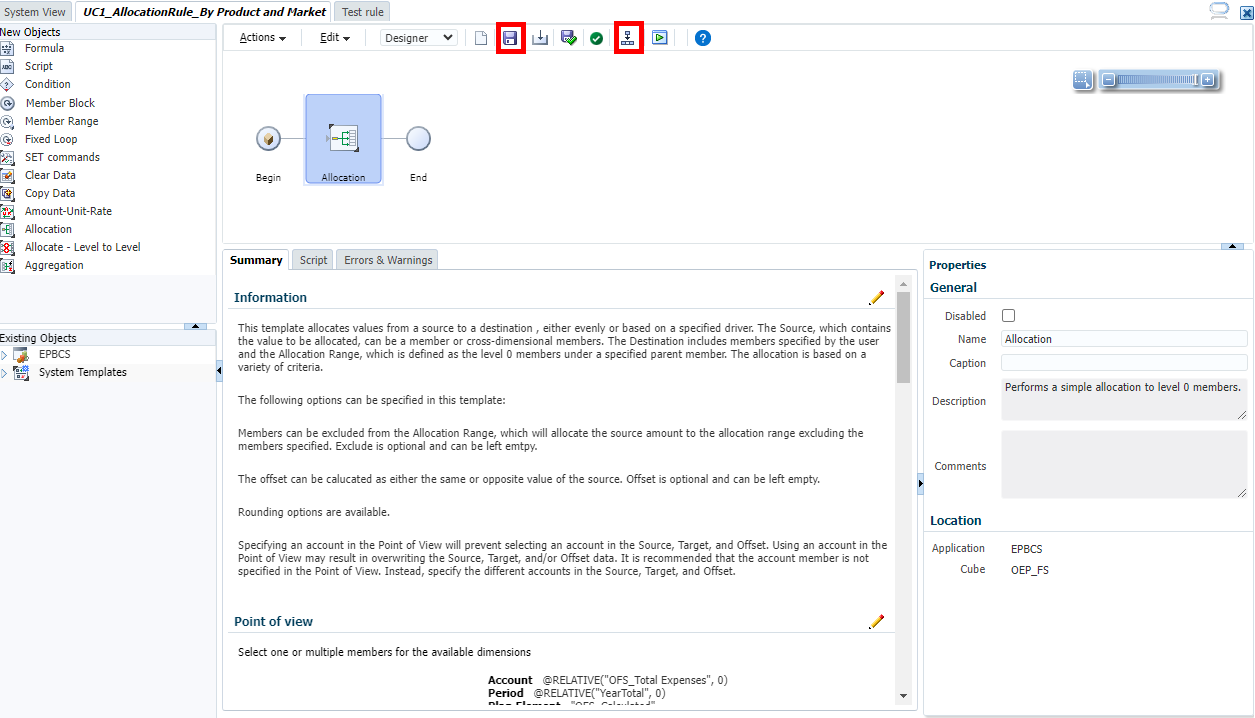
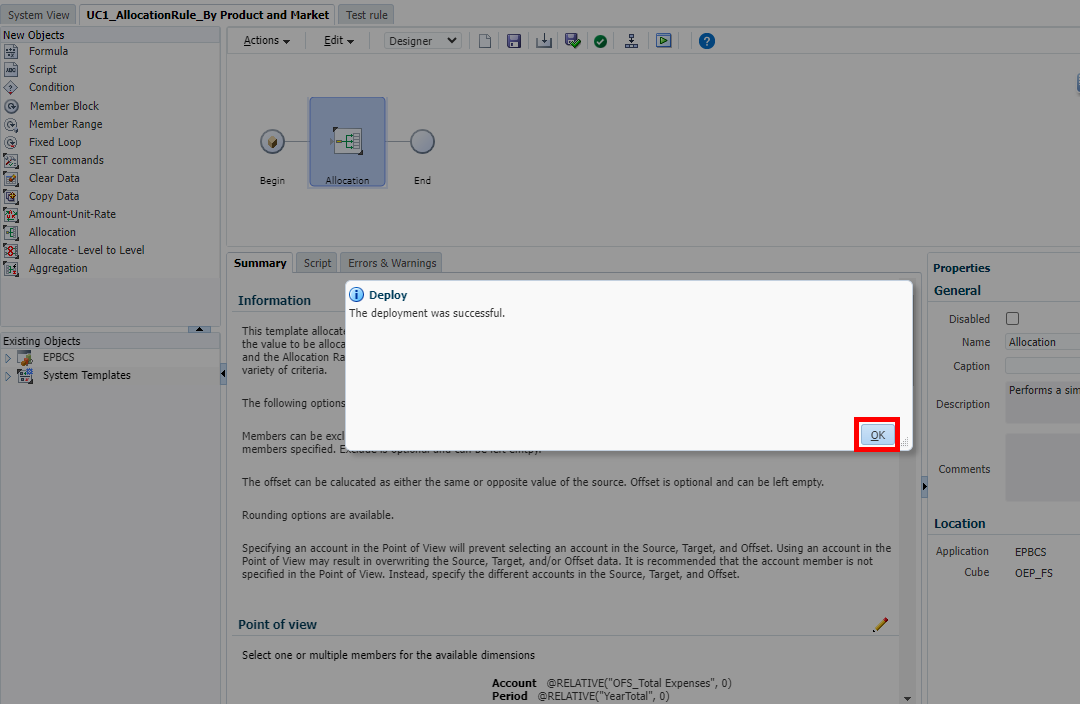
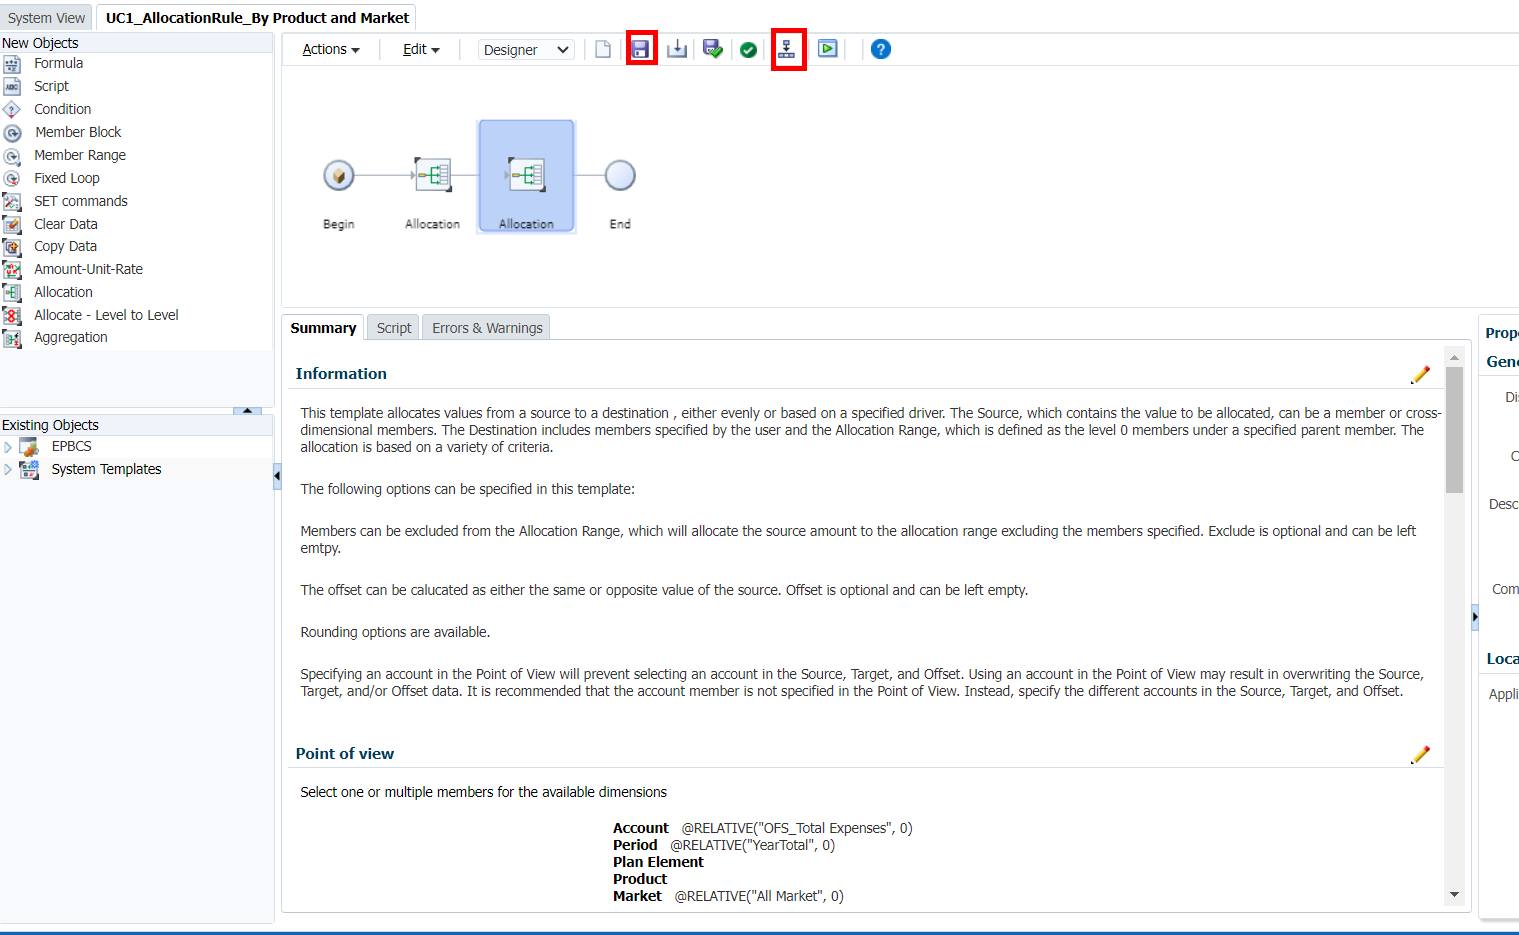
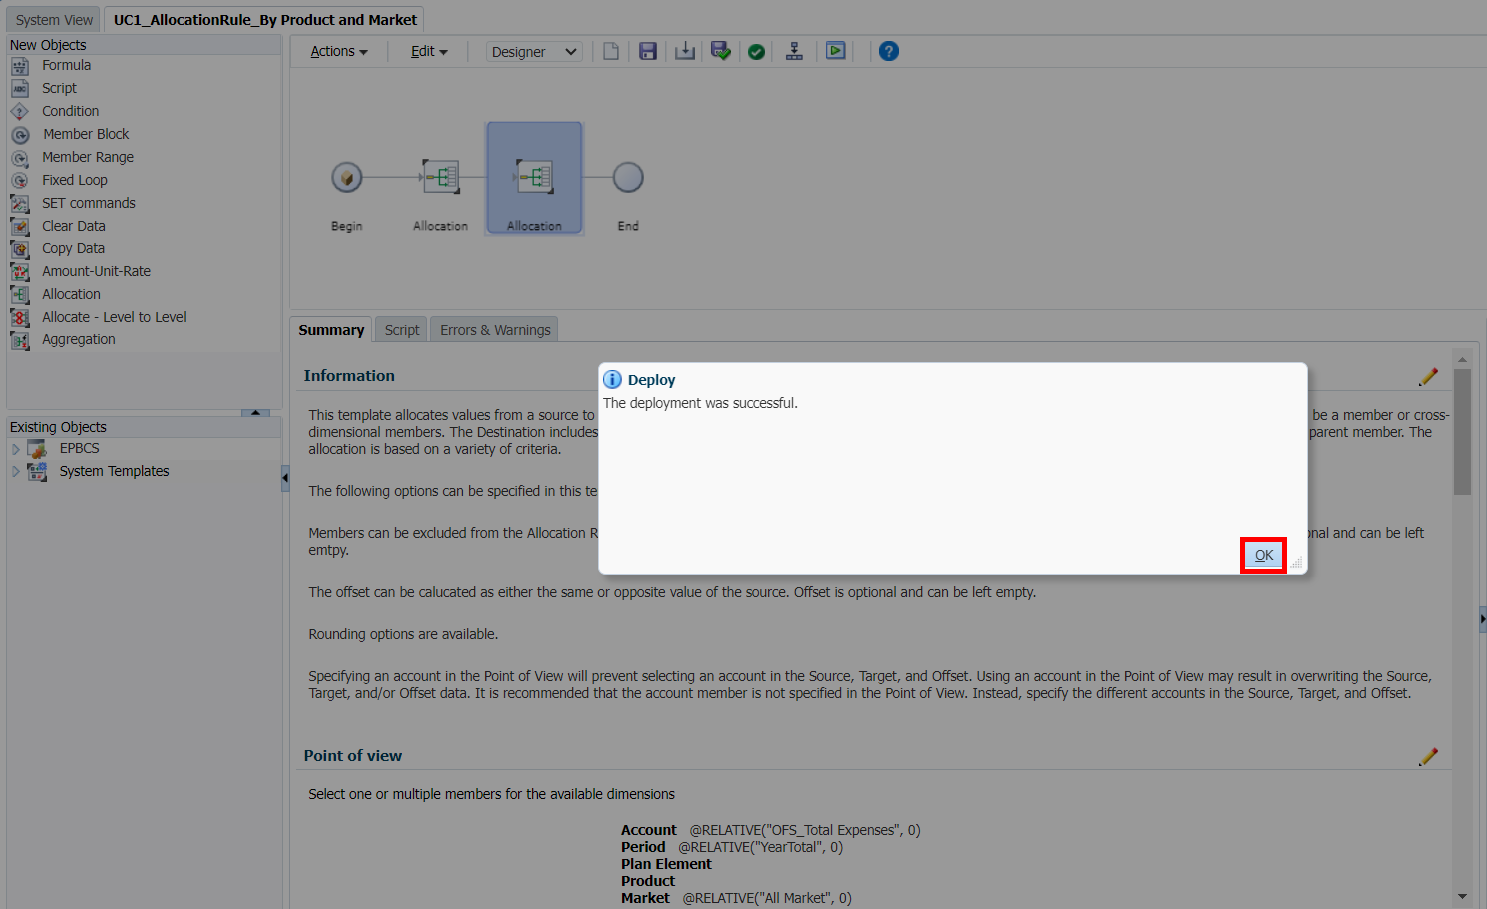
The last step is to Save, Validate and Deploy the rule. Make sure that the deployment is successful so that the rule can be associated to run on form save or using a right-click menu. In the Rule Designer, click Save, then click Validate and Deploy.
Click OK.
Allocating Expenses to Products (Product level allocation)
Similar to the Market level cost allocation template, create another allocation template in the same rule to allocate the cost from each market to product level based on product revenue as the cost driver.
With the Rule still open, repeat Step 4 above, and drag and drop the Allocation Template between the first Allocation Template and the End object. In the Information dialog click Next.
In the Point of View dialog, enter the following information, then click Next.
Dimension
Value
Account
@RELATIVE("OFS_Total Expenses", 0)
Period
@RELATIVE("YearTotal", 0)
Plan Element
OFS_Calculated
Product
Market
@RELATIVE("All Market", 0)
Entity
"Sales US"
Years
"FY23"
Scenario
"OEP_Plan"
Version
"OEP_Working"
Currency
"USD"
For the Warnings message, click OK.
In the Source dialog, for Plan Element, enter "OFS_Calculated", and for Product, enter "No Product", and click Next.
In the Allocation Range dialog, select the Product dimension, and All Product parent member, and click Next.
In the Target dialog, for Plan Element, enter "OFS_Calculated", and click Next.
In the Offset dialog, for Plan Element, enter "OFS_Calculated" and for Product member, enter "No Product", and then for the two questions, select No, and click Next.
In the Exclude dialog, no entry is needed. Click Next.
In the Driver dialog, enter the following information, and click Next.
Dimension
Value
Account
"[OFS_Total Revenue].[OFS_Product Revenue]"
Period
"YearTotal"
Plan Element
"OFS_Calculated"
Market
leave blank
Entity
"Sales US"
Years
"FY23"
Scenario
"OEP_Plan"
Version
"OEP_Working"
Currency
"USD"
In the Other options dialog, enter the selections noted in the screenshot below, and click Save and then click Finish.
In the Rule Designer, click Save, and then click Validate and Deploy.
In the Deploy dialog which indicates a successful deployment, click OK.
Viewing Allocated Data
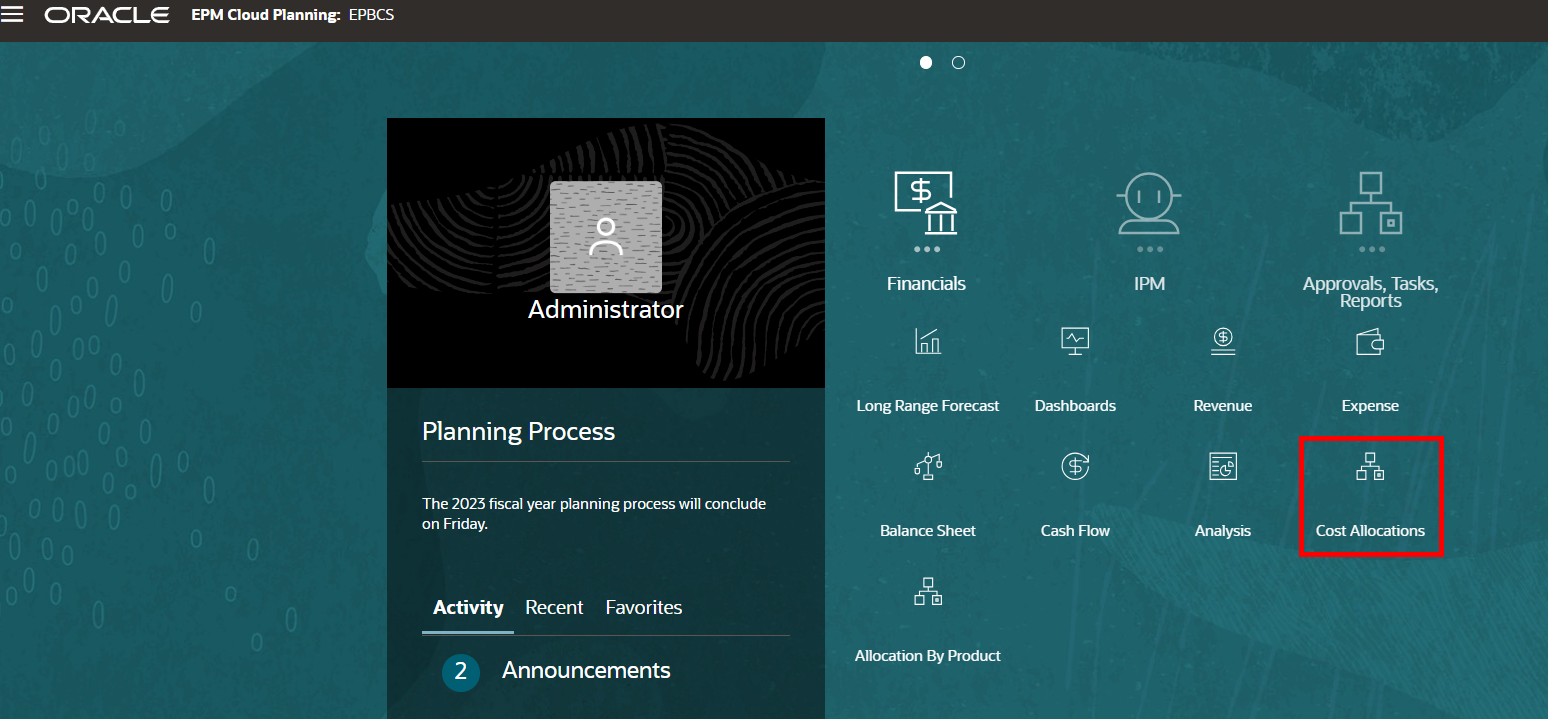
From the Home Page, click Financials, then Cost Allocations.
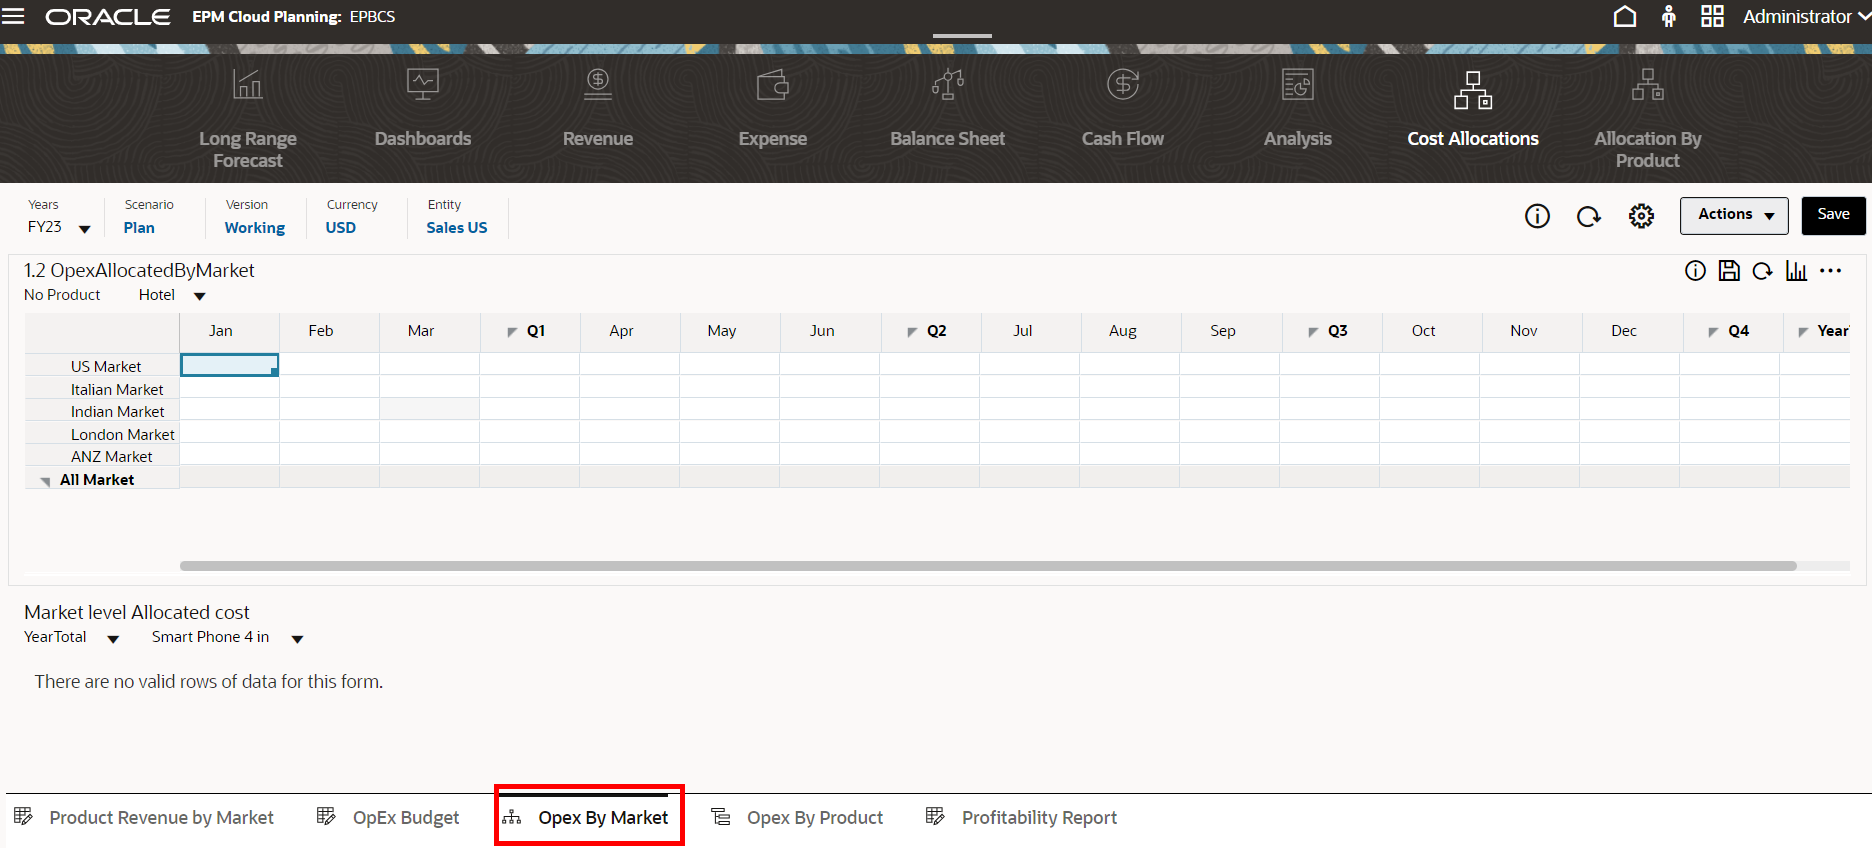
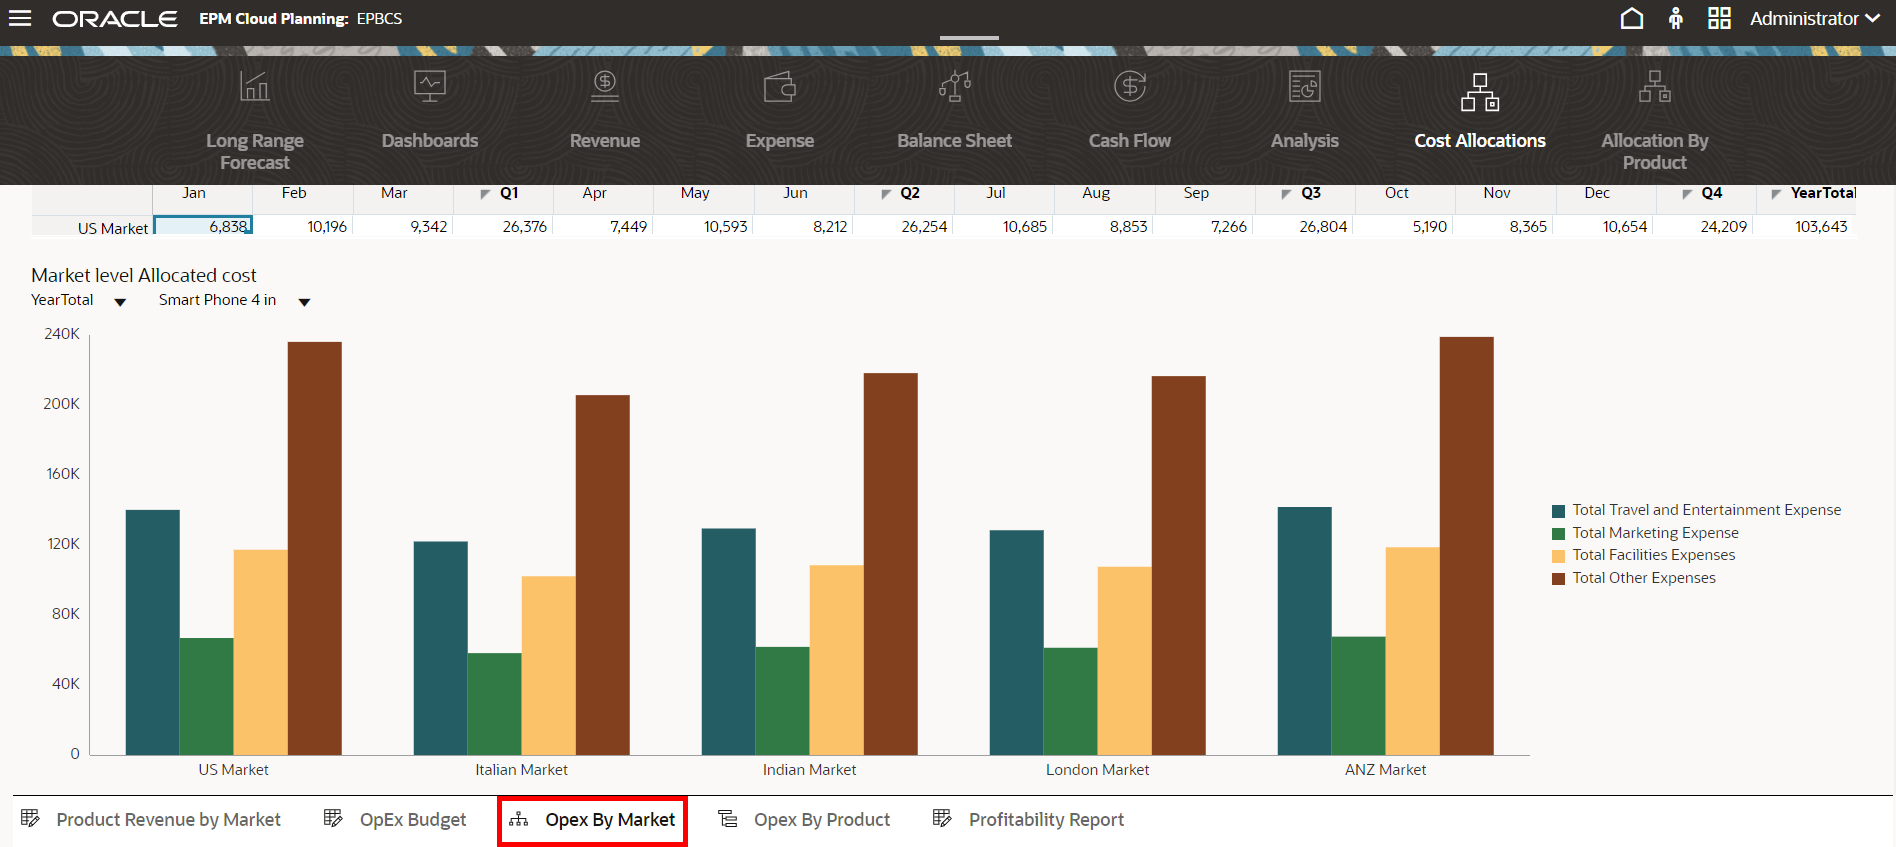
Click the Opex by Market tab.
The OpexAllocatedByMarket form is displayed.
For the top form, for the year, select FY23.
There is no data in the cells.
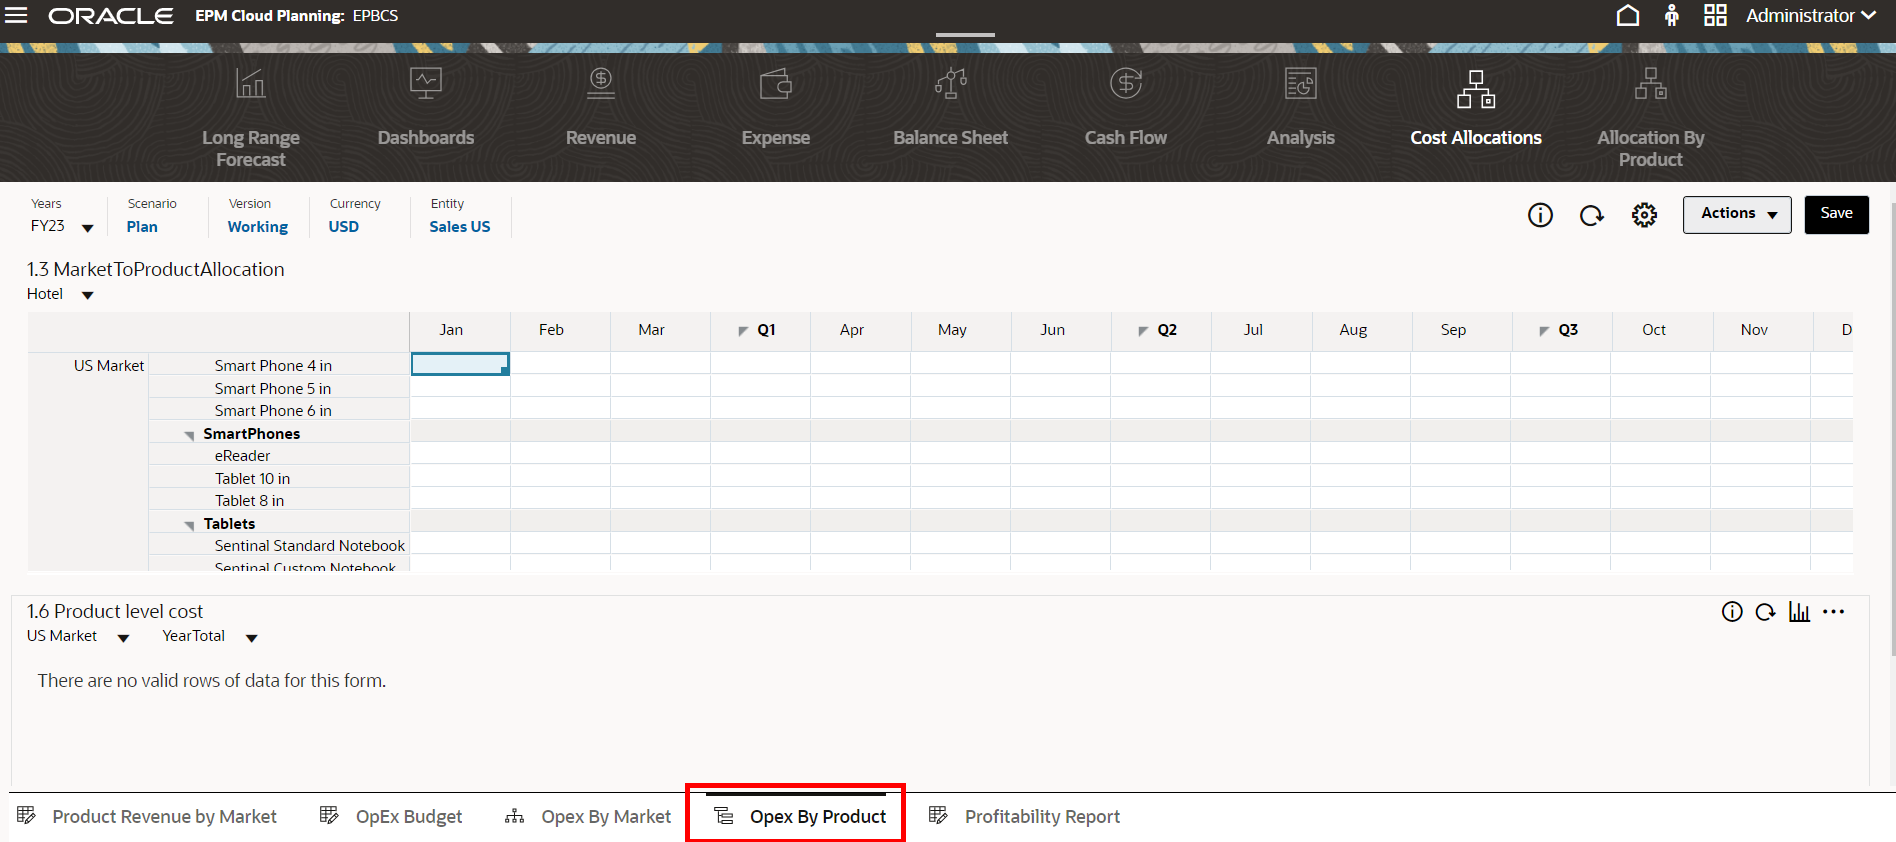
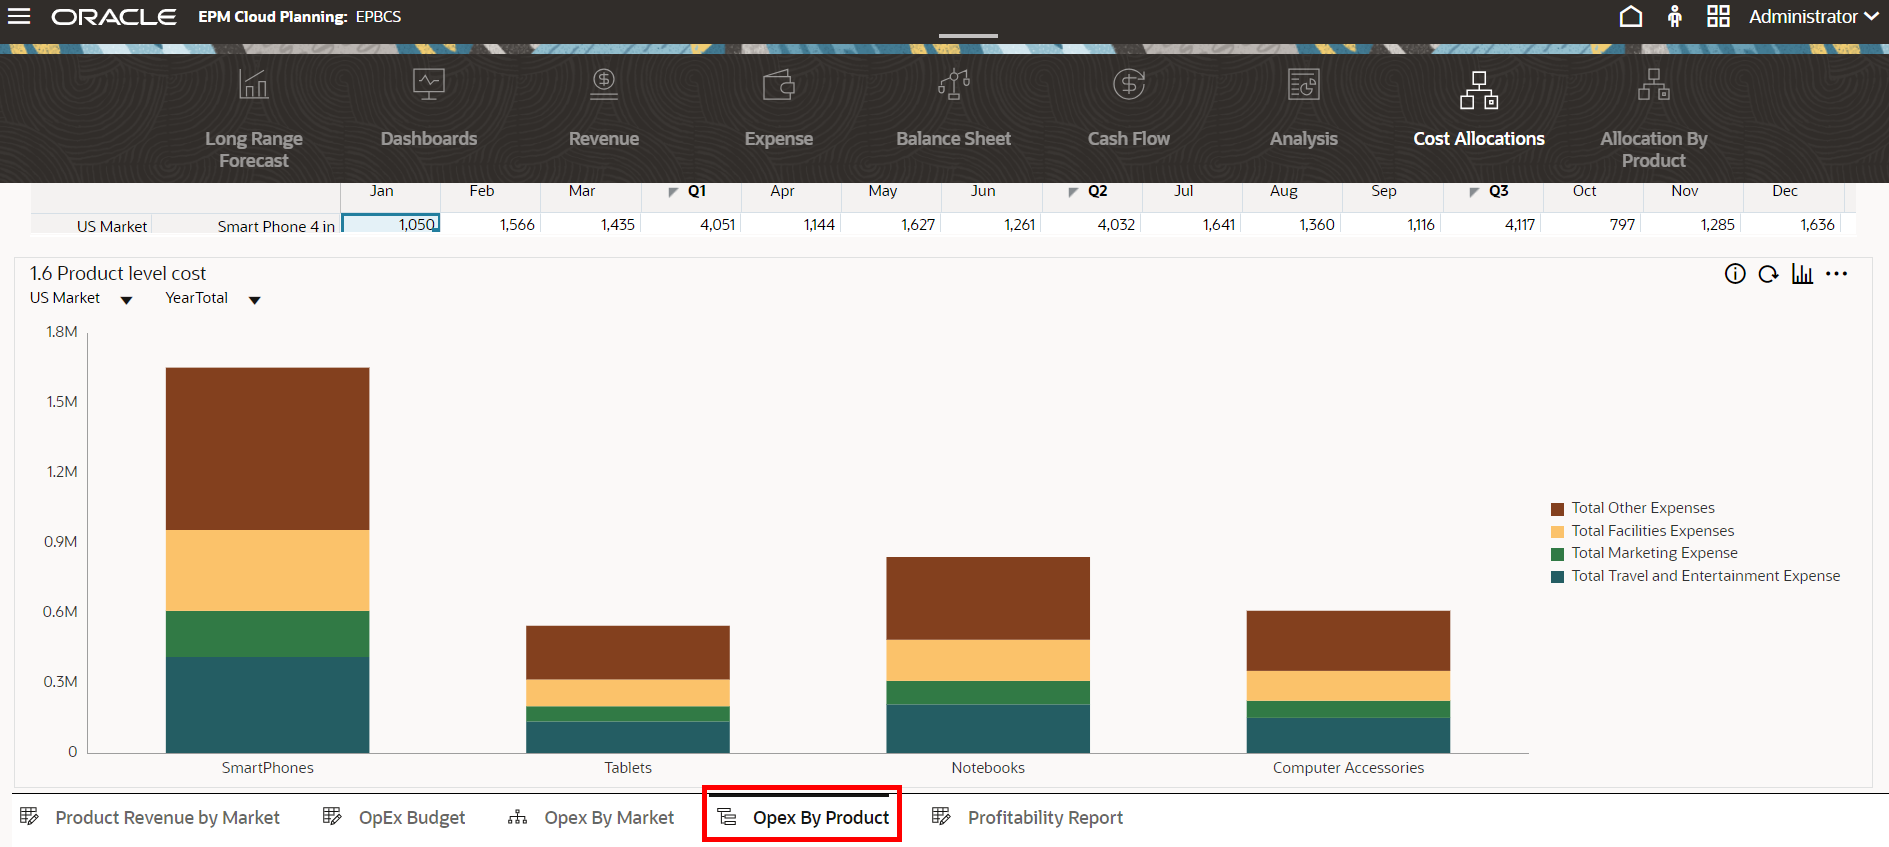
Click the Opex by Product tab.
The MarketToProductAllocation form is displayed
There is no data.
Return to the OpEx Budget tab, then right-click the Jan, Hotel cell. View the context menu, and click Allocate All OpEx to launch the allocation rule. Click OK in the Information box.
Note that the allocation rule attached to this menu is a copy of the allocation rule you just created. This is for demonstration purposes only.
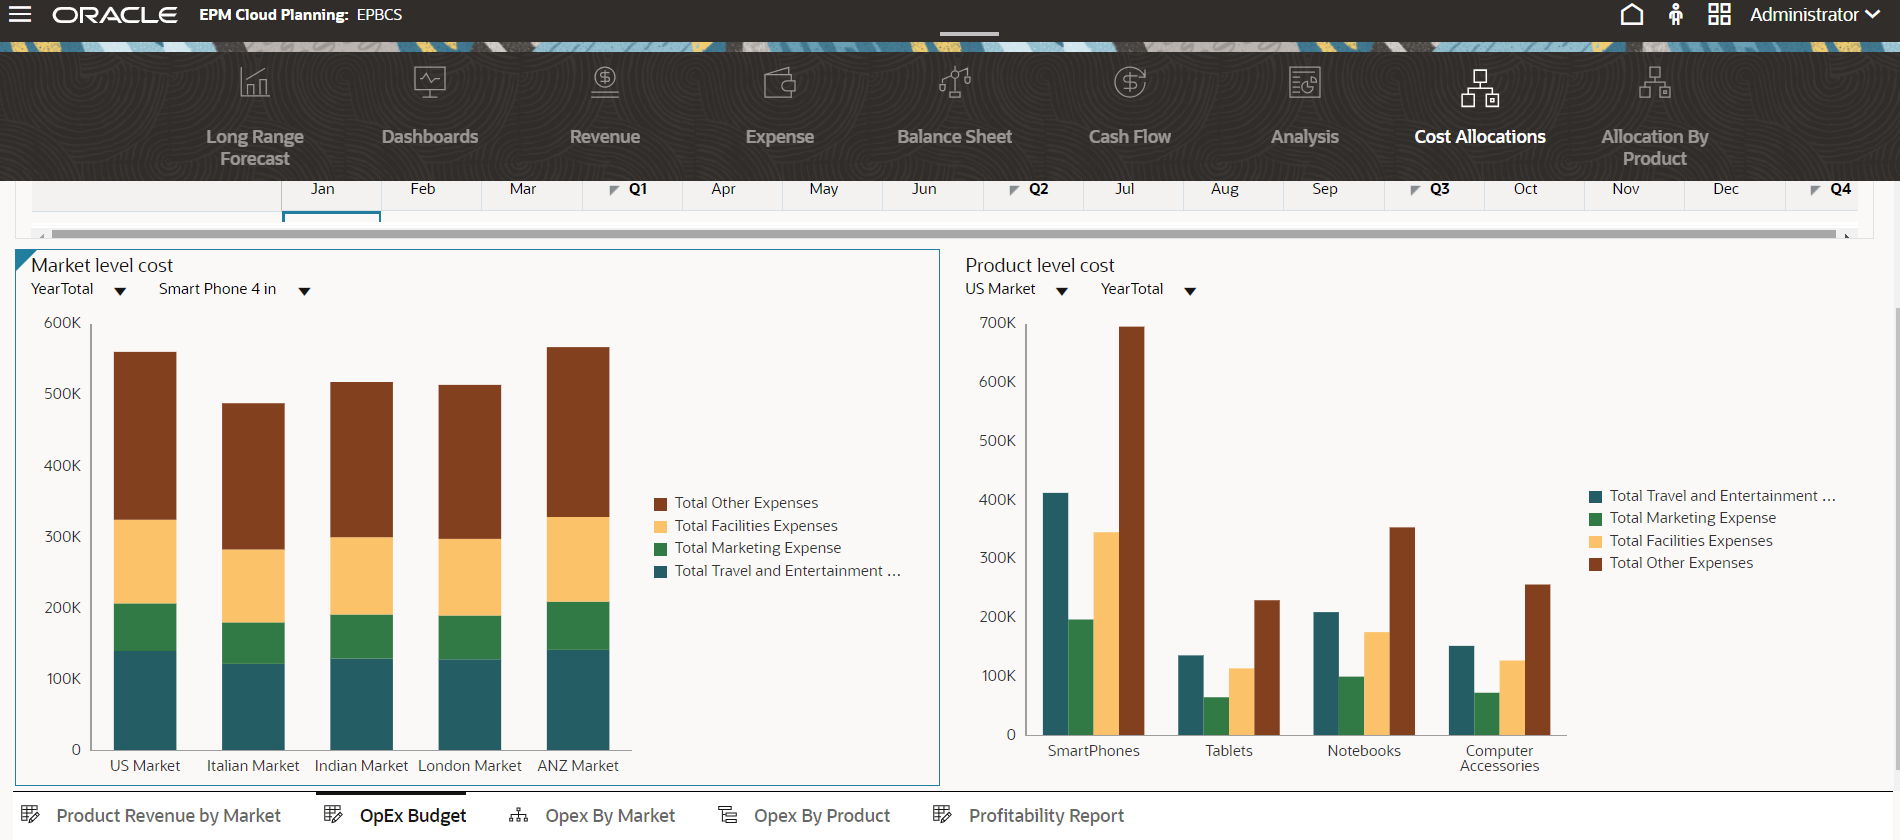
View the allocated data by Market and Product. Scroll down to view all of the chart data.
Open (click) the Opex by Market and Opex by Product tabs. View the expense amounts as allocated.
Scroll down to view all of the chart data.
Use Case 2 - Allocating Expenses From the Parent Product to Child Products (Level to Level)
In the second use case, last year's actual operating expense (OpEx) data is available by Product for each GL account. The annual budgeting for the new year is done at Parent Product level for all the OpEx accounts. Department managers would like to allocate the budget to all of the products, based on last year's actuals as the driver. This allocation can be completed using the seeded Allocation - Level To Level Template.
From the Home Page, click (Navigator), and verify the Financials navigation flow is selected. Then, under Create and Manage, select Rules.
In Calculation Manager System View, expand EPM Cloud, then EPBCS, then OEP_FS, then Rules. Right click Rules, and select New.
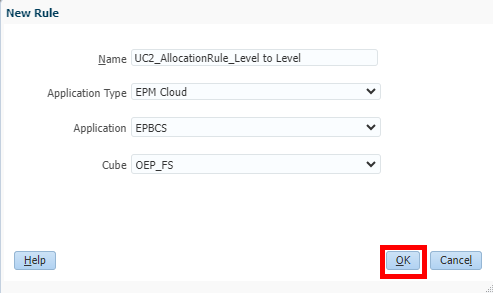
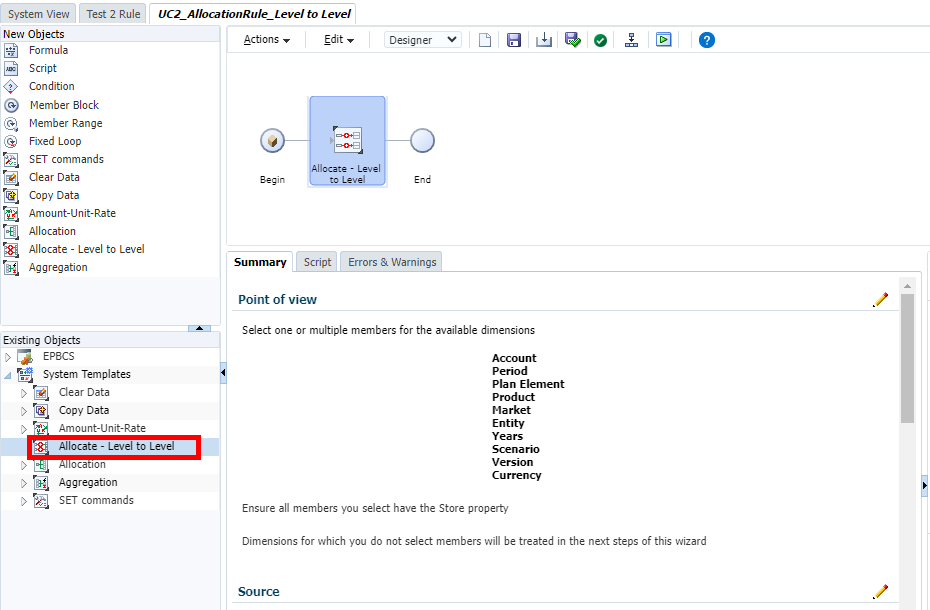
In the New Rule dialog, for Name, enter UC2_AllocationRule_Level to Level, and click OK.
In the Existing Objects section, expand System Templates, and drag the Allocate - Level to Level template and drop it between the Begin and End objects.
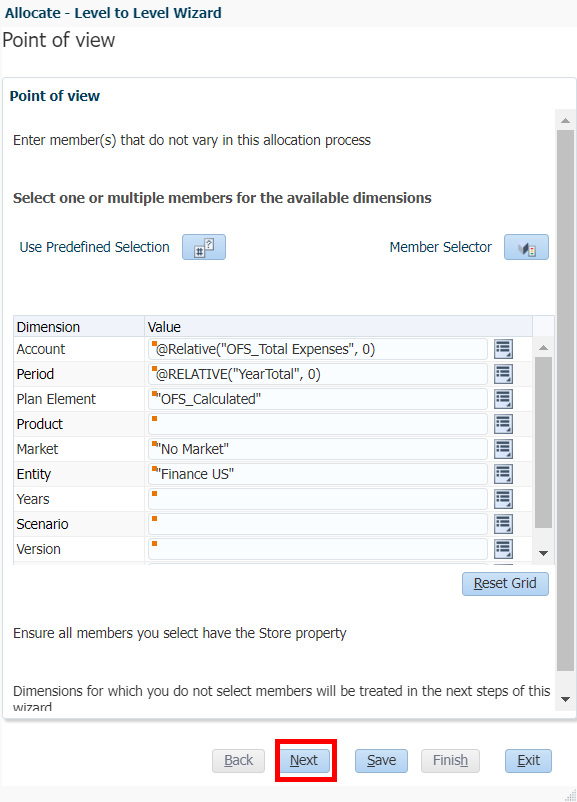
Select the point of view dimension members for each dimension that is common between the Source and Destination. In the Point of view dialog, enter the following data, then click Next:
Dimension
Value
Account
@RELATIVE("OFS_Total Expenses", 0)
Period
@RELATIVE("YearTotal", 0)
Plan Element
"OFS_Calculated"
Market
"No Market"
Entity
"Finance US"
Currency
"USD"
In this business case, Account, Period, Plan Element, Entity, Market and Currency dimensions are common. Leave Product, Years, Scenario, Version dimensions empty. These will be treated in the next step of this allocation wizard.
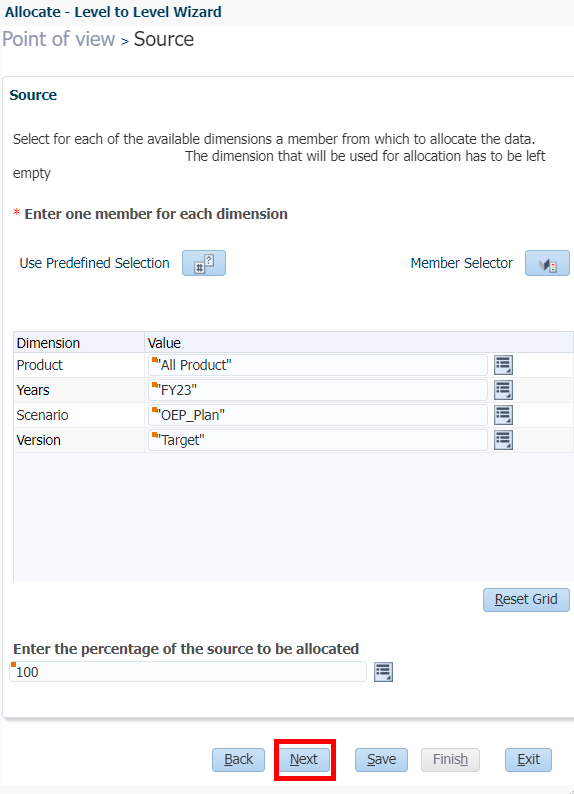
In the Source dialog, for each of the available dimensions, select a source dimension member from which to allocate the data, and click Next.
In this business case, we're allocating the OpEx Budget from All Product->FY23->Plan->Target version. You can also select the percentage of the amounts from the source that needs to be allocated. The default value is 100%. The rule allocates data to Generation 3 of the product dimension which is “All Product” to level 0 products.
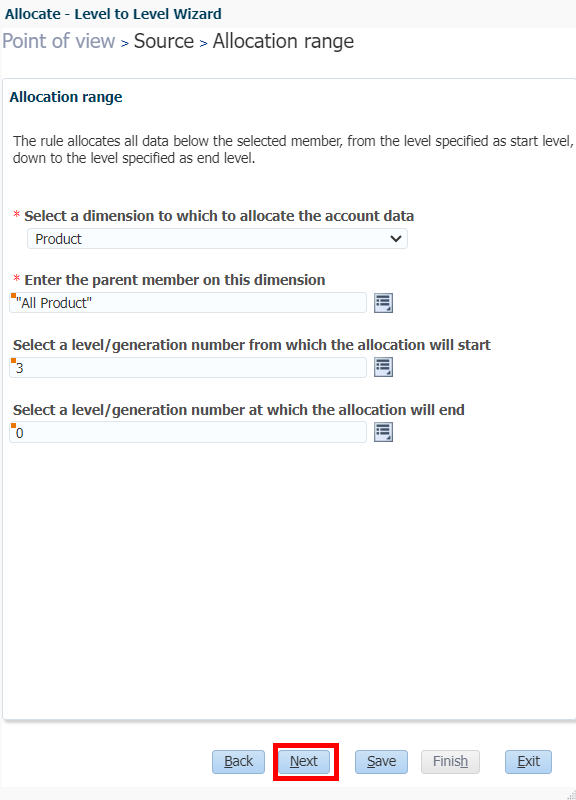
In the Allocation Range dialog, select the parent product, generation number from where the allocation should start, and level to which the costs should be allocated. Enter as noted in the screenshot, and click Next.In this business case, allocate the Opex budget to all level 0 products.
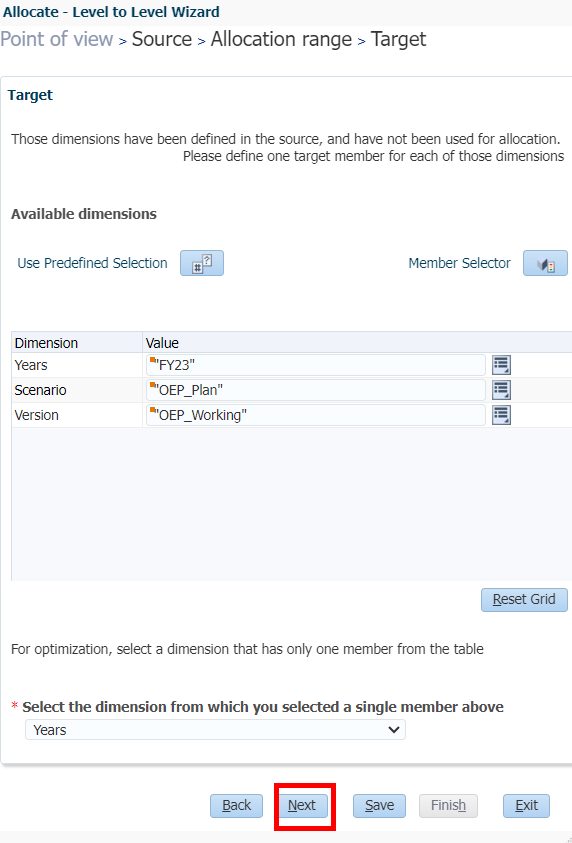
In the Target dialog, specify the destination year, scenario and version to which the costs need to be allocated. Enter "FY23", "OEP_Plan" scenario and "OEP_Working" version. For Select the dimension from which you selected a single member above, select Years, and click Next. In an earlier step, we already specified level 0 products as the destination, and thus, the cost allocation will go to all the products.
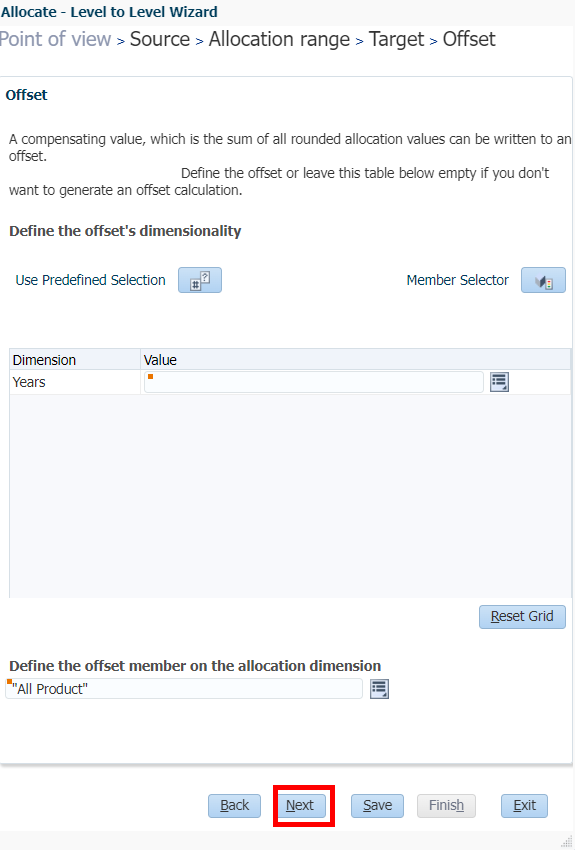
Optional: In the Offset dialog, specify the offsetting value to be calculated as either the same value of source or opposite value. In this business case, leave the Years dimension blank, and select the offset member All Product, and click Next.
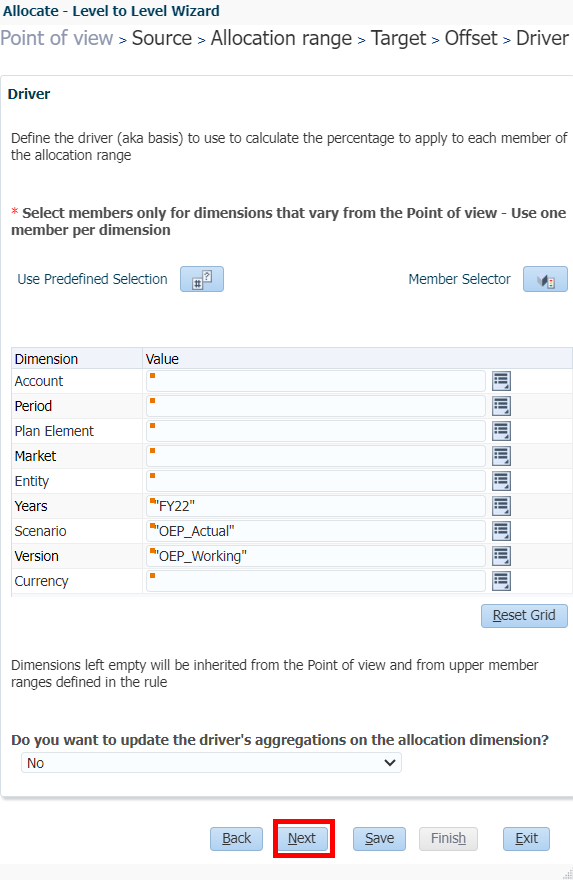
In the Driver dialog, specify the data slice where the cost driver data is available. Select one member per dimension for each dimension that varies from the Point of View. Enter the members as noted in the screenshot below, then click Next.Dimensions you leave empty are inherited from the Point of View and from the upper member ranges defined in the rule. In this business case, use last year actual data by product as the cost driver to allocate the OpEX budget to each product.
Based on Smart View report that we prepared earlier for cost driver data, we can specify the driver information intersection points for all the dimensions.
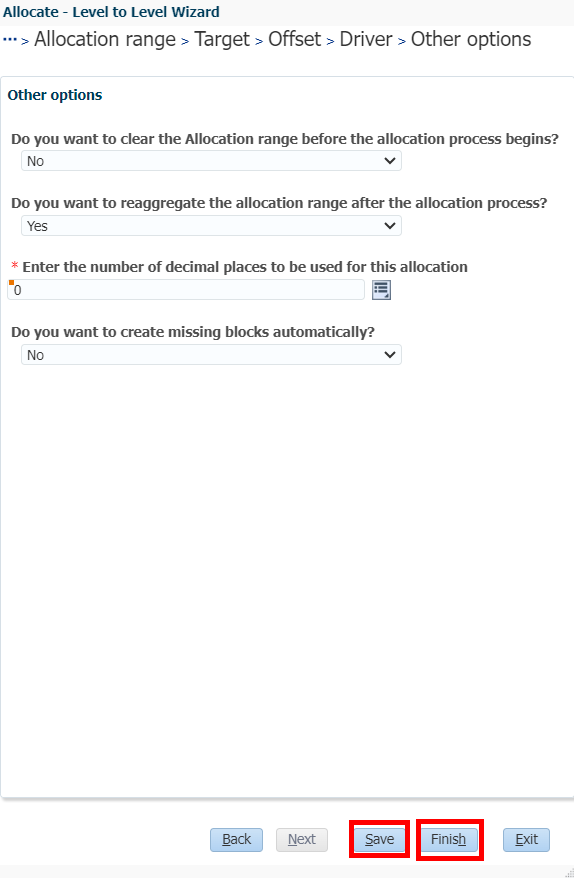
In the Other options dialog, specify if the driver values need to be re-aggregated to ensure correct allocation results. Enter the selections as noted in the screenshot, then click Save, and then Finish.
If the driver values are not dynamically calculated, you can select the Re-aggregate driver option. Otherwise, select the Do not Re-aggregate option from the drop down. If you want to clear the allocation range prior to the allocation process, select Yes. You have the option to select the rounding method in the last step. In this case, select the No Rounding option.
Follow the steps above to save, validate, and deploy the rule.
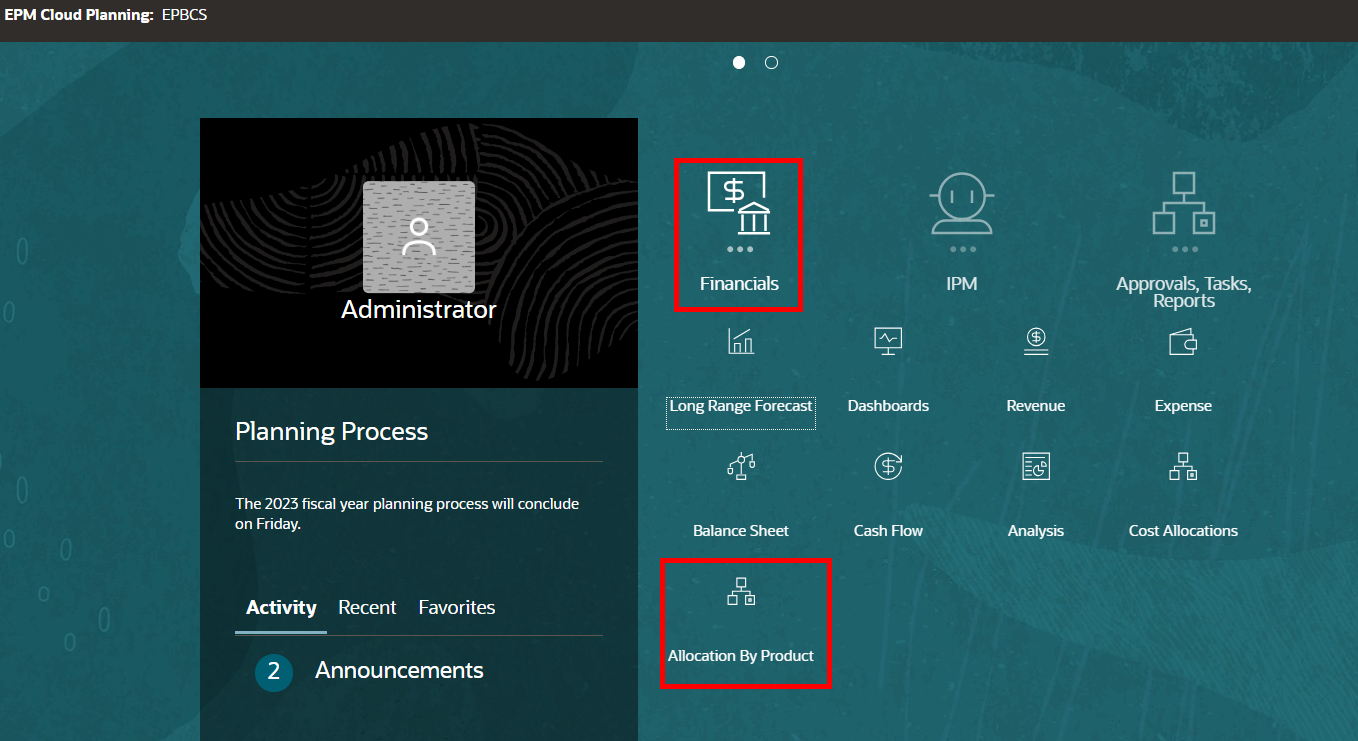
After the rule has been deployed, navigate to the Home page. Click Financials, then Allocation By Product.
Click the OpEx Budget - All Product Level tab. Right-click the Jan, Hotel cell, and in the action menu, select, Allocate to All Products. In the information message, click OK.
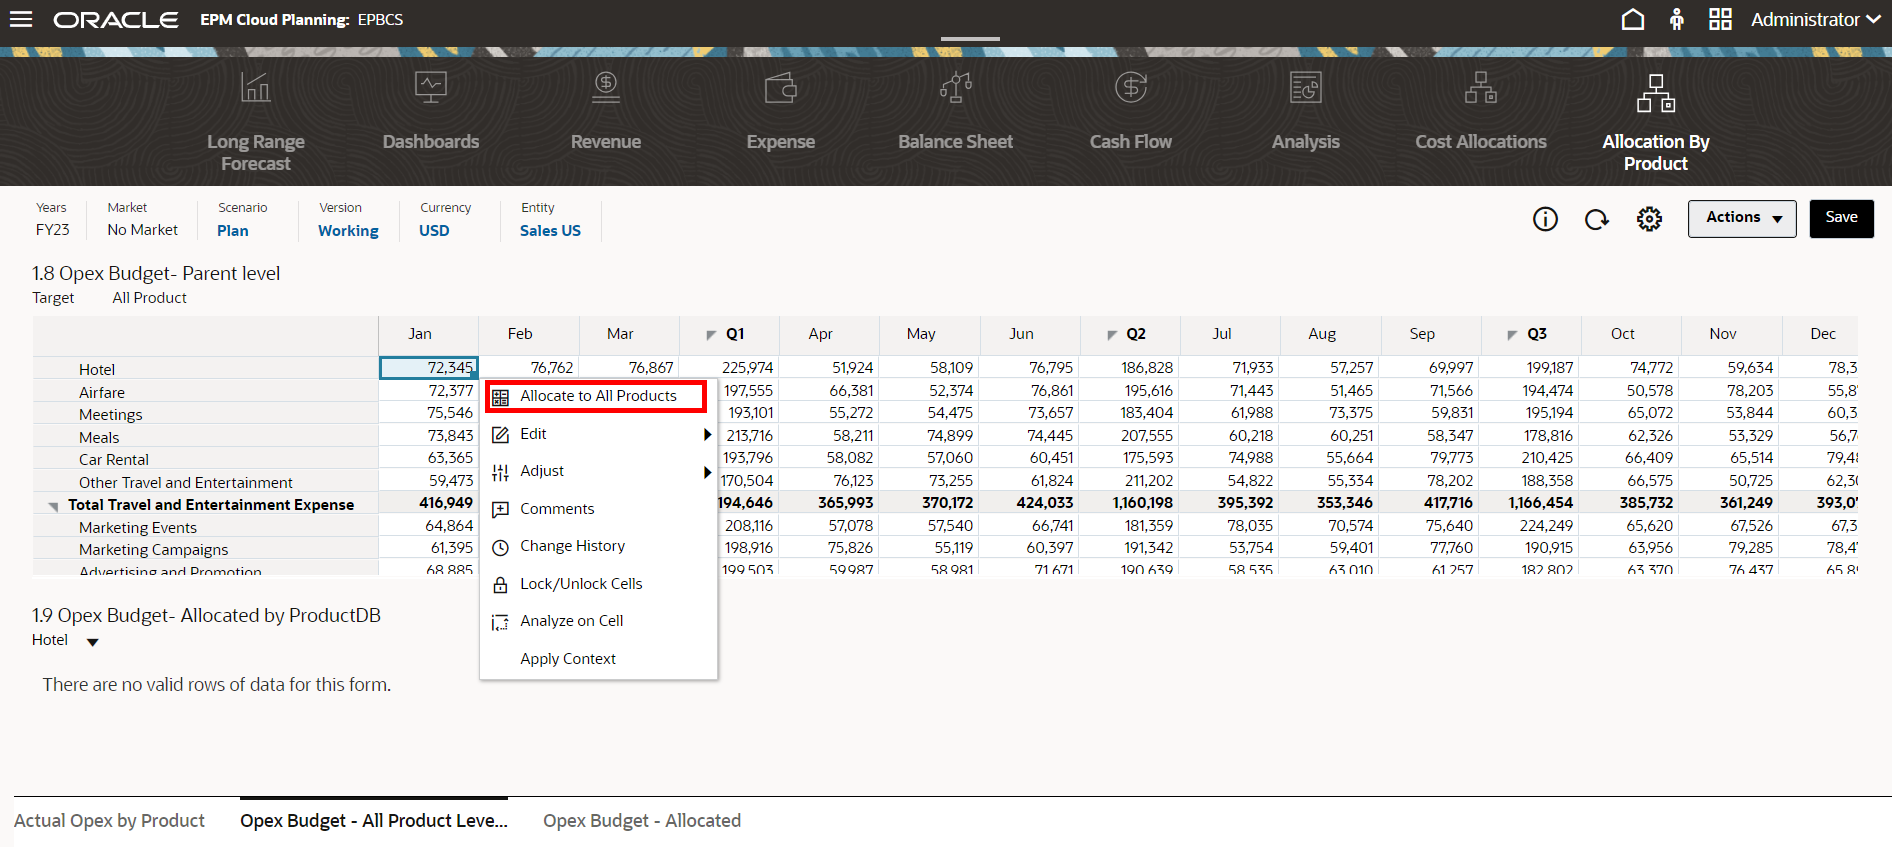
View the allocated data.
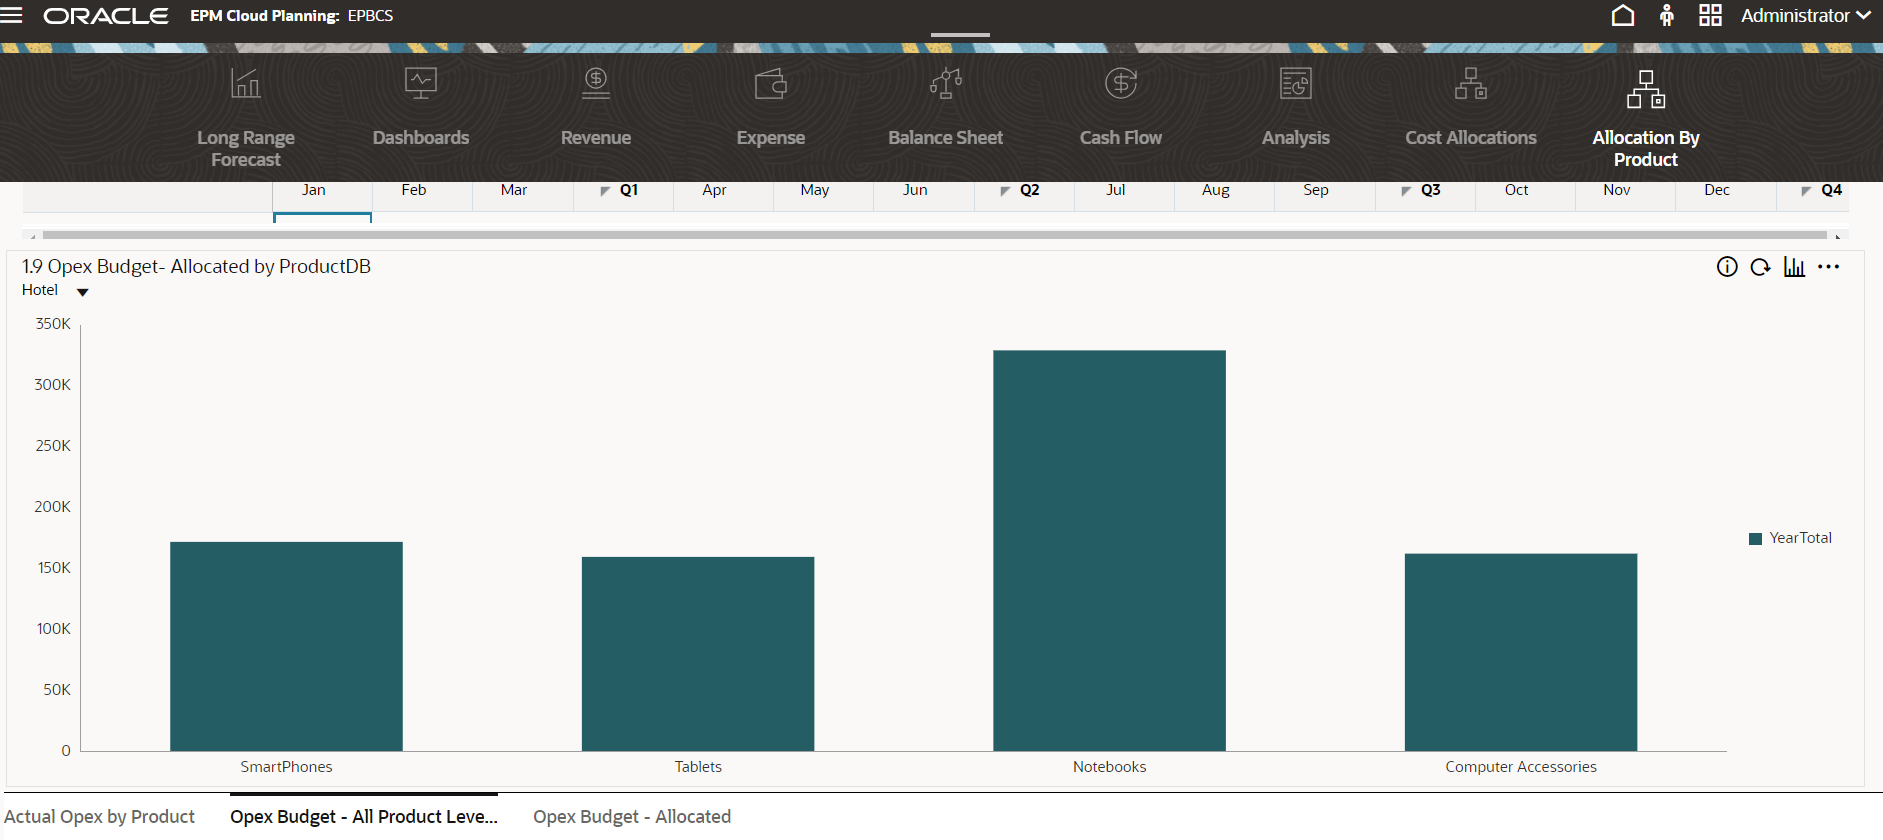
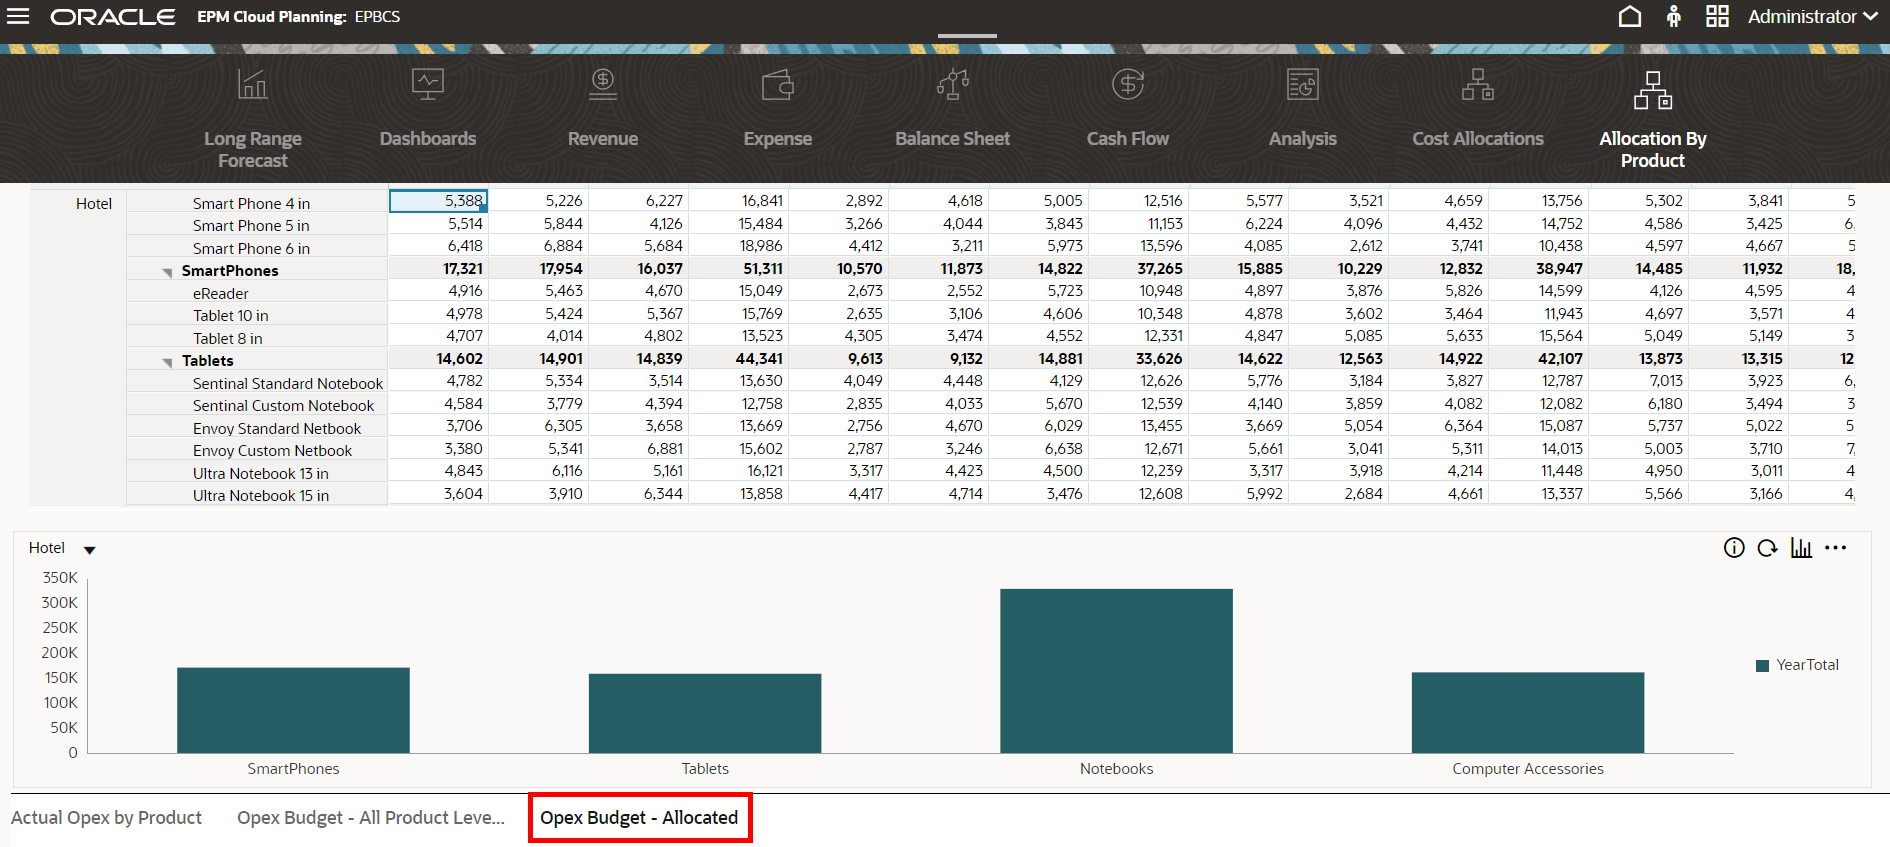
Click the Opex Budget - Allocated tab, and view the allocated data.
Note:
For Use Case 1, you can run the Clear All Allocations Rule whenever you want to clear the allocated data. For Use Case 2, run the Clear All Allocations - 2.0.

 (Home).
 (Navigation Flow), and select Financials.
 (Navigator), and under Tools, click User Preferences.