Introduction
This tutorial introduces you to the Cloud EPM business processes. You also learn how to create Planning business processes in Cloud EPM Service subscriptions.
Background
Oracle Cloud EPM provides end-to-end business processes, such as Planning, to meet the requirements of most organizations and ensure a connected and agile experience across multiple business processes.
Prerequisites
A Cloud EPM Service instance allows you to deploy and use one of the supported business processes. To deploy another business process, you must request another Cloud EPM Service instance or remove the current business process. The business processes that you deploy share the same identity domain to facilitate user management and assigning of roles. Access to resources belonging to a business process is individually controlled for each business process.
Planning is a budgeting and forecasting solution that integrates financial and operational planning processes and improves forecast accuracy.
Cloud EPM Hands-on Tutorials may require you to import a snapshot into your Cloud EPM Enterprise Service instance. Before you can import a tutorial snapshot, you must request another Cloud EPM Enterprise Service instance or remove your current application and business process. The tutorial snapshot will not import over your existing application or business process, nor will it automatically replace or restore the application or business process you are currently working with.
Before starting this tutorial, you must:
- Have Service Administrator access to a Cloud EPM Enterprise Service instance for the respective sections of the tutorial. The instance should not have a business process created.
- Download and save the following files to a local folder:
- LCM snapshot for migration in the Cloud EPM Standard Service instance: ModPlnStd.zip
- OTL file for creating the business process: Sales.otl
- LCM snapshot for migration in the Cloud EPM Enterprise Service instance: P_Sample_LCM_v3.zip
Note:
If you run into migration errors importing the snapshot, re-run the migration excluding the HSS-Shared Services component, as well as the Security and User Preferences artifacts in the Core component. For more information on uploading and importing snapshots, refer to the Administering Migration for Oracle Enterprise Performance Management Cloud documentation.Getting Started
In this section, you learn about Planning in the Cloud EPM Service.
Available Cloud EPM Subscriptions
Oracle Cloud Enterprise Performance Management provides end-to-end business processes to meet the requirements of most organizations and ensures a connected and agile experience across multiple business processes. The business processes and features available to you depend on the specific Cloud EPM subscription that you purchased.
- The EPM Standard Subscription is a powerful, configurable suite of business processes. It is designed primarily for small and mid-sized businesses.
- The EPM Enterprise Subscription comprises the full suite of Cloud EPM business processes supporting a comprehensive array of activities. It includes all functionalities of the EPM Standard subscription.
The following table outlines the key features available with Cloud EPM subscriptions.
Note:
- AI and GenAI features are available exclusively with EPM Enterprise subscriptions.
- Intelligent Performance Management (IPM) features are available exclusively with EPM Enterprise subscriptions.
Exception: AutoPredict is also available with Planning in EPM Standard subscription.
- Some features available with both EPM Standard and EPM Enterprise subscriptions are not listed in this table. For a comprehensive overview of features related to each business process, refer to the Administrator guides.
| EPM Standard Subscription | EPM Enterprise Subscription |
|---|---|
Planning
|
Planning
All EPM Standard subscription features plus:
|
| Account Reconciliation (with Reconciliation Compliance) | Account Reconciliation
All EPM Standard subscription features plus Transaction Matching |
Financial Consolidation and Close
|
Financial Consolidation and Close
All EPM Standard subscription features plus:
|
Narrative Reporting
|
Narrative Reporting
All EPM Standard subscription features plus:
|
| FreeForm | |
| Enterprise Data Management (with limits on hosted employee and hosted record metrics) | |
| Profitability and Cost Management
Application Types:
|
|
Tax Reporting
|
Planning Modules and Strategic Modeling: Planning provides five complete, planning and budgeting solutions for Financials, Workforce, Capital, Projects, and Strategic Modeling. They include built-in best practice predefined content including forms, calculations, dashboards, drivers, and key performance indicators (KPIs). You can get up and running quickly by enabling only the features you need, and later enable additional features to enhance your application. You can integrate to plan at the detail level you need. Configurable help provides default descriptions for forms and members, which you can customize for your business needs.
- Financials: The Financials solution provides integrated driver-based planning for income statement, balance sheet, and cash flow. The out-of-box tools, such as KPIs, drivers, and accounts help you prepare reports faster. You can also use Financials to perform expense and revenue planning.
- Workforce: The Workforce solution enables headcount and compensation planning to link financial plans with the workforce plan. You can budget for future headcount and related personnel expenses such as salary, benefits, and taxes.
- Projects: The Projects solution bridges the gap between project planning systems and the financial planning process. It helps you assess the impact organizational projects and initiatives have on overall resources to ensure they align with short and long term financial targets.
- Capital: The Capital solution helps you plan for the long-term impact of capital assets on financial plans to manage, prioritize, and plan for capital expenses.
- Strategic Modeling: The Strategic Modeling solution combines a set of rich financial forecasting and modeling features with built in on-the-fly scenario analysis and modeling capabilities for long-term strategic planning.
Cloud EPM Service Landing Pages
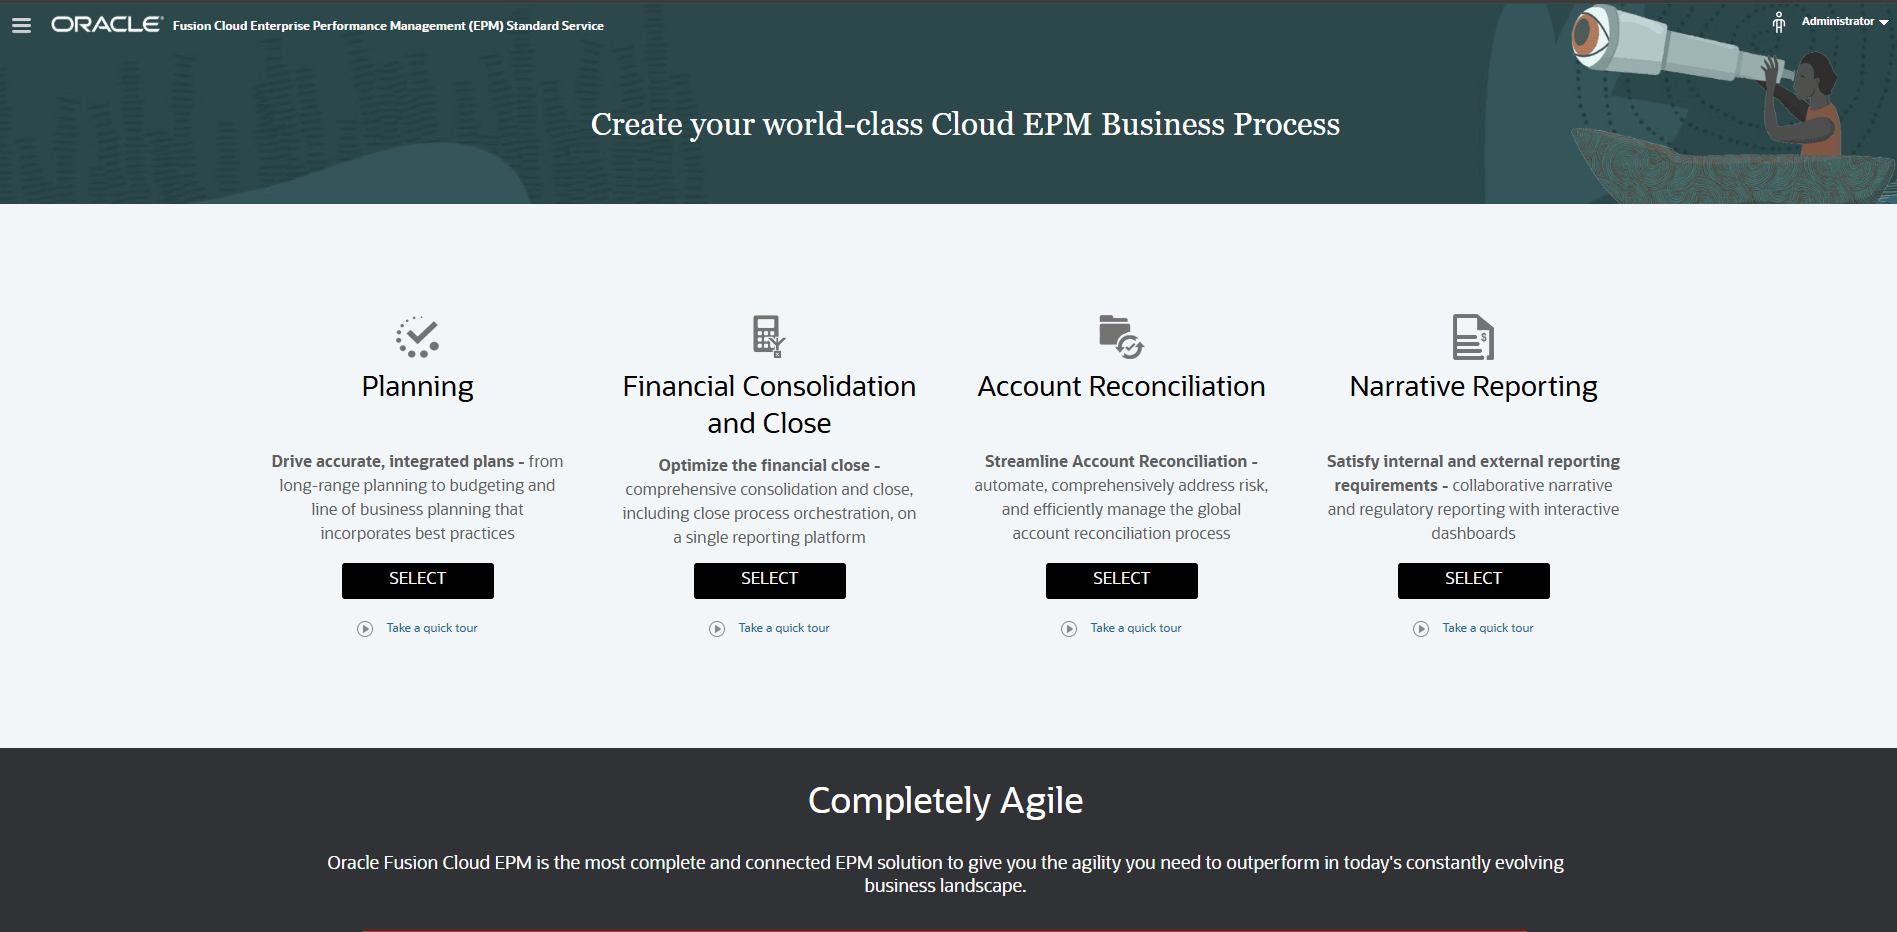
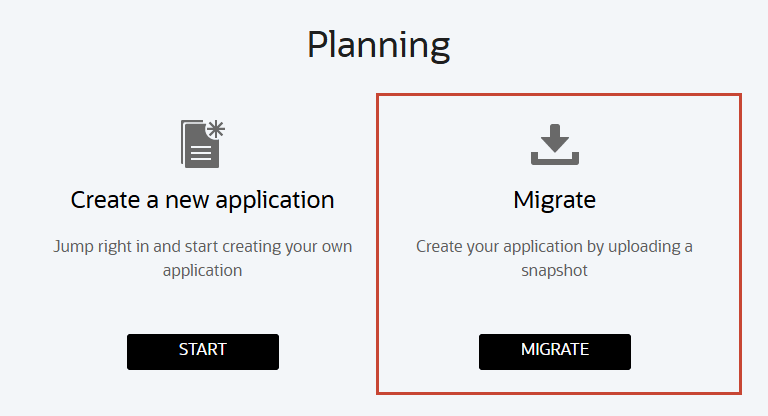
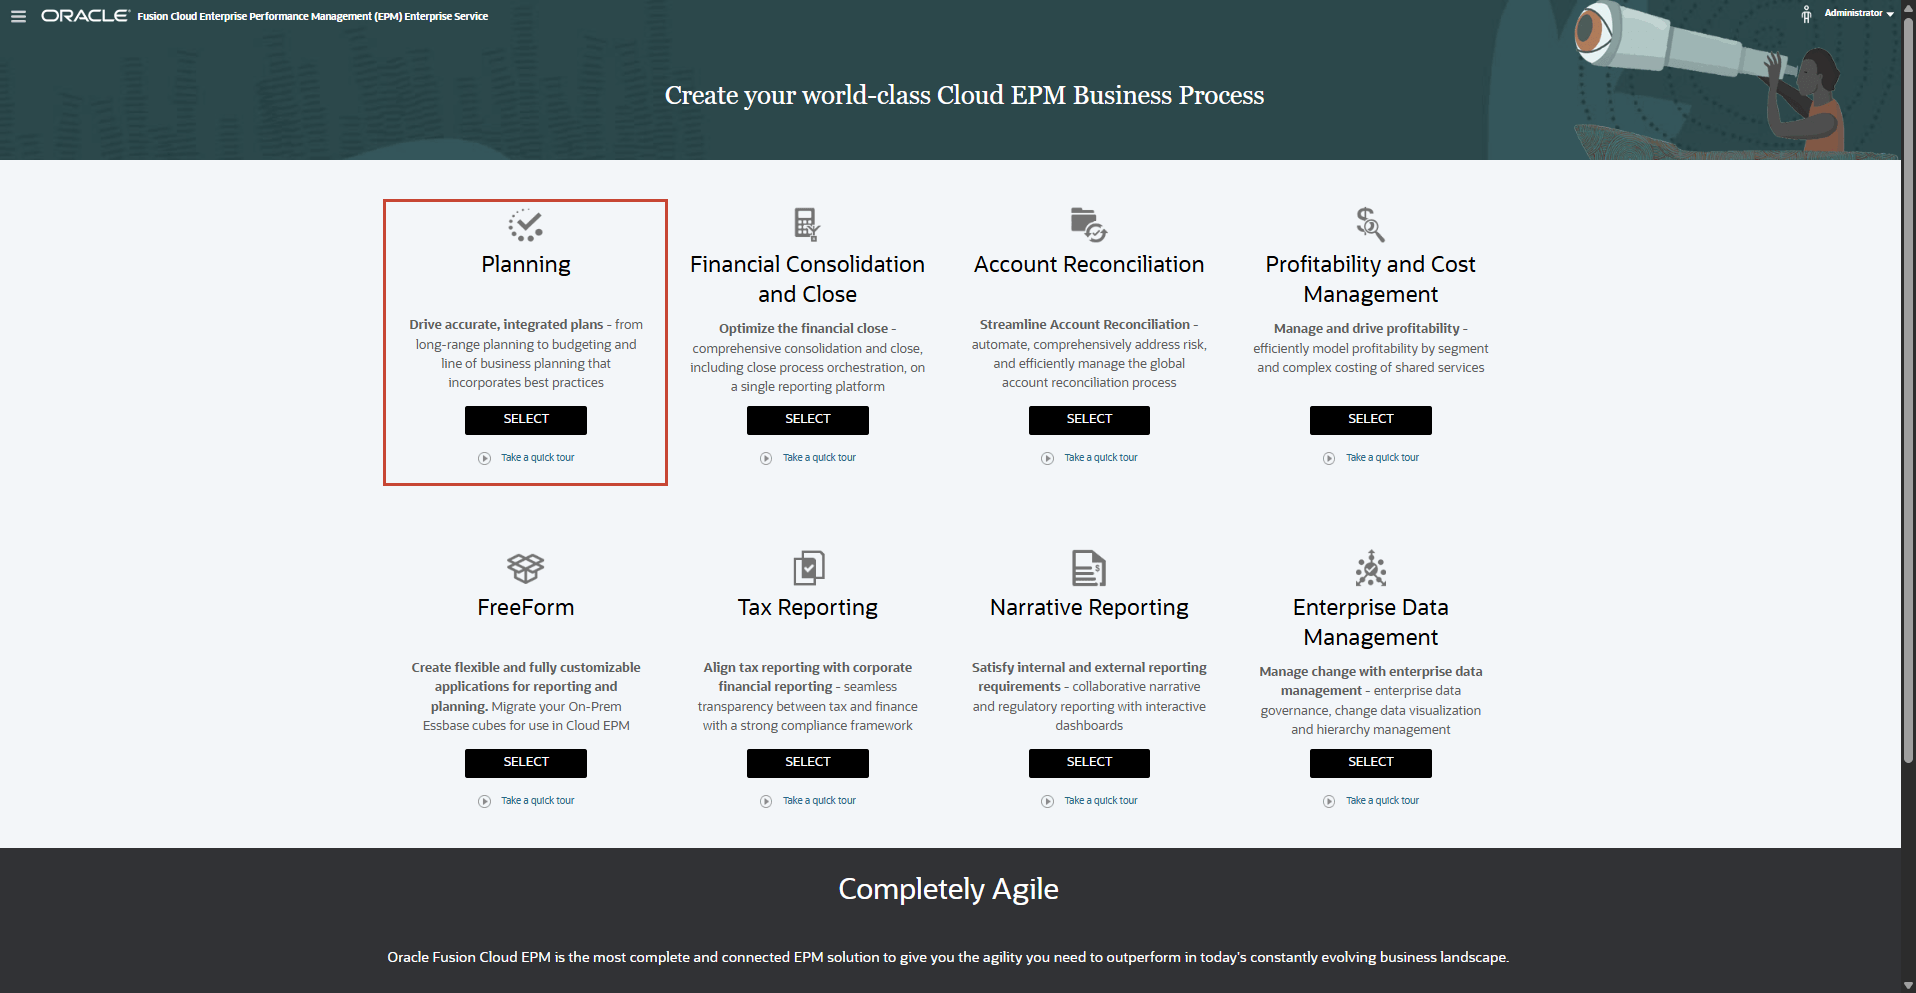
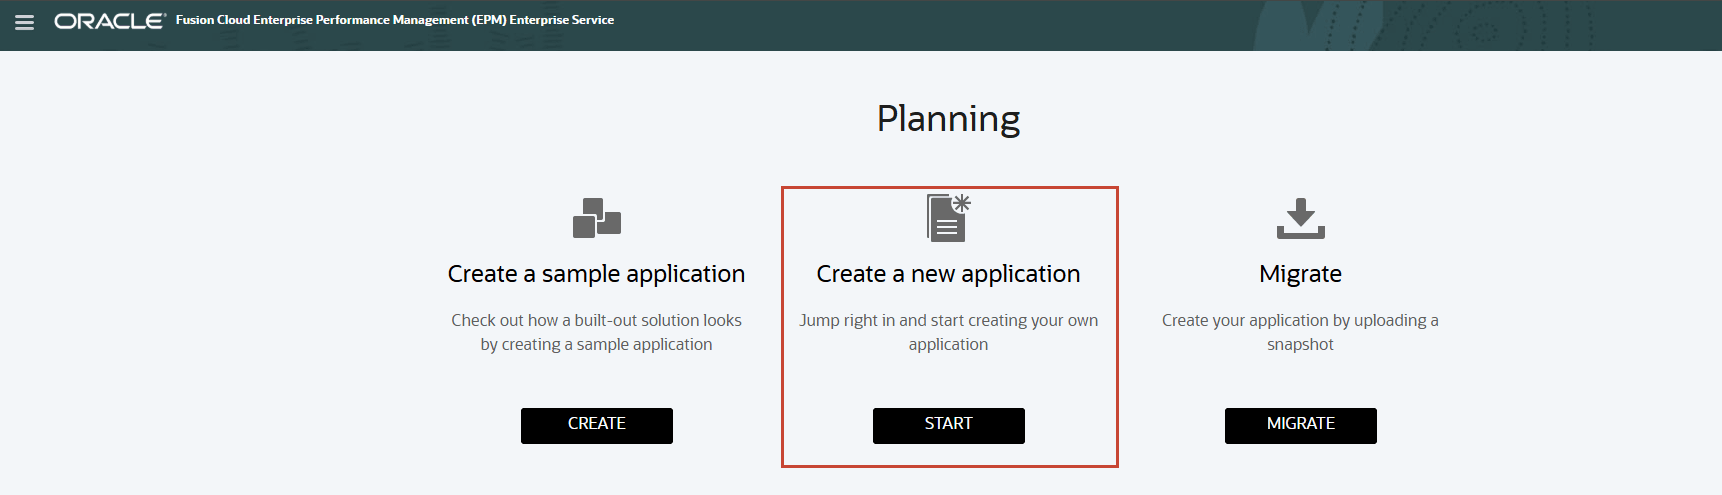
The landing page is your starting point for creating a business process and for viewing video tours to help you get started. The landing page presents the business processes that you can create.
Cloud EPM Standard Service Landing Page
Cloud EPM Enterprise Service Landing Page

Planning Business Process Overview
You develop your operational financial plan with Planning. You set up the Planning business process to include the appropriate structure for your organization's needs. Each Planning business process has a specific framework with the following structure:
- Application name — Specify the name of the business process.
- Calendar structure — Specify your organization’s calendar, such as the first month and first year for your fiscal year.
- Currency — Identify whether multiple currencies are needed and define the default currency.
- Number and names of cubes — Select and name plan types to hold combinations of metadata, forms, and business rules.
After the framework is created, dimensions and members (metadata) are added and assigned to cubes. Security is assigned so that users and groups can access Planning. Access can be further defined to secure metadata, forms, task lists, and business rules.
Creating the Standard Planning Business Process
Before you create your Planning business process, analyze your current processes and determine your organization’s requirements.
Note:
See the Best Practices for Designing Your Application section in the Oracle Cloud Administering Planning documentationIn this section, you learn how to create the following Planning business processes in Cloud EPM Standard Service:
- Module-based
- Migrated Custom
Tip:
After you initiate the creation of a business process, you cannot return to the Cloud EPM Service landing page. If you want to return to the landing page to create a different business process, you must first reset your environment to its original state. See the Recreating Service section of this tutorial.Logging On
- Go to the Planning URL provided by your Service Administrator.
- Enter your Username and Password.
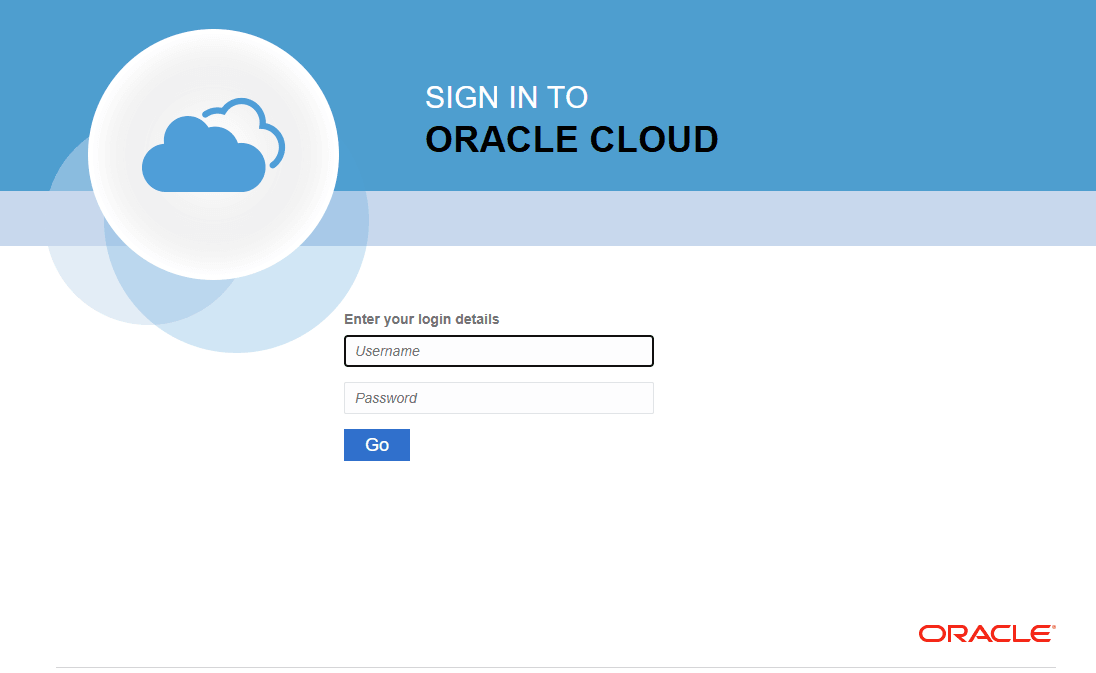
- Click Go.
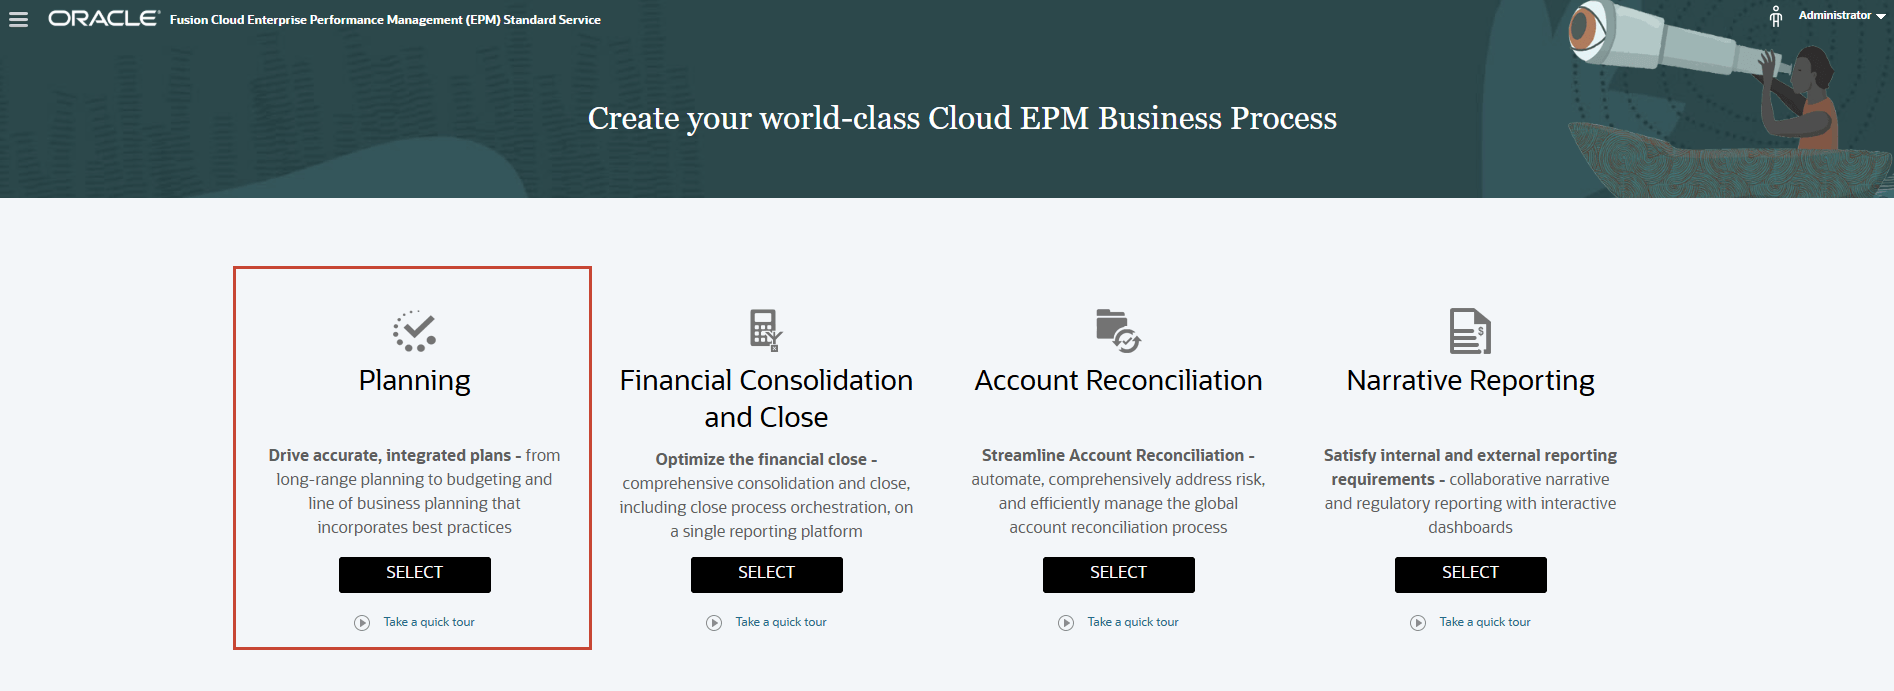
- On the Cloud EPM Standard Service landing page, for Planning click SELECT.
The Planning landing page is displayed.
New Application: Creating a Module-based Application
Note:
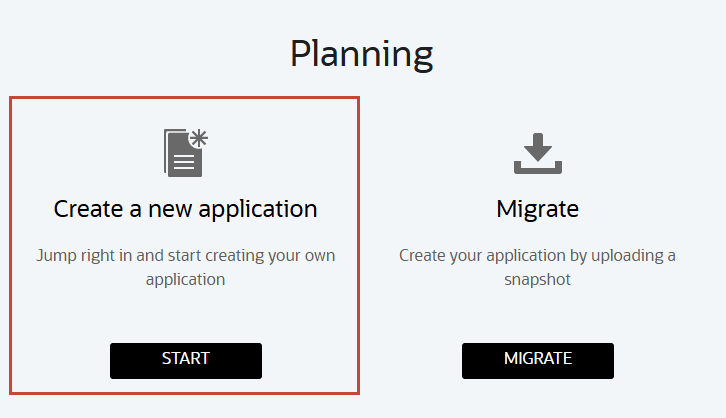
If you have a business process created, remove it first by following the steps in the Removing Applications section of this tutorial.- On the Planning landing page, for Create a new application, click START.
- Complete the required general properties:
- Name your application.
- Enter a description.
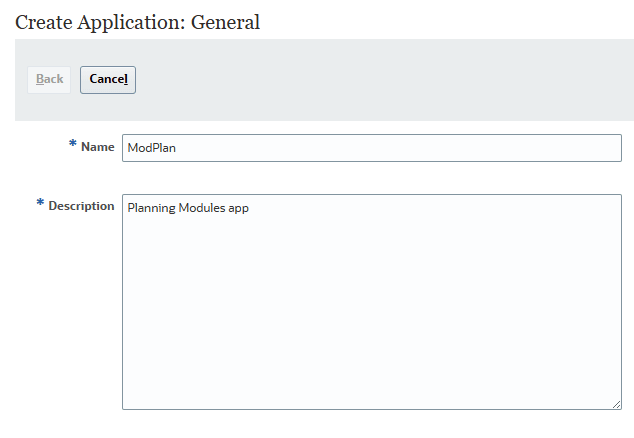
- Click Next.
The Details page is displayed.
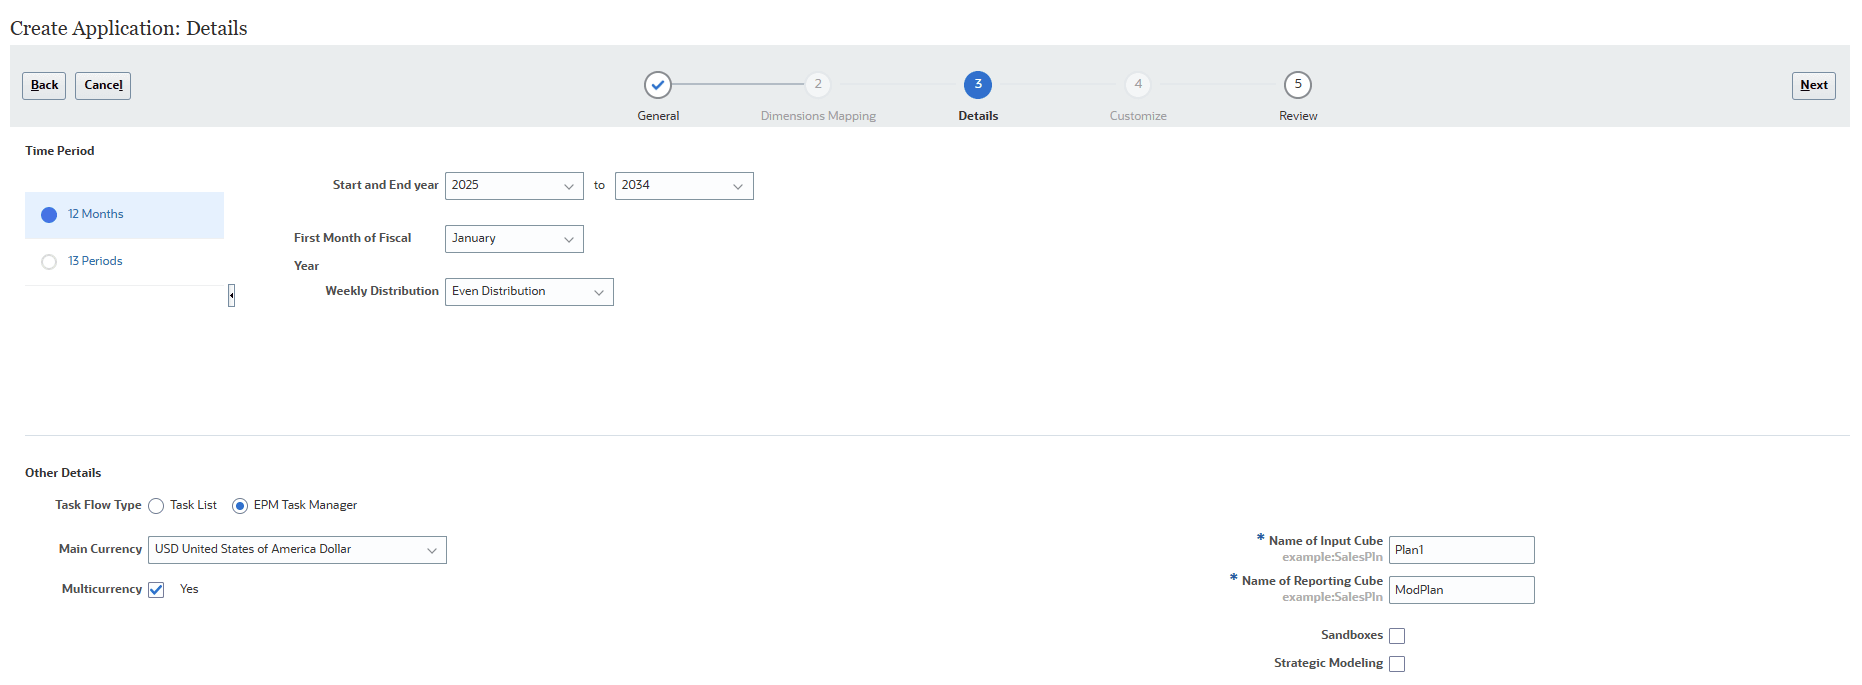
- Select a Time Period.
- Select the Start and End year.
- Select the First Month of Fiscal Year.
- Select a Weekly Distribution option: Even, 445, 454, or 544.
- For Task Flow Type, EPM Task Manager is the default option for new applications.
Task lists are a classic feature which guides users through the planning process by listing tasks, instructions, and end dates.
- Select the Main Currency.
- Select whether to allow for Multicurrency.
- Accept or modify the names of the Input Cube and Reporting Cube.
- Select whether to enable Sandboxes.
- Select whether to enable Strategic Modeling.
- Click Next.
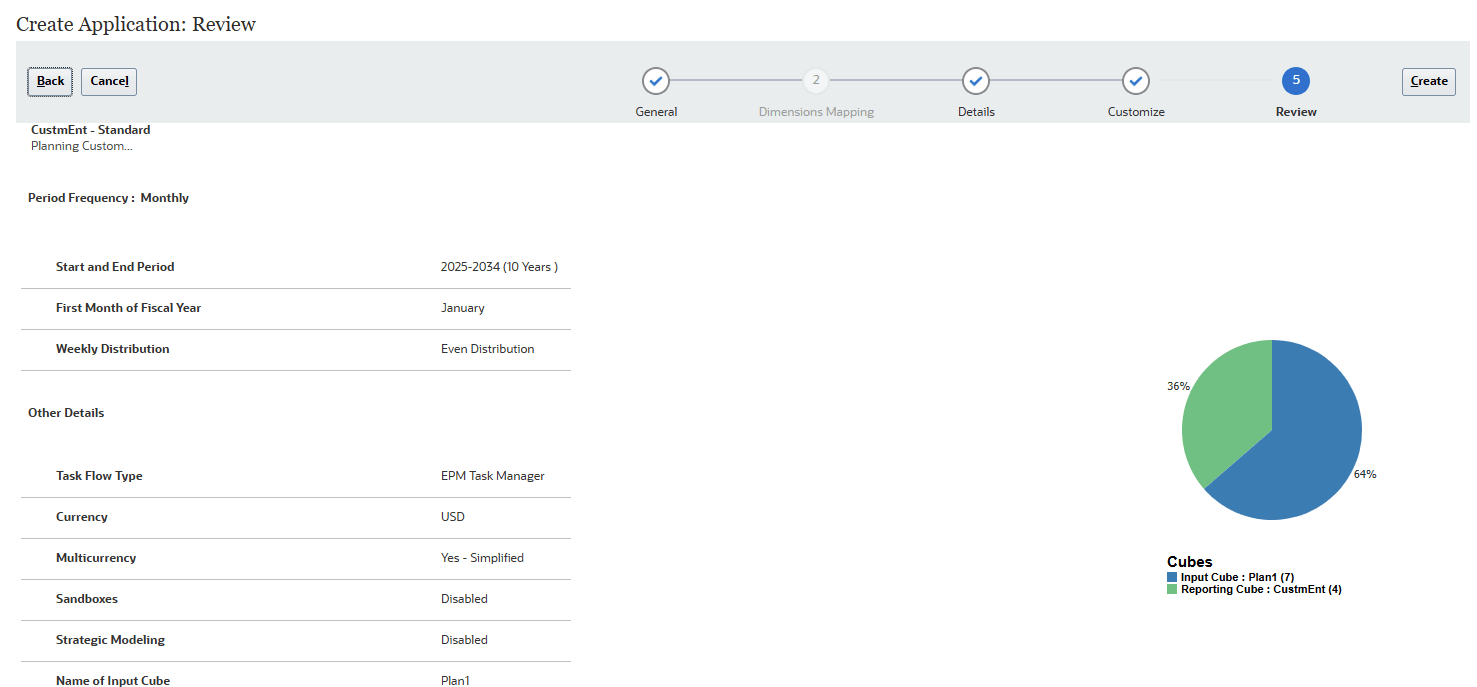
- Review your selections. If necessary, return to previous pages to make changes.
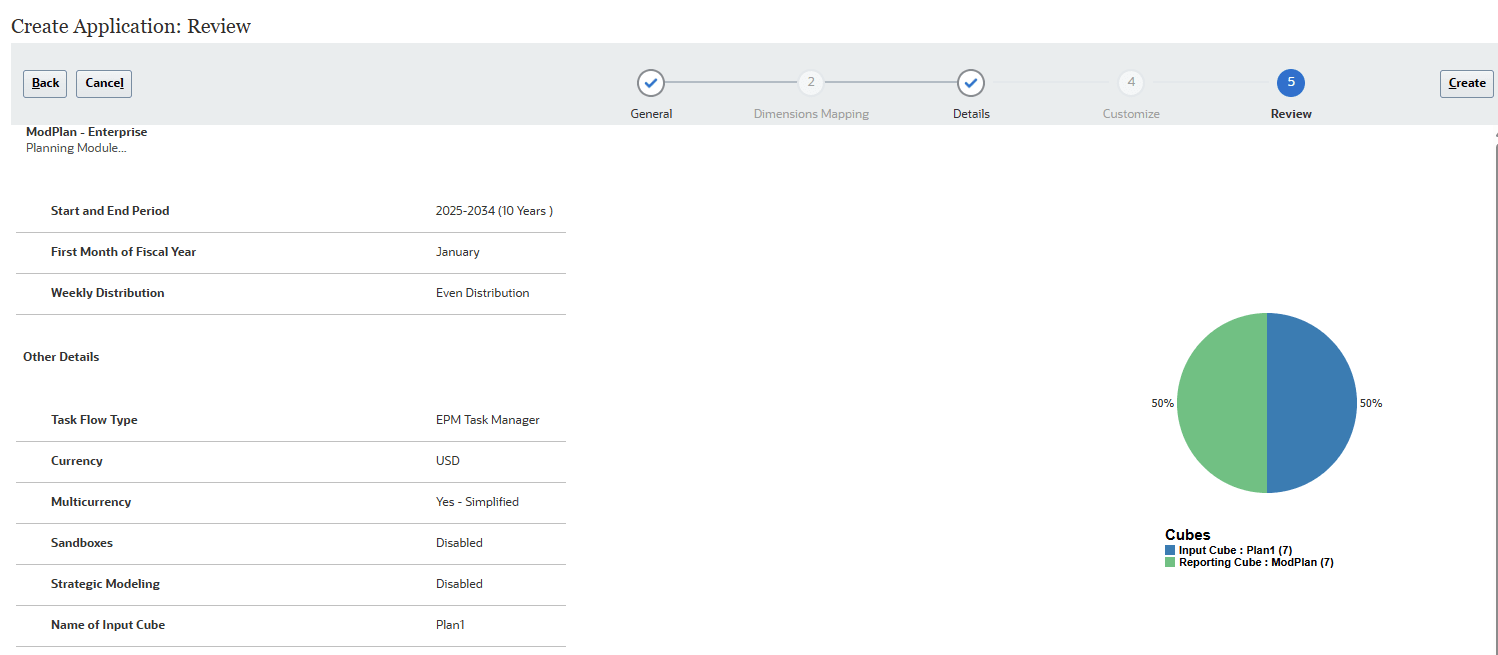
- When ready to proceed, click Create.
The Application Creation Status information message box is displayed.

Application creation may take several minutes. When completed, an Application created successfully message is displayed.
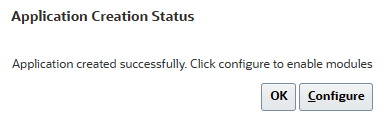
- Click Configure or complete that task later.
If you click OK, the Planning home page is displayed. You can access the Configure page by navigating to Application, then Configure from the home page.
If you click Configure, the Configure page for modules is displayed.
Note:
Refer the Administering Planning Modules documentation for configuration details of the respective Planning Module for your business need.
Migrating a Snapshot to Create an Application
Migration allows you to create a custom Planning business process from a snapshot that you upload to the environment.
Note:
If you have a business process created, remove it first by following the steps in the Removing Applications section of this tutorial. You will need a snapshot compatible with Cloud EPM Standard Service to perform the steps in this tutorial.- On the Planning landing page, click MIGRATE.
The Migration page is displayed.
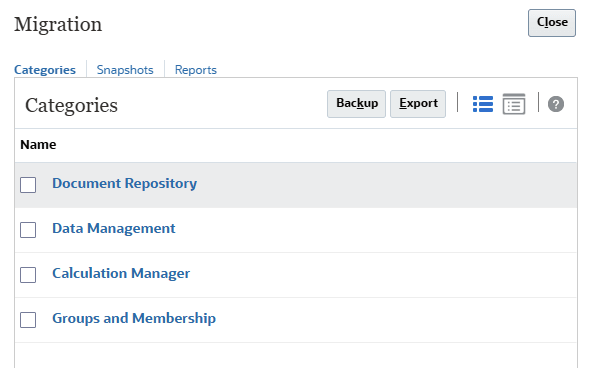
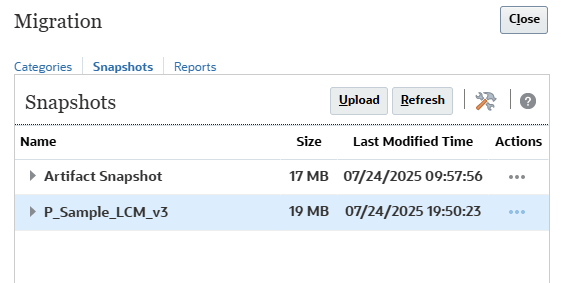
- Click Snapshots.
The Snapshots tab is displayed.
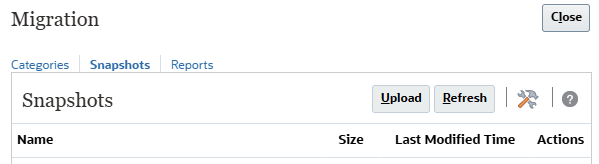
- Click Upload.
- In the Upload dialog box, click Browse to select the file.
Note:
Depending on your browser, the button label may display Choose File or Browse. The snapshot is not provided in this tutorial. You can get a snapshot compatible with Cloud EPM Standard Service to perform the steps in this tutorial. - Navigate to where you saved ModPlnStd.zip, then select and open it.
- Click Upload.
- When a message stating that the File uploaded and processed successfully is displayed, click OK.
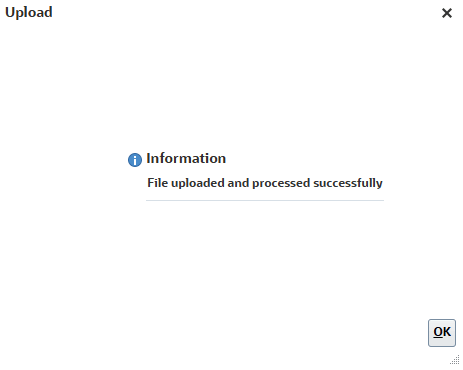
The snapshot is now listed on the Snapshots tab.
- For the snapshot you uploaded, click the Actions icon (…), and select Import.
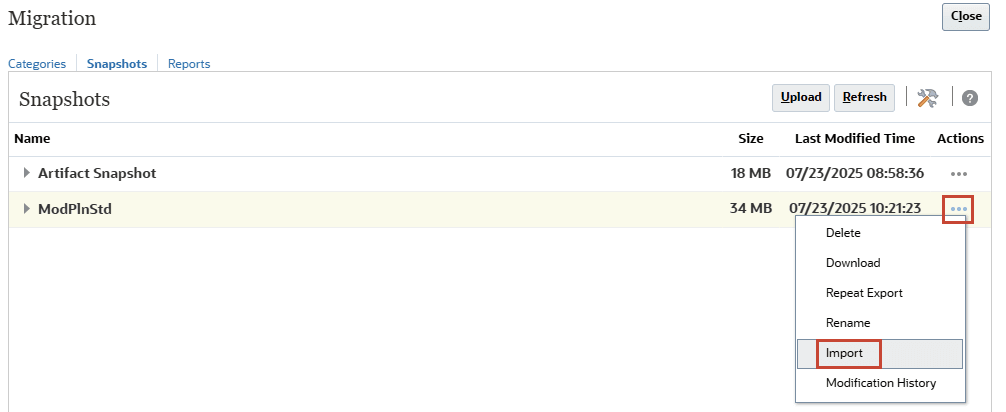
- When prompted to proceed with the import, click OK.
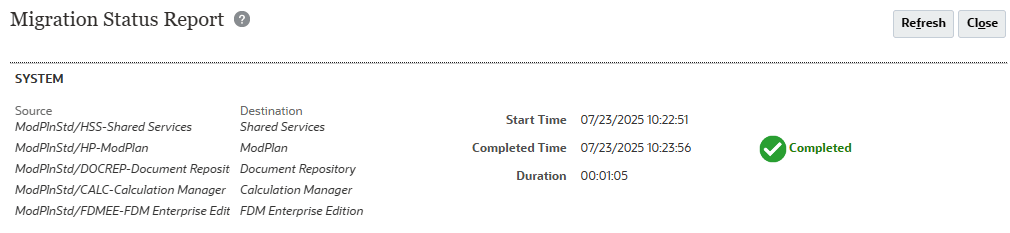
The Migration Status Report is displayed. The migration import process may take several minutes.
- Click Refresh until the status displays Completed.
- Click Close twice to close both dialog boxes.
- Sign out and log back in to start working with Planning.
Creating the Enterprise Planning Business Process
Before you create your Planning business process, analyze your current processes and determine your organization’s requirements.
Note:
See the Best Practices for Designing Your Application section in the Oracle Cloud Administering Planning documentation on docs.oracle.com.In this section, you learn how to create the following Planning business processes in Cloud EPM Enterprise Service:
- Sample application
- Module-based
- Custom
- FreeForm
- Migrated Custom
Tip:
After you initiate the creation of a business process, you cannot return to the Cloud EPM Service landing page. If you want to return to the landing page to create a different business process, you must first reset your environment to its original state. See the Recreating Service section of this tutorial.Logging On
- Go to the Planning URL provided by your Service Administrator.
- Enter your Username and Password.
- Click Go.
- On the Cloud EPM Enterprise Service landing page, for Planning click SELECT.
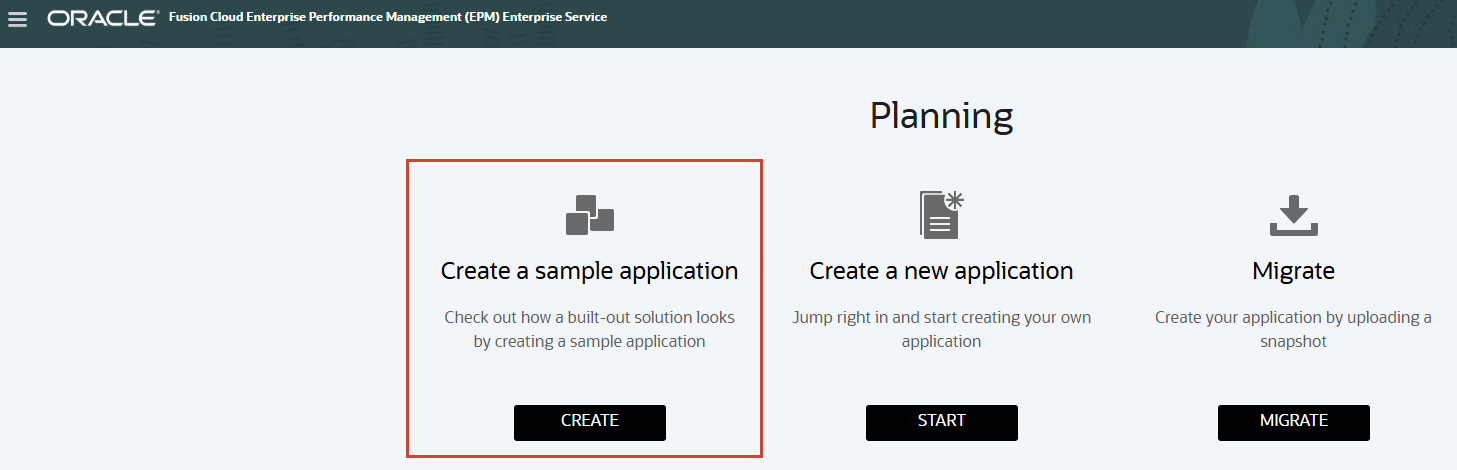
The Planning landing page is displayed.
Sample Application
Planning provides a sample business process, called Vision, that lets you quickly deploy a business process with artifacts and data. The sample business process is only available in Planning for Cloud EPM Enterprise Service.
If you have a business process created, remove it first by following the steps in the Removing Applications section of this tutorial.
- On the Planning landing page, for Create a sample application, click CREATE.
The Application Creation Status information message box is displayed.

Application creation may take several minutes. When completed, an Application created successfully message is displayed.
- Click OK.
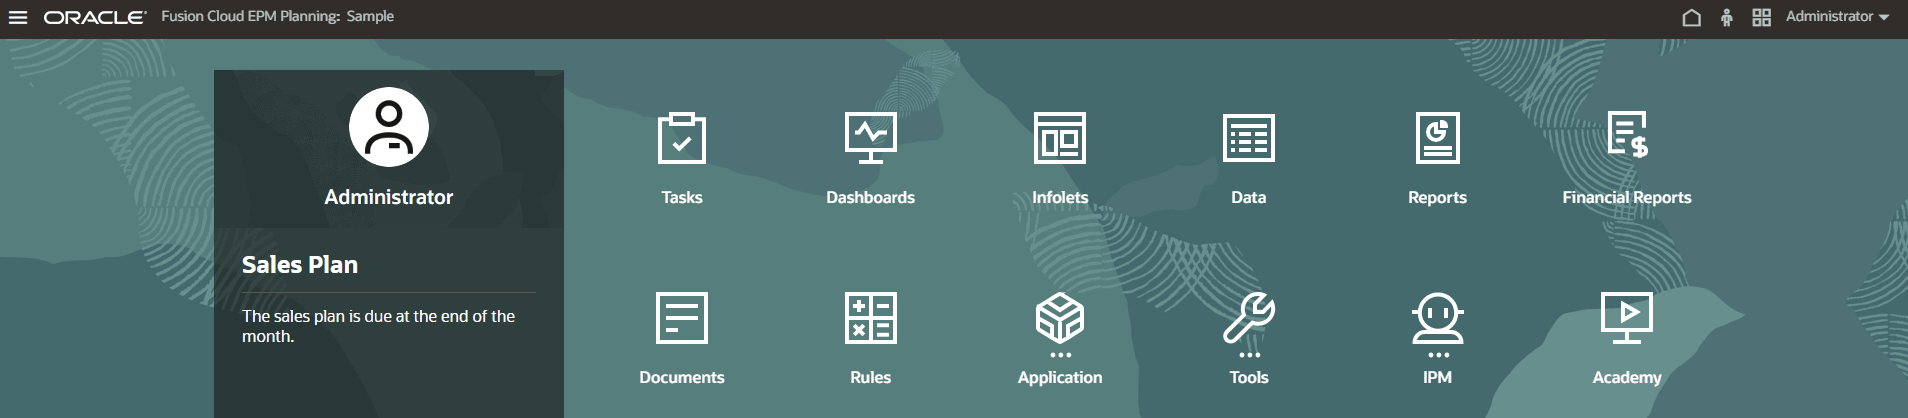
The Planning home page is displayed.

Note:
The home page is for the Default Navigation Flow.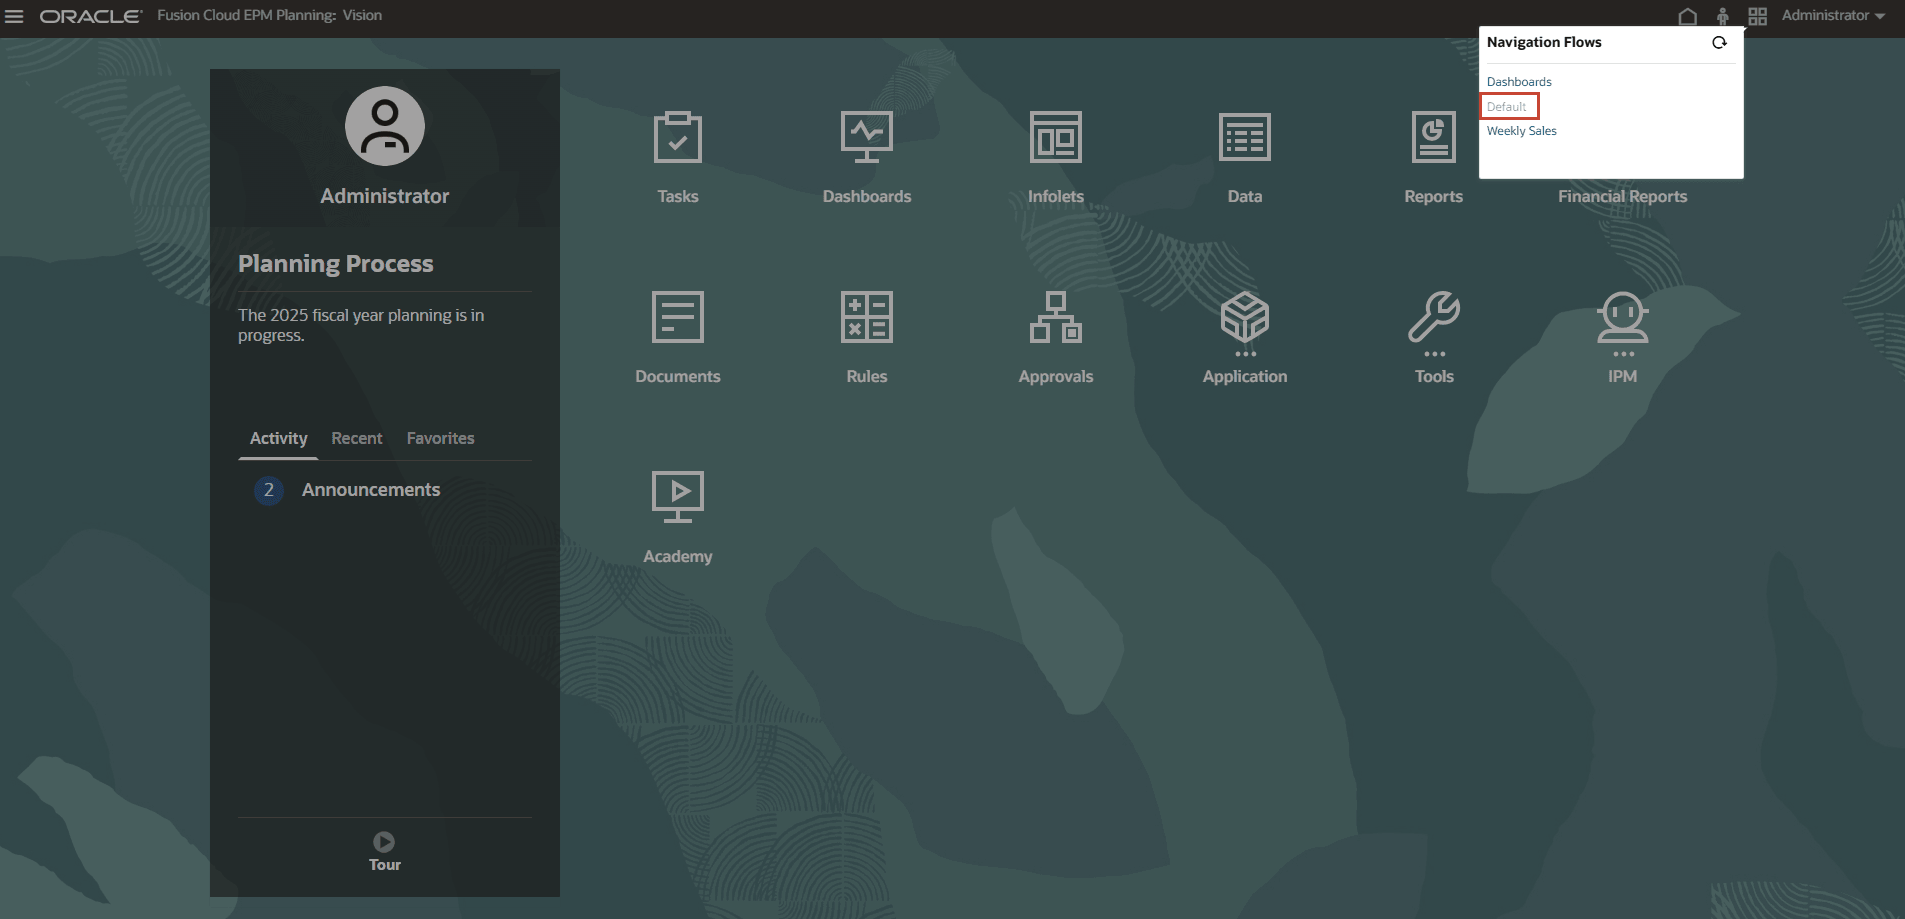
New Application: Creating a Module-based Application
Note:
If you have a business process created, remove it first by following the steps in the Removing Applications section of this tutorial.- On the Planning landing page, for Create a new application, click START.
- Complete the required general properties:
- Name your application.
- Enter a description.
- From the Application Type dropdown list, select Modules.
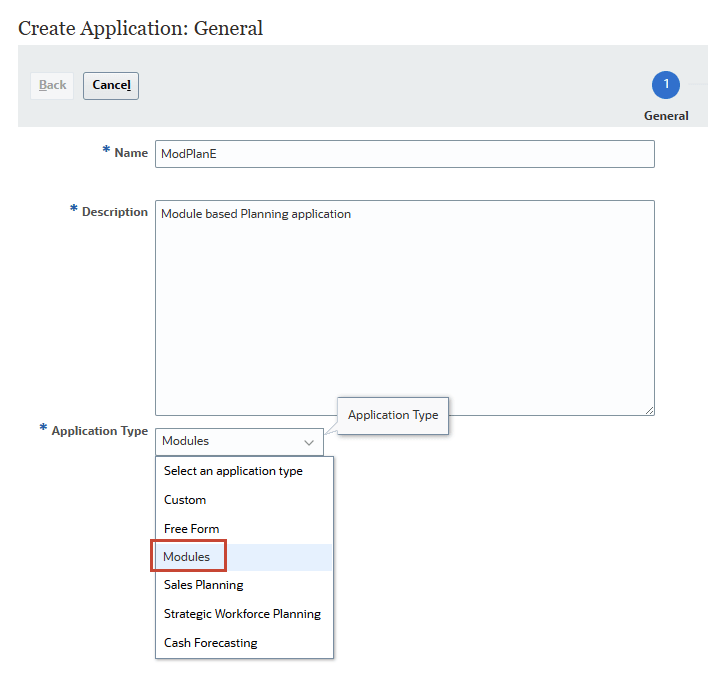
- Click Next.
The Details page is displayed. The Planning Frequency is set to Monthly.
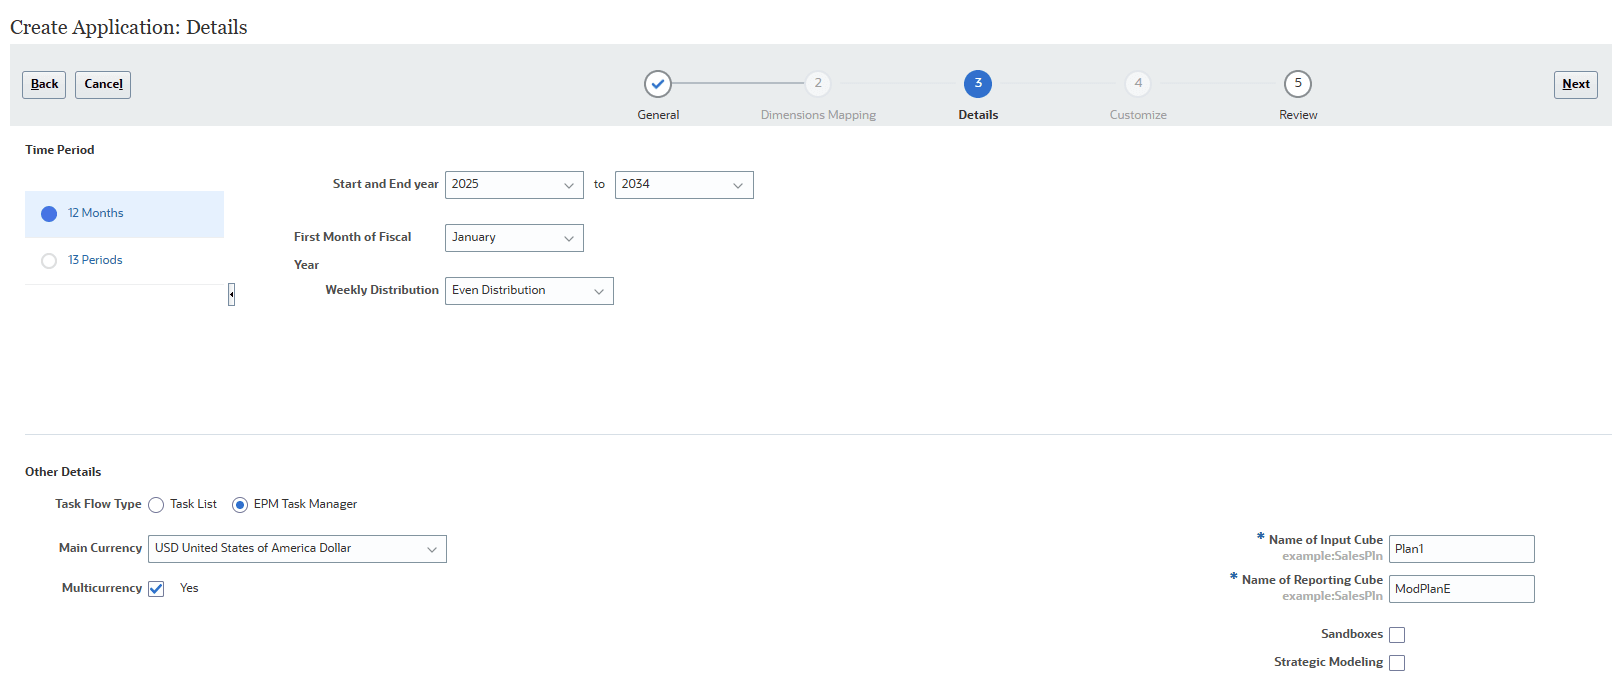
- Select a Time Period.
- Select the Start and End year.
- Select the First Month of Fiscal Year.
- Select a Weekly Distribution option: Even, 445, 454, or 544.
- For Task Flow Type, EPM Task Manager is the default option for new applications.
Task lists are a classic feature which guides users through the planning process by listing tasks, instructions, and end dates.
- Select the Main Currency.
- Select whether to allow for Multicurrency.
- Accept or modify the names of the Input Cube and Reporting Cube.
- Select whether to enable Sandboxes.
- Select whether to enable Strategic Modeling.
- Click Next.
- Review your selections. If necessary, return to previous pages to make changes.
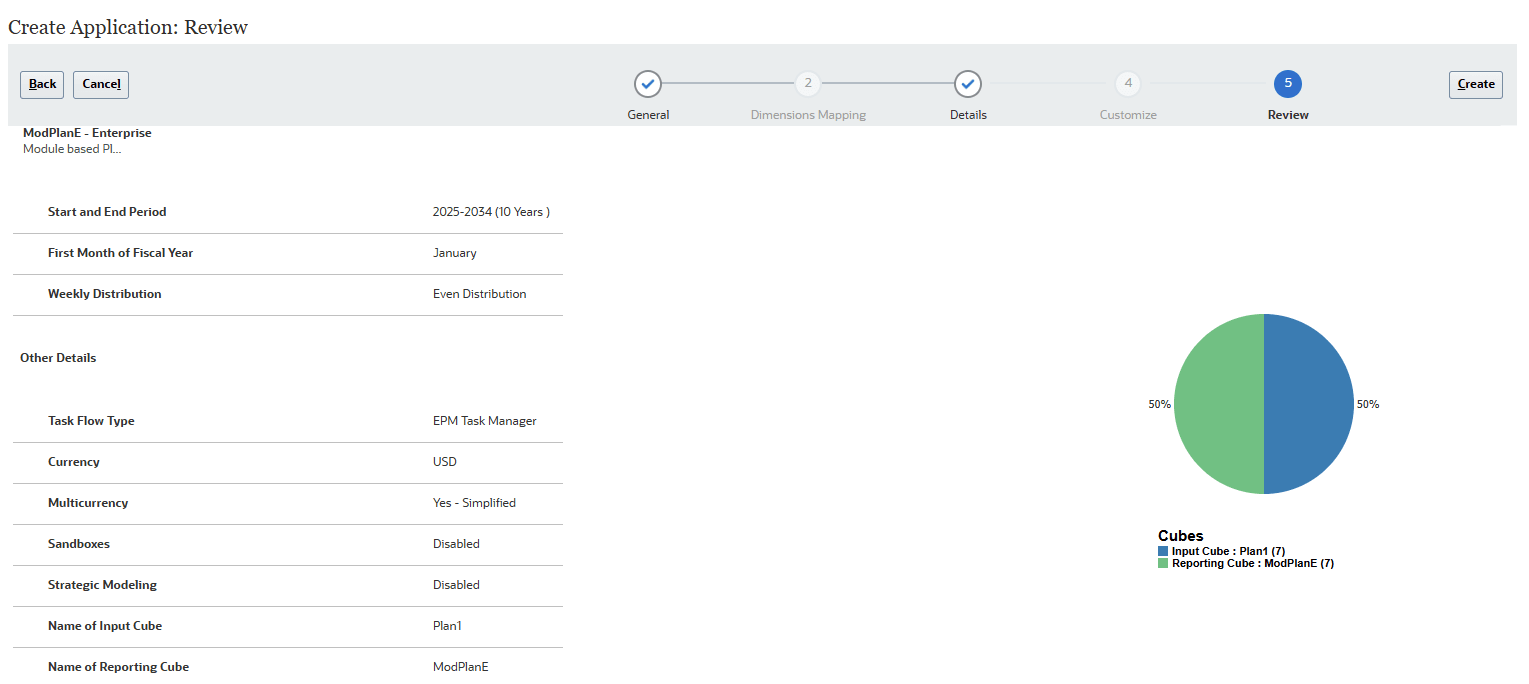
- When ready to proceed, click Create.
The Application Creation Status information message box is displayed.
Application creation may take several minutes. When completed, an Application created successfully message is displayed.
- Click Configure or complete that task later.
If you click OK, the Planning home page is displayed. You can access the Configure page by navigating to Application, then Configure from the home page.
If you click Configure, the Configure page for modules is displayed.
Note:
Refer the Administering Planning Modules documentation for configuration details of the respective Planning Module for your business need.
New Application: Creating a Custom Application
Custom applications support most planning and budgeting requirements through Enterprise complex business logic, such as business rules and allocations. Select this option to create a business process if your requirements would necessitate a high degree of application customization.
Note:
If you have a business process created, remove it first by following the steps in the Removing Applications section of this tutorial.- On the Planning landing page, for Create a new application, click START.
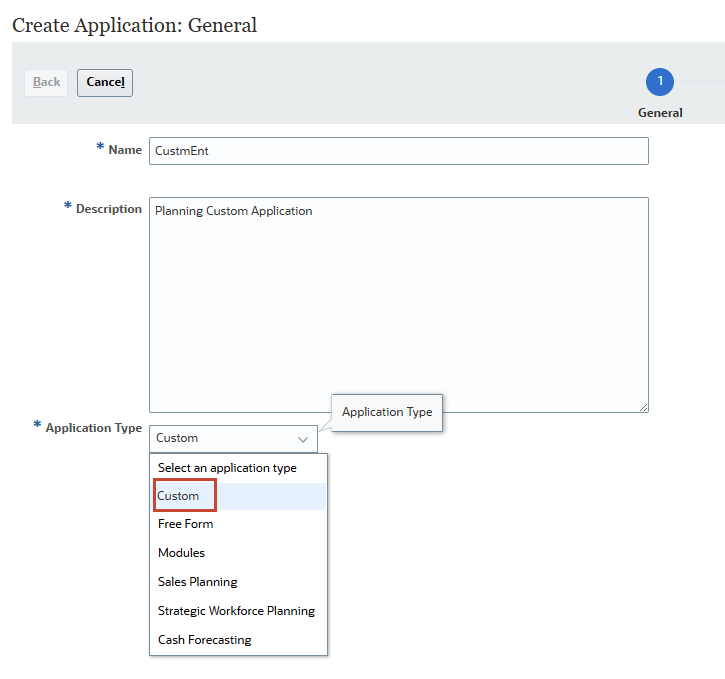
- Complete the required general properties:
- Name your application.
- Enter a description.
- From the Application Type dropdown list, select Custom.
- Click Next.
The Details page is displayed.
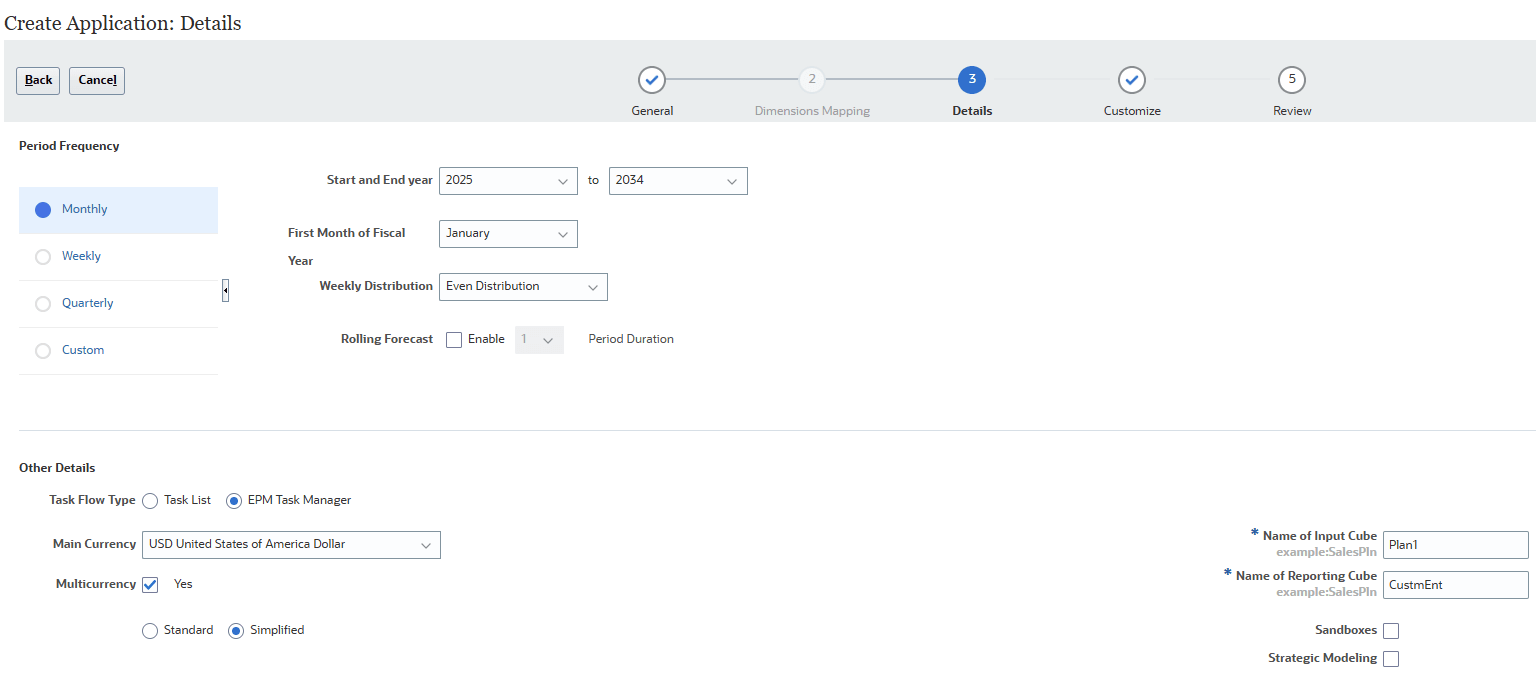
- Select a Period Frequency: Monthly, Weekly, Quarterly, or Custom.
- If you selected Monthly:
- Select the First Month of Fiscal Year.
- Select a Weekly Distribution option: Even, 445, 454, or 544.
- Select the Start and End year.
- If you selected Weekly or Quarterly, select the First Fiscal Period Start Date.
- If you selected Custom:
- Enter the Periods per Year.
- Optional: Specify a prefix.
- Select whether to enable Rolling Forecast and specify the Period Duration.
- For Task Flow Type, EPM Task Manager is the default option for new applications.
- Select the Main Currency.
- Select whether to allow for Multicurrency.
- Accept or modify the names of the Input Cube and Reporting Cube.
- Select whether to enable Sandboxes.
- Select whether to enable Strategic Modeling.
- Click Next.
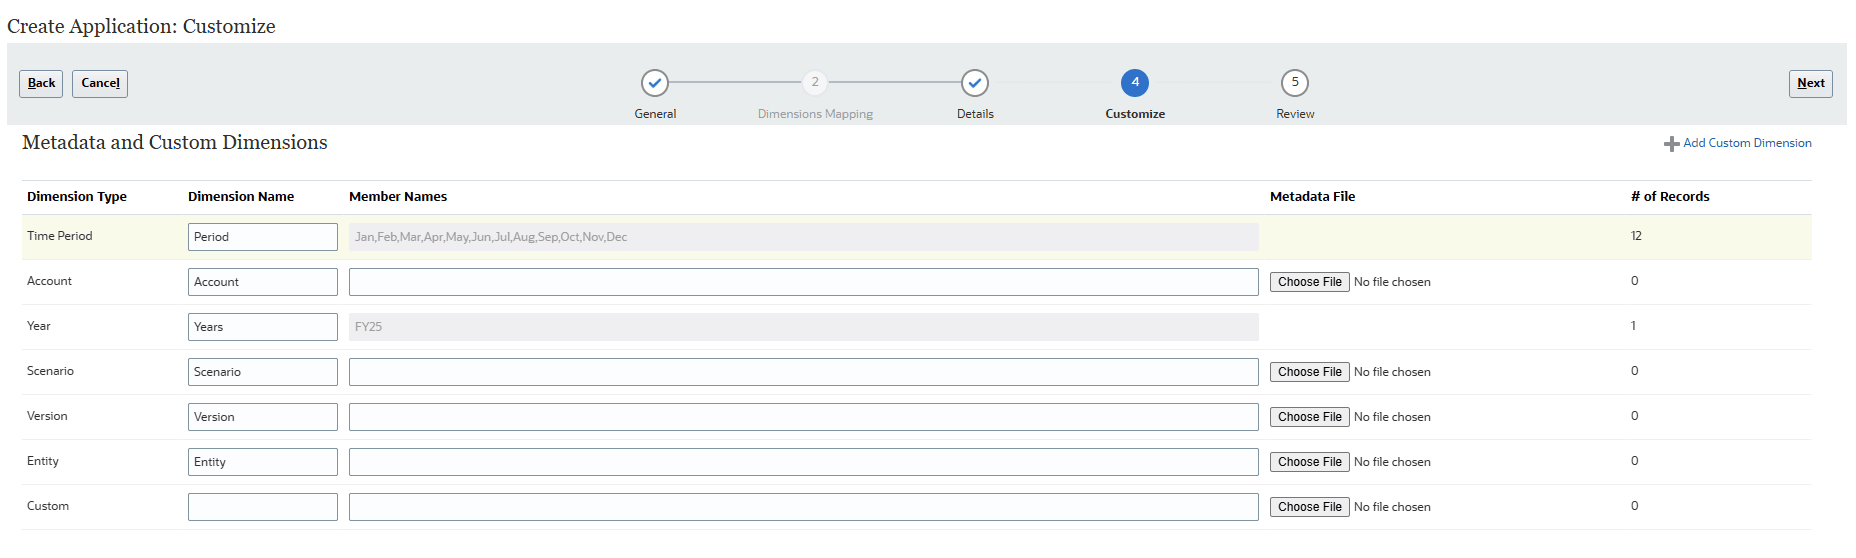
- Customize the required Planning dimensions, if necessary.
- Add members in the Member Names column, separating each name with a comma.
- Optional for Account, Scenario, Version, Entity, and Custom Dimensions: Import metadata using a file.
- To add a custom dimension, for the dimension type listed as Custom, enter a dimension name.
- If you need to add more dimensions, click Add Custom Dimension to add another row.
- Click Next.
- Review your selections. If necessary, return to previous pages to make changes.
- Click Create.
When application is completed, an Application created successfully message is displayed
- Click OK.
The Planning home page is displayed.
New Application: Creating a FreeForm application from an Essbase Outline File
FreeForm business process can be created using an Essbase outline file (OTL) from an on-premises deployment to import dimensions and members. The outline file name can have a maximum of eight characters because the file name is used to name the cube of the FreeForm business process.
- On the Planning landing page, for Create a new application, click START.
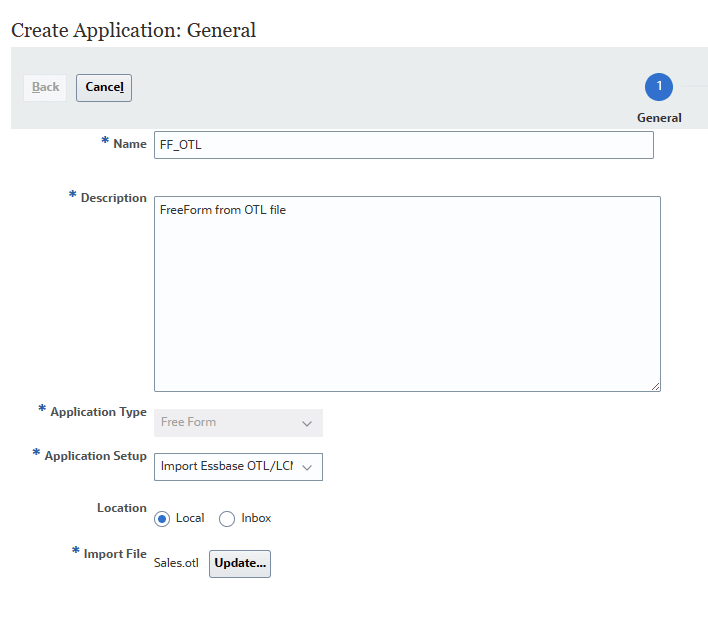
- Complete the required general properties:
- Name your application.
- Enter a description.
- From the Application Type dropdown list, select FreeForm.
- From the Application Setup dropdown list, accept the default value Import Essbase OTL/LCM.
- Select a location:
- Local — if you have the OTL or LCM stored locally.
- If you selected Local, for Import File, click Browse.
Note:
Depending on your browser, the button label may display Choose File or Browse. - Navigate to where you saved Sales.otl, then select and open it.
- If you selected Local, for Import File, click Browse.
- Inbox — if you have the OTL or LCM uploaded to your instance.
- If you selected Inbox, select your OTL or LCM from the Select One dropdown list.
- Click Next.
- Review your selections. If necessary, return to previous pages to make changes.
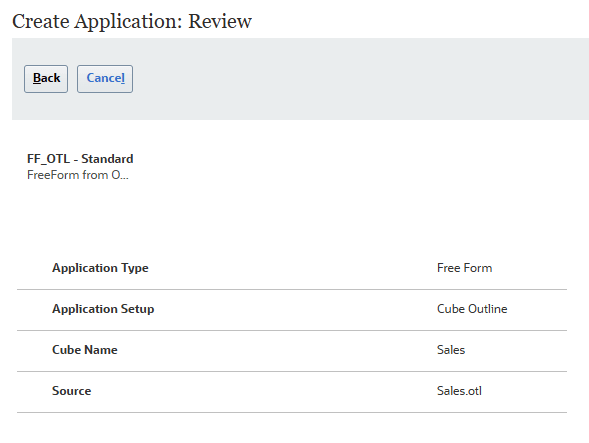
- Click Create.
Application creation may take several minutes. When completed, an Application created successfully message is displayed.
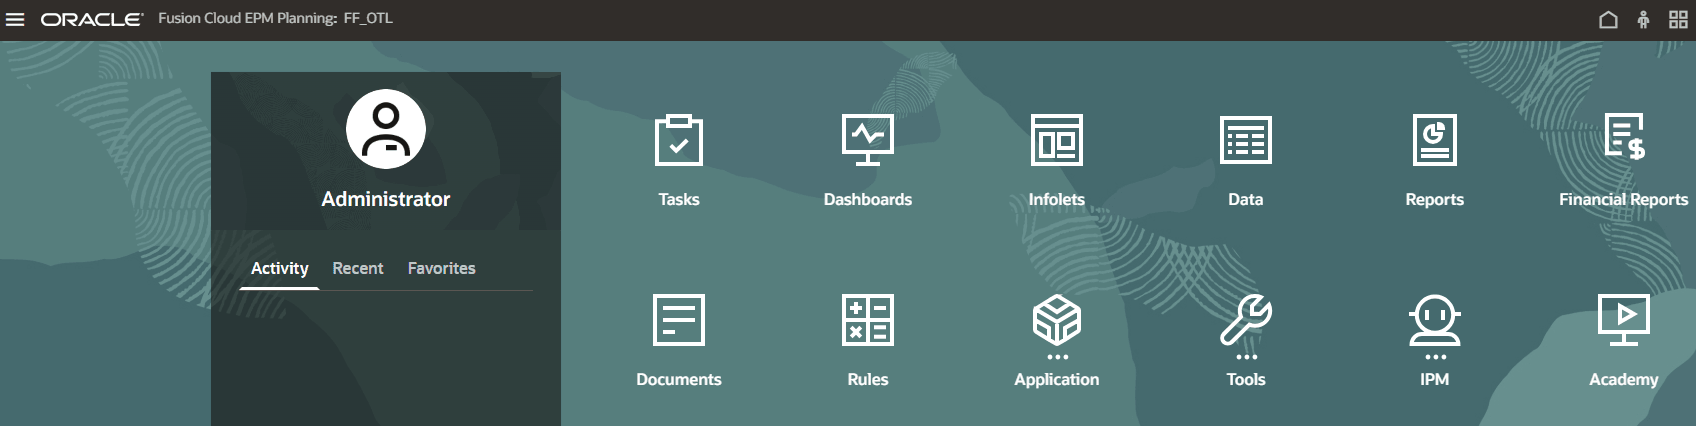
- Click OK.
The Planning home page is displayed.
New Application: Creating a FreeForm application using Create Cubes
You can model and build your own Hybrid BSO or ASO cubes while preserving the ability to leverage Planning functionalities.
Hybrid BSO cubes support some aggregate storage capabilities. Parent members of sparse and dense dimensions can have dynamic aggregations for calculations.
Hybrid cubes provide many benefits including:
- Smaller database and application size
- Better cube refresh performance
- Faster import and export of data
- Improved performance of business rules
- Faster daily maintenance of the application
- On the Planning landing page, for Create a new application, click START.
- Complete the required general properties:
- Name your application.
- Enter a description.
- From the Application Type dropdown list, select FreeForm.
- From the Application Setup dropdown list, select Create Cubes
- Select Is ASO for an aggregate storage Cube.
- Enter a Cube Name.
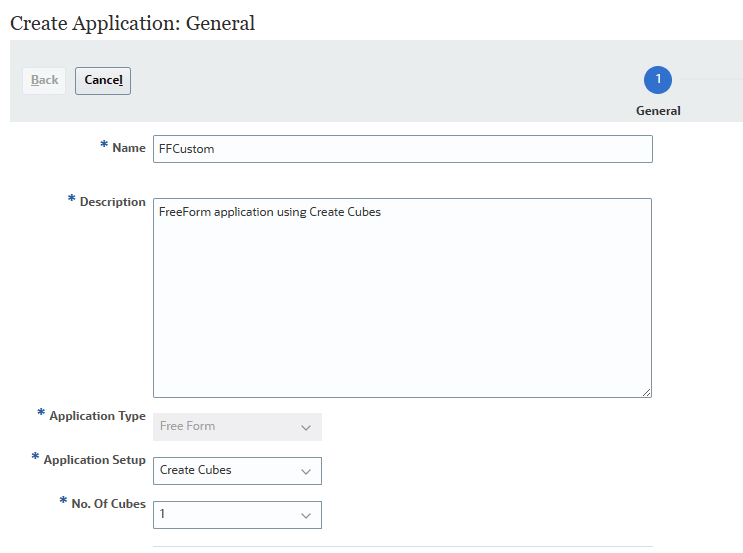

- Click Next.
- Enable the default dimensions.
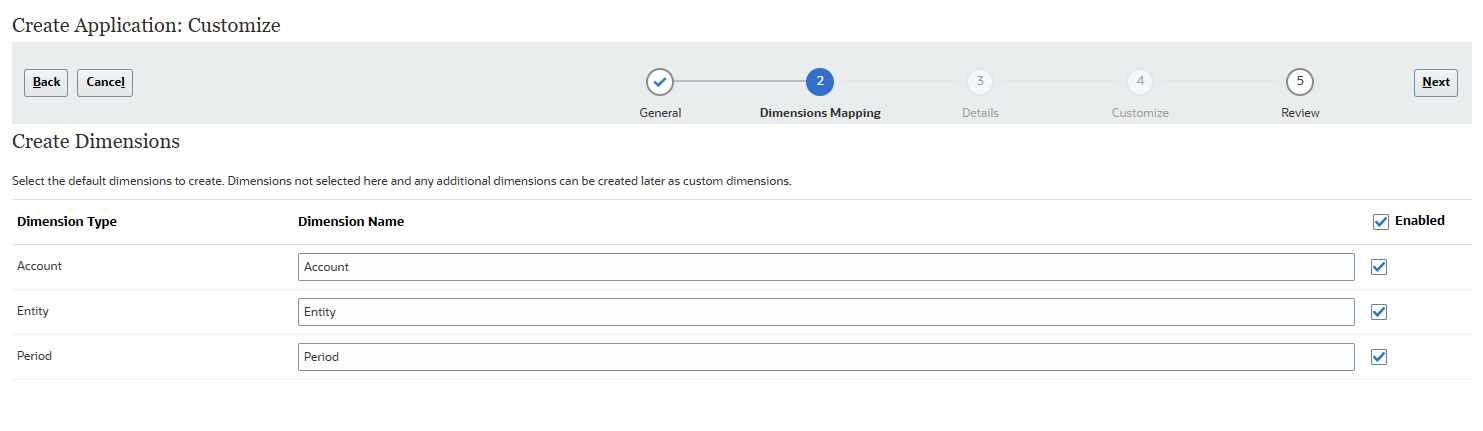
Note:
If you select not to enable the default dimensions here, you create them later in Classic Dimension Editor to make sure that you can assign the correct dimension type. - Click Next.
Review your selections. If necessary, return to previous pages to make changes.
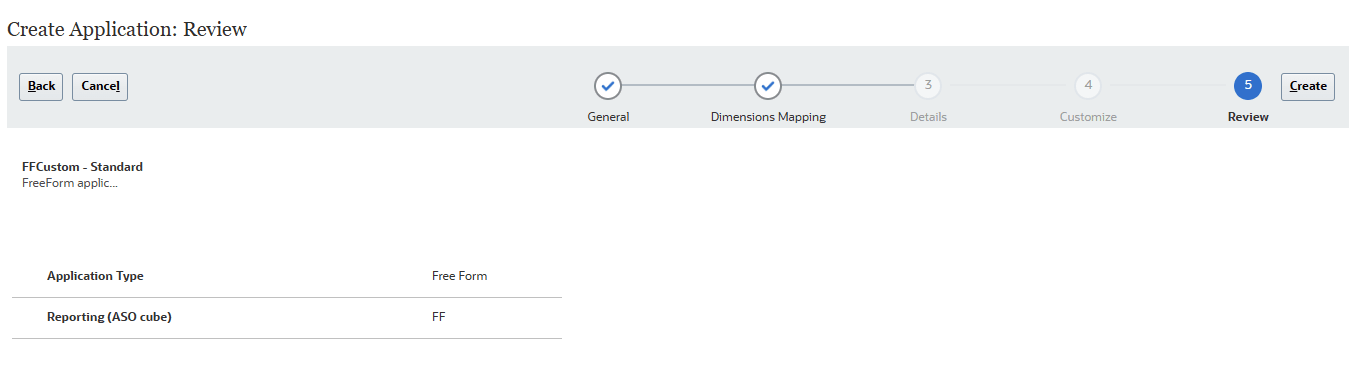
- Click Create.
Application creation may take several minutes. When completed, an Application created successfully message is displayed.
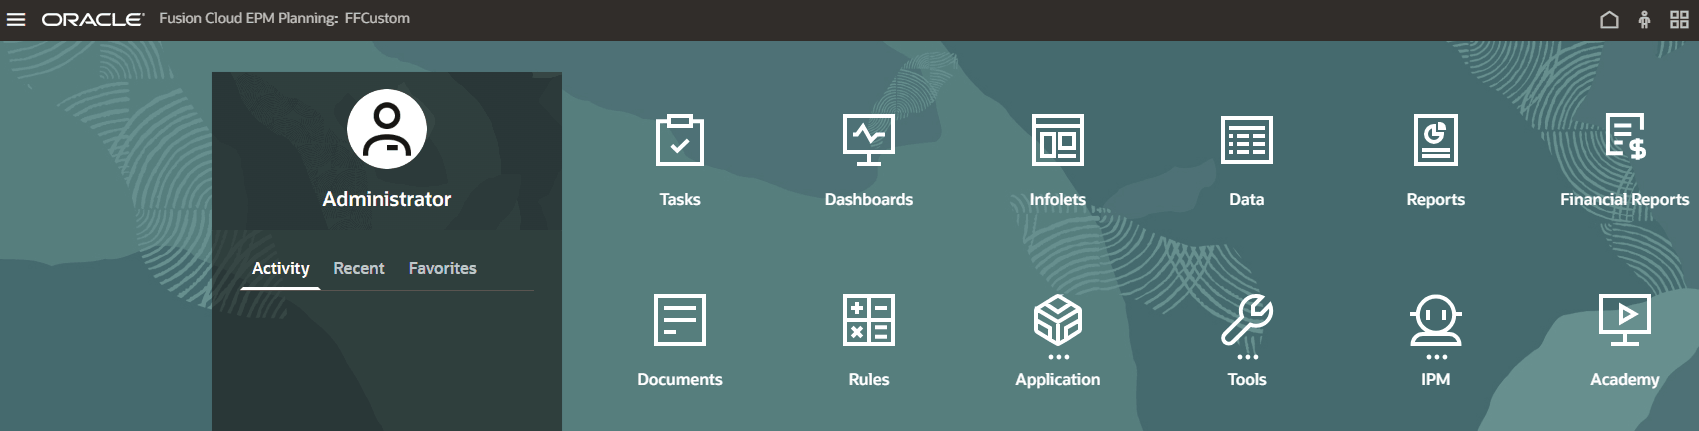
- Click OK.
The Planning home page is displayed.
Note:
Steps to creating a new application in Sales Planning or Strategic Modelling are similar to creating a Module-based or a Custom-based Planning application.Migrating a Snapshot to Create an Enterprise Application
Migration allows you to create a custom Planning business process from a snapshot that you upload to the environment.
Note:
If you have a business process created, remove it first by following the steps in the Removing Applications section of this tutorial.- On the Planning landing page, click MIGRATE.
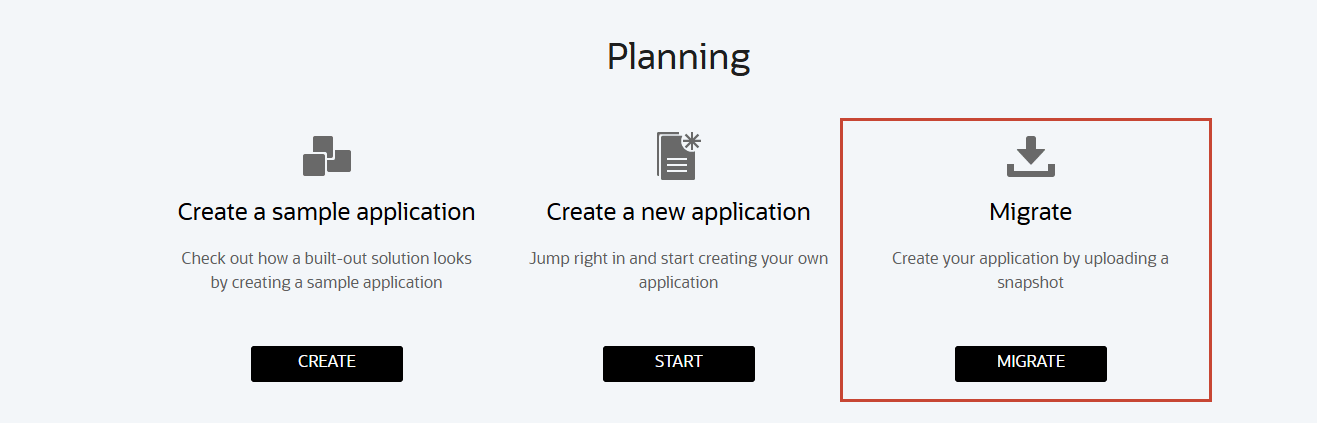
The Migration page is displayed.
- Click Snapshots.
The Snapshots tab is displayed.
- Click Upload.
- In the Upload dialog box, click Browse to select the file.
Note:
Depending on your browser, the button label may display Choose File or Browse. - Navigate to where you saved P_Sample_LCM_v3.zip, then select and open it.
- Click Upload.
- When a message stating that the File uploaded and processed successfully is displayed, click OK.
The snapshot is now listed on the Snapshots tab.
- For the snapshot you uploaded, click the Actions icon (…), and select Import.
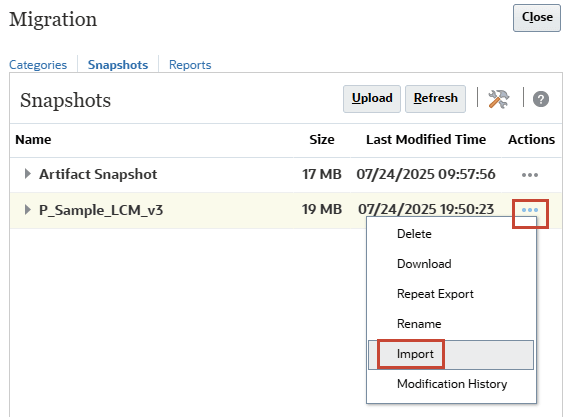
- When prompted to proceed with the import, click OK.
The Migration Status Report is displayed. The migration import process may take several minutes.
- Click Refresh until the status displays Completed.
- Click Close twice to close both dialog boxes.
- Sign out and log back in to start working with Planning.
Removing Applications
In this section, you learn how to remove applications from your Planning instance.
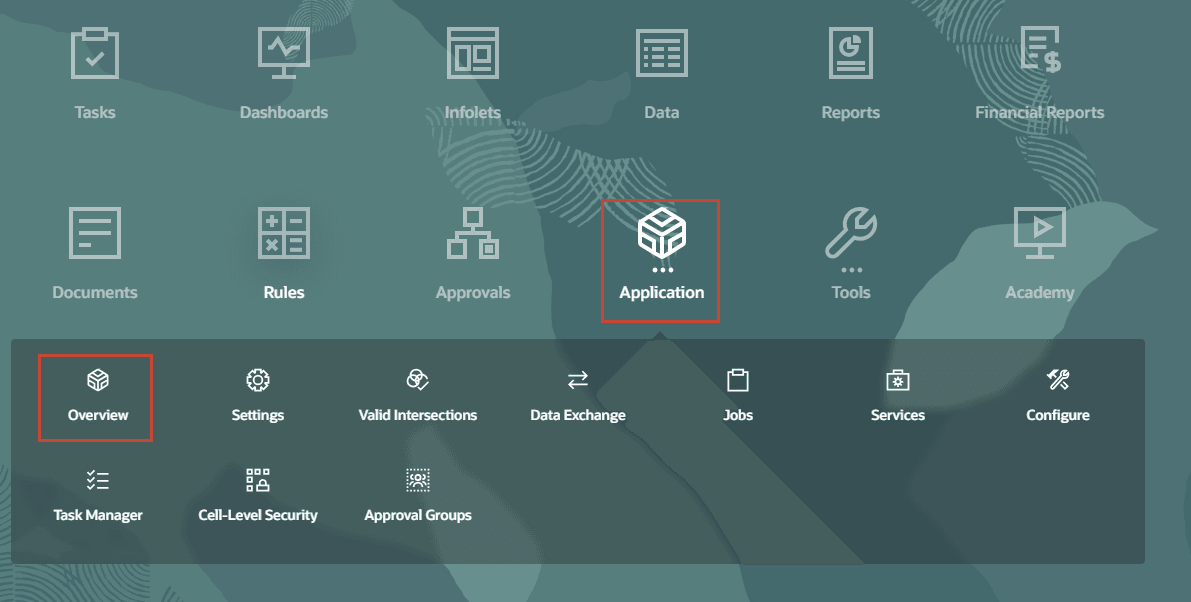
- From the Planning home page, click Application, and then Overview.
- On the Overview tab, click Actions and select Remove Application.
- When prompted to continue to delete the application, click Yes.

The process takes a few minutes to complete. When the application is completely removed, you will be signed out of the instance.

Recreating Service
The process of recreating your environment deletes the current business process, including all user-defined (custom) artifacts and data from the environment. If you want to preserve the data and artifacts in the current environment, you must perform a complete backup of the business process before you re-create an environment.
Tip:
The environment is not available for approximately 15 minutes, while the re-create process is in progress.After re-creating the environment, you can create the same business process or a different one. You can also import a business process from a snapshot using Migration or EPM Automate.
In this section, you learn how to restore the environment into its original state, ready for you to create a new business process.
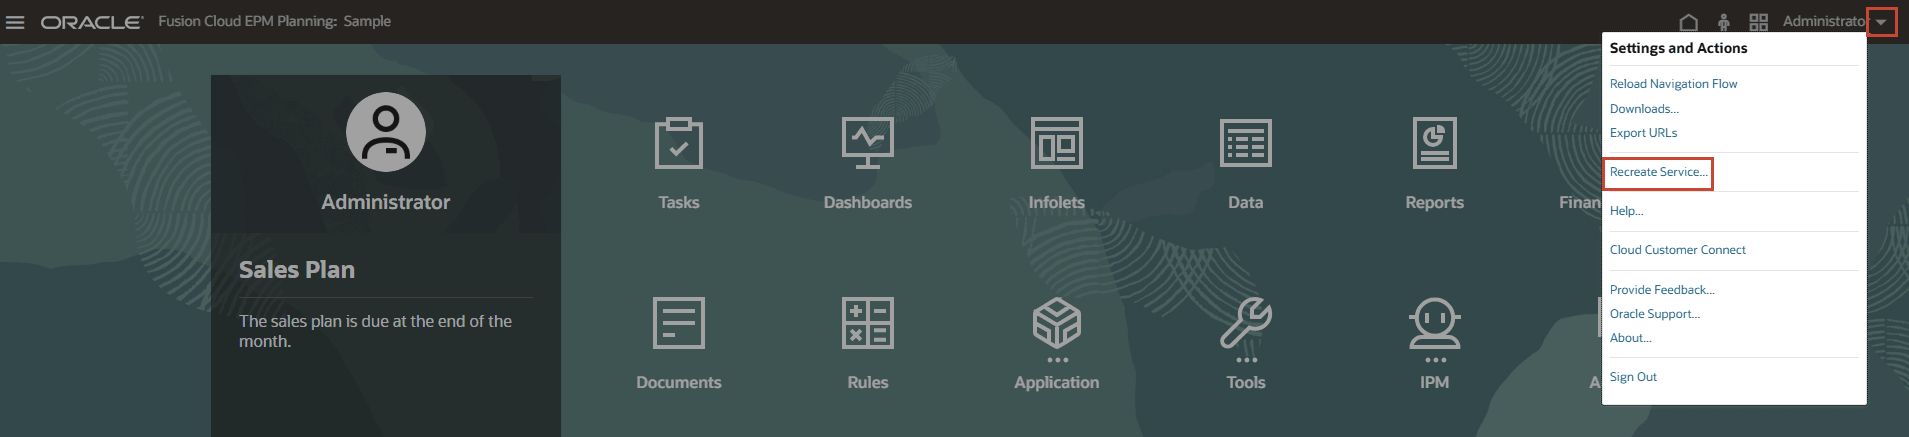
- From the Planning landing page or home page, access Settings and Actions by clicking your username at the top right corner of the screen and select Recreate Service.
The Recreate Service dialog box is displayed. Carefully read the information. The process deletes the application, including its data and artifacts.
- Select the checkboxes to confirm that you are aware of the consequences of recreating the environment.
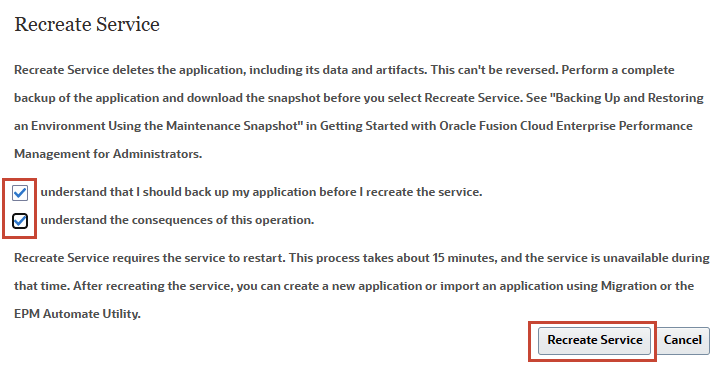
- Click Recreate Service.
You are signed out of the instance. The instance will be inaccessible for approximately 15 minutes.
Related Links
More Learning Resources
Explore other labs on docs.oracle.com/learn or access more free learning content on the Oracle Learning YouTube channel. Additionally, visit Oracle University to view training resources available.
For product documentation, visit Oracle Help Center.
Creating the Planning Business Process
F87767-02
August 2025