Introduction
This 15-minute hands-on tutorial shows you how to add and modify subaccounts in Strategic Modeling, a solution provided by Oracle EPM Enterprise Planning. You start by reviewing the account structure so that you can recognize subaccounts in the Account View and in reports. You add subaccounts to both income statement and balance sheet accounts. You then enter data into subaccounts and see how that data rolls up into main accounts. The sections build on each other and should be completed sequentially.
Background
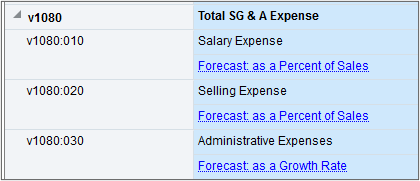
In the Account View, you can view and manage the accounts and subaccounts in a model. Include subaccounts to provide additional detail within standard financial accounts. For example, within Total SG & A Expense, you can include subaccounts for Salary Expense, Selling Expense, and Administrative Expenses. That way you can keep track of and report on these distinct components. Each subaccount is displayed in the Account View and in respective financial statements.
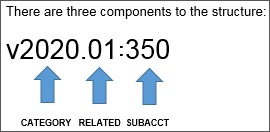
Subaccount IDs are displayed after the main account number, separated by a colon. A main account number drives the accounting integrity of the model. If there is a related account it is the two digit number after the first decimal place. The subaccount id is at the end after a colon.
Prerequisites
Cloud EPM Hands-on Tutorials may require you to import a snapshot into your Cloud EPM Enterprise Service instance. Before you can import a tutorial snapshot, you must request another Cloud EPM Enterprise Service instance or remove your current application and business process. The tutorial snapshot will not import over your existing application or business process, nor will it automatically replace or restore the application or business process you are currently working with.
Before starting this tutorial, you must:
- Have Service Administrator access to a Cloud EPM Enterprise Service instance. The instance should not have a business process created.
- If you haven't already, register for a free Oracle Cloud Customer Connect account so you can
access the required files.
- Download the latest EPBCS Sample Application LCM snapshot from this idea page.
- Upload and import the latest EPBCS Sample Application LCM snapshot into your Planning instance.
Note:
Data in the sample application may vary due to changes over time and across financial years.
Note:
If you run into migration errors importing the snapshot, re-run the migration excluding the HSS-Shared Services component, as well as the Security and User Preferences artifacts in the Core component. For more information on uploading and importing snapshots, refer to the Administering Migration for Oracle Enterprise Performance Management Cloud documentation.Adding subaccounts to Income Statement accounts
In this section, you open a model and add subaccounts.
Opening a model
In this section you open a model to inspect subaccounts.
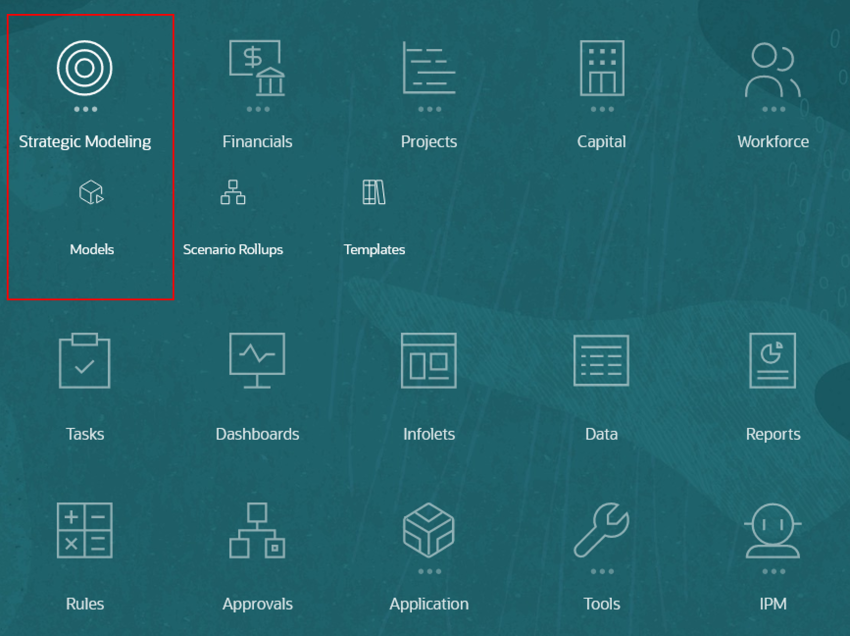
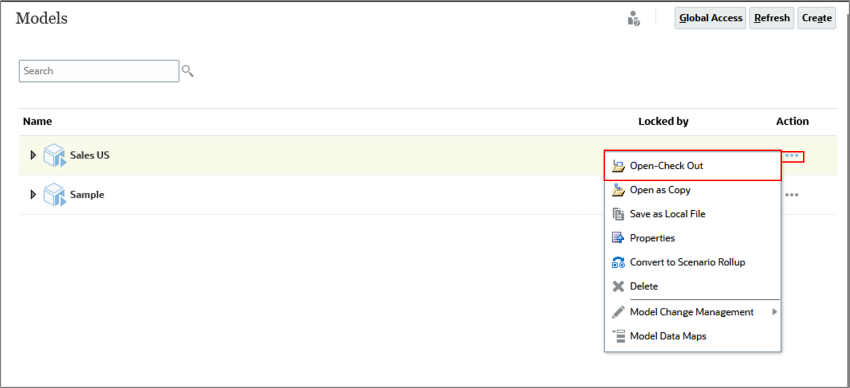
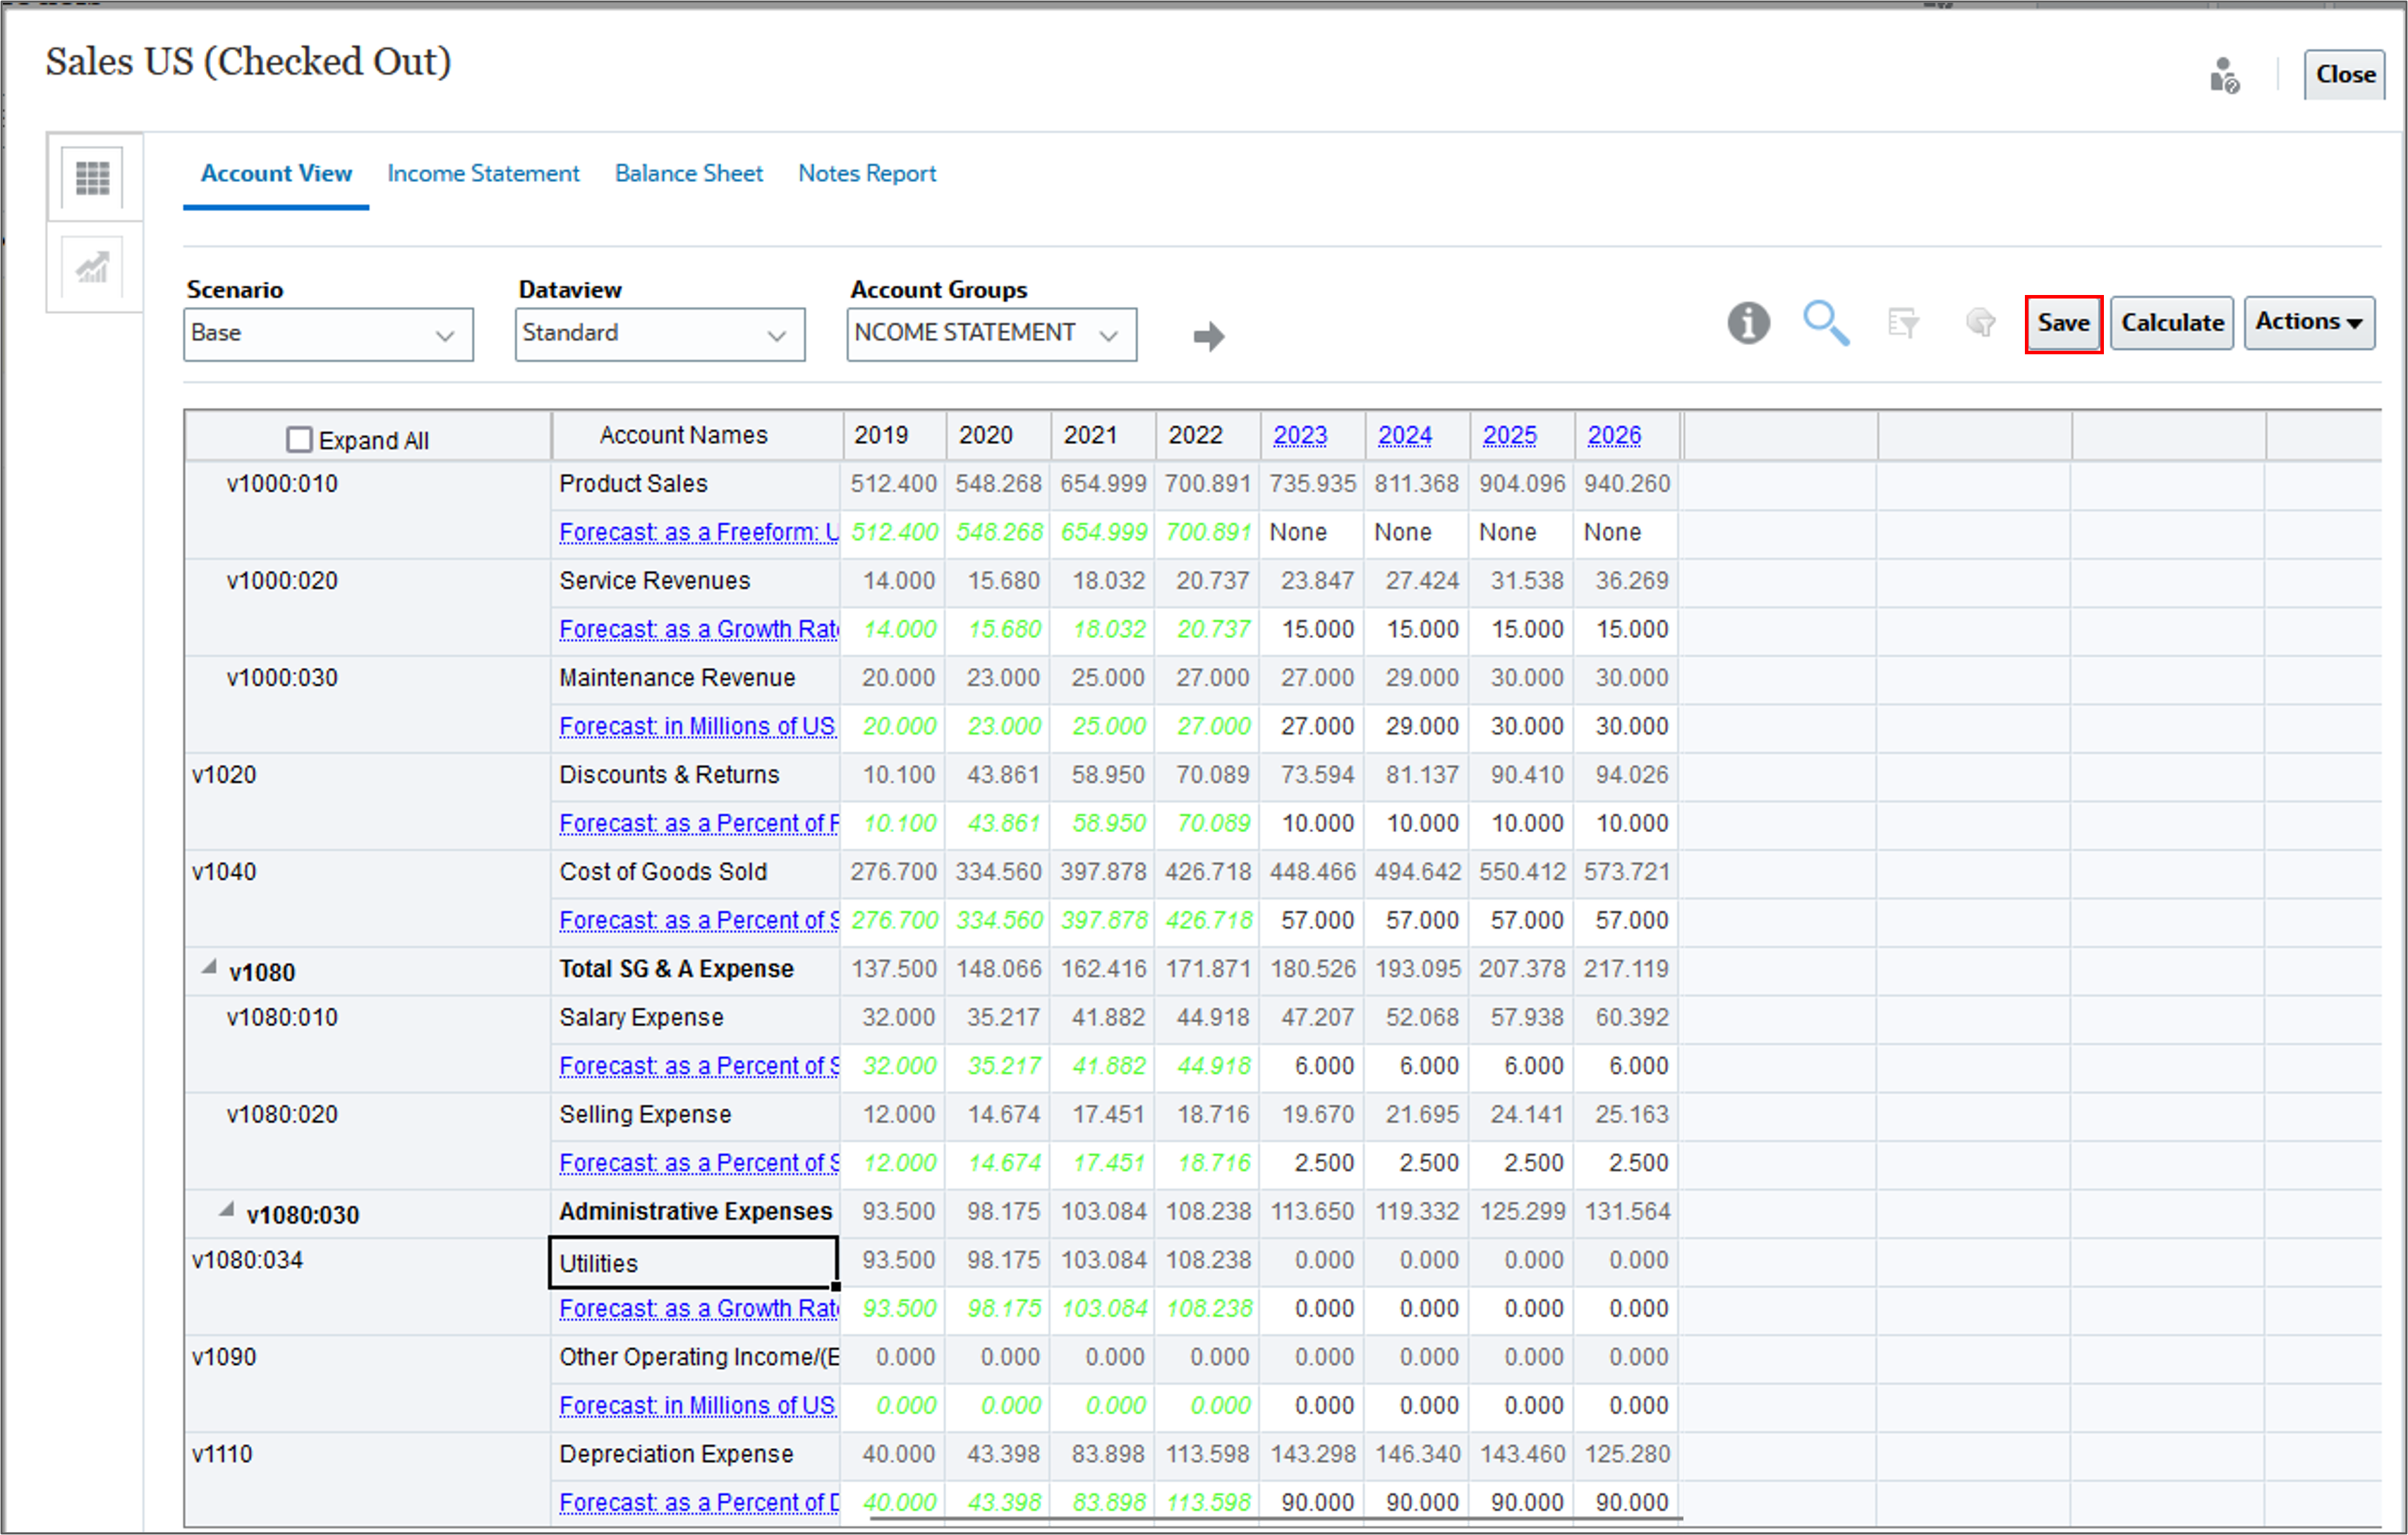
- On the Planning home page, click Strategic Modeling and then Model View.
- For Sales US, click (...) Action and select Open–Check Out.
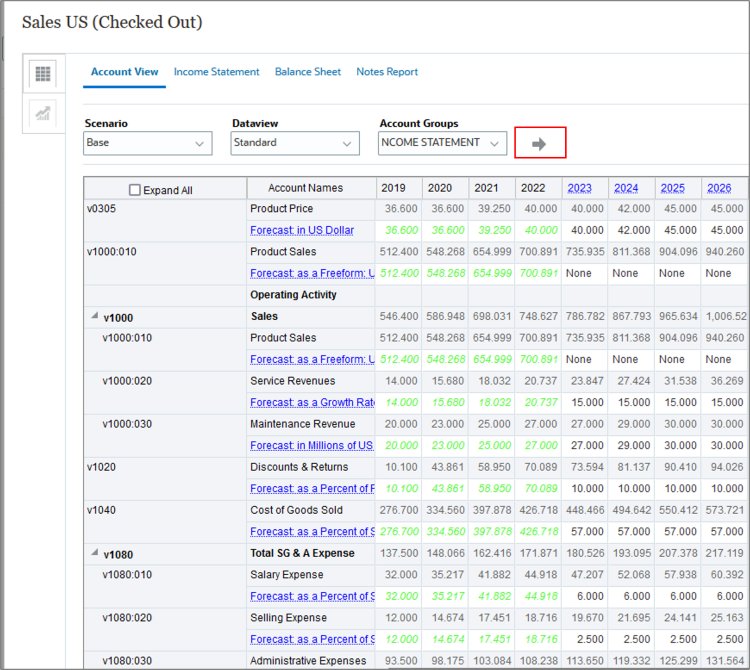
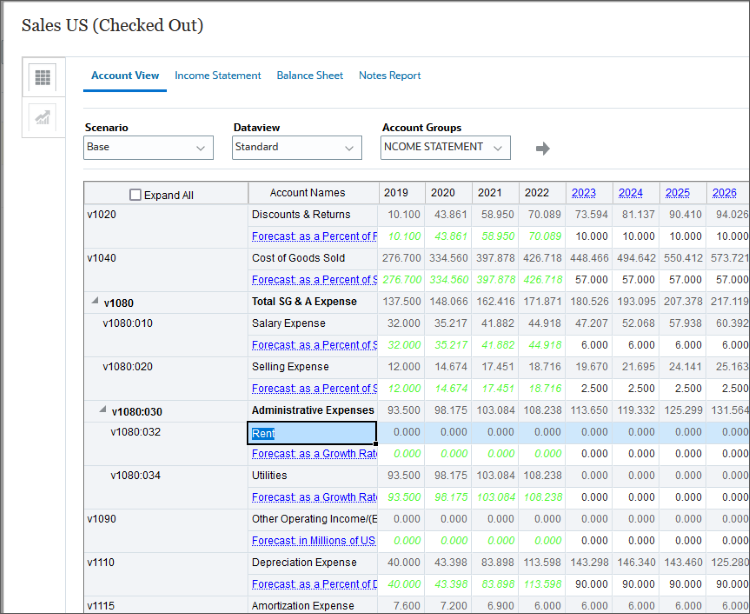
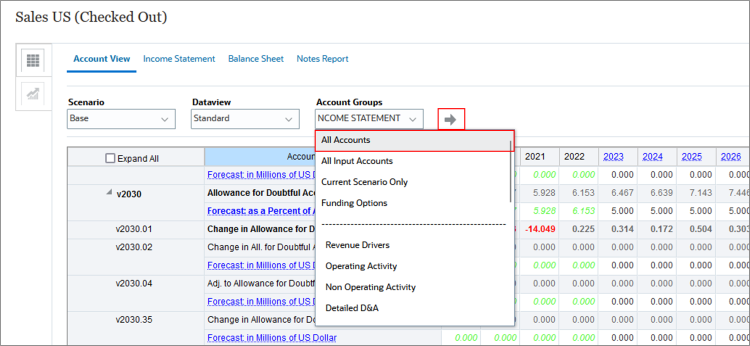
- In the Account View, set the POV as follows:
- Scenario: Base
- Dataview: Standard
- Account Groups: INCOME STATEMENT
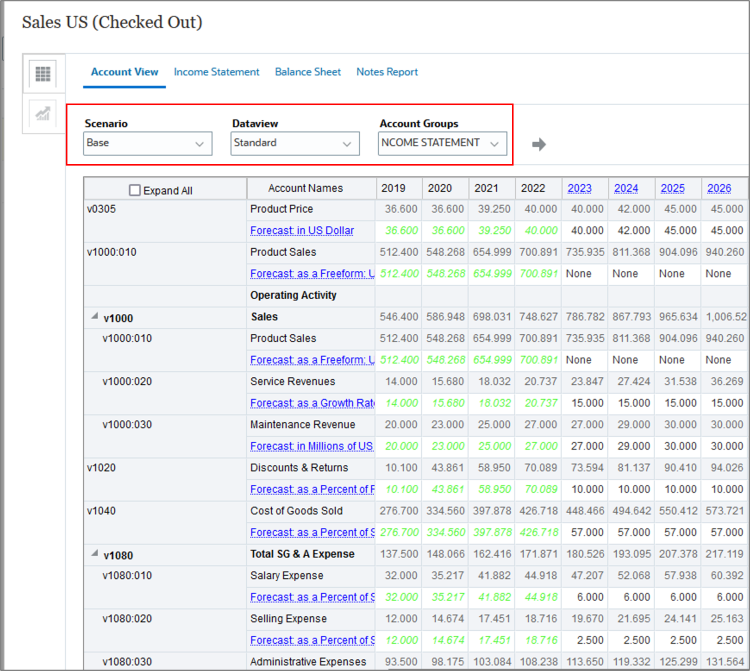
- Click (
 ) Refresh .
 - Scroll to v1080. Notice that the Salary Expense account is a subaccount of Total SG & A Expense. Its account number includes the main account 1080 and the subaccount 10.
Reviewing Income Statement subaccounts
In this section you review subaccounts for Income Statement accounts.
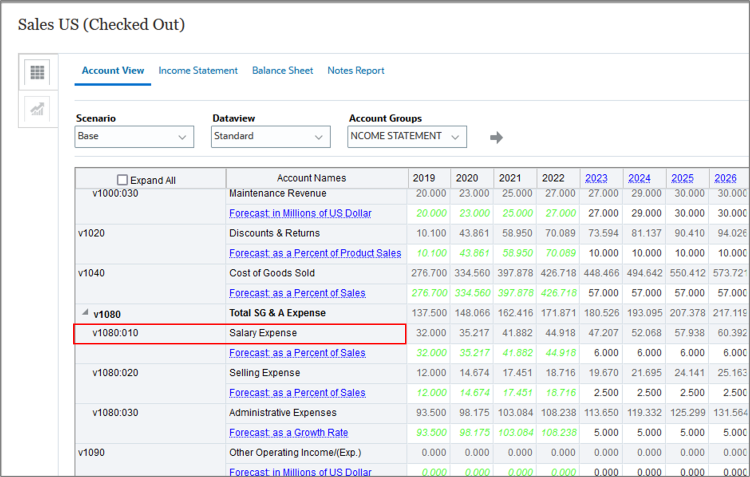
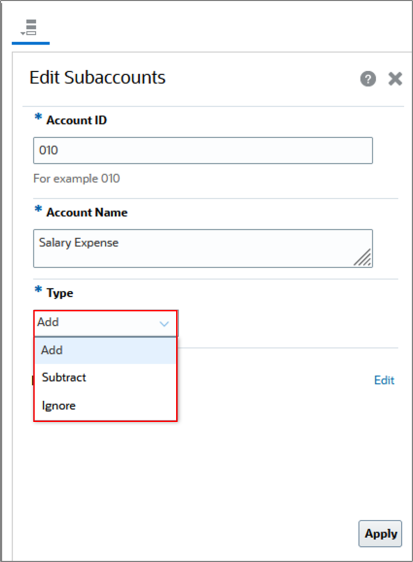
- Right-click v1080:010.and select Edit Subaccounts.
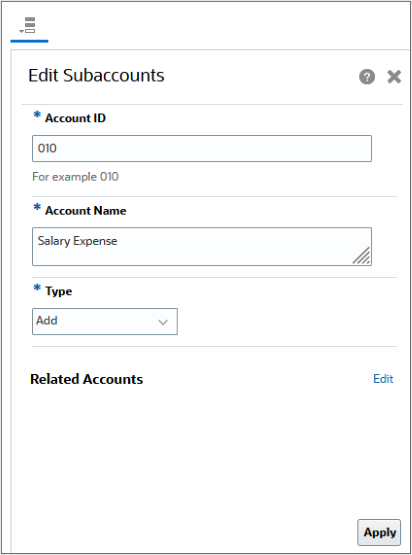
- Review the subaccount information. The subaccount is displayed in the Account ID, and the name of the account is displayed in Account Name. Type is set to Add. Values for salary expense are additive and increase the Total SG & A Expense value.
- Open the Type drop-down list. For subaccounts, you can select Subtract to subtract the value from its parent, or you can select Ignore if the subaccount is independent of its parent.
- Leave Type set to Add and click X to close Subaccounts.


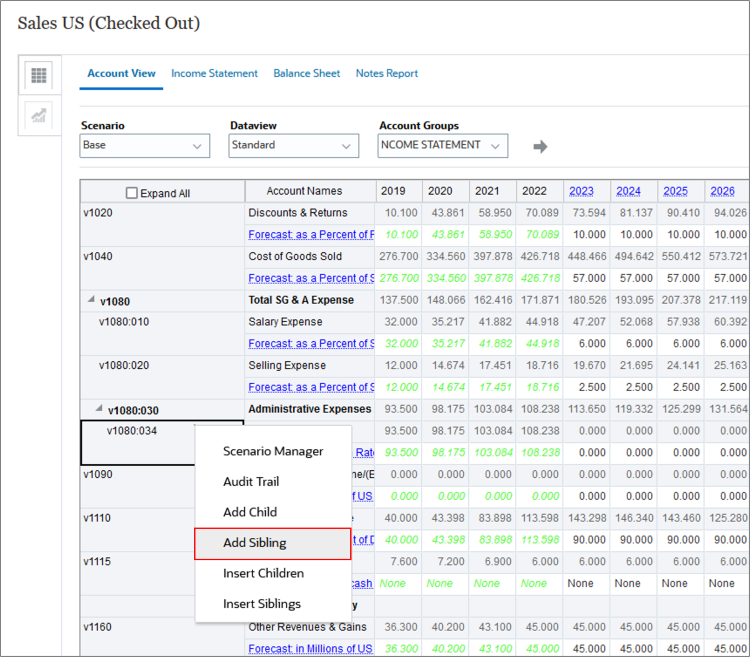
Adding a subaccount by adding a child member
You can add subaccount members to the account hierarchy by adding a child or a sibling member to the selected account. In this section you add a Utilities subaccount by adding a child member.
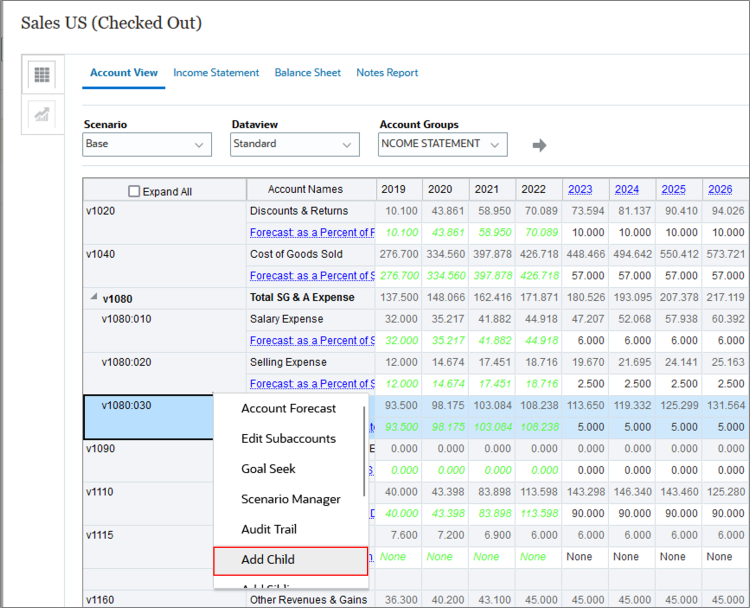
- Right-click v1080:30, and select Add Child.
- Notice that a new row v1080:01 is displayed.
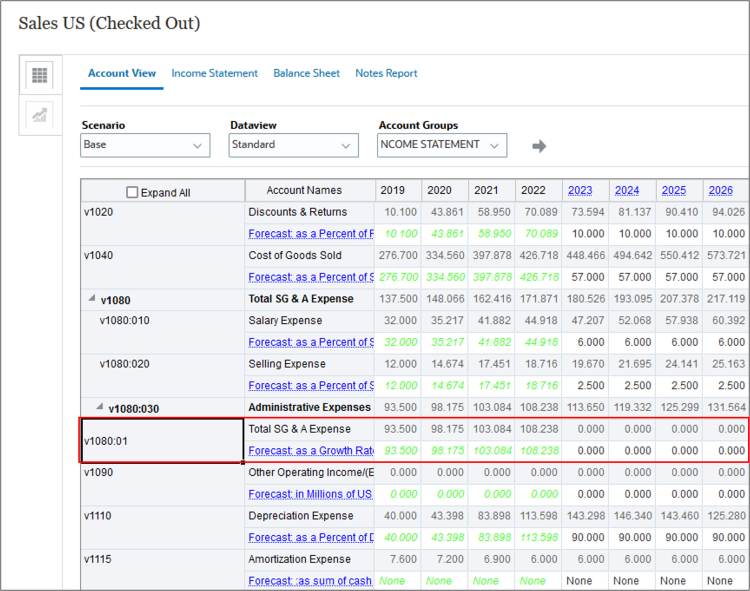
- Select v1080:01 and change the account id from 01 to 034.
- In the v1080:034 row, change the account name from Total SG & A Expense to Utilities. In this case, you will track expense data for Utilities separately, however it will roll up into Administrative Expenses.
- Click Save.

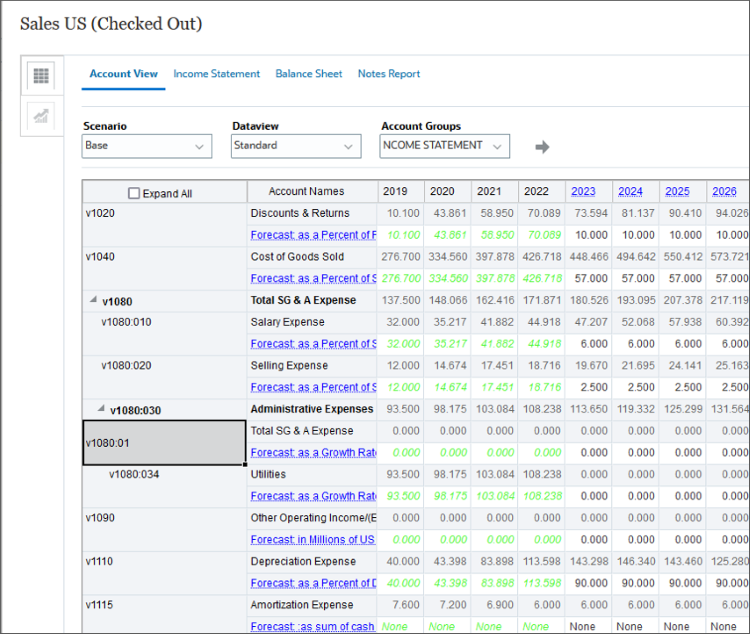
Adding a subaccount by adding a sibling member
In this section you add a subaccount using a sibling member to track expense data for Rent separately.
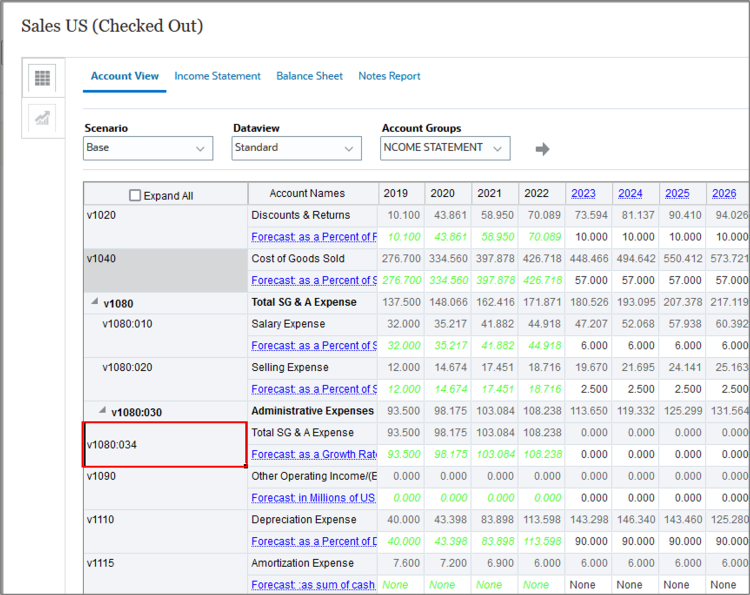
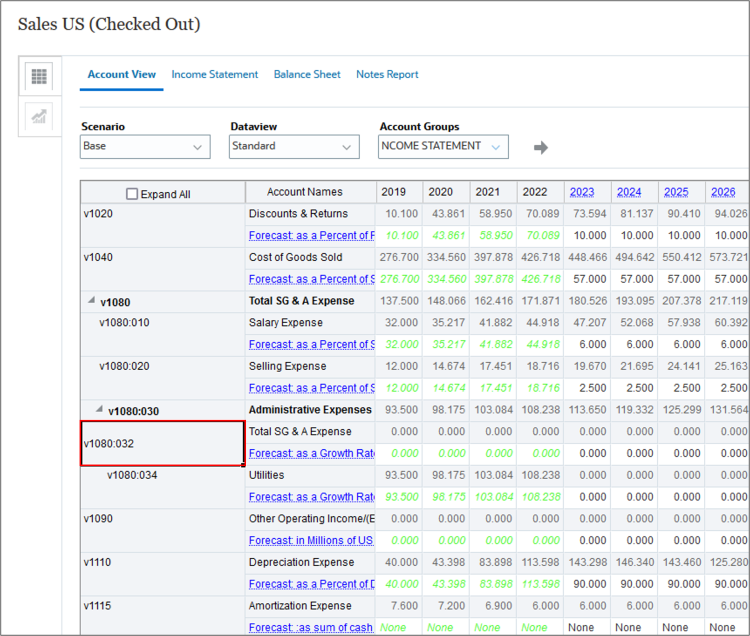
- Right-click 1080:034, and select Add Sibling.
- In the added row, select v1080:01.
- Change the account id from 01 to 032.
- Change the Account Name for the row to Rent.
- Click Save.
Changing a forecast method
In this section you change the forecast method for the Rent subaccount.
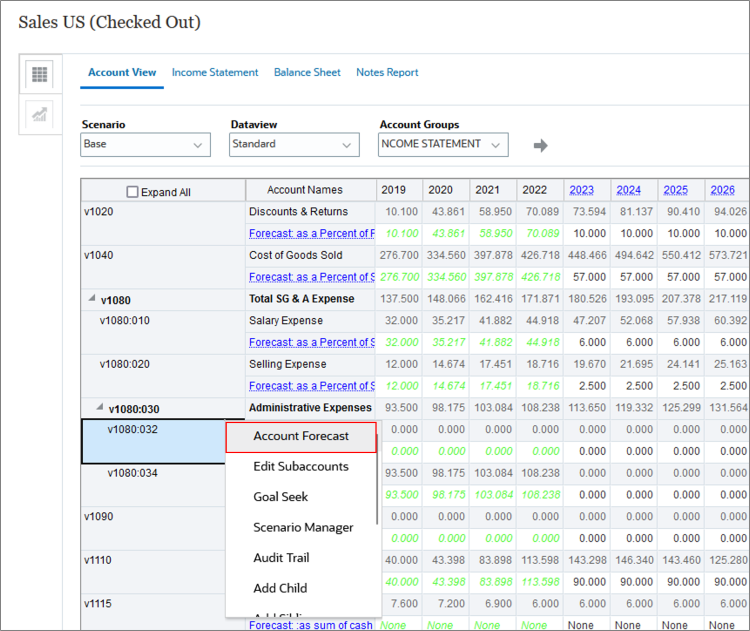
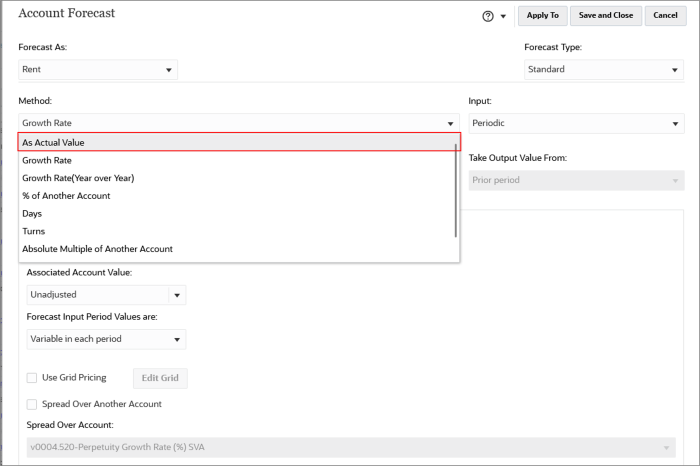
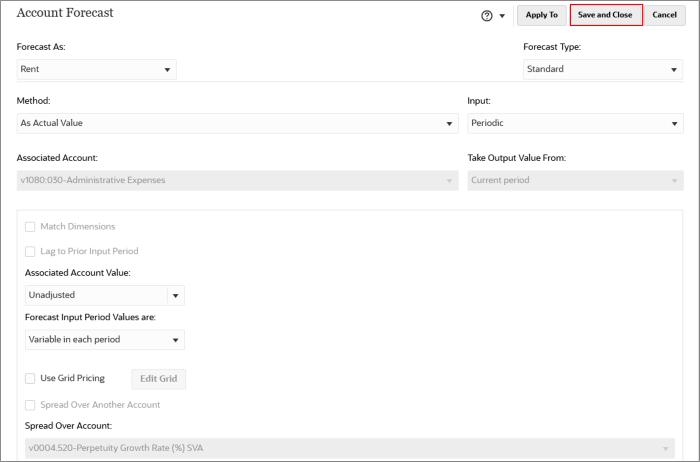
- Right-click 1080:032, and select Account Forecast.
- In the Account Forecast dialog, change the forecast method from Growth Rate to As Actual Value.
- Click Save and Close to close the Account Forecast dialog.
Entering subaccount data
In this section you enter data for the subaccounts Rent and Utilities.
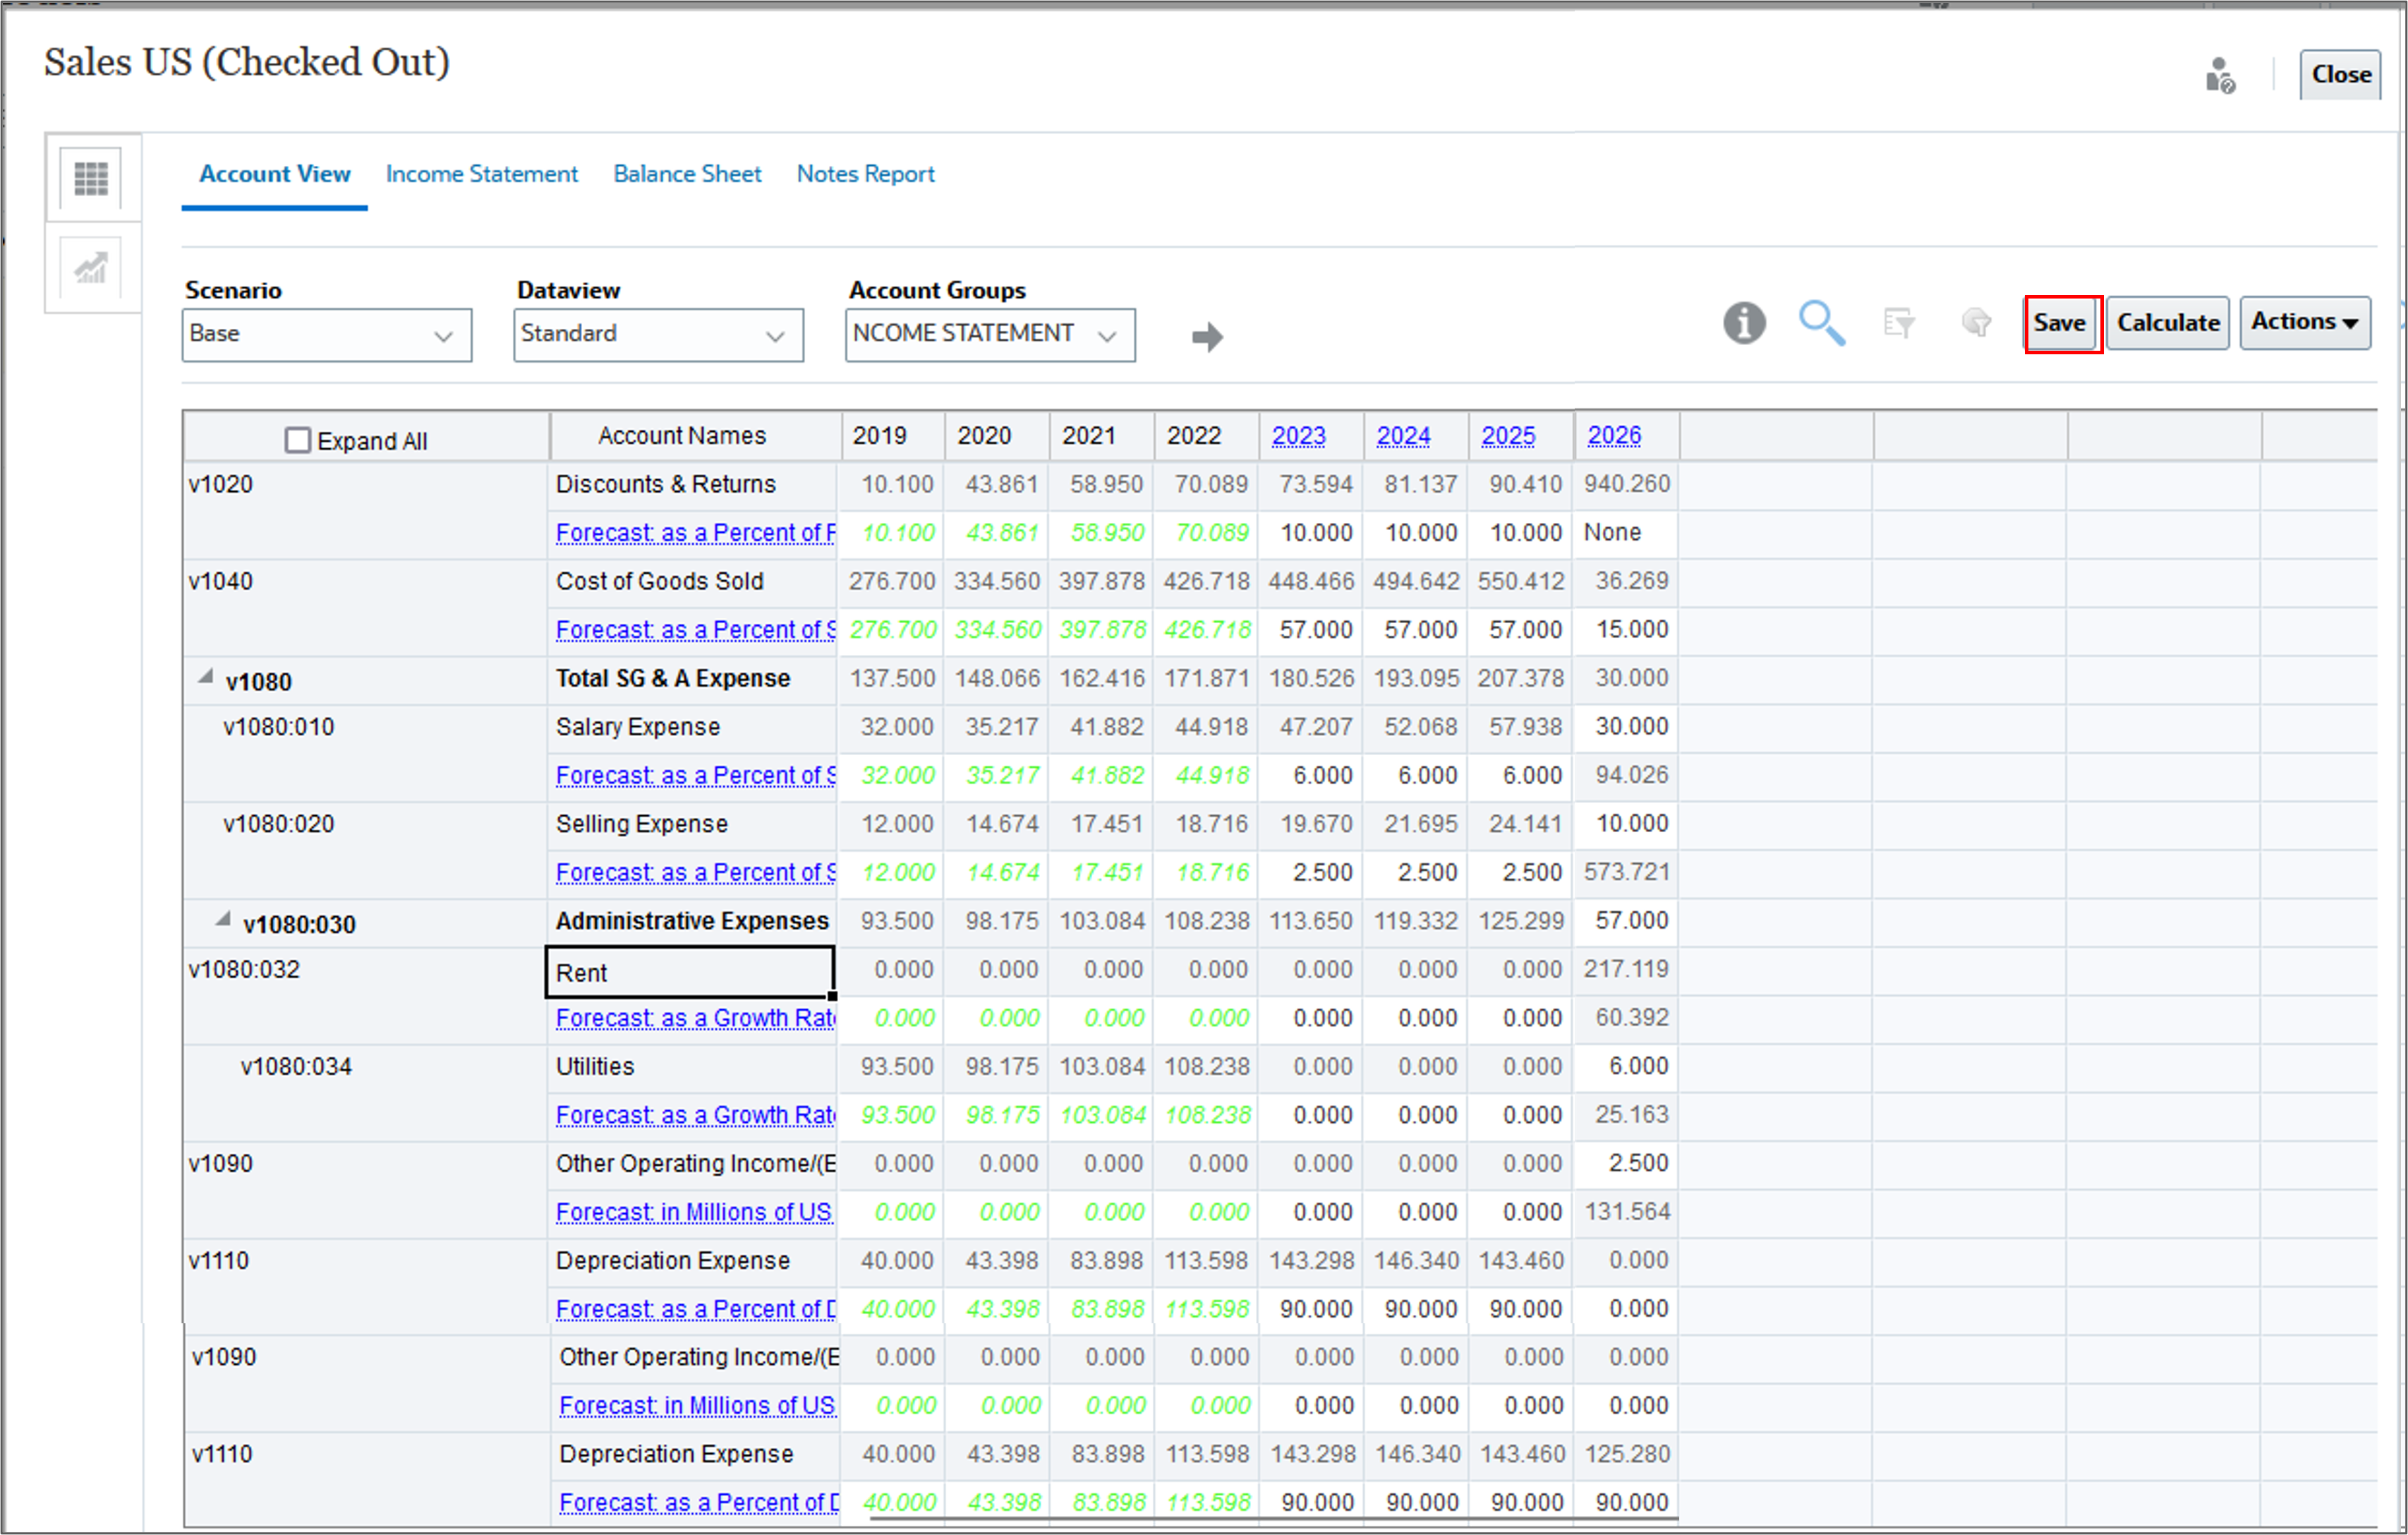
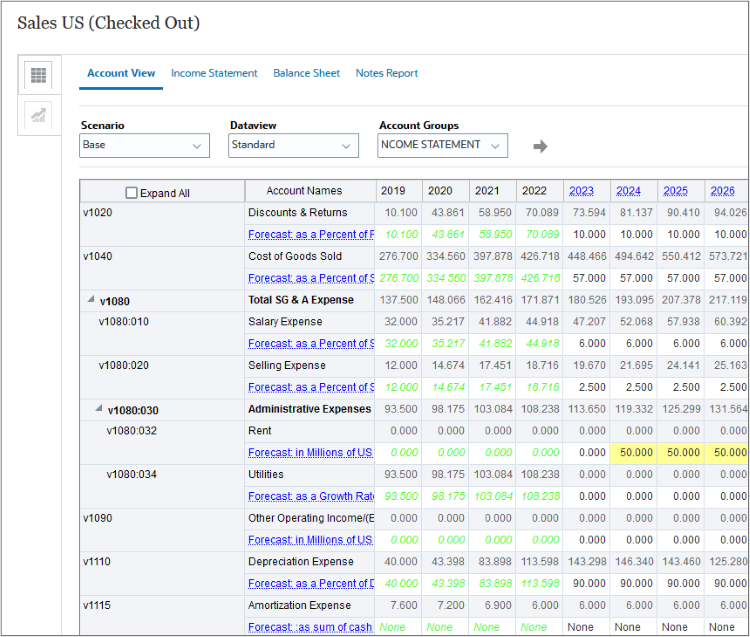
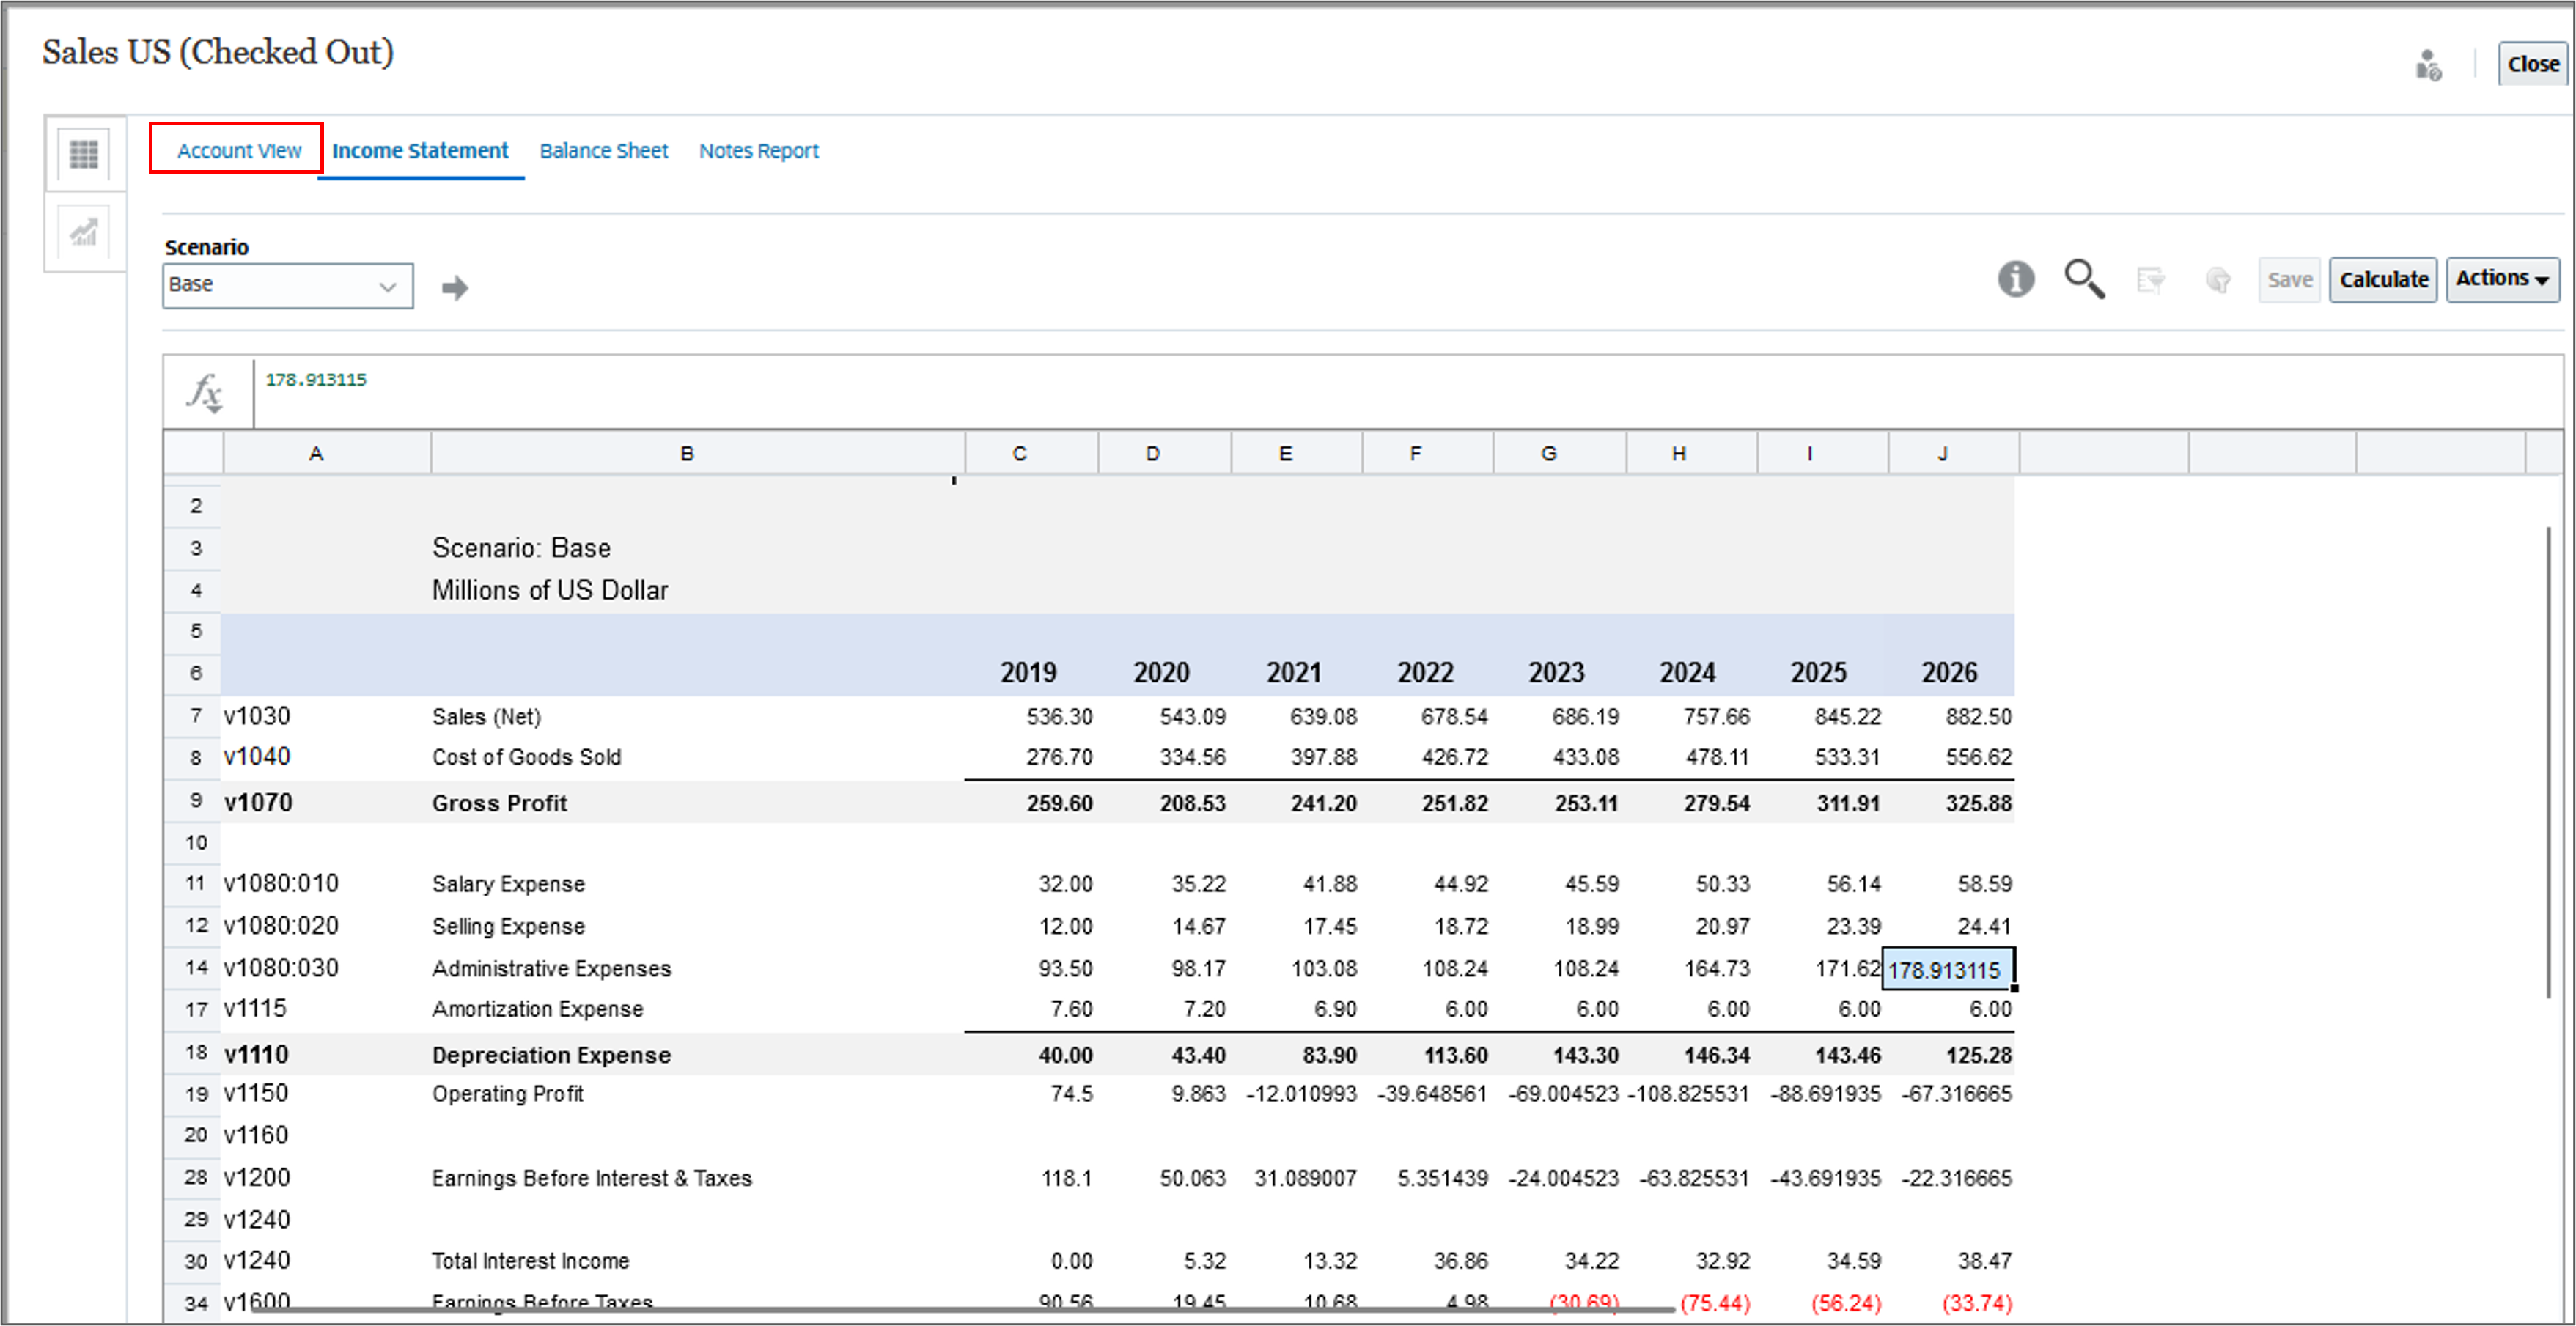
- For Rent, enter 50 for 2024, 2025, and 2026.
- For Utilities, enter 6 for 2024, 2025, and 2026.
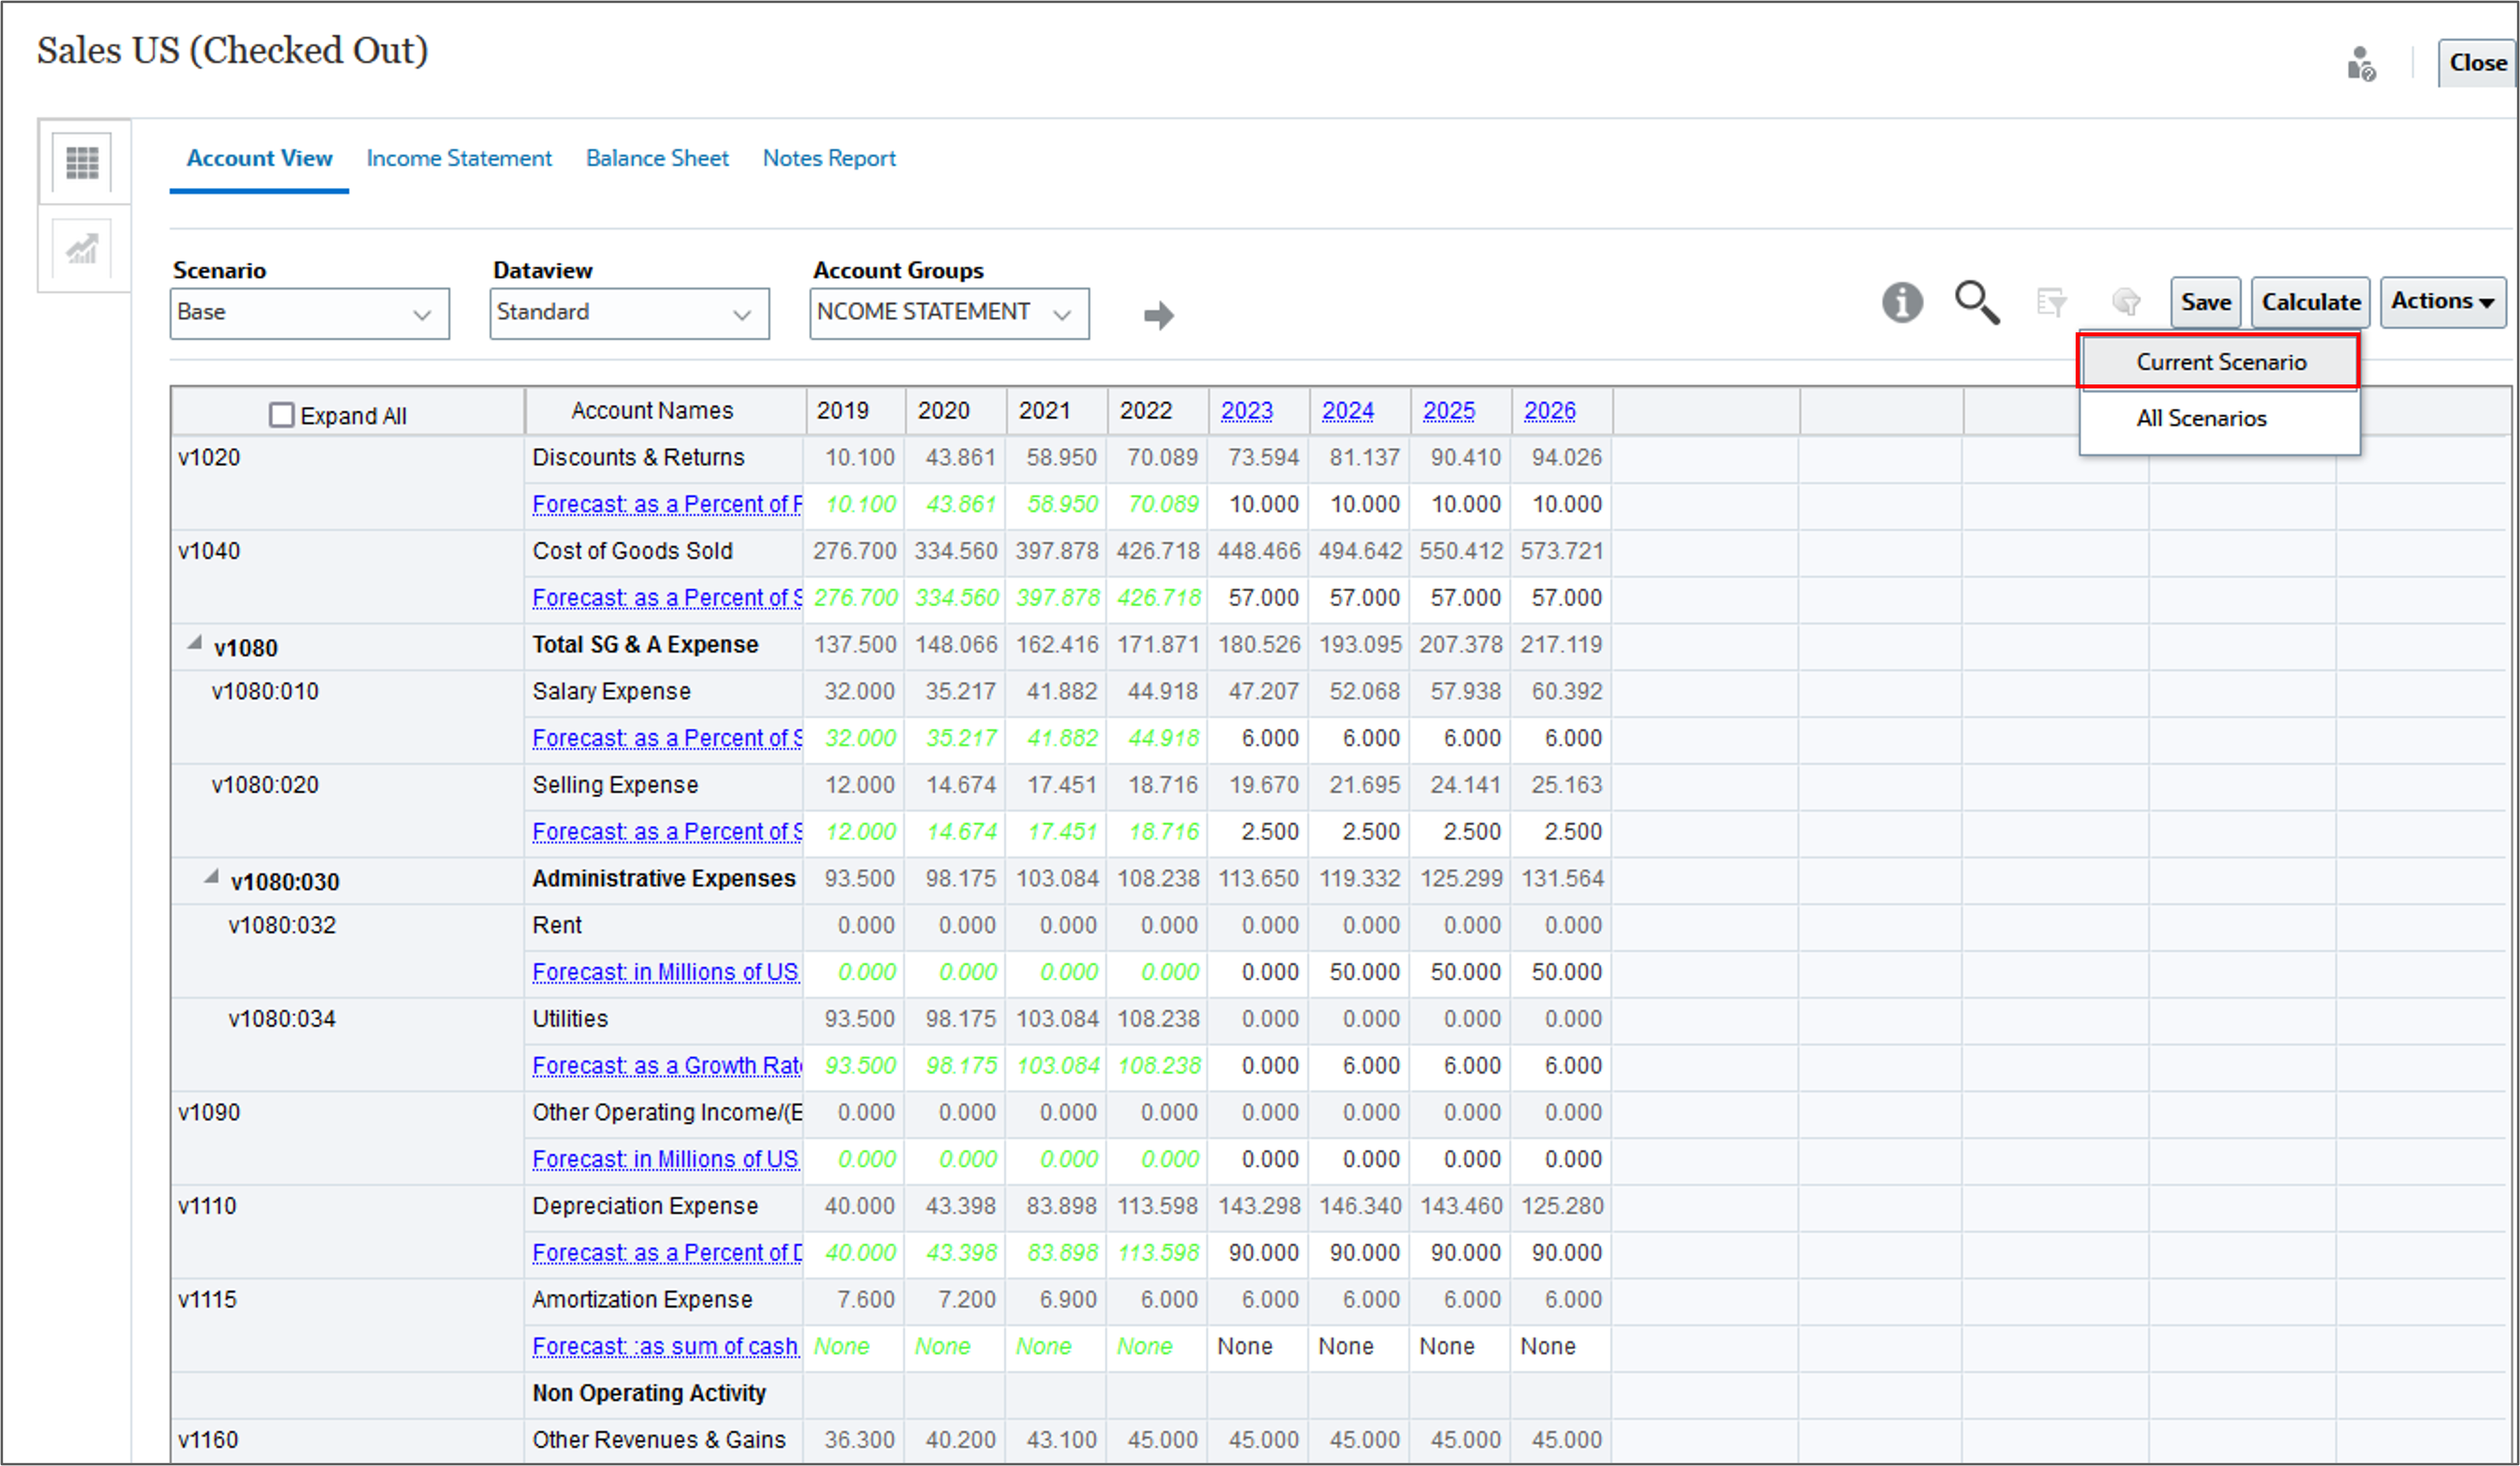
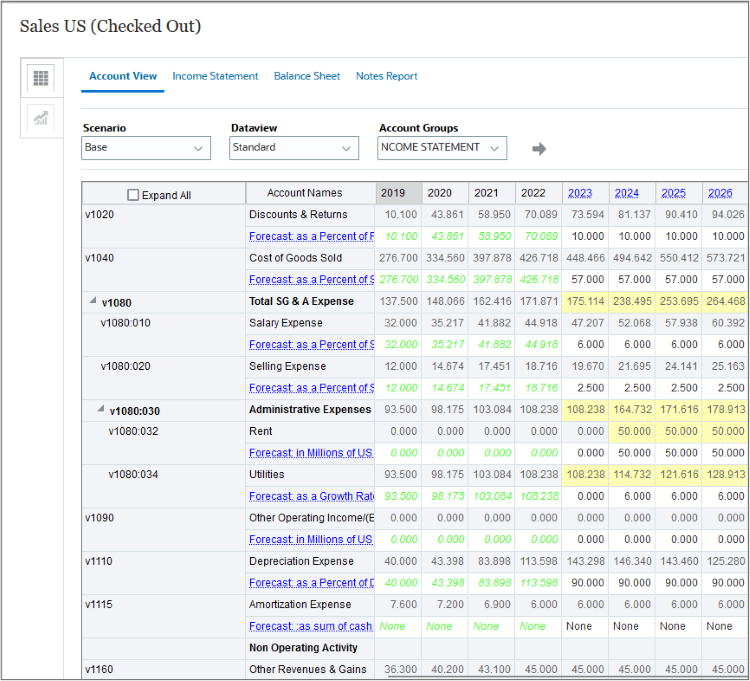
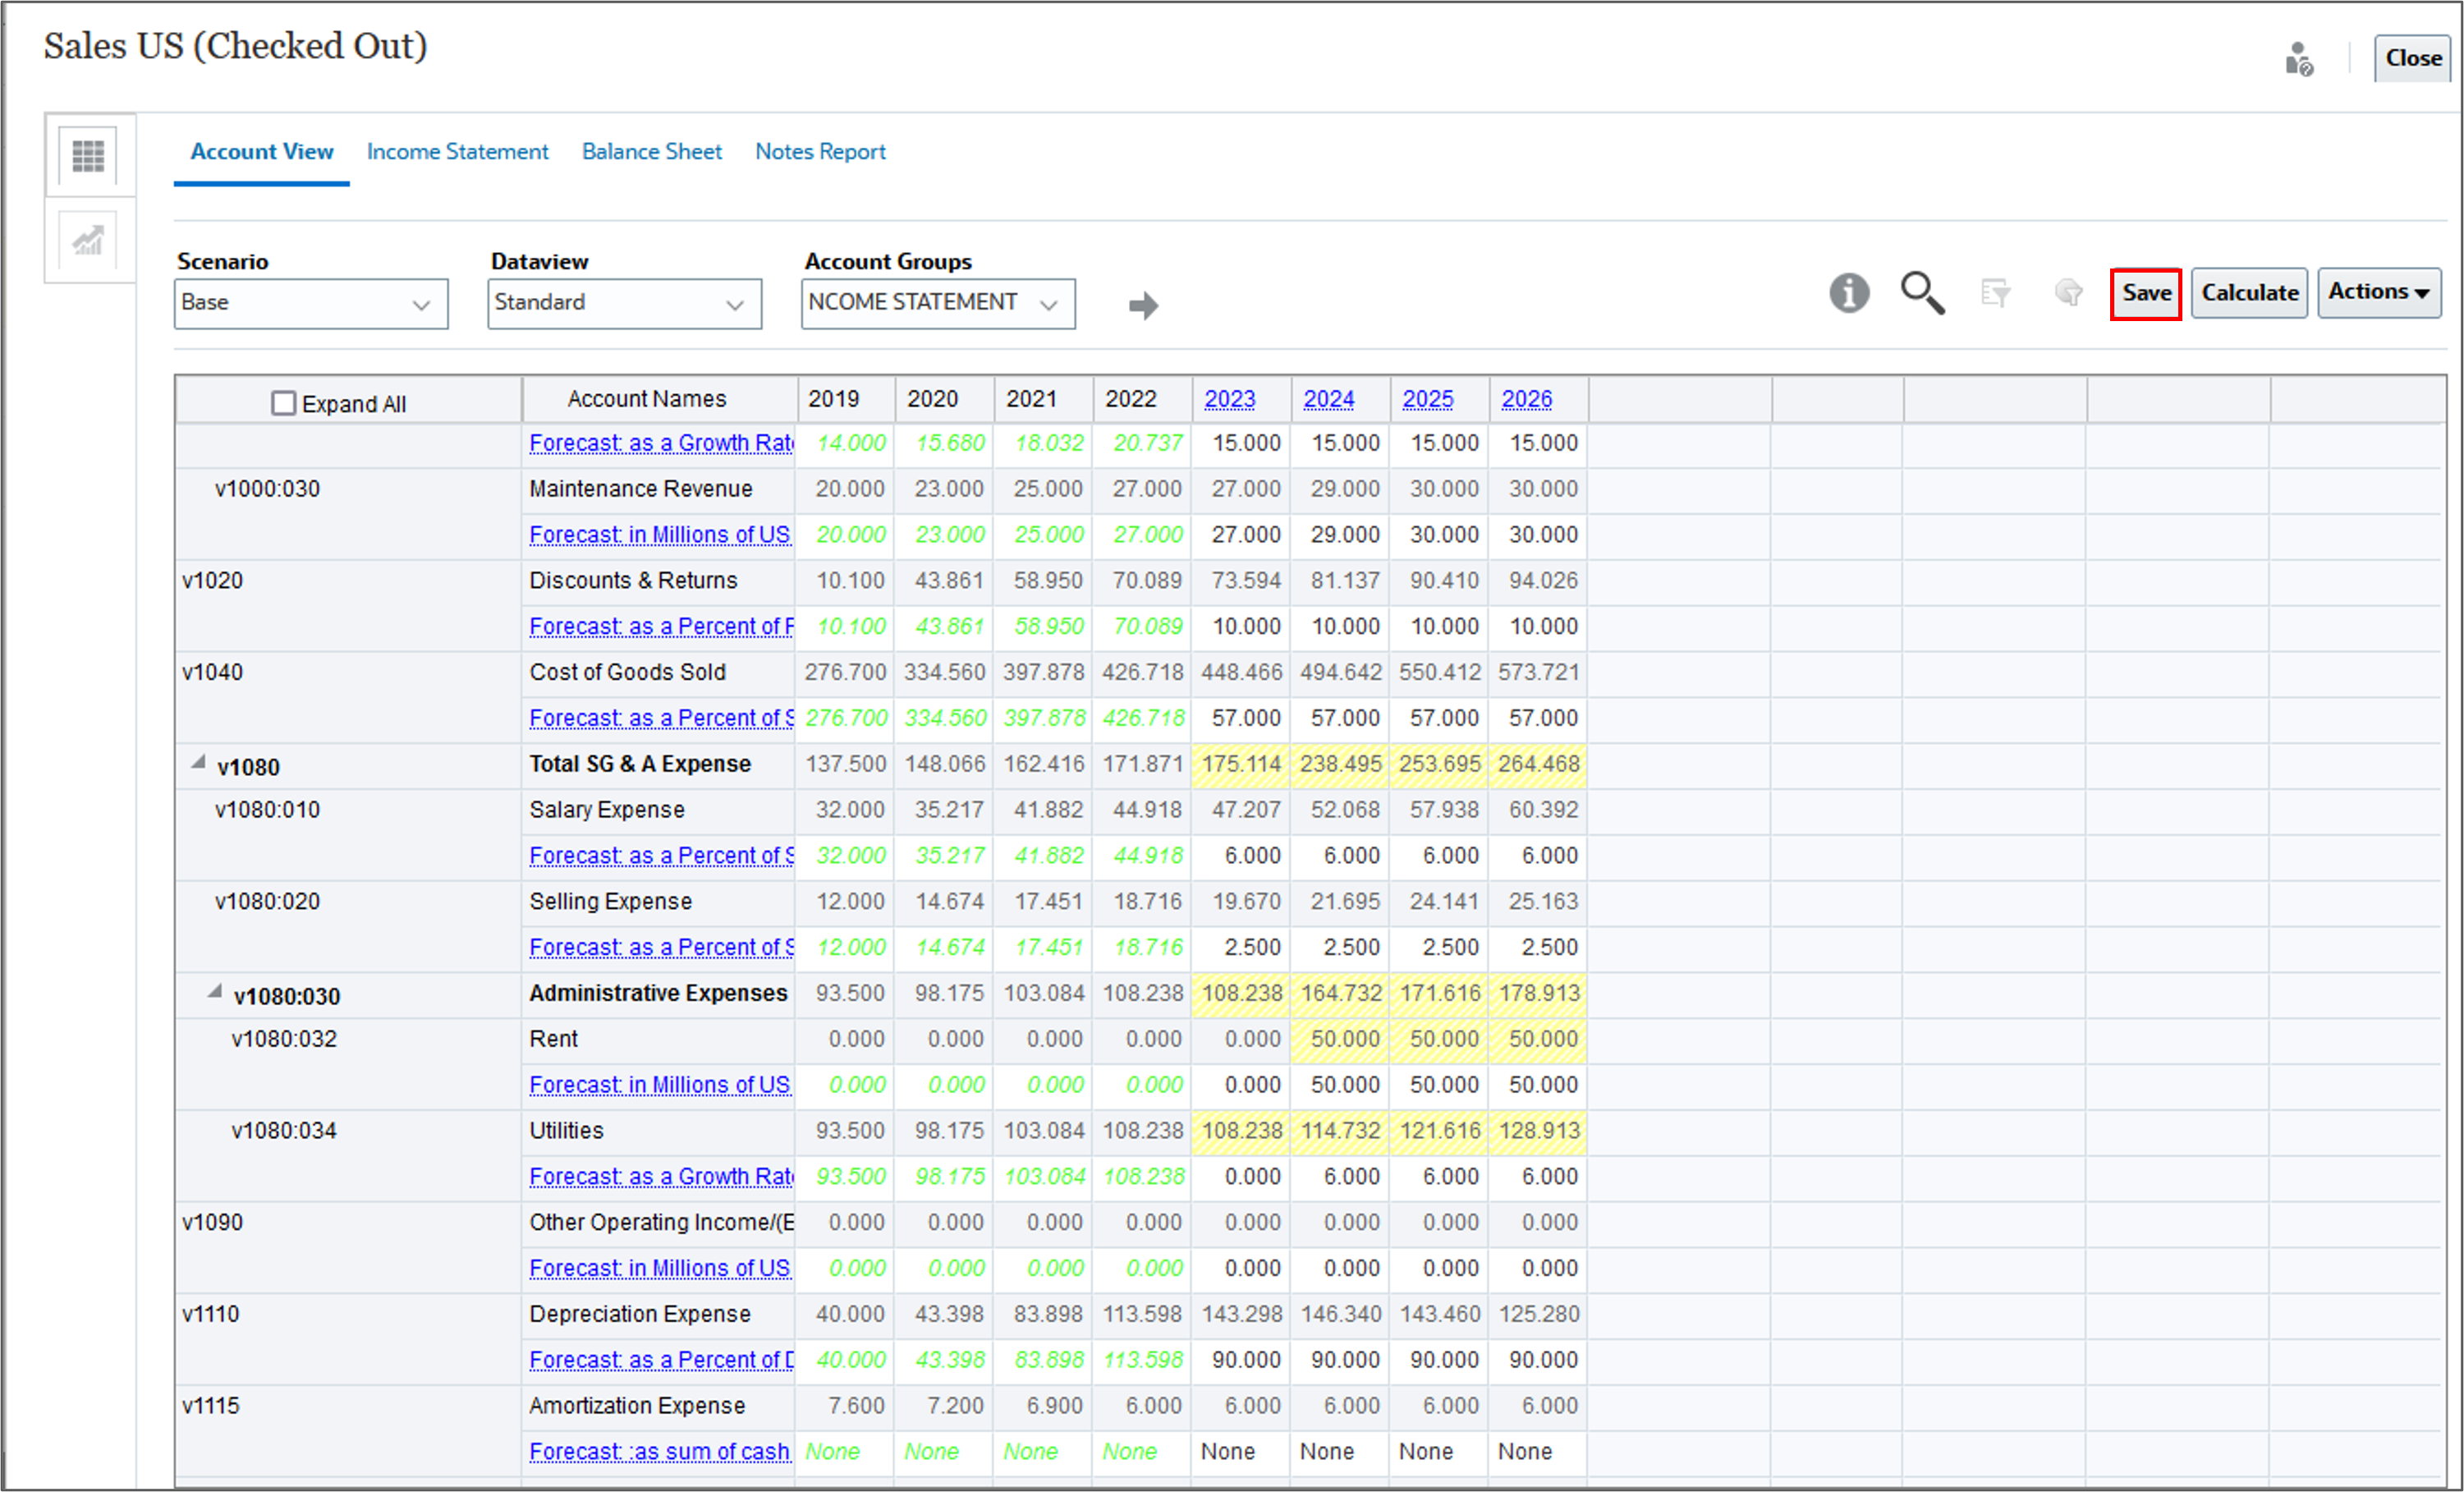
- Click Save.
- Click Calculate and select Current Scenario.
- Notice that the subaccount data rolls up to Administrative Expenses, and data for Administrative Expenses rolls up to the main account, Total SG & A Expense.
- Click Save.
Verifying subaccount data in reports
In this section you verify subaccount data in the Income Statement.
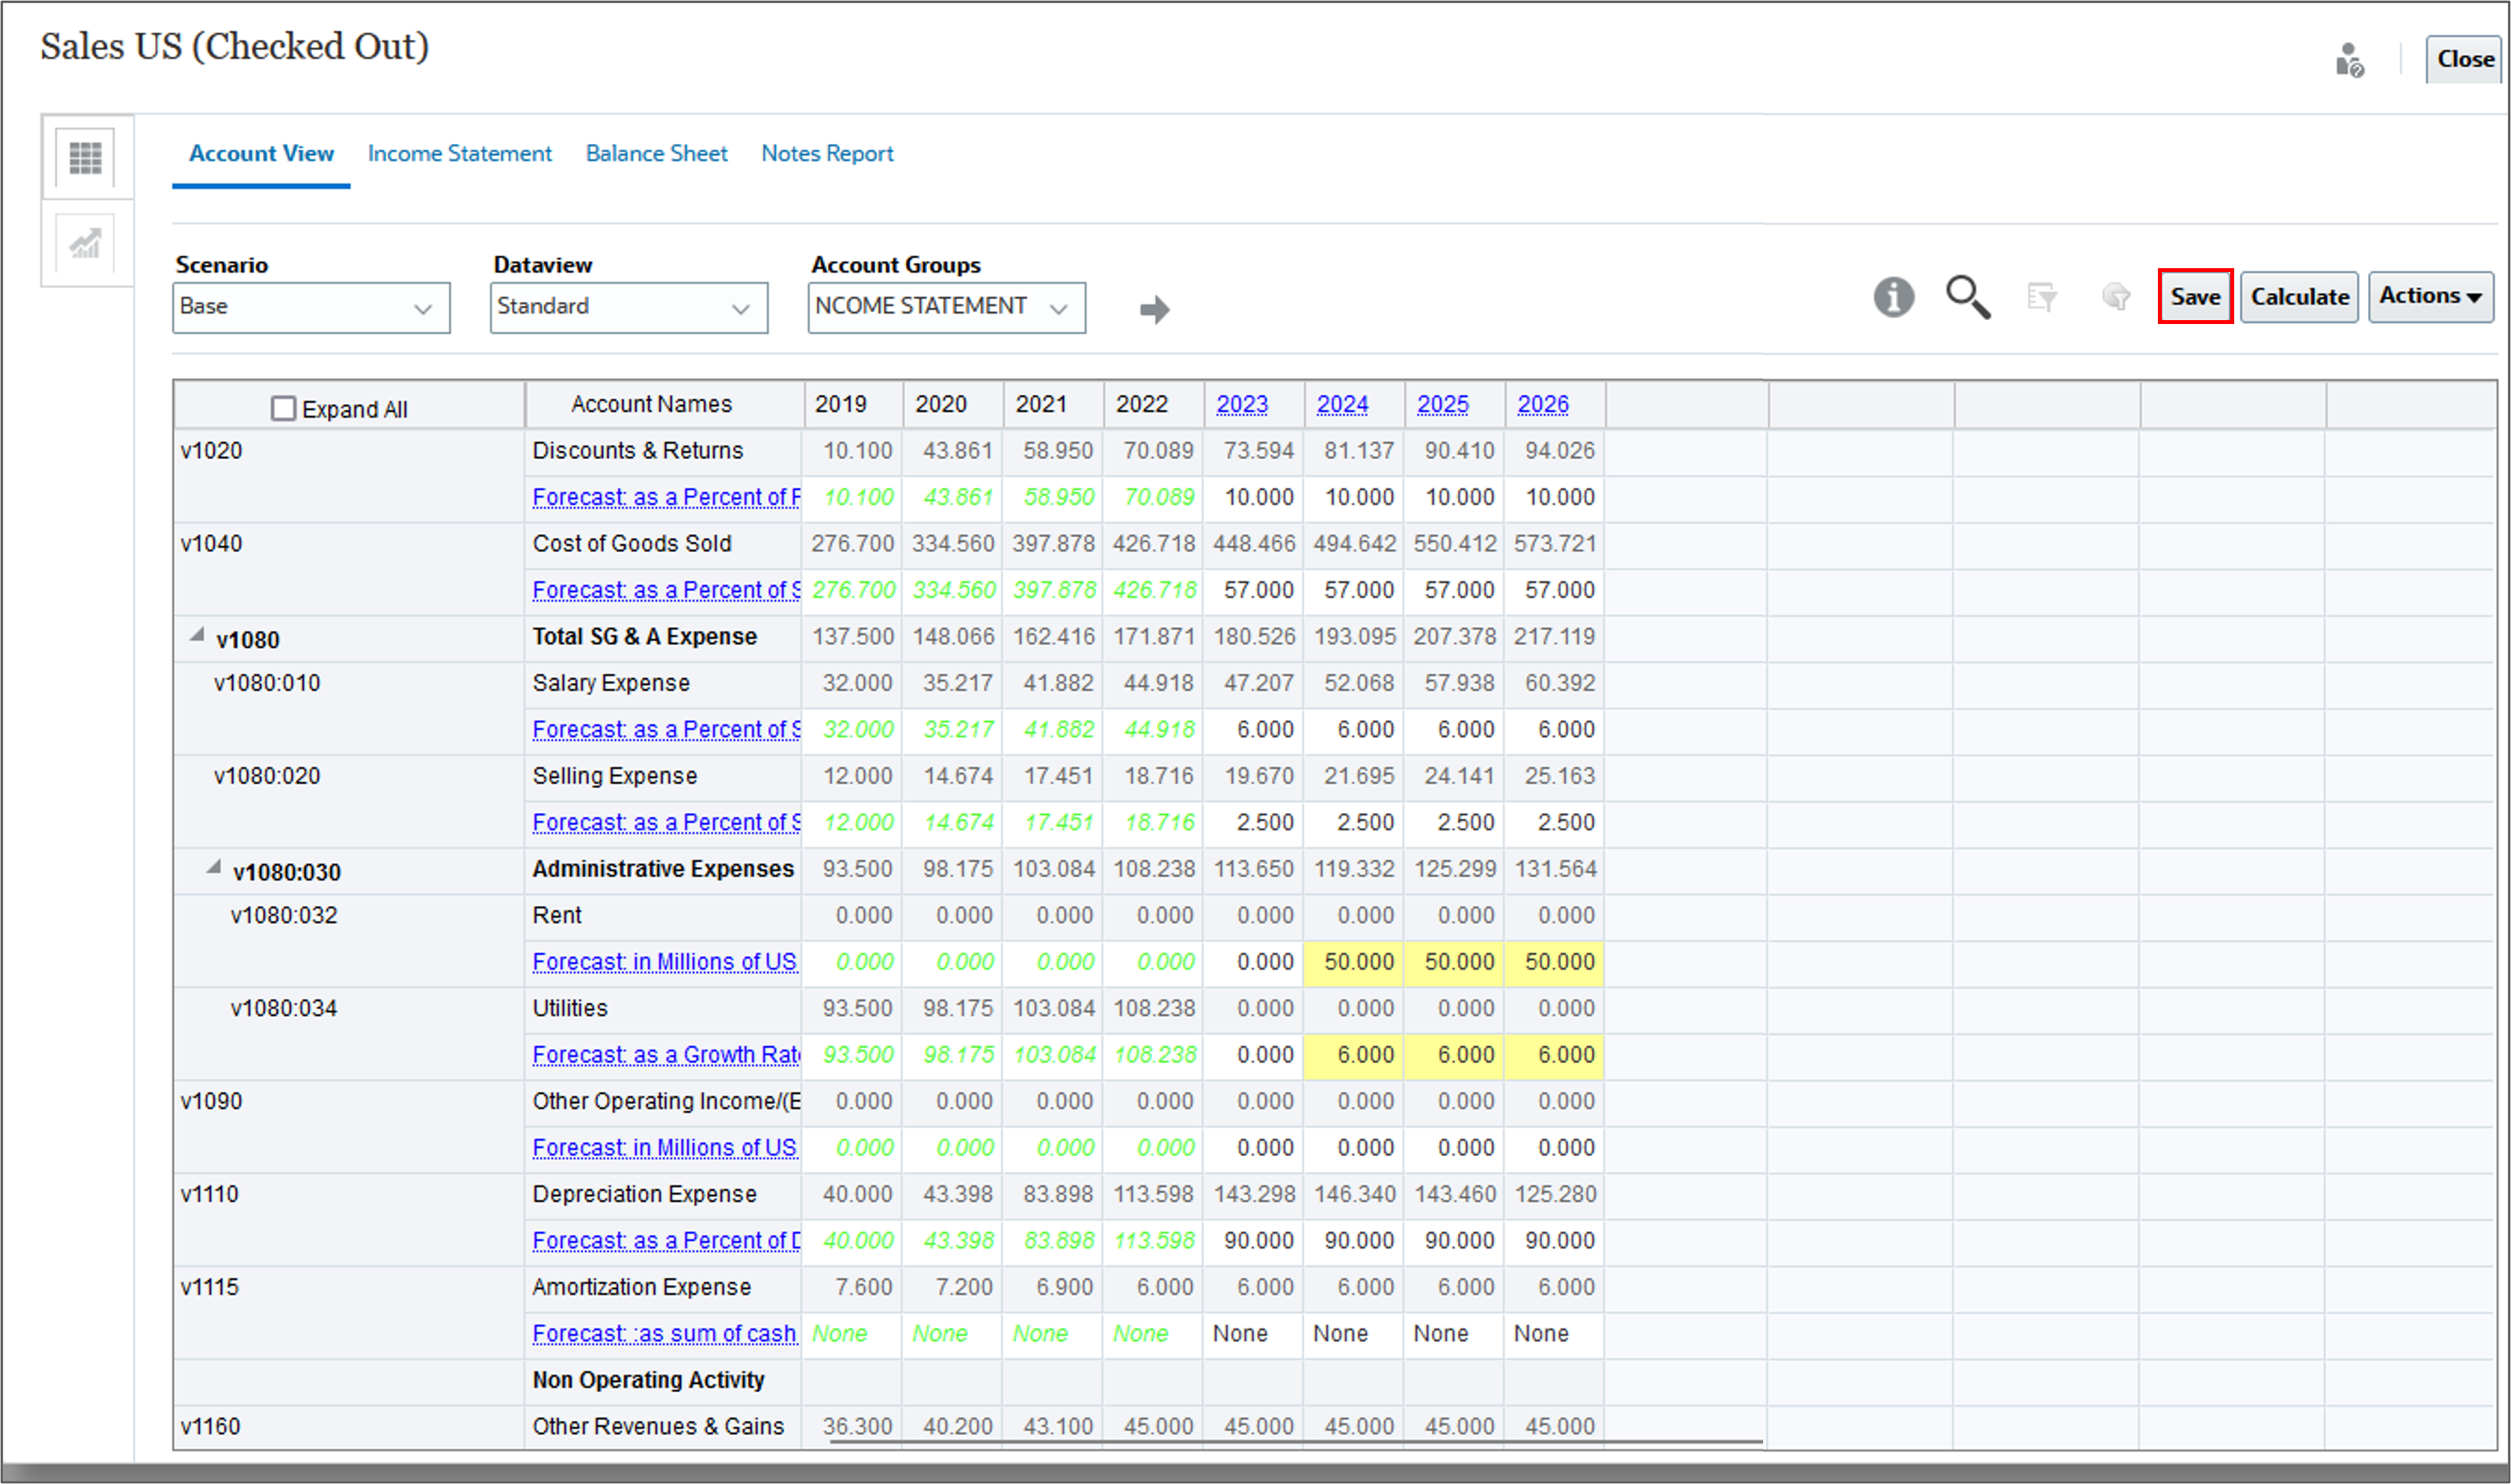
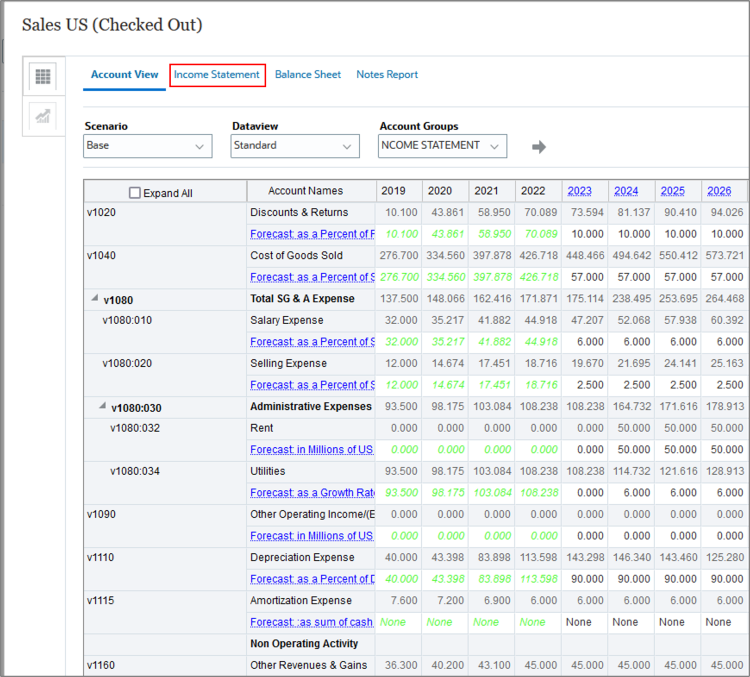
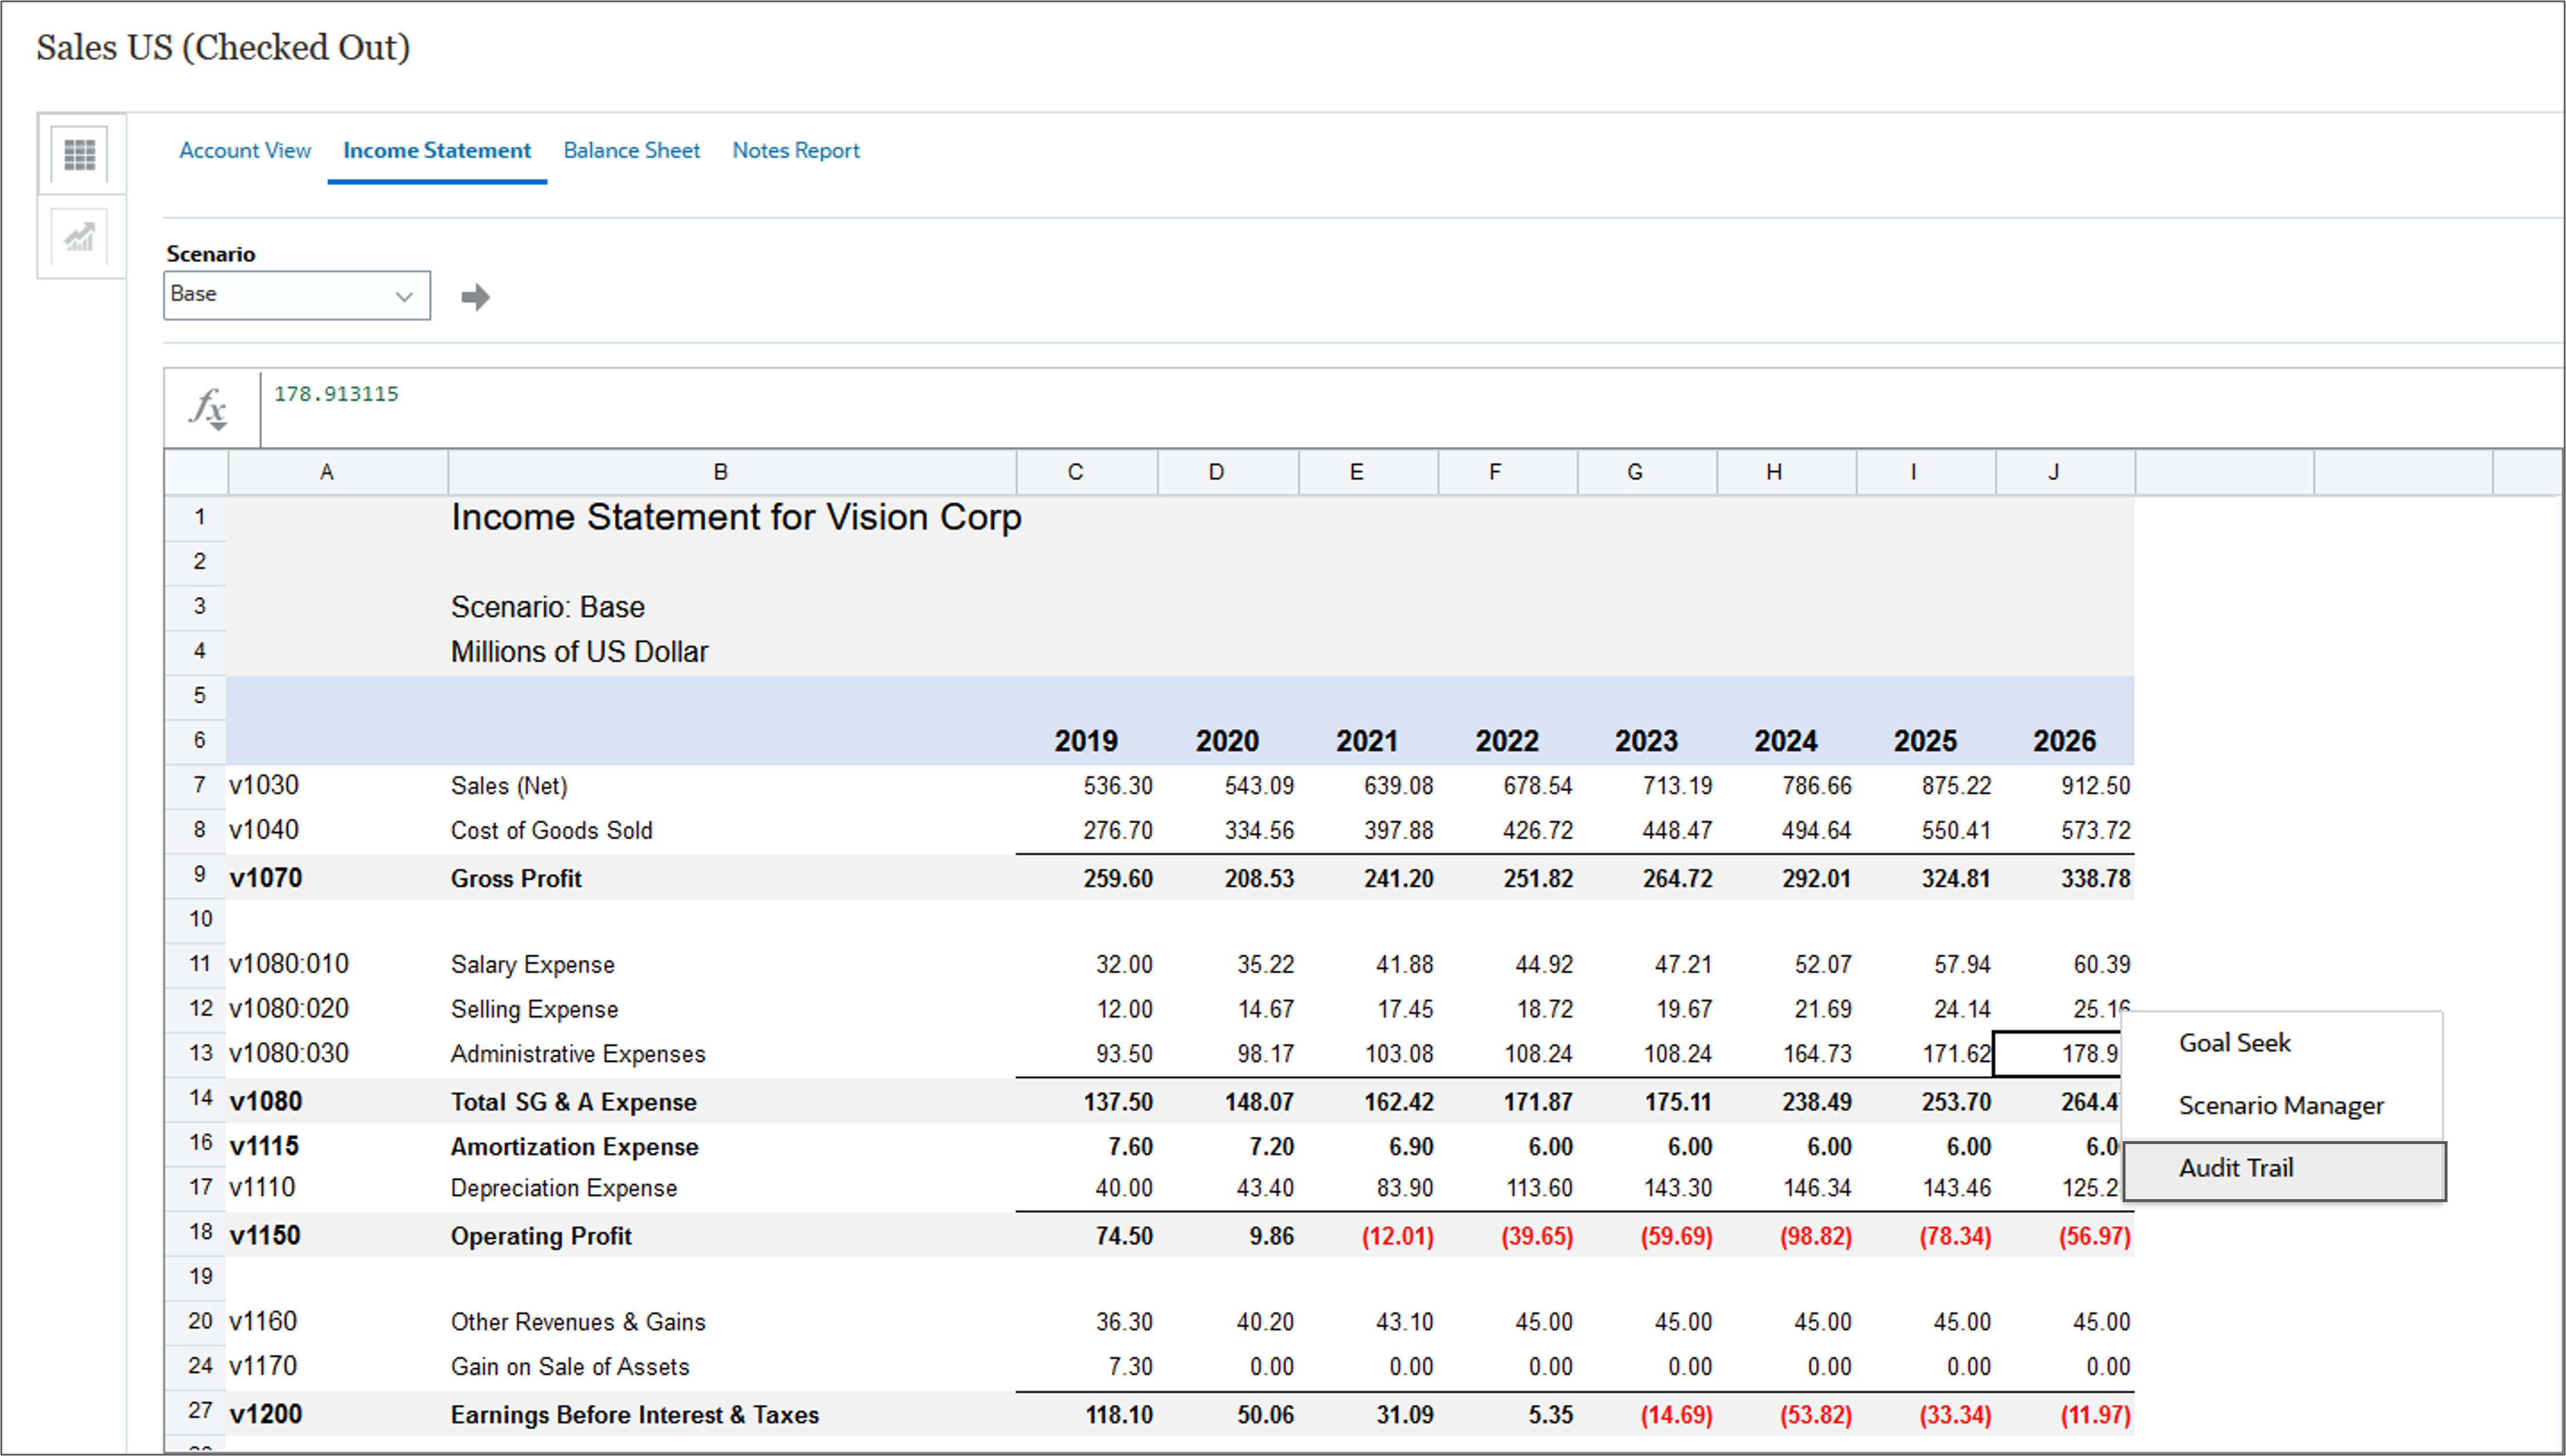
- Click the Income Statement tab.
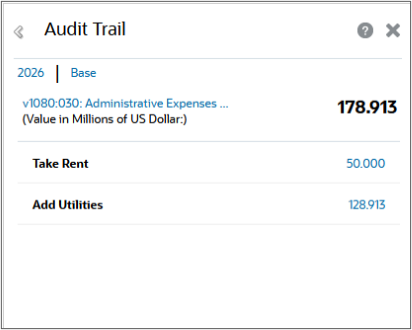
- Right click the 2026 value for Administrative Expenses, and select Audit Trail.
- Notice that the Audit Trail panel displays the subaccount data.
- Click X to close the Audit Trail panel.

Adding subaccounts to Balance Sheet accounts
In this section, you review and add subaccounts for Balance Sheet accounts. Adding subaccounts to Balance Sheet accounts works differently than adding subaccounts to Income Statement accounts. When you add subaccounts for Balance Sheet accounts that already have related accounts, such as a "change in" account, subaccounts are also added for all of those related accounts.
Reviewing subaccounts for Balance Sheet accounts
In this section you review subaccounts for Balance Sheet accounts.
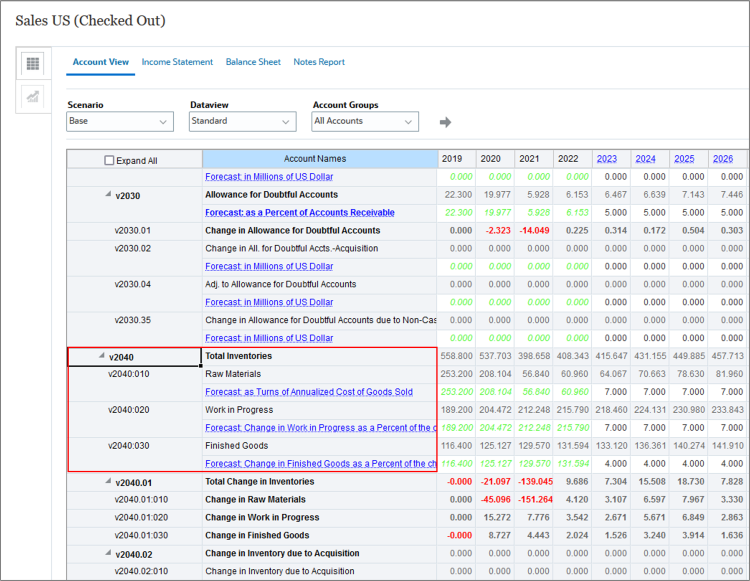
- Let’s take a look at an example of subaccounting on the balance sheet. Click the Account View tab.
- Change the Account Group to All Accounts and click () Refresh.
- Scroll to v2040. Notice that Total Inventories includes three subaccounts: Raw Materials, Work in Progress, and Finished Goods. The Raw Materials account has an account number that includes the main account 2040 and the subaccount 10.
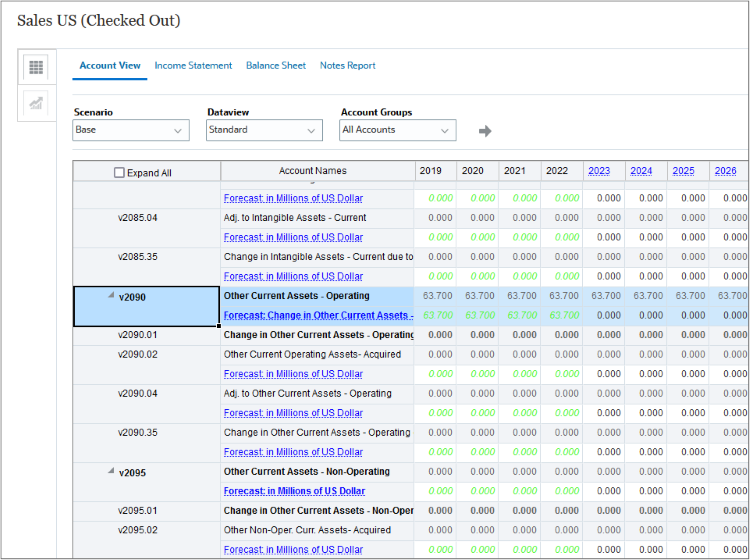
Adding subaccounts to other current assets
In this section you add subaccounts to Balance Sheet accounts.
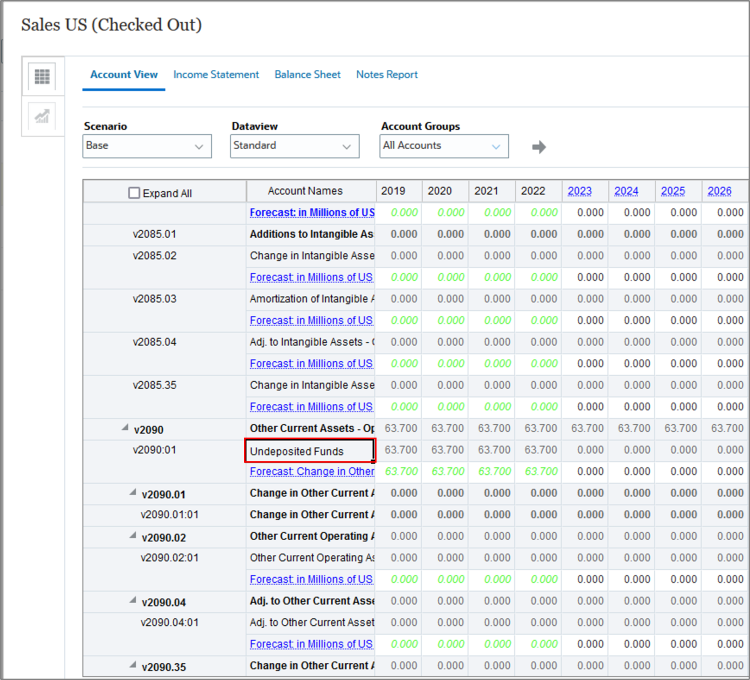
- Scroll to v2090 Other Current Assets - Operating.
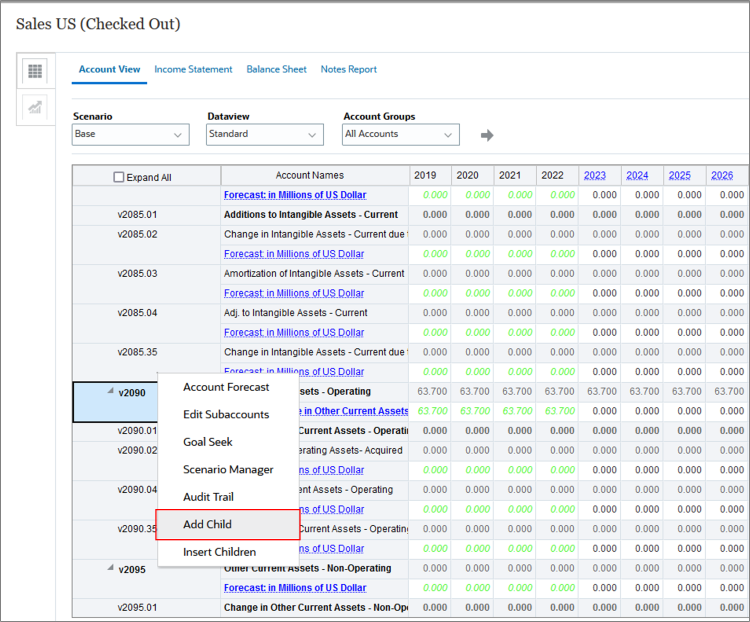
- Right-click v2090, and select Add Child.
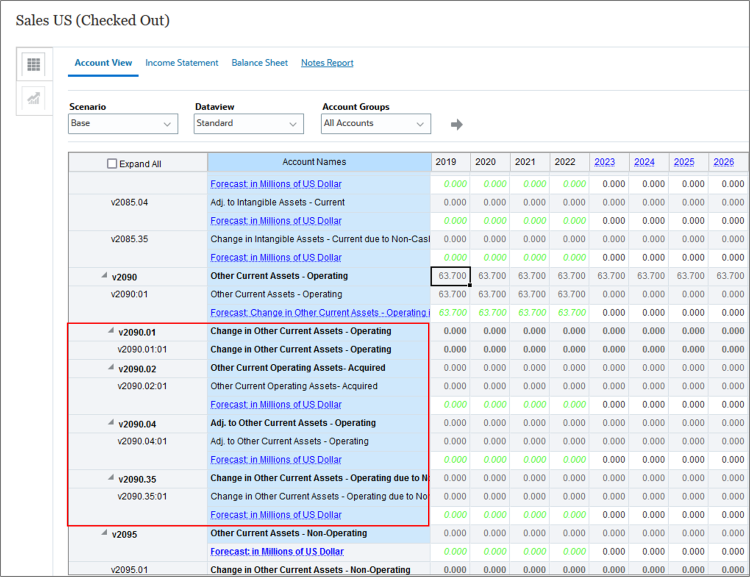
- Notice that each related account now has a new subaccount. When you subaccount a financial account that has related accounts, all of the related accounts are subaccounted automatically.
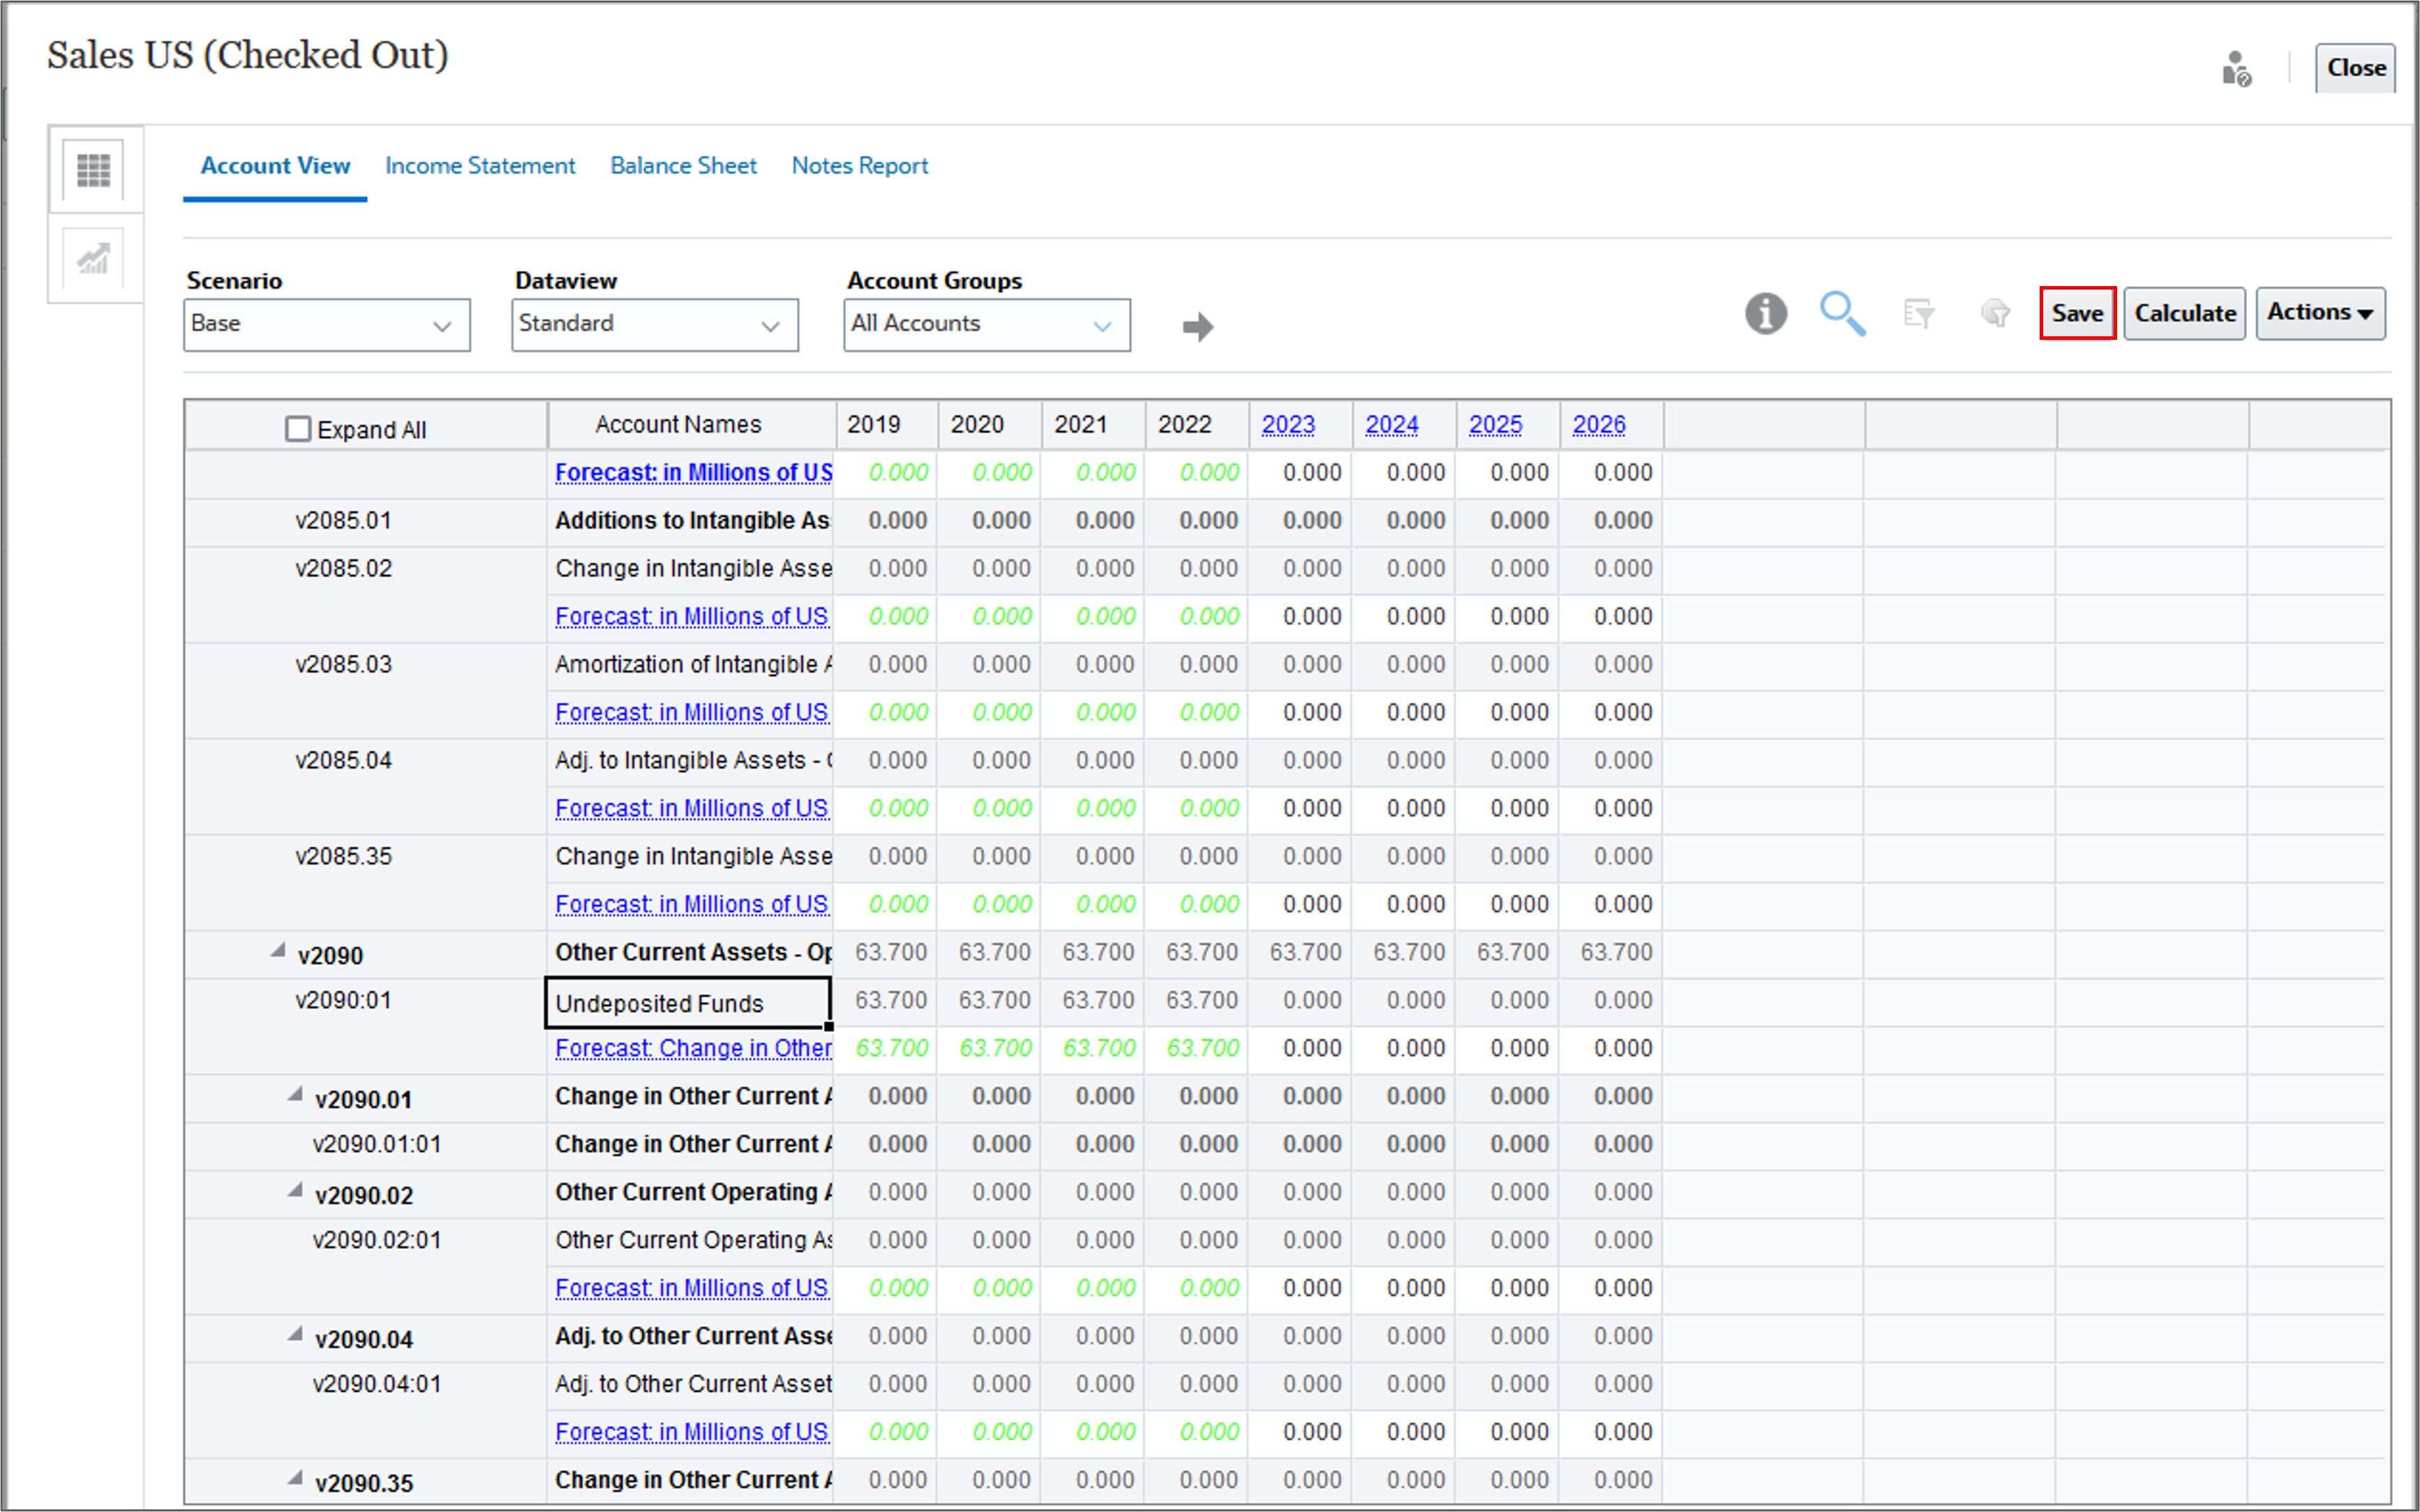
- For the v2090:01 row that you just added, enter the Account Name Undeposited Funds to better reflect what the data for this account represents.
- Click Save.
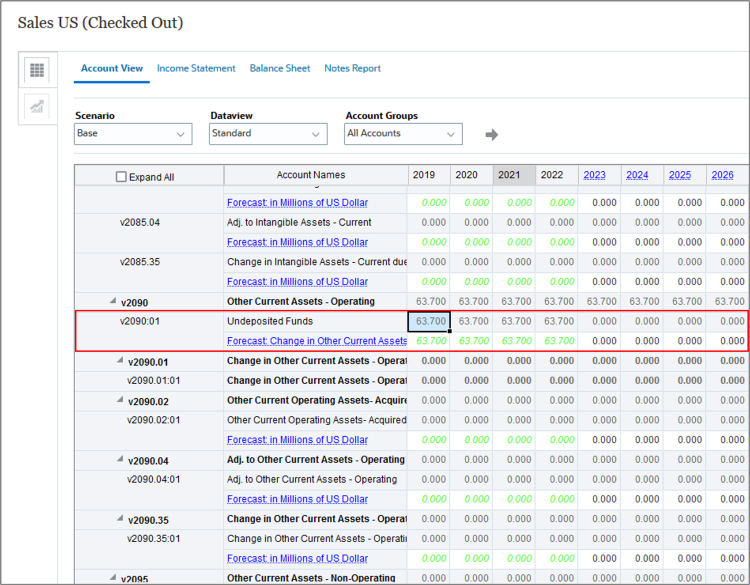
- Notice that the Account Names column now includes Undeposited Funds. Now you can track the part of Other Current Assets that is from undeposited funds separately, while still including its value in the total.
Related Links
Managing subaccounts with Strategic Modeling
F95951-03
March, 2026