Introduction
This tutorial shows you how to login to Planning, navigate Planning, and access Planning in Smart View.
Background
Service Administrators are tasked with setting up Planning and provisioning users. With a provisioned username and password, you can log on to a Cloud EPM instance using a URL, also provided by your Service Administrator. Here is a production environment URL pattern: https://epm-idDomain.epm.dataCenterRegion.oraclecloud.com/epmcloud
Oracle Fusion Cloud Enterprise Performance Management environments utilize the Redwood Experience, which offers a modern interface with unique features.
Prerequisites
Cloud EPM Hands-on Tutorials may require you to import a snapshot into your Cloud EPM Enterprise Service instance. Before you can import a tutorial snapshot, you must request another Cloud EPM Enterprise Service instance or remove your current application and business process. The tutorial snapshot will not import over your existing application or business process, nor will it automatically replace or restore the application or business process you are currently working with.
Before starting this tutorial, you must:
- Have Service Administrator access to a Cloud EPM Enterprise Service instance.
- Have the Planning sample application (Vision) created in your instance.
- Microsoft Excel installed.
- Smart View installed and configured to connect to your instance.
Logging on to Planning
In this section, you log on to the Planning URL provided by your Service Administrator, using your Username and Password.
Note:
This tutorial assumes you already have a Sample application created in your environment. Please refer the section on Sample Application creation in the tutorial - Creating the Planning Business Process.- Go to the URL provided by your Service Administrator.
The login page is displayed.
- Enter your Username and Password.
- Click Go.
Selecting a Navigation Flow
- Click
 (Navigation Flow) icon on the top right portion of the Home Page.
 - If not already selected, click Default.

When the Default Navigation Flow is selected, the cards and clusters on the Home Page are updated to display:
Navigating the Planning Home Page
In this section, you identify sections of the Planning Home Page.
 Cards and Clusters
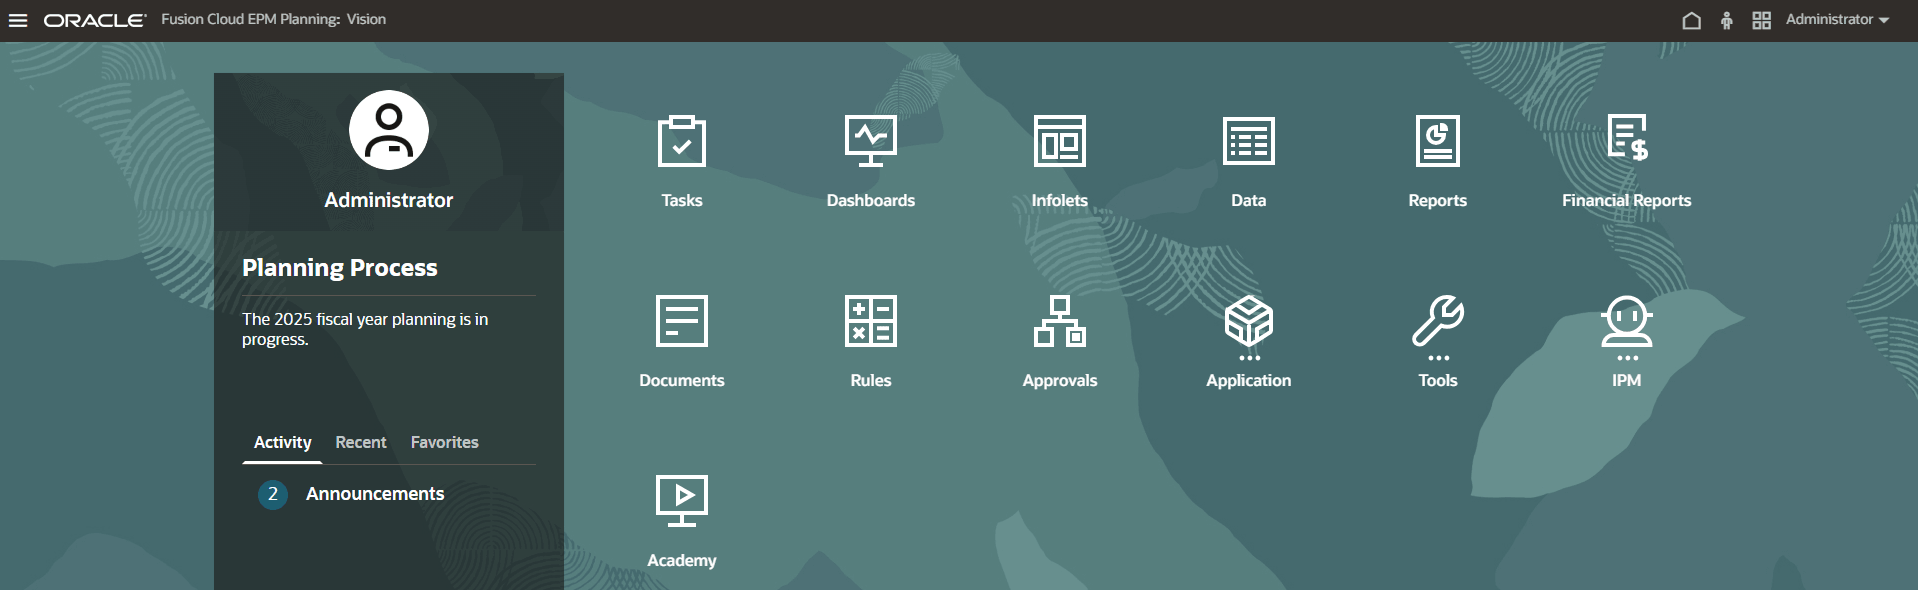
When you log on to an environment, the Planning Home Page displays clusters and cards that group the activities that you can perform in the environment.
Cards provide access to key tasks, tutorials, and related information. When you click a card, a page containing available shortcuts or tasks opens. Availability of shortcuts and tasks on a page depends on the role you have in the environment.
You can customize which cards and clusters to display by setting up Navigation Flows.
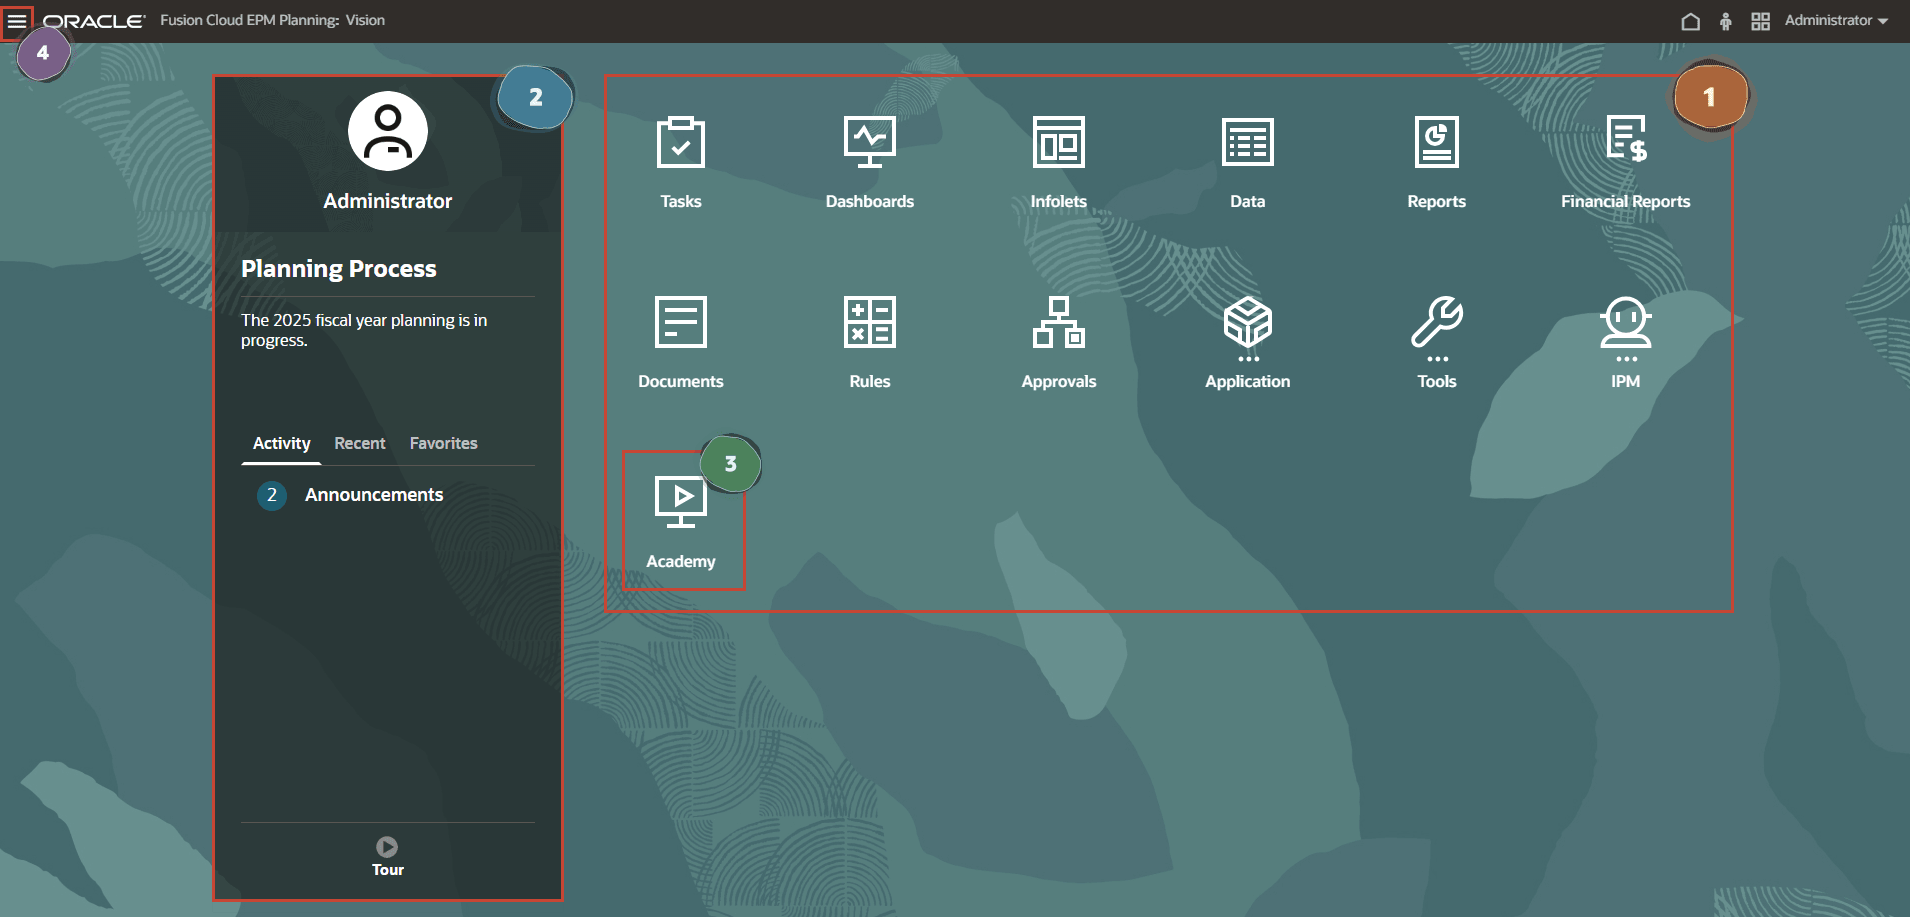
 Announcements Area
The Announcements area gives you quick access to key information including messages and the tasks assigned to you.
 Academy
The Academy gives you access to a variety of resources for understanding and working with the service. Available resources include video overviews, tutorials, and information on key tasks.
 Navigator
The Navigator menu opens a list of shortcuts to features and functionality that you normally access from the cards available on the Planning Home Page. Click Navigator to display the list of shortcuts.
Exploring the Navigator Menu
Clicking ![]() (Navigator) displays a list of links that connect you to Planning functionality.
(Navigator) displays a list of links that connect you to Planning functionality.
You can also select which Navigation Flow to use by selecting it in the Navigator.

In this example, the Default navigation flow is selected. Included in that Default Navigation Flow is an Application cluster. The Application cluster includes: Overview, Settings, Valid Intersections, Data Exchange, Jobs, Services, Task Manager, Cell-Level Security and Approval Groups.
Navigating to the Application Pages
In this section, you navigate to the Application page and review the tasks you can perform on each tab.
- From the Planning Home Page, click Application, then Overview.
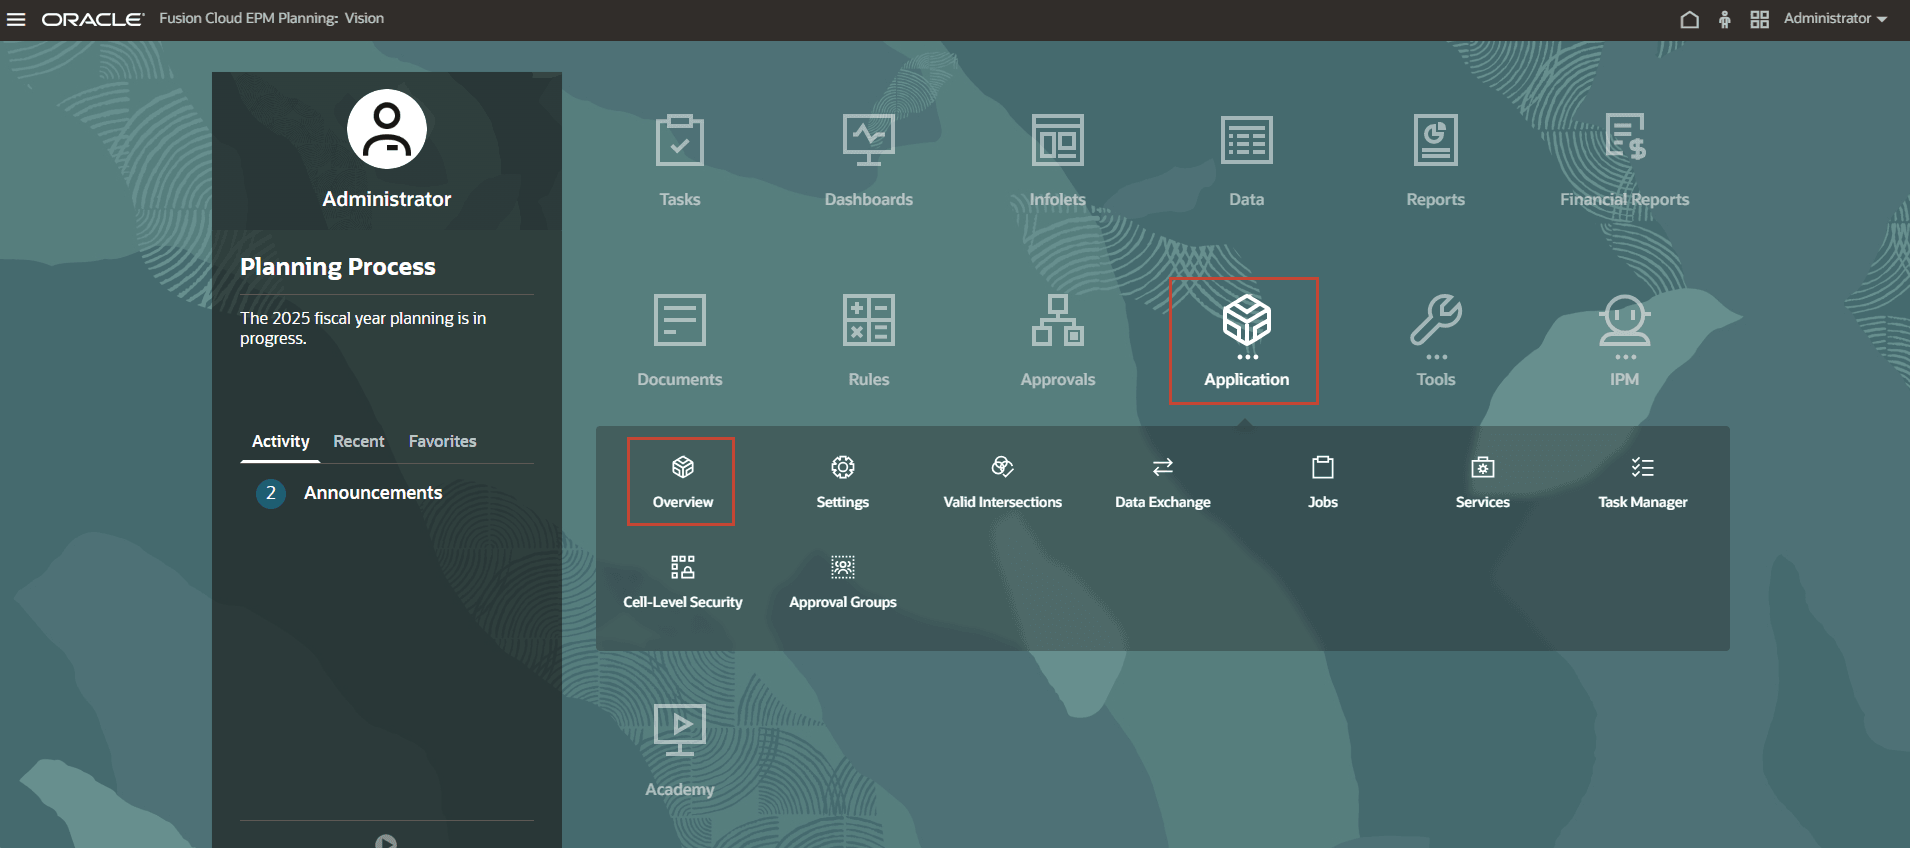
- On the Overview tab, review the following information:
- Name (Application name)
- Description
- Application Type
- Application Chart Data, displaying the number Data Entry Forms, Rules, Approval Units, and Dimensions in each cube.
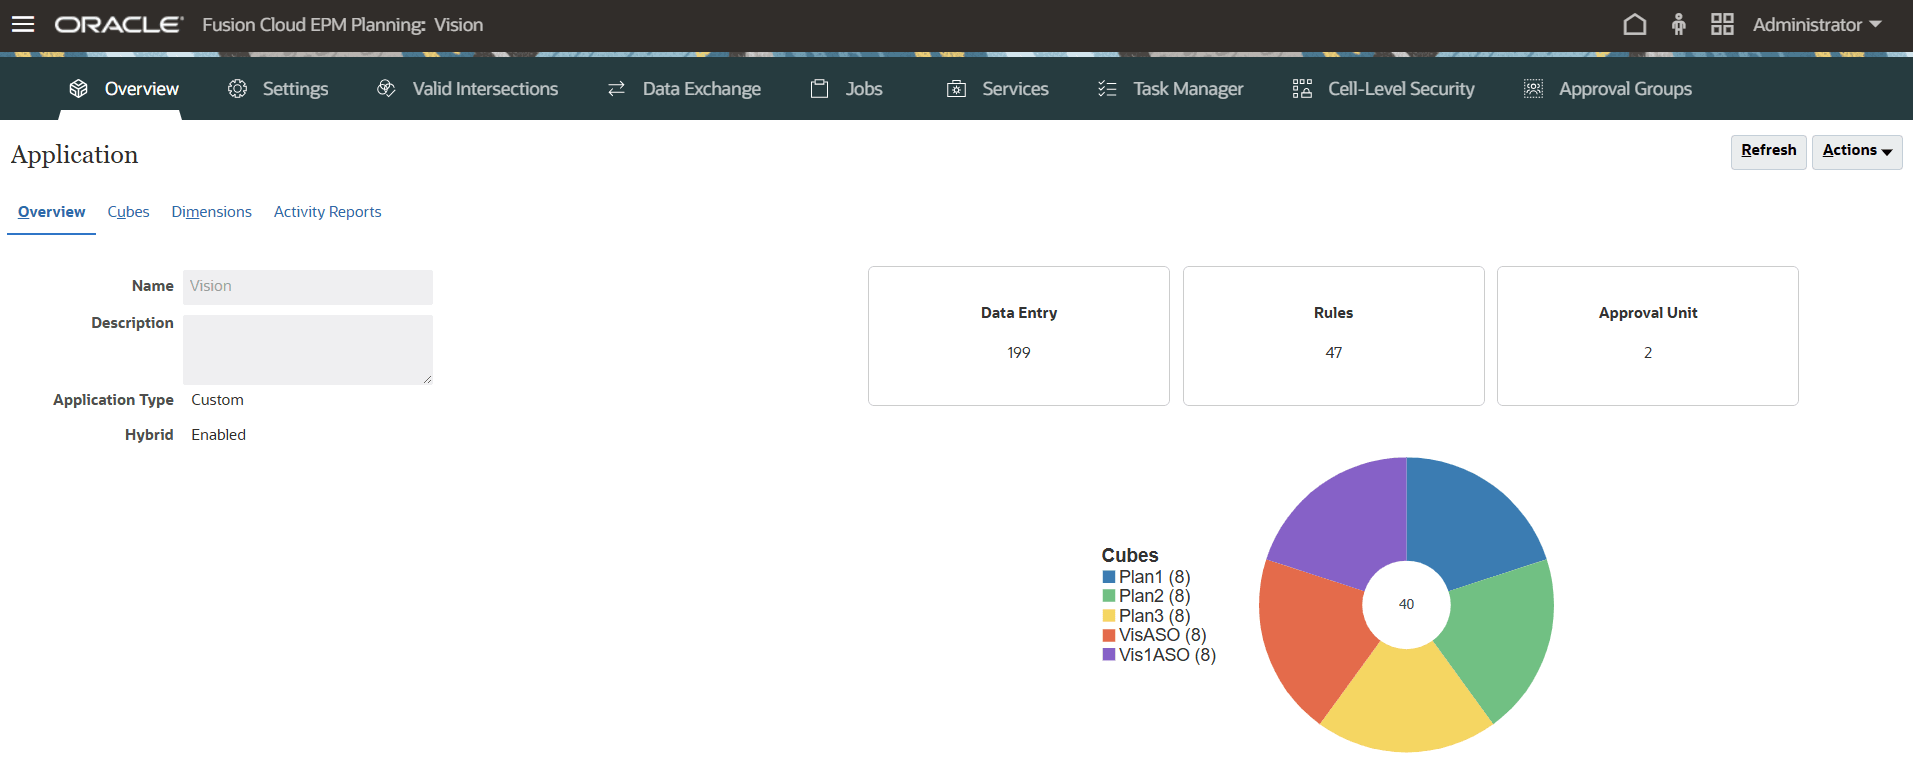
- Click Refresh to update page content.
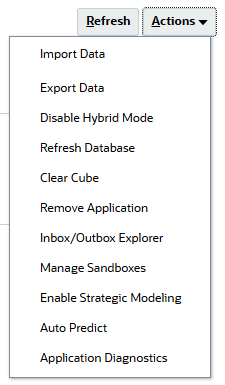
- Click the Actions menu to access tasks.
- Click the Cubes tab.
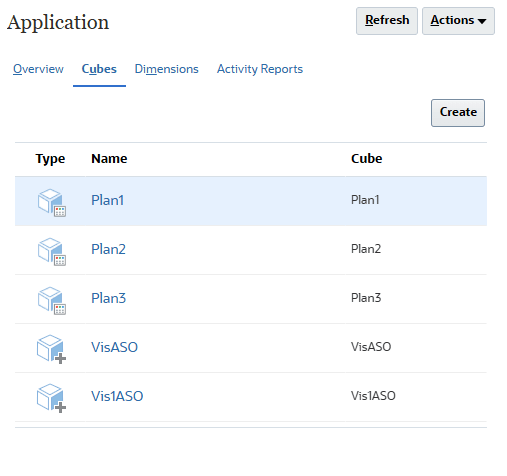
Create cubes or review cube information on this tab.
- Click a cube name to display basic cube information.
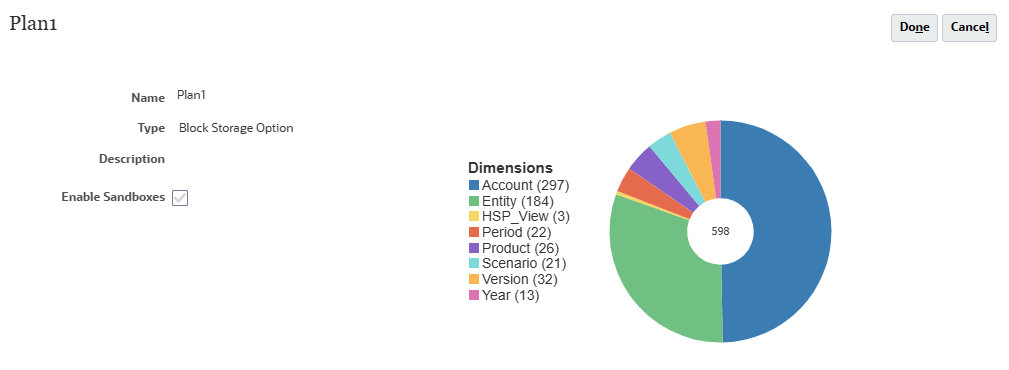
- When finished reviewing, click Done.
- Click the Dimensions tab.
Create, import, or export dimensions on this tab.
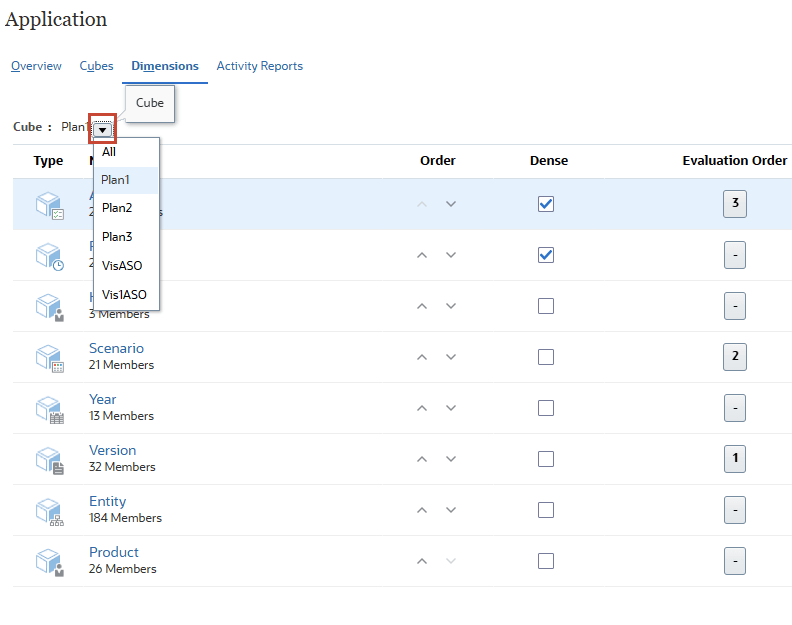
Dimensions and its number of members are displayed for each cube. You can choose dimensions displayed by selecting All or a cube name from the Cube dropdown list.
- Click a dimension name.
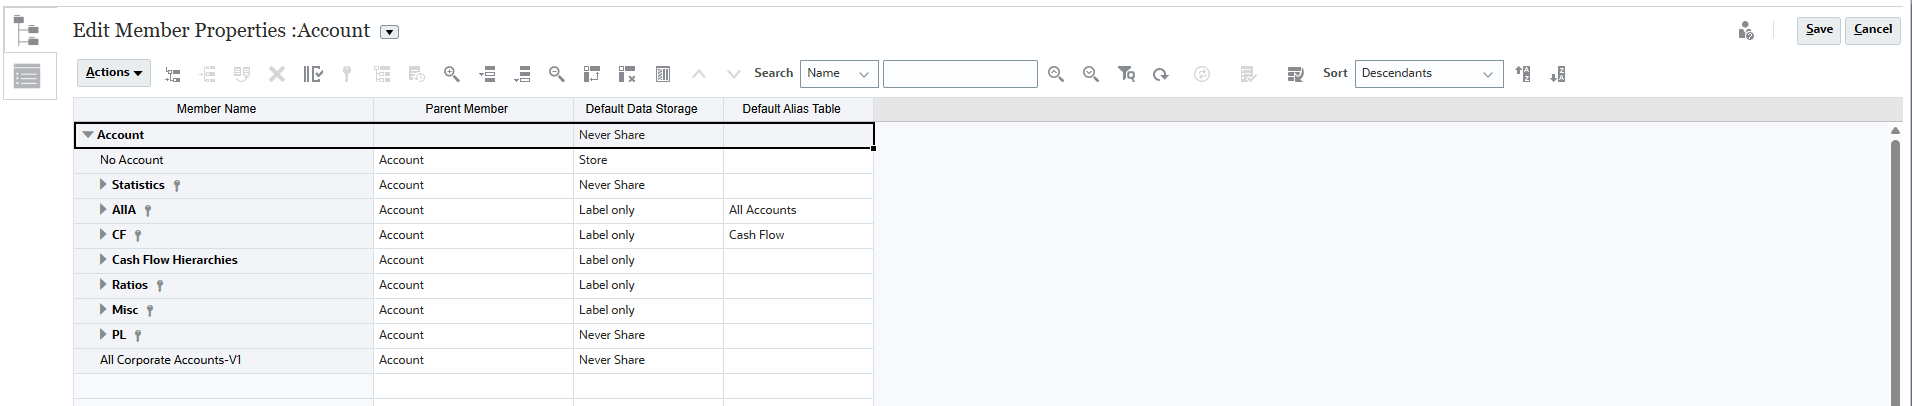
The Edit Member Properties dialog box is displayed. You can manage dimensions and members here.
- Click Cancel to close the dialog box without making any changes.
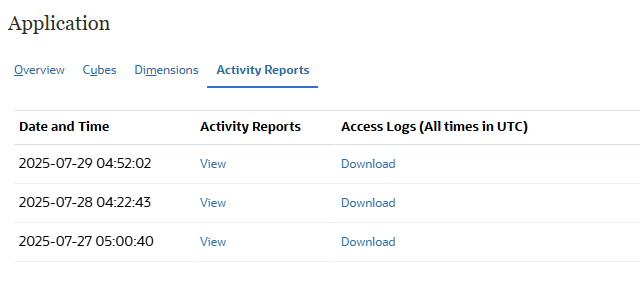
- Click the Activity Reports tab.
You can diagnose performance issues with business rules and pinpoint and address any issues using activity reports.
Accessing Planning in Smart View
In this section, you launch Smart View and connect to Planning.
- Launch Excel. Ensure that you have a blank worksheet open.
- On the Smart View ribbon, click Options.

- Under Advanced, verify that you have the correct Shared Connections URL entered.
Sample URL:
https://acme-epmidm.epm.us-phoenix-1.ocs.oraclecloud.com/workspace/SmartViewProviders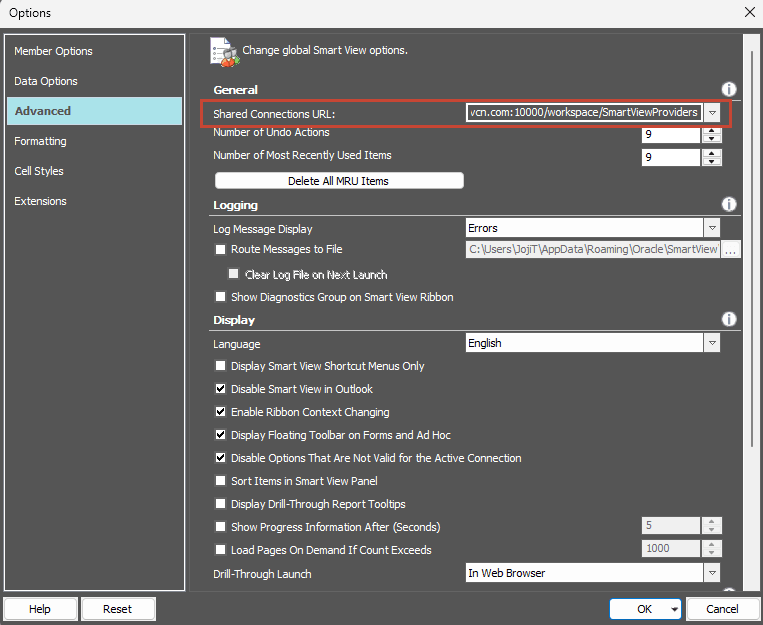
If you do not have the correct Shared Connections URL entered, contact your Service Administrator.
- Click OK.
- On the Smart View ribbon, click Panel.
- Click Shared Connections.
- If prompted to log on, enter your Username and Password, and then click Go.
- In Shared Connections, from the dropdown list, select the connection.
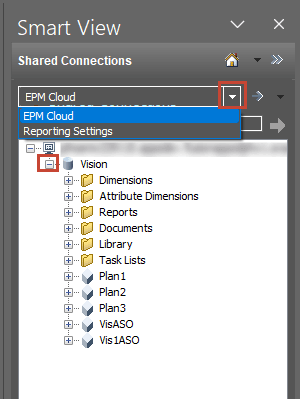
- Expand the server node.
- Expand the Planning business process node to display the business process components.
You can now start Planning with Smart View.
Note:
For more information on tasks you can perform with Smart View, see Working with Oracle Smart View for Office documentation.
Related Links
More Learning Resources
Explore other labs on docs.oracle.com/learn or access more free learning content on the Oracle Learning YouTube channel. Additionally, visit Oracle University to view training resources available.
For product documentation, visit Oracle Help Center.