Introduction
This 35-minute hands-on tutorial shows you how to add measures to Quota Planning in Oracle Sales Planning. The sections build on each other and should be completed sequentially.
Background
Measures enable you to collect objective, quantifiable data or data that indicates progress toward a performance or strategy target. While high-level measures may focus on overall performance of the organization, the low-level measures may focus on performance within teams or individuals.
Quota Planning builds best practices into its content, including its forms, calculations, dashboards, drivers, and measures. Enhance the planning process in your organization by adding custom measures, task lists, or approvals.
This tutorial shows you how to add custom measures needed by your organization.
Prerequisites
Cloud EPM Hands-on Tutorials may require you to import a snapshot into your Cloud EPM Enterprise Service instance. Before you can import a tutorial snapshot, you must request another Cloud EPM Enterprise Service instance or remove your current application and business process. The tutorial snapshot will not import over your existing application or business process, nor will it automatically replace or restore the application or business process you are currently working with.
Before starting this tutorial, you must:
- Have Service Administrator access to a Cloud EPM Enterprise Service instance. The instance should not have a business process created.
- If you haven't already, register for a free Oracle Cloud Customer Connect account so you can
access the required files.
- Download the latest Sales Planning Sample Application snapshot from this idea page.
- Upload and import the latest Sales Planning Sample Application snapshot into your Planning instance.
Note:
If you run into migration errors importing the snapshot, re-run the migration excluding the HSS-Shared Services component, as well as the Security and User Preferences artifacts in the Core component. For more information on uploading and importing snapshots, refer to the Administering Migration for Oracle Enterprise Performance Management Cloud documentation.
Setting Values for User Variables
In this section, you review the substitution variables that are set up for the application.
- From the home page, click Tools, then User Preferences.
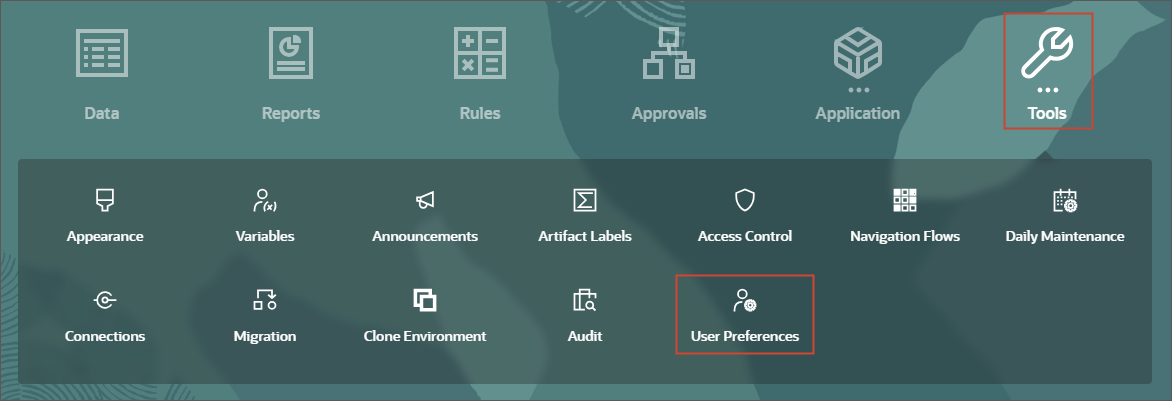
- On the left, under Preferences, click User Variables.
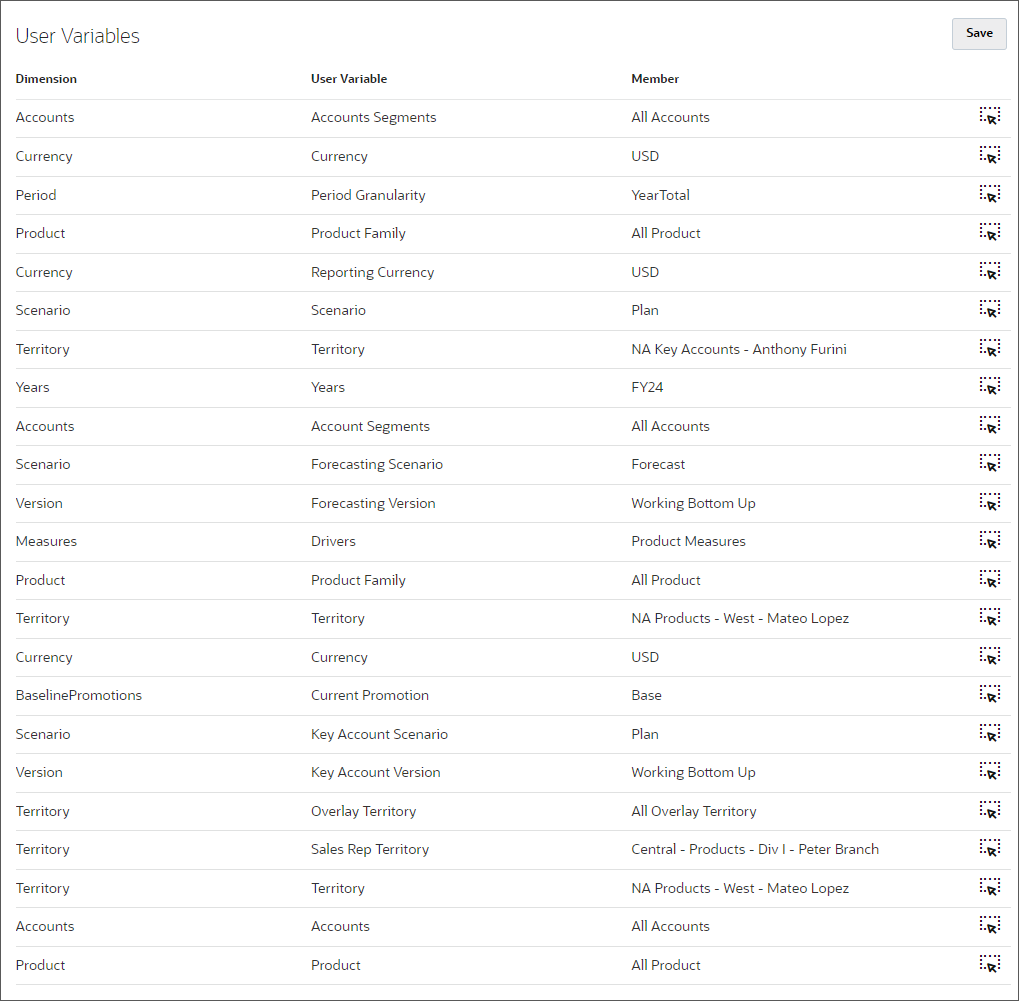
- For each variable, click its
 (Select Member) to select a member as the variable's value:
Dimension User Variable Member Accounts Accounts Segments All Accounts Currency Currency USD Period Period Granularity YearTotal Product Product Family All Product Currency Reporting Currency USD Scenario Scenario Plan Territory Territory NA Key Accounts - Anthony Furini Years Years FY24 Accounts Account Segments All Accounts Scenario Forecasting Scenario Forecast Version Forecasting Version Working Bottom Up Measures Drivers Product Measures Product Product Family All Product Territory Territory NA Products - West - Mateo Lopez Currency Currency USD BaselinePromotions Current Promotion Base Scenario Key Account Scenario Plan Version Key Account Version Working Bottom Up Territory Overlay Territory All Overlay Territory Territory Sales Rep Territory Central - Products - Div I -Peter Branch Territory Territory NA Products - Central - Alex Smith Accounts Accounts All Accounts Product Product All Product Tip:
If you selected to show aliases in Member Selector, the value listed in the Member column may vary. For example, for some dimensions, the prefix (OEP_ and OGS_) are not shown. For some territory members, instead of the numeric member name, the full alias name is displayed. - Verify your selections, and click Save.
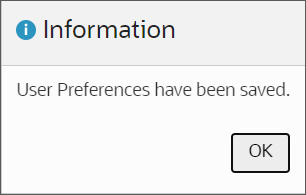
- In the Information message, click OK.
Reviewing Measures in Configure: Quota Planning
The features you enabled in Quota Planning determine which out-of-the-box measures are included in your application. You can review measures for each subcomponent in Configure: Quota Planning.
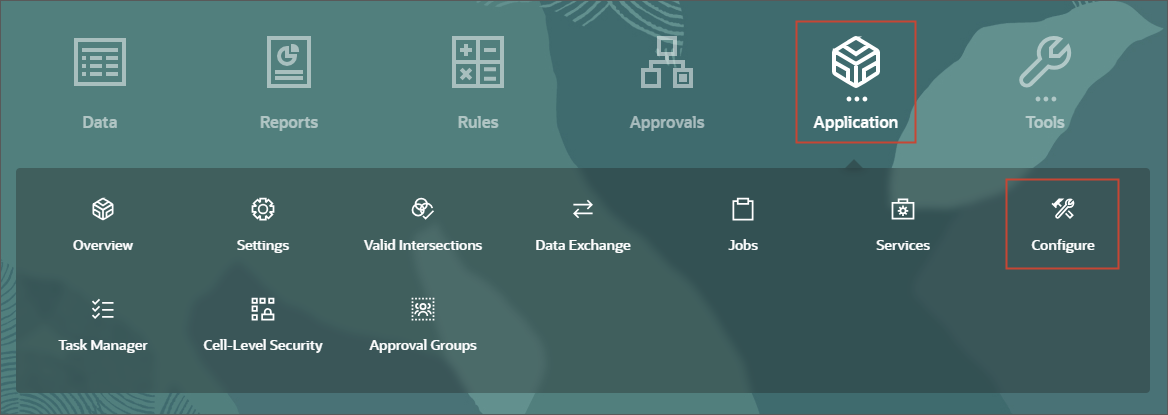
- From the home page, click Application, then Configure.
In Configure: Quota Planning, you can manage out-of-the-box measures for Quota Planning. The subcomponents listed depend on which features were enabled in the application.
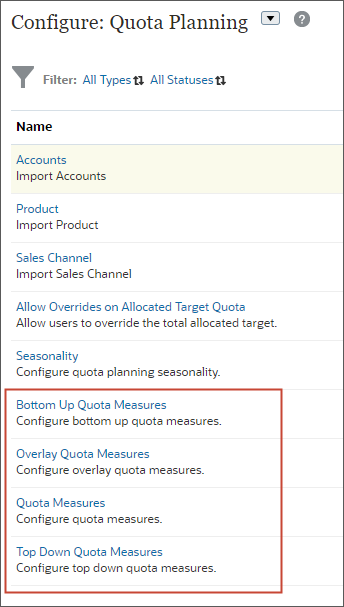
- Click Top Down Quota Measures.
- In Top Down Quota Measures, review the measures added to the component.
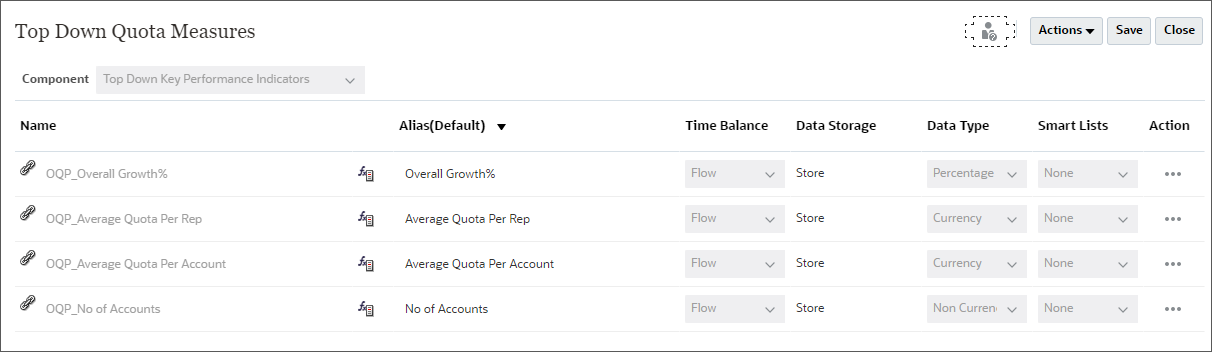
- For Average Quota Per Rep, click
 (Edit Formula).
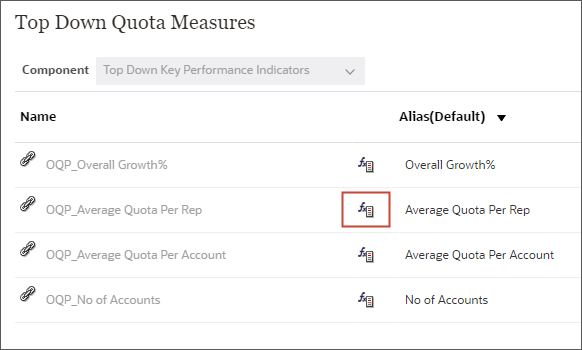
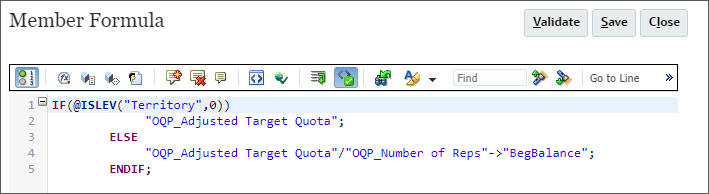
- Review the member formula, then click Cancel.
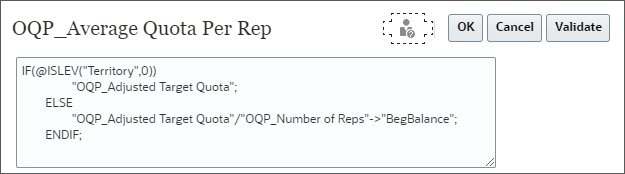
The member formula calculates the Average Quota Per Rep. If Territory is at the lowest level (Level 0), the Average Quota takes the value of the Adjusted Target Quota at that level. If Territory is at a higher level, the measure value is calculated by dividing the Adjusted Target Quota by the Number of Reps.
- Click Actions to display and review options.
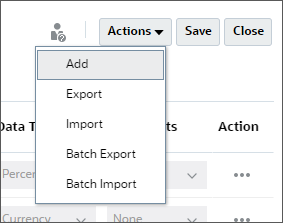
- To add a measure, select Add from the Actions menu, then select New Member and enter details in the new row.
- To modify a group of measures, or to add many new ones, export the set of predefined measures. Select Export from the Actions menu, and then modify the export file in Excel. You can edit predefined measures, make a copy of a measure and modify it to create a new one, or add new measures.
- To import the modified file, select Import from the Actions menu.
- To export or import all measures, use Batch Export or Batch Import.
- Click
 (Close).
 - Following the steps in this section, review measures for the other sub-components.
Adding Custom Measures in the Simplified Dimension Editor
You can add custom measures directly within the hierarchy by using the Simplified Dimension Editor.
Reviewing Measures in the Simplified Dimension Editor
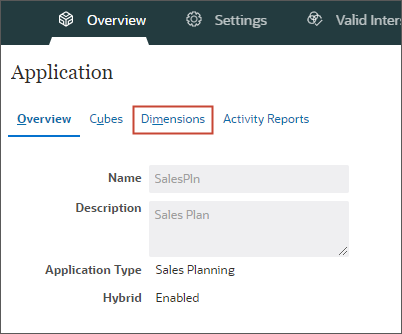
- From the cards on the top of the page, click Overview.

- In Application, click Dimensions.
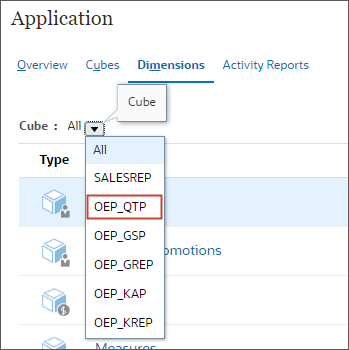
- In Dimensions, for Cube, select OEP_QTP.
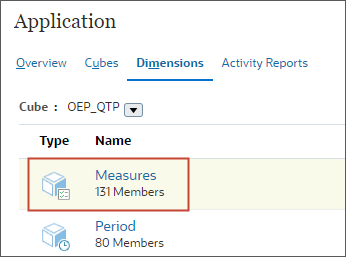
- Click Measures.
- In Edit Member Properties, click
 (Zoom in All Levels).

- Right-click on the table header and select the following columns.
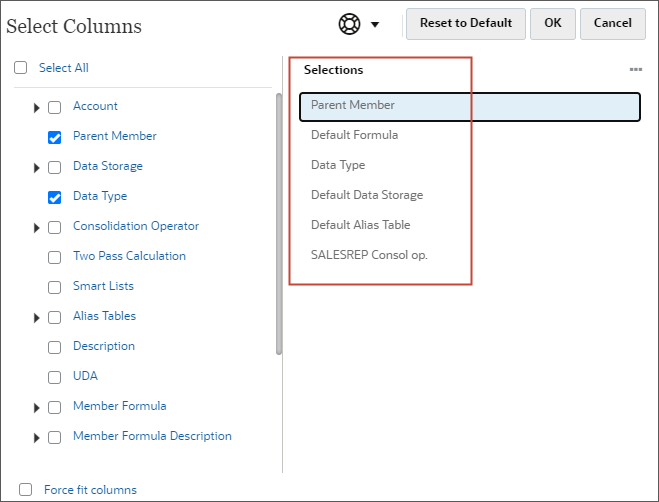
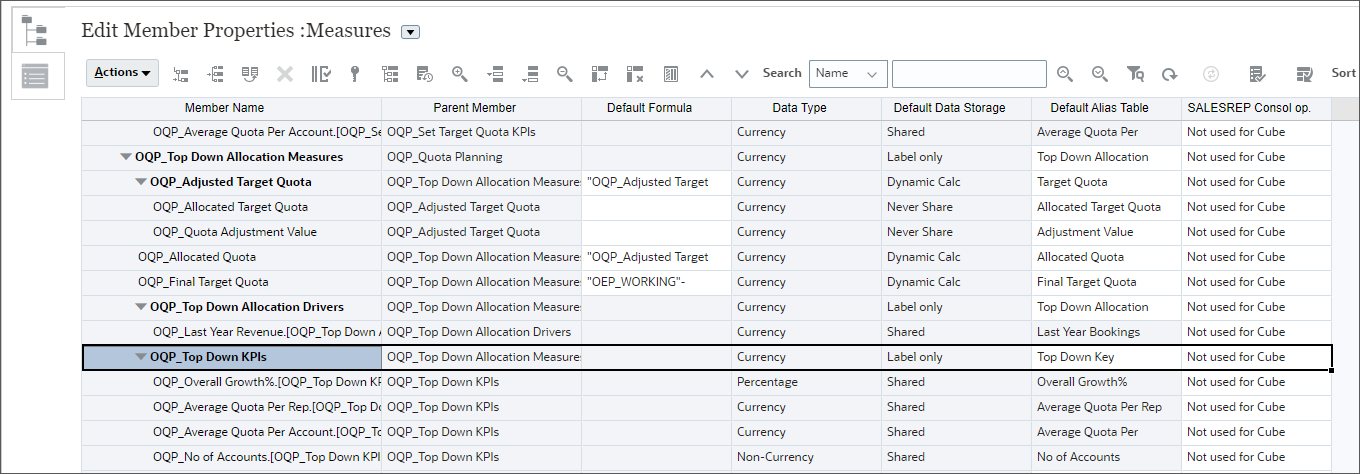
- In the grid, scroll down and locate OQP_Quota KPIs and OQP_Average Quota Per Rep.
- Select the OQP_Average Quota Per Rep row.
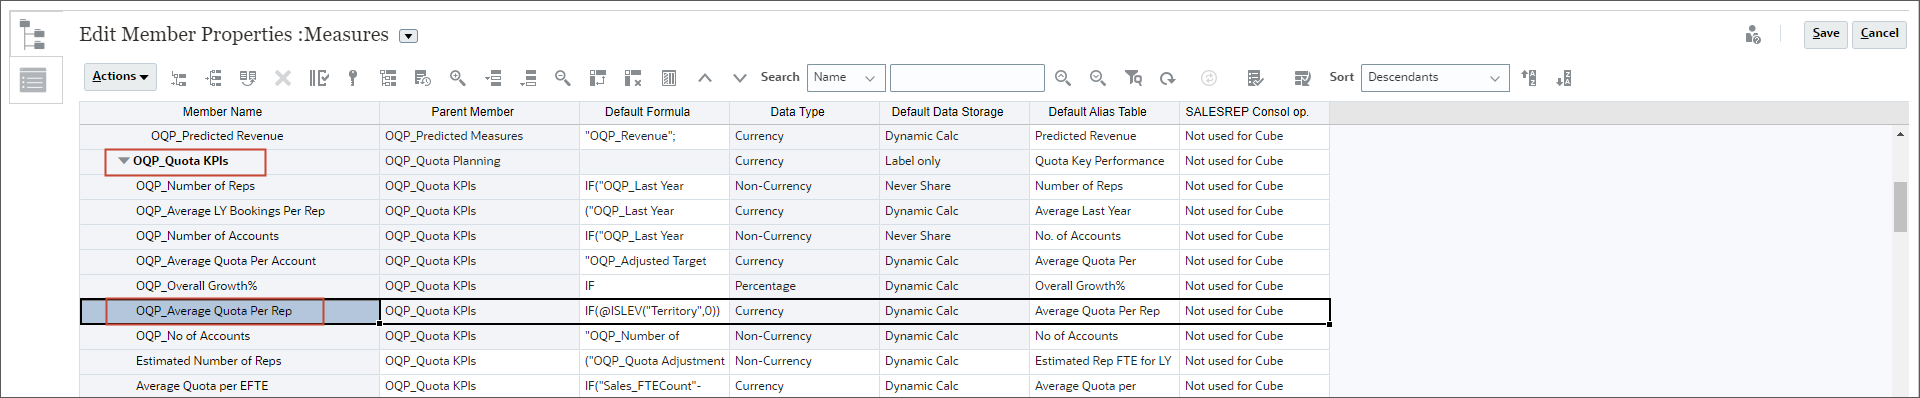
- Select the Default Formula cell and click
 (Member Formula) to view the formula.
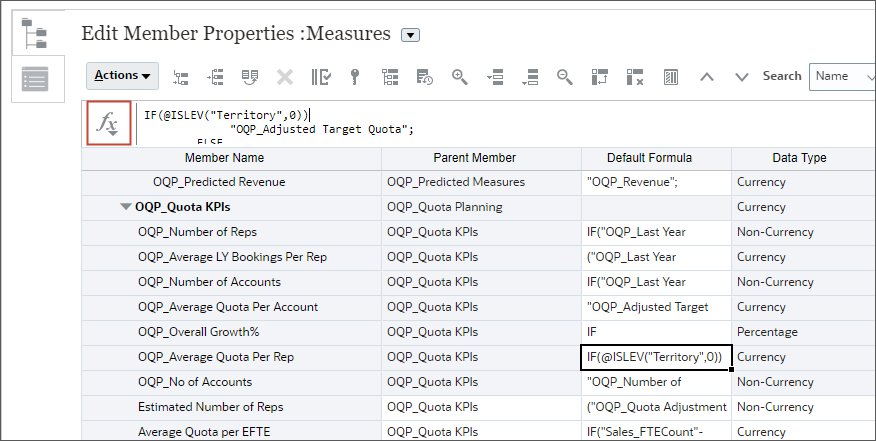
- Review the member formula, then click
 (Close).
The member formula for the selected measure is displayed in a dialog box.
Adding Measures to Top Down Quota
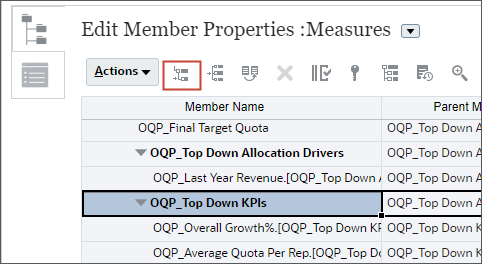
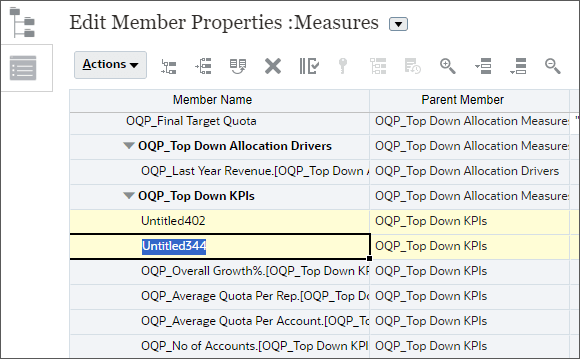
- In the grid, scroll down, locate, and select OQP_Top Down KPIs.
- Click
 (Add Child).
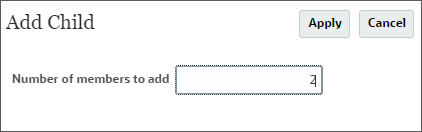
- In Add Child, for Number of members to add, enter 2 , and
click Apply.
- Average LY Bookings Per Rep = LY Bookings / No. of Reps
- Rep to Accounts Ratio = No. of Reps / Number of Accounts
- For each row, enter or select the following member properties:
Member Name Default Formula Default Data Storage Data Type Average LY Bookings Per Rep IF(@ISLEV("Territory",0))
"OQP_Last Year Revenue";
ELSE
"OQP_Last Year Revenue"/"OQP_Number of Reps"->"BegBalance";
ENDIF;Dynamic Calc Currency Reps to Account Ratio "OQP_Number of Reps"->"BegBalance"/"OQP_Number of Accounts"->"BegBalance";Dynamic Calc Non-Currency Tip:
To add default formula, select the Default Formula cell and click (Member Formula).
- Make sure that the Parent Member for both measures is set to OQP_Top Down KPIs.
- Make sure that SALESREP Consol op. for both measures is set to Not used for Cube.
- Verify your entries and click
 (Save).
The measures (members) are added to the outline. To see your changes, you must refresh the database.
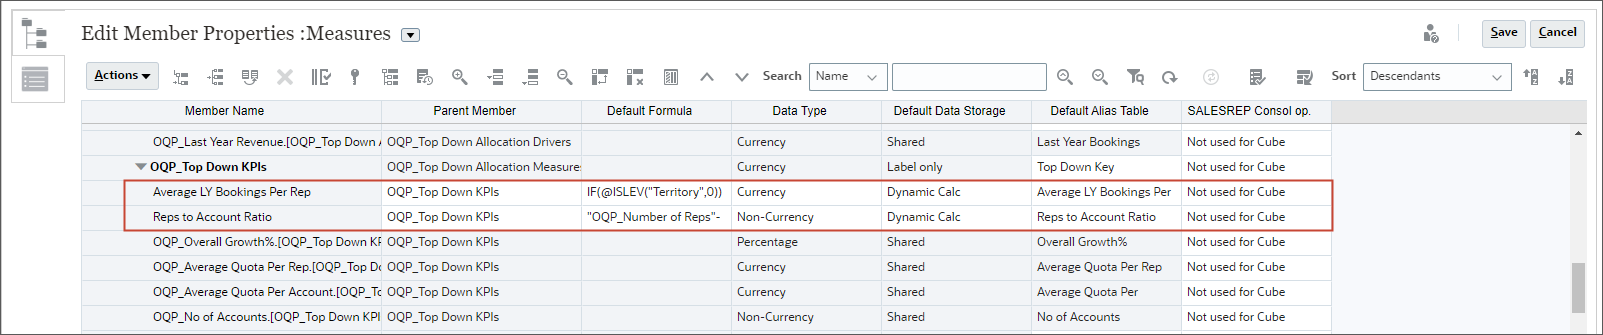
New rows are added under OQP_Top Down KPIs.
You will be adding two measures that are dynamically calculated based on the following formulas:

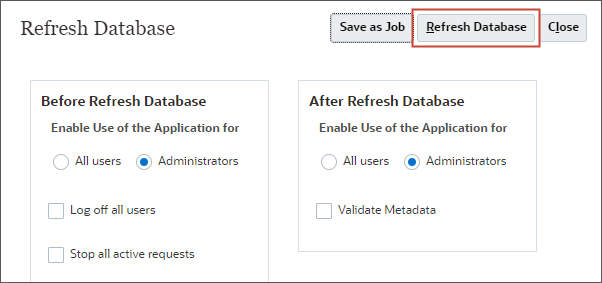
Refreshing the Database
- In Edit Member Properties, click
 (Refresh
Database)
(Refresh
Database) - In Refresh Database, click Refresh Database.
- In the warning message, click Refresh.
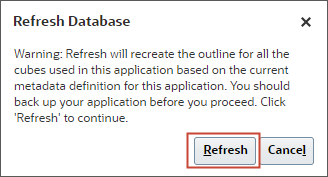
Cube Refresh takes a moment to complete.
- When the Status displays as Succeeded, click Finish.
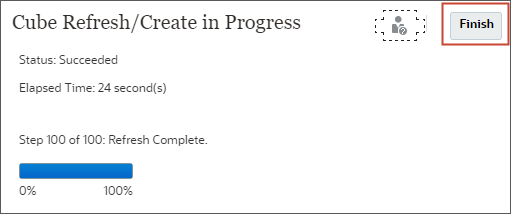
- Click (Close).
- In Edit Member Properties, click
 (Cancel).
 - Return to the home page. Click
 (Home).
Tip:
Alternatively, you can refresh the database from the Actions menu in the Application cluster.Viewing Custom Measures in Dashboards
Review the Top Down Planning dashboards for an overview of revenue and quota along with out-of-the-box measures and the custom measures you added to the hierarchy.
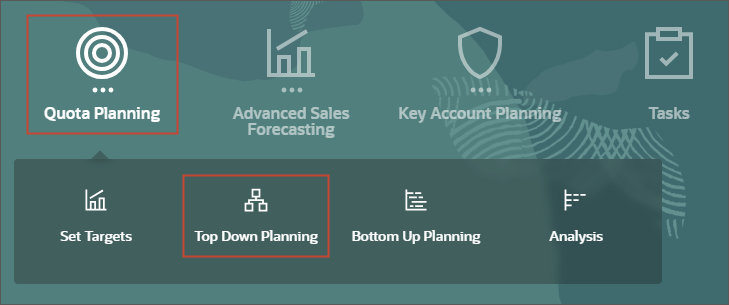
- From the home page, click Quota Planning, and then Top Down
Planning.
- In Top down and Adjust, for the top (My Target) and bottom (My Team Target) forms, you can
review the measures you added.
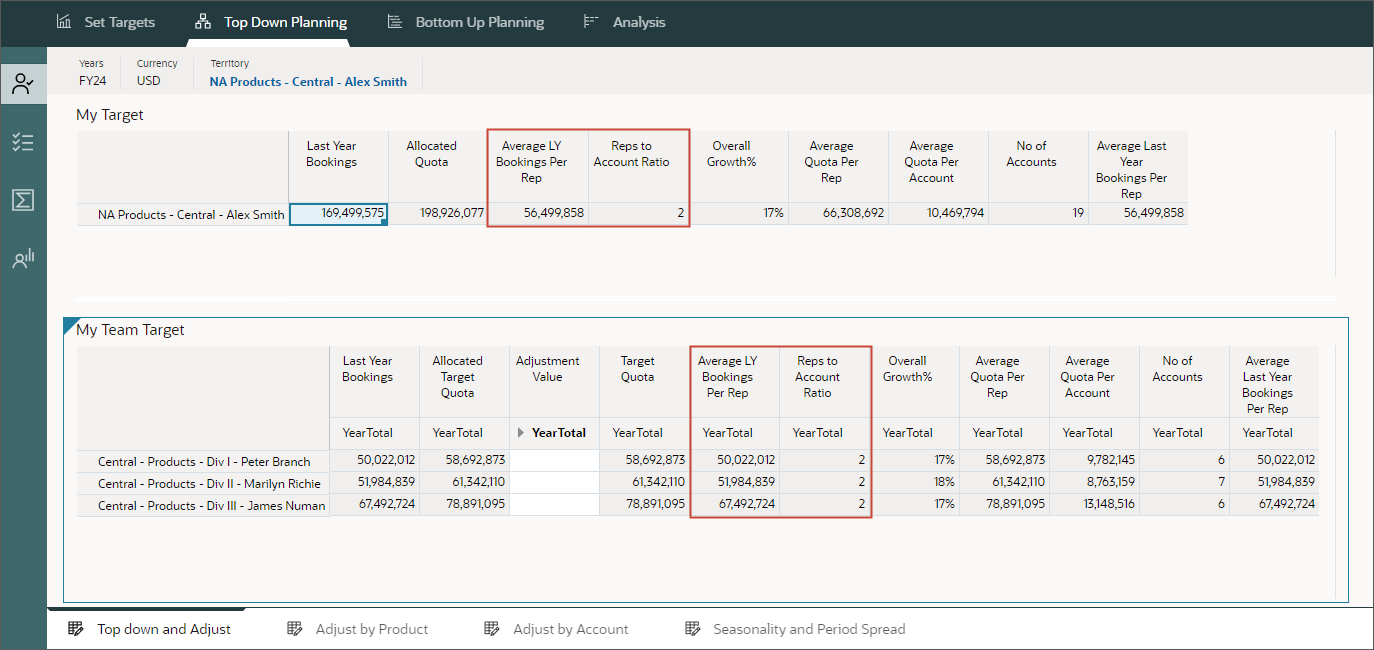
- Maximize the bottom form (My Team Target). Move your mouse to the upper-right side of the form
to view icons, click
 (More) and
select Maximize.
(More) and
select Maximize.

- In My Team Target, review the calculated measures for the selected point-of-view.

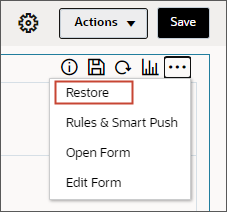
- When finished, move your mouse to the upper-right side of the form
to view icons, click (More) and
select Restore.
Related Links
Adding Measures in Sales Planning
G12899-02
August 2024