Introduction
This tutorial shows you how to generate dynamic predictions and insights in Cloud EPM. The sections build on each other and should be completed sequentially.
Background
With the dynamic parent-level prediction capability business users and the FP&A team can make predictions at the parent level or any level and generate insights without depending on granular data. Generating dynamic predictions and insights provides more accurate data analysis when subcategory data may be missing or inconsistent.
You can generate predictions and insights at a higher, aggregated level – whether it's a parent, a department, or any level in your hierarchy, to improve planning and forecasting accuracy. This provides you with meaningful summary-level information at the parent level, reducing the need for excessive sub-category details and simplifies analysis by allowing you to focus on top-level trends first, while departments can drill down into leaf-level data to identify root causes and gain deeper insights.
Note:
To generate dynamic predictions, by default historical Actuals are retrieved from the Working version and the Actual scenario. If your historical Actual data resides somewhere else, you must specify the source cube and POV for those historical Actuals on the Application Settings page to ensure that the correct data is used for generating predictions.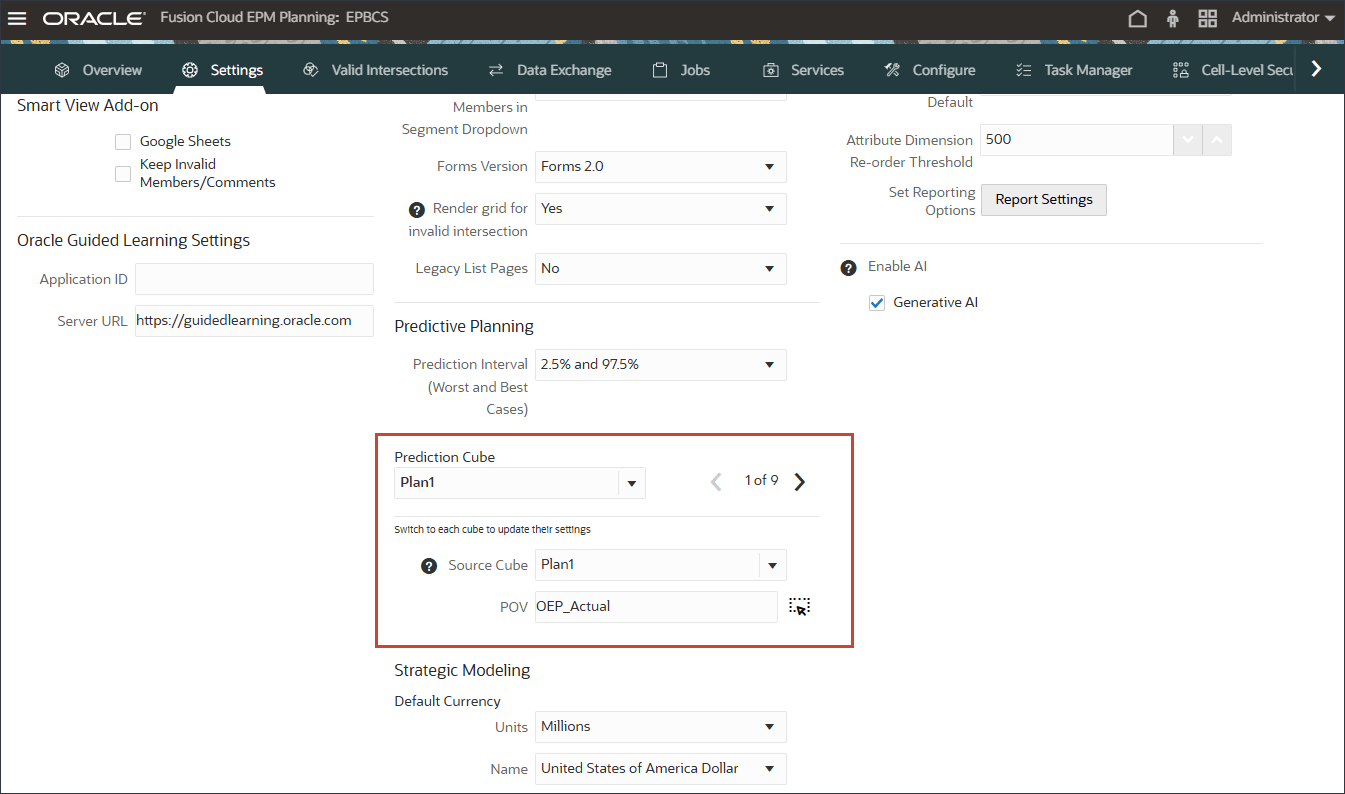
Key Benefits:
- Enhanced Decision-Making: Offers a high-level view of performance, supporting strategic planning.
- Effective Data Handling: Enables accurate forecasting at the parent level, even when level 0 data is incomplete or missing.
- Faster Analysis & Reporting: Identifies key trends without getting lost in excessive details.
- Reduced Manual Effort: Minimizes the need for granular-level data processing and modeling
- Streamlined Planning: Facilitates high-level forecasting before diving into detailed data.
- Improved Forecast Accuracy: Helps avoid misleading trends caused by fluctuations at lower levels.
Prerequisites
Cloud EPM Hands-on Tutorials may require you to import a snapshot into your Cloud EPM Enterprise Service instance. Before you can import a tutorial snapshot, you must request another Cloud EPM Enterprise Service instance or remove your current application and business process. The tutorial snapshot will not import over your existing application or business process, nor will it automatically replace or restore the application or business process you are currently working with.
Before starting this tutorial, you must:
- Have Service Administrator access to a Cloud EPM Enterprise Service instance. The instance should not have a business process created.
- Upload and import this snapshot into your Planning business process.
- Download this allocation script file to a local folder.
- Download this parent level prediction file to a local folder.
Note:
If you run into migration errors importing the snapshot, re-run the migration excluding the HSS-Shared Services component, as well as the Security and User Preferences artifacts in the Core component. For more information on uploading and importing snapshots, refer to the Administering Migration for Oracle Enterprise Performance Management Cloud documentation.Preparing the Application
Before you perform the steps in this tutorial, you need to prepare the application. In this section you create the Financial Analyst group and then assign it to the Financials navigation flow. You also select members for user variables.
Creating the Financial Analyst Group
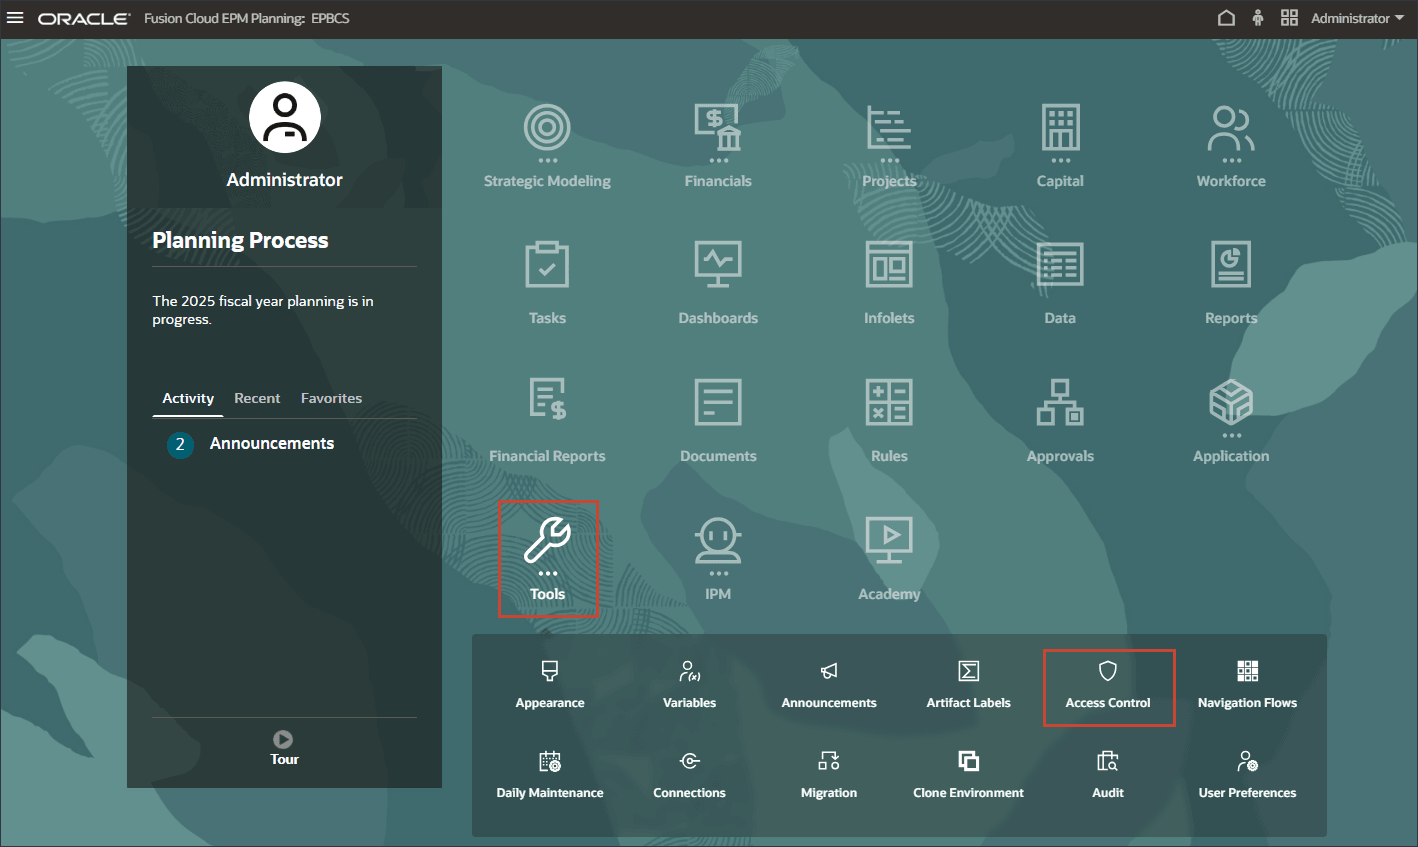
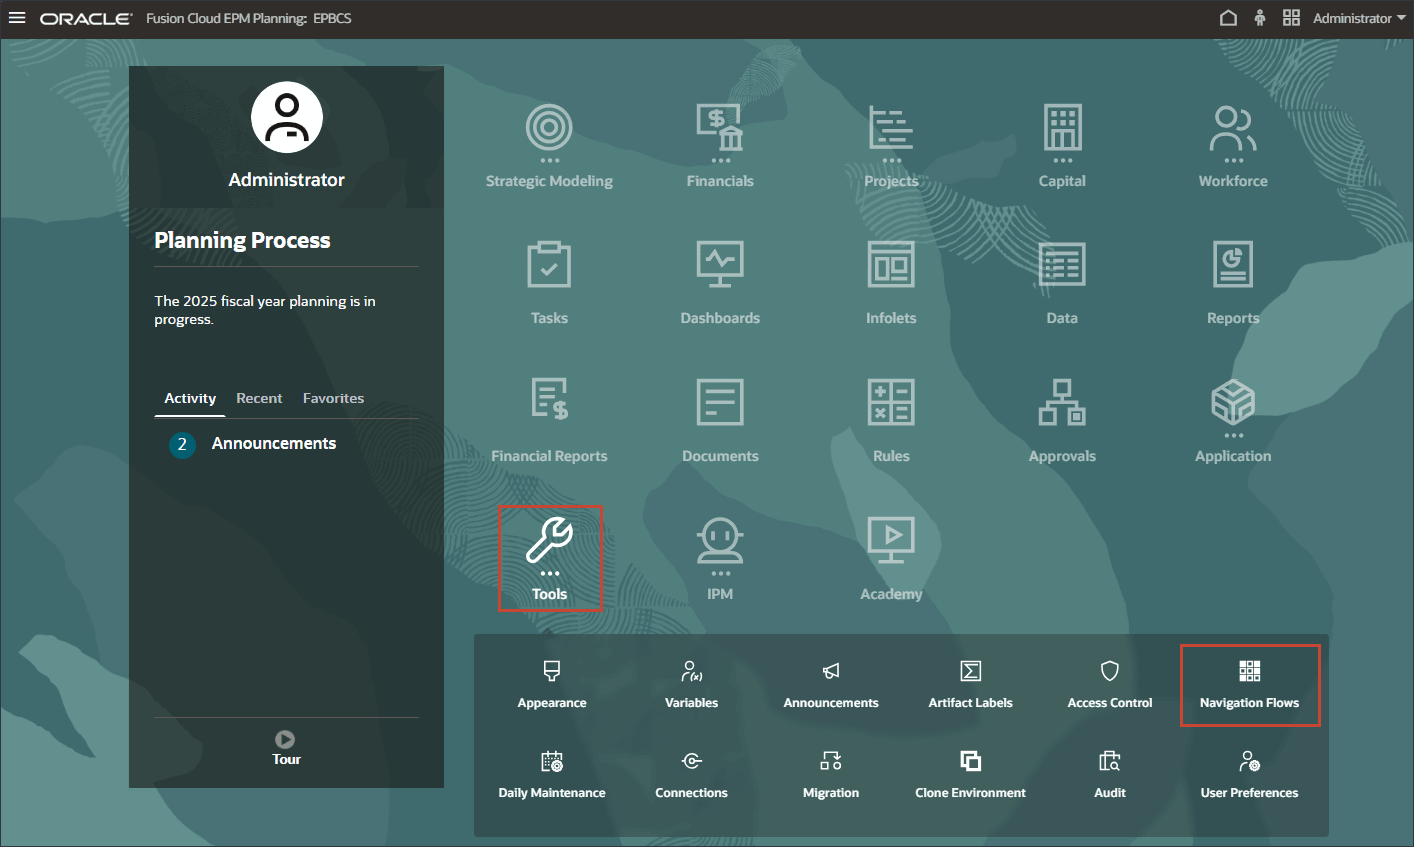
- On the home page, click Tools, and then click Access Control.
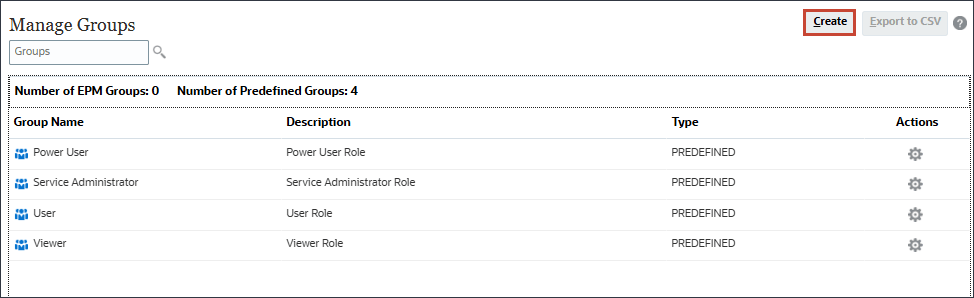
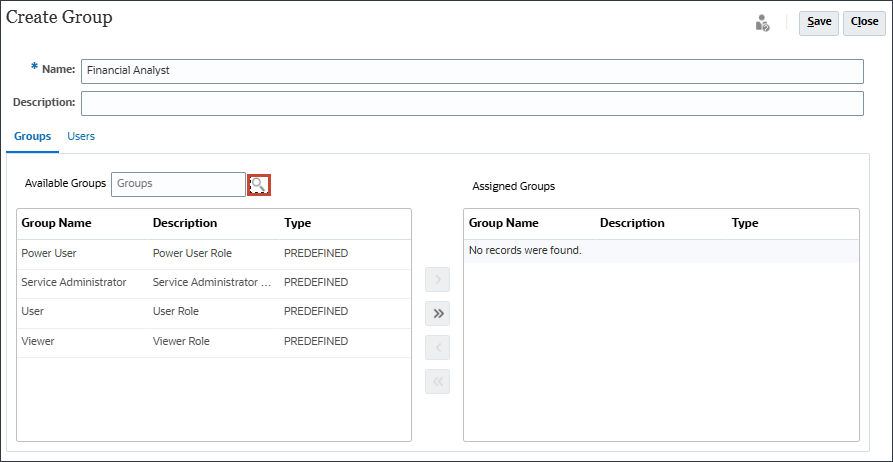
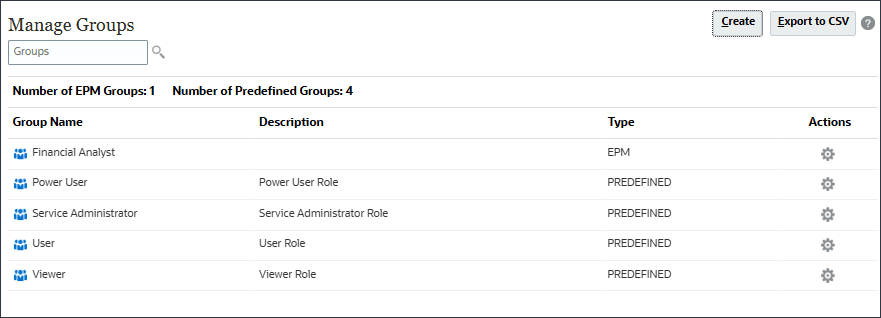
- In Manage Groups, click Create.
- In Create Group, for Name, enter Financial Analyst.
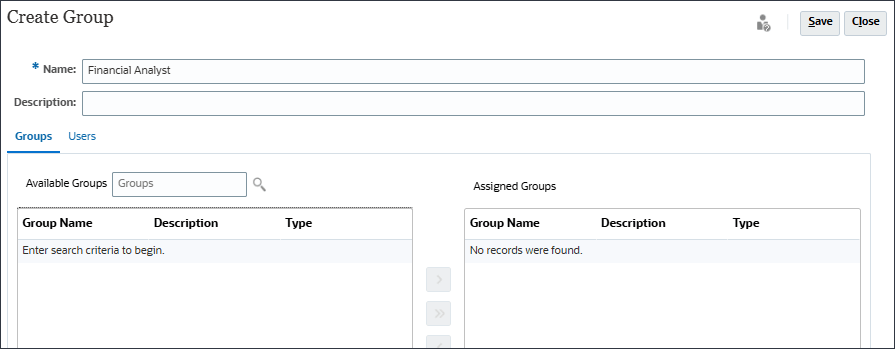
- With Groups selected, next to Available Groups, click
 (Search).
Available groups are listed.
- Select the predefined roles and click
 (Move).
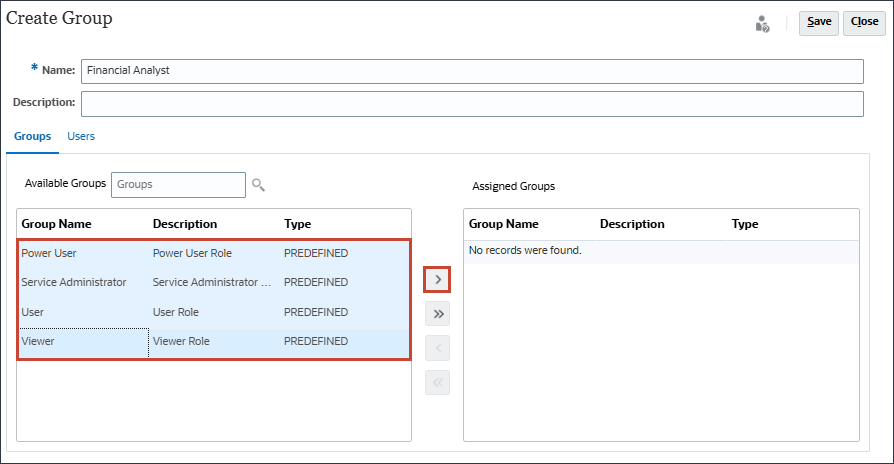
Tip:
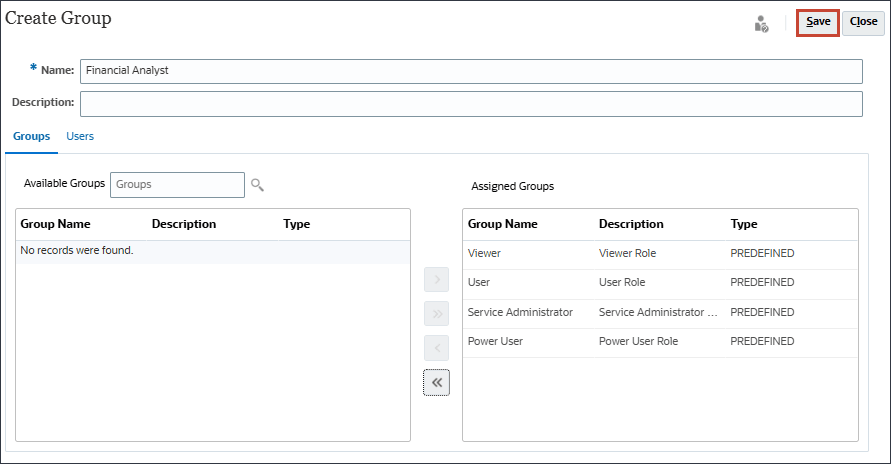
Use the Ctrl key to select multiple items simultaneously. Press and hold Ctrl and click on each item in the list to select them. - Click Save.
- At the information message, click OK.
- Verify that Financial Analyst is listed in Manage Groups.
- Click
 (Home) to return to the Home page.
- On the home page, click Tools, and then click Navigation Flows.
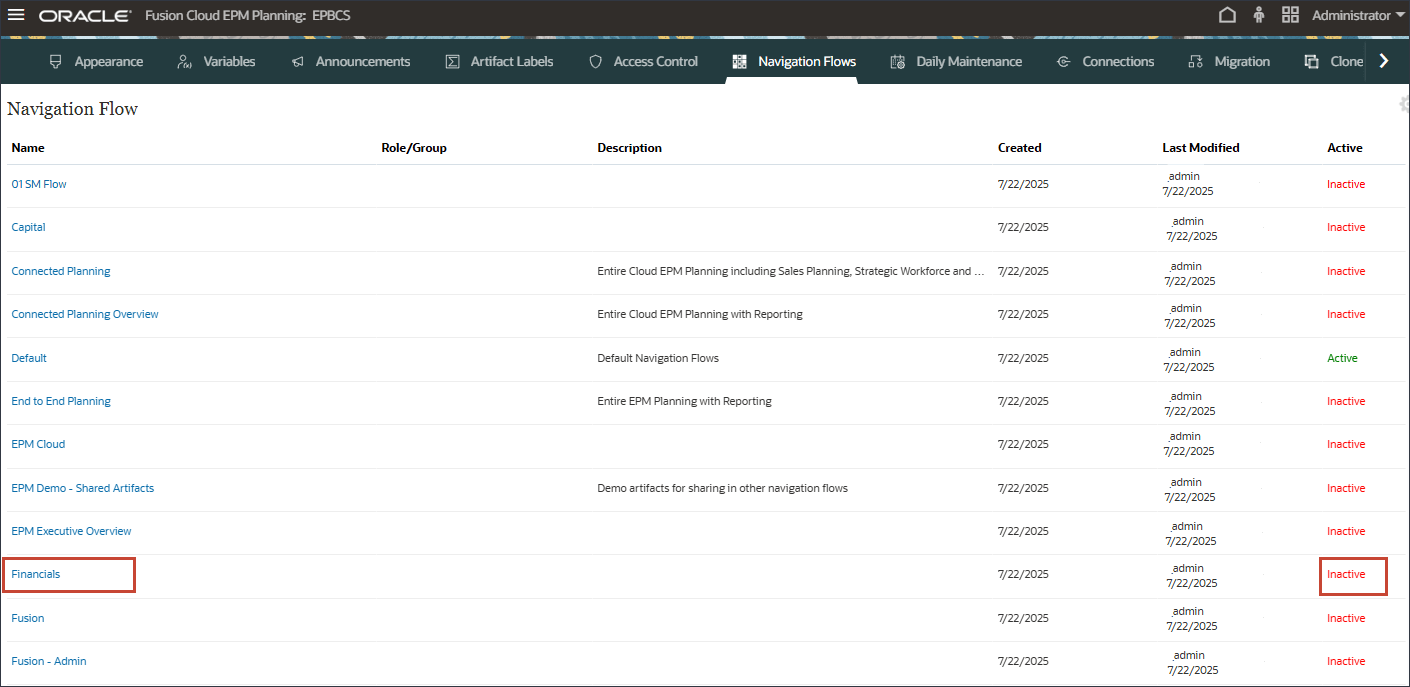
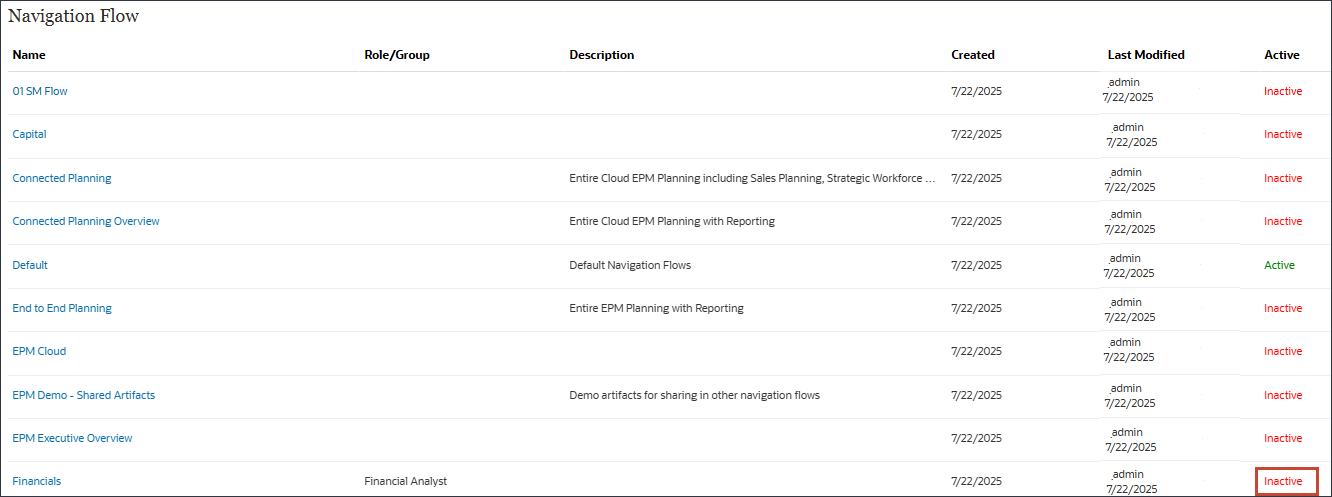
- In Navigation Flow, verify that Financials is set to Inactive, then click Financials.
- In Financials, for Assign to, enter Financial Analyst, and click Save and Close.
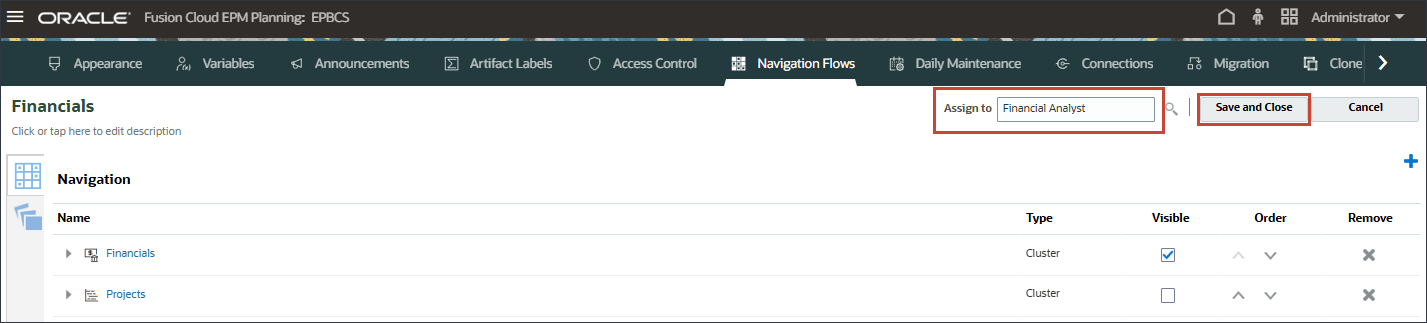
- For Financials, click Inactive to activate the Financials navigation flow.
- Click (Home) to return to the Home page.
Assigning the Financial Analyst Group to the Financials Navigation Flow.
You assign the Financial Analyst group to the Financials navigation flow to streamline your user experience by providing direct access to relevant financial tasks, data, and reports, increasing efficiency and productivity.
Selecting User Variables
You select user variables to personalize and streamline your user experience by allowing you to filter and access relevant data quickly, improving efficiency and accuracy in your workflows.
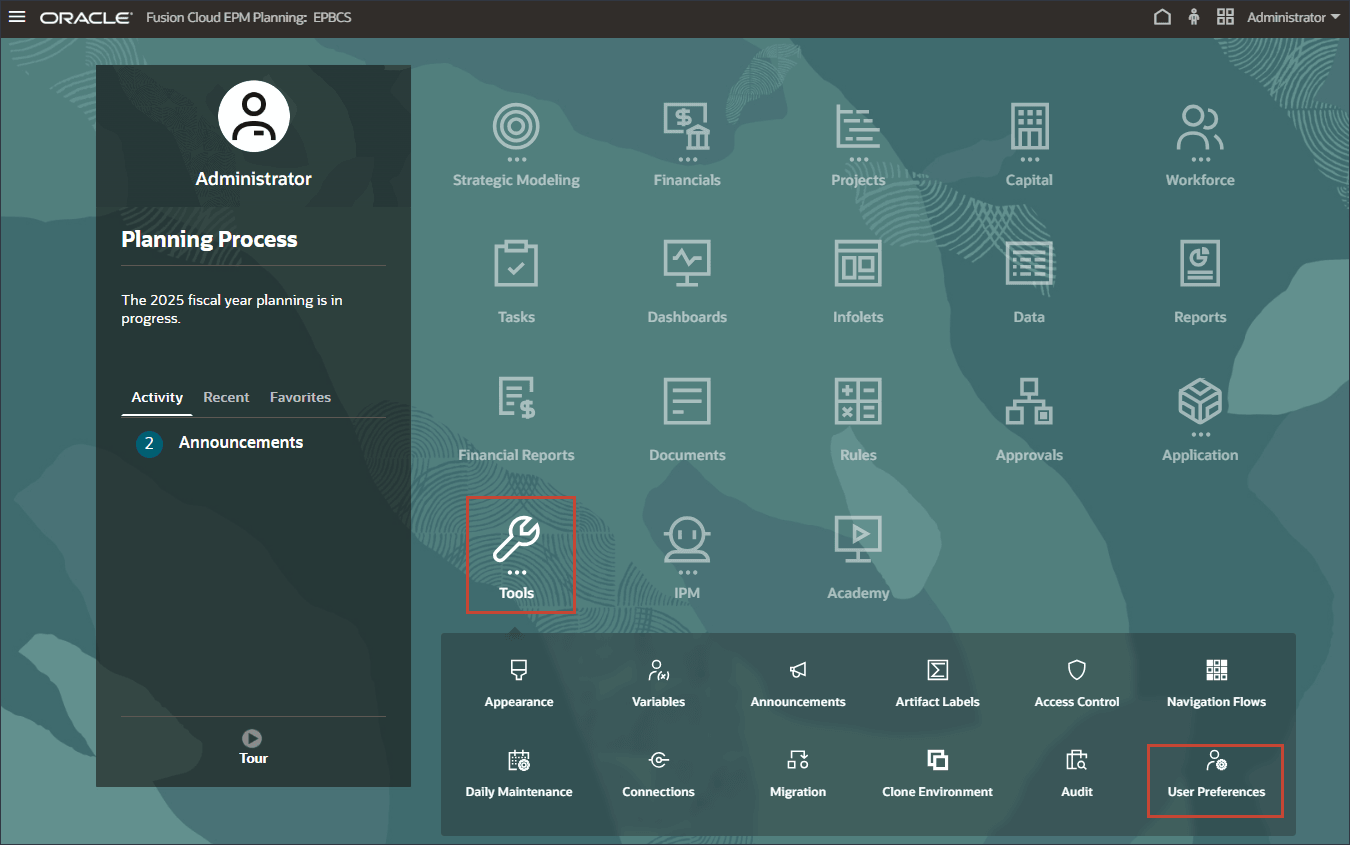
- On the home page, click Tools, and then click User Preferences.
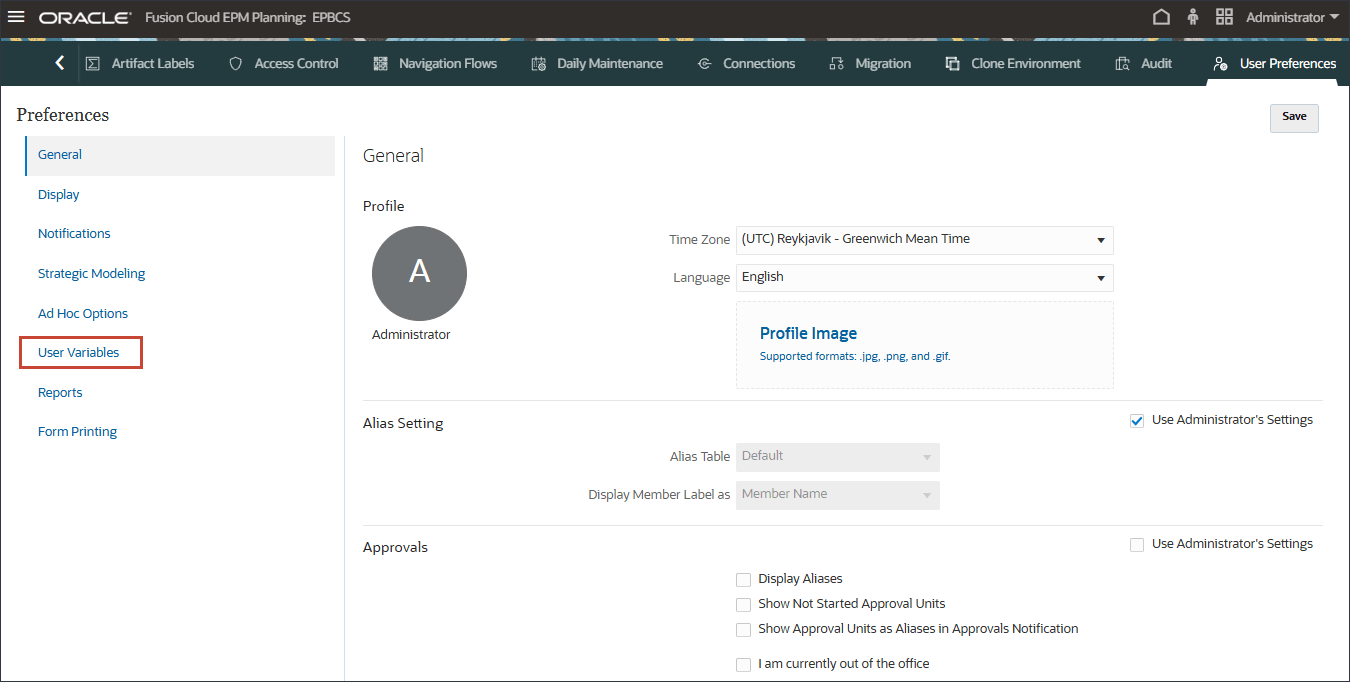
- Click User Variables.
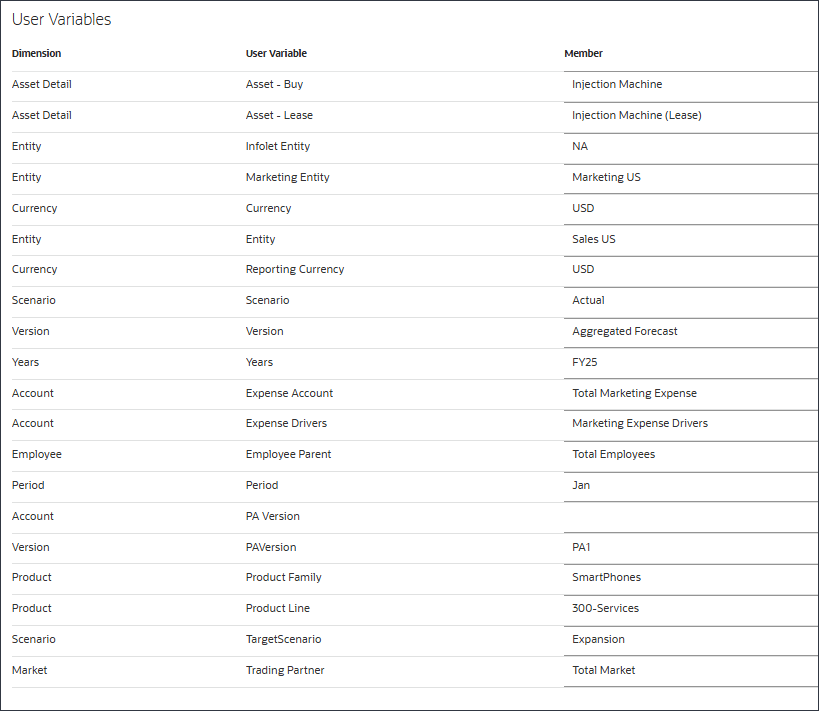
- For user variables, enter or select the following, and click Save.
- Click (Home) to return to the Home page.
Prerequisite for Generating Dynamic Predictions - UDA Enablement
In Dynamic Predictions, a user-defined attribute (UDA) is a custom label assigned to metadata members for classification or filtering. HSP_DYN_PREDICT is a system-generated UDA automatically assigned to members that are enabled for dynamic predictions.
You must complete a prerequisite configuration so that users can generate dynamic parent-level predictions. You associate the UDA 'HSP_DYN_PREDICT' with the Scenario/Version/Plan Element or similar dimension that is used to store predicted values. Any members associated with this UDA will display predicted values rather than aggregated values. In this tutorial, the prerequisite configuration required is for the Predict version. At this dimension member level, you enable users to generate dynamic parent-level predictions. To enable this, you set up the system to allow dynamic creation of parent-level members and ensure that the necessary placeholders are in place for accurate predictions.
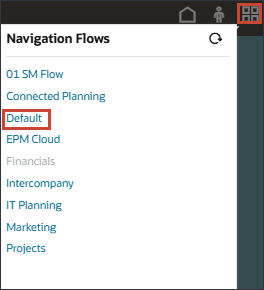
- On the home page, click
 (Default), then in Navigation Flows, select Financials.

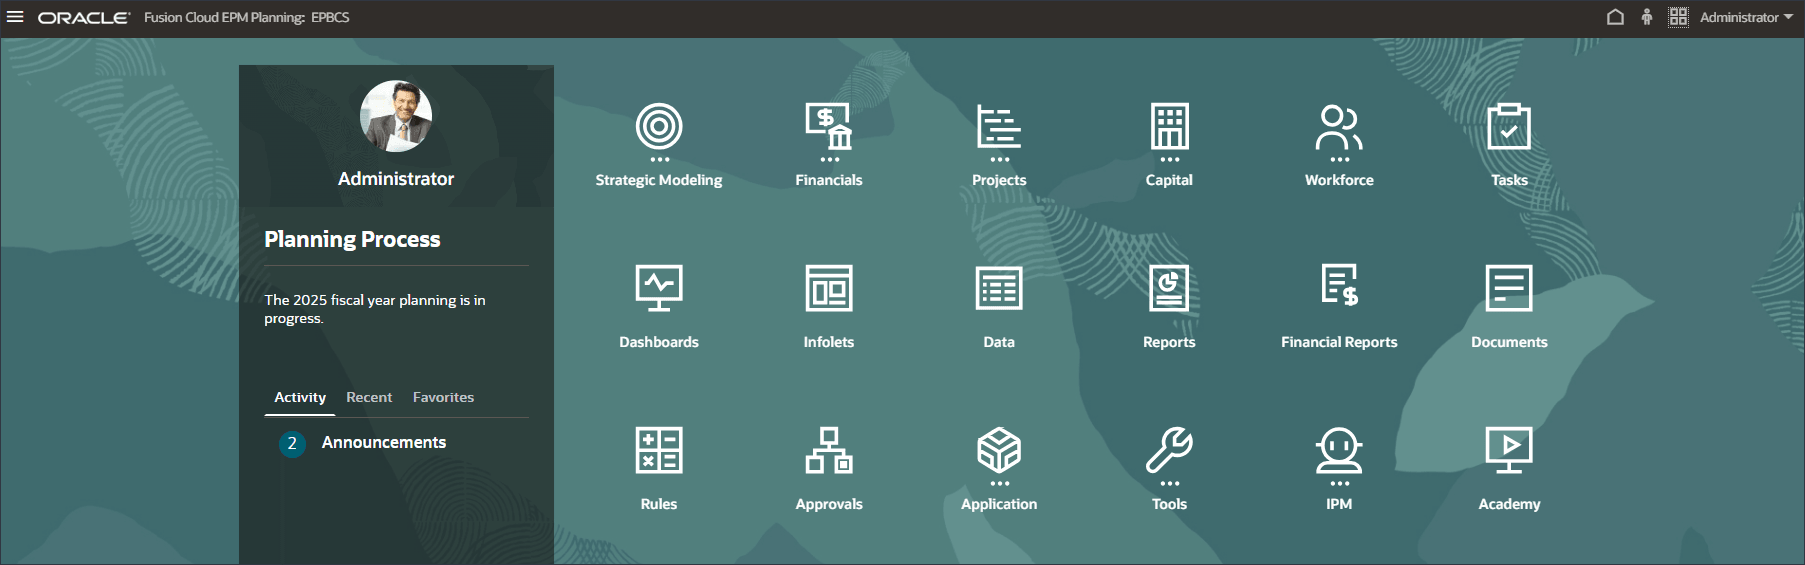
The home page is displayed with the Financials navigation flow.
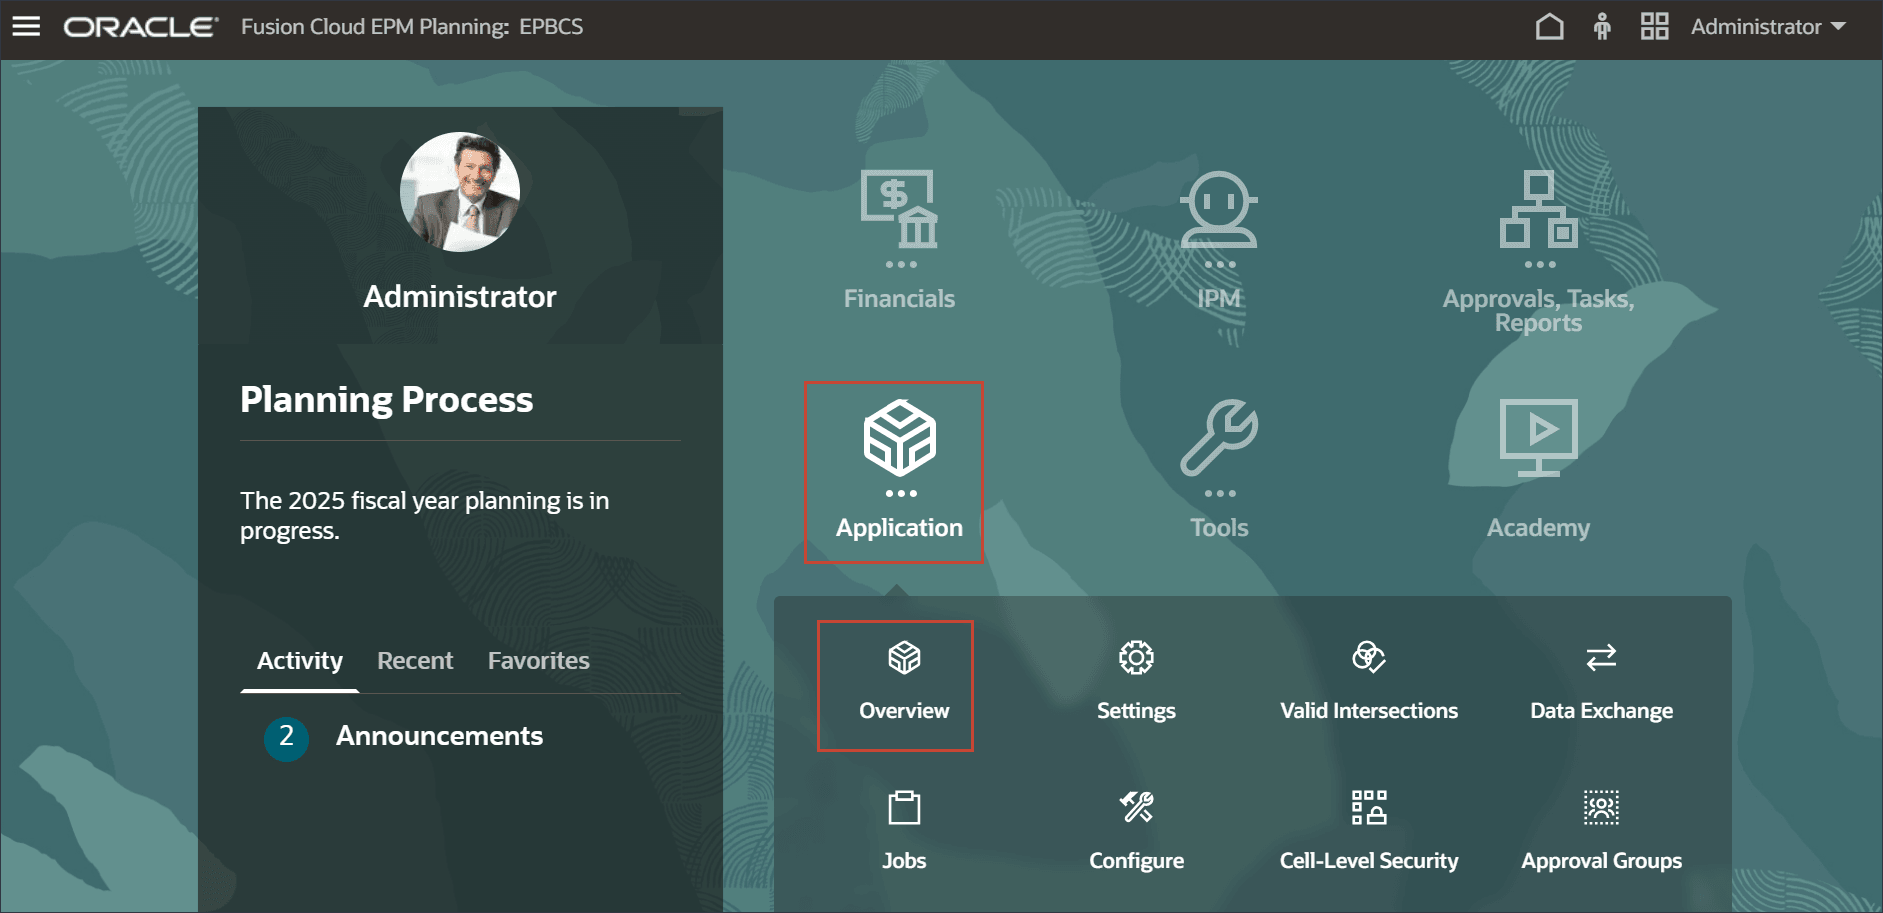
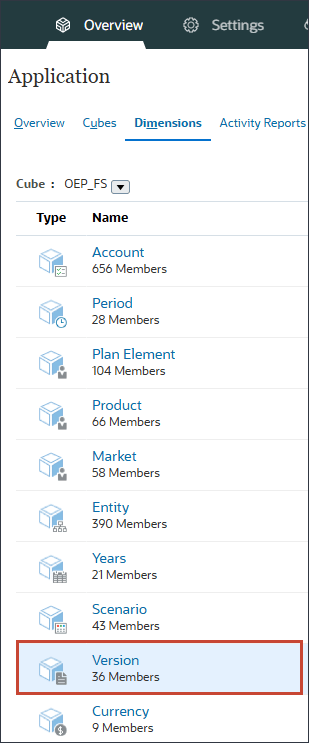
- On the home page, select Application, then Overview.
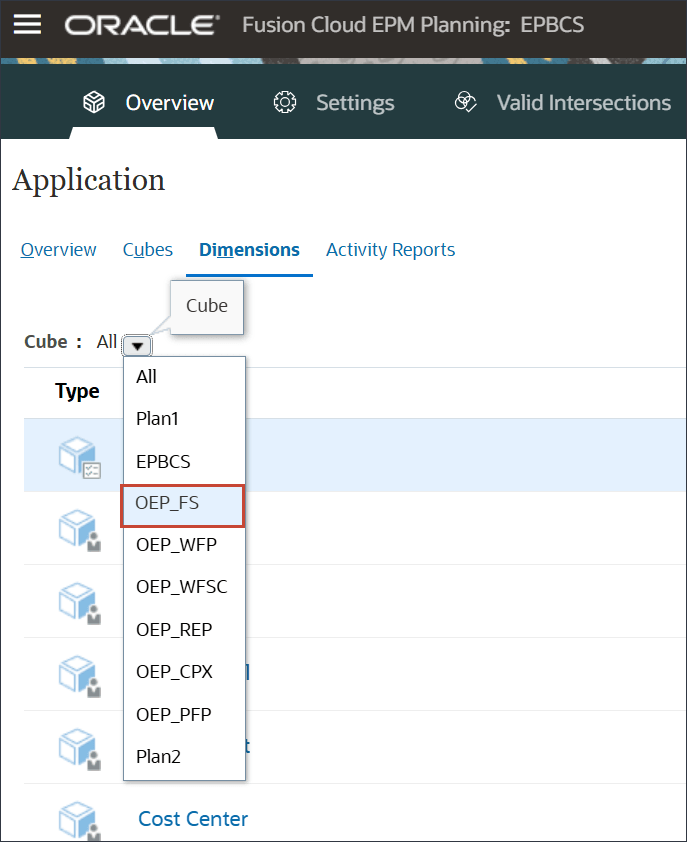
- Click the Dimensions tab.
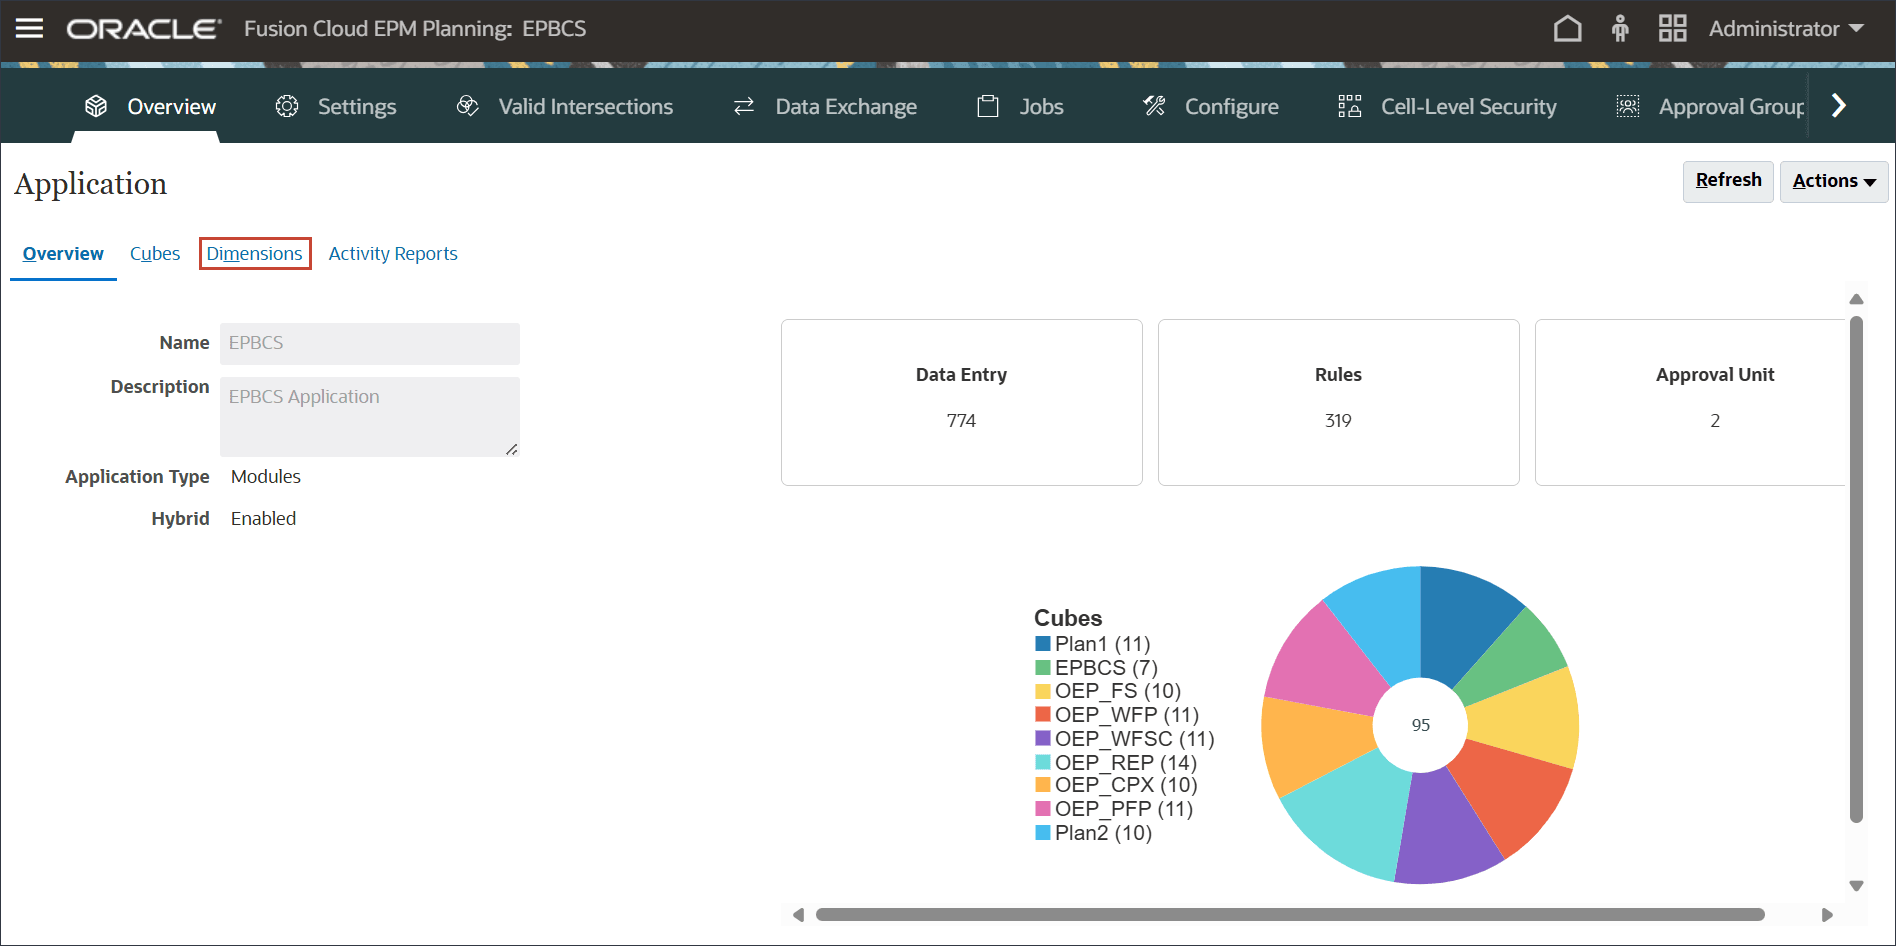
- For Cube, select OEP_FS.
- Click Version.
- Right-click any column.
The Select Columns dialog is displayed.

- Select UDA, and click OK.
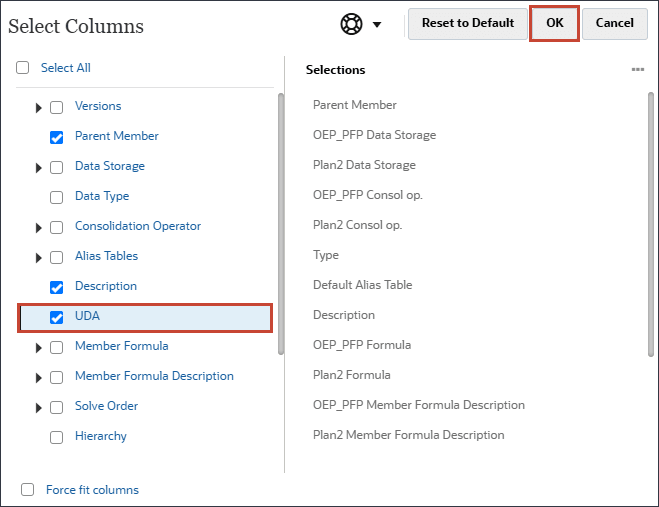
The UDA column is added on the right.
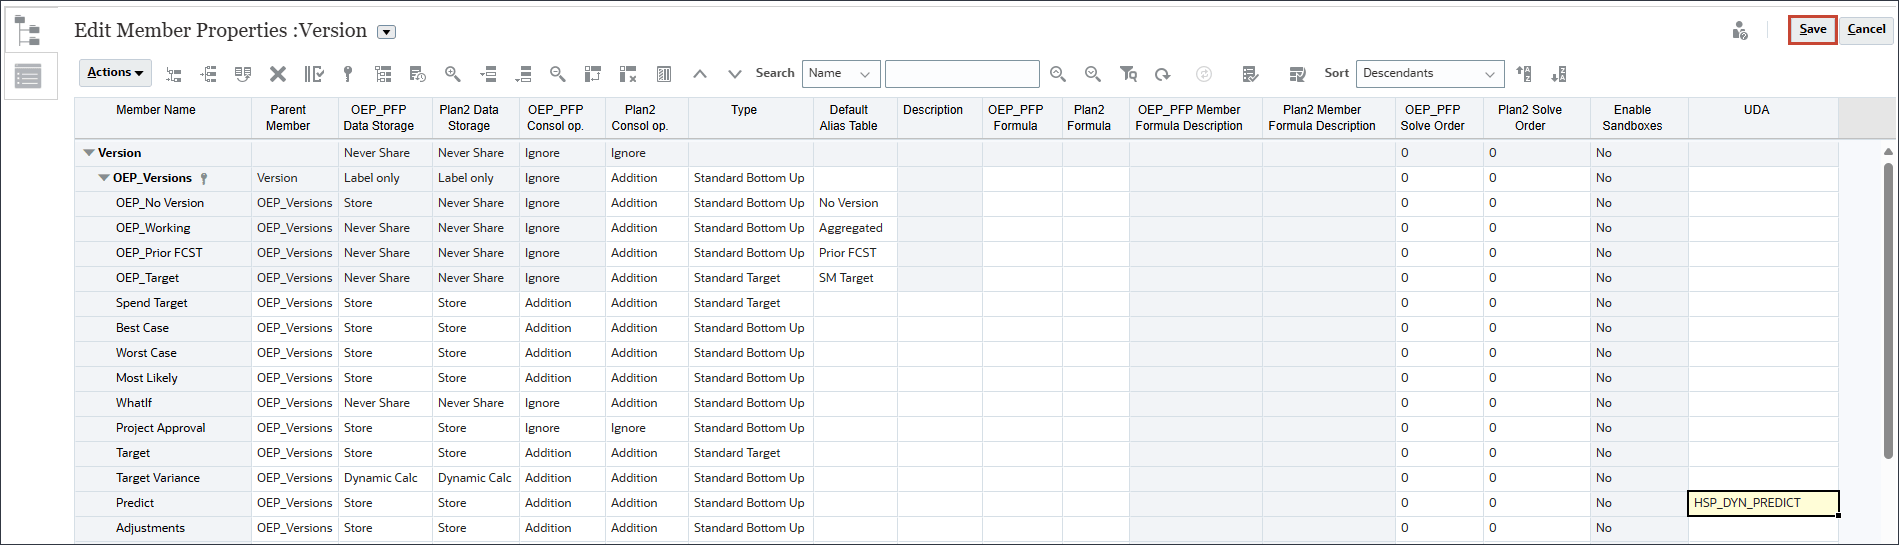
- Expand Version, OEP_Versions, and for the Predict version, locate the UDA column.
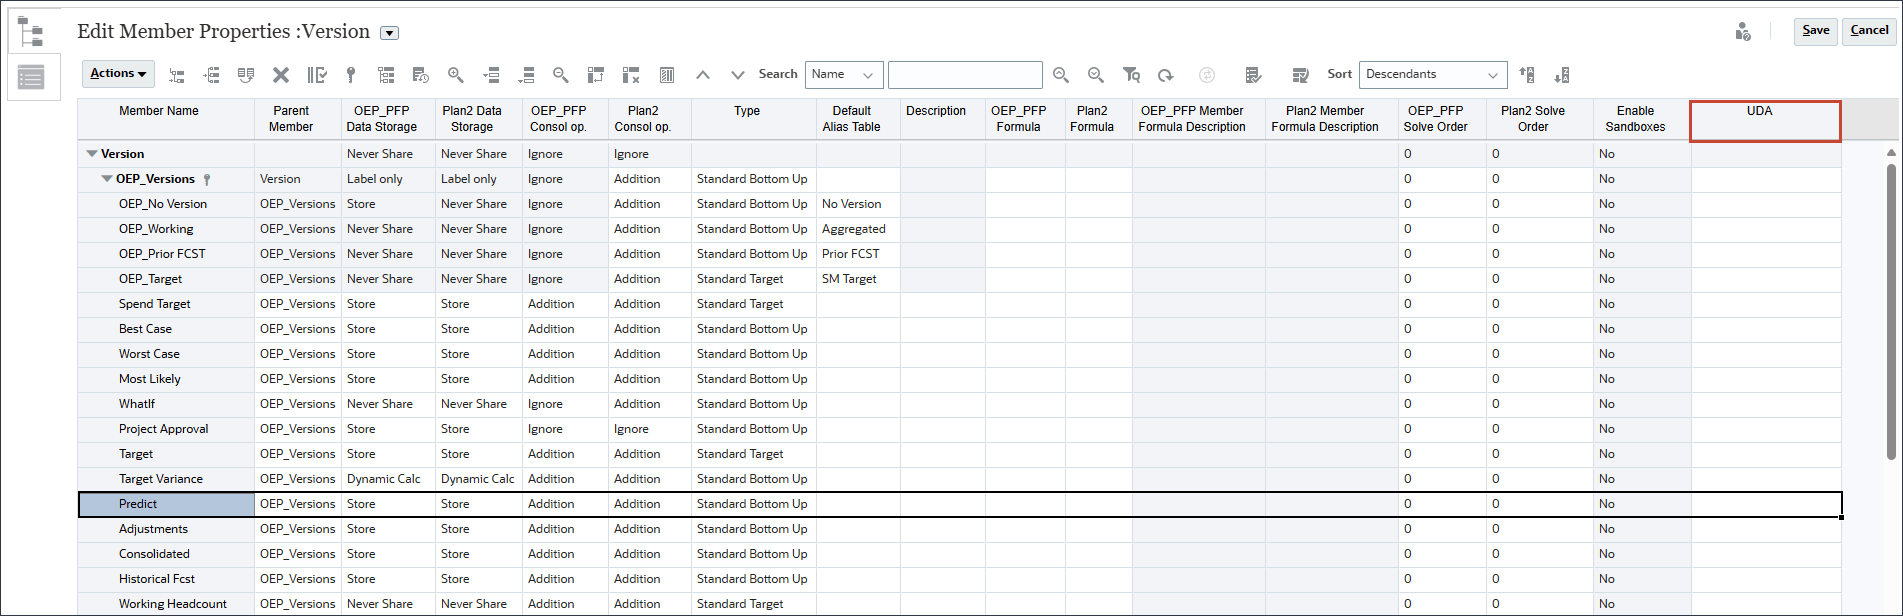
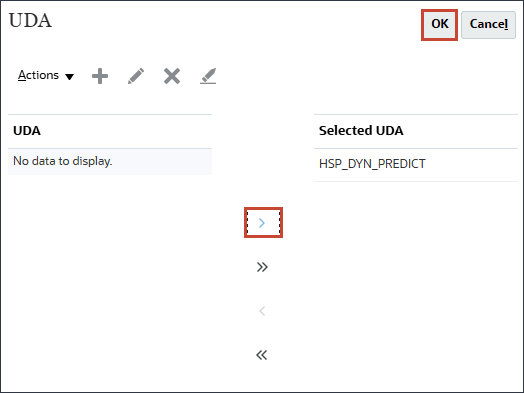
- For the Predict version, in UDA, select HSP_DYN_PREDICT and click (Move) to assign the uda to the Predict version, then click OK.
- Click Save.
- Click
 (RefreshDB).
 - Click Refresh Database.
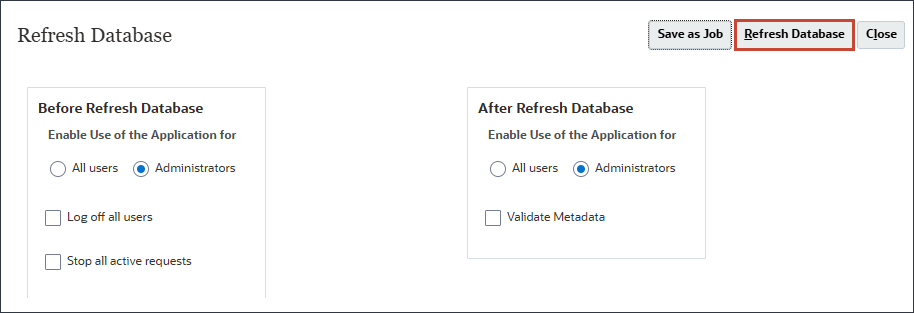
- Click Refresh.

There are some warning messages that you can ignore.
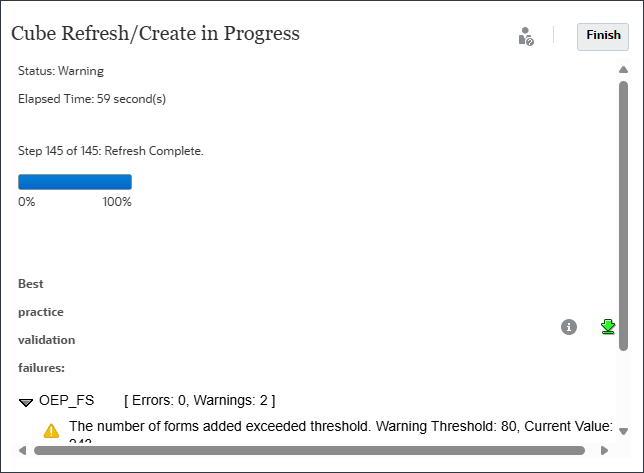
- In the Cube Refresh message, click Finish.
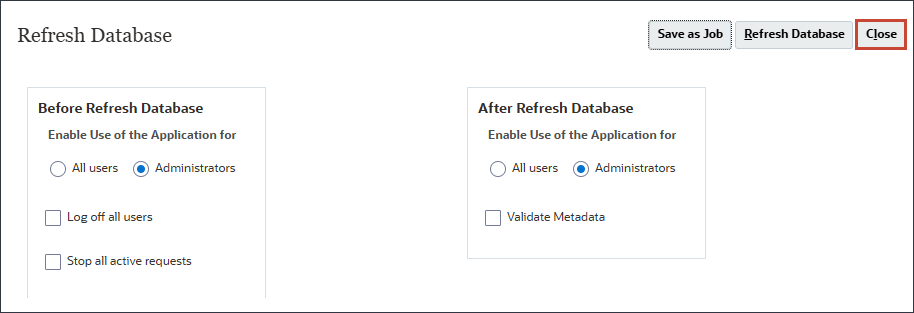
- Click Close.
- Click Cancel.
- Click (Home).
Reviewing Parent Members in the Account Dimension
You want to predict parent-level Opex accounts. In this section, you review the account structure for Operating Expenses, and you review Opex details. You review parent members in the Account dimension to ensure accurate data aggregation and reporting by verifying that roll-ups and hierarchies correctly reflect the organization's financial structure.
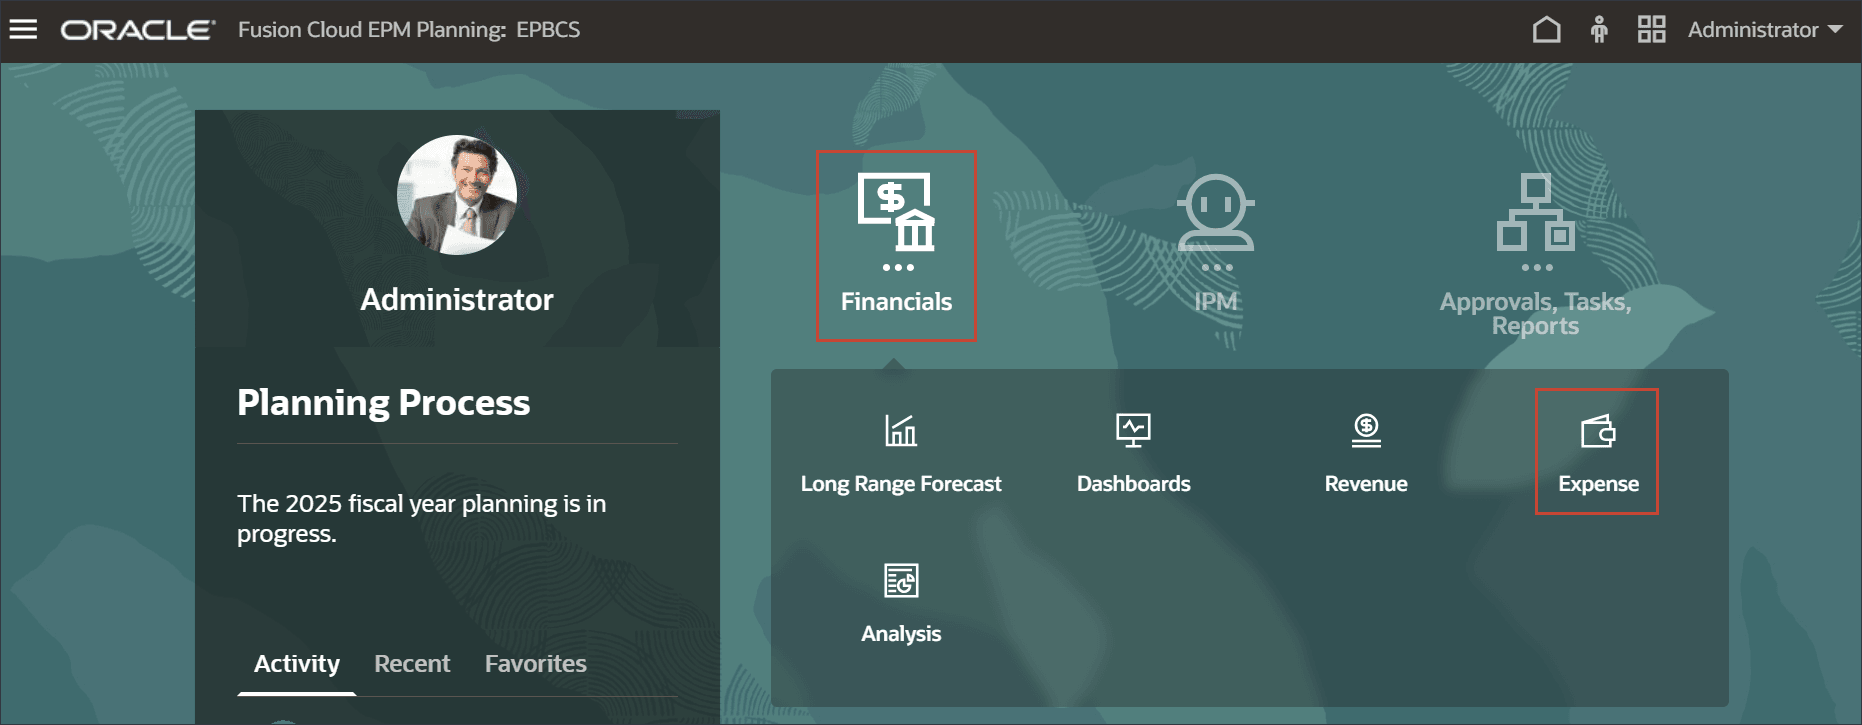
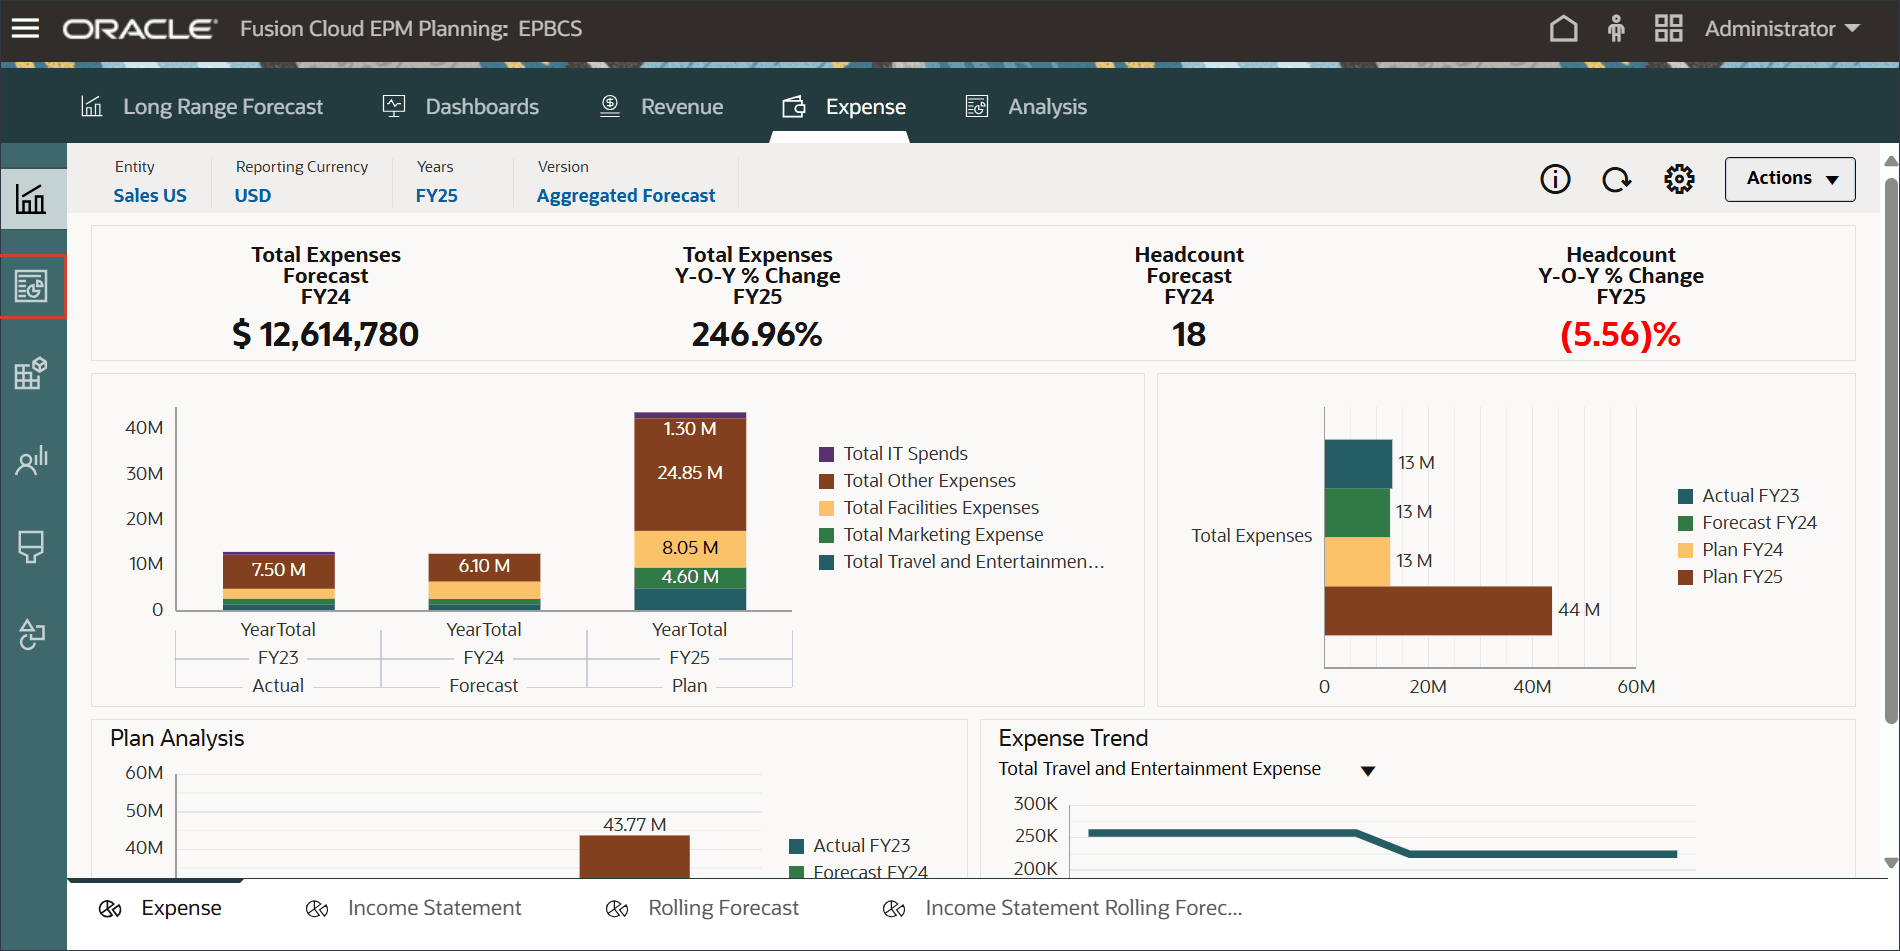
- On the home page, click Financials then Expense.
- Select the second vertical tab, click
 (Parent level Opex Plan).
- On the Opex Details tab, review the historical actual data from the past two years: FY23 and FY24, along with next year's budget: FY25.
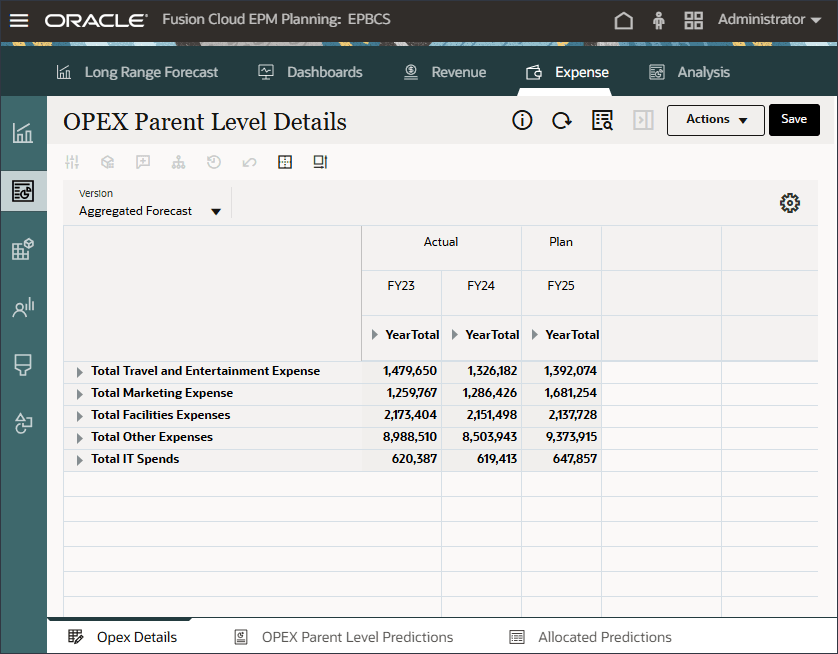
This data has been prepared using traditional methods such as driver-based, trend-based, or zero-based methods.
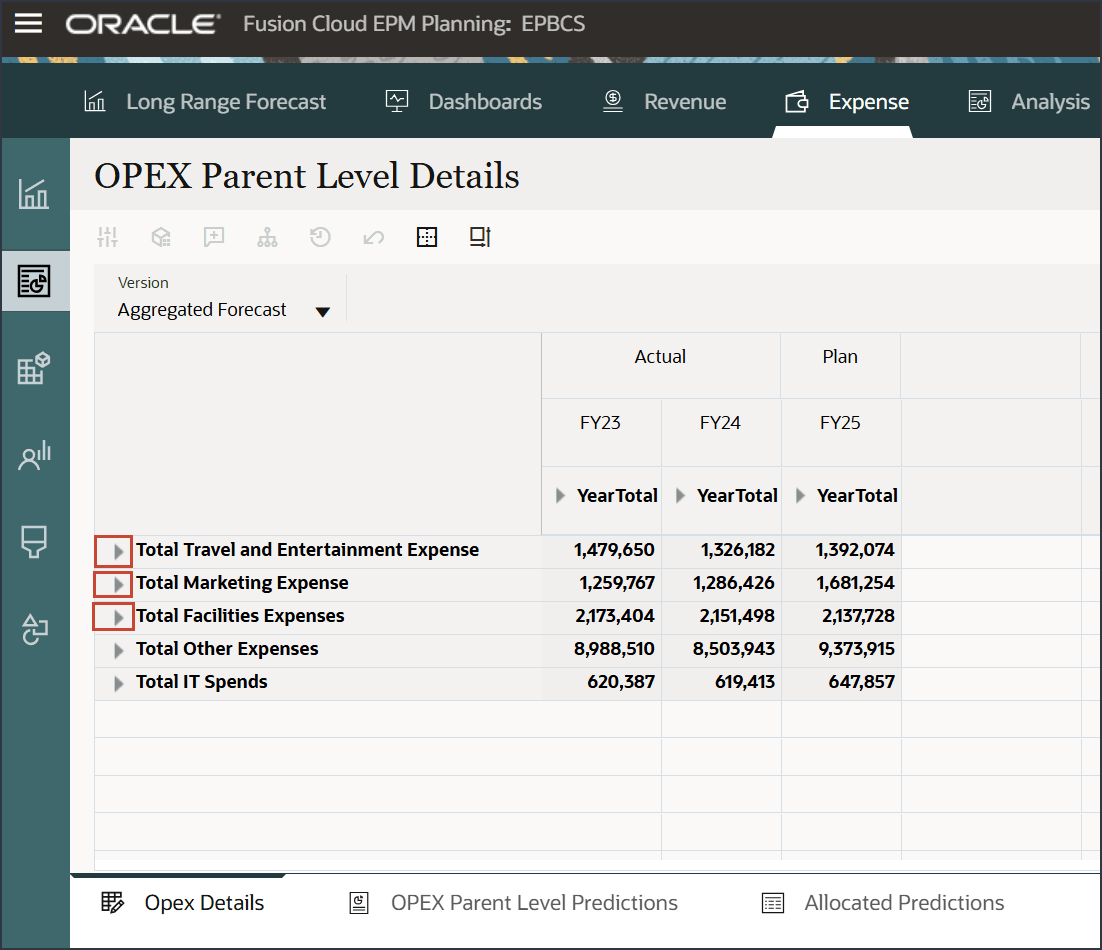
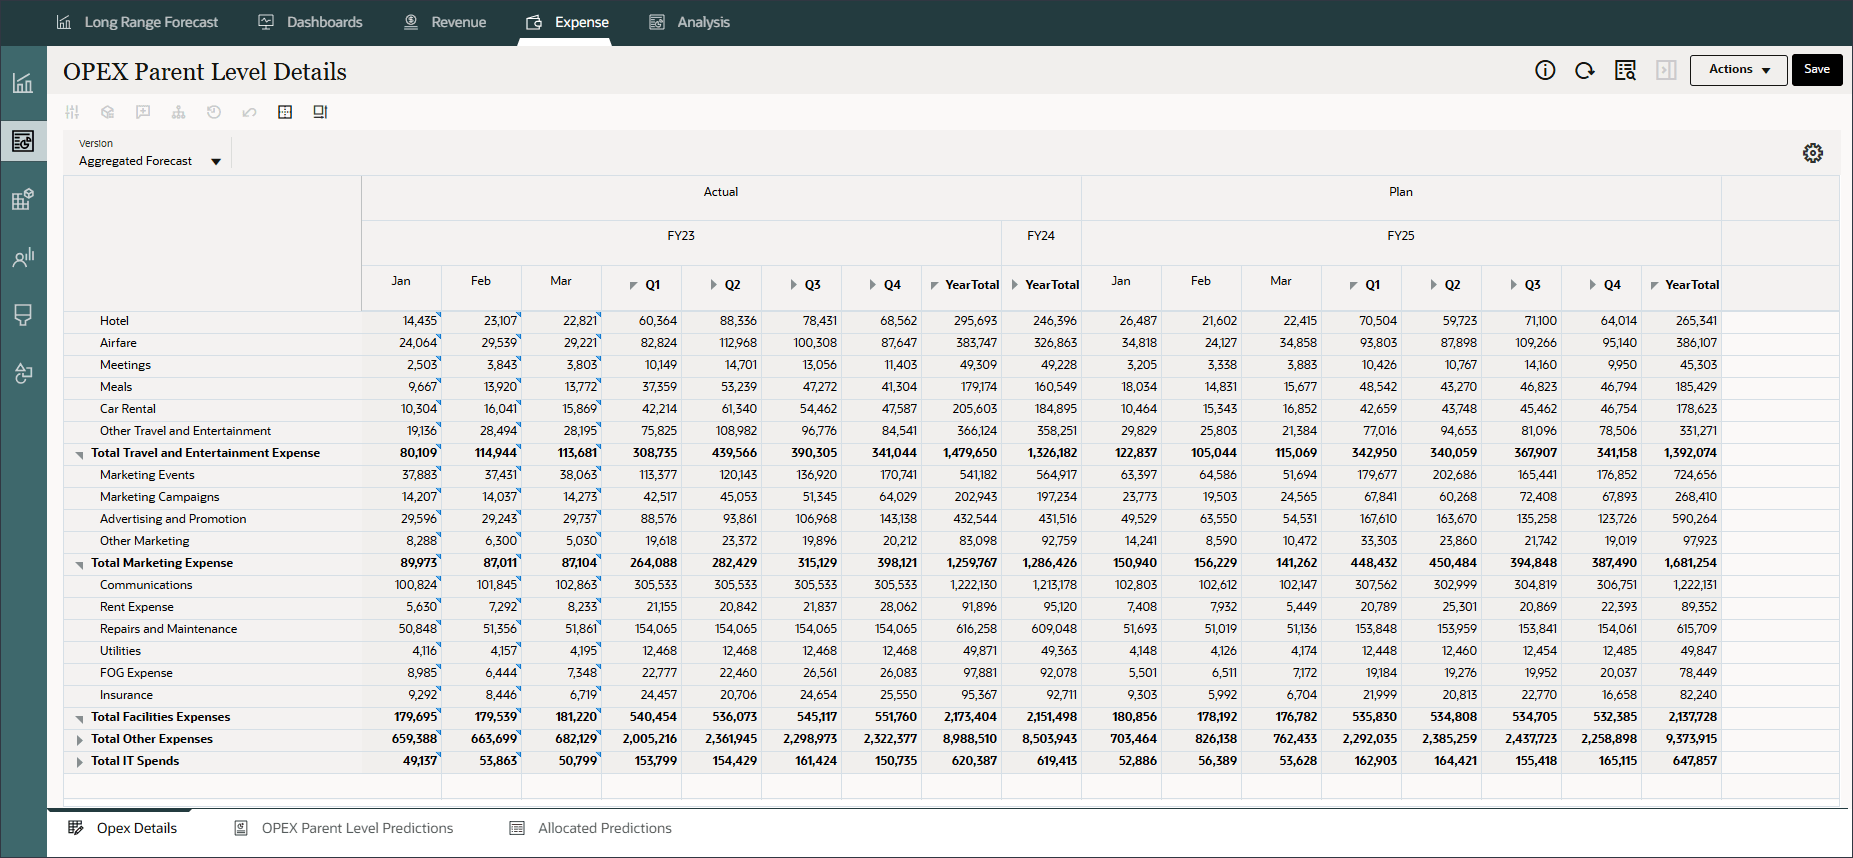
- In the rows, you can expand the dynamic expense account members to review the level 0 opex accounts. In the rows, expand Total Travel and Entertainment Expense, Total Marketing Expense, and Total Facilities Expenses.
- You can also expand the Period dimension to review monthly details for Actuals and Plan data. In the columns, for FY23 and FY25, expand YearTotal, and Q1.
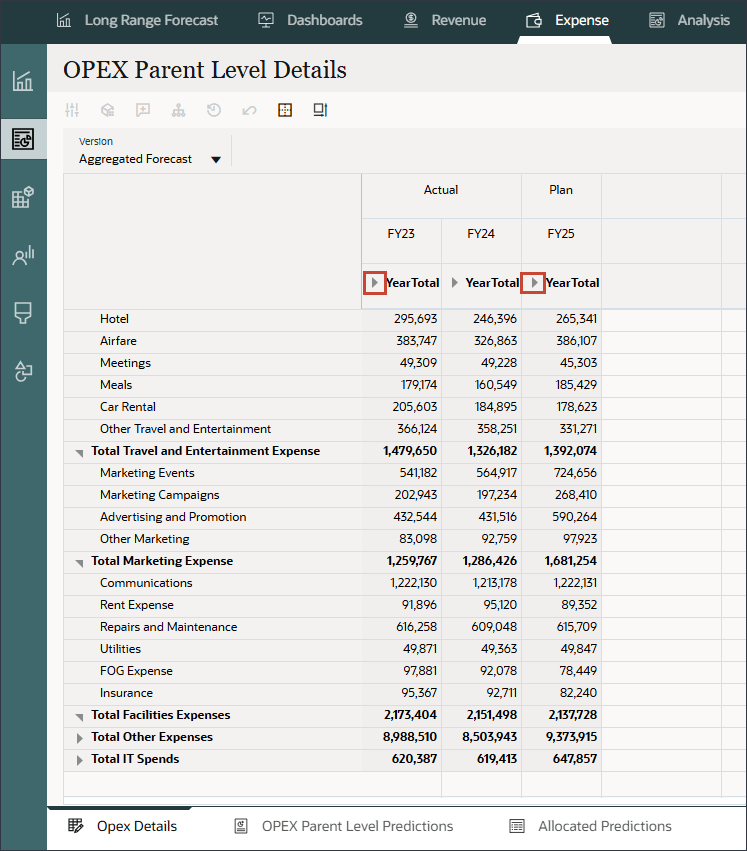
You can review granular-level data, including level 0 Opex accounts and monthly details.
Running the Dynamic Calculation Parent Level Prediction
Reviewing Parent Level Predictions Form
In this section, you review the aggregated forecast predictions, before generating parent level predictions.
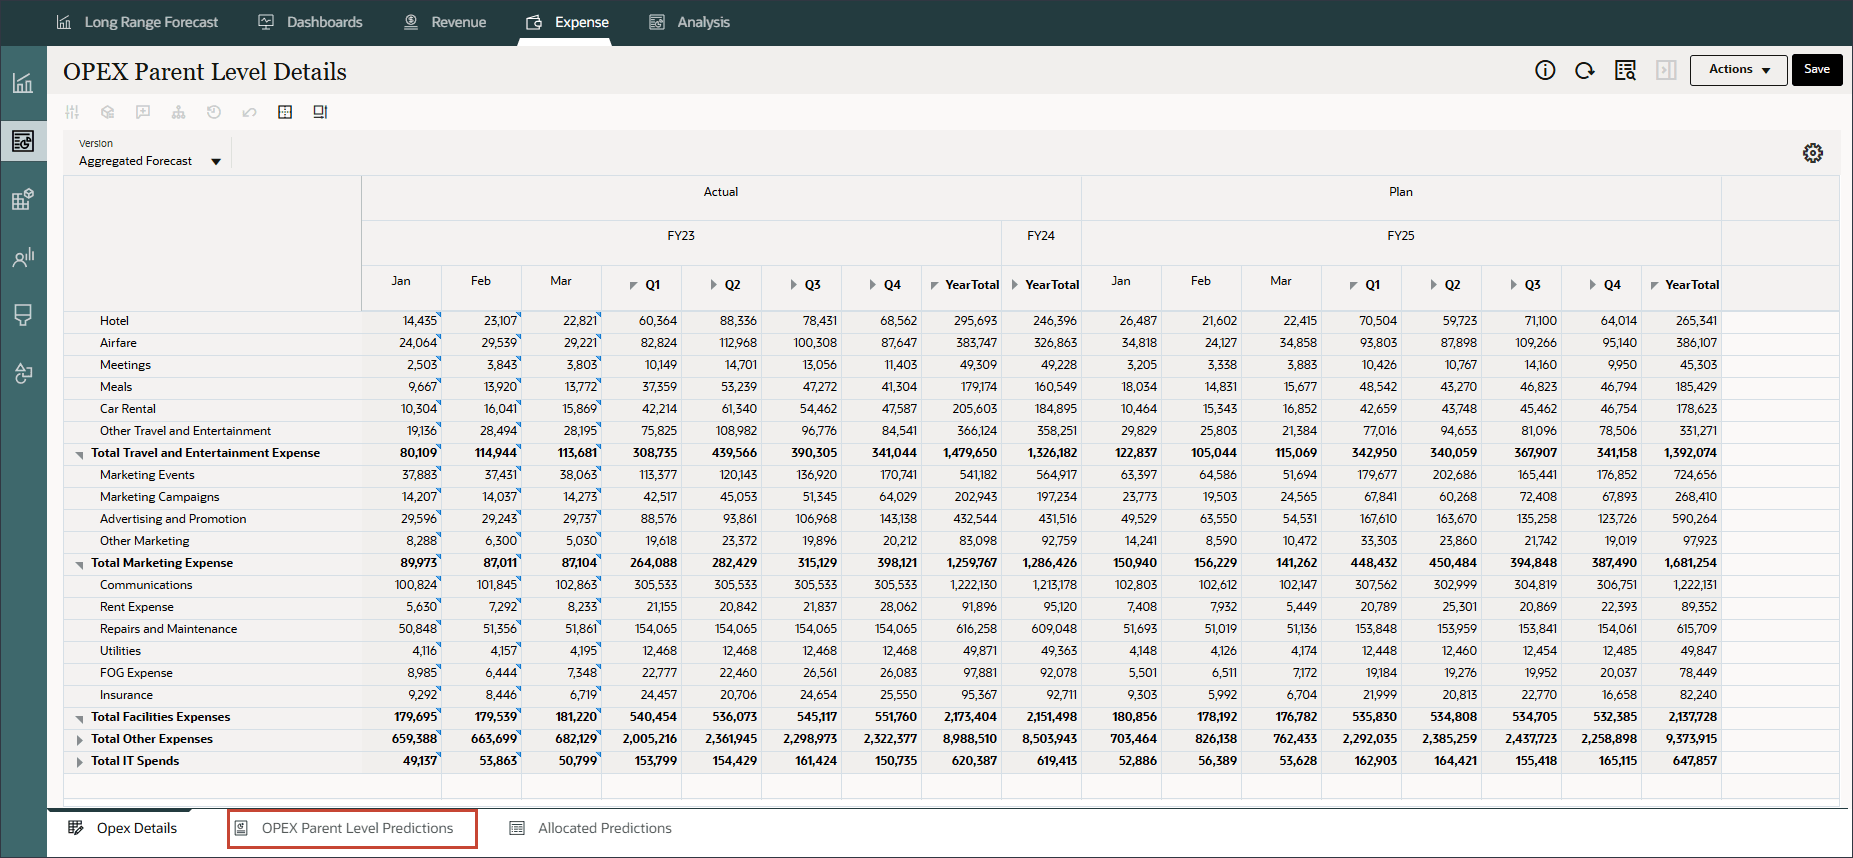
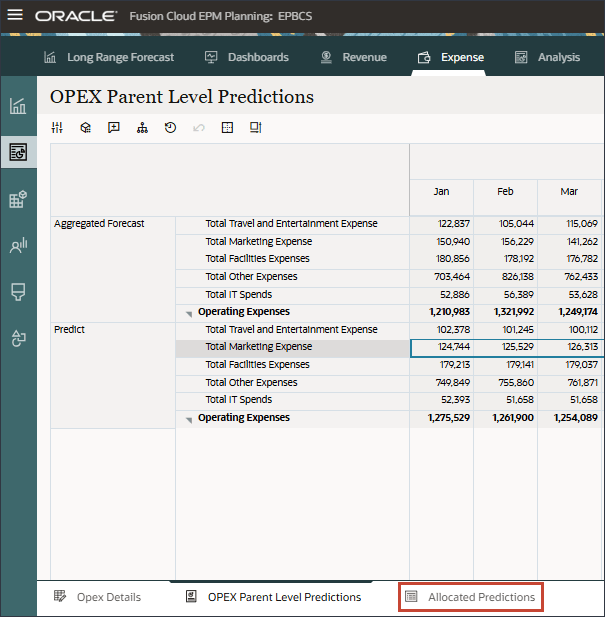
- Navigate to the second horizontal tab, "OPEX Parent Level Predictions". Click the OPEX Parent Level Predictions tab.
- Notice that there are two versions: Aggregated Forecast and Predict.
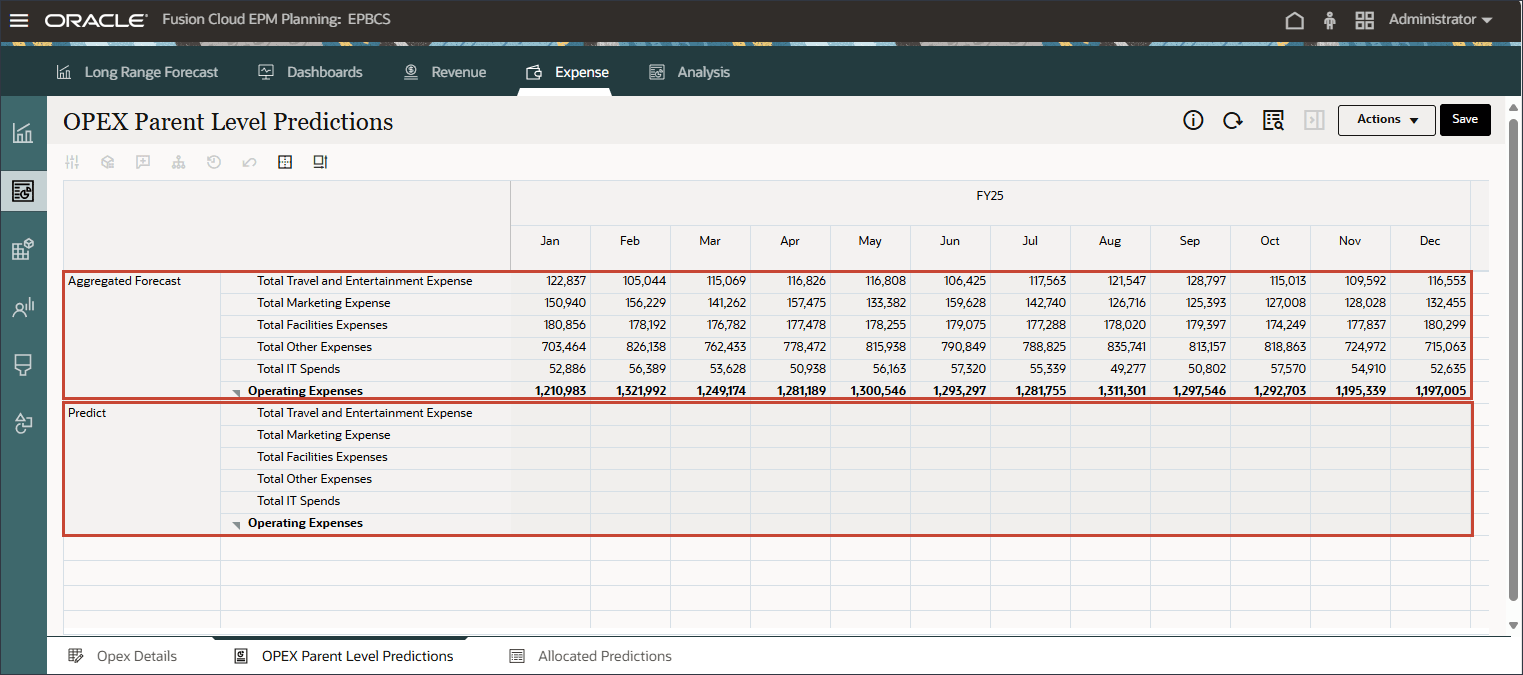
The Aggregated Forecast version contains numbers aggregated from level 0 members in the Opex hierarchy. The Predict version does not have any data.
Enabling Dynamic Parent Level Predictions
In this section, you modify the OPEX Parent Level Predictions form to enable parent level predictions.
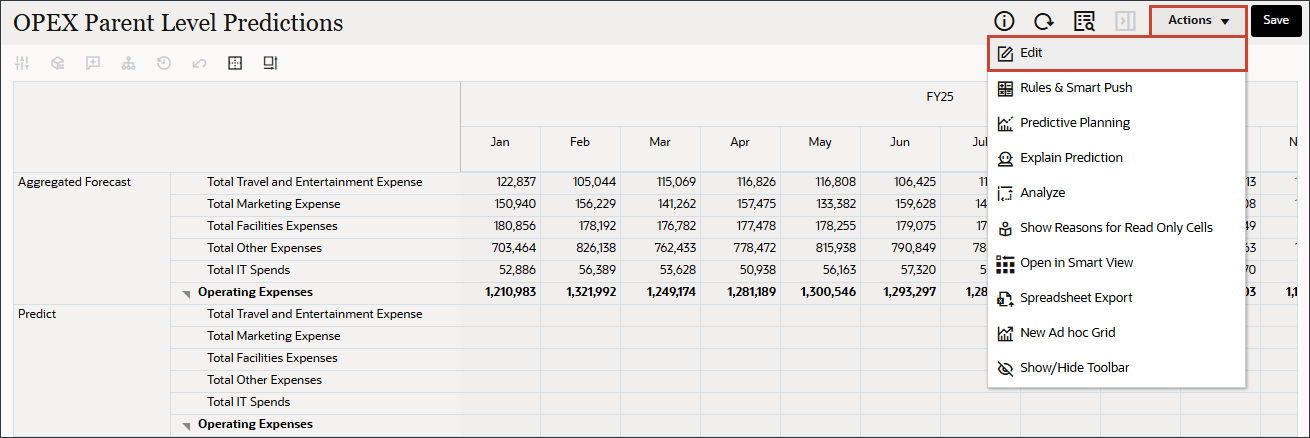
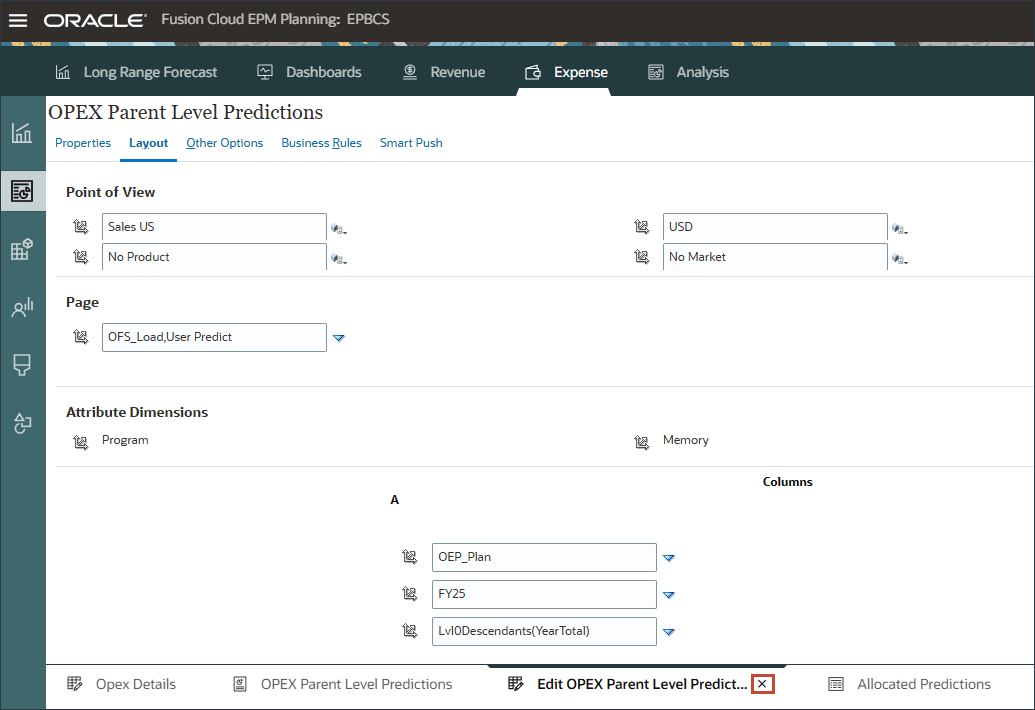
- On the OPEX Parent Level Predictions form, click Actions, and select Edit to open the form in designer mode.
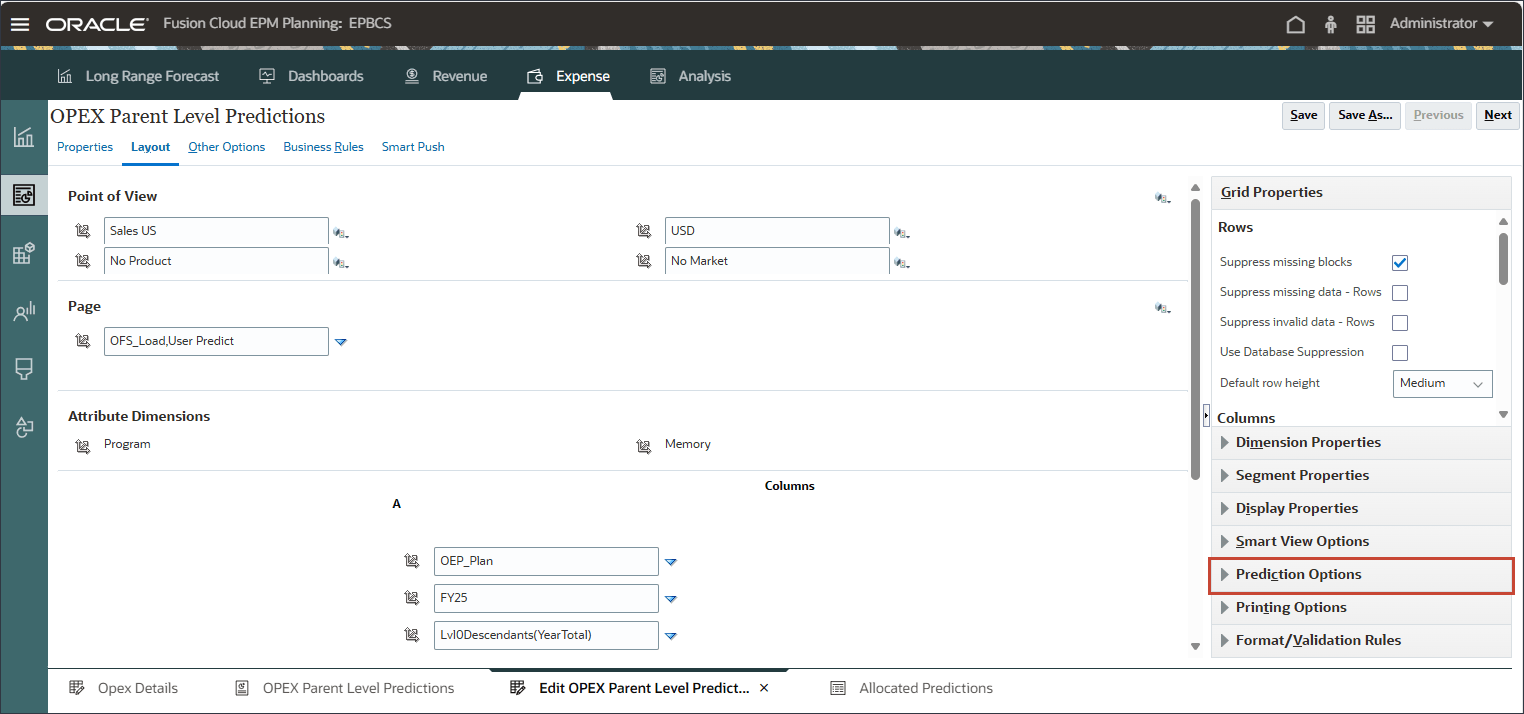
- On the Layout tab, on the right, select Prediction Options.
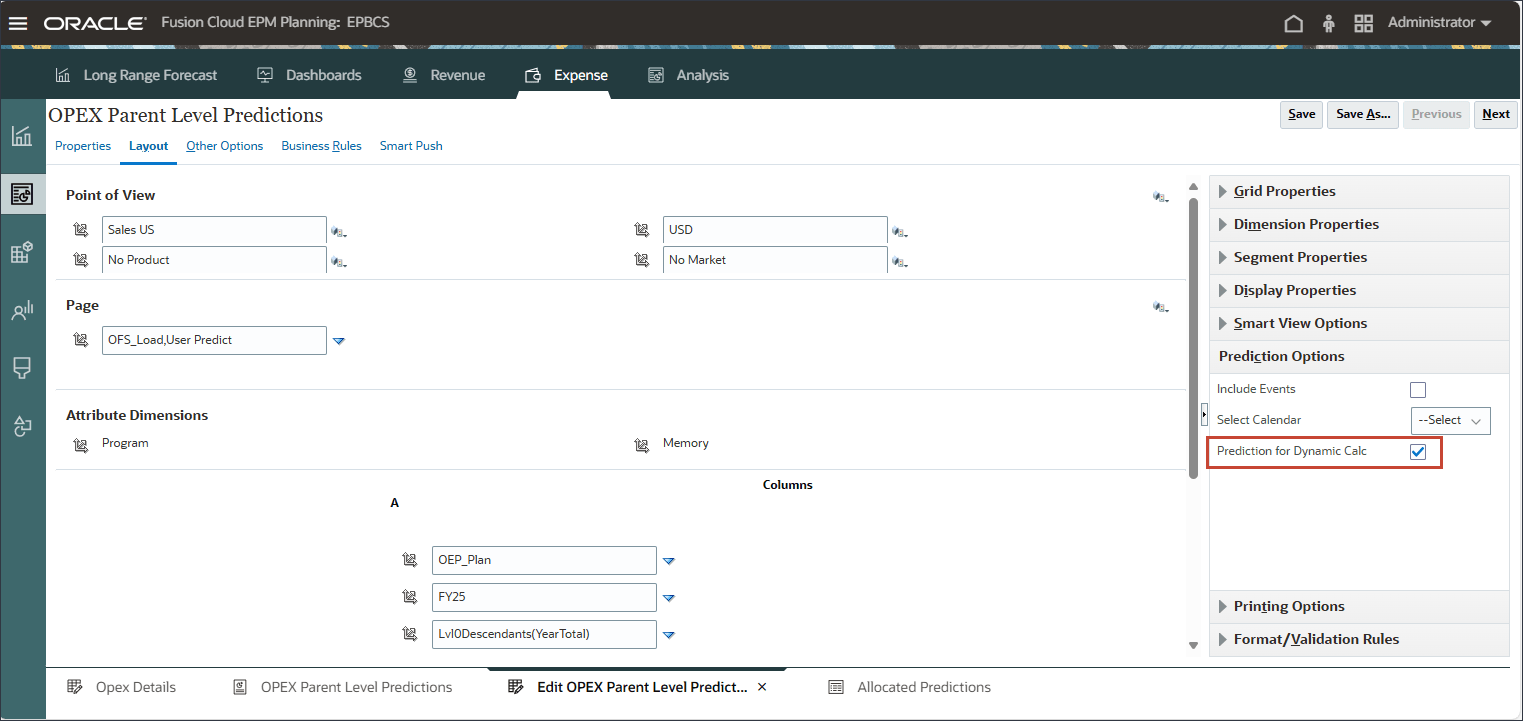
- In Prediction Options, select Prediction for Dynamic Calc.
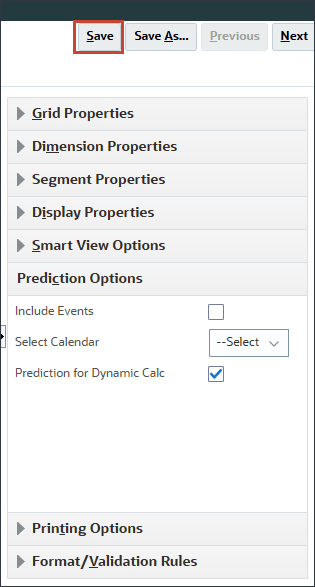
- Click Save.
- At the Information message, click OK.

- Close the form designer to return to the OPEX Parent Level Predictions form.
Reviewing Parent Level Prediction Data
In this section, you review the parent level prediction data in the Predict version for each dynamic parent level Opex account member and you also review the explainability. You run the Dynamic Calculation Parent Level Prediction which provides consolidated, real-time predictive insights at the parent level, enabling more accurate and timely decision-making for summarized financial data.
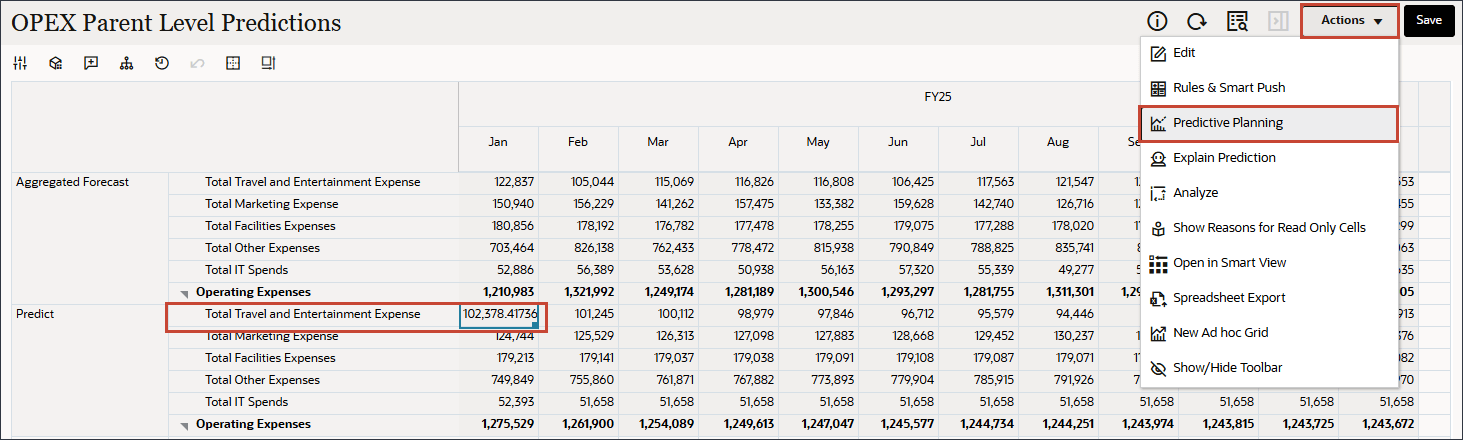
- Review the parent-level prediction data in the Predict version for each dynamic parent-level Opex account.

These predictions are generated based on historical actual data at the parent level, using statistical methods that analyze historical data patterns, seasonality, and apply time series forecasting techniques.
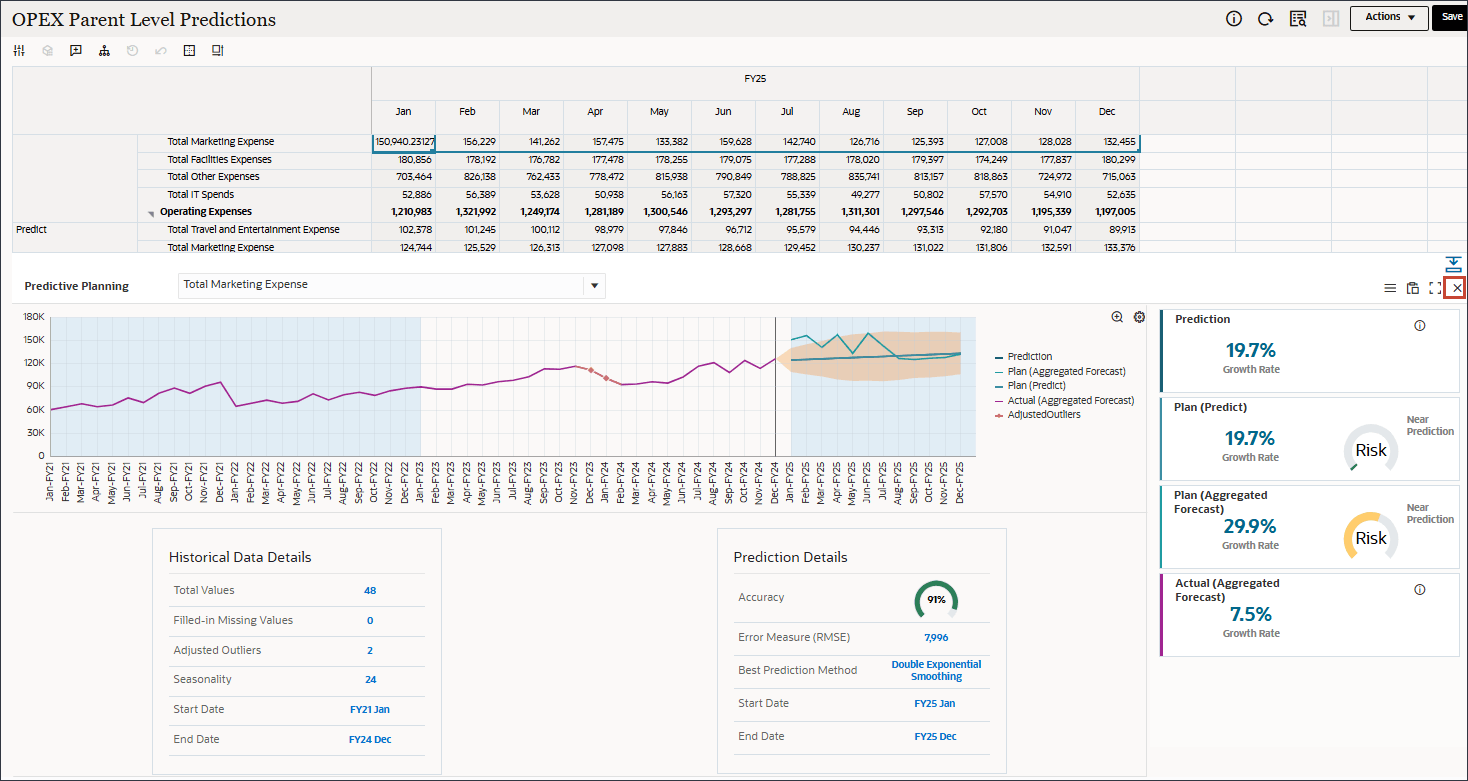
- To review explainability, select a predicted value such as Total Travel and Entertainment Expense, and click Actions, and select Predictive Planning.
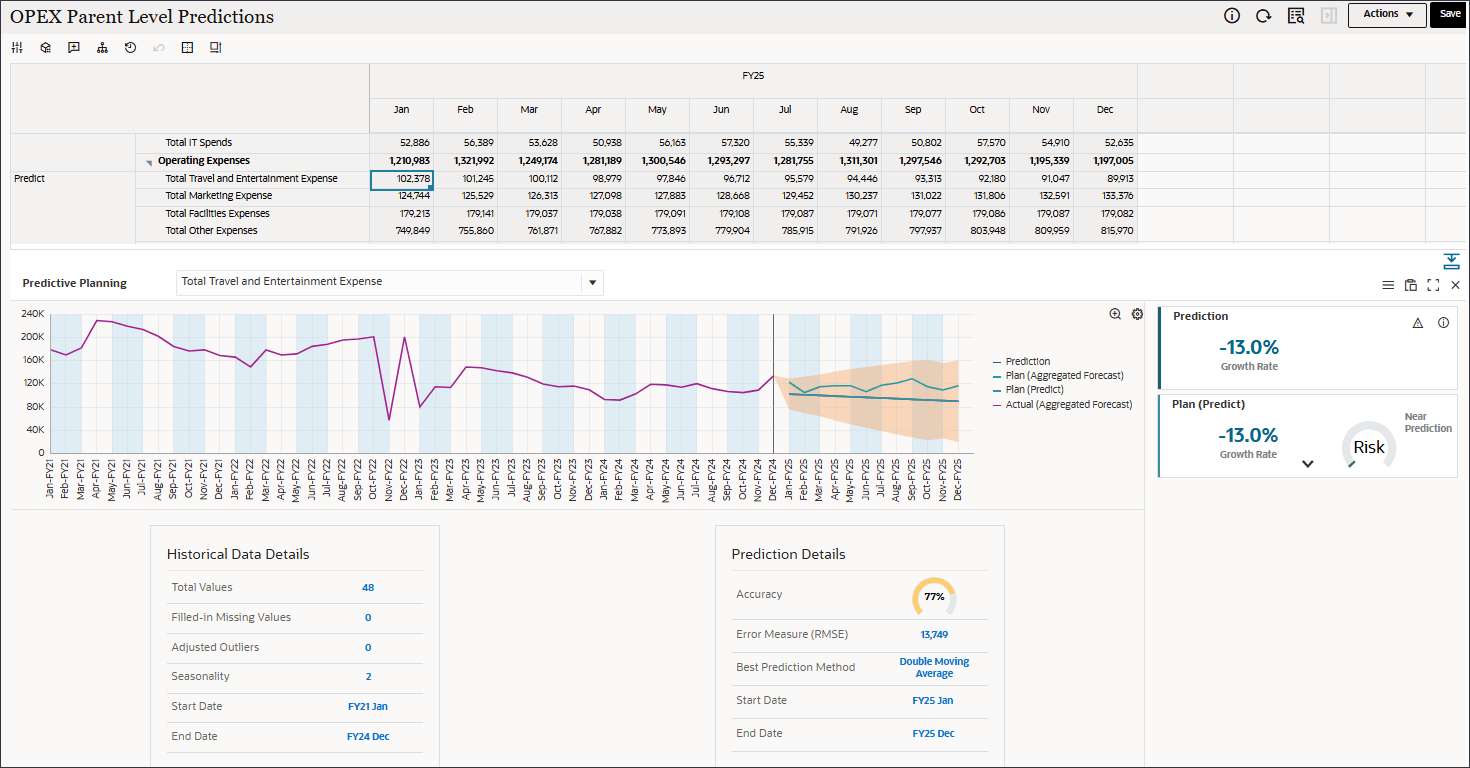
- Review the predictive planning chart containing historical data details, predictions details, accuracy, prediction method used, adjusted outliers and seasonality.
- Above the chart, from the drop-down, select a different parent level account such as Total Marketing Expense.
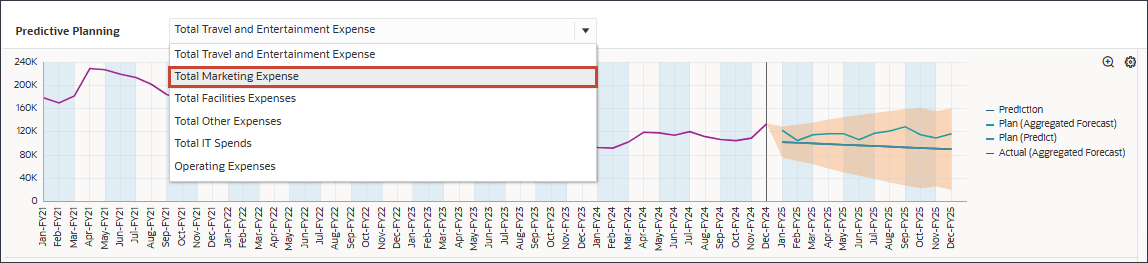
Explainability for Total Marketing Expense is displayed.

- Close the Explainability panel.
Allocating Opex Predictions
In this section, you allocate the dynamic parent-level prediction data from the Predict version to level 0 account members based on the prior year’s actual proportions and you review the allocated values. Allocating OPEX predictions ensures that forecasted operating expenses are accurately distributed across relevant departments or accounts, supporting more precise budgeting and financial analysis.
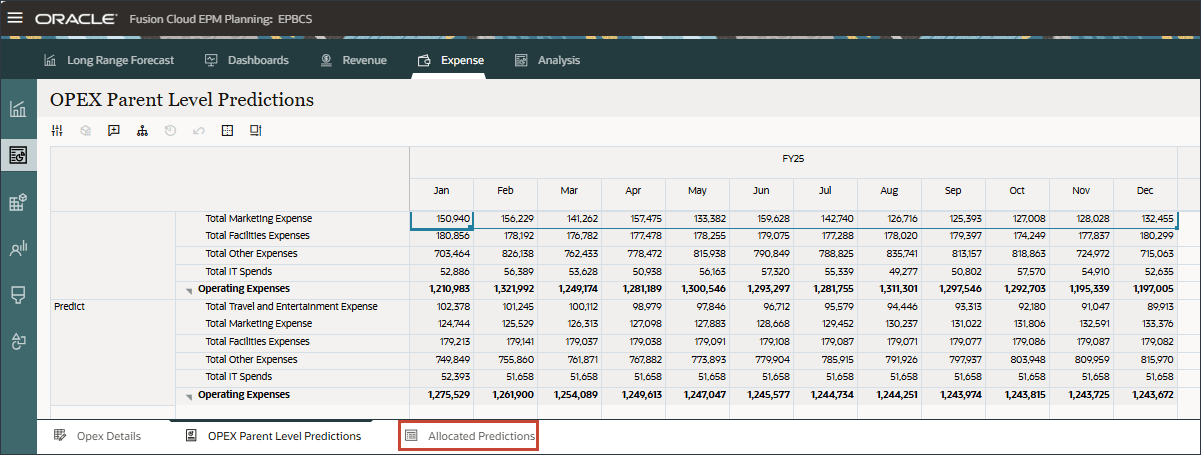
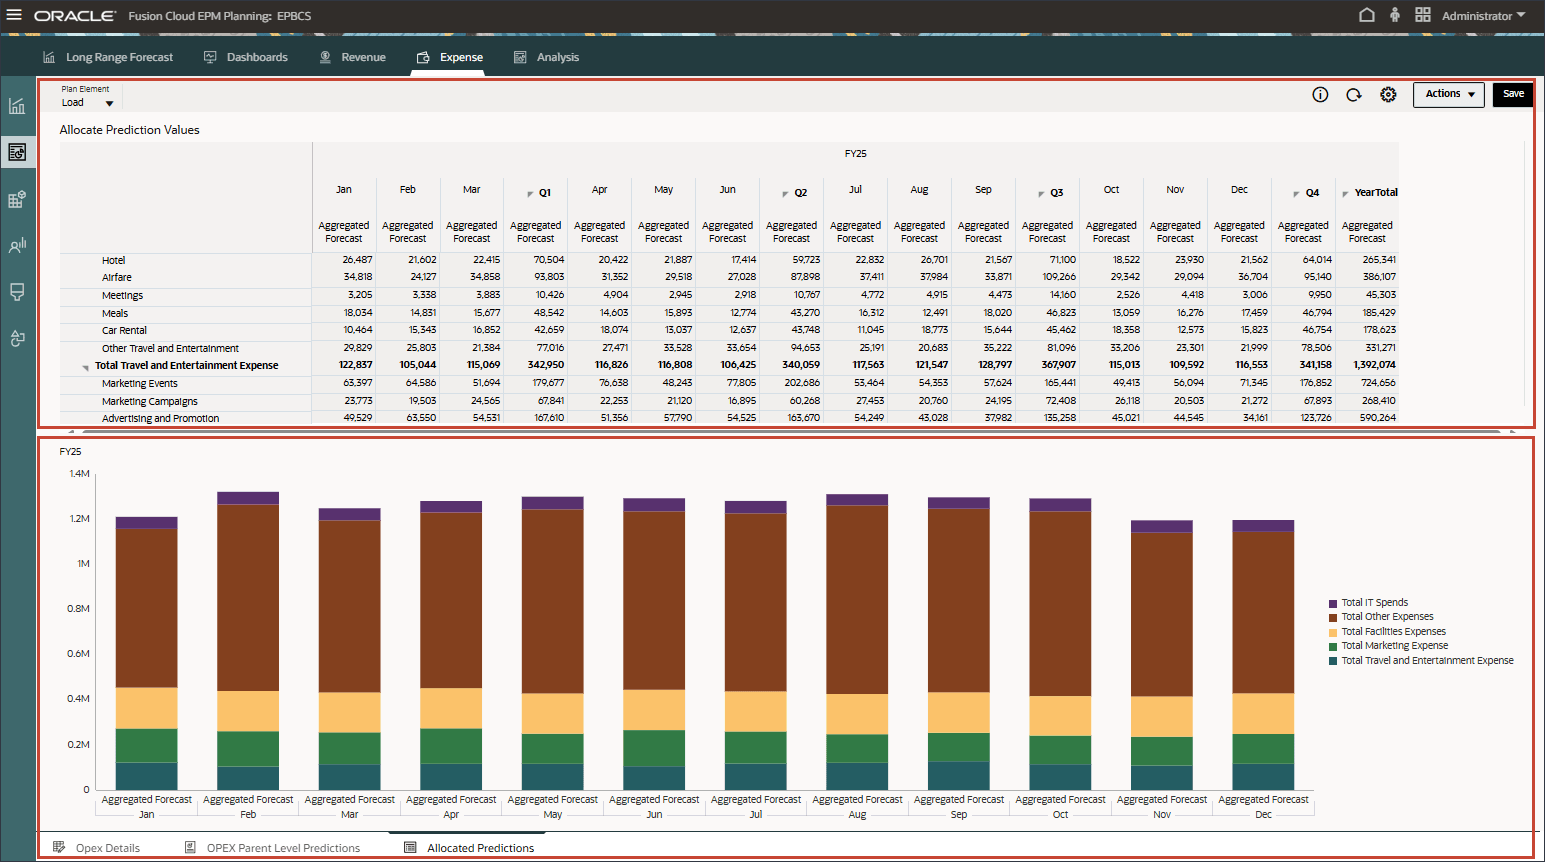
- Before running the allocations, navigate to the third horizontal tab: Allocated Predictions. Click the Allocated Predictions tab.
The Aggregated Forecast for FY25 is available. Shown on the top, the aggregated forecast was generated using traditional budget methods. Underneath the grid, there is a column chart which displays the aggregated forecast values for each parent-level Opex account by month.
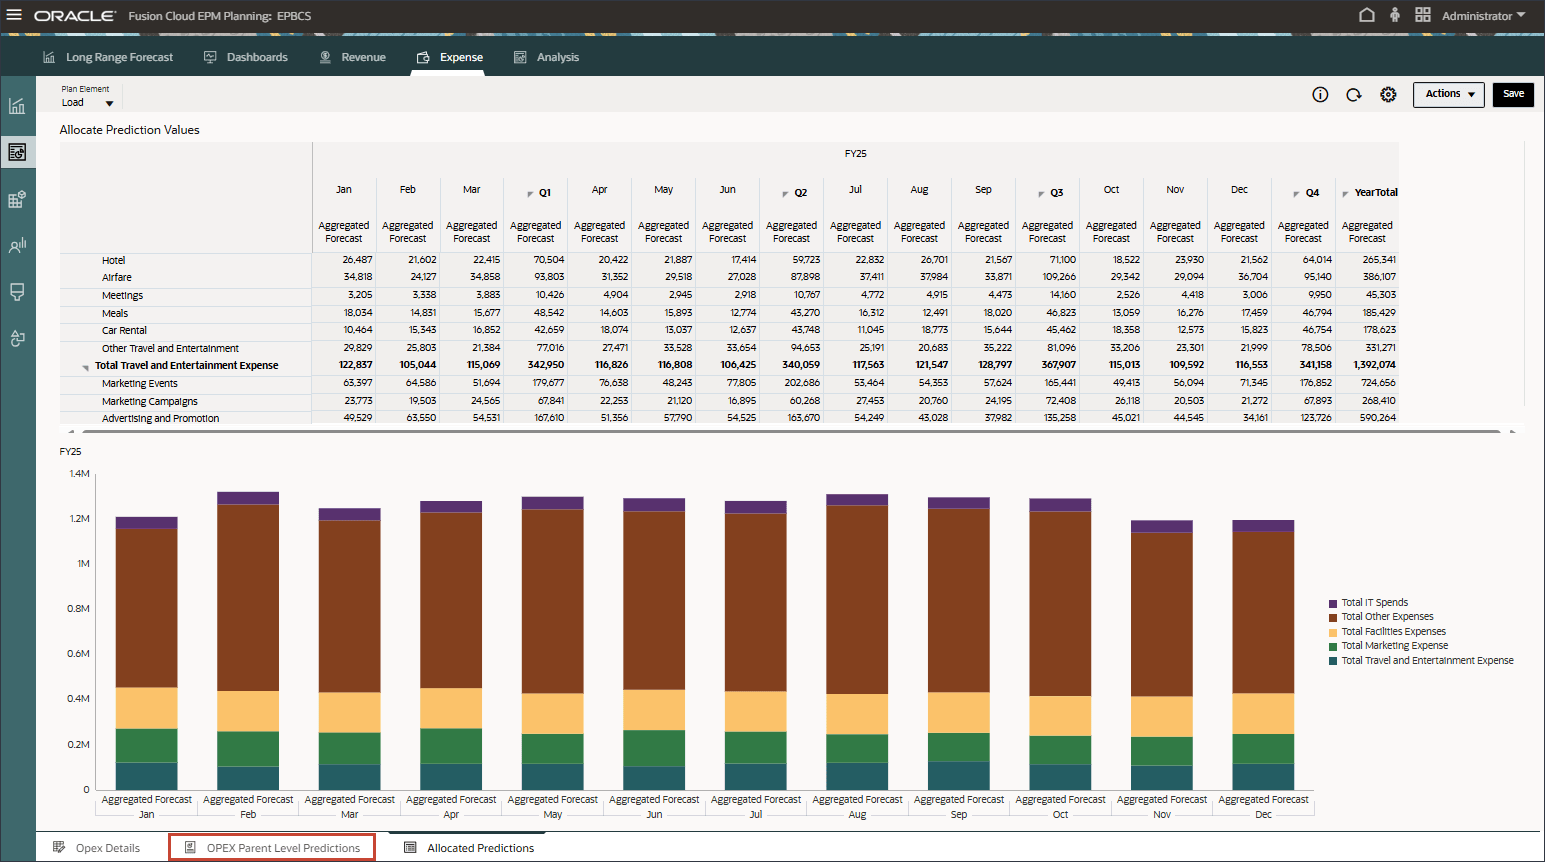
- Return to the previous tab: Opex Parent Level Predictions. On the bottom, click the OPEX Parent Level Predictions tab.
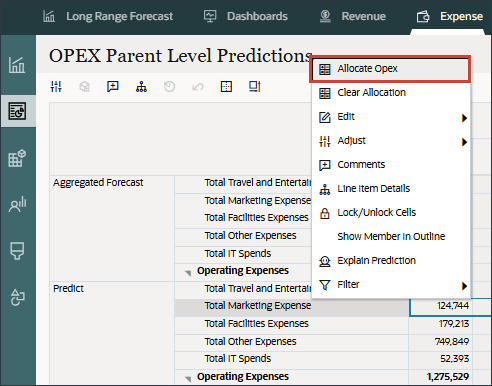
- To distribute parent-level data based on the prior year's actual data, right-click Total Marketing Expense, and select Allocate Opex.
- In the Information message, click OK.
A groovy rule runs which picks up grid level values from the form, and allocates it based on the prior year actual proportion. The results are stored in the Final version.
- Click the Allocated Predictions tab to review the allocated results.
Allocated values by period are displayed for the Final version. Additionally, a column chart is displayed that compares the allocated values in the Final version with the aggregated values.

- Click (home) to return to the home page.
Reviewing Parent Level Insights
In this section, you review parent level Insights, and you review how the Insights job is set up. Reviewing parent level insights provides a consolidated, high-level view of performance and trends, enabling informed decision-making and more effective financial management across the organization.
Reviewing Insights
In this section, you review parent level Insights.
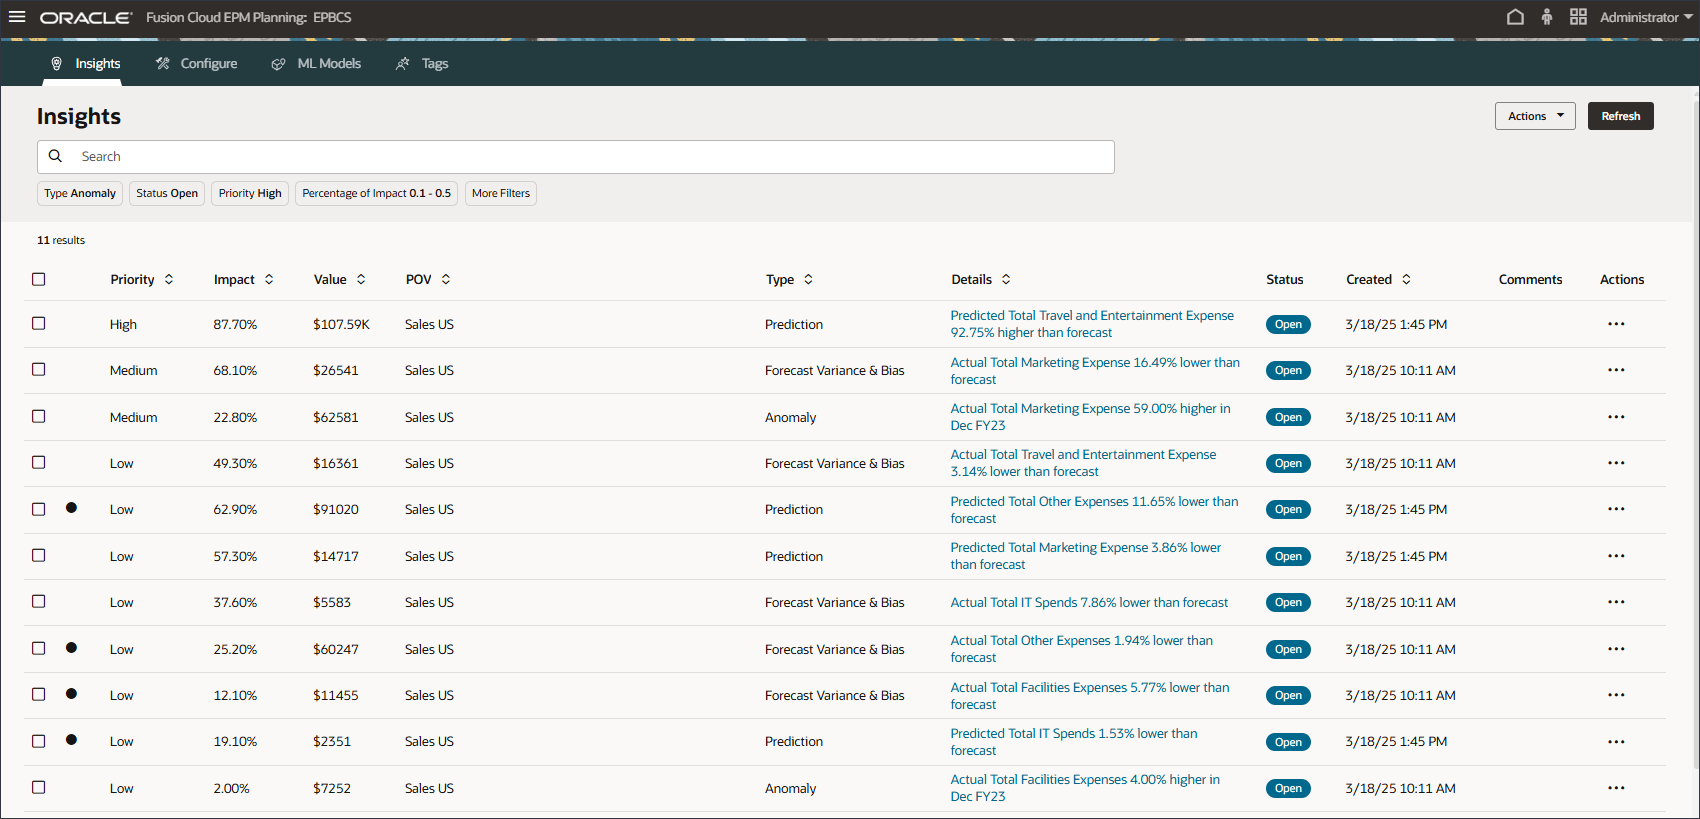
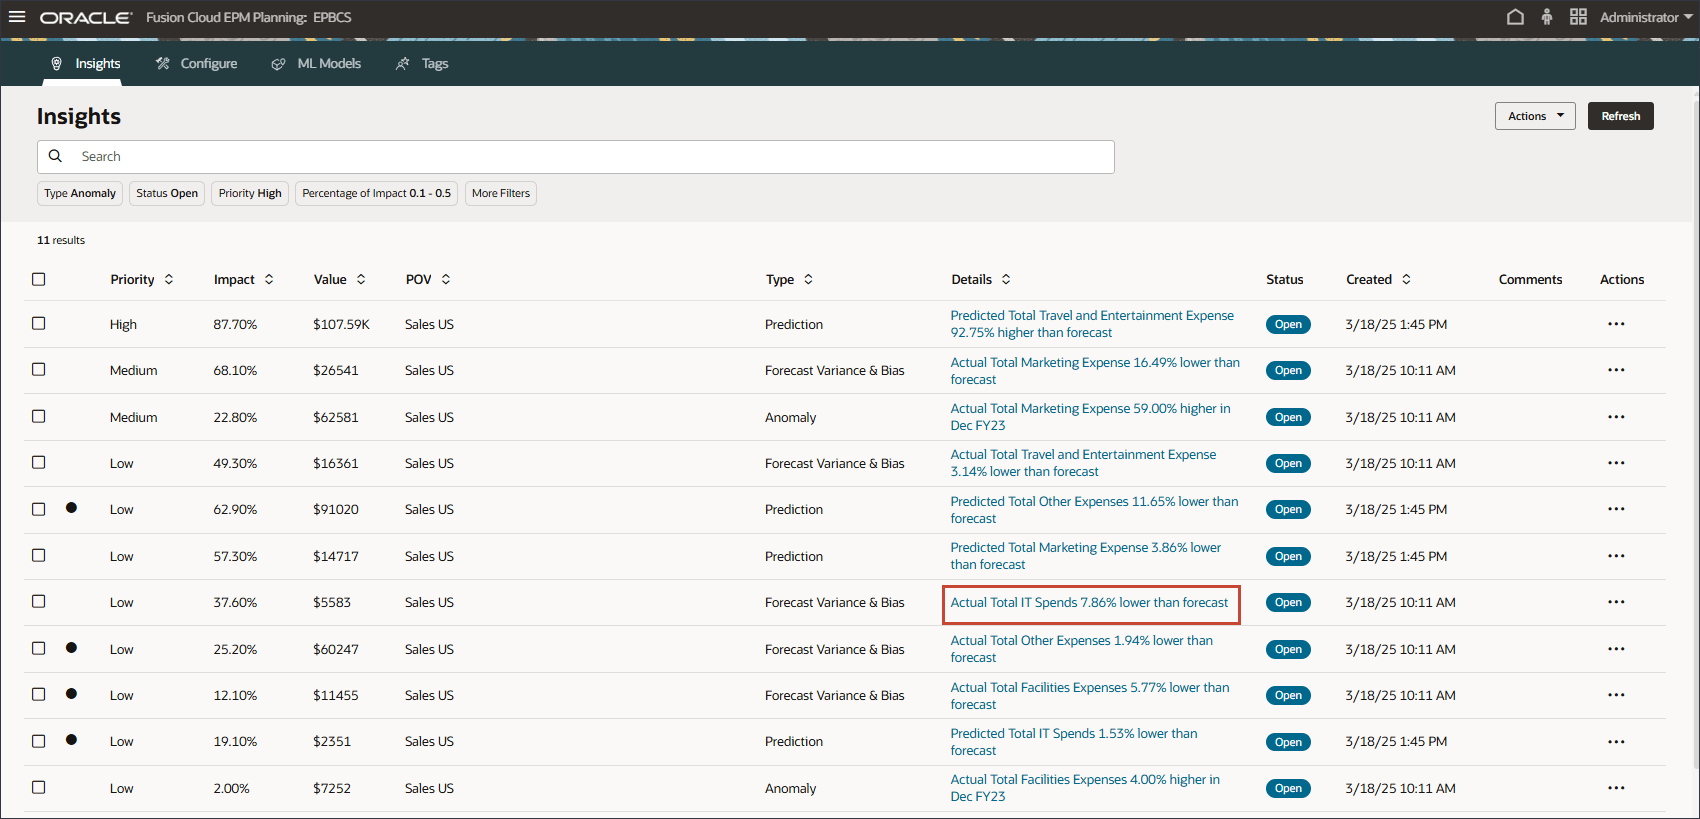
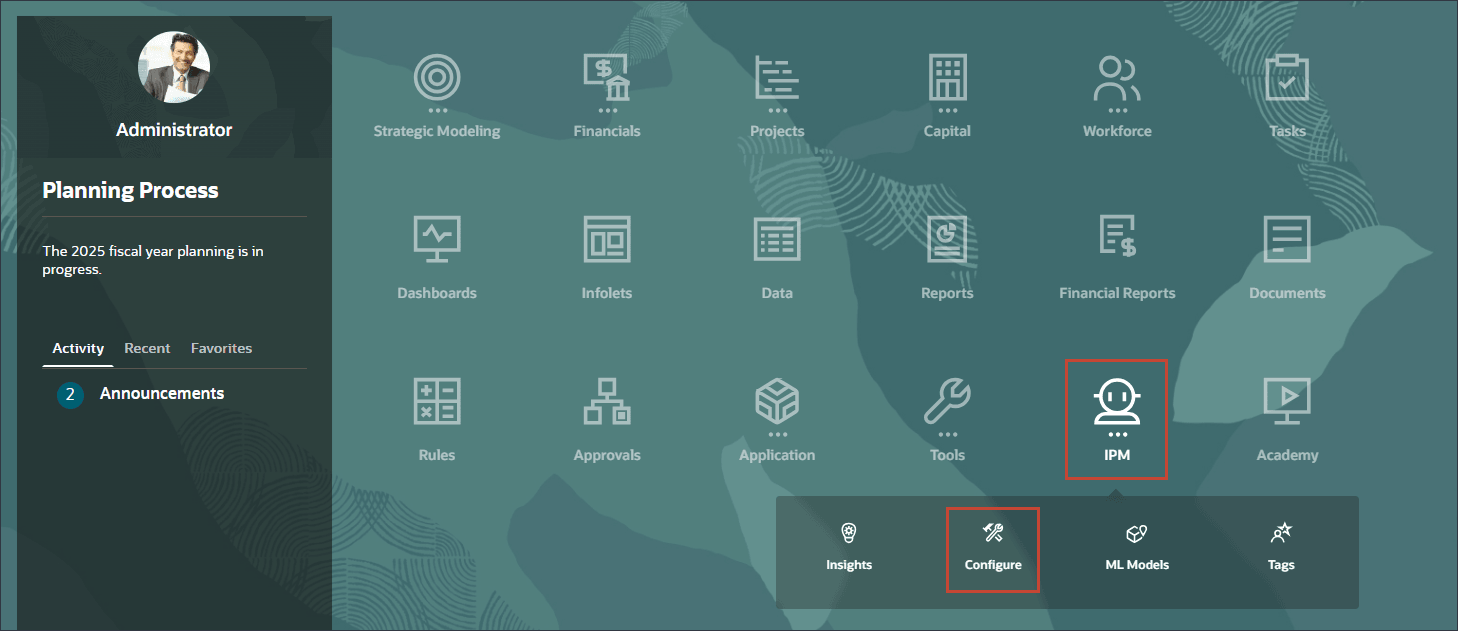
- On the home page, click IPM and select Insights.
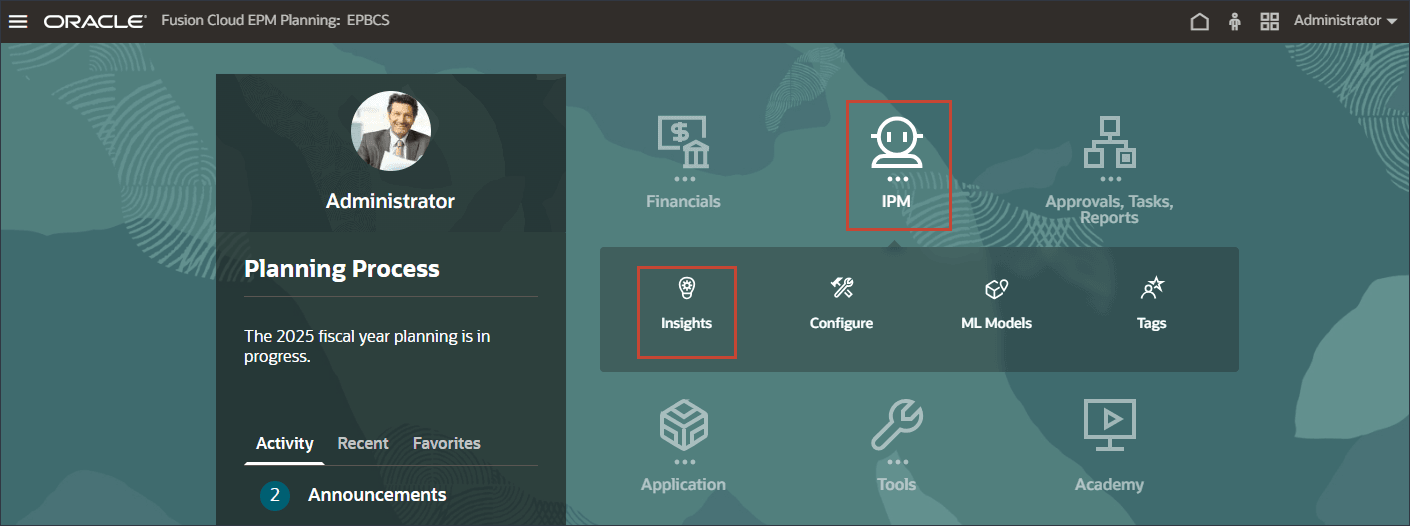
The Insights page is displayed where you can review the dynamic parent level insights for all three types of insights - Anomaly, Forecast Variance & Bias and Prediction.
- To view the details of an anomaly insight, click one of the anomaly insights such as the one in the third row to see details about Actual Total Marketing Expense.
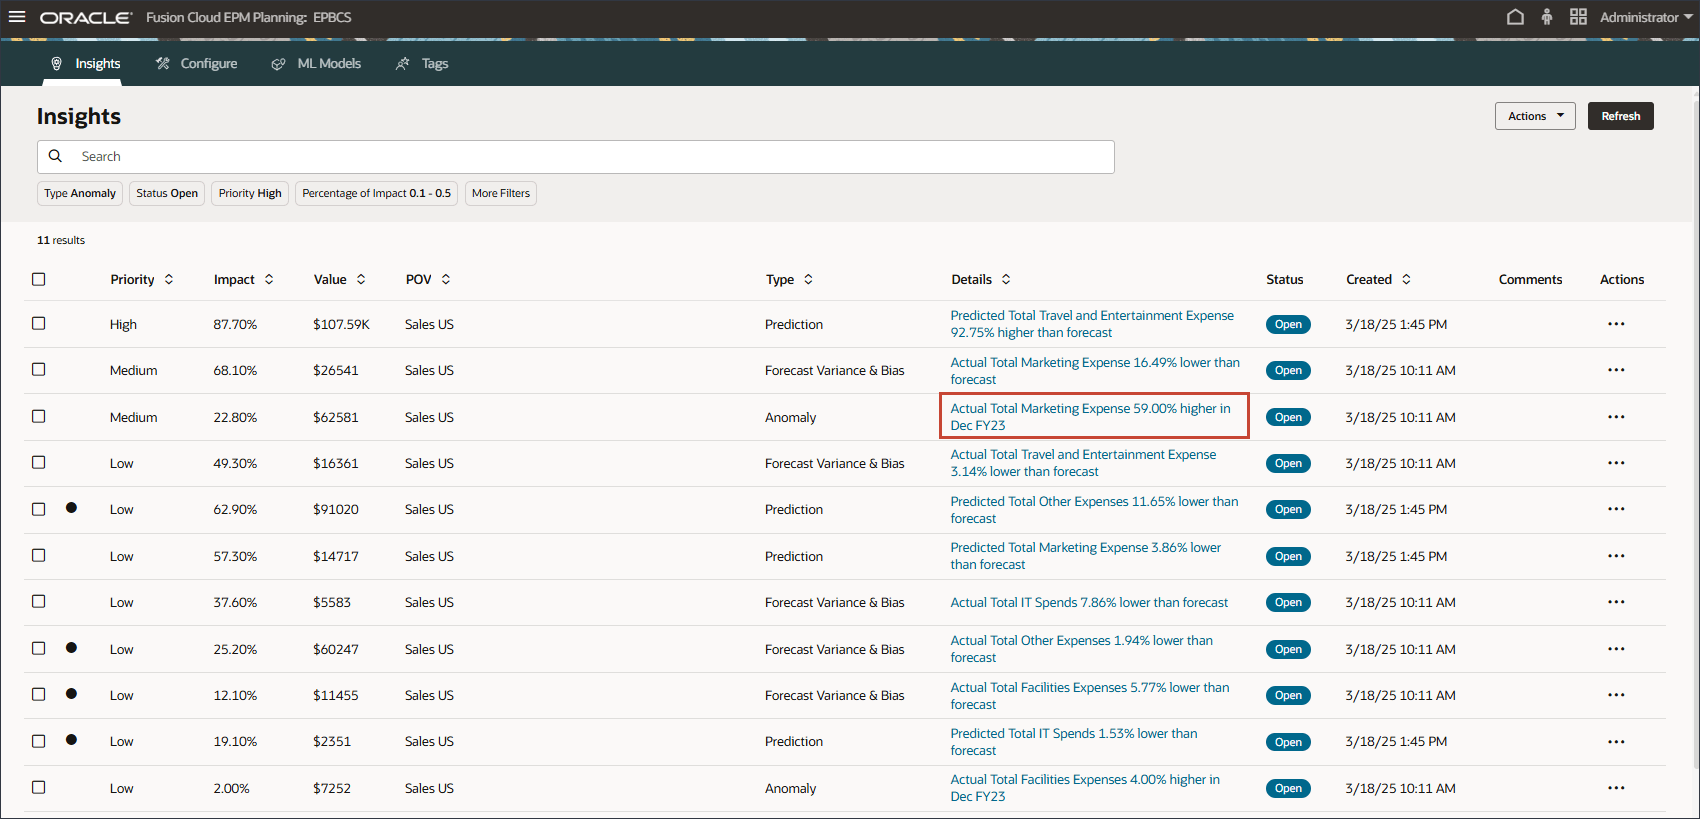
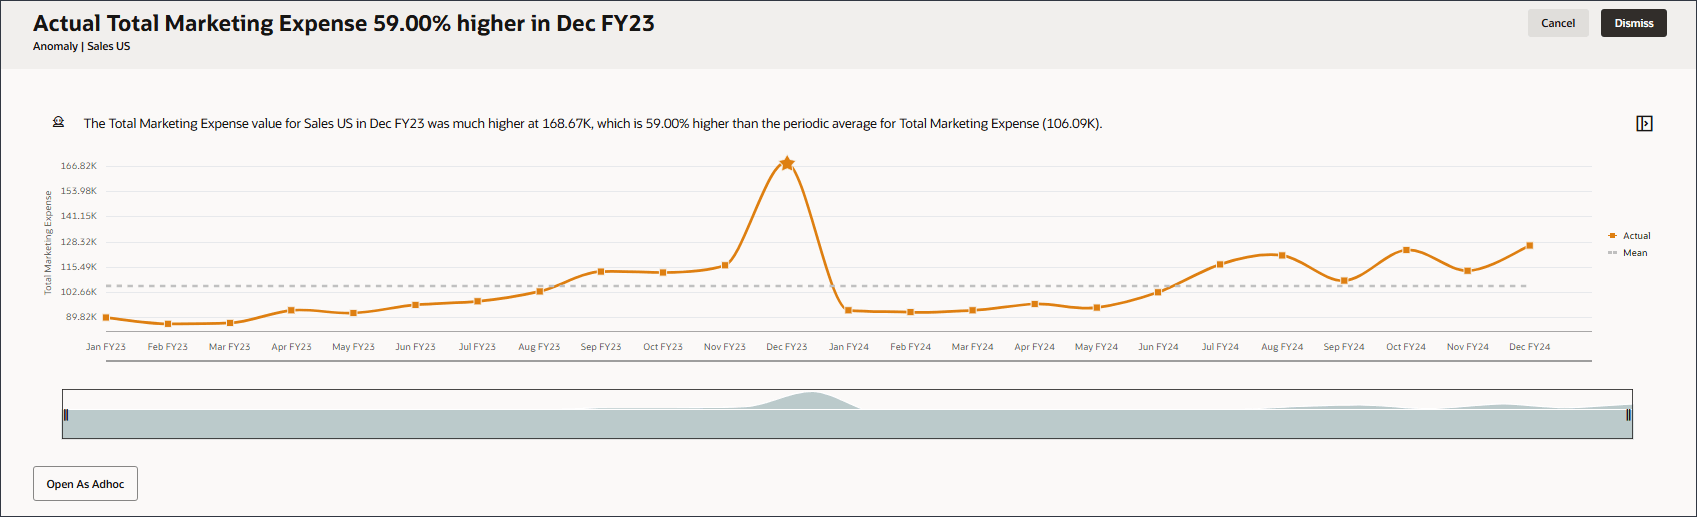
Detailed information for this insight is displayed.
- Place your cursor over the anomaly to view the details.
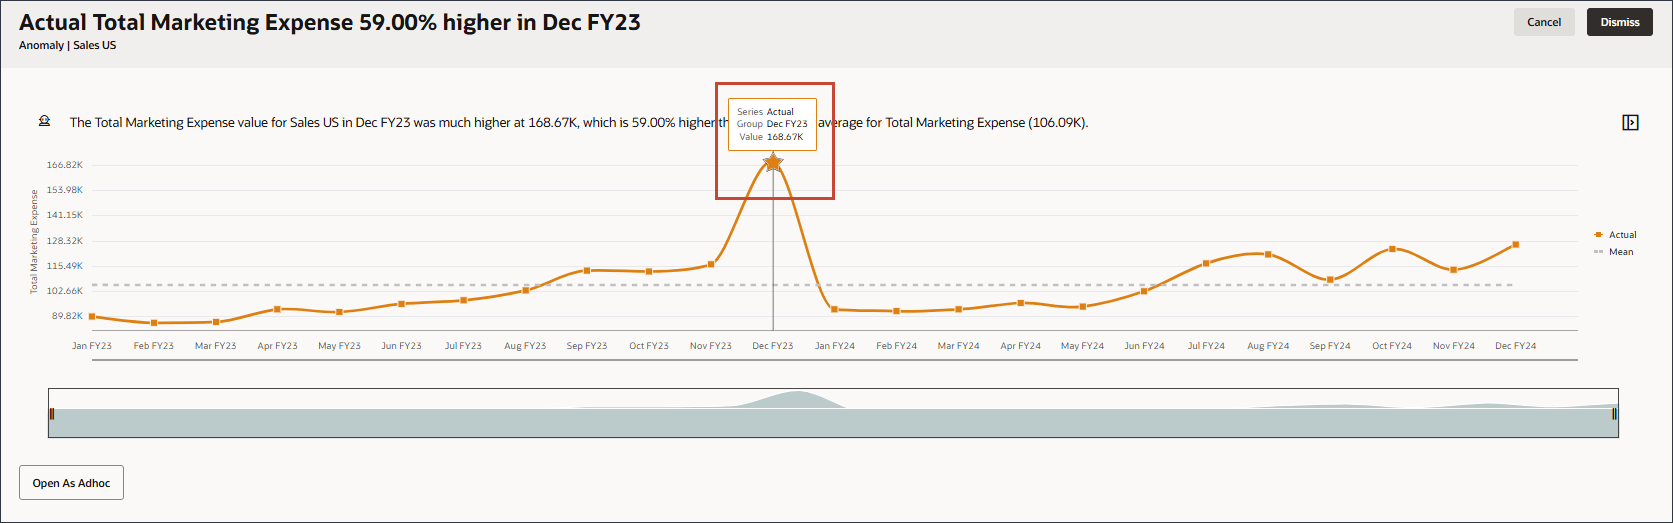
- Click Cancel.
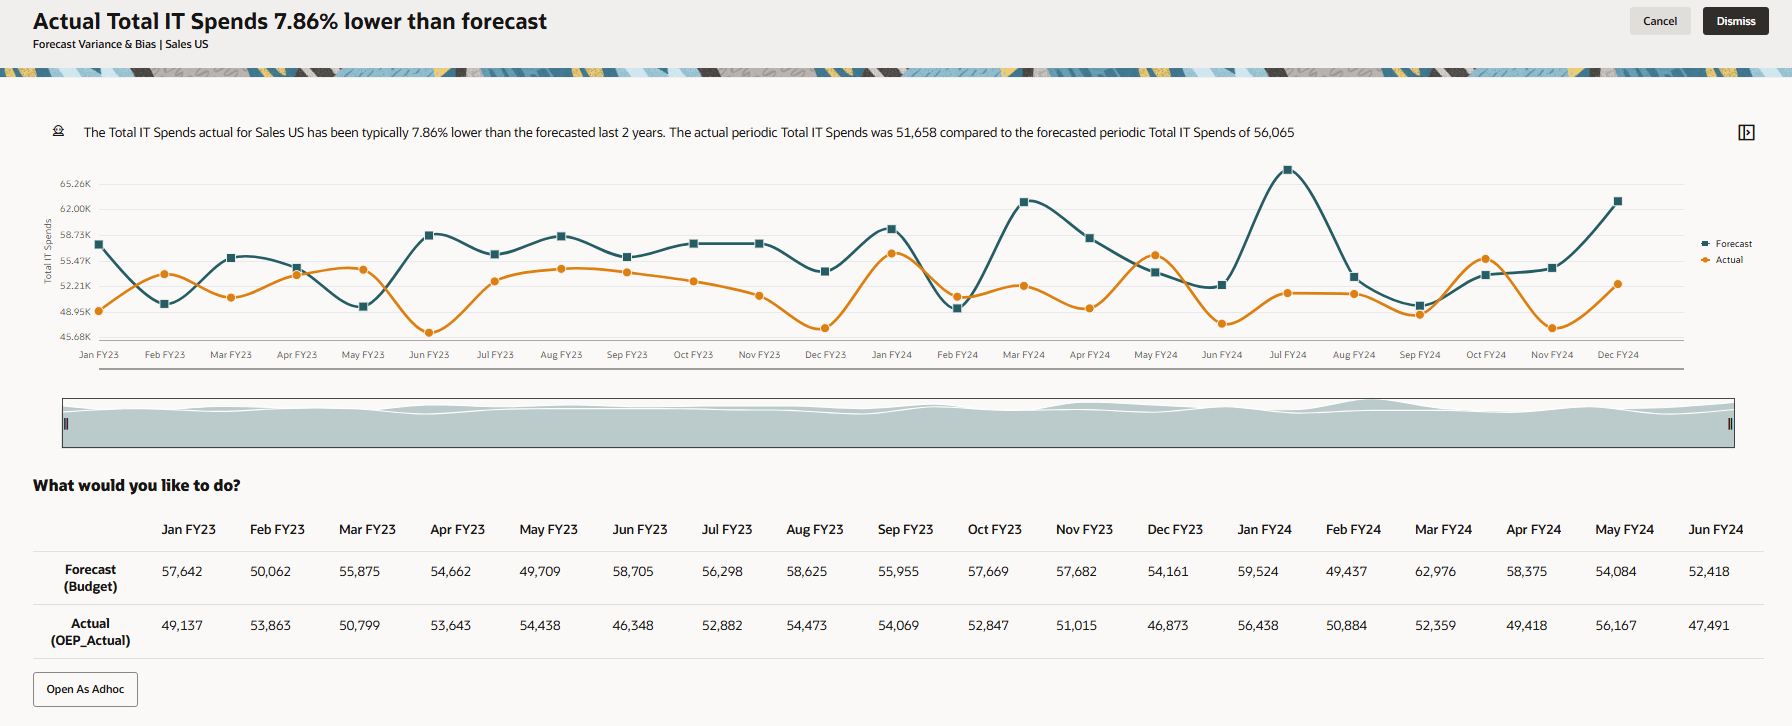
- To view the details of a forecast variance and bias insight, click one of the forecast variance and bias insights such as the one in the seventh row to see details about Actual Total IT Spends.
Detailed information for this insight is displayed.
- Click Cancel.
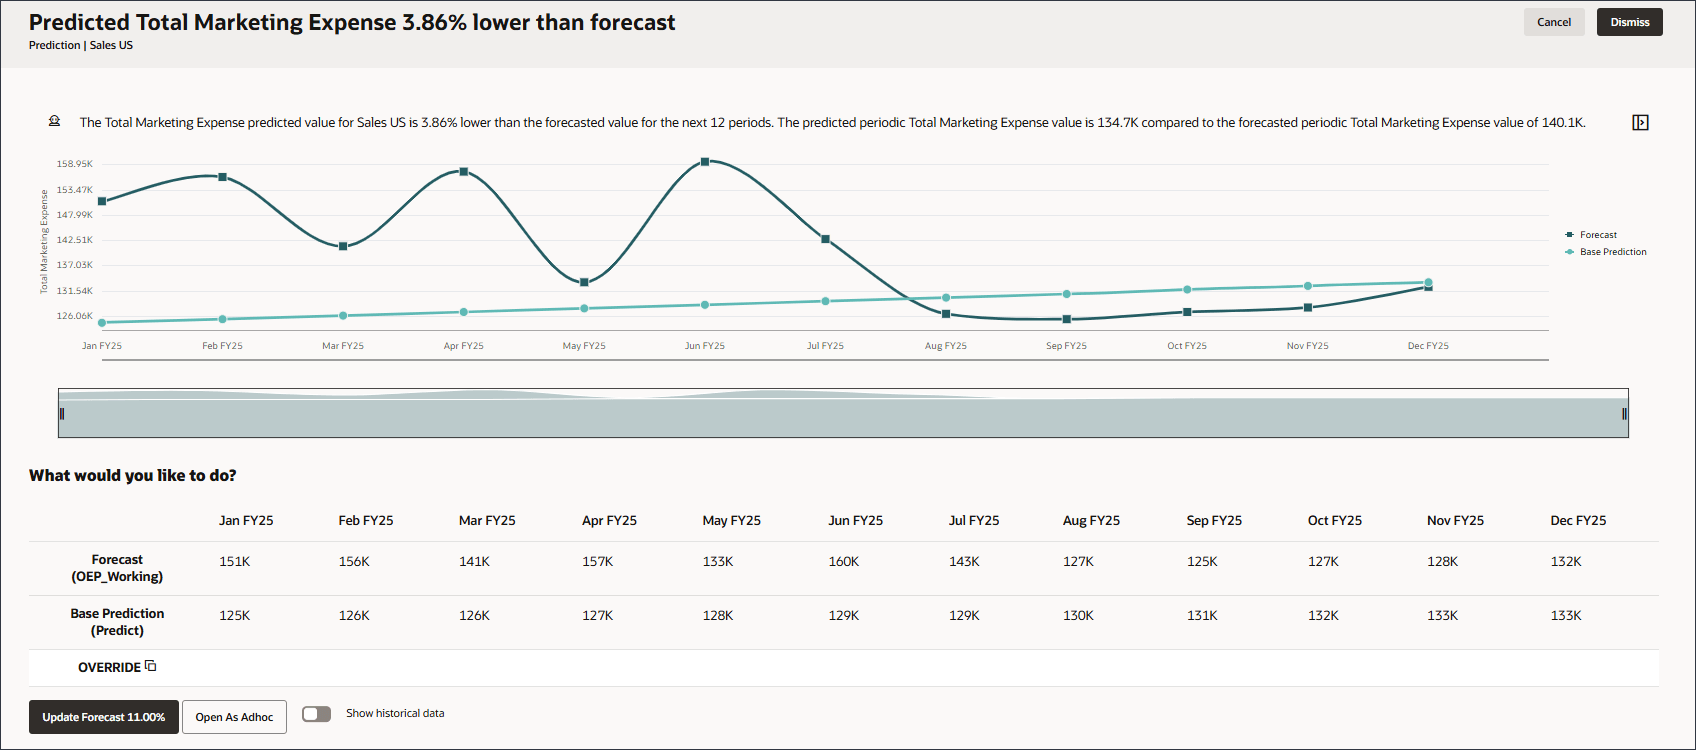
- To view the details of a prediction insight, click one of the prediction insights such as the one in the sixth row to see details about Predicted Total Marketing Expense.
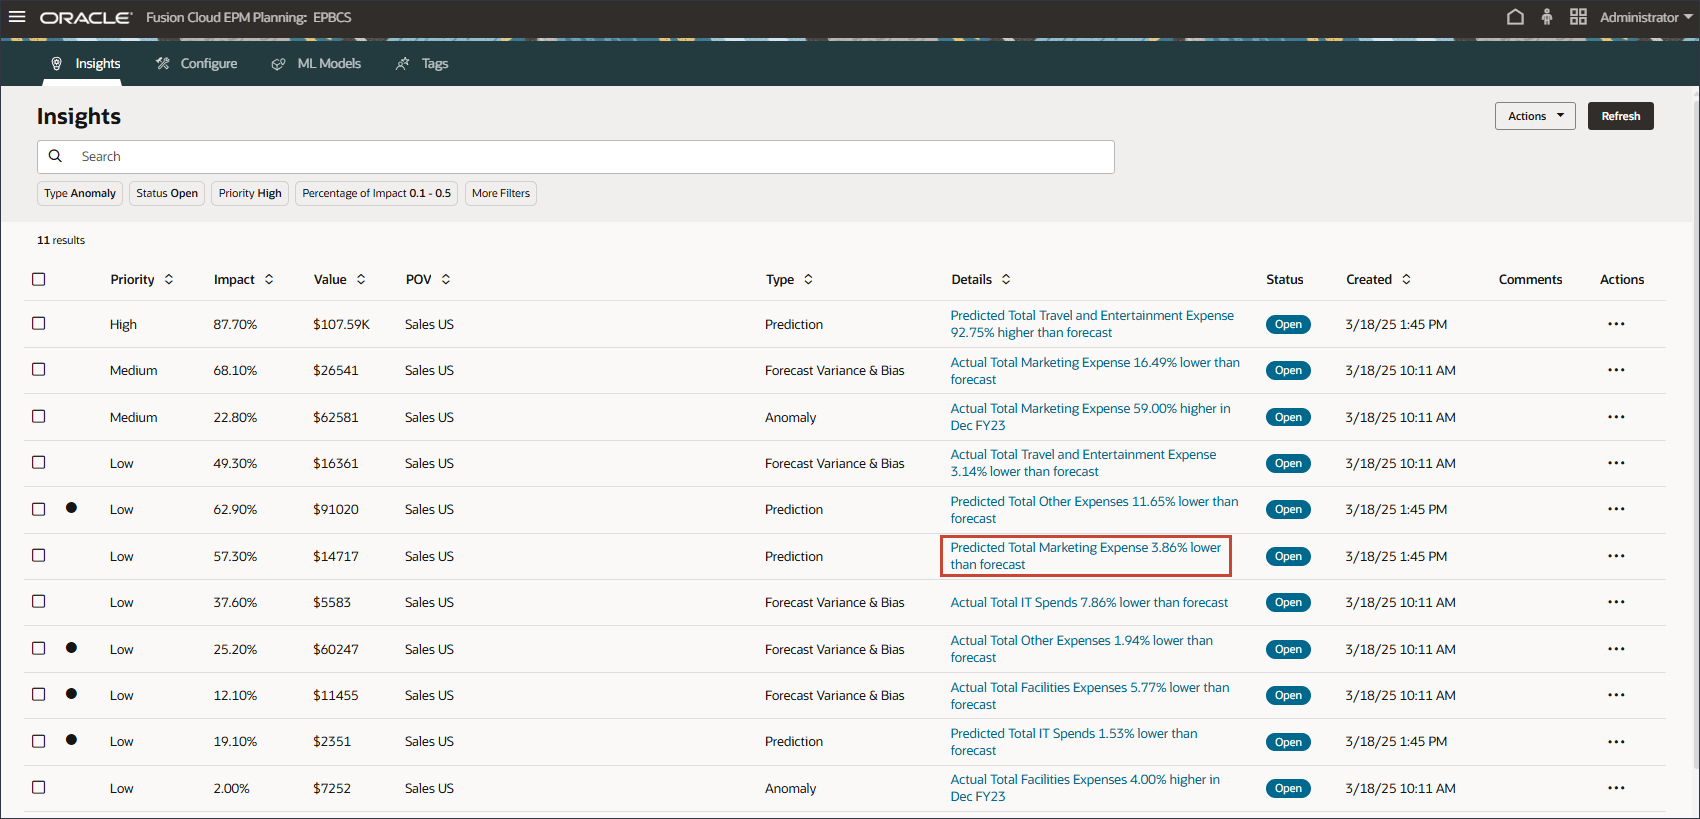
The system dynamically generates predictions for the Predict version as it is enabled with a user-defined attribute (UDA). These predictions are then compared with the traditional budget to generate prediction insights based on the variance threshold configured in the IPM job.
- Click Cancel.
- Click (home) to return to the home page.
Reviewing Parent Level Insights Job
In this section, you review a parent level Insights job to see how it is configured.
- On the home page, click (Financials), then in Navigation Flows, select Default.
The home page is displayed with the Default navigation flow.
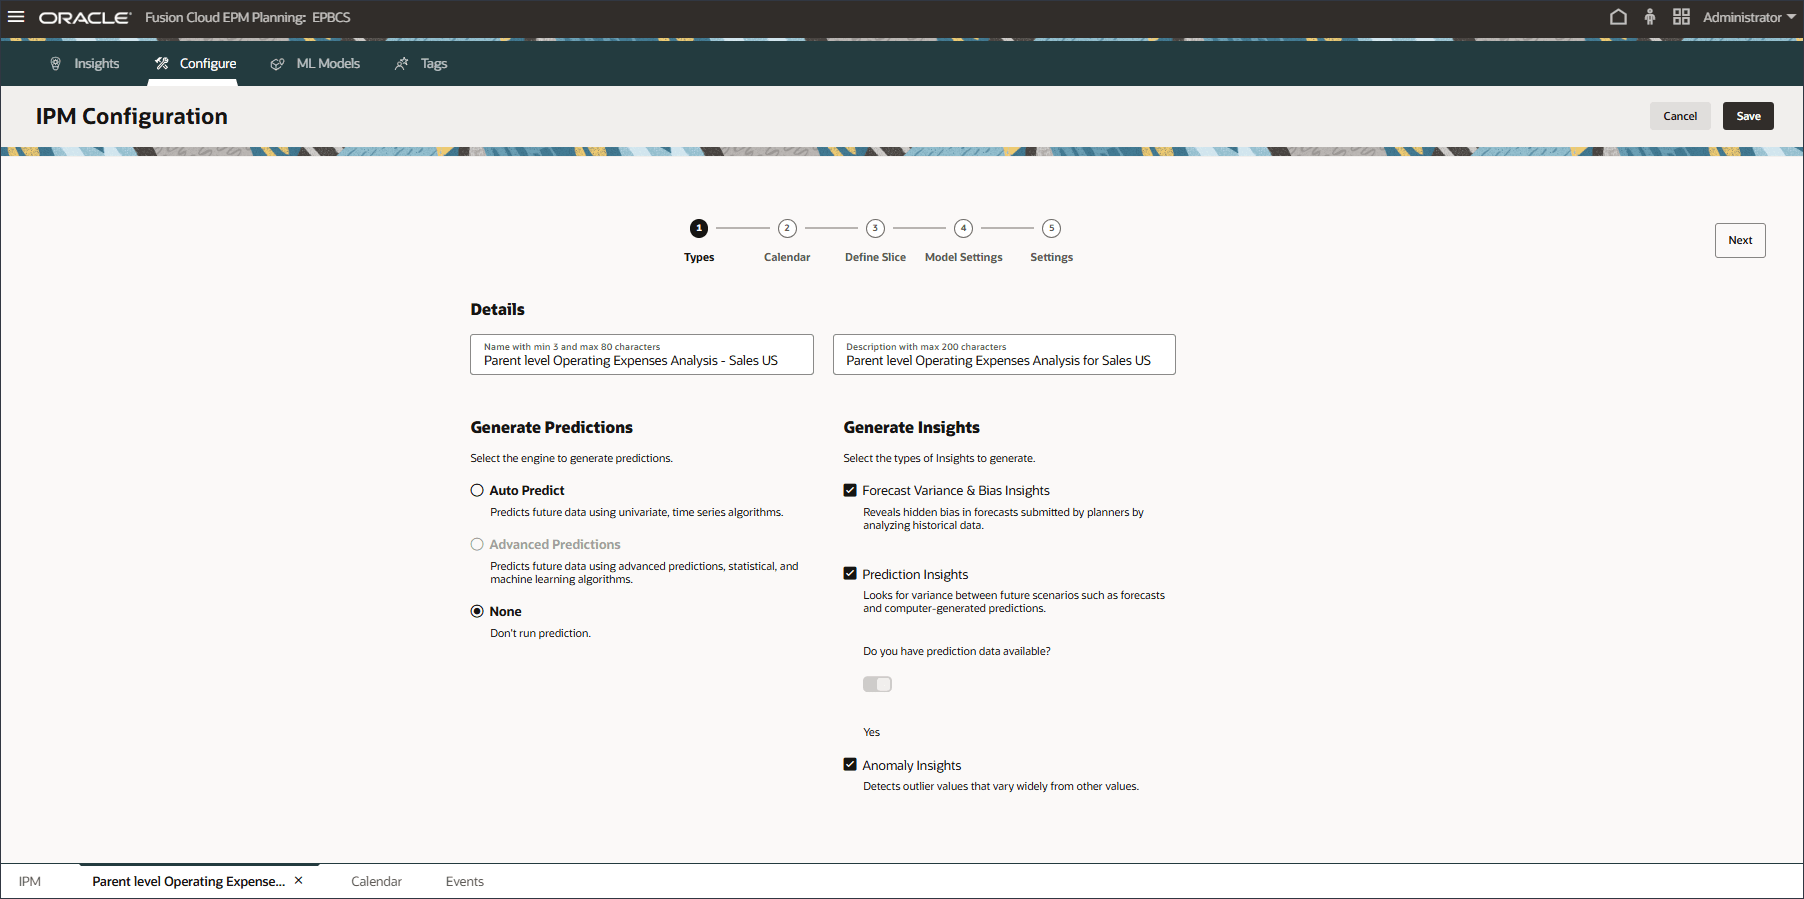
- On the home page, click IPM and select Configure.
- Select Parent level Operating Expenses Analysis - Sales US.
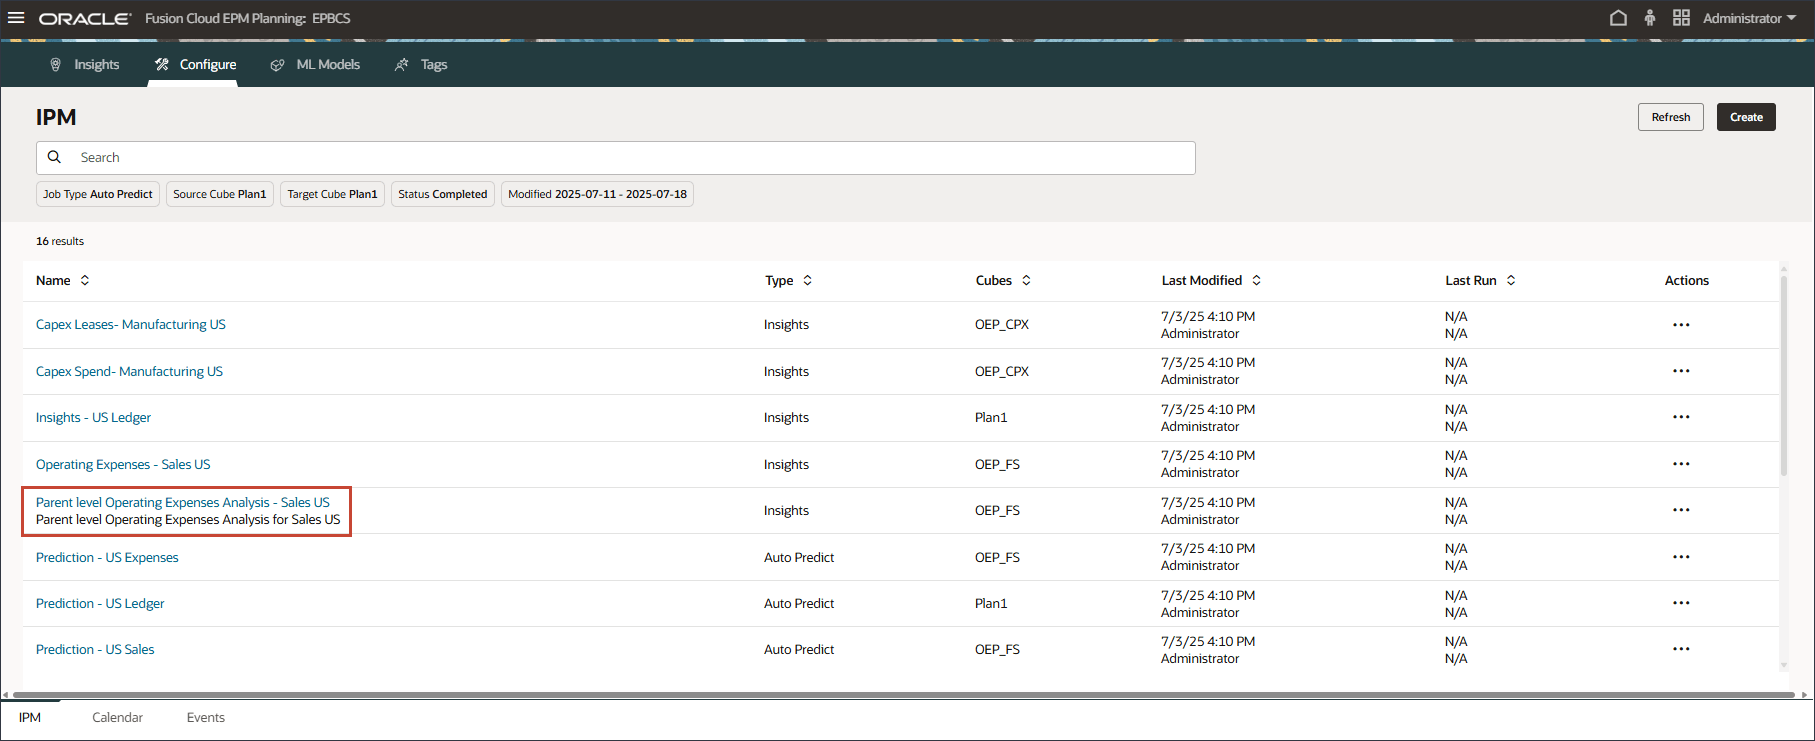
The IPM Configuration page is displayed.
- Click Define Slice.
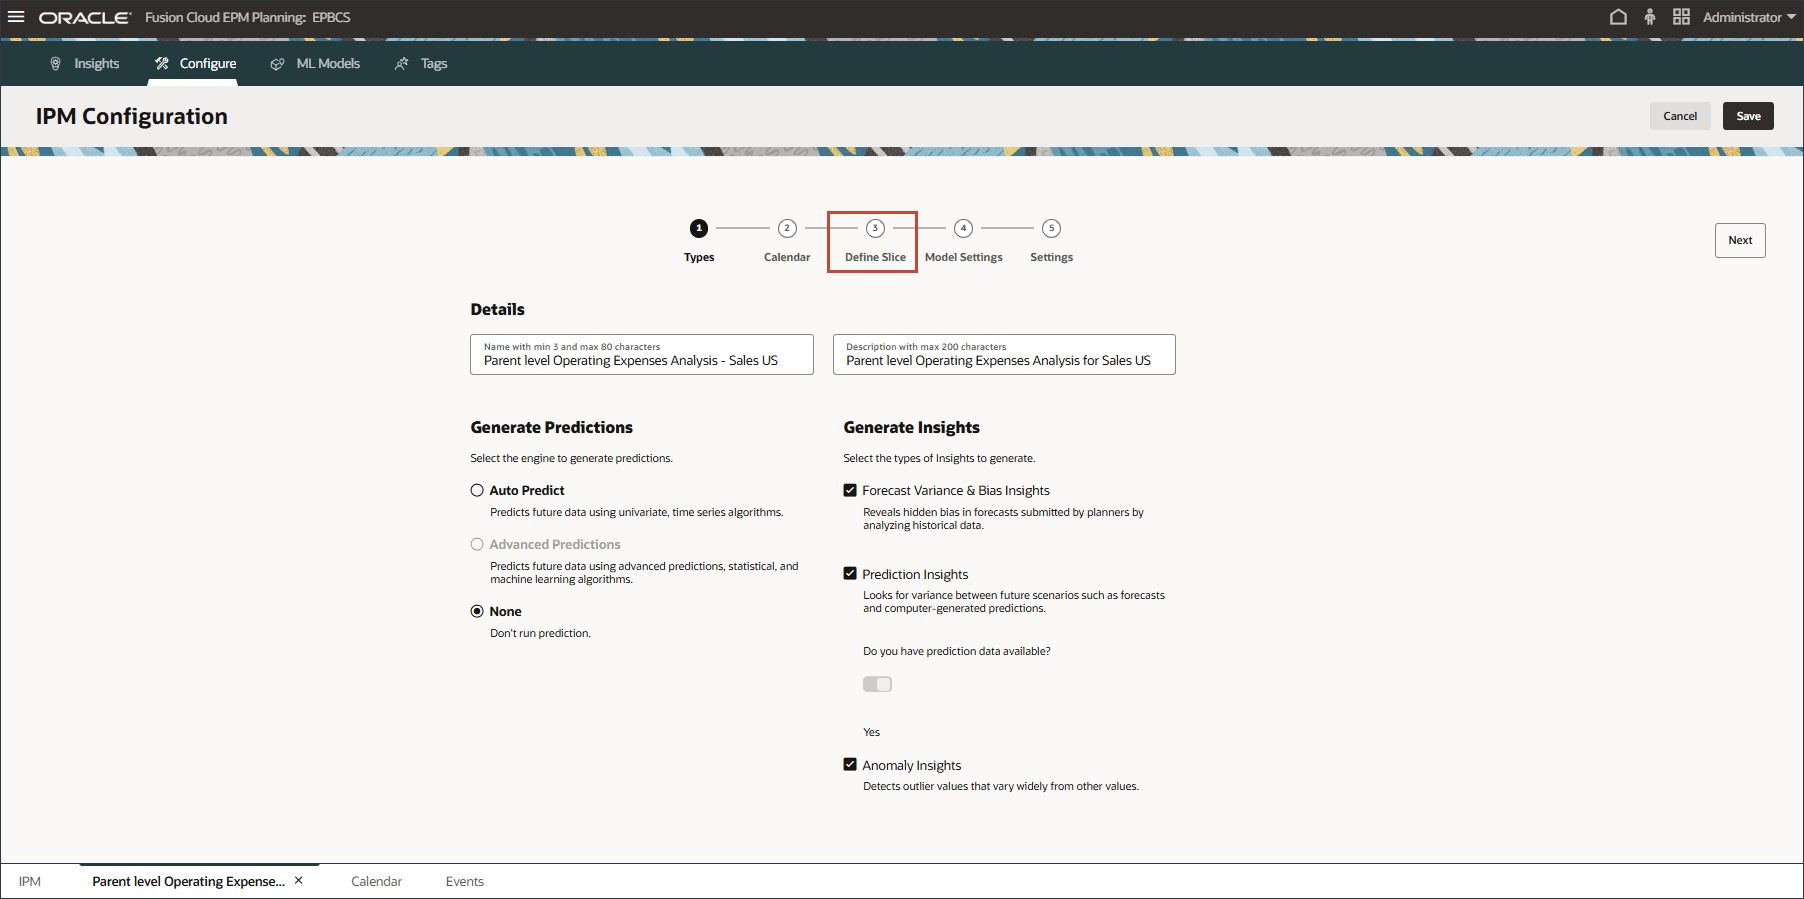
The slice definition is displayed.
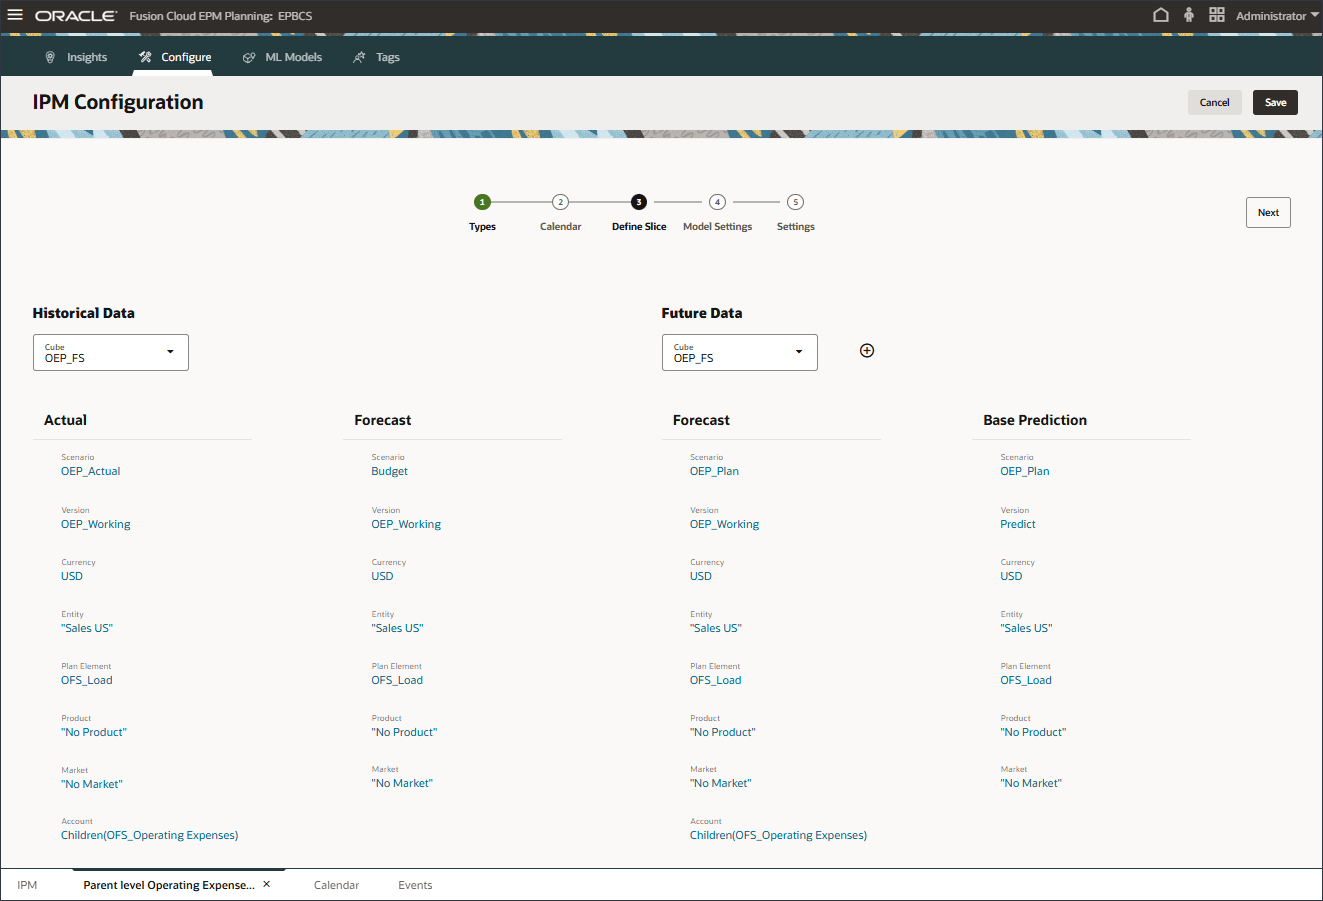
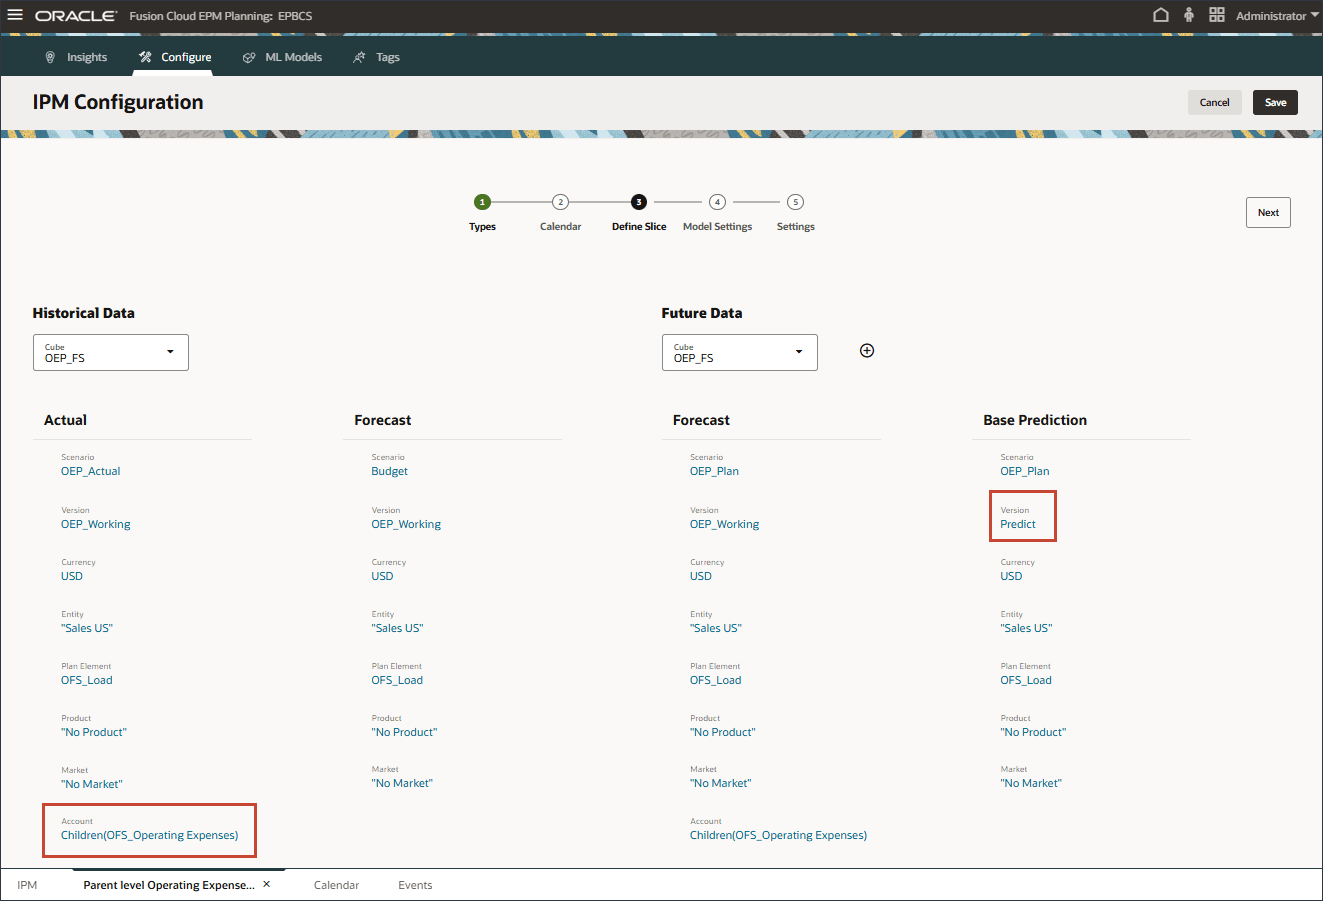
- Notice the following in the slice definition:
- By selecting Children(OFS_Operating Expenses), we designate parent-level operating expenses accounts. This selection enables the system to generate insights at the parent level.
- By choosing the Predict version as the base prediction slice, the system dynamically generates predictions for these parent-level Opex accounts. It then compares these predictions against the traditional budget (future forecast slice) and generates prediction insights based on the configured variance threshold in the IPM job.
- Click Cancel.
- Click (home) to return to the home page.
Reviewing Groovy Script
In this section, you review the Groovy scripts "Allocation Script" and "Copy Parent Level Prediction. A Groovy script is a piece of code written in the Groovy programming language, often used in Oracle EPM to automate processes, perform data validations, customize calculations, and enhance application functionality by extending native capabilities.
- If you have not already, download this allocation script file to a local folder.
- If you have not already, download this copy parent level prediction file to a local folder.
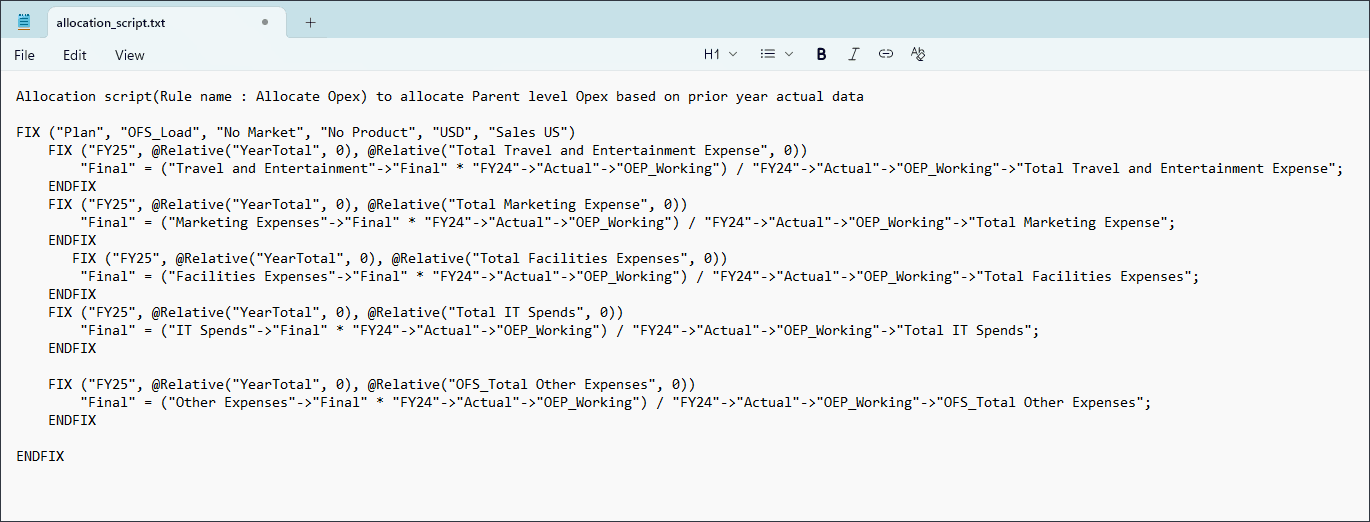
- Open the file "Allocation_Script.txt", and review its contents.
The file is displayed.
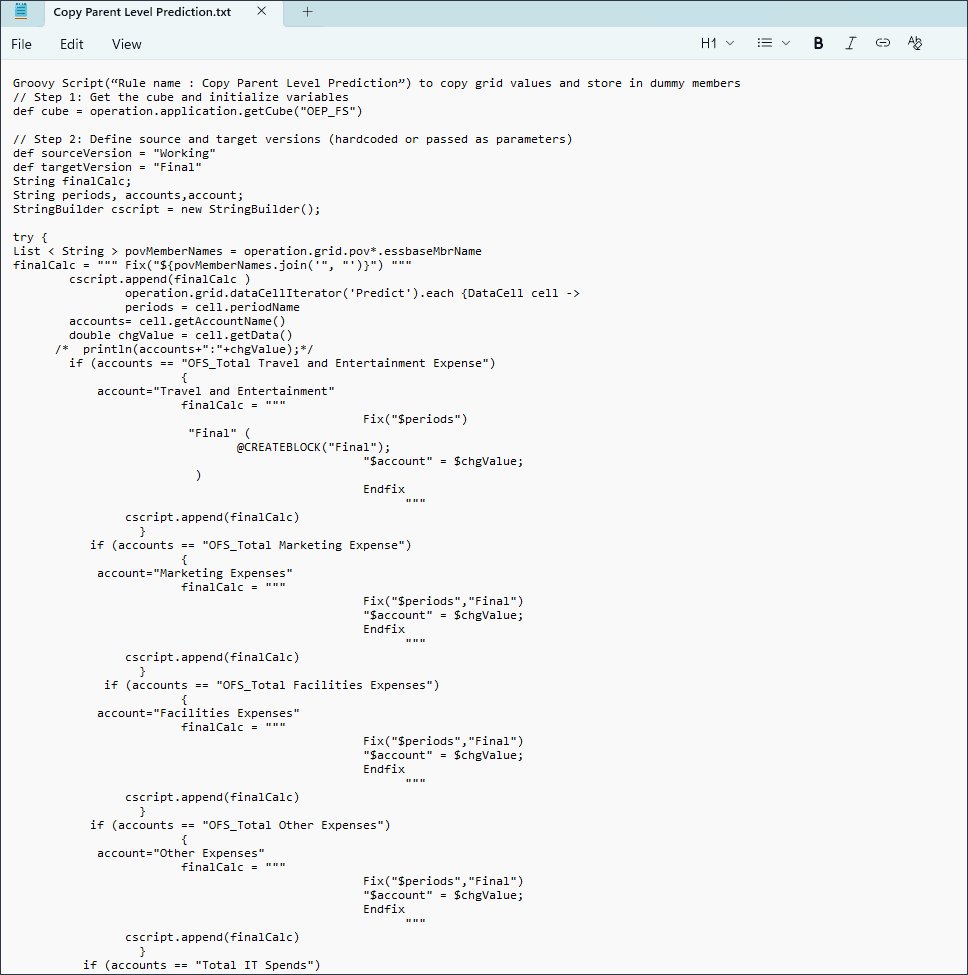
- Open the file "Copy_Parent_Level_Prediction.txt", and review its contents.
The file is displayed. A portion of the file is displayed below.
Related Links
More Learning Resources
Explore other labs on docs.oracle.com/learn or access more free learning content on the Oracle Learning YouTube channel. Additionally, visit education.oracle.com/learning-explorer to become an Oracle Learning Explorer.
For product documentation, visit Oracle Help Center.
Generating Dynamic Predictions and Insights in Cloud EPM
G38740-03
Oct 2025