Before you Begin
This 30-minute tutorial shows you how to identify and enter financial and non-financial project benefits. The sections build on each other and should be completed sequentially.
Background
With Projects, you can bridge the gap between project planning systems and the financial planning process. You can assess the impact organizational projects and initiatives have on overall corporate resources and ensure they align with short and long term financial targets.
For indirect and capital projects, you can analyze project finances by tracking project benefits. By planning project benefits, you can quantify the financial benefits to help justify the need for the project. You can also plan the non-financial benefits of a project, which can be used to justify a project and help measure a project's success.
Supported types of project benefits:
- Financial—You can define financial benefits associated with projects; users can
track project performance.
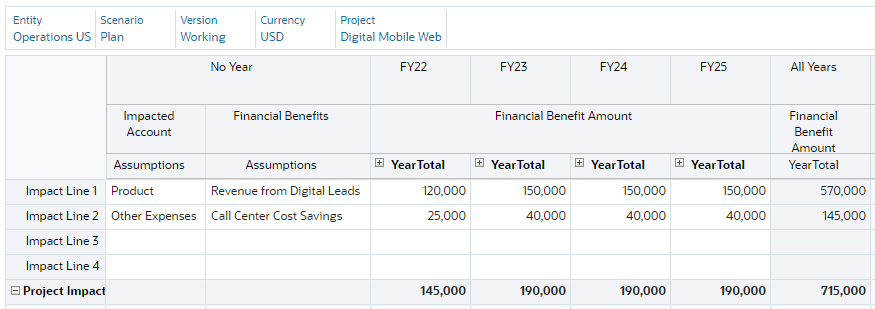
For example, if you are setting up a new web site, you can track financial benefits that might come out of the project: incremental revenue from leads from the web site, and website inquiries which could lead to call center savings. Or, a new video conferencing facility project can also lead to savings on travel expenses. - Non-Financial—You also can define non-financial benefits.
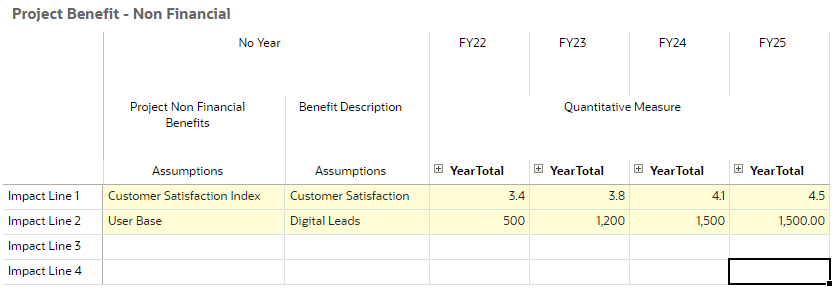
For example, a new web site might improve the customer satisfaction index, or you might see an incremental increase in your user base by investing in the project. You can quantify the benefits and map them to various project accounts.
Once you define the benefits, you can track the performance.
You can also capture additional qualitative project benefits that aren't trackable with numbers that can help justify projects. For example, you could note that customers will have a better user experience with the improved web site design.
In this tutorial, you identify and enter financial and non-financial project benefits.
What Do You Need?
An EPM Cloud Service instance allows you to deploy and use one of the supported business processes. To deploy another business process, you must request another EPM Enterprise Cloud Service instance or remove the current business process.
- Have Service Administrator access to an EPM Enterprise Cloud Service instance. The instance should not have a business process created.
- Upload and import this snapshot into your instance.
Note:
If you run into migration errors importing the snapshot, re-run the migration excluding the HSS-Shared Services component, as well as the Security and User Preferences artifacts in the Core component. For more information on uploading and importing snapshots, refer to the Administering Migration for Oracle Enterprise Performance Management Cloud documentation.Reviewing User Variables
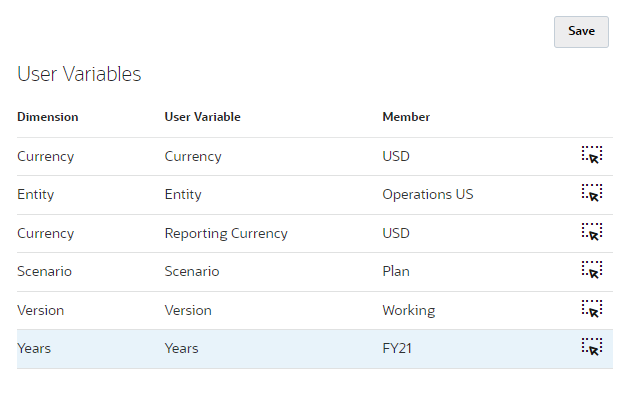
User Variables were added when the business process was created. User variables act as filters in forms, enabling planners to focus only on certain members. In this section, you review the values set for user variables.
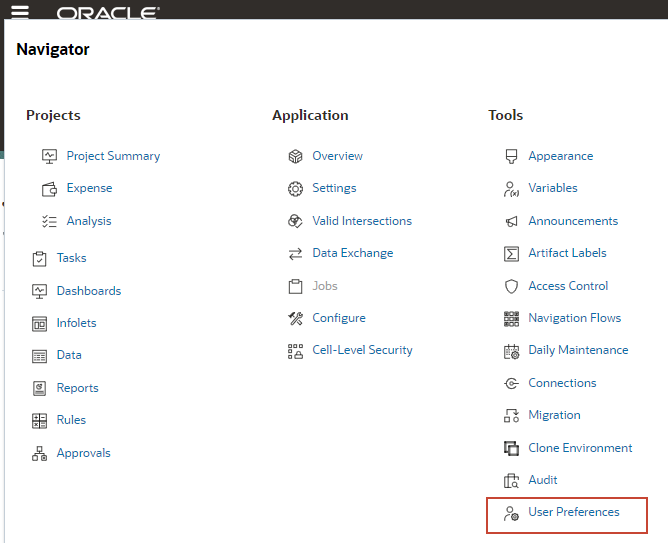
- Click
 (Navigator), then under Tools, click User Preferences.
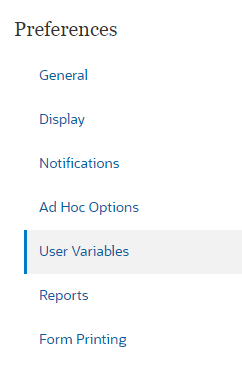
- On the left, click User Variables.
- Review the selected members for each dimension:
- Return to the home page. On the upper right, click
 (Home).
Navigating to Project Expenses
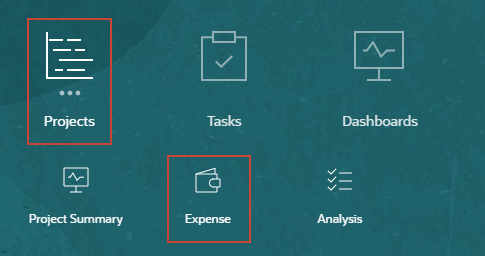
In this section, you navigate to the Expenses card to start entering project benefits.
- On the home page, click Projects, and then Expense.
The Expense card initially opens the Expense Overview dashboard.

- Review the data point-of-view (POV) and click the Project dropdown list to display its options.
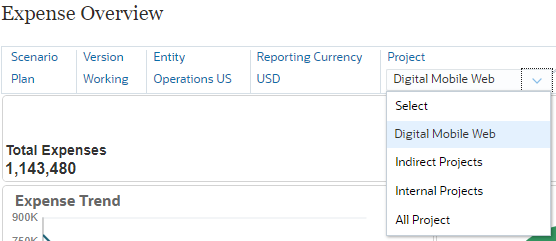
The POV members are taken from user variable values. The Project dropdown lists individual projects, as well project types.
Note:
The Planning application used in this tutorial includes an indirect project: Digital Web Mobile. To learn more how the project was added, see the Adding Indirect Projects tutorial. - Click and review the following vertical tabs:
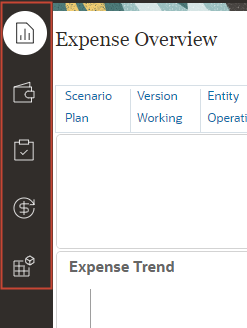
- Expense Overview—displays a high-level dashboard-type view of project expenses.
- Driver Based—enables you to perform driver-based planning by setting up expense assumptions.
- Direct Input—enables you enter expenses directly in a spreadsheet-like grid format and plan project benefits.
- Review Project Expense—enables you to review overall expenses for a project.
- Assumptions—enables you to review global rate assumptions that drive project financials.
Adding Financial Benefits
- From the vertical tabs on the left, click
 (Direct Input).
Direct Input opens with Expense Direct Entry displayed.
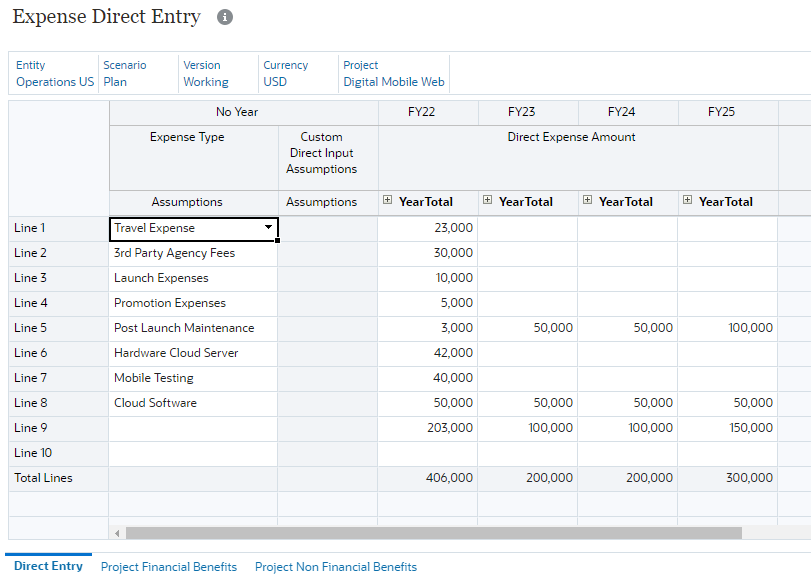
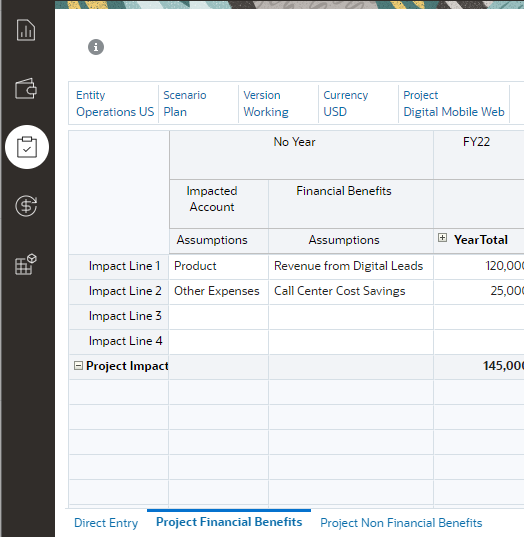
- From the horizontal tabs, click Project Financial Benefits.
- In the point-of-view (POV), verify that Project is set to Digital Web Mobile.

- In the grid, enter or select the following values:

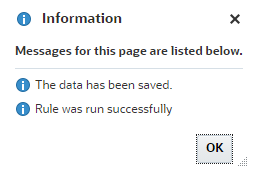
- Click Save.
- At the information message, click OK.
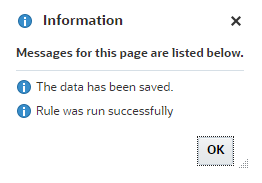
Data is saved to Planning and updated on the form.
Reviewing the Overall Project Benefits
- From the cards on top, click Project Summary.

- In the Indirect Overview dashboard, verify that the Projects POV is set to Digital Mobile Web.

- Review the project summary:
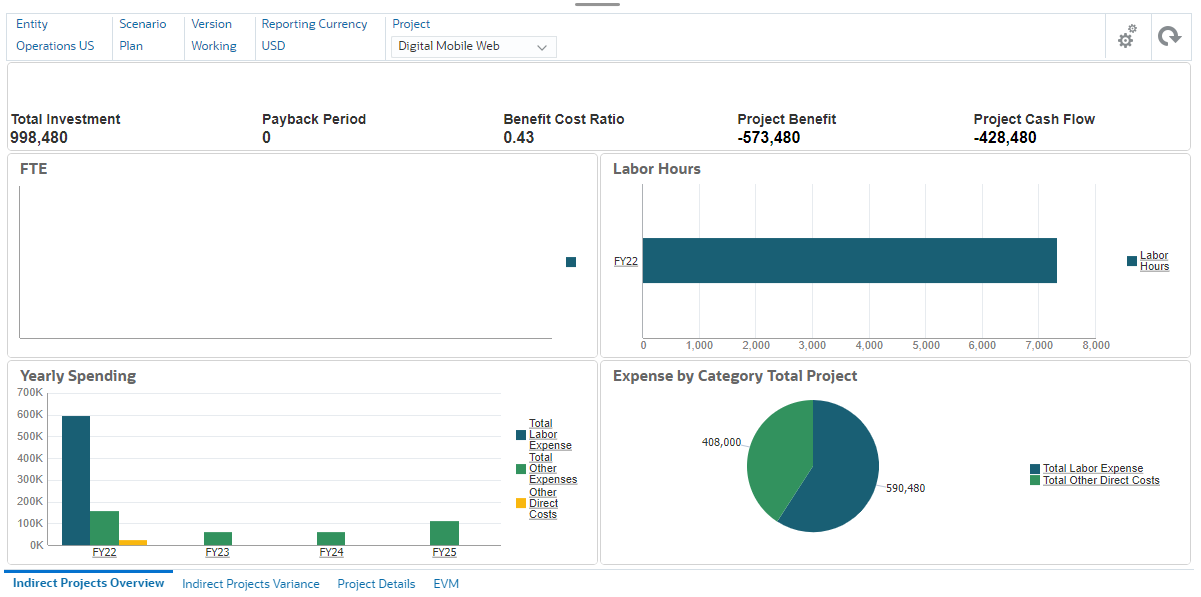
Project benefits is still in the negative. You will be entering additional project benefits in the next section.
Adding Non-Financial Benefits
- From the cards on top, click Expense.

- Verify that you are on Project Financial Benefits of the Direct Input vertical tab.
- Click the Project Non Financial Benefits horizontal tab.
- Verify that the Project POV is set to Digital Mobile Web.

- Enter the following quantitative measures:
- Hover your mouse on the top right portion of the first form to display icons and click
 (Save).

- At the information message, click OK.
- For Project Benefit- Qualitative, enter the following measures:
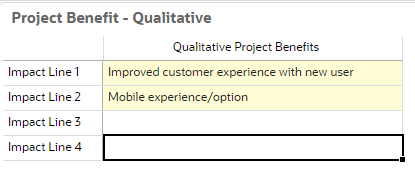
- Hover your mouse on the top right portion of the second form to display icons and click (Save).
Learn More
Adding Financial and Non-Financial Project Benefits
F46561-02
April 2022
Copyright © 2022, Oracle and/or its affiliates.
This 30-minute tutorial shows you how to identify and enter financial and non-financial project benefits.
This software and related documentation are provided under a license agreement containing restrictions on use and disclosure and are protected by intellectual property laws. Except as expressly permitted in your license agreement or allowed by law, you may not use, copy, reproduce, translate, broadcast, modify, license, transmit, distribute, exhibit, perform, publish, or display any part, in any form, or by any means. Reverse engineering, disassembly, or decompilation of this software, unless required by law for interoperability, is prohibited.
If this is software or related documentation that is delivered to the U.S. Government or anyone licensing it on behalf of the U.S. Government, then the following notice is applicable:
U.S. GOVERNMENT END USERS: Oracle programs (including any operating system, integrated software, any programs embedded, installed or activated on delivered hardware, and modifications of such programs) and Oracle computer documentation or other Oracle data delivered to or accessed by U.S. Government end users are "commercial computer software" or "commercial computer software documentation" pursuant to the applicable Federal Acquisition Regulation and agency-specific supplemental regulations. As such, the use, reproduction, duplication, release, display, disclosure, modification, preparation of derivative works, and/or adaptation of i) Oracle programs (including any operating system, integrated software, any programs embedded, installed or activated on delivered hardware, and modifications of such programs), ii) Oracle computer documentation and/or iii) other Oracle data, is subject to the rights and limitations specified in the license contained in the applicable contract. The terms governing the U.S. Government's use of Oracle cloud services are defined by the applicable contract for such services. No other rights are granted to the U.S. Government.
This software or hardware is developed for general use in a variety of information management applications. It is not developed or intended for use in any inherently dangerous applications, including applications that may create a risk of personal injury. If you use this software or hardware in dangerous applications, then you shall be responsible to take all appropriate fail-safe, backup, redundancy, and other measures to ensure its safe use. Oracle Corporation and its affiliates disclaim any liability for any damages caused by use of this software or hardware in dangerous applications.
Oracle and Java are registered trademarks of Oracle and/or its affiliates. Other names may be trademarks of their respective owners.
Intel and Intel Inside are trademarks or registered trademarks of Intel Corporation. All SPARC trademarks are used under license and are trademarks or registered trademarks of SPARC International, Inc. AMD, Epyc, and the AMD logo are trademarks or registered trademarks of Advanced Micro Devices. UNIX is a registered trademark of The Open Group.
This software or hardware and documentation may provide access to or information about content, products, and services from third parties. Oracle Corporation and its affiliates are not responsible for and expressly disclaim all warranties of any kind with respect to third-party content, products, and services unless otherwise set forth in an applicable agreement between you and Oracle. Oracle Corporation and its affiliates will not be responsible for any loss, costs, or damages incurred due to your access to or use of third-party content, products, or services, except as set forth in an applicable agreement between you and Oracle.