Introduction
This tutorial shows you how to configure and enable features in Projects. The sections build on each other and should be completed sequentially.
Background
Planning provides five complete, planning and budgeting solutions for Financials, Workforce, Capital, Projects, and Strategic Modeling. They include built-in best practice predefined content including forms, calculations, dashboards, drivers, and key performance indicators (KPIs).
In this tutorial, you configure and enable features in Projects.
With Projects, you can bridge the gap between project planning systems and the financial planning process. You can assess the impact organizational projects and initiatives have on overall corporate resources and ensure they align with short and long term financial targets.
You use Projects to evaluate how assets and resources related to corporate initiatives are allocated, and analyze their probable return on investment.
Before you can start planning for projects, you must enable features. Enable only the features you want to use. You can incrementally enable components to best meet your project planning needs; however you must enable all the dimensions you want to include in the application the first time you enable features.
Prerequisites
Cloud EPM Hands-on Tutorials may require you to import a snapshot into your Cloud EPM Enterprise Service instance. Before you can import a tutorial snapshot, you must request another Cloud EPM Enterprise Service instance or remove your current application and business process. The tutorial snapshot will not import over your existing application or business process, nor will it automatically replace or restore the application or business process you are currently working with.
Before starting this tutorial, you must:
- Have Service Administrator access to a Cloud EPM Enterprise Service instance. The instance should not have a business process created.
- Download the following import files:
Creating the Application
In this section, you create a Module-based Planning application.
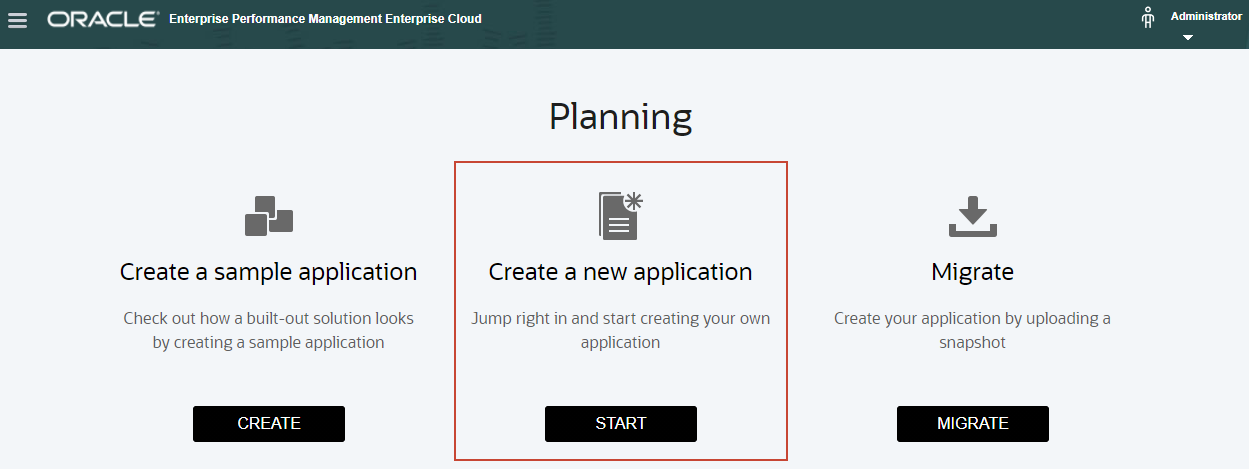
- On the Enterprise landing page, for Planning, click SELECT.

- On the Planning landing page, for Create a new application, click START.
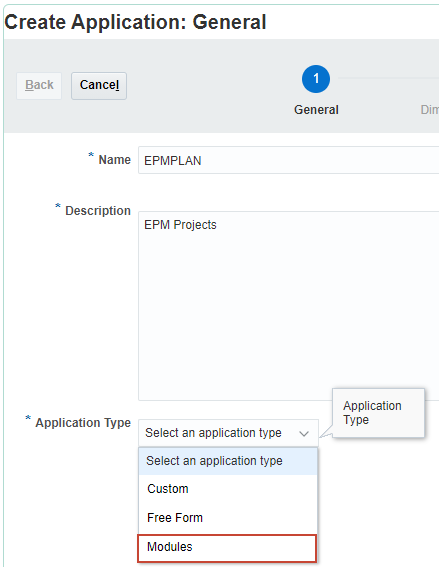
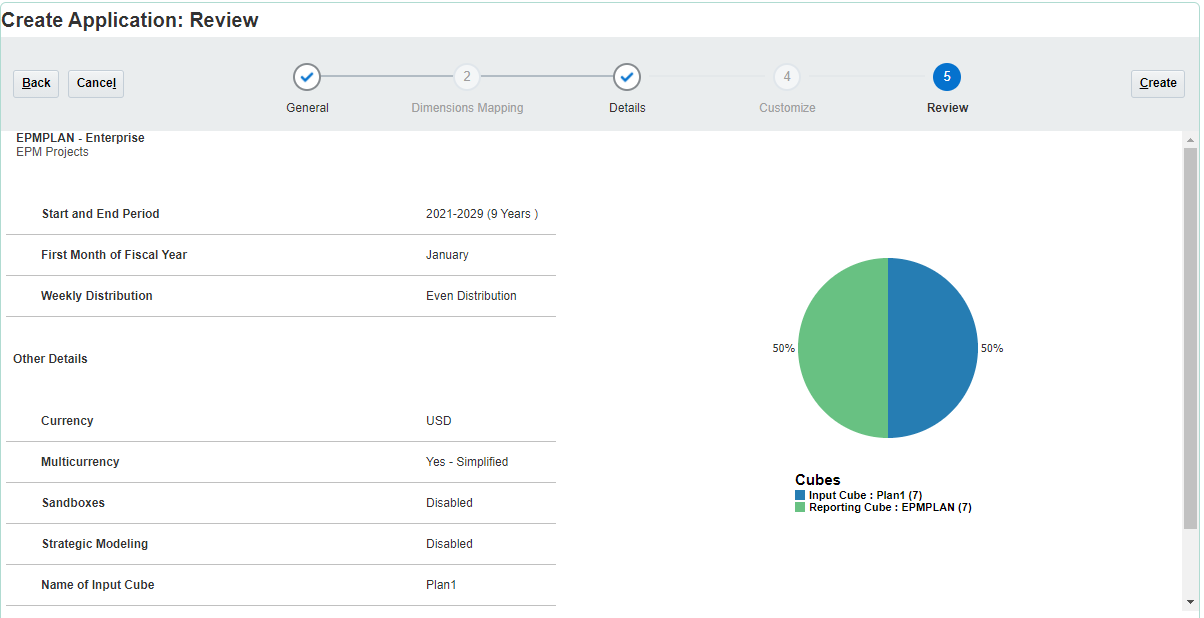
- In the Application Wizard, for General properties, enter or select the following:
Detail Value Name EPMPLAN Description EPM Projects Application Type Modules - Verify your selections and click Next.
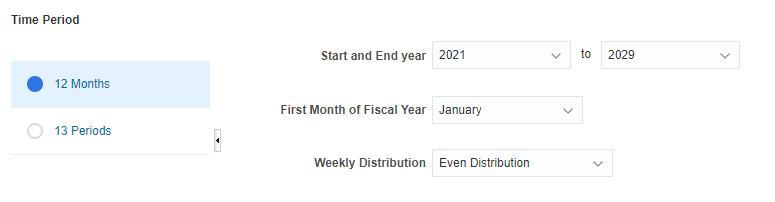
- In Details, for Time Period, accept the default: 12 Months.
- Verify the Start and End year is: 2025 to 2034.
- Accept the following default time period selections:
Detail Value First Month of Fiscal Year January Weekly Distribution Even Distribution - Verify your selections.
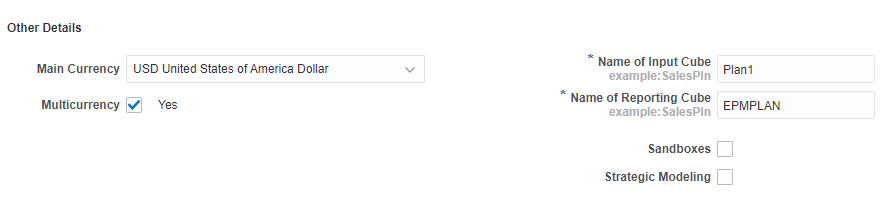
- For Other Details, accept all default selections and click Next.
- Review application details and click Create.
The application creation process takes a moment to complete.

When the application creation process completes, an information message displays.
You can click OK to proceed to the home page, or click Configure to proceed to the Configure page for modules.
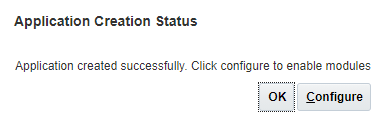
- Click Configure.
Enabling Features
In this section, you select which features in Projects to enable and set the application to display the Redwood Experience.
Selecting Features and Components
- On the Configure page, select Projects from the dropdown list.
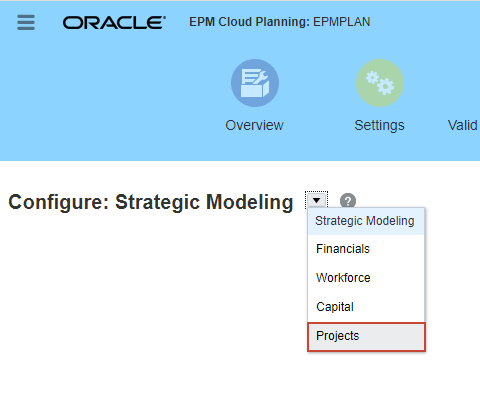
The Configure page for Projects is displayed.
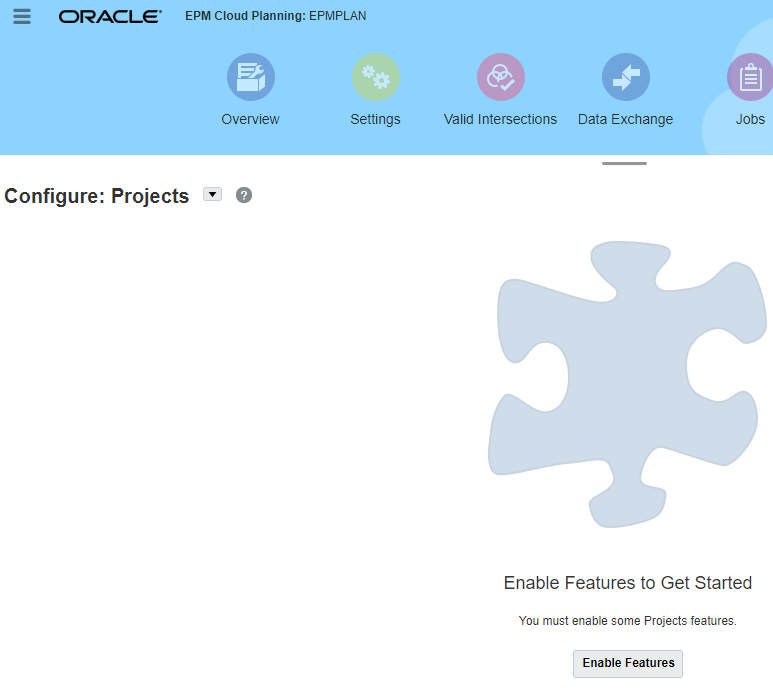
- On the Configure page for Projects, click Enable Features.
- In Enable Features, select Project Type, and then under Internal Projects, select Indirect.
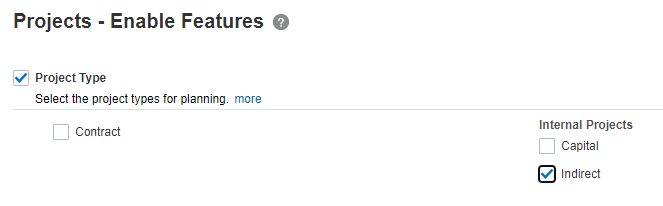
You can enable Contract, Capital, and Indirect project types. In this tutorial, you enable Indirect projects.
Indirect projects have a cost impact but don’t generate revenue. If a project is classified as Indirect, you can do only expense budgeting for the project. You can, however, plan financial and non-financial benefits of the project.
- Select Project Benefits, then select Financial and Non-Financial.
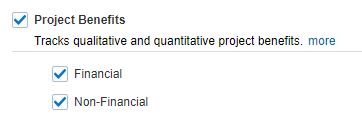
For indirect and capital projects, an additional way to analyze project finances is by tracking project benefits. By planning project benefits, you can quantify the financial benefits to help justify the need for the project. You can also plan the non-financial benefits of a project, which can be used to justify a project and help measure a project's success.
- Select Expense, then:
- Under Driver Based, select Labor and Equipment
- Direct Input
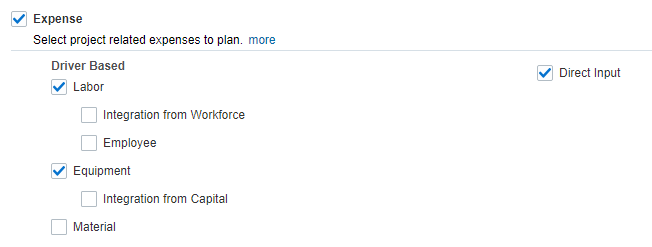
You can plan expenses for all project types.
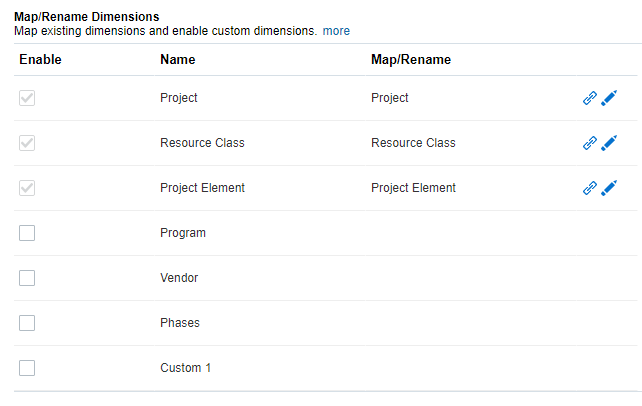
- Scroll down to Map/Rename Dimensions.
- In Map/Rename Dimensions, for Program, select Enable.
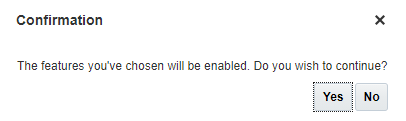
- In the upper-right, click Enable.
- At the confirmation message, click Yes.
The enable process takes a moment to complete.

- At the information message, click OK.

- Sign out and sign back into Planning.
Specifying Application Settings
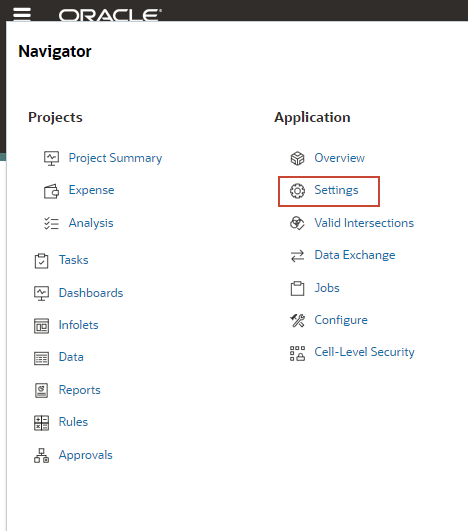
- Click
 (Navigator), and under Application, click Settings.
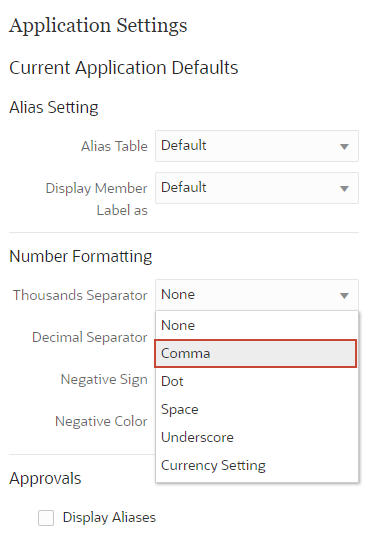
- In Application Settings, under Number Formatting, set the Thousands Separator to Comma.
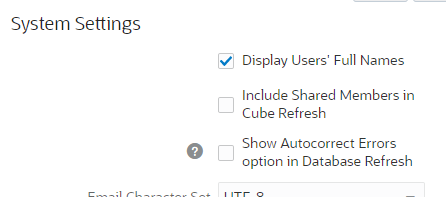
- Under System Settings, select Display Users' Full Names.
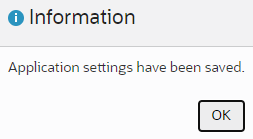
- Click Save.
- At the information message, click OK.
Importing Entities
In this section, you import entities as part of the configuration process.
- Click (Navigator), then under Application, click Configure.
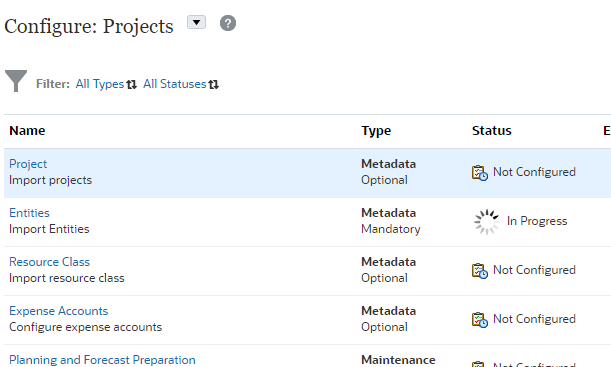
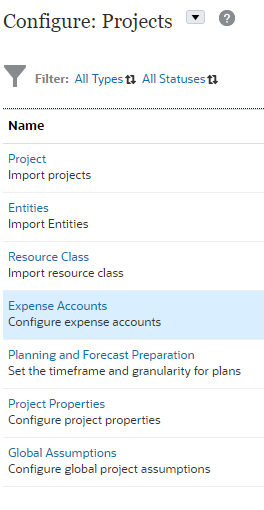
- On the Configure page, select Projects from the dropdown list.
The Configure page for Projects displays enabled features. You can now start configuring components.
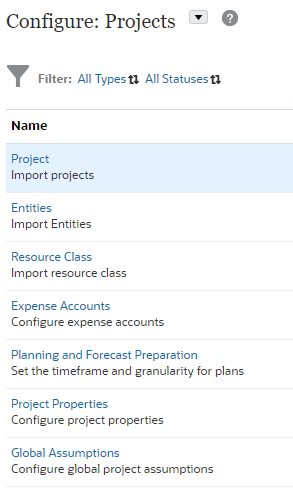
- Click Entities.
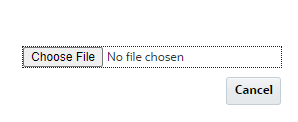
- In Import Metadata for Entity, click Browse.
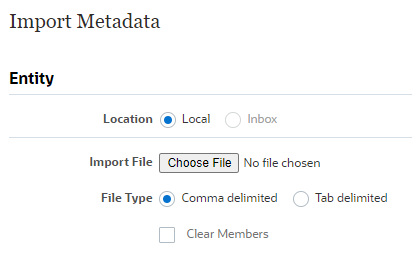
Note:
Depending on your browser, the button label may display Choose File or Browse. - Navigate to where you saved Entity.csv, then select or open it.
Once selected, it displays as:
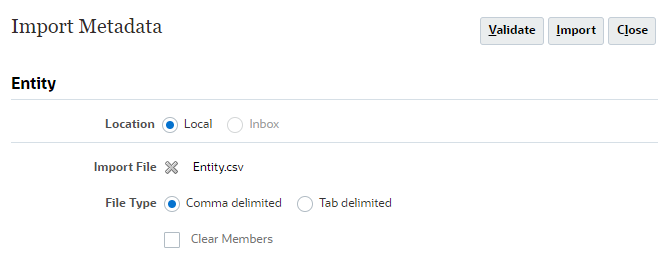
- Click Import.
Tip:
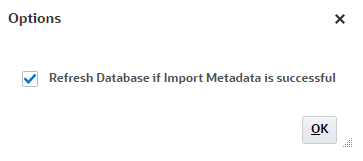
Oracle recommends validating your import file before running the import process. The import file included in this tutorial has been tested and validated. - In Options, select Refresh Database if Import Metadata is successful and click OK.
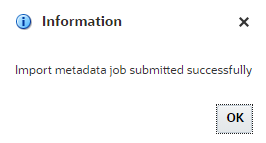
- At the information message, click OK.
- In Import Metadata, click Close.
- On the Configure page for Projects, verify the status for Entities.
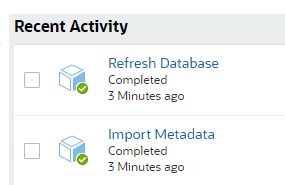
- From the cards on top, click Jobs.

- In Jobs, locate the following jobs and verify that they completed successfully:
Assigning Values to User Variables
User Variables were added when the business process was created. User variables act as filters in forms, enabling planners to focus only on certain members. In this section, you set values for user variables.
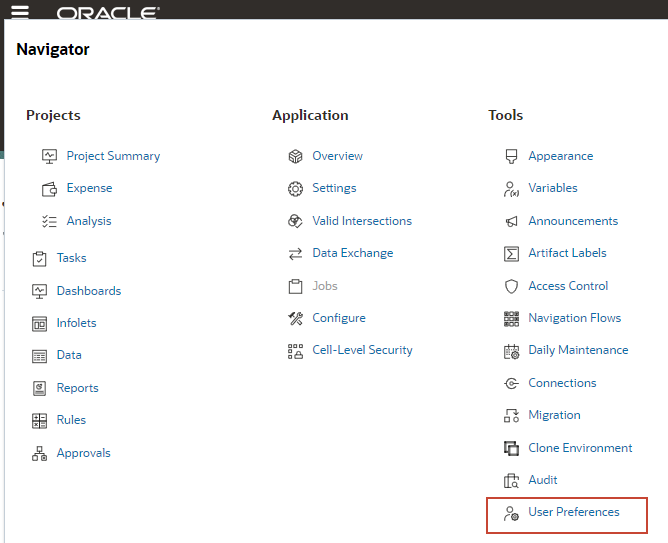
- Click (Navigator), then under Tools, click User Preferences.
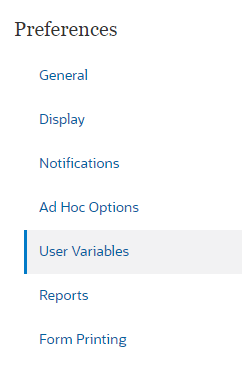
- On the left, click User Variables.
- For each variable, click its
 (Member Selector) to select a member as the variable's value:
User Variable Member Currency USD Entity Operations US Reporting Currency USD Scenario Plan Version Working Years FY25 - Verify your selections and click Save.
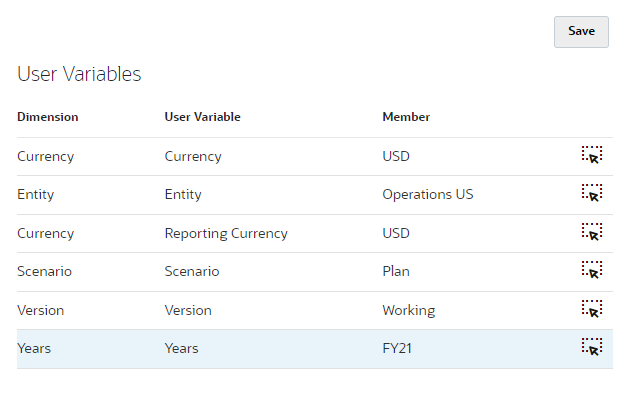
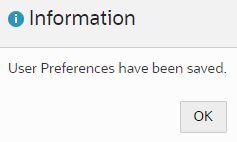
- At the information message, click OK.
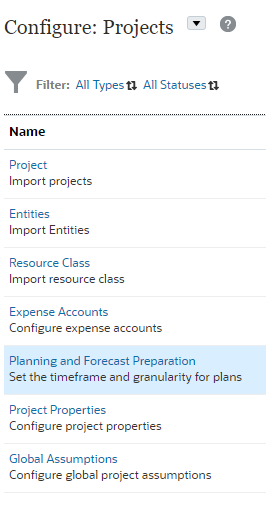
Setting the Timeframe and Granularity for Plans
In this section, you set up the timeframe and period granularity for Project plans.
- Click (Navigator), then under Application, click Configure.
- On the Configure page, select Projects from the dropdown list.
- On the Configure page for Projects, click Planning and Forecast Preparation.
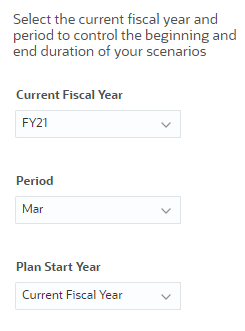
The Planning and Forecast Preparation dialog is displayed.
- For Period, select Mar.
- For Plan Start Year, select Current Fiscal Year.
- Verify your selections:
- For Plan, set all years to Monthly.
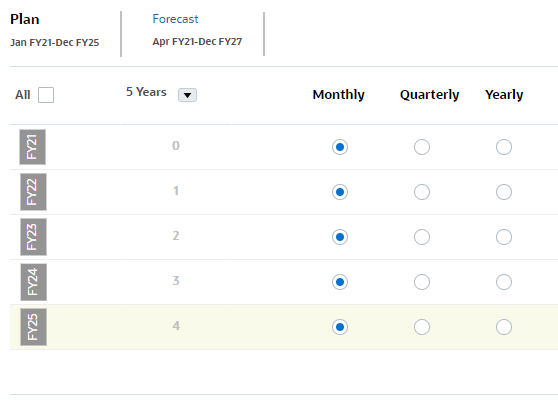
Typically, projects are planned and calculated in detail monthly. If your organization plans using a different time period, make sure to select the appropriate time period in your application.
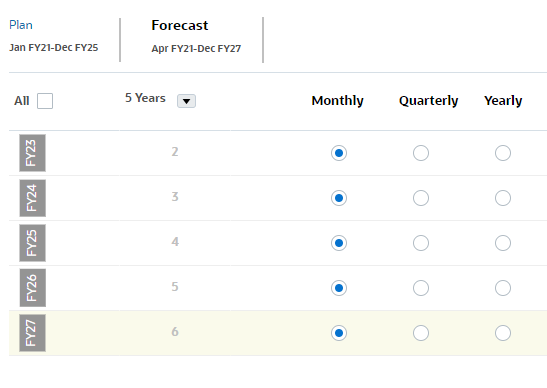
- Click Forecast.
- For Forecast, set all years to Monthly.
- Click Save.
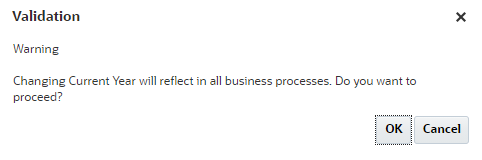
- At the validation message, click OK.
- Click Close.
Importing Job Codes
In this section, you import resource class members. The Resource Class consists of labor, material, and equipment codes. You import detailed jobs to use for planning project expenses.
Reviewing the Job Smart List
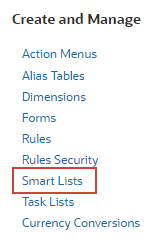
- Click (Navigator), then under Create and Manage, click Smart Lists.
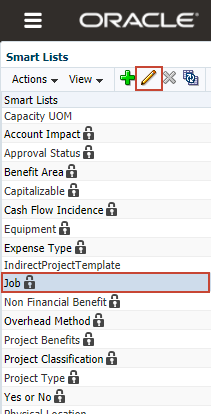
- From the available Smart Lists, select Job and click
 (Edit).
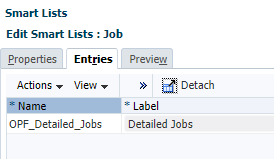
- Click the Entries tab.
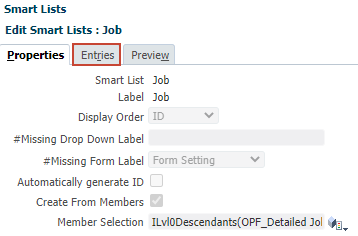
- Note that there are no Job entries other than the OPF_Detailed_Jobs placeholder:
- Click Cancel.
Adding Resource Class Members
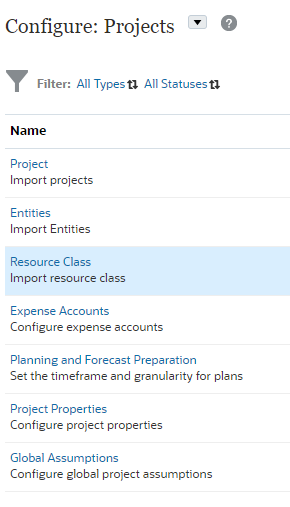
- On the Configure page for Projects, click Resource Class.
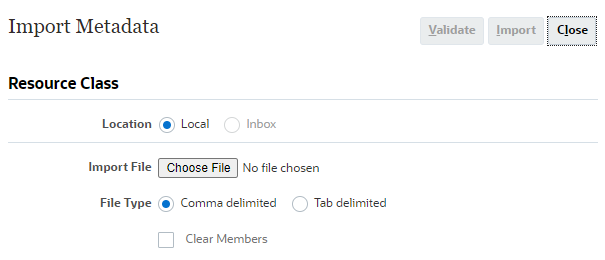
- In Import Metadata for Resource Class, click Browse.
Note:
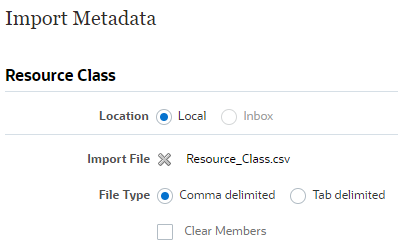
Depending on your browser, the button label may display Choose File or Browse. - Navigate to where you saved Resource_Class.csv, then select or open it.
Once selected, it displays as:
- Click Import.
Tip:
Oracle recommends validating your import file before running the import process. The import file included in this tutorial has been tested and validated. - In Options, select Refresh Database if Import Metadata is successful and click OK.
- At the information message, click OK.
- In Import Metadata, click Close.
- On the Configure page for Projects, verify the status for Resource Class.
- Optional: Navigate to Jobs to verify that the import process completed successfully.
Verifying the Imported Resource Class Members in the Job Smart List
- Click (Navigator), then under Create and Manage, click Smart Lists.
- From the available Smart Lists, select Job and click (Edit).
- Click the Entries tab.
- Review the added Smart List entries:
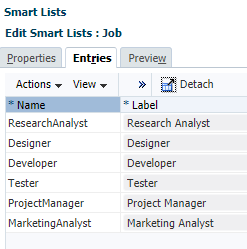
- Click Cancel.
Adding Expense Accounts
In this section, you import custom expense accounts to include in planning projects.
- Click (Navigator), then under Application, click Configure.
- On the Configure page, select Projects from the dropdown list.
- On the Configure page for Projects, click Expense Accounts.
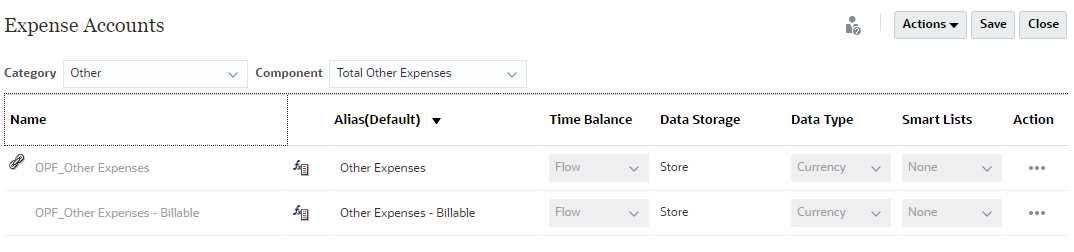
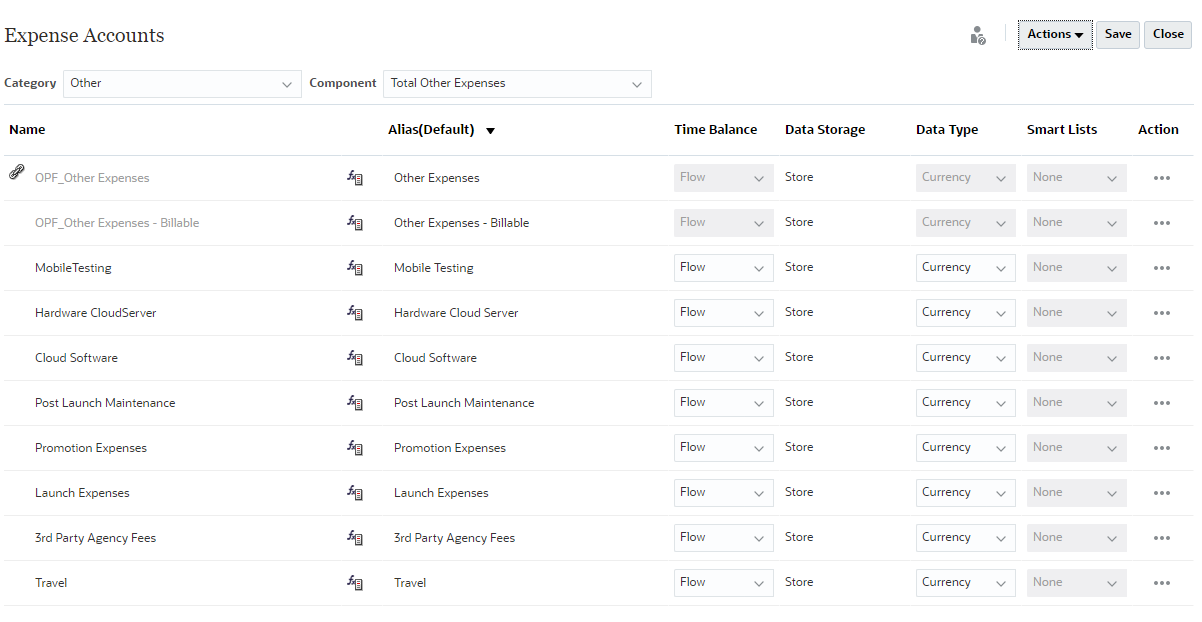
- Review the predefined expense accounts by changing the Category and Component dropdown list selections.
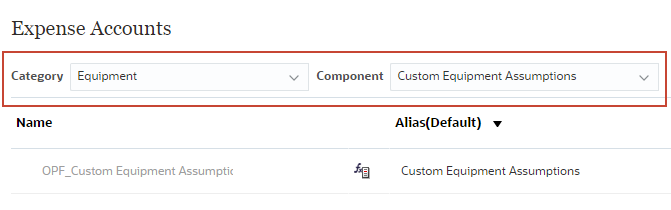
- For Category, select Other.
- For Component, select Total Other Expenses.
- Review the expense accounts in this category and component.
- Click Actions and select Import.
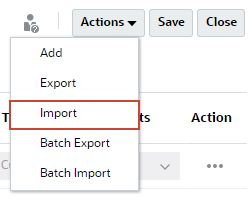
- In the Import dialog, click Browse.
Note:
Depending on your browser, the button label may display Choose File or Browse. - Navigate to where you saved Expenses.xlsx, then select or open it.
After the import completes, members are added to the Expense Accounts dialog for the selected category and component.
- Click Save.
- At the information message, click OK.

- Click Close.
Adding a Custom Project Category Property
In this section, you create a Smart List and associate it with a project property.
Creating a Project Category Smart List
- Click (Navigator), then under Create and Manage, click Smart Lists.
- Click
 (Create).
 - Enter the following properties:
Property Value Smart List Project_Category Label Project Category - Verify that entered the Smart List name and label correctly, and click the Entries tab.
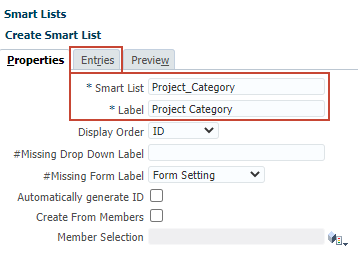
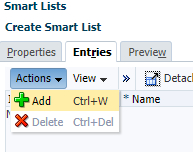
- In Entries, click Actions and select Add.
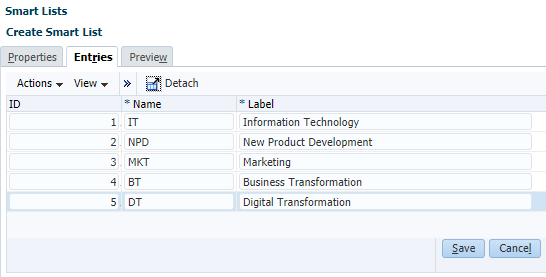
- Accept the default ID and enter the following properties:
Name Label IT Information Technology - Repeat steps 5 through 6 to add the following entries:
Name Label NPD New Product Development MKT Marketing BT Business Transformation DT Digital Transformation - Verify your entries and click Save.
Adding the Project Category Smart List to Project Properties
- Click (Navigator), then under Application, click Configure.
- On the Configure page, select Projects from the dropdown list.
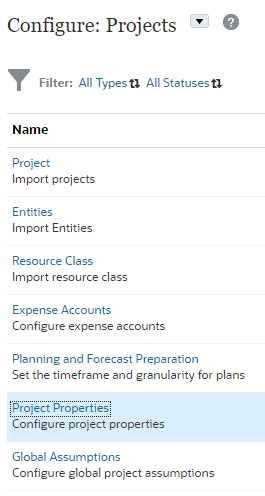
- On the Configure page for Projects, click Project Properties.
- In Project Properties, click Actions and select Add.
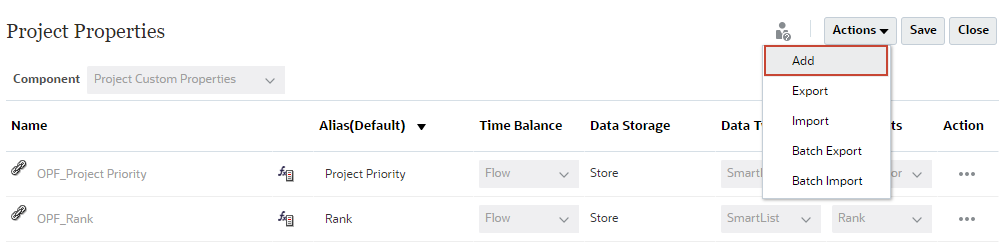
A new row is added to the Project Properties dialog.
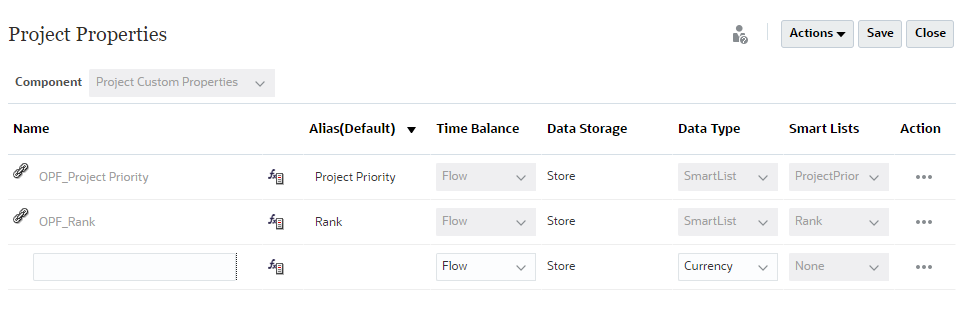
- Enter the following member properties:
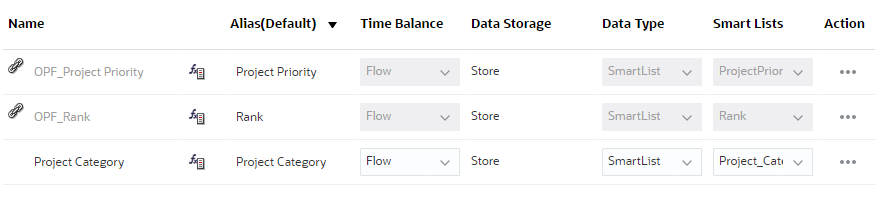
Property Value Name Project Category Alias Project Category Time Balance Flow Data Type SmartList Smart Lists Project_Category - Verify your entry and click Save.
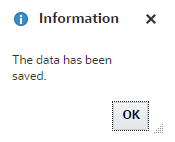
- At the information message, click OK.
- Click Close.
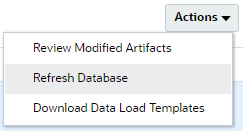
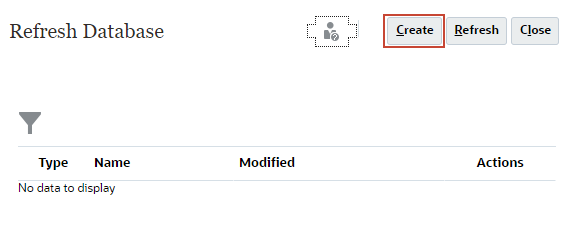
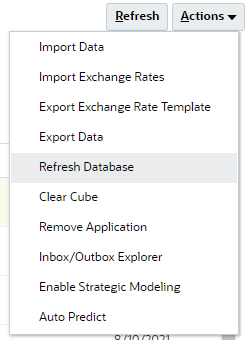
- On the Configure page for Projects, click Actions and select Refresh Database.
- In Refresh Database, click Create.
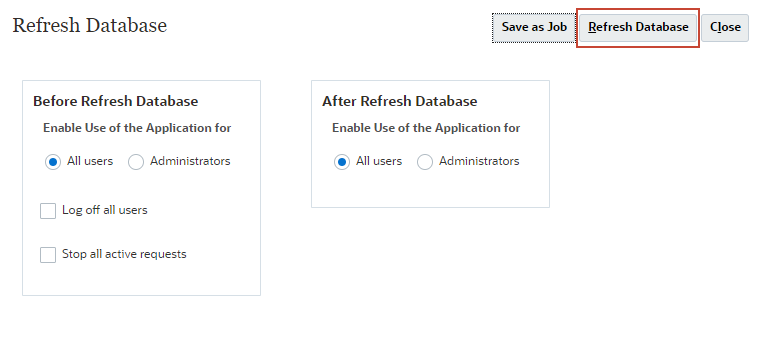
- In the next Refresh Database, accept all default selections and click Refresh Database.
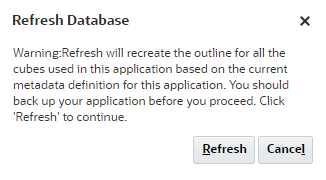
- When prompted, click Refresh.
Refreshing the database takes a moment to complete.
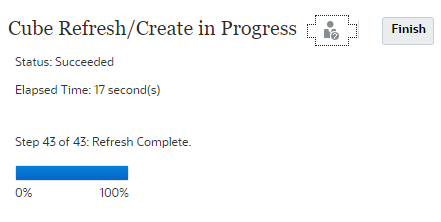
- Click Finish.
- Click Close, twice to close both Refresh Database dialogs.
Adding Members to the Program Attribute
In this section, you add members to the Program attribute.
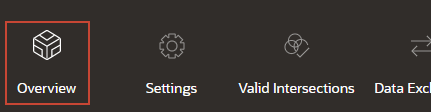
- From the cards on top, click Overview.
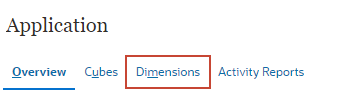
- In Application, click Dimensions.
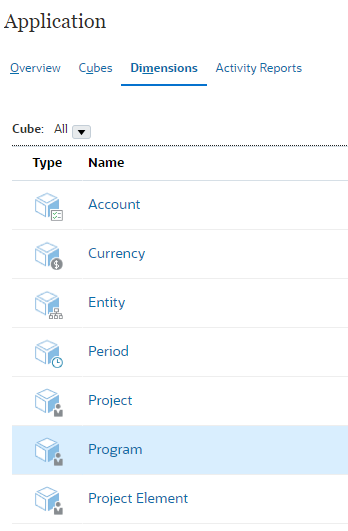
- For Cube, select All.

- Click Program.
Edit Member Properties for Program is displayed.
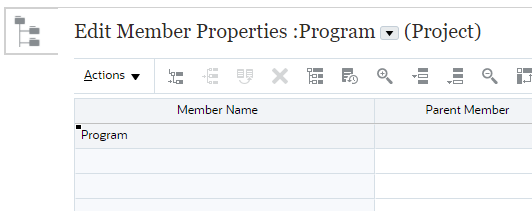
- Click
 (Add Child).
 - In Add Child, for Number of members to add, enter 3 and click Apply.
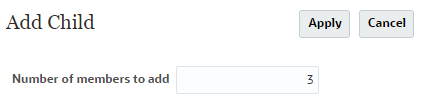
Three (3) rows were added to the grid.
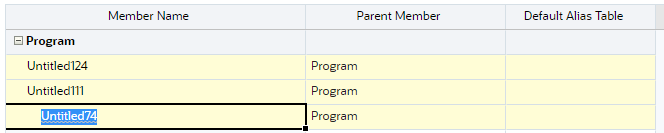
- Replaced the untitled member names with:
- Transformation
- New Tech
- Management
- Verify your entries and click Save.
Grid cells change in color to confirm that the entries were saved.
- Click Cancel.
- In Application - Dimensions, click Actions and select Refresh Database.
- In Refresh Database, click Create.
- In the next Refresh Database, accept all default selections and click Refresh Database.
- When prompted, click Refresh.
Refreshing the database takes a moment to complete.
- Click Finish.
- Click Close, twice to close both Refresh Database dialogs.
More Learning Resources
Explore other labs on docs.oracle.com/learn or access more free learning content on the Oracle Learning YouTube channel. Additionally, visit Oracle University to view training resources available.
For product documentation, visit Oracle Help Center.