Before you Begin
This 30 minute hands-on tutorial shows you how to integrate data between Projects and Financials. You learn how to map Projects data to Financials accounts, and push the data to Financials. The sections build on each other and should be completed sequentially.
Background
You can push summarized project data from Projects to Financials. When you configure Projects, you map Projects accounts to Financials accounts. You can map multiple Projects accounts to the same account in Financials. You can create global mappings that apply to all entities, or entity-specific mappings. After you enter and calculate Projects data, you can run the Rollup Projects business rule to push the summarized data to Financials.
What Do You Need?
An EPM Cloud instance allows you to deploy and use one of the supported business processes. To deploy another business process, you must request another EPM Enterprise Cloud instance or remove the current business process.
- Have Service Administrator access to EPM Enterprise Cloud. The instance should not have a business process created.
- Upload and import this snapshot into your Planning instance.
Note:
If you run into migration errors importing the snapshot, re-run the migration excluding the HSS-Shared Services component, as well as the Security and User Preferences artifacts in the Core component. For more information on uploading and importing migration snapshots, refer to the Administering Migration for Oracle Enterprise Performance Management Cloud documentation.Reviewing Integration Data
- Login to your Planning instance with Service Administrator credentials.
- On the Home page, click Financials, and then Analysis.

- Click the Forms vertical tab.
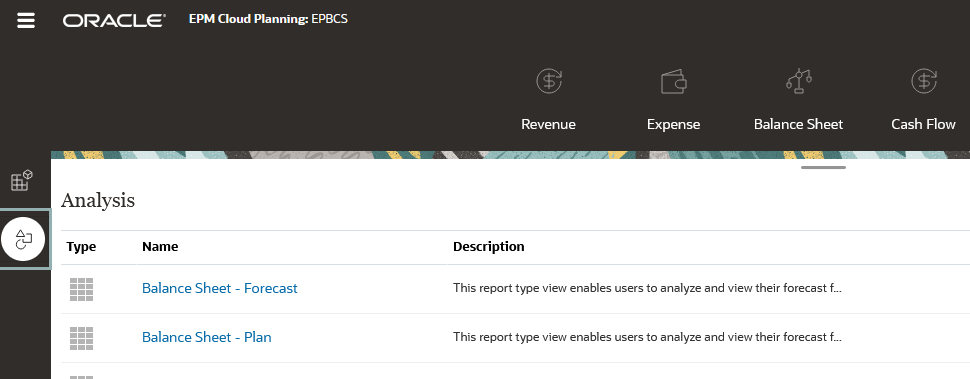
- In the list of forms, click Financial Integration Summary.
- Verify that the point of view is set to Sales US, Plan, Working, USD, FY22.

- Scroll the form to review the data for Total Cost of Sales in the Project Detail column.
Currently no data has been pushed from Projects. You will be adding cost of sales data in Projects and pushing it to Financials in a later section.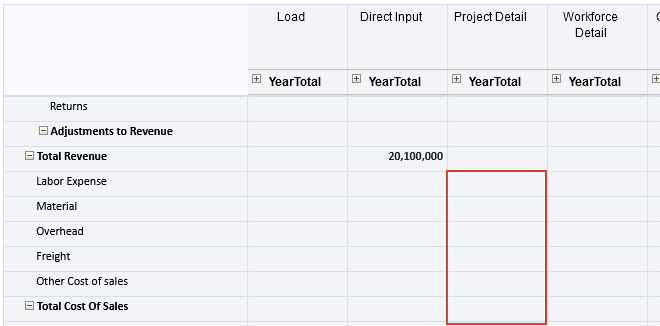
- Click the x on the Financials Integration Summary tab at the bottom of the page to close the form.
- Click Home
 to return to the Home page.
The Financials Integration Summary, Balance Sheet Integration Summary, and Cash Flow Integration Summary forms included with Financials show data that has been pushed from other modules to Financials. Data pushed from Projects is displayed in the Project Detail column of the form.
Mapping Data to Financials Accounts
You map Projects accounts to Financials using the Projects Financials Mapping option on the Configure page. You can map accounts globally or at the entity level. To map accounts globally, select Company Assumptions for Entity in the POV. If an account has both a global and an entity-level mapping, the entity-level mapping overrides the global mapping. If you map multiple Projects accounts to the same Financials account, the data is aggregated.
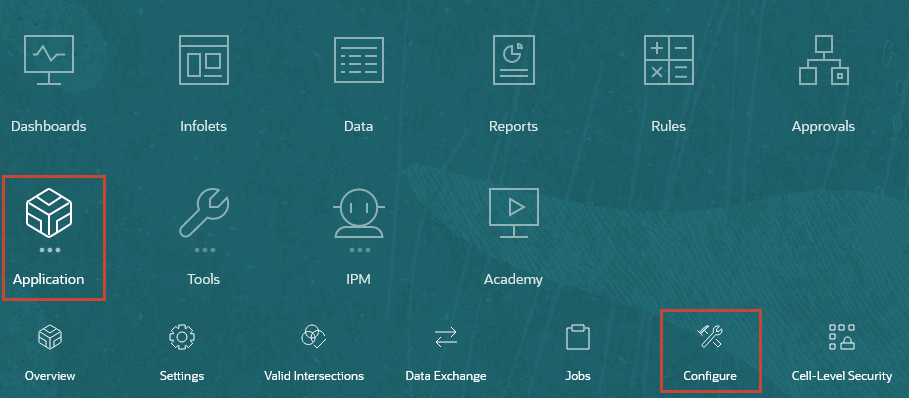
- From the Home page, click Application, then click Configure.
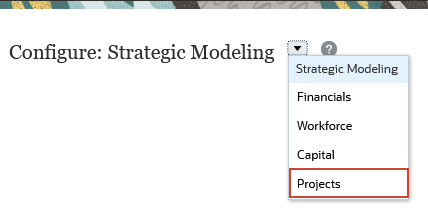
- In the Configure drop-down list, select Projects.
- In the list of configuration items, click Projects Financials Mapping.
The mapping dialog box is displayed. The first column shows accounts in Projects and the second column shows the Financials accounts to which they are mapped. Notice that Labor Expense is mapped to the Labor Expense account in Financials and Material Expense is mapped to the Material account. No mappings have been made for overhead accounts. The Entity is set to Sales US, so these mappings apply to the Sales US entity only.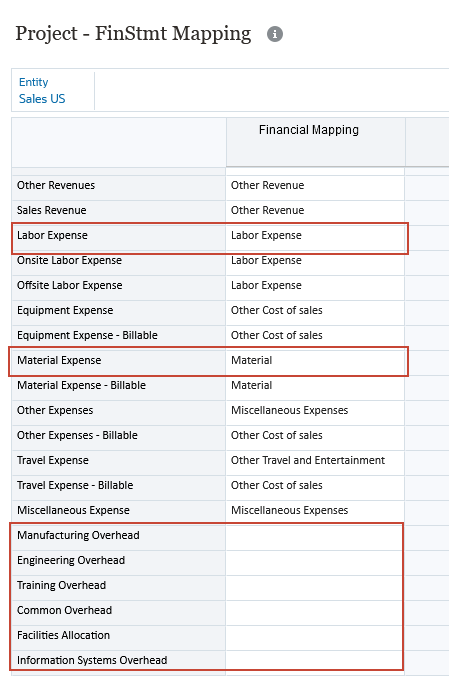
- For Materials Overhead, in the Financial Mapping Column, select Overhead.
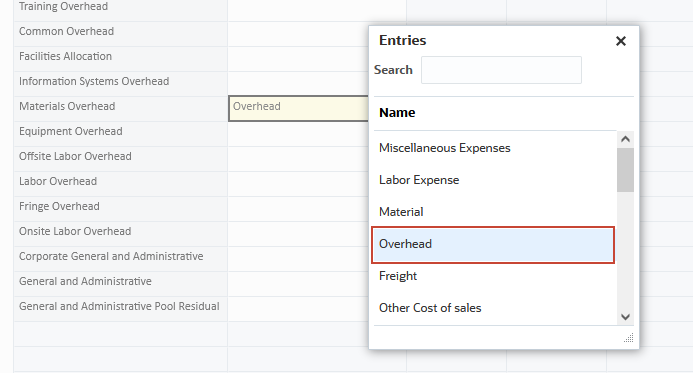
- For Labor Overhead, in the Financial Mapping Column, select Overhead.
You mapped both Material Overhead and Labor Overhead to the Overhead account in Financials, so the data for these accounts will be aggregated when pushed to Financials.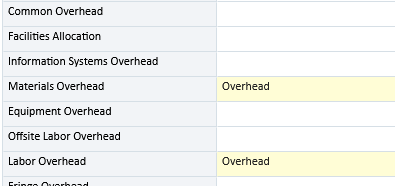
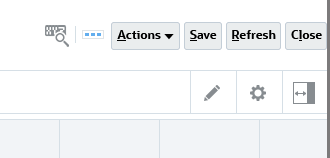
- Click Save.
- In the POV, click Entity.
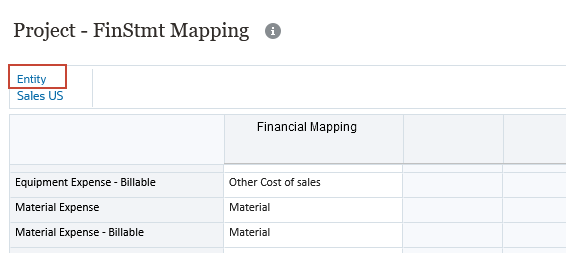
- To define global mappings that apply to all entities, you can select the Company Assumptions member. In this tutorial we are defining entity-level mappings.
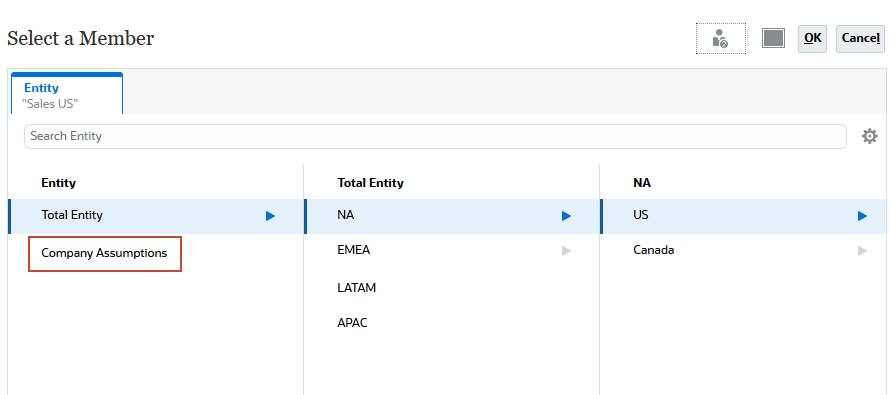
- Click Cancel to close the member selection dialog box, and then click Close to return to the Configuration page.
- Click Home
 to return to the Home page.
Tip:
The accounts available in the drop down lists in the columns are the accounts from the OFS_Project Integration subhierarchy under the OFS_Cross Module Integration hierarchy in the Account dimension. If you are using a custom chart of accounts in Financials rather than the predefined chart, you should add those accounts in the OFS_Financial Accounts hierarchy to which you want to be able to map data as shared members to the OFS_Project Integration hierarchy.Adding Driver Data and Calculating Expenses
In the section you update expense data for Labor Expense and Material Expense. You then add driver data to calculate overhead for labor and materials.
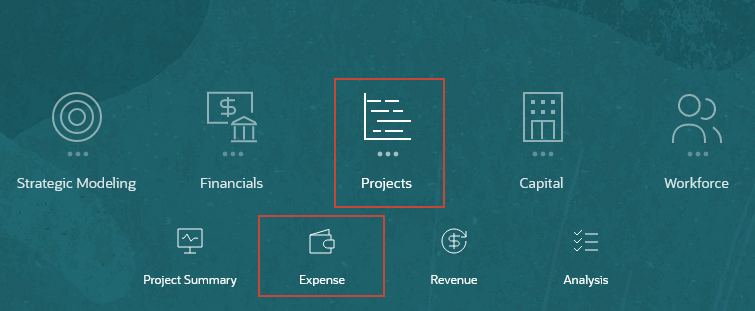
- From the home page, click Projects, and then Expense.
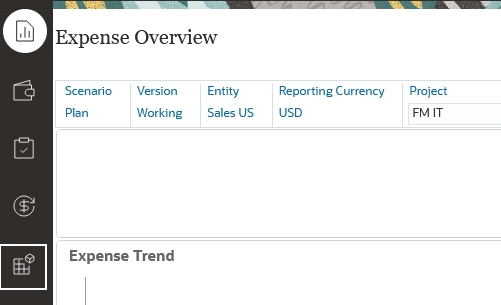
- In the vertical tabs, click Assumptions.
- In the tabs at the bottom of the page, click Overhead.

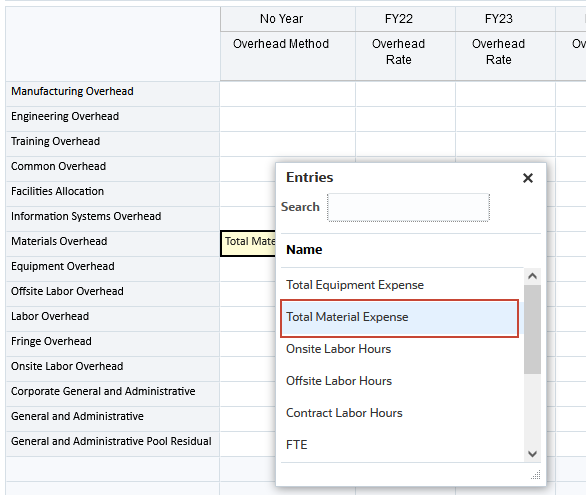
- In the row for Materials Overhead, in the Overhead Method column, select Total Material Expense.
- In the row for Material Overhead, in the FY22 Overhead Rate column, enter .2.
This calculates Material Overhead as 20% of Total Material Expense.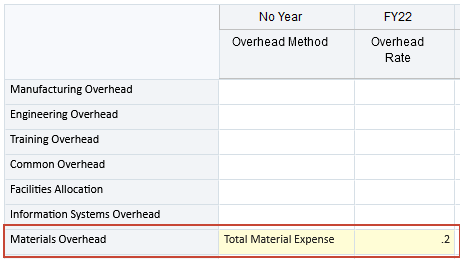
- In the row for Labor Overhead, in the Overhead Method column, select Total Labor Expense.
- In the row for Labor Overhead, in the FY22 Overhead Rate column, enter .1.
This calculates Labor Overhead as 10% of Total Labor Expense.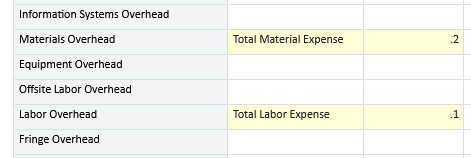
- Click Save.
- Select the Direct Input vertical tab.
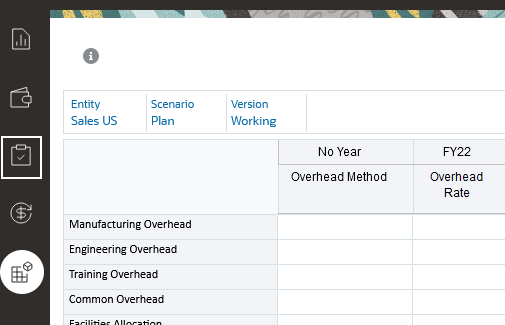
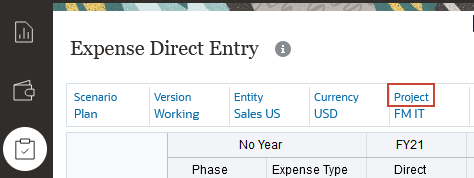
- In the point of view, click Project.
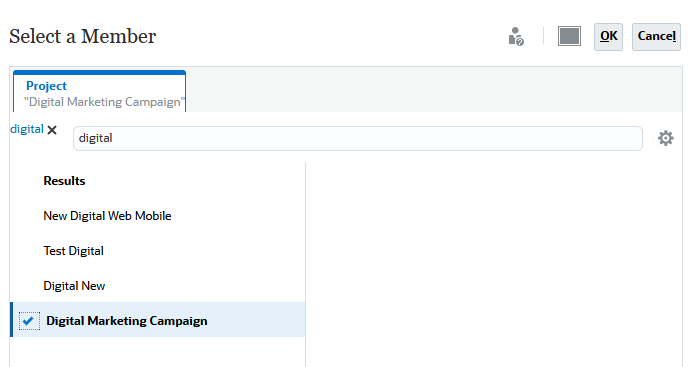
- In the member selector dialog box, enter digital in the Search box and press Enter. Select Digital Marketing Campaign from the member list, and then click OK.
- In the POV bar, click GO to refresh the form data.

- In the Line 1, Material Expense row, in the FY22 Year Total column, replace the current value with 400,000.
- In the Line 3, Labor Expense row, in the FY22 Year Total column, replace the current value with 200,000.
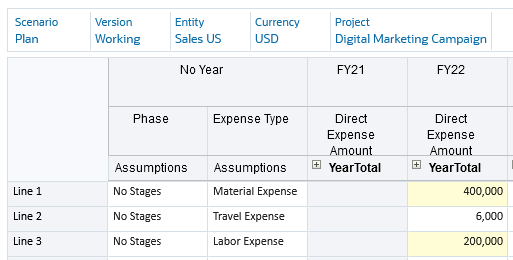
- Click Save.
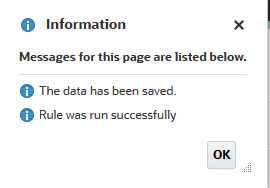
- At the Information prompt, click OK.
- Right-click a cell in the form and select Calculate Expenses.
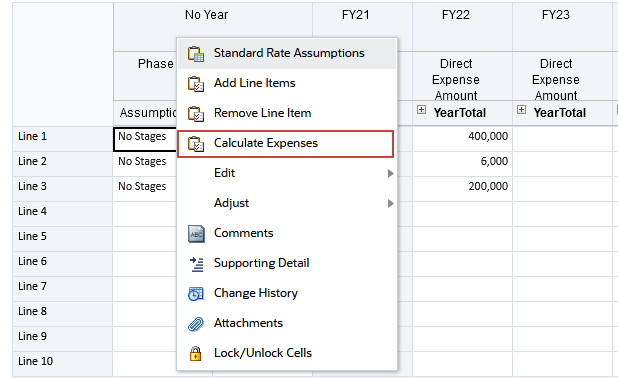
- At the Information prompt, click OK.
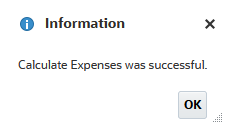
- Click the Review Project Expense vertical tab.
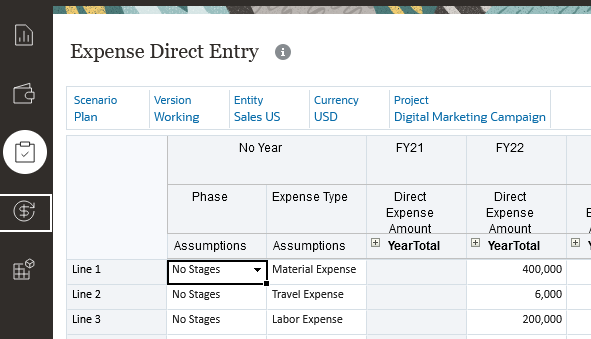
- Review the values in the Calculated FY22 column.
The values you entered for Labor Expense and Material Expense, and the values calculated for Labor Overhead and Materials Overhead, are displayed. The Materials Overhead value is 80,000 (20% of 400,000). The Labor Overhead value is 20,000 (10% of 200,000).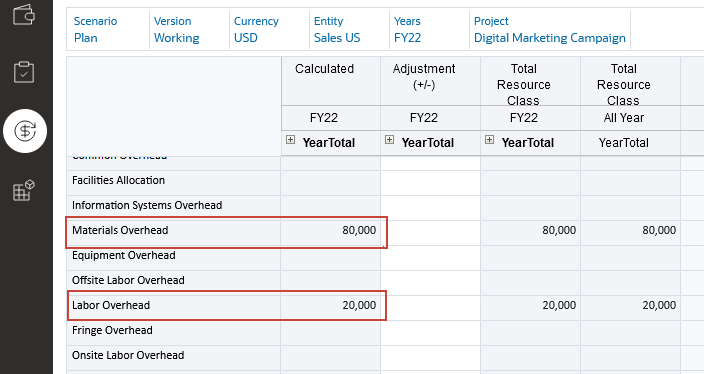
- Click Home
 to return to the Home page.
Running the Rollup Projects Business Rule
In this section, you run the Rollup Projects business rule to push data from Projects to Financials.
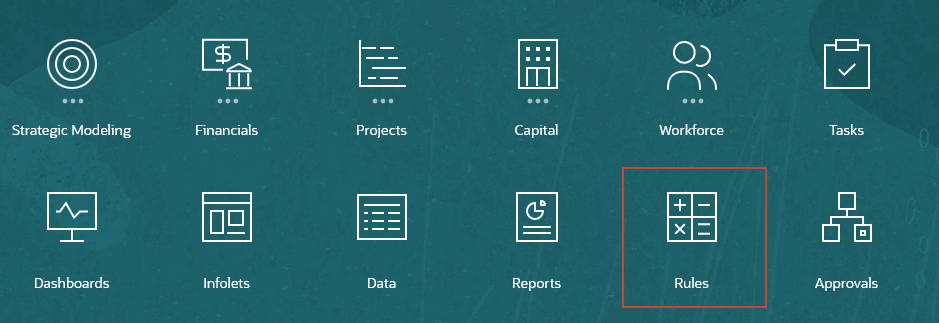
- On the Home page, click Rules.
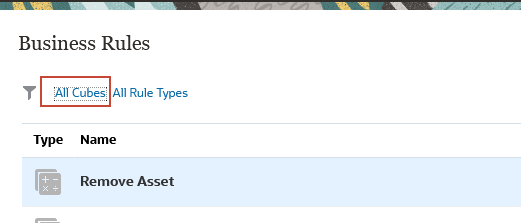
- Click All Cubes.
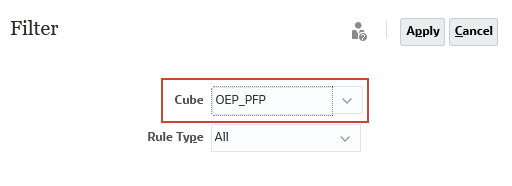
- In the Filter dialog box, select OEP_PFP from the Cubes list, and click Apply.
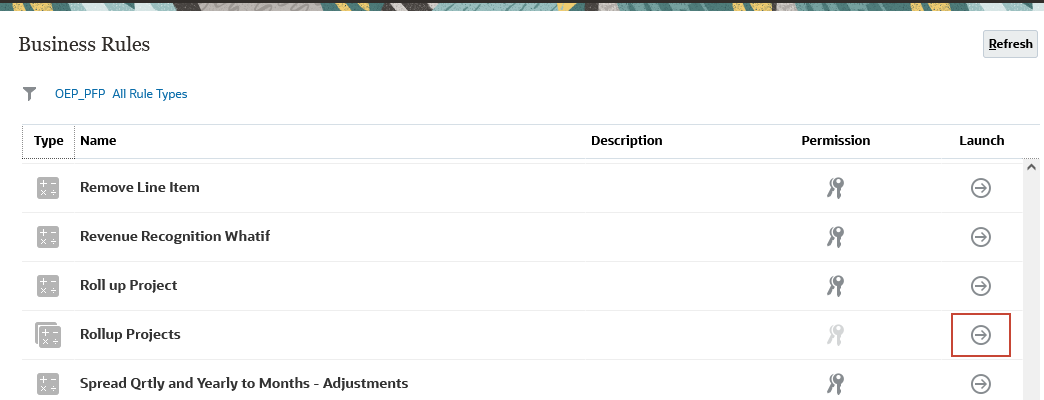
- Scroll the list until Rollup Projects is visible, and click Launch for Rollup Projects.
- In the Business Rules dialog box, enter the following members :
- Currency: USD
- Entity: Sales US
- Scenario: Plan
- Version: Working
Your screen should match the following:
- Click Launch.
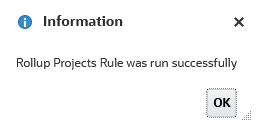
- At the Information dialog box, click OK.
- Click Home
 to return to the Home page.
- On the Home page, click Financials, and then Analysis.

- If it is not already displayed, click the Forms vertical tab.

- In the list of forms, click Financial Integration Summary.
- Verify that the POV is set to Sales US, Plan, Working, USD, FY22.

- Scroll the form to review the data under Total Cost of Sales in the Project Detail column.
The values you entered for the Labor Expense and Material Expense accounts in Projects were pushed to the Labor Expense and Material accounts in Financials. The data calculated for the Labor Overhead and Materials Overhead accounts that you mapped to the Overhead account in Financials was aggregated and pushed to the Overhead account.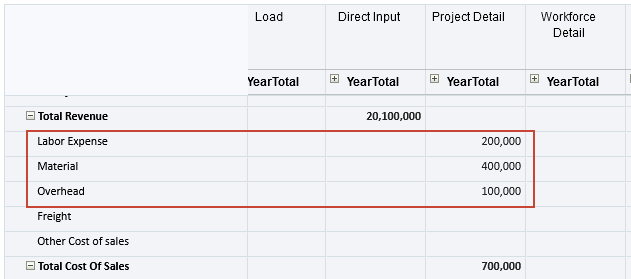
Tip:
To enable users to update Financials with the most recent Projects data more easily, you can add the Rollup Projects rule to the right-click menu or to the Business Rules dialog box in your forms in Projects. Use the Run After Save option to automatically run the rule when they save their data. For instructions on adding business rules to forms, see Adding and Removing Rules in Forms in the Administering Planning guide.Learn More
Integrating Projects Data with Financials in Planning
F53524-02
April 2022
Copyright © 2022, Oracle and/or its affiliates.
This 30 minute hands-on tutorial shows you how to integrate data between Projects and Financials.
This software and related documentation are provided under a license agreement containing restrictions on use and disclosure and are protected by intellectual property laws. Except as expressly permitted in your license agreement or allowed by law, you may not use, copy, reproduce, translate, broadcast, modify, license, transmit, distribute, exhibit, perform, publish, or display any part, in any form, or by any means. Reverse engineering, disassembly, or decompilation of this software, unless required by law for interoperability, is prohibited.
If this is software or related documentation that is delivered to the U.S. Government or anyone licensing it on behalf of the U.S. Government, then the following notice is applicable:
U.S. GOVERNMENT END USERS: Oracle programs (including any operating system, integrated software, any programs embedded, installed or activated on delivered hardware, and modifications of such programs) and Oracle computer documentation or other Oracle data delivered to or accessed by U.S. Government end users are "commercial computer software" or "commercial computer software documentation" pursuant to the applicable Federal Acquisition Regulation and agency-specific supplemental regulations. As such, the use, reproduction, duplication, release, display, disclosure, modification, preparation of derivative works, and/or adaptation of i) Oracle programs (including any operating system, integrated software, any programs embedded, installed or activated on delivered hardware, and modifications of such programs), ii) Oracle computer documentation and/or iii) other Oracle data, is subject to the rights and limitations specified in the license contained in the applicable contract. The terms governing the U.S. Government's use of Oracle cloud services are defined by the applicable contract for such services. No other rights are granted to the U.S. Government.
This software or hardware is developed for general use in a variety of information management applications. It is not developed or intended for use in any inherently dangerous applications, including applications that may create a risk of personal injury. If you use this software or hardware in dangerous applications, then you shall be responsible to take all appropriate fail-safe, backup, redundancy, and other measures to ensure its safe use. Oracle Corporation and its affiliates disclaim any liability for any damages caused by use of this software or hardware in dangerous applications.
Oracle and Java are registered trademarks of Oracle and/or its affiliates. Other names may be trademarks of their respective owners.
Intel and Intel Inside are trademarks or registered trademarks of Intel Corporation. All SPARC trademarks are used under license and are trademarks or registered trademarks of SPARC International, Inc. AMD, Epyc, and the AMD logo are trademarks or registered trademarks of Advanced Micro Devices. UNIX is a registered trademark of The Open Group.
This software or hardware and documentation may provide access to or information about content, products, and services from third parties. Oracle Corporation and its affiliates are not responsible for and expressly disclaim all warranties of any kind with respect to third-party content, products, and services unless otherwise set forth in an applicable agreement between you and Oracle. Oracle Corporation and its affiliates will not be responsible for any loss, costs, or damages incurred due to your access to or use of third-party content, products, or services, except as set forth in an applicable agreement between you and Oracle.