Introduction
This tutorial shows you how to configure additional earnings, benefits, and taxes in Workforce. The sections build on each other and should be completed sequentially.
Background
Align critical corporate resources with the strategies that best leverage a competitive advantage. Using Workforce, departments collaborate to plan headcount and related expenses such as salaries, health care, bonuses, and taxes. Planners can see up-to-date charts and analysis that show expenses and trends.
Workforce provides several out-of-the-box and generic accounts for benefits, taxes, and additional earnings that can be assigned using Default Assignments to an employee or job, depending on the granularity.
In this tutorial, you learn how to configure and customize additional earnings, benefits, and taxes that can enhance your Workforce plans.
Prerequisites
Cloud EPM Hands-on Tutorials may require you to import a snapshot into your Cloud EPM Enterprise Service instance. Before you can import a tutorial snapshot, you must request another Cloud EPM Enterprise Service instance or remove your current application and business process. The tutorial snapshot will not import over your existing application or business process, nor will it automatically replace or restore the application or business process you are currently working with.
Before starting this tutorial, you must:
- Have Service Administrator access to a Cloud EPM Enterprise Service instance. The instance should not have a business process created.
- If you haven't already, register for a free Oracle Cloud Customer Connect account so you can access the required files.
- Download the latest EPBCS Sample Application LCM snapshot from this idea page.
- Upload and import the latest EPBCS Sample Application LCM snapshot into your Planning instance.
Note:
If you run into migration errors importing the snapshot, re-run the migration excluding the HSS-Shared Services component, as well as the Security and User Preferences artifacts in the Core component. For more information on uploading and importing snapshots, refer to the Administering Migration for Oracle Enterprise Performance Management Cloud documentation.Reviewing User Variable Values
User Variables were added when the business process was created. User variables act as filters in forms, enabling planners to focus only on certain members. In this section, you review the values selected for user variables.
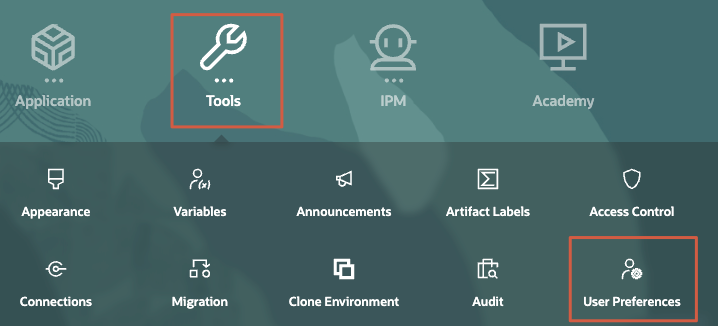
- On the home page, click Tools, then User Preferences.
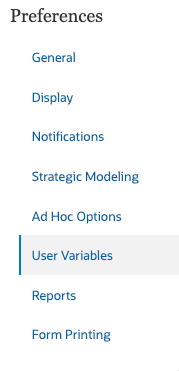
- Under Preferences, click User Variables.
- Review the members selected for each user variable.

- When finished reviewing, return to the home page. On the upper-right, click
 (Home).
Configuring Additional Earnings
Adding Bonus Pay
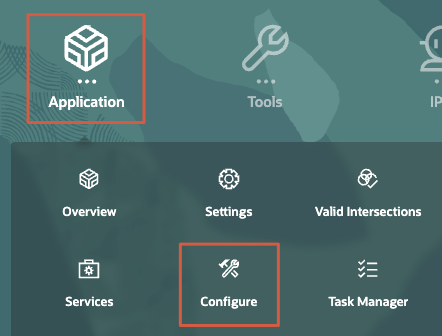
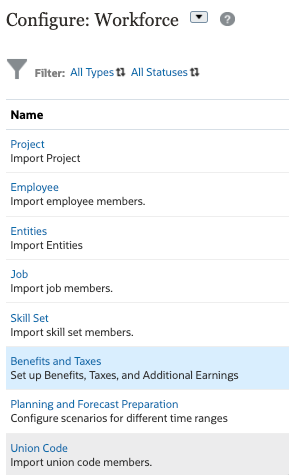
- On the home page, click Application, then Configure.
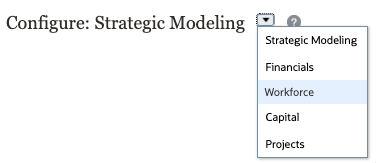
- From the Configure dropdown, select Workforce.
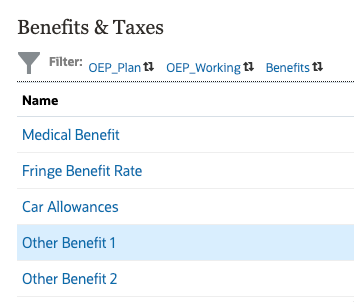
- In Configure: Workforce, click Benefits and Taxes.
- In Benefits & Taxes, click any of the filter links to open the Filter dialog.
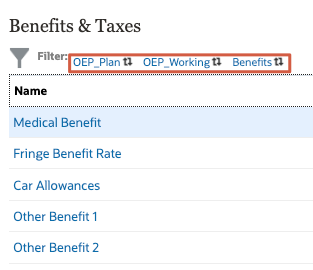
- In the Filter dialog, select the following:
Filter By Value Scenario OEP_Plan Version OEP_Working Components Additional Earnings - Verify your selections and click Apply.

- In Benefits & Taxes, click Bonus Pay.

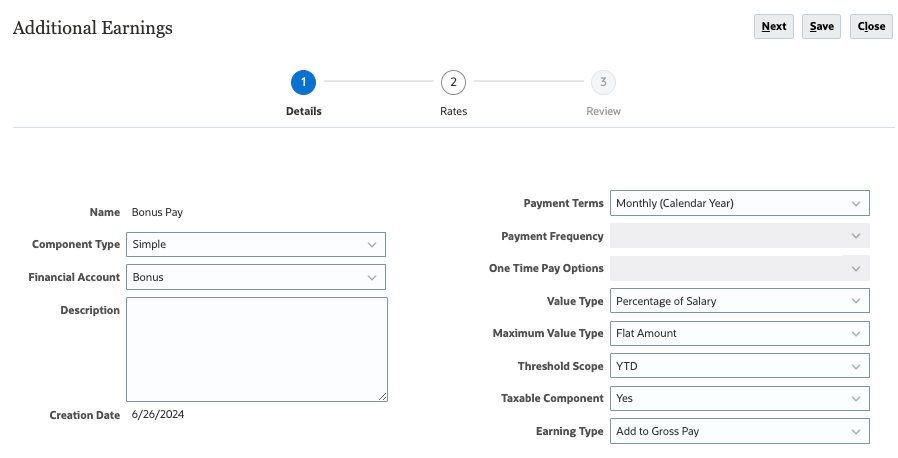
- In Additional Earnings for Bonus Pay, select the following:
Bonus Pay Details Value Component Type Simple Financial Account Bonus Payment Terms Monthly (Calendar Year) Value Type Percentage of Salary Maximum Value Type Flat Amount Threshold Scope YTD Taxable Component Yes Earning Type Add to Gross Pay - Verify your selections and click Next.
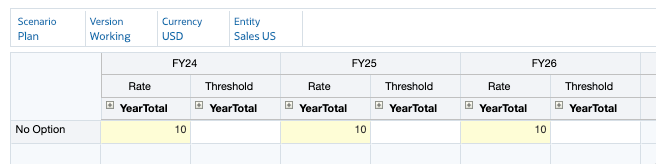
- In Rates, verify or set the following data POV values:
Dimension Member Scenario Plan Version Working Currency USD Entity Sales US

- In the data grid, for No Option, enter 10 as the Rate for all YearTotal members for all three years (FY25, FY26, and FY27).
Tip:
The data grid opens with the YearTotal member collapsed, with the Time Balance property of Account set to Balance. With out-of-box Options and Tiers, the value entered in YearTotal is copied to all periods. However, subsequent changes to YearTotal will only apply to the last period. You can expand YearTotal and manually enter and change rates in the level 0 members.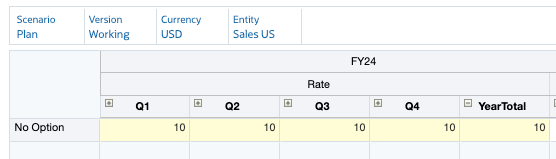
- Click Next.
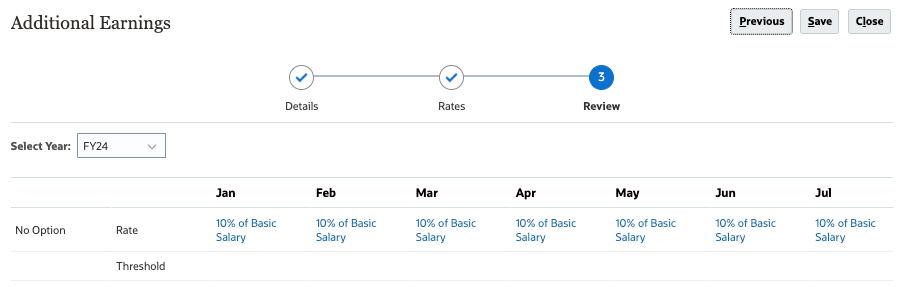
- Review the rate values you entered, and then click Save.
- At the information dialog, click OK.
- In Additional Earnings, click Close.
- In Benefits & Taxes, click Close.
- Return to the home page. On the upper-right, click (Home).
Assigning Default Values
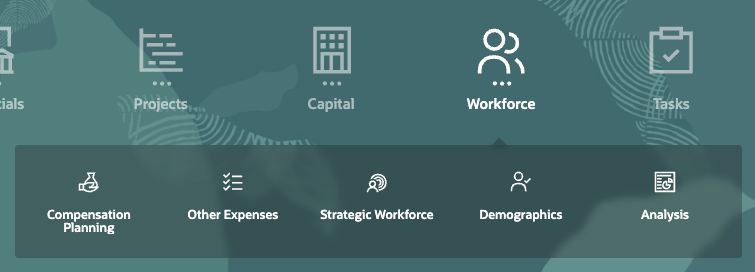
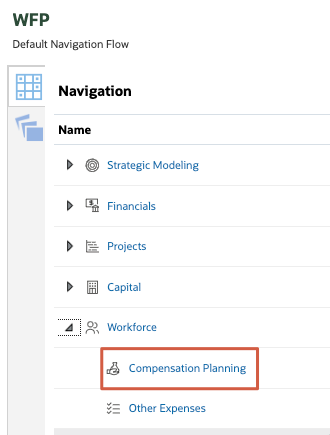
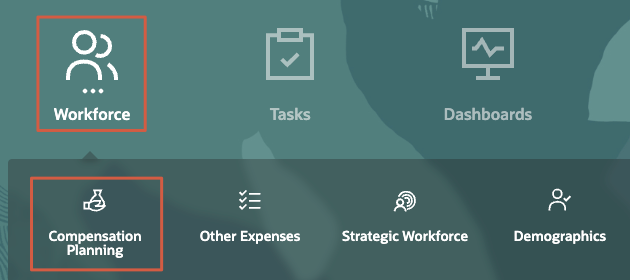
- On the home page, click Workforce, then Compensation Planning.
- From the vertical tabs on the left, click
 (Defaults).
 - From the bottom tabs, click Additional Earnings.
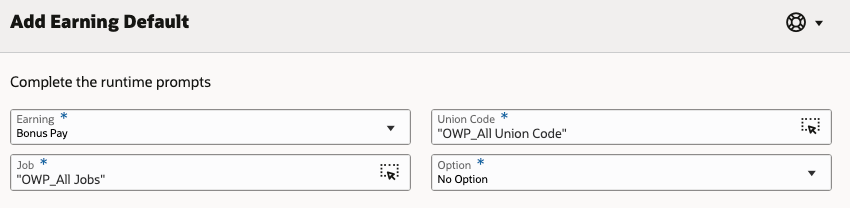
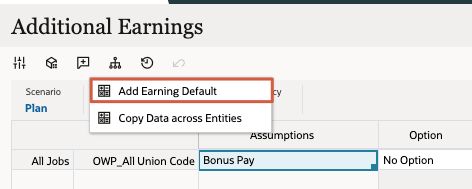
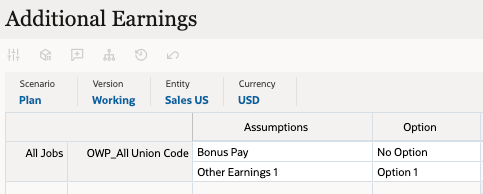
- In Additional Earnings, right-click in the content area to display menu options, and then select Add Earning Default.
- In Add Earning Defaults, select prompt values as follows:
Prompt Value Earning Bonus Pay Job OWP_All Jobs Union Code OWP_All Union Code Option No Option Tip:
When available, you can click a dimension or prompt's (Member Selector) to open the Select Member dialog where you can search, select, and assign members, user variables, or substitution variables to a dimension.
 - Verify your selections.
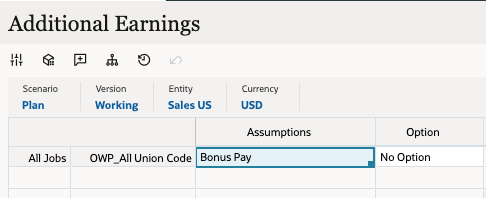
- Click OK.
- At the information message, click OK.
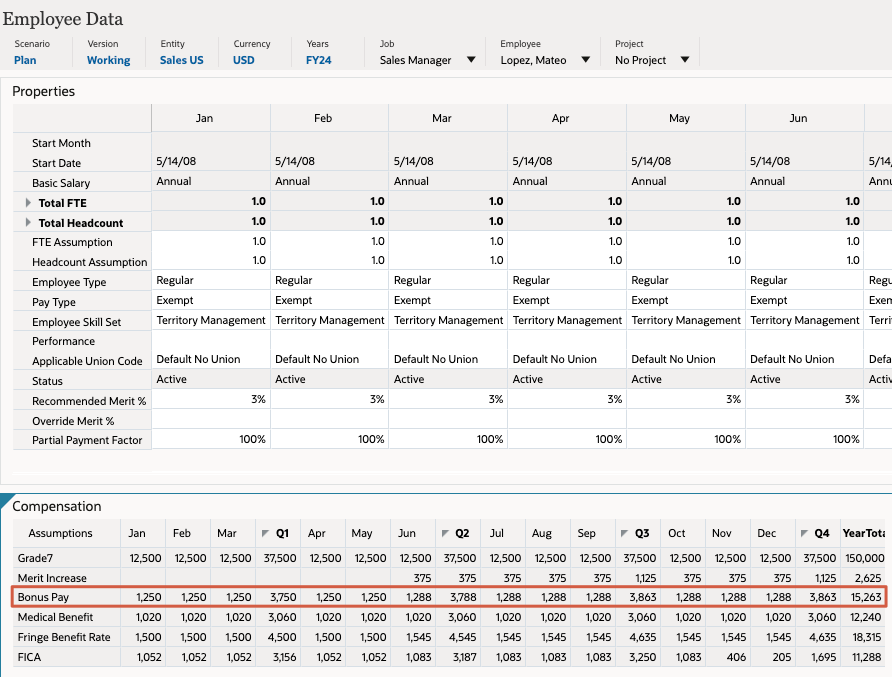
Bonus Pay was added an additional earning assumption. The assumption details are displayed on the form.
Synchronizing Defaults
- From the vertical tabs on the left, click
 (Manage Employees).
 - From the bottom tabs, click Existing Employees.
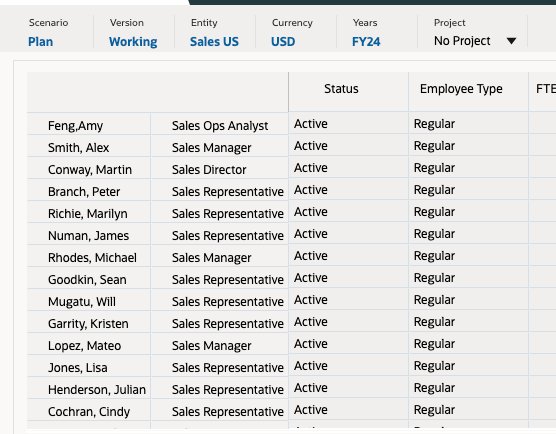
- In Existing Employees, set the POV to the following members:
Dimension Member Scenario Plan Version Working Entity Sales US Currency USD Years FY25 Project No Project Existing Employee data is displayed on the form.
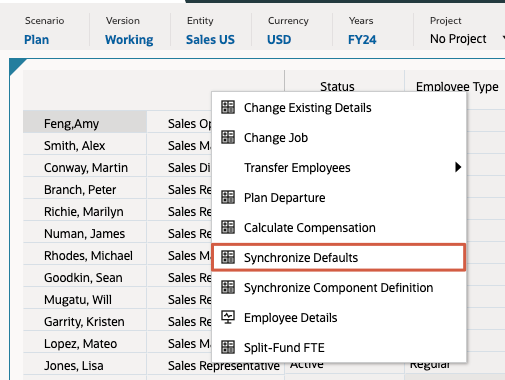
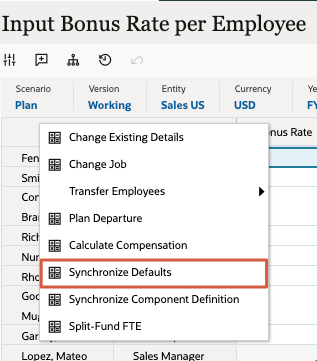
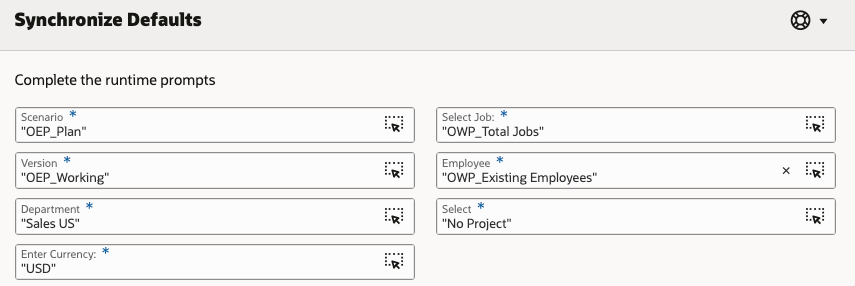
- In the data grid, right-click the top left empty header cell to display menu options, and then select Synchronize Defaults.
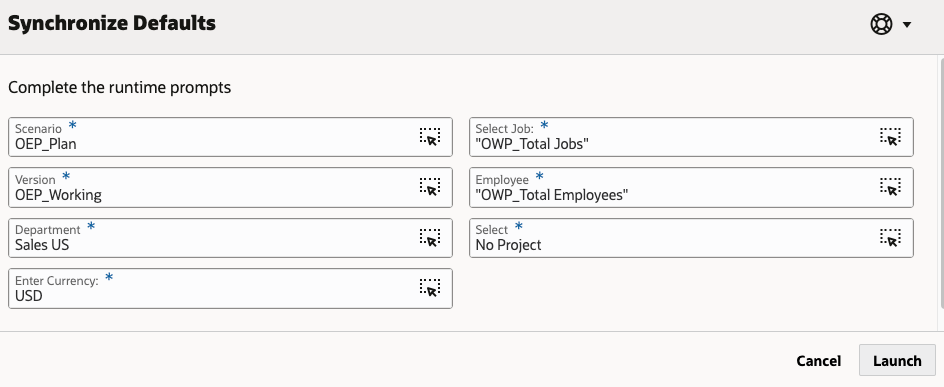
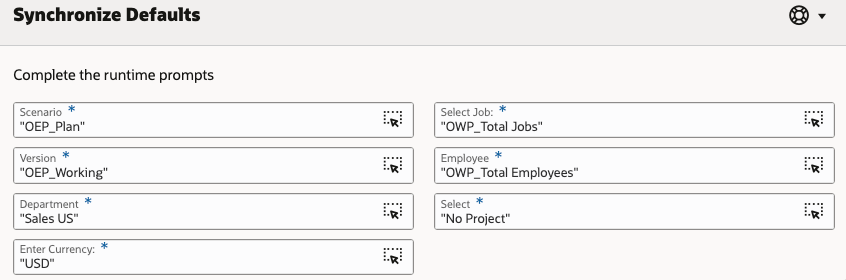
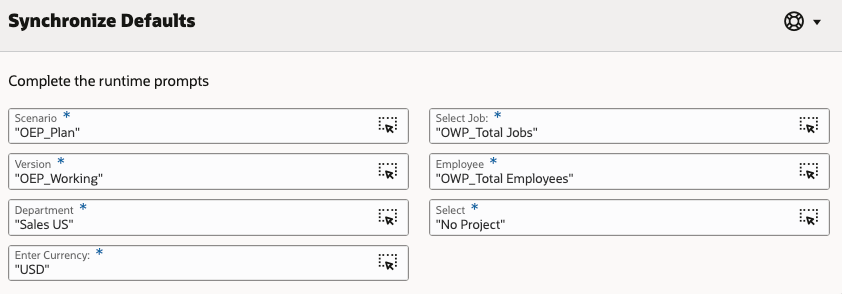
- In Synchronize Defaults, set the prompt values to:
Prompt Value Scenario OEP_Plan Version OEP_Working Department Sales US Enter Currency USD Select Job OWP_Total Jobs Employee OWP_Total Employees Select No Project Tip:
Always verify your member selections to avoid selecting incorrect members. For example, OWP_Total Jobs is different from OWP_All Jobs, which was used in the assignment of defaults. - Verify your selections and then click OK.
- At the information message, click OK.
- In the data grid, expand Total Compensation.
The Total Earnings column displays data based on the Bonus Pay rate you previously defined, which is 10% of the Total Salary.

- From the vertical tabs on the left, click
 (Employee Details).
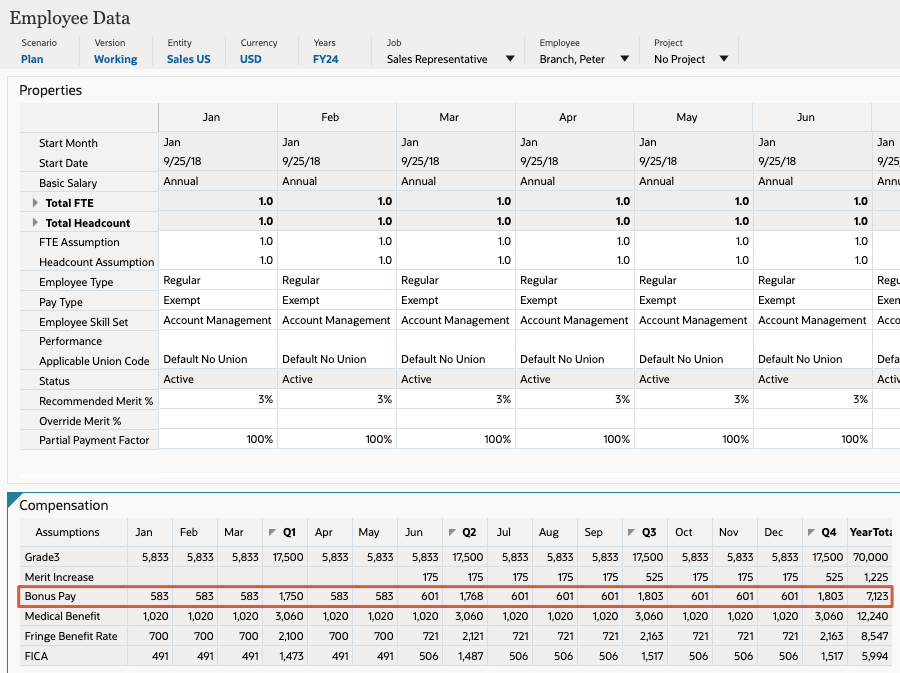
 - In Employee Details, set the POV to:
Dimension Member Job Sales Representative Employee Branch, Peter Project No Project - Review the Bonus Pay data for Peter Branch.
- Display details for another employee. Set the POV to:
Dimension Member Job Sales Manager Employee Lopez, Mateo Project No Project - Review the Bonus Pay data for Mateo Lopez.
- Return to the home page. On the upper-right, click (Home).
Customizing Additional Earnings
Adding the Bonus Rate Account to the Workforce Cube
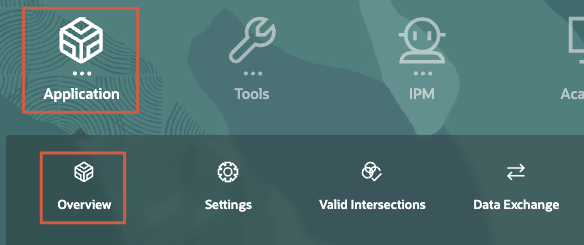
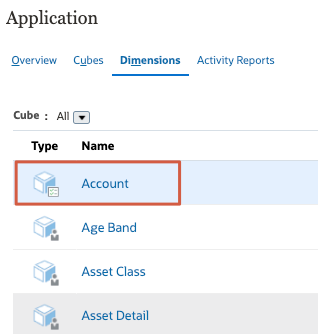
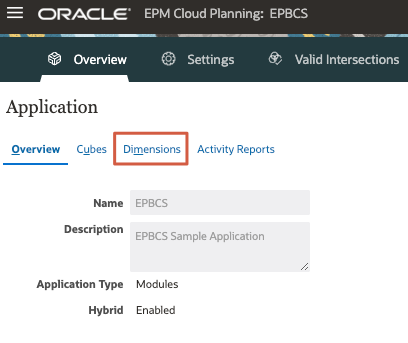
- On the home page, click Application, and then Overview.
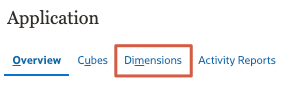
- Click Dimensions.
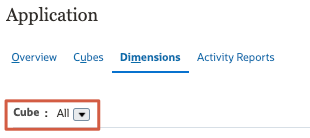
- From the Cube dropdown, verify that All is selected.
- From the list of dimensions, click Account.
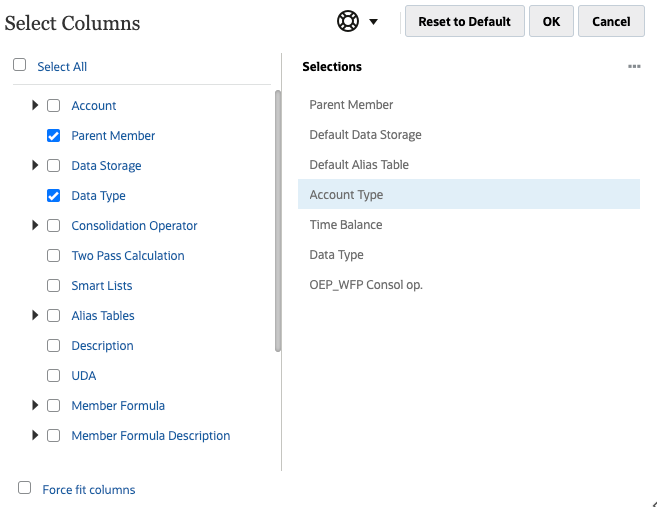
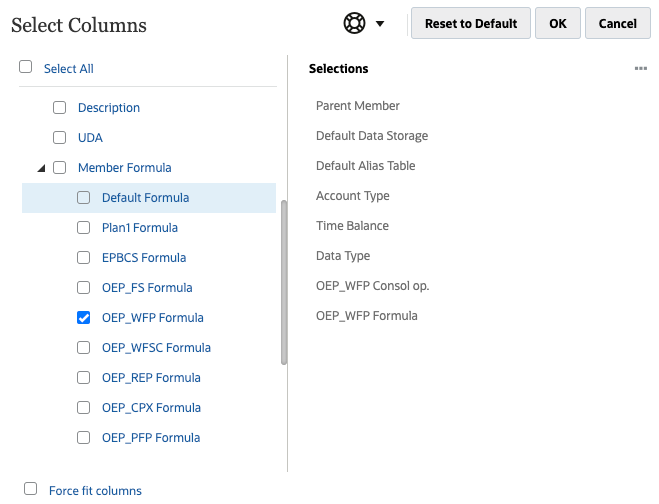
- In Edit Member Properties for Account, right-click the Member Name column header to open the Select Columns dialog.
- Under Selections, for all properties except for Parent Member, Default Data Storage and Default Alias Table, hover over the property name of and then click X to remove it.
- On the left, in Select Columns, select the following columns:
- Under Account: Account Type
- Under Account: Time Balance
- Data Type
- Under Consolidation Operator: OWP_WFP Consol op.
- Verify your selections and click OK.
- In the Search box, enter OWP_Dynamic Properties and click
 (Search Down).

The OWP_Dynamic Properties member is displayed and selected in the grid.
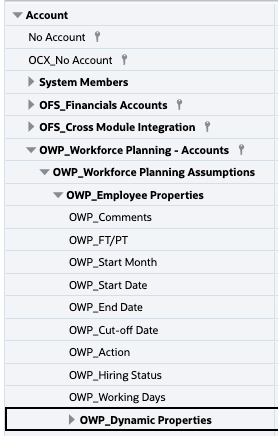
Tip:
You can find the OWP_Dynamic Properties member underAccount\OWP_Workforce Planning - Accounts\OWP_Workforce Planning Assumptions\OWP_Employee Properties. - With OWP_Dynamic Properties selected, click
 (Add Sibling).
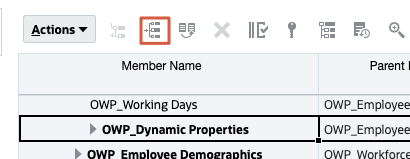
- In Add Sibling, accept the default value of 1 in Number of members to add and click Apply.
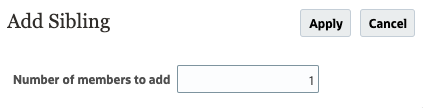
A new row is added to the grid.

- Replace the member name with Bonus_Rate.
Tip:
Make sure to include the underscore in between "Bonus" and "Rate".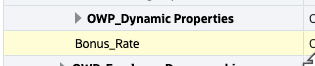
- For Bonus_Rate, set the following member properties:
Property Value Default Data Storage Store Default Alias Table Bonus Rate Account Type Saved Assumption Time Balance Average Data Type Non-Currency OEP_WFP Consol op. Ignore Tip:
For aggregation logic, consider selecting Never for accounts with rates if there is no requirement to aggregate the data with other dimensions. Selecting Never saves a lot of upper-level blocks from being created during aggregation. - Verify your selections and click Save.

Tip:
Verify your selections after saving to make sure your updates are saved. - Click
 (Refresh Database).
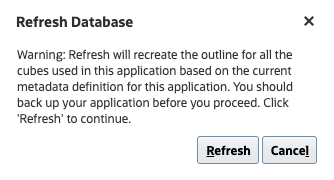
 - In Refresh Database, make the following selections and click Refresh Database:
Before Refresh Database Enable Use of the Application for Administrators After Refresh Database Enable Use of the Application for All users - Review the warning message and click Refresh.
Caution:
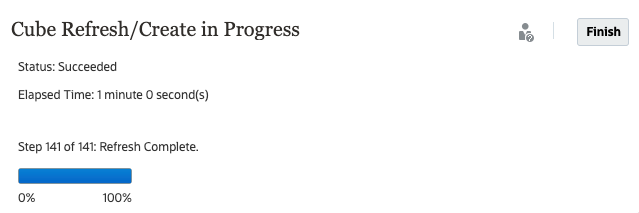
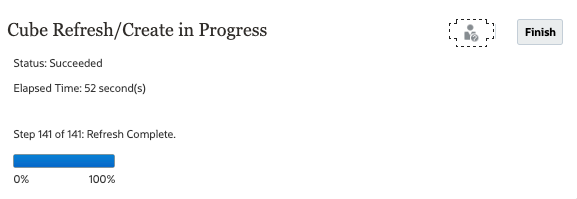
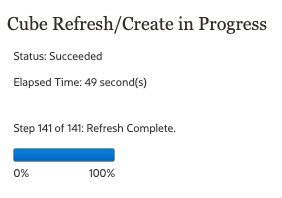
Best practices suggest creating a full backup of your entire application instance prior to making any metadata changes.The cube refresh process takes a moment to complete.
- When the status displays as Succeeded and the percent complete is 100%, click Finish.
You can ignore any warnings at the bottom.
- In Refresh Database, click Close.
- In Edit Member Properties for Account, click Cancel.
Creating a Form for Bonus Rate Input
- Click
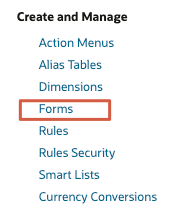
 (Navigator), and under Create and Manage, click Forms.
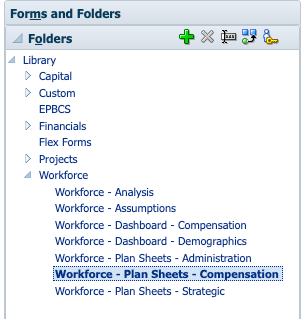
- In Folders, expand Library, then Workforce, and select Workforce - Plan Sheets - Compensation.
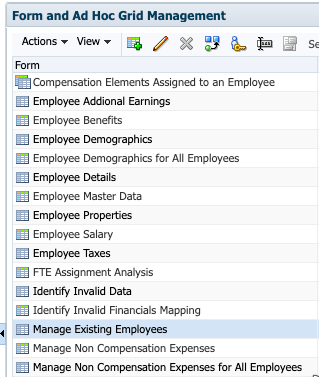
- In the content area, select Manage Existing Employees and click
 (Edit).
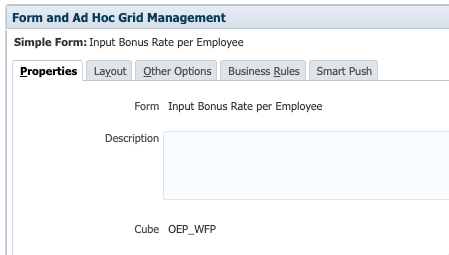
- In Form and Ad Hoc Grid Management for Manage Existing Employees, click Save As.
- In the Save As dialog, enter Input Bonus Rate per Employee as the new name for the form and click OK.

The Input Bonus Rate per Employee is now opened in Form and Ad Hoc Grid Management.
- Click the Layout tab.
- In Column A, make the following changes:
- Replace the Account members with Bonus_Rate.
- Replace the Period members with Assumptions.
Tip:
Assumptions is the default alias for the BegBalance period member.
- Right-click Column B and select Delete Column.
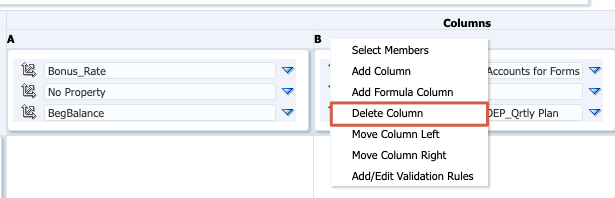
Column C replaces the original Column B.

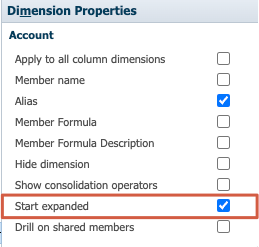
- In Column B, click in the Account cell to display Dimension Properties.
Dimension Properties is under the panel on the right.
- In Dimension Properties for Account (Column B), select Start Expanded.
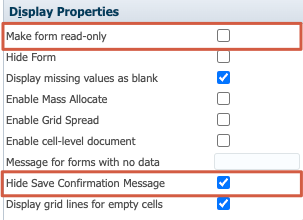
- Expand Display Properties.
- In Display Properties, make the following changes:
Property Value Make form read only Deselect Hide Save Confirmation Message Selected - Verify your selections.
- Click the Business Rules tab.
- In Business Rules, select the OEP_WFP-Rule-Calculate Existing Employee Compensation rule and click Add.
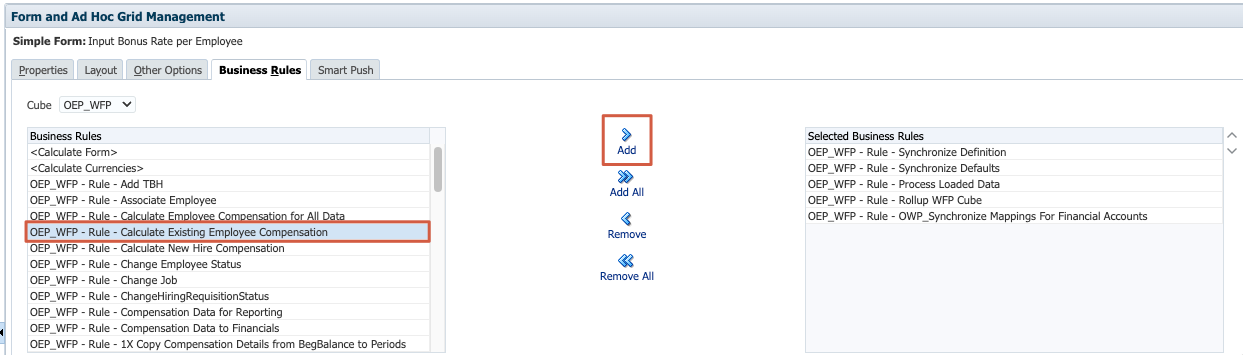
- In Business Rules Properties, for OEP_WFP-Rule-Calculate Existing Employee Compensation, select Use Members on Form.

- Click Finish.
- Return to the home page. On the upper-right, click (Home).
Creating a Navigation Flow
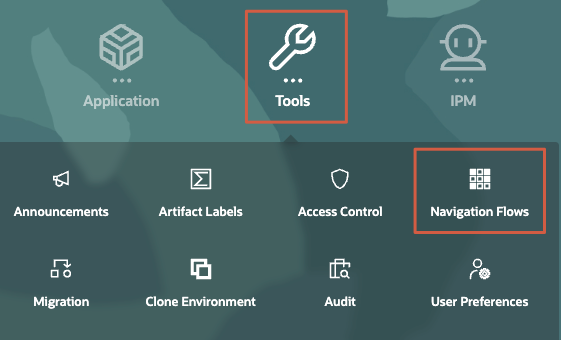
- Click (Navigator), and under Tools, click Navigation Flows.
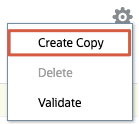
- Select the Default navigation flow row, and then click
 (Actions) and select Create Copy.
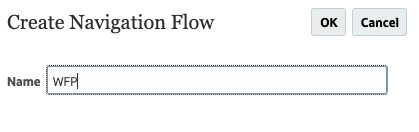
- In Create Navigation Flow, enter WFP as the name and click OK.
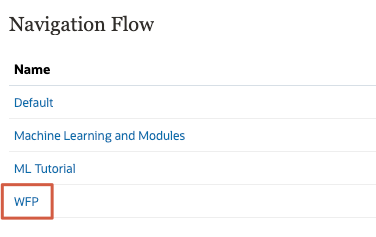
- In Navigation Flow, click WFP to edit it.
- In WFP, expand Workforce and click Compensation Planning.
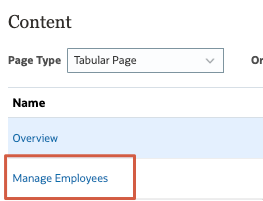
- In Manage Card - Content, click Manage Employees.
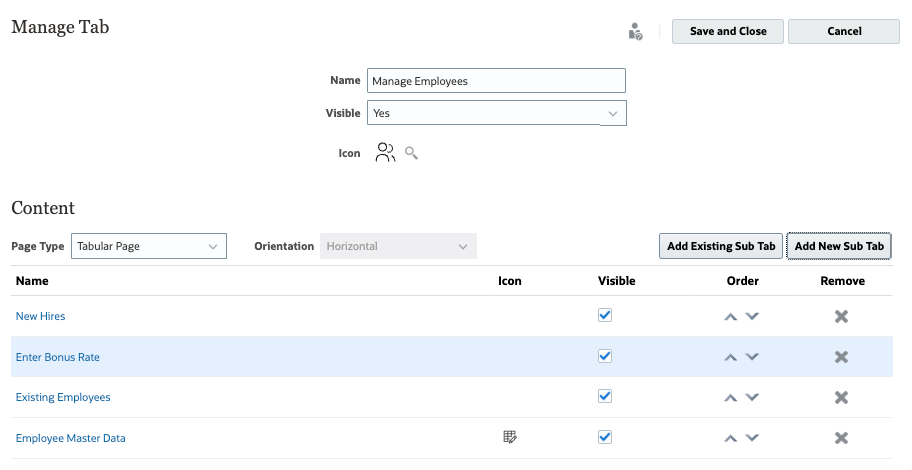
- In Manage Tab - Content, click Add New Sub Tab.
- In Manage Sub Tab, type Enter Bonus Rate as the name.
- For Artifact, click
 (Choose Artifact).
 - In Library, locate and select Input Bonus Rate per Employee, and click OK.
Tip:
Input Bonus Rate per Employee is saved underLibrary\Workforce\Workforce - Plan Sheets - Compensation. - In Manage Sub Tab, click Save and Close.
- In Manage Tab, verify that Enter Bonus Rate is listed as a tab and click Save and Close.
- In Manage Card, click Save and Close.
- In WFP, click Save and Close.
- In Navigation Flow, for WFP, click Inactive.
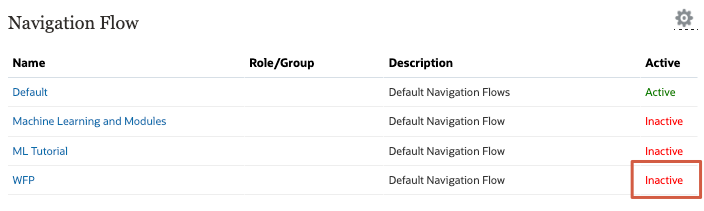
- Verify that WFP is set to Active and click (Home) to return to the home page.
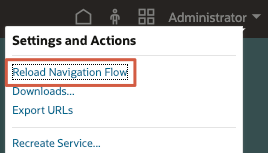
- On the upper-right of the home page, click Administrator and select Reload Navigation Flow.
- On the home page, click Workforce, and then Compensation Planning.
- From the vertical tabs on the left, click (Manage Employees).
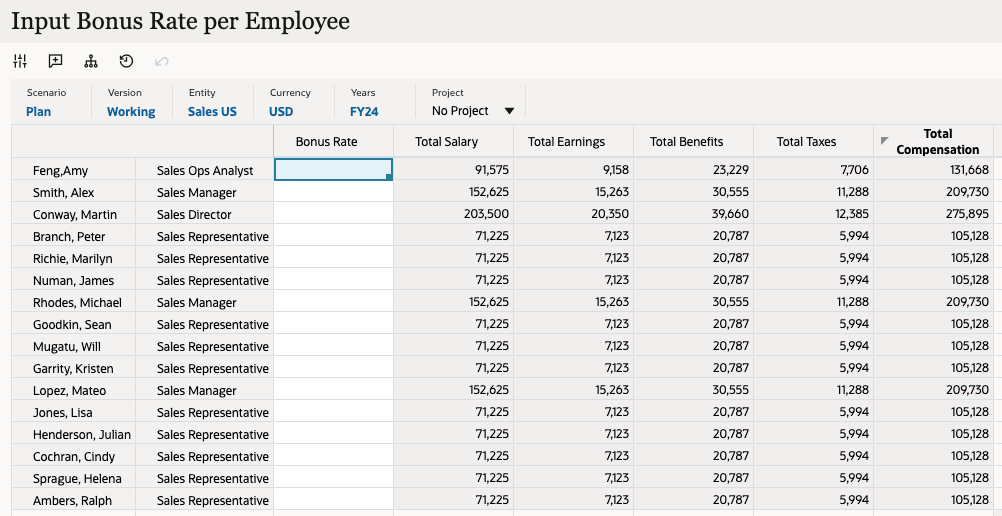
- From the bottom tabs, click Enter Bonus Rate.
The Input Bonus Rate per Employee form is displayed.
- Return to the home page. On the upper-right, click (Home).
Modifying the Member Formula for Custom Earnings
- On the home page, click Application, and then Overview.
- Click Dimensions.
- From the Cube dropdown, verify that All is selected.
- From the list of dimensions, click Account.
- In Edit Member Properties for Account, right-click the Member Name column header to open the Select Columns dialog.
- On the left, in Select Columns, expand Member Formula and select OEP_WFP Formula.
- Verify your selections and click OK.
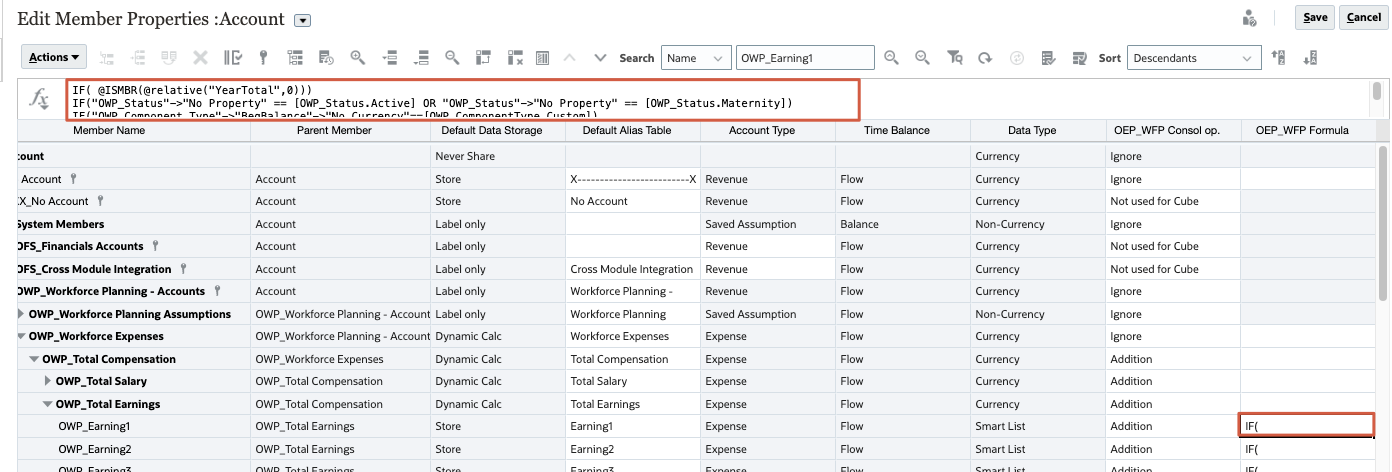
- In the Search box, enter OWP_Earning1 and click (Search Down).

The OWP_Earning1 member is displayed and selected in the grid.
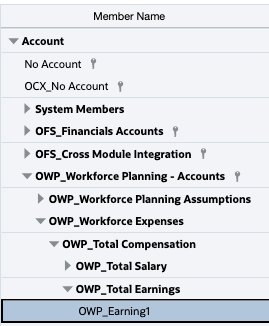
Tip:
You can find the OWP_Earning1 member underAccount\OWP_Workforce Planning - Accounts\OWP_Workforce_Expenses\OWP_Total Compensation\OWP_Total Earnings. - For OWP_Earning1, click the OEP_WFP Formula cell.
After selecting the OEP_WFP Formula cell for OWP_Earning1, the member formula is displayed above the grid.
- On the left of the member formula, click
 (Member Formula).
The Member Formula dialog is displayed.
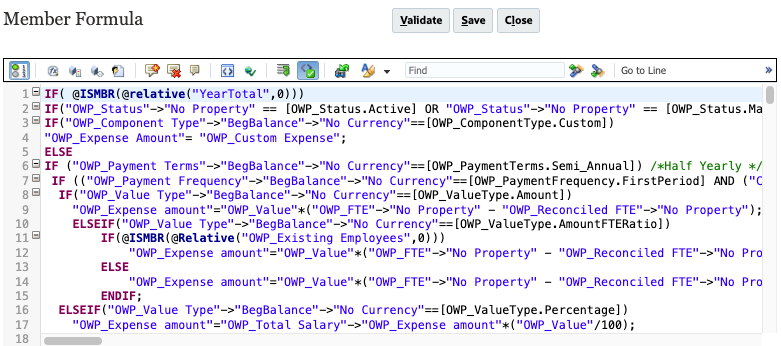
- On the toolbar, click
 (Wrap) to display member formula text within window boundaries.
 - Scroll down to line 112 where the
/*Month options*/comment is displayed.
- Locate line 125 and insert a line right below it.
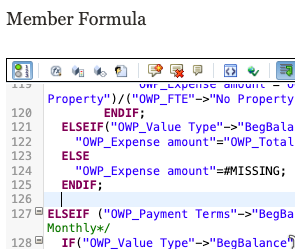
- Copy and paste the following formula into that section:
Note:
In this formula, the Bonus Pay is expected to be computed as percentage of Total Salary paid in the year.IF("No Property"->"BegBalance"==[OWP_EarningList.Bonus_Pay] AND "Bonus_Rate"->"No Property"->"BegBalance" <> #Missing) "OWP_Expense Amount"="OWP_Total Salary"->"OWP_Expense Amount"*("Bonus_Rate"->"No Property"->"BegBalance"/100); ENDIFTip:
You can use the Copy option available here within the code.Bonus Pay is calculated based on this formula:
Bonus Pay = Total Salary x Bonus Rate.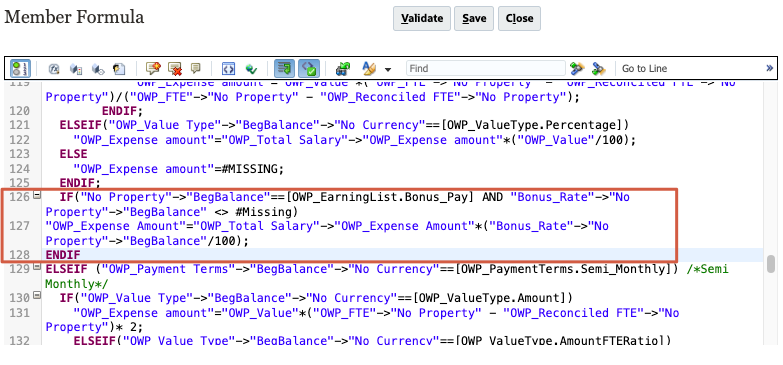
In this example, the calculation only applies to existing employees. New hires will initially receive the default bonus pay.
You can optionally copy the same formula into the other payment terms.
You can further customize this member formula by modifying sections on thresholds, gross pay, and taxable calculations. Prior to making changes, backup your application. Then, apply your changes to all relevant payment terms and earning accounts.
- Click Validate.
A validation message displays at the bottom of the dialog.
- Click Save.
- In Edit Member Properties for Account, click Save.
- Click (Refresh Database).
- In Refresh Database, make the following selections and click Refresh Database:
Before Refresh Database Enable Use of the Application for Administrators After Refresh Database Enable Use of the Application for All users - Review the warning message and click Refresh.
The cube refresh process takes a moment to complete.
- When the status displays as Succeeded and the percent complete is 100%, click Finish.
You can ignore any warnings at the bottom.
- In Refresh Database, click Close.
- In Edit Member Properties for Account, click Cancel.
- Return to the home page. On the upper-right, click (Home).
Entering Bonus Rates
- On the home page, click Workforce, and then Compensation Planning.
- From the vertical tabs on the left, click (Manage Employees).
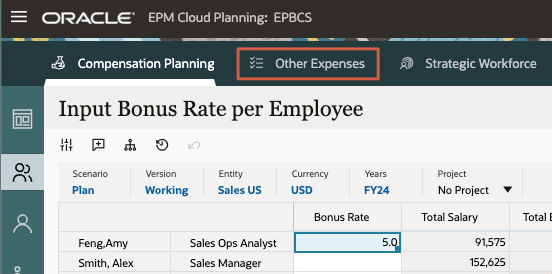
- From the bottom tabs, click Enter Bonus Rate.
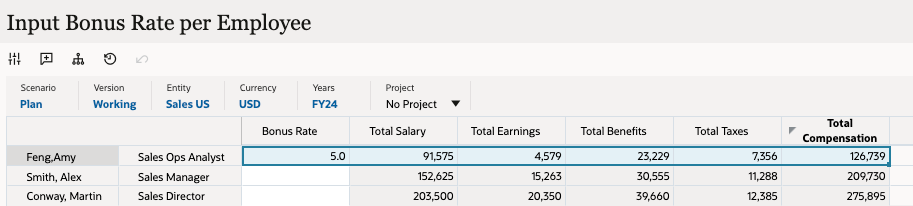
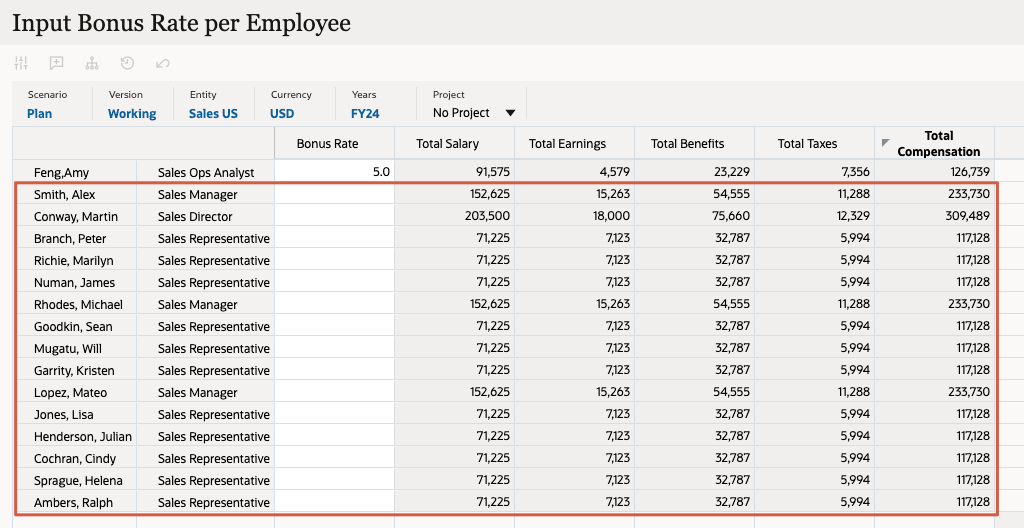
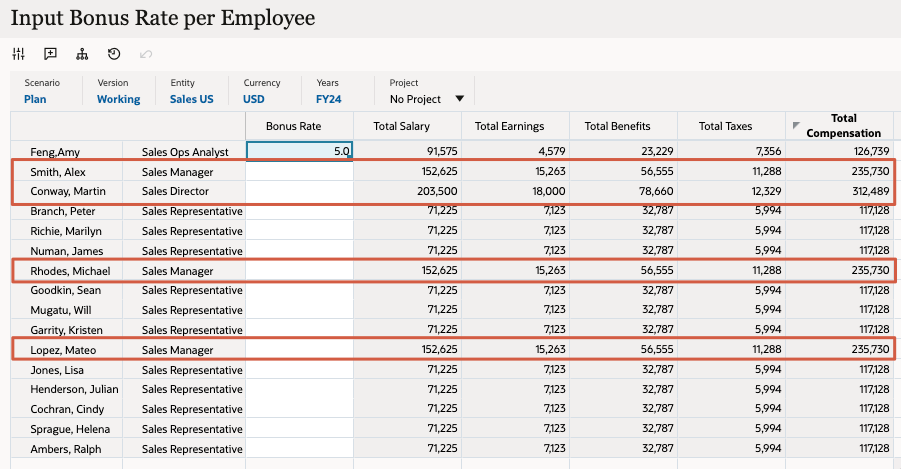
The Input Bonus Rate per Employee form is displayed.
In this tutorial, you enter bonus rates for FY25. Typically, you enter bonus rates for all applicable years.
Note that by default, Total Earnings is calculated at 10% of Total Salary.
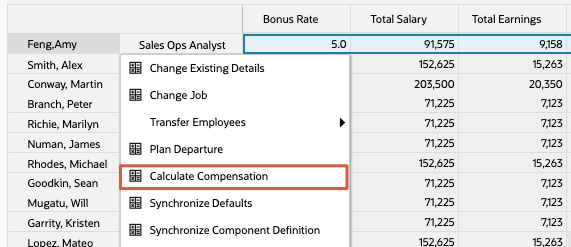
- For Feng, Amy, enter 5 as the Bonus Rate.
The member formula you added in the previous section calculates the bonus rate by 100, which calls for the bonus rate value to be entered as "5" instead of "5%" or "0.05."
IF("No Property"->"BegBalance"==[OWP_EarningList.Bonus_Pay] AND "Bonus_Rate"->"No Property"->"BegBalance" <> #Missing)
"OWP_Expense Amount"="OWP_Total Salary"->"OWP_Expense Amount"*("Bonus_Rate"->"No Property"->"BegBalance"/100);
ENDIF - Click Save.
- Right-click the member cell for Feng, Amy and select Calculate Compensation.
- At the information dialog, click OK.
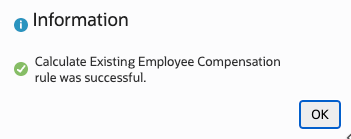
Total Earnings, Total Taxes, and Total Compensation for Amy Feng were updated based on the entered Bonus Rate value.
- Return to the home page. On the upper-right, click (Home).
Modifying Benefits and Synchronizing Component Definitions
In this section, you modify existing Additional Earnings, Benefits, and Taxes using the configuration parameters in the Benefits and Taxes Wizard.
Adding a Threshold to Bonus Pay
- On the home page, click Application, then Configure.
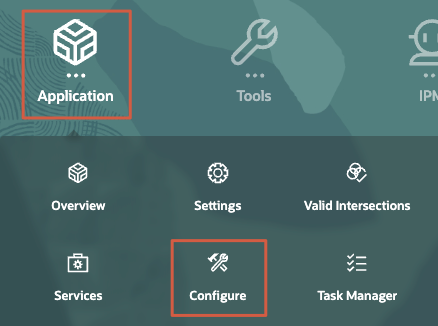
- From the Configure dropdown, select Workforce.
- In Configure: Workforce, click Benefits and Taxes.
- In Benefits & Taxes, click any of the filter links to open the Filter dialog.
- In the Filter dialog, select the following:
Filter By Value Scenario OEP_Plan Version OEP_Working Components Additional Earnings - Verify your selections and click Apply.
- In Benefits & Taxes, click Bonus Pay.
- In Additional Earnings for Bonus Pay, review details and click Next.
- In the data grid, for No Option, enter 18000 as the Threshold for all YearTotal members for all three years (FY25, FY26, and FY27):
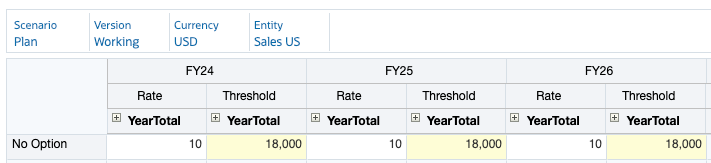
Here are a few tips when performing grid operations:
- Enter the shortcut 18K for 18000.
- To copy values across multiple cells, make sure that the cells you want to copy to are visible. You may need to expand columns. Then, select the cell you want to copy. Point your cursor to the bottom right cell border of the selection. When the pointer becomes a (+) move cursor, click and drag the border across the cells where you want the value copied. For example, for FY25, expand YearTotal, then its quarters, then its months. Enter a value in Jan. Make sure the cell focus is still on Jan, then point your cursor to the bottom right of its cell border. When the move cursor is displayed, click and drag the border across all periods in FY25.
- Click Next.
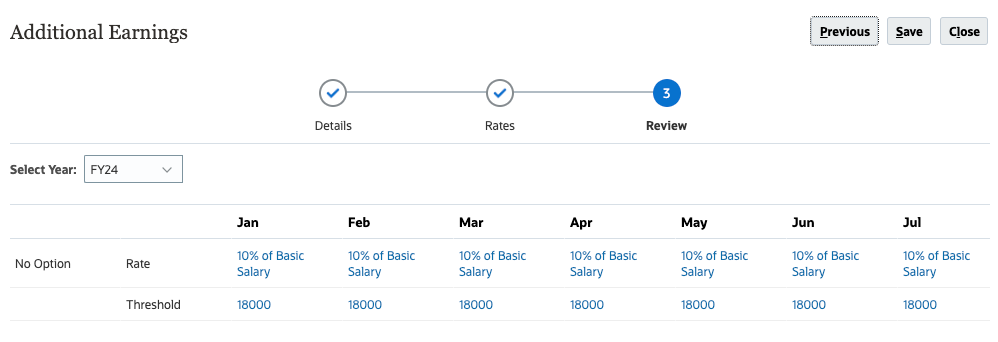
- Review the threshold values you entered and click Save.
- At the information message, click OK.
- In Additional Earnings, click Close.
- In Benefits & Taxes, click Close.
- Return to the home page. On the upper-right, click (Home).
Synchronizing Component Definition
- On the home page, click Workforce, then Compensation Planning.
- From the vertical tabs on the left, click (Manage Employees).
- From the bottom tabs, click Enter Bonus Rate.
- Right-click the member cell for Conway, Martin and select Synchronize Component Definition.

Note:
With Synchronize Defaults previously run against data, changes were made to an existing component (Bonus Pay) for an existing employee. In this case, only Synchronize Component Definition is required to efficiently process the recent changes where threshold data was added.
Synchronize Defaults is only required for new components added to the Benefits and Taxes Wizard or the first time an employee is added to an entity.
For changes to apply to the Calculate Compensation rule, you must run the applicable Synchronize rule first. - At the information message, click OK.
- Review the changes to Total Earnings, Total Taxes, and Total Compensation for Martin Conway.
Total Earnings is now capped at 18,000 based on the threshold value entered in the Benefits & Taxes Wizard. Total Taxes and Total Compensation were updated based on this change.

- Return to the home page. On the upper-right, click (Home).
Configuring Rate Table Benefits
Defining a Rate Table Benefit
- On the home page, click Application, then Configure.
- From the Configure dropdown, select Workforce.
- In Configure: Workforce, click Benefits and Taxes.
- In Benefits & Taxes, verify or set filter values:
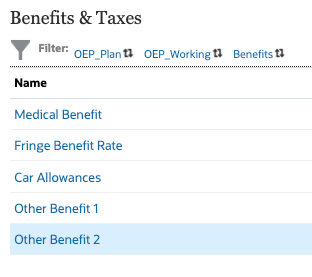
Filter By Value Scenario OEP_Plan Version OEP_Working Components Benefits - In Benefits & Taxes, click Other Benefit 1.
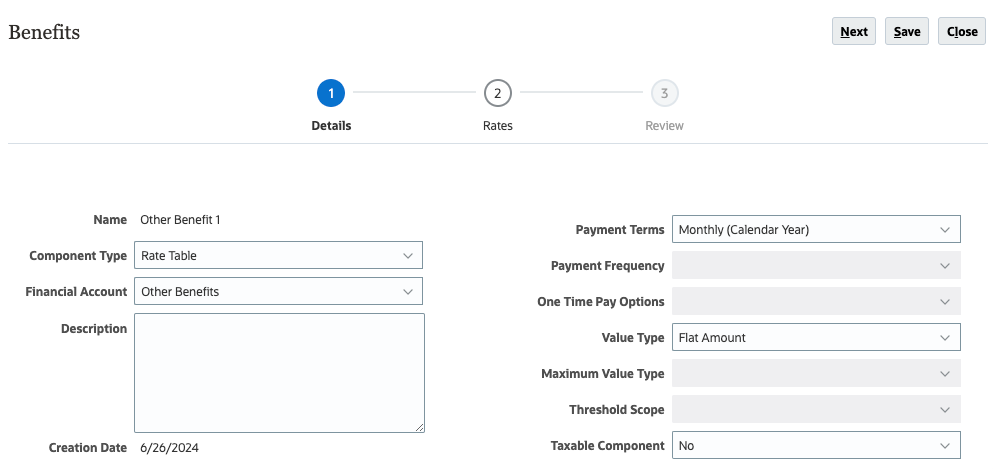
- In Benefits for Other Benefit 1, select the following values:
Benefit Details Value Component Type Rate Table Financial Account Other Benefits Payment Terms Monthly (Calendar Year) Value Type Flat Amount Taxable Component No - Verify your selections and click Next.
- Verify or set the POV with the following values:
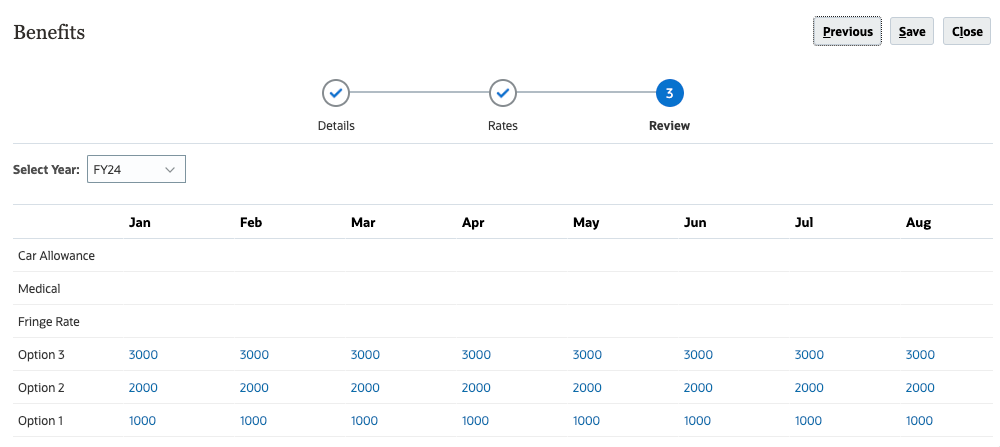
Dimension Member Scenario Plan Version Working Currency USD Entity Sales US - In the data grid, enter the following rates for these Options:
FY25 FY26 FY27 Rate Rate Rate YearTotal YearTotal YearTotal Option 3 36000 48000 60000 Option 2 24000 36000 48000 Option 1 12000 24000 36000 Note:
Option 1, Option 2, and Option 3 are not pre-seeded members and are customer specific. For training purposes, these members were added as generic options with a Time Balance setting of Flow. For example, to get a 3,000/month value for Option 3, you enter 36,000 for YearTotal. You can set Time Balance options based on your company requirements. For a list of supported Time Balance options, see the documentation on Administering Planning. - Click Next.
- Review the values you entered and click Save.
- At the information message, click OK.
- In Benefits, click Close.
- In Benefits & Taxes, click Close.
Adding Defaults for Other Benefit 1
- On the home page, click Workforce, then Compensation Planning.
- From the vertical tabs on the left, click (Defaults).
- From the bottom tabs, click Benefits.
- In Benefits, right-click in a read-only cell in the content area and select Add Benefit Defaults.
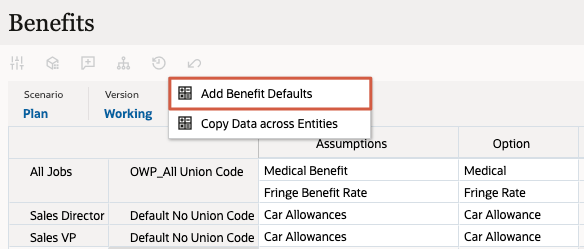
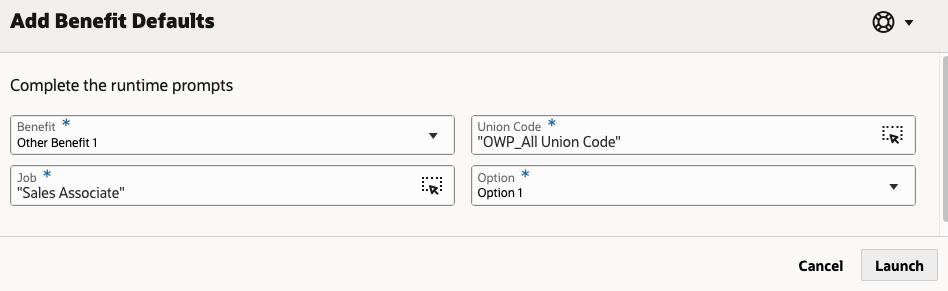
- In Add Benefit Defaults, set values as follows:
Prompt Value Benefit Other Benefit 1 Job Sales Representative Union Code OWP_All Union Code Option Option 1 Tip:
Use Member Selector to find and select member values for Job and Union Code. When selecting the Sales Representative Job member, it may display its alias Sales Associate in Add Benefit Defaults. - Verify your selections and click OK.
- At the information message, click OK.
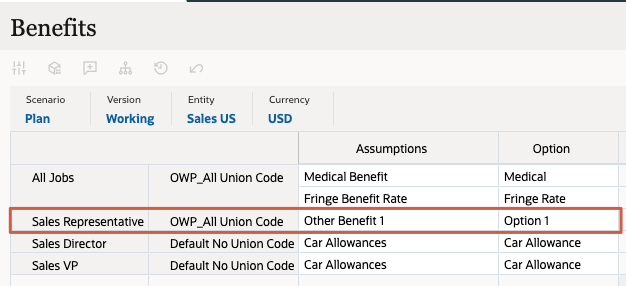
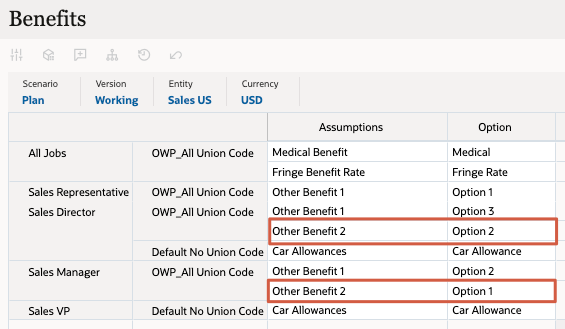
Option 1 for Sales Representatives is added to the form.
- Perform steps 4 to 7 using the following selections for Option 2 and Option 3.
- Option 2
Prompt Value Benefit Other Benefit 1 Job Sales Manager Union Code OWP_All Union Code Option Option 2 - Option 3
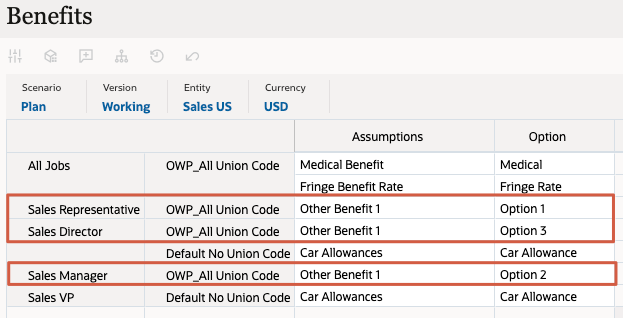
Prompt Value Benefit Other Benefit 1 Job Sales Director Union Code OWP_All Union Code Option Option 3 - Verify that Option 1, Option 2, and Option 3 are added to the form.
Synchronizing Defaults
- From the vertical tabs on the left, click (Manage Employees).
- From the bottom tabs, click the Enter Bonus Rate.
- Verify or set the POV to the following members:
Dimension Member Scenario Plan Version Working Entity Sales US Currency USD Years FY25 Project No Project - In the data grid, right-click the top left empty header cell to display menu options, and then select Synchronize Defaults.
- In Synchronize Defaults, set the prompt values to:
Prompt Value Scenario OEP_Plan Version OEP_Working Department Sales US Enter Currency USD Select Job OWP_Total Jobs Employee OWP_Total Employees Select No Project - Verify your selections and click OK.

- At the information message, click OK.
- Review the data changes for the Sales Manager, Sales Director, and Sales Associate employees.
Benefit defaults were synchronized for these jobs, mapping to the Option members you added values to.
- From the vertical tabs on the left, click the (Employee Details).
- Set the POV and Page selections to the following:
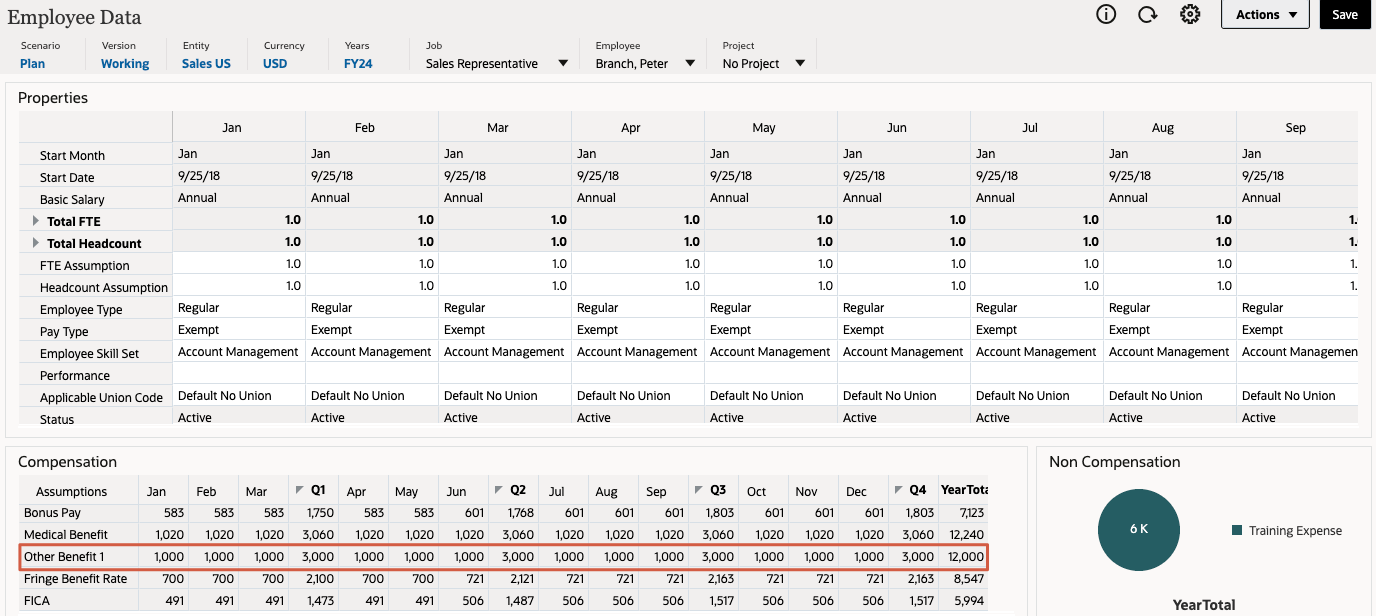
Dimension Member Job Sales Representative Employee Branch,Peter Project No Project Updated compensation details including new benefits for Peter Branch is displayed. The Compensation data grid includes Other Benefit 1 with a monthly value of $1,000 that corresponds to Option 1.
- Set the POV and Page selections to the following:
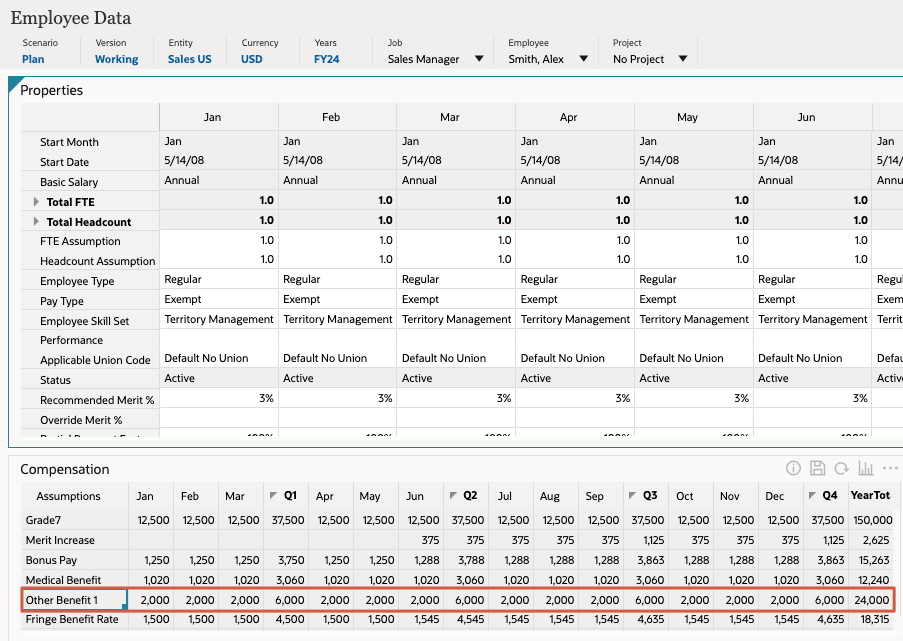
Dimension Member Job Sales Manager Employee Smith,Alex Project No Project Updated compensation details including new benefits for Alex Smith is displayed. The Compensation data grid includes Other Benefit 1 with a monthly value of $2,000 that corresponds to Option 2.
- Set the POV and Page selections to the following:
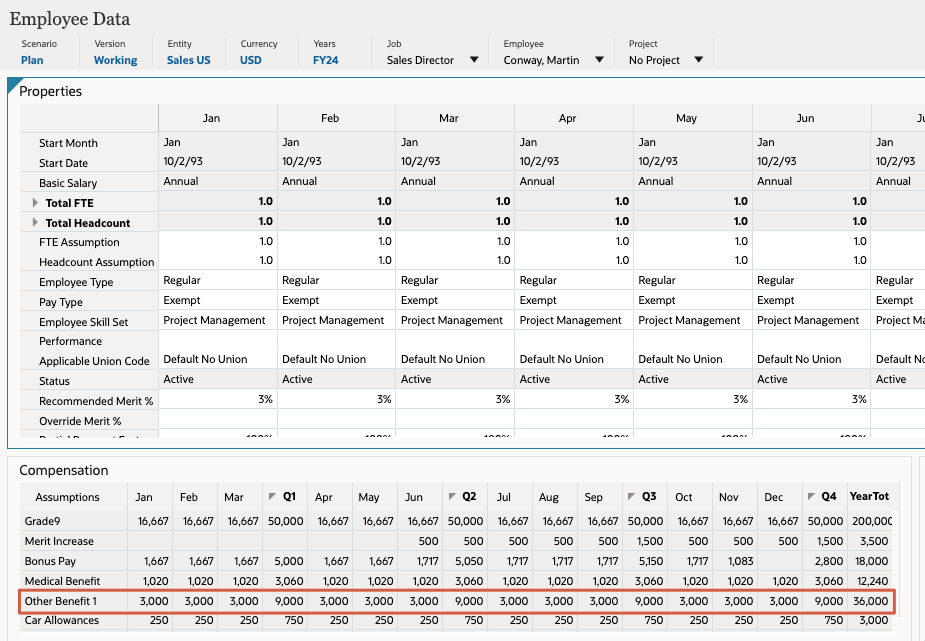
Dimension Member Job Sales Director Employee Conway,Martin Project No Project Updated compensation details including new benefits for Martin Conway is displayed. The Compensation data grid includes Other Benefit 1 with a monthly value of $3,000 that corresponds to Option 3.
- Return to the home page. On the upper-right, click (Home).
Configuring Rate Table and Threshold Benefits
Defining a Rate Table and Threshold Benefit
- On the home page, click Application, then Configure.
- From the Configure dropdown, select Workforce.
- In Configure: Workforce, click Benefits and Taxes.
- In Benefits & Taxes, verify or set filter values:
Filter By Value Scenario OEP_Plan Version OEP_Working Components Benefits - In Benefits & Taxes, click Other Benefit 2.
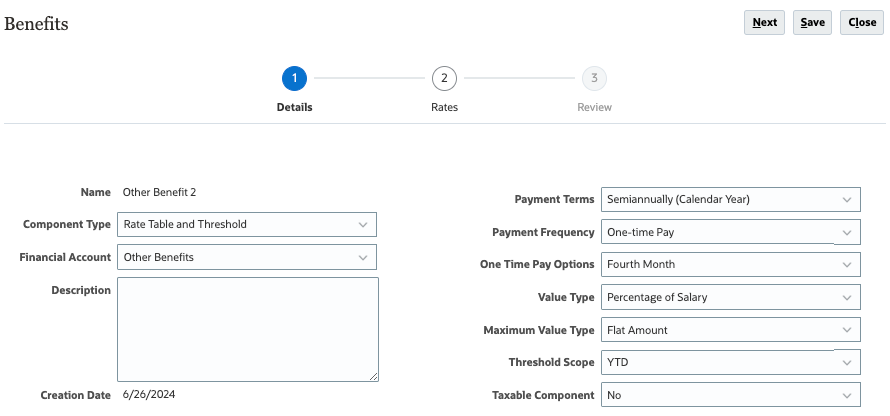
- In Benefits for Other Benefit 2, select the following values:
Benefit Details Value Component Type Rate Table and Threshold Financial Account Other Benefits Payment Terms Semiannually (Calendar Year) Payment Frequency One-time Pay One Time Pay Options Fourth Month Value Type Percentage of Salary Maximum Value Type Flat Amount Threshold Scope YTD Taxable Component No - Verify your selections and click Next.
- Verify or set the POV to the following values:
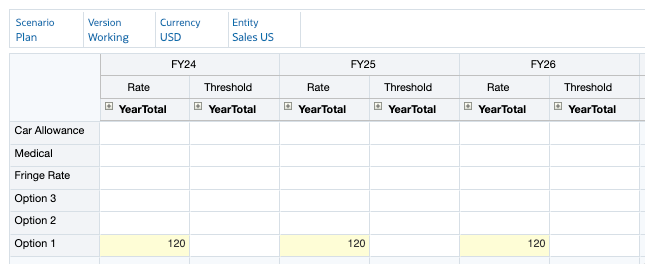
Dimension Member Scenario Plan Version Working Currency USD Entity Sales US - In the data grid, enter the following rates and thresholds for Option 1 and Option 2:
FY25 FY26 FY27 Rate Threshold Rate Threshold Rate Threshold YearTotal YearTotal YearTotal YearTotal YearTotal YearTotal Option 2 120 36000 120 39000 120 42000 Option 1 120 24000 120 27000 120 30000 Note:
Option 1, Option 2, and Option 3 are not pre-seeded members and are customer specific. For training purposes, these members were added as generic options with a Time Balance setting of Flow. You can set Time Balance options based on your company requirements. For a list of supported Time Balance options, see the documentation on Administering Planning.
- Click Next.
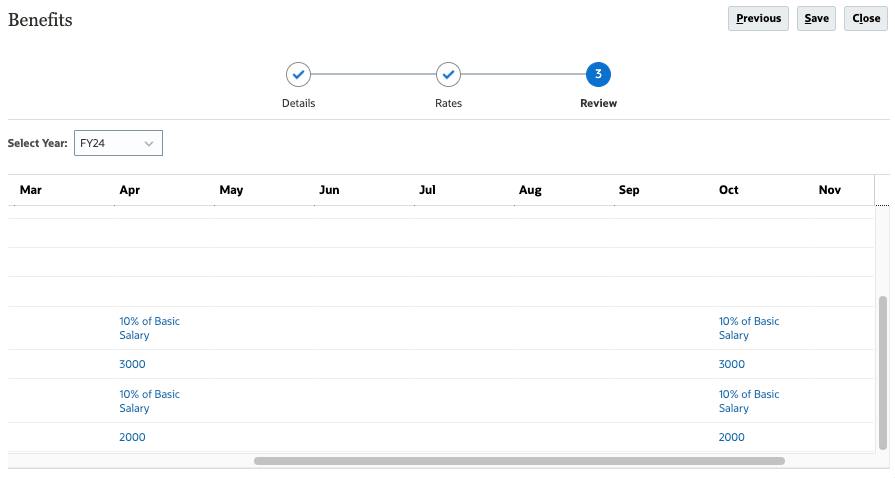
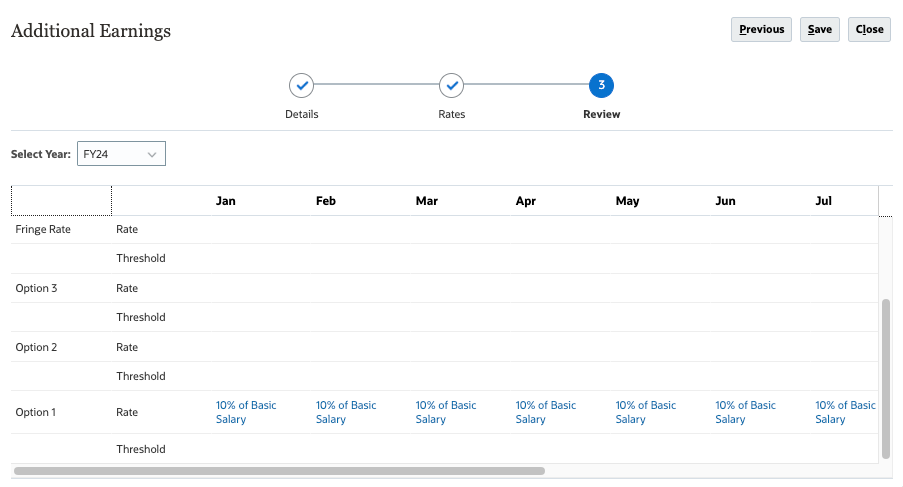
- Review the rate and threshold data you entered, and then click Save.
Data is displayed for April and October based on the fourth month pay options selected.
- At the information message, click OK.
- In Benefits, click Close.
- In Benefits & Taxes, click Close.
- Return to the home page. On the upper-right, click (Home).
Adding Defaults for Other Benefit 2
- On the home page, click Workforce, then Compensation Planning.
- From the vertical tabs on the left, click (Defaults).
- From the bottom tabs, click Benefits.
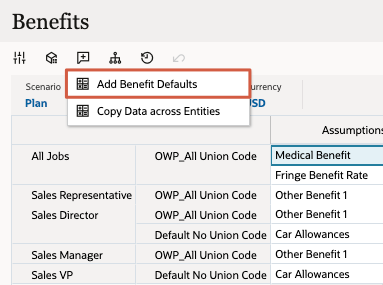
- In Benefits, right-click in a read-only cell in the content area and select Add Benefit Defaults.
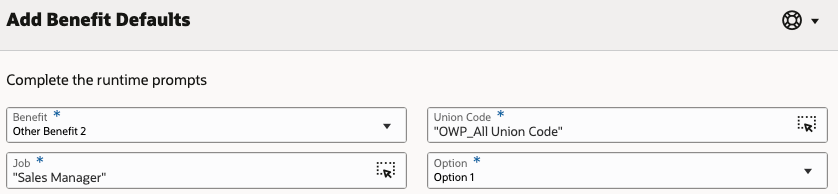
- In Add Benefit Defaults, set values as follows:
Prompt Value Benefit Other Benefit 2 Job Sales Manager Union Code OWP_All Union Code Option Option 1 Tip:
Use Member Selector to find and select member values for Job and Union Code. - Verify your selections and click OK.
- At the information message, click OK.
- Perform steps 4 to 7 using the following selections for Option 2:
Prompt Value Benefit Other Benefit 2 Job Sales Director Union Code OWP_All Union Code Option Option 2 - Verify that Other Benefit 2 for Option 1 and Option 2 are added to the form.
Synchronizing Defaults
- From the vertical tabs on the left, click (Manage Employees).
- From the bottom tabs, click the Enter Bonus Rate.
- Set the POV to the following members:
Dimension Member Scenario Plan Version Working Entity Sales US Currency USD Years FY25 Project No Project - In the data grid, right-click the top left empty header cell to display menu options, and then select Synchronize Defaults.
- In Synchronize Defaults, set the prompt values to:
Prompt Value Scenario OEP_Plan Version OEP_Working Department Sales US Enter Currency USD Select Job OWP_Total Jobs Employee OWP_Total Employees Select No Project - Verify your selections and click OK.
- At the information message, click OK.
- Review the data changes for the Sales Manager and Sales Director employees.
Benefit defaults were synchronized for these jobs, mapping to the Option members you added values to.
- From the vertical tabs on the left, click the (Employee Details).
- Set the POV and Page selections to the following:
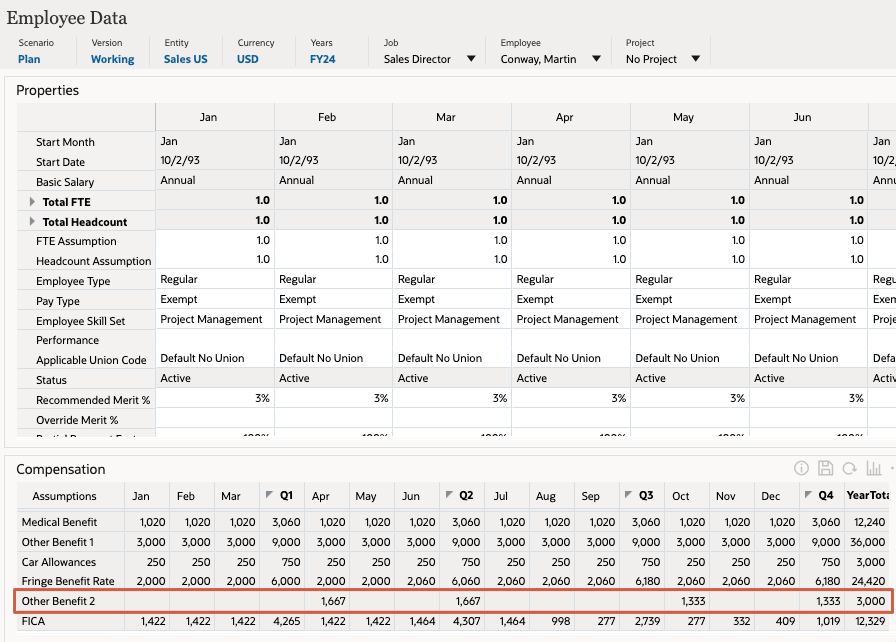
Dimension Member Job Sales Manager Employee Smith,Alex Project No Project Updated compensation details, including new benefits, for Alex Smith are displayed. The Compensation data grid includes a benefit (Other Benefit 2) in both April and October. The Other Benefit 2 amount for April is $1,288 in April which is 10% of that month's salary. The Other Benefit 2 amount for October is reduced to $713 due to the maximum annual threshold amount of $2000.
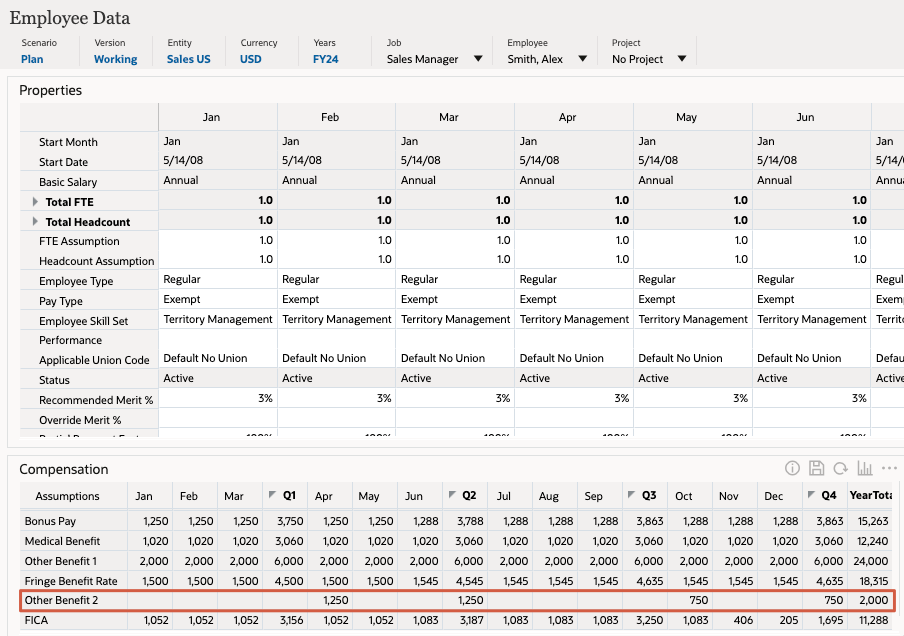
Tip:
Scroll to the right to display the rest of the period data. - Set the POV and Page selections to the following:
Dimension Member Job Sales Director Employee Conway,Martin Project No Project Updated compensation details, including new benefits, for Martin Conway are displayed. The Compensation data grid includes a benefit (Other Benefit 2) in both April and October. The Other Benefit 2 amount for April is $1,717 in April which is 10% of that month's salary. The Other Benefit 2 amount for October is reduced to $1283 due to the maximum annual threshold amount of $3000.
- Return to the home page. On the upper-right, click (Home).
Configuring a Multi-Tiered Rate and Threshold Table for Taxes
Defining a Rate Table and Threshold Tax Option
- On the home page, click Application, then Configure.
- From the Configure dropdown, select Workforce.
- In Configure: Workforce, click Benefits and Taxes.
- In Benefits & Taxes, click any of the filter links to open the Filter dialog.
- In the Filter dialog, select the following values and click Apply:
Filter By Value Scenario OEP_Plan Version OEP_Working Components Taxes - In Benefits & Taxes, click Other Tax 1.
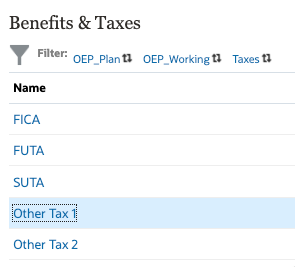
- In Taxes for Other Tax 1, select the following values:
Tax Details Value Component Type Rate Table and Threshold Financial Account Payroll Taxes Payment Terms Monthly (Calendar Year) Value Type Percentage of Taxable Earnings Maximum Value Type Threshold Amount Threshold Scope YTD - Verify your selections and click Next.
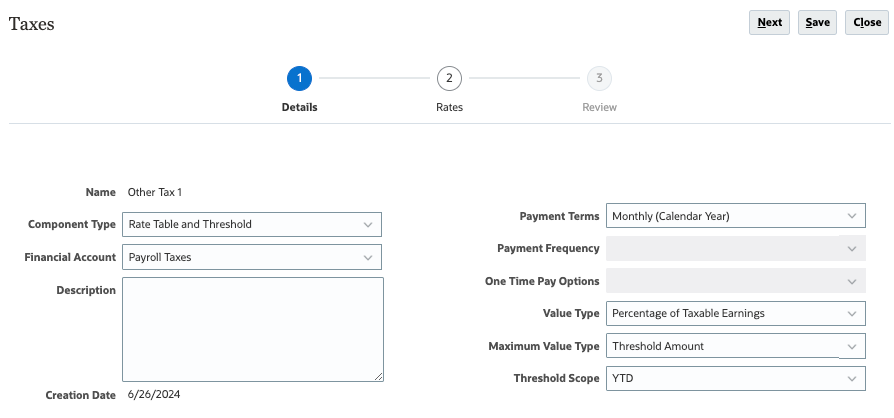
Selecting Threshold Amount for the Maximum Value Type allows for taxes to cross the Tiers for different thresholds rather than assigning any one Tier as a default. For example, a Country Tax might be 10% on the first $75,000 of Year-to-Date (YTD) earnings, 5% on the amount above the first Threshold ($75,000), up to $100,000 of YTD earnings, and 1% on anything above the second Threshold ($100,000). This allows the default to be applied across multiple tax tiers depending on the taxable earnings.
- Verify or set the POV to the following values:
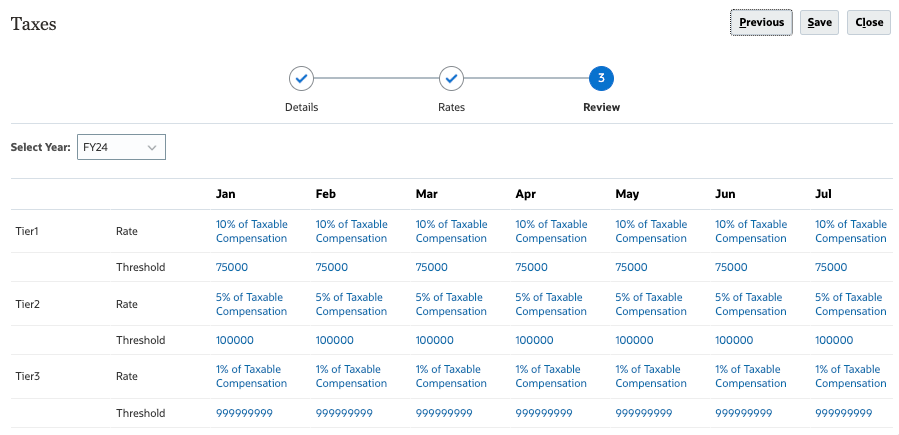
Dimension Member Scenario Plan Version Working Currency USD Entity Sales US - In the data grid, enter the following rates and thresholds for Tier 1, Tier 2, and Tier 3:
FY25 FY26 FY27 Rate Threshold Rate Threshold Rate Threshold YearTotal YearTotal YearTotal YearTotal YearTotal YearTotal Tier 1 10 75000 10 76000 10 77000 Tier 2 5 100000 5 102500 5 105000 Tier 3 1 999999999 1 999999999 1 999999999 Note:
The final tier's threshold is set to an exceptionally large value to cover the infinite amount above the penultimate threshold.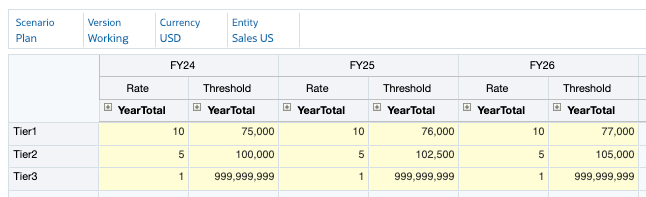
- Click Next.
- Review the rate and threshold values you entered, and then click Save.
- At the information message, click OK.
- In Taxes, click Close.
- In Benefits & Taxes, click Close.
- Return to the home page. On the upper-right, click (Home).
Adding Defaults for Other Tax 1
- On the home page, click Workforce, then Compensation Planning.
- From the vertical tabs on the left, click (Defaults).
- From the bottom tabs, click Taxes.
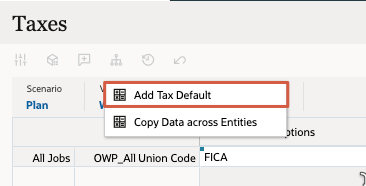
- In Taxes, right-click in a read-only cell in the content area and select Add Tax Default.
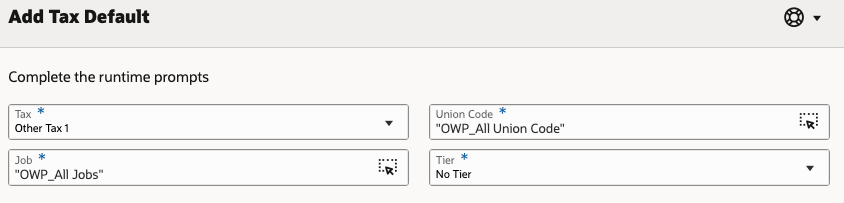
- In Add Tax Default, set values as follows:
Prompt Value Tax Other Tax 1 Job OWP_All_Jobs Union Code OWP_All Union Code Tier No Tier Note:
Since Threshold Amount was selected as the Maximum Value Type, the Tier setting in this prompt becomes irrelevant as it is ignored in the calculation. - Verify your selections and click OK.
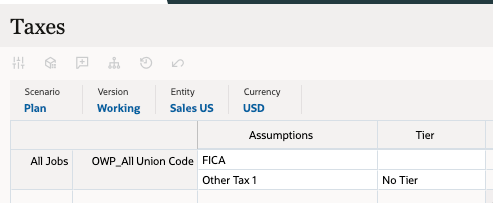
- At the information message, click OK.
- Verify that Other Tax 1 - No Tier is added for all jobs.
Synchronizing Defaults
- From the vertical tabs on the left, click (Manage Employees).
- From the bottom tabs, click Enter Bonus Rate.
- Verify or set the POV to the following members:
Dimension Member Scenario Plan Version Working Entity Sales US Currency USD Years FY25 Project No Project - In the data grid, right-click the top left empty header cell to display menu options, and then select Synchronize Defaults.
- In Synchronize Defaults, select the following members:
Prompt Value Scenario OEP_Plan Version OEP_Working Department Sales US Enter Currency USD Select Job OWP_Total Jobs Employee OWP_Total Employees Select No Project - Verify your selections and click OK.
- At the information message, click OK.
- From the vertical tabs on the left, click (Employee Details).
- Set the POV and Page selections to the following:
Dimension Member Job Sales Director Employee Conway,Martin Project No Project - Review the updated compensation details in the Compensation data grid in the bottom left of the page.

In this example, Total Taxable Earnings includes Basic Salary (referenced by Grade9), Bonus Pay, and Car Allowances.
Notice the months where the Other Tax 1 amount changes.
- In May, the amount drops as the $75,000 YTD Threshold is met in this month. There is a partial amount paid at the 10% Rate and the remainder at the 5% Rate.
- In June, the amount drops again as the $100,000 YTD Threshold is met in this month. There is a partial amount paid at the 5% Rate and the remainder at the 1% Rate.
- In July, the amount drops again as the entire Total Taxable Earnings are now at the 1% Rate.
- In November, the amount drops again because the Bonus Pay meets its Threshold in this month. The Total Taxable Earnings drops while still at the 1% Other Tax 1 Rate.
- In December, the amount drops again since the Bonus Pay is now zero. The Total Taxable Earnings drop again while still at the 1% Other Tax 1 Rate.
- Return to the home page. On the upper-right, click (Home).
Creating a Custom Additional Earning
Defining a Custom Earning
- On the home page, click Application, then Configure.
- From the Configure dropdown, select Workforce.
- In Configure: Workforce, click Benefits and Taxes.
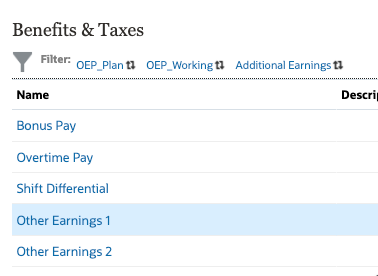
- In Benefits & Taxes, click any of the filter links to open the Filter dialog.
- In the Filter dialog, select the following:
Filter By Value Scenario OEP_Plan Version OEP_Working Components Additional Earnings - Verify your selections and click Apply.
- In Benefits & Taxes, click Other Earnings 1.
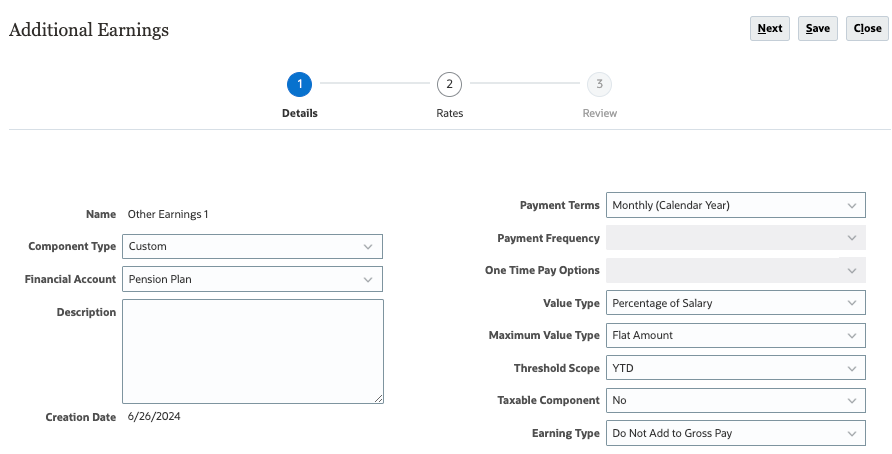
- In Additional Earnings for Other Earnings 1, select the following values:
Other Earnings Details Value Component Type Custom Financial Account Pension Plan Payment Terms Monthly (Calendar Year) Value Type Percentage of Salary Maximum Value Type Flat Amount Threshold Scope YTD Taxable Component No Earning Type Do Not Add to Gross Pay - Verify your selections and click Next.
- Verify or set the POV to the following values:
Dimension Member Scenario Plan Version Working Currency USD Entity Sales US - In the data grid, for Option 1, enter 120 as the Rate for all YearTotal members for all three years (FY25, FY26 and FY27):
Tip:
In case of any issues in data grid display, try to change POV and come back to the intended POV here. - Click Next.
- Review the rate values you entered and click Save.
- At the information message, click OK.
- In Additional Earnings, click Close.
- In Benefits & Taxes, click Close.
- Return to the home page. On the upper-right, click (Home).
Adding a Member Formula to a Custom Earning
- On the home page, click Application, and then Overview.
- In Application Overview, click Dimensions.
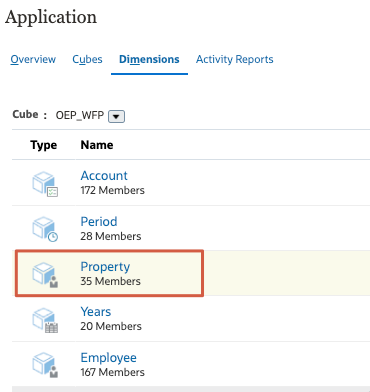
- From the Cube dropdown, select OEP_WFP.

- From the list of dimensions, click Property.
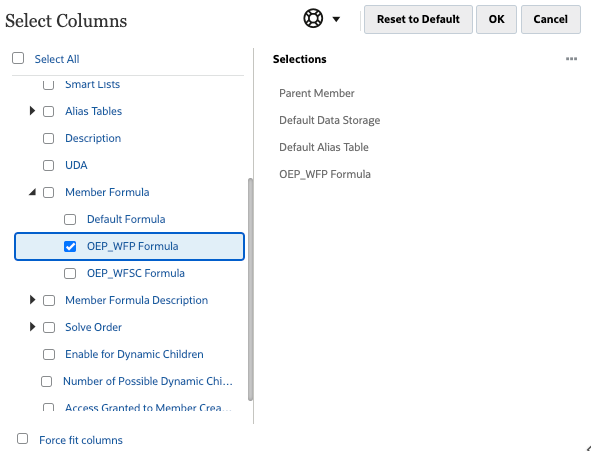
- In Edit Member Properties for Property, right-click the Member Name column header to open the Select Columns dialog.
- On the left, in Select Columns, expand Member Formula and select OEP_WFP Formula.
- Verify your selections and click OK.
- In Member Name, expand Property.
- Click the OWP_Custom Expense member to select its row.
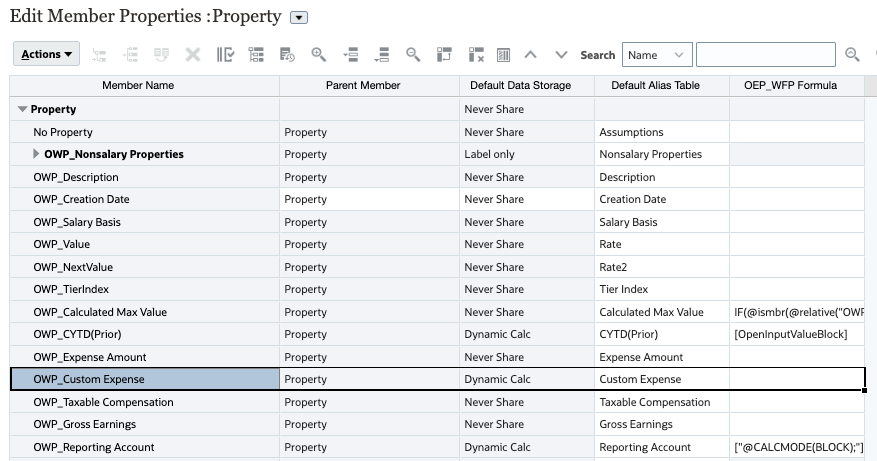
- For OWP_Custom Expense, click the OEP_WFP Formula cell.
- Right above the grid, click (Member Formula).
The Member Formula editor dialog is opened.
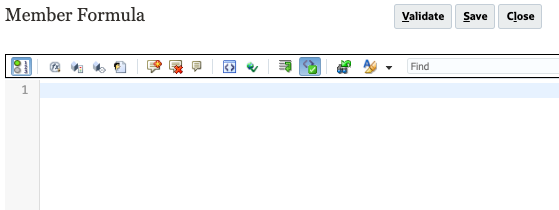
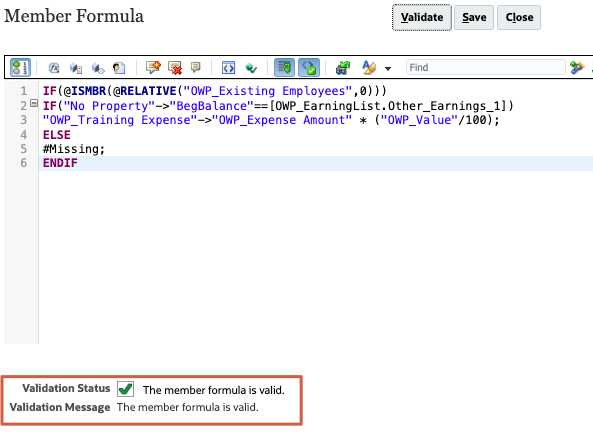
- Copy and paste the following formula into the editor:
IF(@ISMBR(@RELATIVE("OWP_Existing Employees",0)))
IF("No Property"->"BegBalance"==[OWP_EarningList.Other_Earnings_1])
"OWP_Training Expense"->"OWP_Expense Amount" * ("OWP_Value"/100);
ELSE
#Missing;
ENDIF
In this example, the Additional Earning is limited to existing employees. Note the use of Training Expense in the calculation.
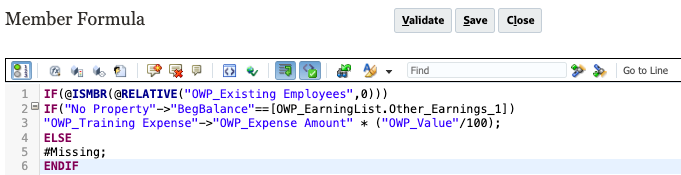
Make sure to remove any extra spaces at the end of the formula.
- Click Validate.
When the validation completes, a message is displayed.
- Click Save.
- Click (Refresh Database).
- In Refresh Database, make the following selections and click Refresh Database:
Before Refresh Database Enable Use of the Application for Administrators After Refresh Database Enable Use of the Application for All users - Review the warning message and click Refresh.
Caution:
Best practices suggest creating a full backup of your entire application instance prior to making any metadata changes.The cube refresh process takes a moment to complete.
- When the status displays as Succeeded and the percent complete is 100%, click Finish.
You can ignore any warnings at the bottom.
- In Refresh Database, click Close.
- In Edit Member Properties for Property, click Save, then click Cancel.
- Return to the home page. On the upper-right, click (Home).
Adding Custom Earning Defaults
- On the home page, click Workforce, then Compensation Planning.
- From the vertical tabs on the left, click (Defaults).
- From the bottom tabs, click Additional Earnings.
- In Additional Earnings, right-click in a read-only cell in the content area and select Add Earning Default.
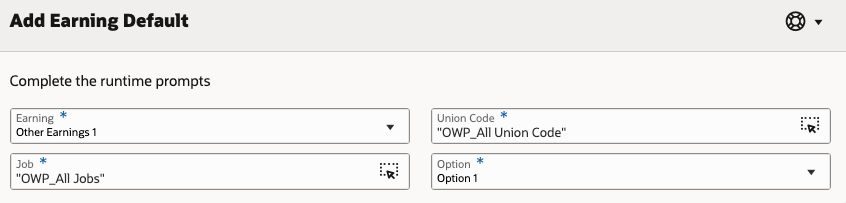
- In Add Earning Default, set values based on the following:
Prompt Value Earning Other Earnings 1 Job OWP_All Jobs Union Code OWP_All Union Code Option Option 1 - Verify your selections and click OK.
- At the information message, click OK.
Other Earnings 1 - Option 1 is displayed on the form.
Synchronizing Defaults
- From the vertical tabs on the left, click (Manage Employees).
- From the bottom tabs, click Enter Bonus Rate.
- Set the POV to the following members:
Dimension Member Scenario Plan Version Working Entity Sales US Currency USD Years FY25 Project No Project - In the data grid, right-click the top left empty header cell to display menu options, and then select Synchronize Defaults.
- In Synchronize Defaults, set the prompt values to:
Prompt Value Scenario OEP_Plan Version OEP_Working Department Sales US Enter Currency USD Select Job OWP_Total Jobs Employee OWP_Existing Employees Select No Project Tip:
Make sure to select OWP_Existing Employees since the member formula you entered is restricted to them. - Verify your selections and click OK.
- At the information message, click OK.
- From the navigation options on the top of the page, click Other Expenses.
- From the vertical tabs on the left, click
 (Non Compensation Expenses).
 - Set the POV to the following members:
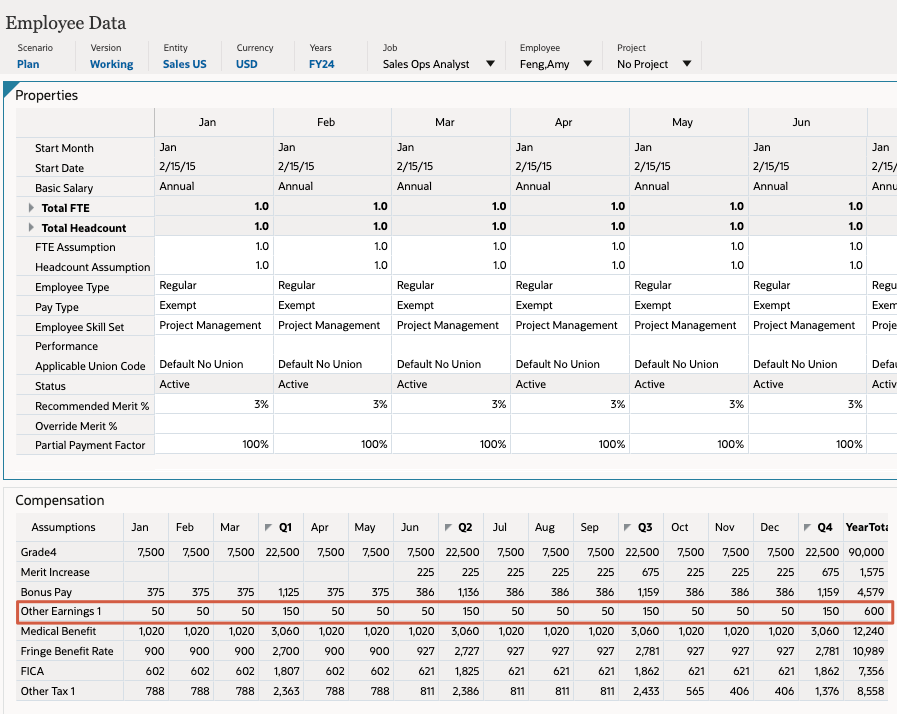
Dimension Member Version Working Scenario Plan Entity Sales US Currency USD Years FY25 Employee Feng,Amy Job Sales Ops Analyst Project No Project Data for Amy Feng is displayed.

Notice the $500 per month value. This will be the basis for the 10% custom calculation.
- From the navigation options on the top of the page, click Compensation Planning.
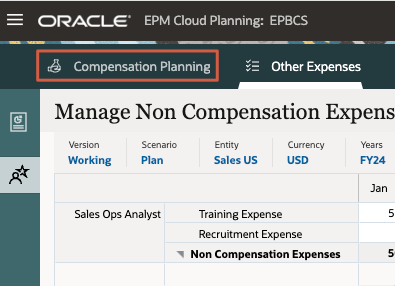
- From the vertical tabs on the left, click (Employee Details).
- Verify or set the POV and Page selections to the following:
Dimension Member Job Sales Ops Analyst Employee Feng,Amy Project No Project - Verify that Other Earnings 1 is displayed on the form. The value is calculated as 10% of Training Expense.
Related Links
More Learning Resources
Explore other labs on docs.oracle.com/learn or access more free learning content on the Oracle Learning YouTube channel. Additionally, visit Oracle University to view training resources available.
For product documentation, visit Oracle Help Center.
Defining Additional Earnings and Configuring Benefits & Taxes
F44268-04
September 2025