Before you Begin
This 45-minute tutorial shows you how to modify out-of-the-box templates in order to disable Salary Defaults. You first create a new Salary Option Smart List, and then modify Groovy Templates used in Workforce--Add Requisition, Change Requisition, and Change Existing Details--to use the salary options specified in the smart list: Salary Grade, and Salary Basis & Rate. The sections build on each other and should be completed sequentially.
Background
After configuring Additional Earnings, Benefits, and Taxes using the wizard, you can assign defaults for Salary, Additional Earnings, Benefits, and Taxes, as well as Salary Grades for New Hires.
If you want to remove the option to use Salary Defaults when adding new hires, changing new hire details, or changing existing employee details, you modify the Add Hiring Requisition, Change Requisition, and Change Existing Details out-of-the-box Groovy Templates.
In this tutorial, you create a new Salary Option Smart List and modify the following Groovy Templates used in Workforce: Add Requisition, Change Requisition, and Change Existing Details. You then verify your changes by adding new hires, changing new hire details, and modifying an existing employee's salary details.
What Do You Need?
An EPM Cloud Service instance allows you to deploy and use one of the supported business processes. To deploy another business process, you must request another EPM Enterprise Cloud Service instance or remove the current business process.
- Have Service Administrator access to an EPM Enterprise Cloud Service instance. The instance should not have a business process created.
- Upload and import this snapshot into your instance.
Note:
If you run into migration errors importing the snapshot, re-run the migration excluding the HSS-Shared Services component, as well as the Security and User Preferences artifacts in the Core component. For more information on uploading and importing snapshots, refer to the Administering Migration for Oracle Enterprise Performance Management Cloud documentation.Assigning Values to User Variables
User Variables were added when the business process was created. User variables act as filters in forms, enabling planners to focus only on certain members. In this section, you set values for user variables.
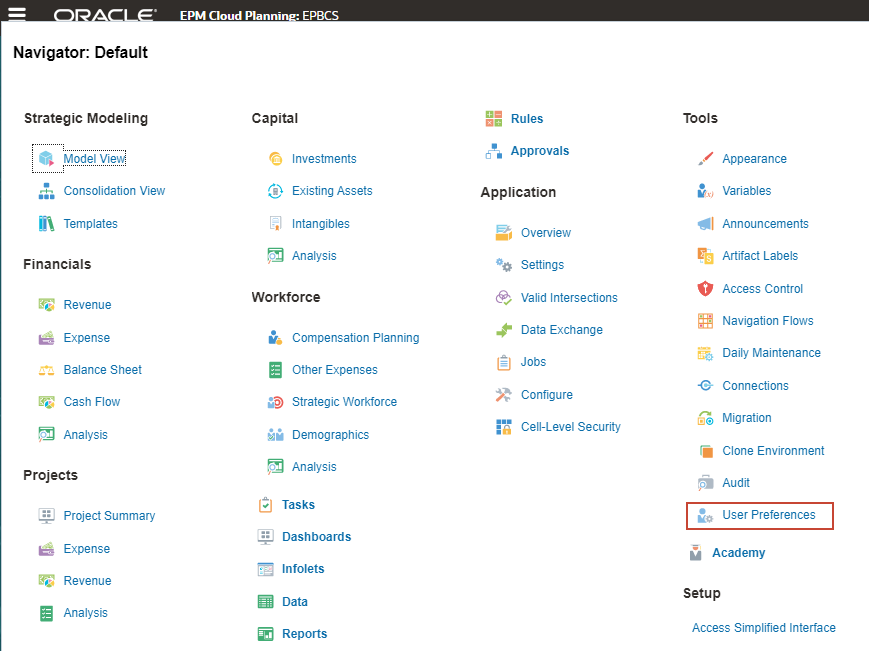
- On the home page, click
 (Navigator), and under Tools, click User Preferences.
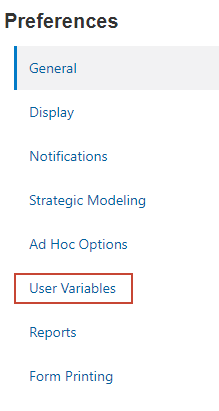
- Under Preferences, click User Variables.
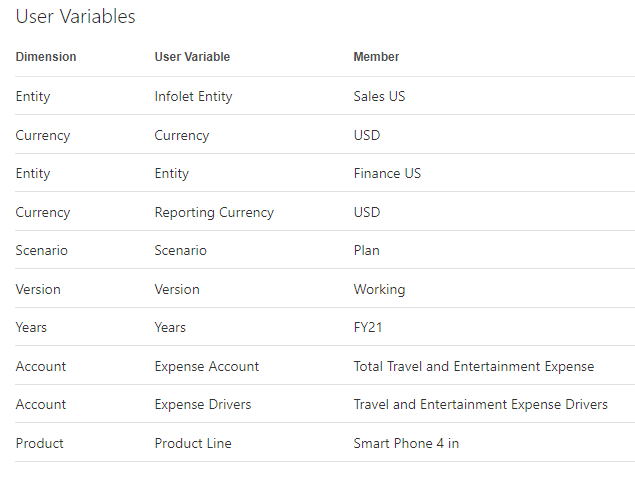
- For each variable, click its
 (Member Selector) to select a member as the variable's value:
User Variable Member Infolet Entity Sales US Currency USD Entity Finance US Reporting Currency USD Scenario Plan Version Working Years FY21 Expense Account Total Travel and Entertainment Expense Expense Drivers Travel and Entertainment Expense Drivers Product Line Smart Phone 4 in - Verify your selections and click Save.
- At the information message, click OK.
Creating the Custom Salary Options Smart List
The out-of-the-box Add Requisition template uses the out-of-the-box Salary Options Smart List.
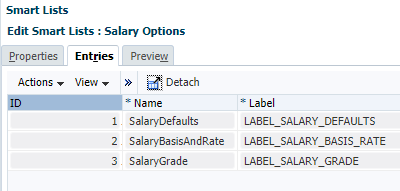
In this section, you create a new Smart List with only two options.
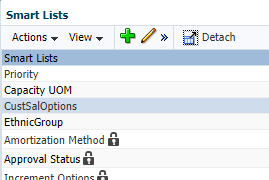
- In Planning, click (Navigator), and under Create and Manage, click Smart Lists.
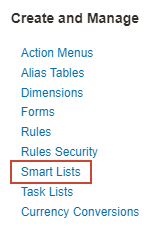
- Click
 (Create).
 - Enter the following information:
Detail Value Smart List CustSalOptions Label Custom Salary Options

- Click the Entries tab.
- In Entries, click Actions and select Add.
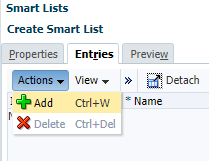
-
Enter the following information:
ID Name Label 1 SalaryBasisAndRate Salary Basis And Rate - Add another entry. Click Actions and select Add.
-
Enter the following information:
ID Name Label 2 SalaryGrade Salary Grade - Verify your entries and click Save.
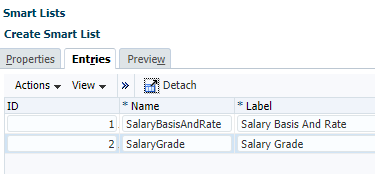
The CustSalOptions Smart List and its entries are saved and ready for use.
Modifying the Add Requisition Groovy Template
In this section, you modify the Add Requisition Groovy template to use the smart list you created in the previous section.
- In Planning, click (Navigator), and under Create and Manage, click Rules.

Calculation Manager opens in a separate window. System View is displayed.
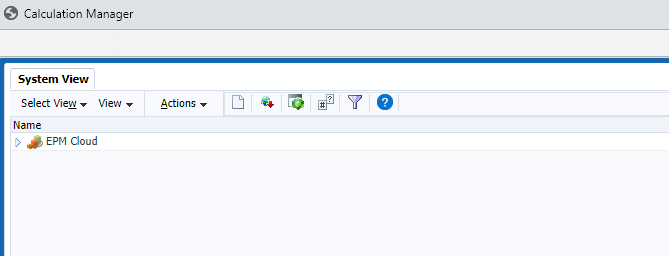
- Expand EPM Cloud.
- Right-click EPBCS and select Refresh.
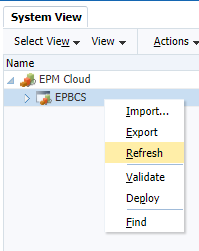
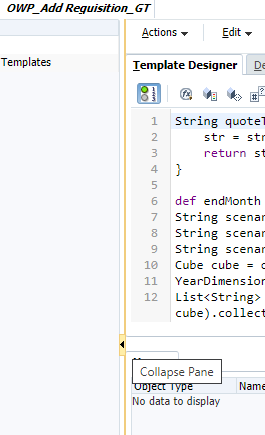
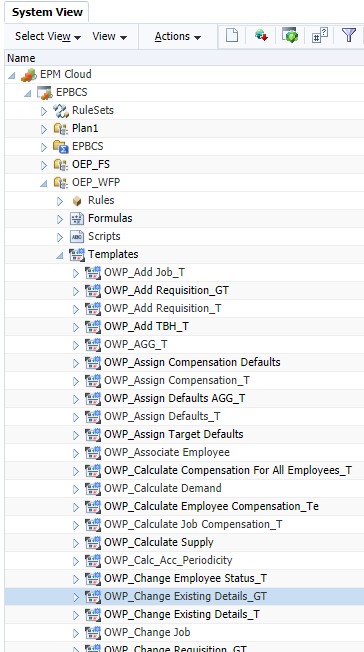
- Expand EPBCS, then OEP_WFP, then Templates and locate OWP_Add Requisition_GT.

- Double-click OWP_Add Requisition_GT to open it.
- At the information message, click OK.

The groovy template is displayed.
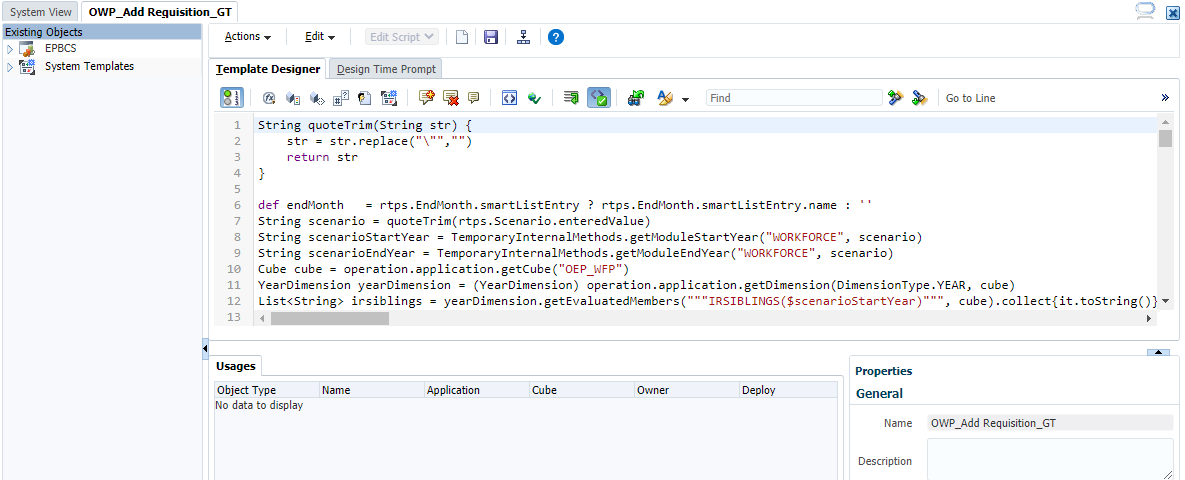
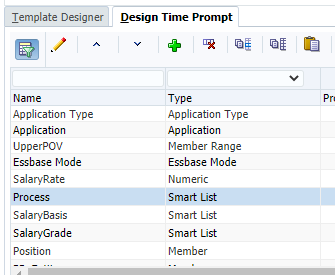
- Click the Design Time Prompt tab.
- In Design Time Prompt, select the Process row.
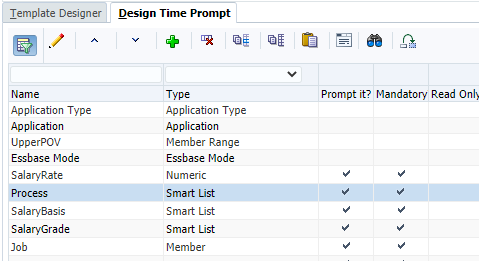
- Click
 (Edit Prompt).
 - In Edit Prompt, change the Smartlist selection to CustSalOptions.
Tip:
In the Smartlist dropdown, type C to find Smart Lists that begin with that letter. If you have several Smart Lists that begin with the letter C, continue pressing that letter until you find CustSalOptions.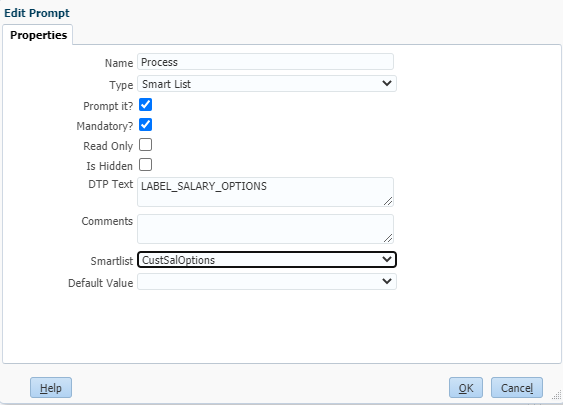
Tip:
You can optionally set a Default Value if one option is more likely to be used than the other. - Click OK.
- Click the Template Designer tab.
- Click Collapse Pane to expand the content area.
- Hover your cursor right above the Usage tab until a yellow line appears, then click and drag the yellow line down to expand the script area.

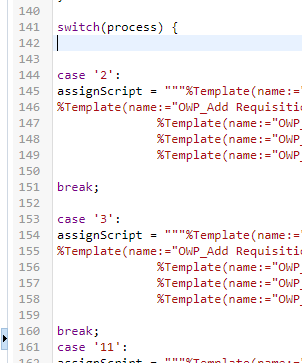
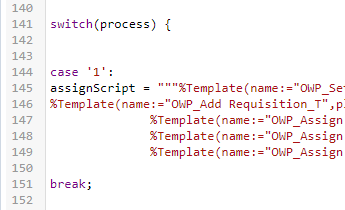
- In the script area, scroll down and locate lines 142 to 149.
- Select the contents of lines 142 to 149 and press Delete.
Delete the contents for the case 1 codeblock.
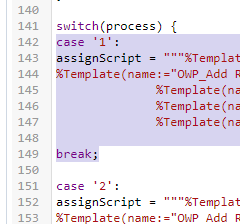
The rest of the script is moved up, with the case 2 codeblock starting at line 144.
- In line 144, change the case number from 2 to 1.
- In line 153, change the case number from 3 to 2.
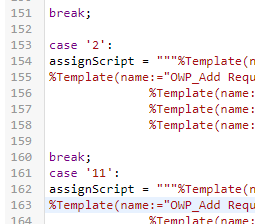
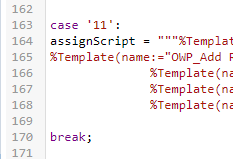
- Select the contents of lines 161 to 168 and press Delete.
Delete the contents for the case 11 codeblock.

The updated script now starts the case 21 codeblock in line 163.
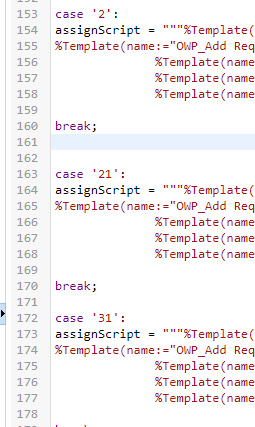
- In line 163, change the case number from 21 to 11.
- In line 172, change the case number from 31 to 21.

- Click
 (Save).

- At the information message confirming your changes, click OK.

- At the information message, click OK.
- Click
 (Deploy).

The deployment process takes a moment to complete.

- At the information message, click OK.
- Close the Calculation Manager window and return to Planning.
Verifying Groovy Template Updates for Adding New Hires
In this section, you add new hires to verify changes made to the template.
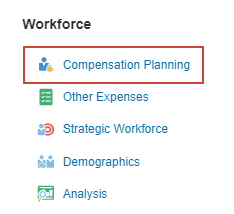
- In Planning, click (Navigator), and under Workforce, click Compensation Planning.
- From the vertical tabs on the left, click
 (Manage Employees).
 - Verify that you are on the New Hires tab.
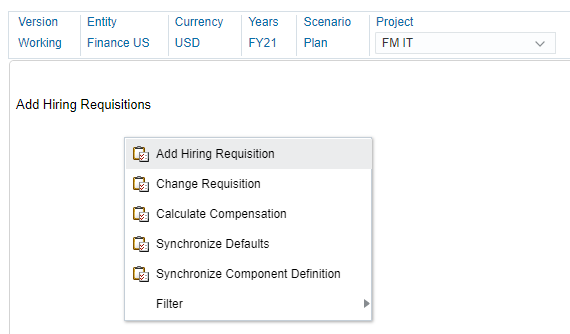
- Verify or set the POV to the following values:
Dimension Member Version Working Entity Finance US Currency USD Years FY21 Period Jan Scenario Plan Project FM IT Tip:
To modify the POV selections and open Member Selector, click the member you want to change. When finished, click (Go) to apply your changes.
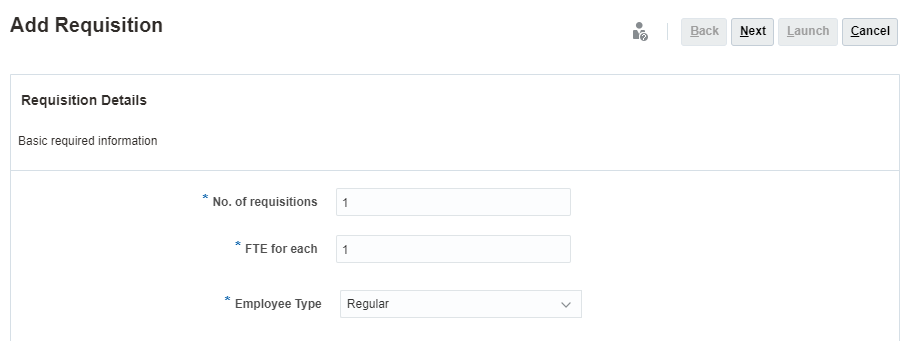
 - In Add Hiring Requisitions, right-click and select Add Hiring Requisition.
- In Add Requisition, for FTE for each, enter 1.
- Accept all default selections and click Next.
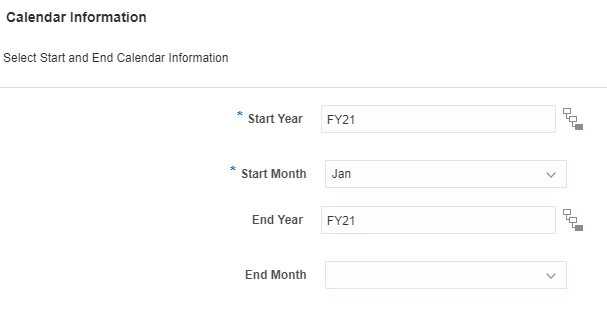
- Review and accept the default calendar, and then click Next.
- Select Job and Salary options:
Option Value Job Accountant Union Code Default No Union Code - Click the Salary Options dropdown to display the Smart List entries you added in the previous section.
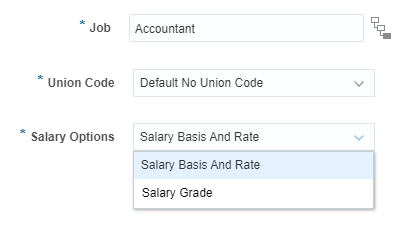
- Select Salary Basis and Rate and click Next.
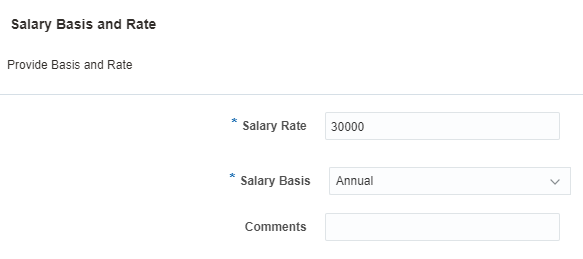
- Enter the following Salary Basis and Rate:
Option Value Salary Rate 30000 Salary Basis Annual - Verify your selections and click Launch.
- At the information message, click OK.

The new hire was added with Total Compensation calculated.

- In Add Hiring Requisitions, right-click on the whitespace below the grid and select Add Hiring Requisition.
- In Add Requisition, for FTE for each, enter 1.
- Accept all default selections and click Next.
- Review and accept the default calendar, and then click Next.
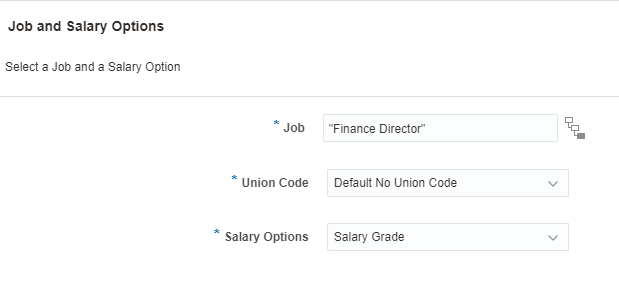
- Select Job and Salary options:
Option Value Job Finance Director Union Code Default No Union Code Salary Options Salary Grade - Verify your selections and click Next.
- For Salary Grade, select Grade8.

- Click Launch.
- At the information message, click OK.

The new hire was added to the form.

- Expand the Total Compensation column and review the components used to calculate its value.

Modifying the Change Requisition Groovy Template
In this section, you modify the Change Requisition Groovy Template in order to remove Salary Defaults from the Workforce wizards.
- In Planning, click (Navigator), and under Create and Manage, click Rules.
- In System View, expand EPM Cloud, then EPBCS, then OEP_WFP, then Templates and locate OWP_Change Requisition_GT.
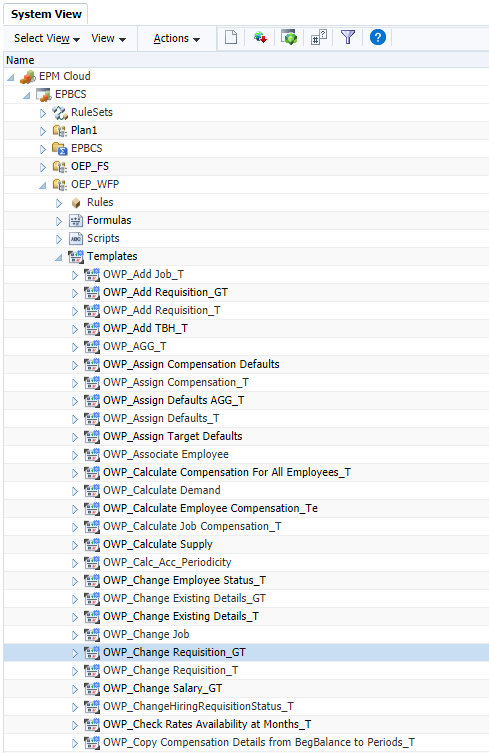
- Double-click OWP_Change Requisition_GT to open it.
- At the information message, click OK.

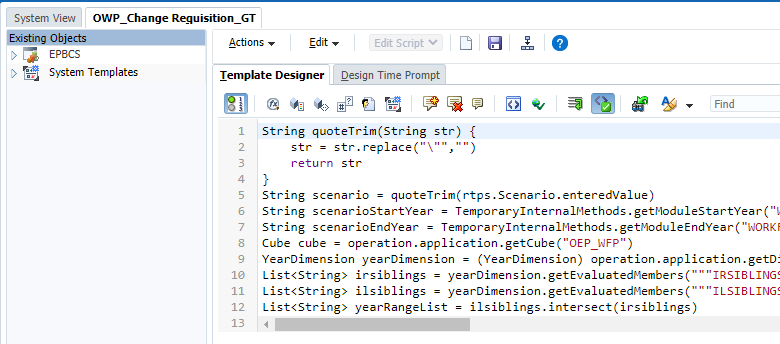
The groovy template is displayed.
- Click the Design Time Prompt tab.
- In Design Time Prompt, select the Process row.
- Click (Edit Prompt).
- In Edit Prompt, change the Smartlist selection to CustSalOptions.
Tip:
In the Smartlist dropdown, type C to find Smart Lists that begin with that letter. If you have several Smart Lists that begin with the letter C, continue pressing that letter until you find CustSalOptions.Tip:
You can optionally set a Default Value if one option is more likely to be used than the other. - Click OK.
- Click the Template Designer tab.
- Click Collapse Pane to expand the content area.
- Hover your cursor right above the Usage tab until a yellow line appears, then click and drag the yellow line down to expand the script area.
- In the script area, scroll down and locate lines 26 to 28.
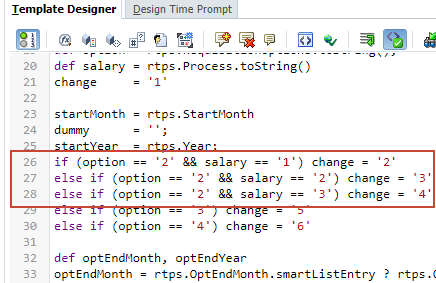
- Make the following changes:
- In line 26, where it states change = '2', replace the value of 2 with 3.
- In line 27, where it states change = '3', replace the value of 3 with 4.
- Comment out line 28 by inserting a /* at the beginning of the line, and a */ at the end of the line.
- Verify your changes.
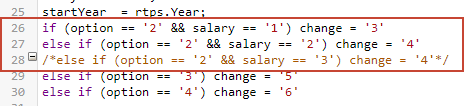
- Click (Save).
- At the information message confirming your changes, click OK.
- At the information message, click OK.
- Click (Deploy).
- At the information message, click OK.
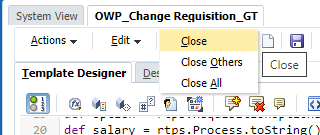
- Right-click the OWP_Change Requisition tab and select Close.
Modifying the Change Existing Details Groovy Template
In this section, you modify the Change Existing Details Groovy Template in order to remove the Salary Defaults option from Workforce wizards.
The changes you will make will be similar to the changes you made in the previous template.
- In System View, under
EPM Cloud > EPBCS > OEP_WFP > Templates, locate and double-click OWP_Change Existing Details_GT to open it.
- At the information message, click OK.
- Click the Design Time Prompt tab.
- In Design Time Prompt, select the Process row.
- Click (Edit Prompt).
- In Edit Prompt, change the Smartlist selection to CustSalOptions.
Tip:
In the Smartlist dropdown, type C to find Smart Lists that begin with that letter. If you have several Smart Lists that begin with the letter C, continue pressing that letter until you find CustSalOptions.Tip:
You can optionally set a Default Value if one option is more likely to be used than the other. - Click OK.
- Click the Template Designer tab.
- Click Collapse Pane to expand the content area.
- Hover your cursor right above the Usage tab until a yellow line appears, then click and drag the yellow line down to expand the script area.
- In the script area, scroll down and locate lines 24 to 26.
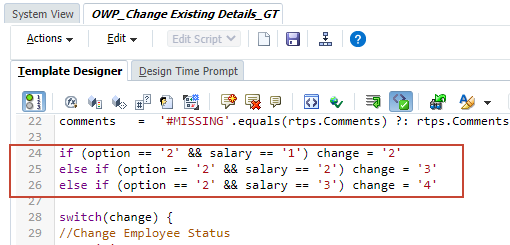
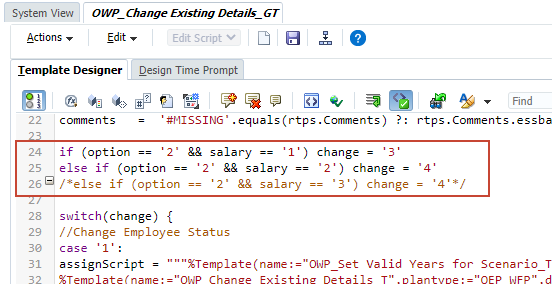
- Make the following changes:
- In line 24, where it states change = '2', replace the value of 2 with 3.
- In line 25, where it states change = '3', replace the value of 3 with 4.
- Comment out line 26 by inserting a /* at the beginning of the line, and a */ at the end of the line.
- Verify your changes.
- Click (Save).
- At the information message confirming your changes, click OK.
- At the information message, click OK.
- Click (Deploy).
- At the information message, click OK.
- Close the Calculation Manager window and return to Planning.
Verifying Groovy Template Updates for Change Requisitions
In this section, you verify the Groovy Template updates to Change Requisitions that apply to recently added new hires and existing employees.
- In Planning, click (Navigator), and under Workforce, click Compensation Planning.
- From the vertical tabs on the left, click (Manage Employees).
- Verify that you are on the New Hires tab.
- Verify or set the POV to the following values:
Dimension Member Version Working Entity Finance US Currency USD Years FY21 Period Jan Scenario Plan Project FM IT Tip:
To modify the POV selections and open Member Selector, click the member you want to change. When finished, click (Go) to apply your changes. - In the grid, right-click Accountant and select Change Requisition.
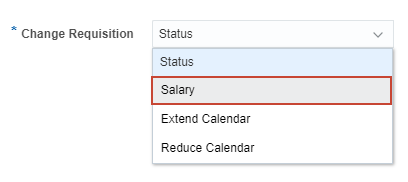
- For Change Requisition, select Salary.
- Click Next.
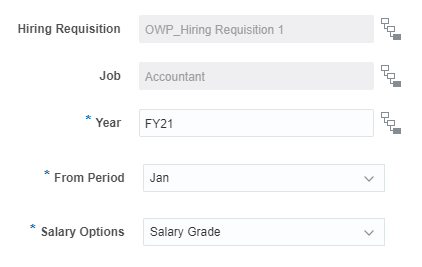
- In Salary Options, for Year, accept the default: FY21.
- Select the following:
Salary Option Value From Period Jan Salary Options Salary Grade Note:
Notice that the Salary Options dropdown lists only the two options from the Smart List you created.
When you first added the Accountant new hire, you set the Salary Option to Salary Basis and Rate with an annual salary of $30,000. - Verify your selections and click Next.
- For Salary Grade, select Grade1.
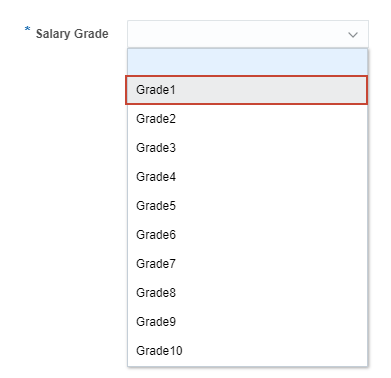
- Click Launch.
- At the information message. click OK.
- In the grid, expand Total Compensation.
- For the Accountant row, review Total Compensation and its components.
Notice the increase in Total Salary to $62,400 annually.

Total Salary is based on the following calculation: Hourly Rate x 2080 hours. The hourly rate of $30 is taken from the Grade1 Salary Grade that you assigned to this new hire.
- Click the Existing Employees horizontal tab.
- In Existing Employees, set the POV to the following values:
Dimension Member Version Working Entity Sales US Currency USD Years FY21 Period Jan Scenario Plan Project No Project Tip:
To modify the POV selections and open Member Selector, click the member you want to change. When finished, click (Go) to apply your changes. - In the grid, take note of the Total Compensation value for Patrick John.
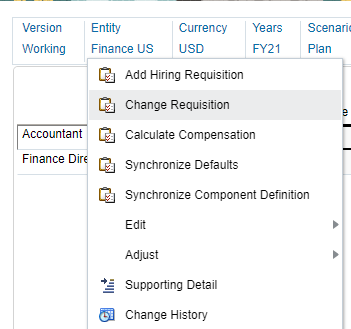
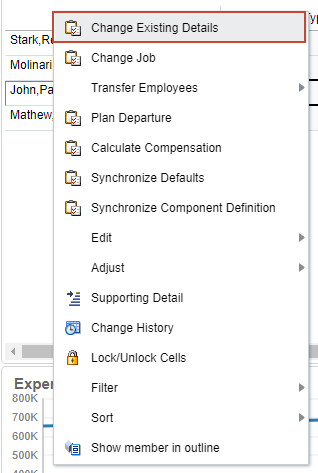
- Right-click John,Patrick and select Change Existing Details.
- For Change Employee, select Salary.

- Click Next.
- In Salary Options, accept the default year: FY21.
- Select the following options:
Salary Options Value From Period Sep Salary Options Salary Basis and Rate Note that Salary Options no longer includes Salary Defaults.
- Click Next.
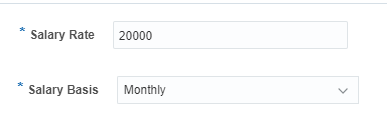
- In Salary Basis and Rate, enter or select the following:
Option Value Salary Rate 20000 Salary Salary Basis Monthly - Verify your selections and click Launch.
- At the information message, click OK.
Total Compensation for Patrick John was updated.

- From the vertical tabs on the left, click
 (Employee Details).
 - Set the POV/Page selections to the following and click (Go:)
Dimension Member Job Sales Director Employee John,Patrick Project No Project - Review the employee details for Patrick John.
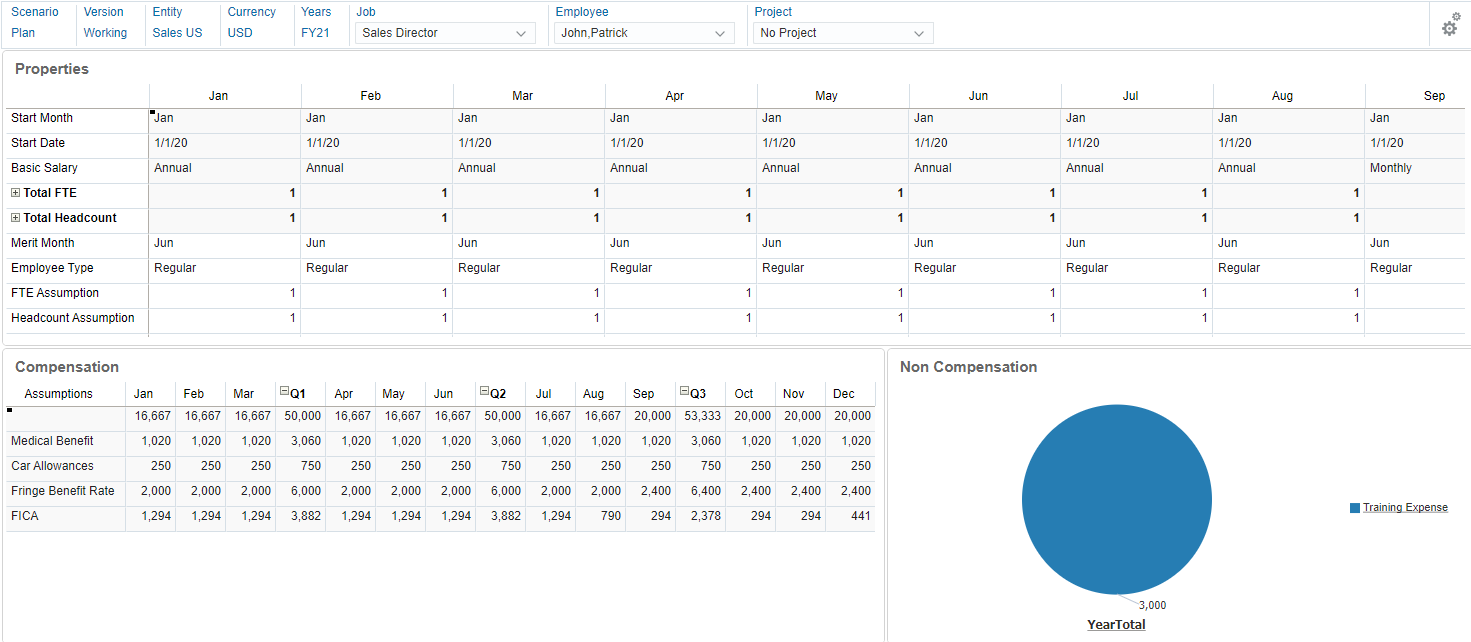
At the bottom-left, review the Compensation form.

The first row displays Salary value. Notice that starting September, salary for Patrick John is now $20,000 monthly.
Learn More
Disabling Salary Defaults
F45411-03
April 2022
Copyright © 2022, Oracle and/or its affiliates.
This 45-minute tutorial shows you how to modify out-of-the-box templates in order to disable Salary Defaults. You first create a new Salary Option Smart List, and then modify Groovy Templates used in Workforce--Add Requisition, Change Requisition, and Change Existing Details--to use the salary options specified in the smart list: Salary Grade, and Salary Basis & Rate.
This software and related documentation are provided under a license agreement containing restrictions on use and disclosure and are protected by intellectual property laws. Except as expressly permitted in your license agreement or allowed by law, you may not use, copy, reproduce, translate, broadcast, modify, license, transmit, distribute, exhibit, perform, publish, or display any part, in any form, or by any means. Reverse engineering, disassembly, or decompilation of this software, unless required by law for interoperability, is prohibited.
If this is software or related documentation that is delivered to the U.S. Government or anyone licensing it on behalf of the U.S. Government, then the following notice is applicable:
U.S. GOVERNMENT END USERS: Oracle programs (including any operating system, integrated software, any programs embedded, installed or activated on delivered hardware, and modifications of such programs) and Oracle computer documentation or other Oracle data delivered to or accessed by U.S. Government end users are "commercial computer software" or "commercial computer software documentation" pursuant to the applicable Federal Acquisition Regulation and agency-specific supplemental regulations. As such, the use, reproduction, duplication, release, display, disclosure, modification, preparation of derivative works, and/or adaptation of i) Oracle programs (including any operating system, integrated software, any programs embedded, installed or activated on delivered hardware, and modifications of such programs), ii) Oracle computer documentation and/or iii) other Oracle data, is subject to the rights and limitations specified in the license contained in the applicable contract. The terms governing the U.S. Government's use of Oracle cloud services are defined by the applicable contract for such services. No other rights are granted to the U.S. Government.
This software or hardware is developed for general use in a variety of information management applications. It is not developed or intended for use in any inherently dangerous applications, including applications that may create a risk of personal injury. If you use this software or hardware in dangerous applications, then you shall be responsible to take all appropriate fail-safe, backup, redundancy, and other measures to ensure its safe use. Oracle Corporation and its affiliates disclaim any liability for any damages caused by use of this software or hardware in dangerous applications.
Oracle and Java are registered trademarks of Oracle and/or its affiliates. Other names may be trademarks of their respective owners.
Intel and Intel Inside are trademarks or registered trademarks of Intel Corporation. All SPARC trademarks are used under license and are trademarks or registered trademarks of SPARC International, Inc. AMD, Epyc, and the AMD logo are trademarks or registered trademarks of Advanced Micro Devices. UNIX is a registered trademark of The Open Group.
This software or hardware and documentation may provide access to or information about content, products, and services from third parties. Oracle Corporation and its affiliates are not responsible for and expressly disclaim all warranties of any kind with respect to third-party content, products, and services unless otherwise set forth in an applicable agreement between you and Oracle. Oracle Corporation and its affiliates will not be responsible for any loss, costs, or damages incurred due to your access to or use of third-party content, products, or services, except as set forth in an applicable agreement between you and Oracle.