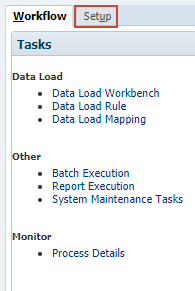
JavaScript must be enabled to correctly display this content
Introduction
This tutorial shows you how to set up and configure Data Integration to load and calculate incremental Workforce data. The sections build on each other and should be completed sequentially.
Background
If after loading an entire data set into Workforce you need to import new records and update some existing records, you’ll need to run calculations on the new and updated records. For example, your organization requires daily loads for updated existing employee data from your Human Resources system due to frequent changes in the planning cycle.
With Workforce, Data Integration, and Groovy Rules, you can set up a data load process that:
Compares a source data file with a previous version of that file.
Identifies new or changed records.
Loads only records that are new or have changed since the last load.
Runs the Workforce rule that calculates the new and updated data.
Whenever you load data from Data Integration, to copy data to future periods, you must select one of these Workforce rules:
Your Objective
Add this Workforce Rule
Apply entity defaults for additional earnings, benefits and taxes and calculate compensation based on the component definition and rates that are set in the Benefits and Taxes Wizard.
Copy changed data (employee/job properties or any change in salary) to future periods in the Year Range.
OWP_Incremental Process Data with Synchronize Defaults
Load compensation assignments for additional earnings, benefits, and taxes and calculate compensation based on the rates in the data load file.
Copy changed data (employee/job properties or any change in salary or compensation assignments) to future periods in the Year Range.
OWP_Incremental Process Data with Synchronize Definition
Note:
If you want to apply the rates from the Benefits and Taxes Wizard, then load only component assignments. Don't provide rates in the data load file.
In this tutorial, you load Workforce data using the Incremental File Adapter in Data Integration.
Prerequisites
Cloud EPM Hands-on Tutorials may require you to import a snapshot into your Cloud EPM Enterprise Service instance. Before you can import a tutorial snapshot, you must request another Cloud EPM Enterprise Service instance or remove your current application and business process. The tutorial snapshot will not import over your existing application or business process, nor will it automatically replace or restore the application or business process you are currently working with.
Before starting this tutorial, you must:
Have Service Administrator access to an EPM Enterprise Cloud Service instance. The instance should not have a business process created.
If you haven't already, register for a free Oracle Cloud Customer Connect account so you can access the required files.
Download the latest EPBCS Sample Application LCM snapshot from this idea page.
Upload and import the latest EPBCS Sample Application LCM snapshot into your Planning instance.
Have access to a text editor such as Notepad or Notepad++.
Note:
If you run into migration errors importing the snapshot, re-run the migration excluding the HSS-Shared Services component, as well as the Security and User Preferences artifacts in the Core component. For more information on uploading and importing snapshots, refer to the Administering Migration for Oracle Enterprise Performance Management Cloud documentation.
Setting up the Foundation
Assigning Values to User Variables
User Variables were added when the business process was created. User variables act as filters in forms, enabling planners to focus only on certain members. In this section, you set values for user variables.
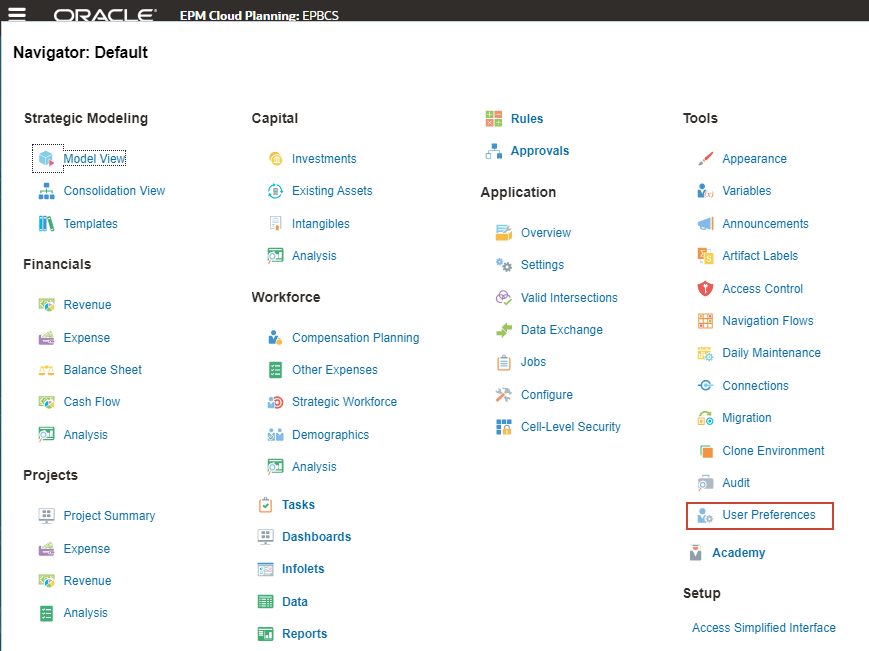
On the home page, click (Navigator), and under Tools, click User Preferences.
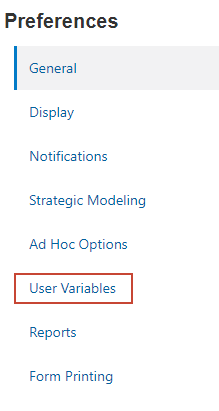
Under Preferences, click User Variables.
For each variable, click its (Member Selector) to select a member as the variable's value:
User Variable
Member
Product Line
Smart Phone 4 in
Infolet Entity
Sales US
Currency
USD
Entity
Sales US
Reporting Currency
USD
Scenario
Plan
Version
Working
Years
FY25
Expense Account
Total Travel and Entertainment Expense
Expense Drivers
Travel and Entertainment Expense Drivers
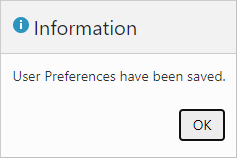
Verify your selections and click Save.
At the information message, click OK.
Minimize Planning.
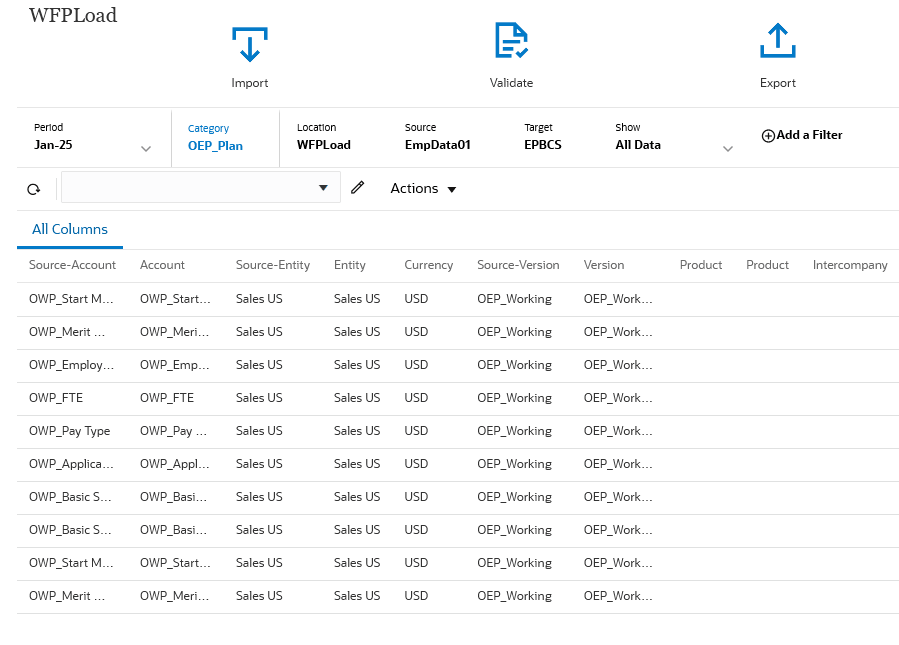
Reviewing the Data Source Files
Review contents of the EmpData01.txt and EmpData02.txt source files using your text editor.
EmpData01.txt
The data source file contains 168 records, which represents eight (8) rows per employee. 21 employee records will be loaded into Workforce.
The data source file contains records for a new employee (E0022 - Dennis Ross) and updated records for two (2) previously loaded employees (E0021 - Anthony Cooper and E0015 - Michelle Ryan).
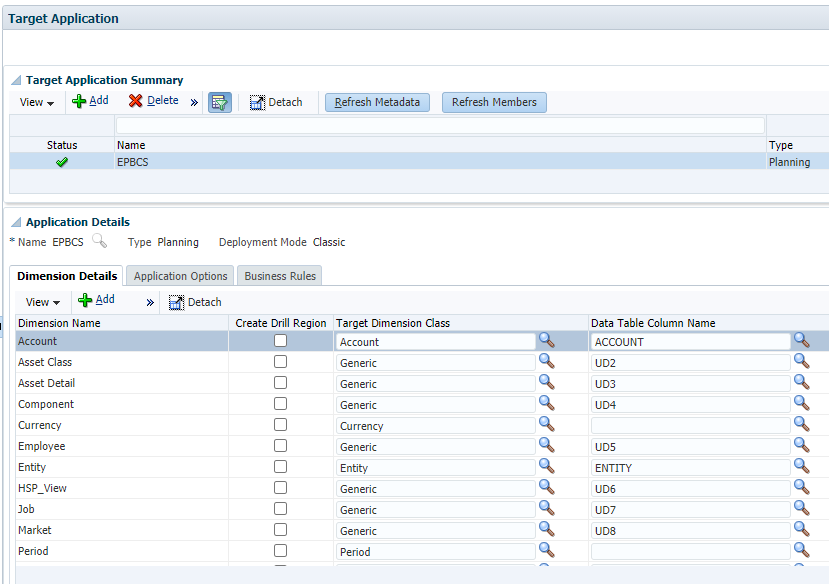
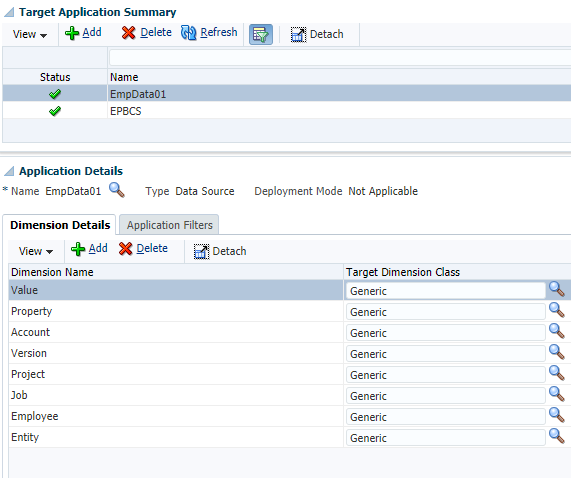
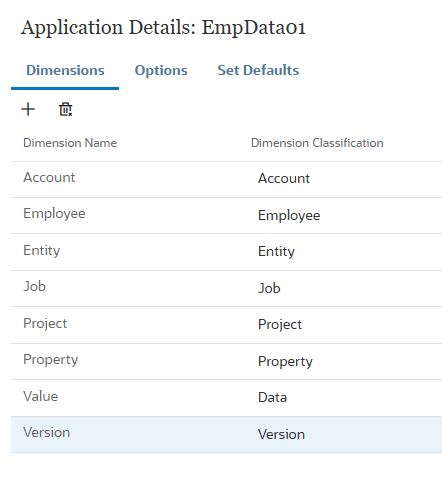
The EmpData01 target application is listed with details.
Select EmpData01, and verify that you are on Dimensions tab.
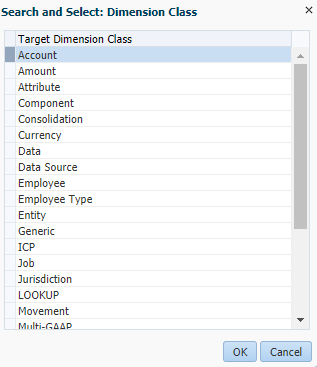
For Dimension Classification of the Account dimension, from the list of Target Dimension Classes, select Account.
Repeat the step for the rest of the dimensions based on the following:
Dimension Name
Dimension Classification
Employee
Employee
Entity
Entity
Job
Job
Project
Project
Property
Property
Value
Data
Version
Version
Verify your selections:
In Application Details, click .
Click (Return).
Click X (Close).
Mapping Periods
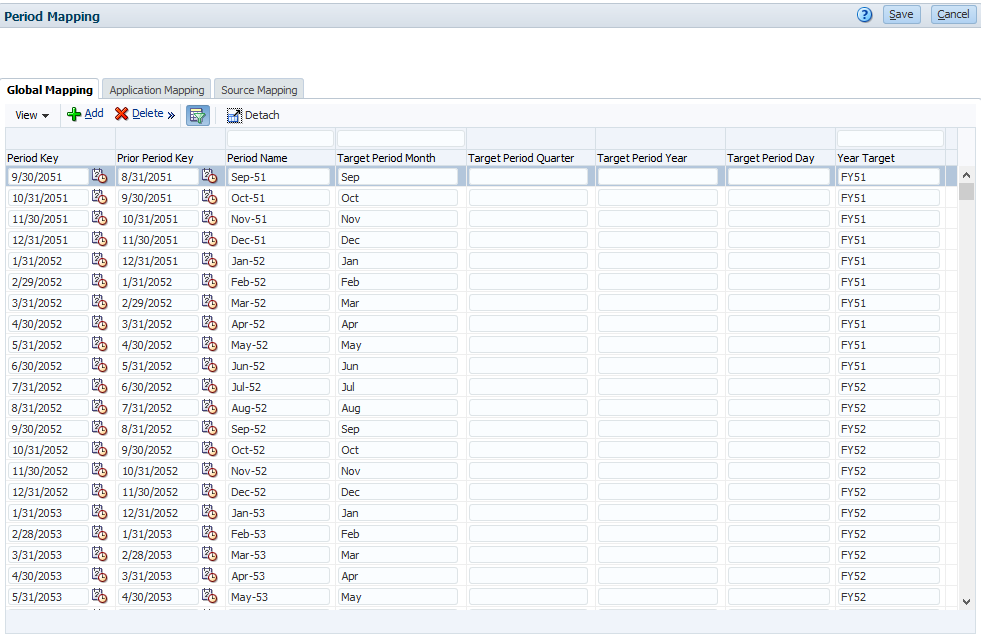
You create period mappings between source and target calendars (In Data Integration, from the Actions menu click Period Mapping).
You can define period mappings using:
Global Mapping: You define a global mapping in cases where you do not have target applications getting data from source systems with different types of source calendars. Use a global mapping to ensure that various periods are accommodated in the individual mapping.
Application Mapping: You define application mappings if you have integrations between source and target applications with complex period types.
Source Mapping: You define source mappings for adapter-based integrations with different types of calendars between the source and target.
Mapping Categories
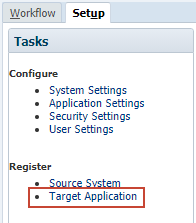
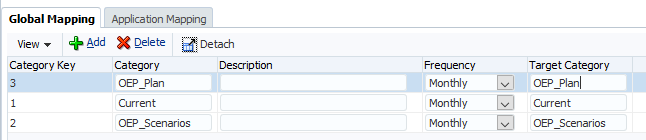
In Data Integration, from the Actions menu click Category Mapping.
Category mappings map Scenarios between the source and target system.
Verify OEP_Plan in both Category and Target Category.
Click X (Close)
Creating Incremental File Integrations
Defining Integrations
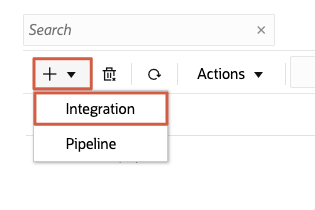
In Data Integration, click + (Create), then select Integration.
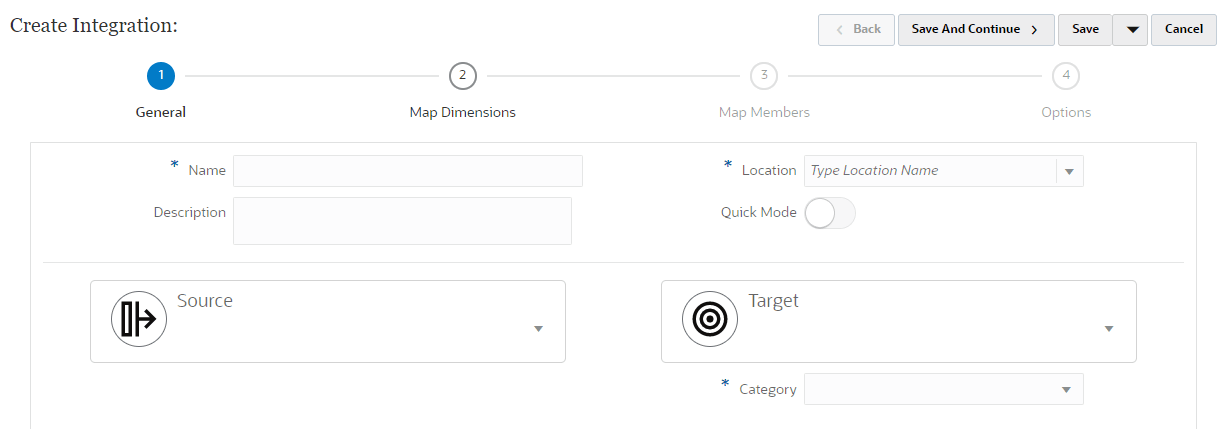
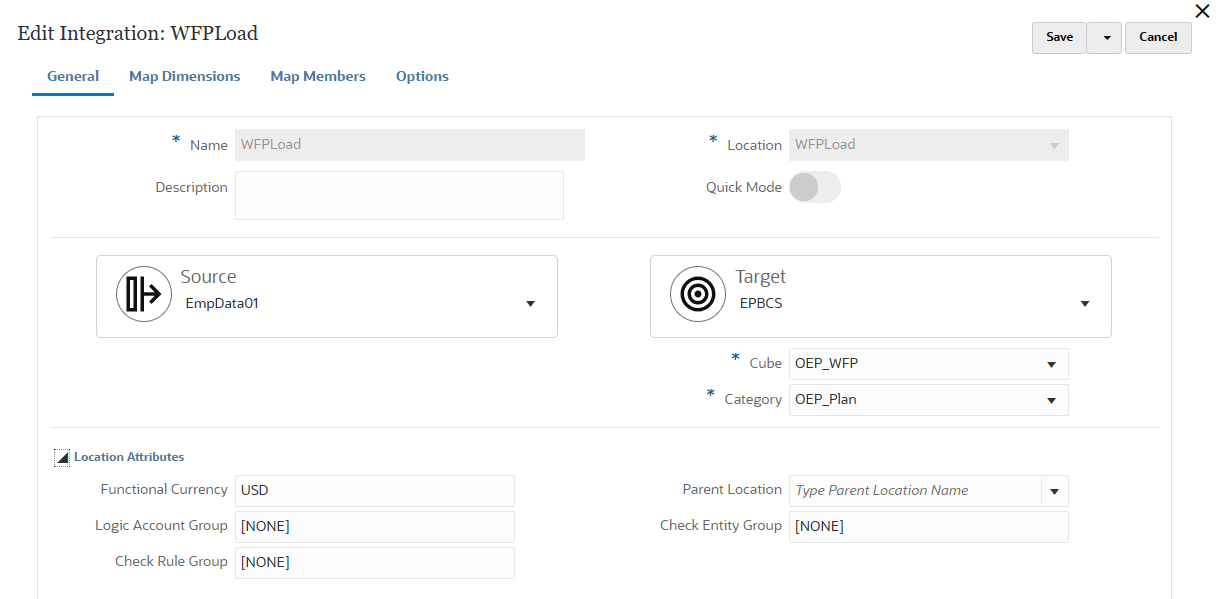
The integration workflow is opened with the General page displayed. Navigate between tasks by clicking a task on the workflow bar, or the buttons on the top right.
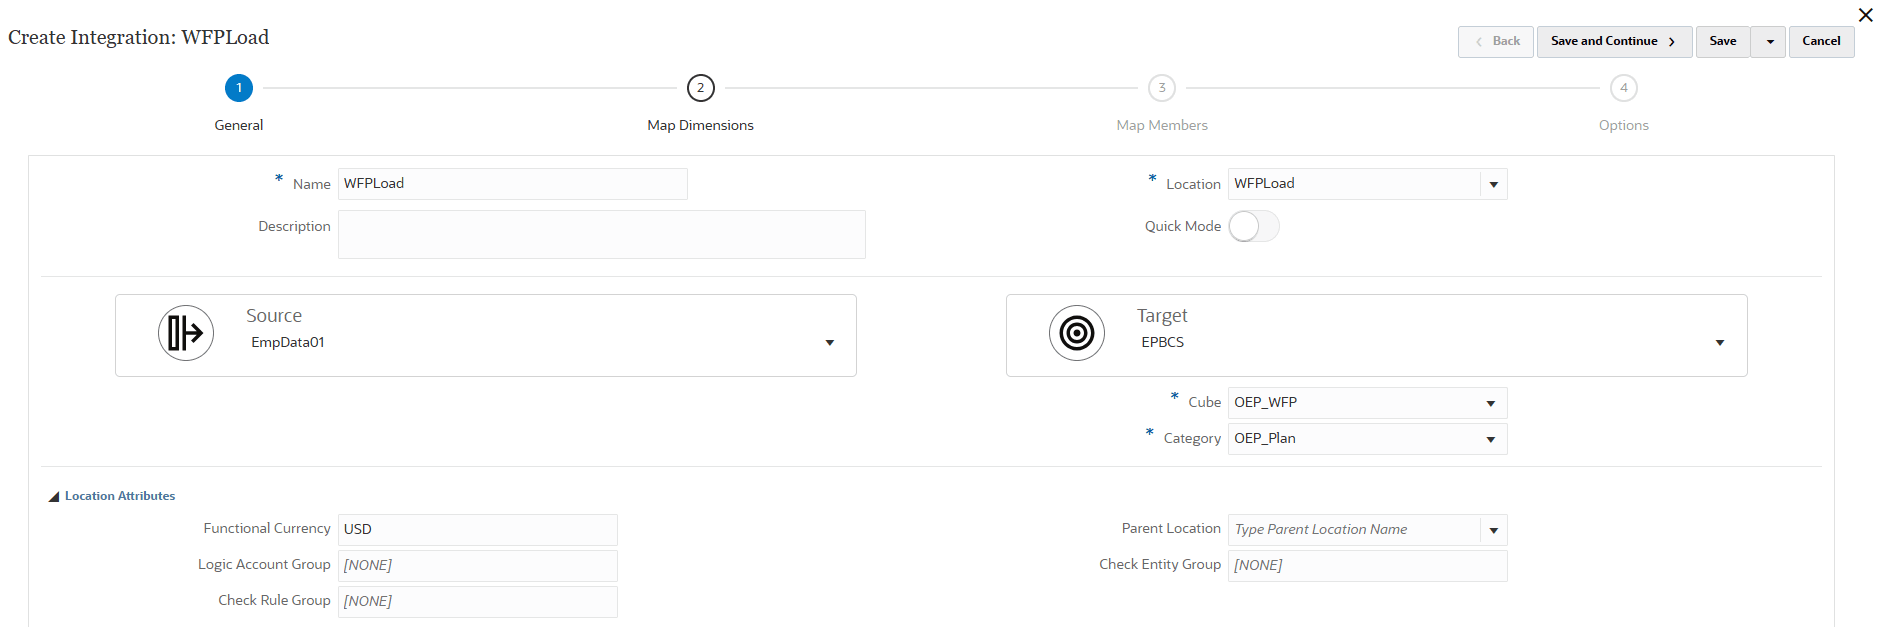
For Name, enter WFPLoad.
Tip:
Descriptions are optional.
For Location, enter WFPLoad.
Tip:
If you have locations previously defined for another integration, you can select them here. If you select an existing location for your integration, the target application is preselected for you. If you enter a new location, make sure to select a source and target application.
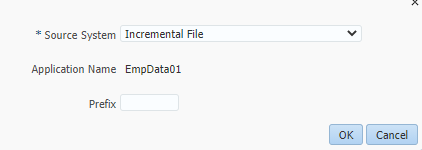
For Source, click the down arrow and select EmpData01.
For Target, click the down arrow and select EPBCS.
For Cube, select OEP_WFP.
For Category, select OEP_Plan.
Expand Location Attributes.
For Functional Currency, enter USD.
Review your selections.
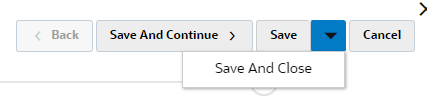
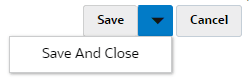
On the top-right, click the arrow next to Save and select Save And Close.
When saved, the integration is listed in Data Integration. The status icon on the left identifies it as a new integration that has not been executed.
Modifying Integrations
In Data Integration, click WFPLoad.
In Edit Integration: WFPLoad, review your previous integration selections on the General page.
Click X (Close)
Mapping Dimensions and Members
Mapping Source and Target Dimensions
In this section, you map the source dimensions to the target dimensions in the application.
In Data Integration, click WFPLoad.
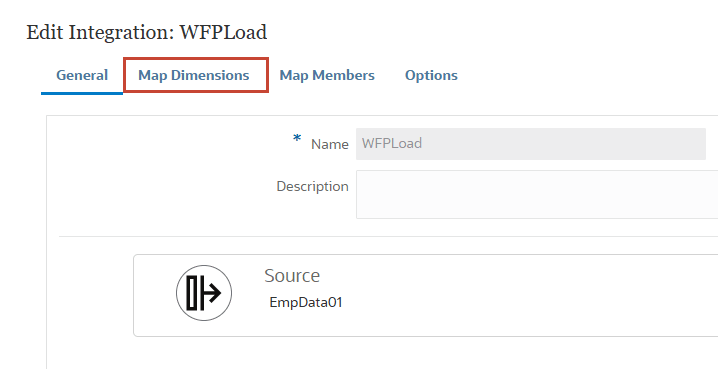
In Edit Integration: WFPLoad, click Map Dimensions.
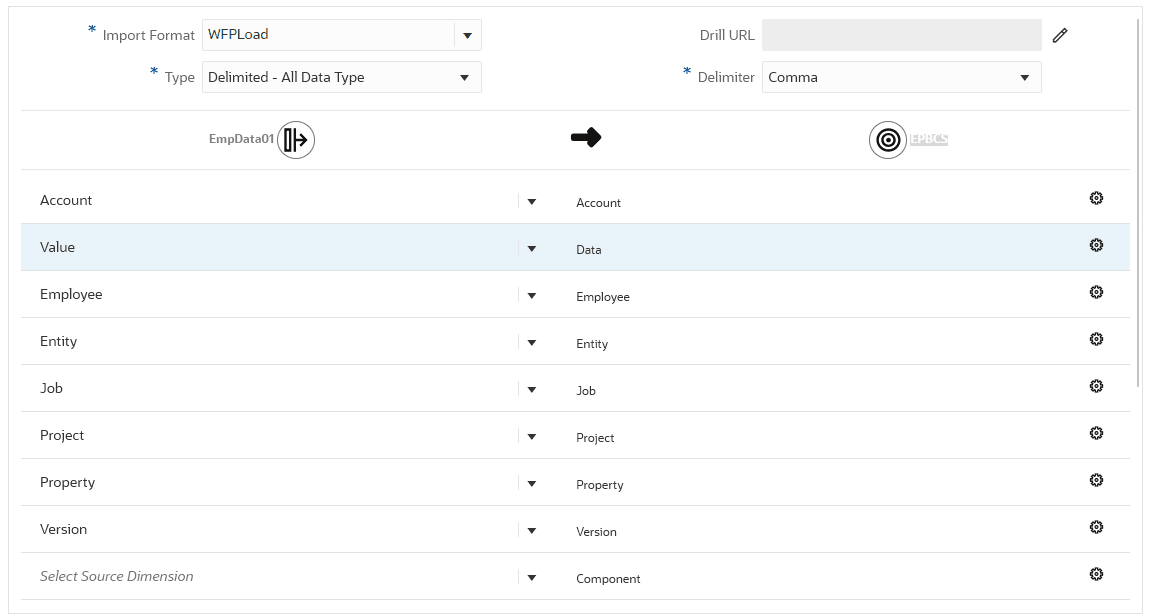
In Map Dimensions, set or verify the following:
Import Format: WFPLoad
Type: Delimited - All Data Type
Delimiter: Comma
For each source dimension, click the down arrow and select a dimension to map to the target selection. Map:
EmpData01
EPBCS
Account
Account
Value
Data
Employee
Employee
Entity
Entity
Job
Job
Project
Project
Property
Property
Version
Version
Tip:
If your previous mappings were removed or have changed, make sure to map the Value dimension based on the image.
Verify your selections and click Save.
Notice that the Amount dimension in the target has updated to Data.
Mapping Source and Target Members
Mapping members allows you to translate source values to valid members in each target dimension.
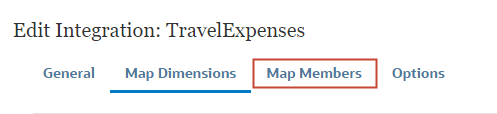
In Edit Integration: WFPLoad, click Map Members.
In Map Members, display the list of dimensions. Click the down arrow next to Dimension.
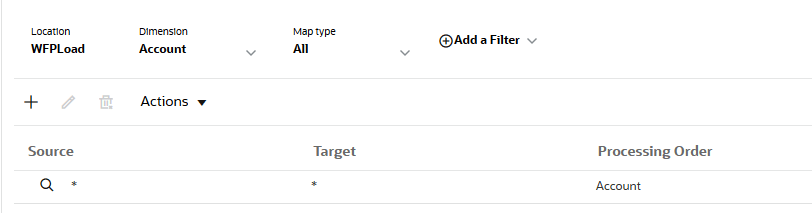
For Dimension, select Account.
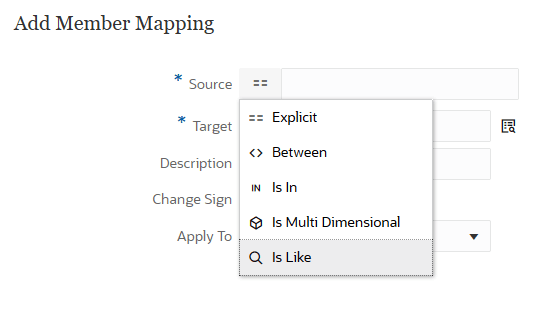
Click + (Add).
In Add Member Mapping, click the icon next to Source and select Is Like.
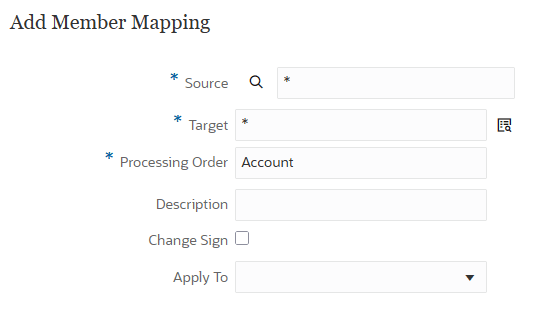
For each dimension listed below, click the down arrow next to Dimension, and create mappings:
Dimension
Source Type
Source Value
Target
Processing Order
Account
Is Like
*
*
Account
Data
Is Like
*
*
Data
Employee
Is Like
*
*
Employee
Entity
Is Like
*
*
Entity
Job
Is Like
*
*
Job
Project
Is Like
*
*
Project
Property
Is Like
*
*
Property
Version
Is Like
*
*
Version
Click Save.
Setting Integration Options
Use Options to specify and verify file options, explicit period formats, category, cube, filters for importing data, and options on how to process the data when loading to the target application.
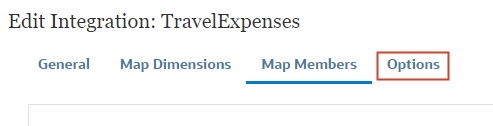
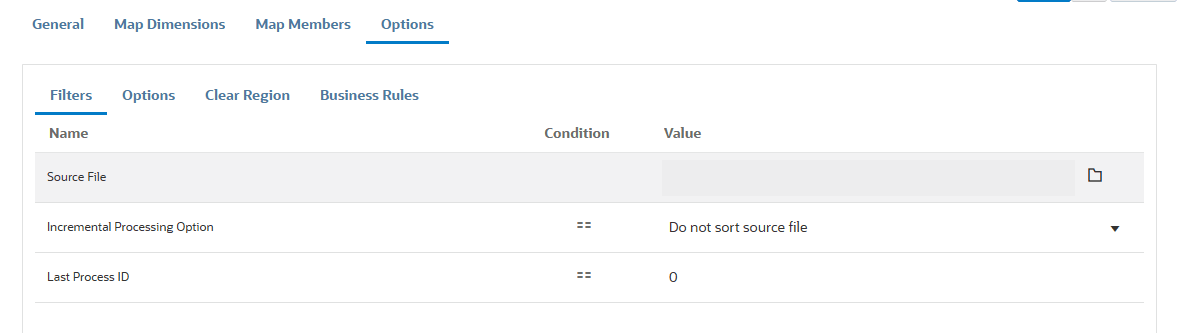
In Edit Integration: WFPLoad, click Options.
In Filters, review and verify selections.
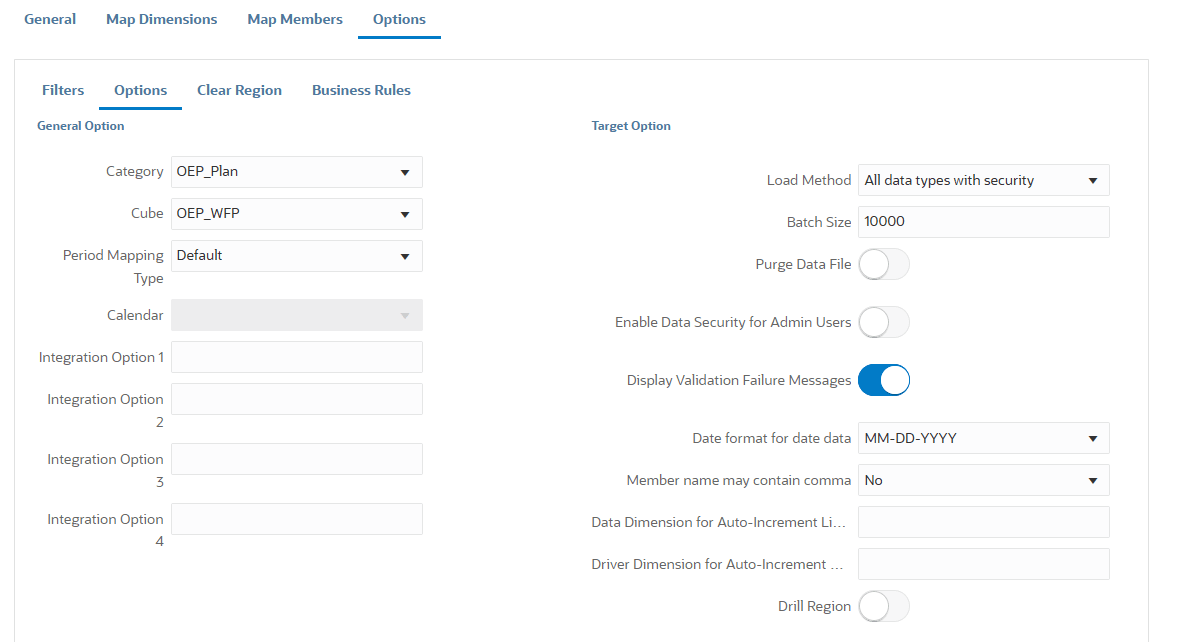
Click Options.
In Options, review and verify selections.
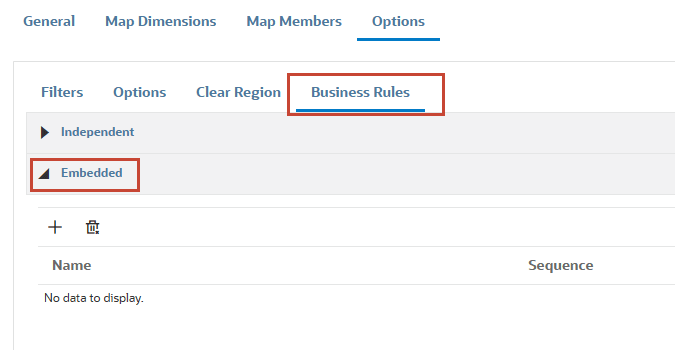
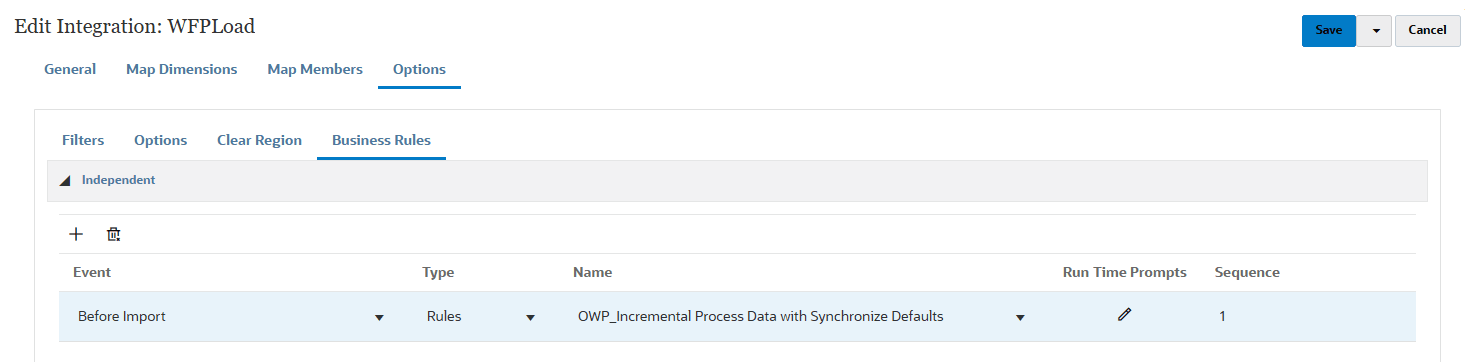
Click Business Rules.
In Business Rules, expand Embedded.
Click + (Add).
In the new row, for Name, enter OWP_Incremental Process Data with Synchronize Defaults.
Caution:
You can copy and paste the rule name listed in this step. The data load will fail if the business rule name is entered incorrectly.
For Sequence, enter 1.
Click the down arrow next to Save and select Save And Close.
Running and Verifying the Data Load
In this section, you run and verify the data load.
Reviewing the Data Point-of-View
Before running the data load, review the data point-of-view, including the list of existing employees.
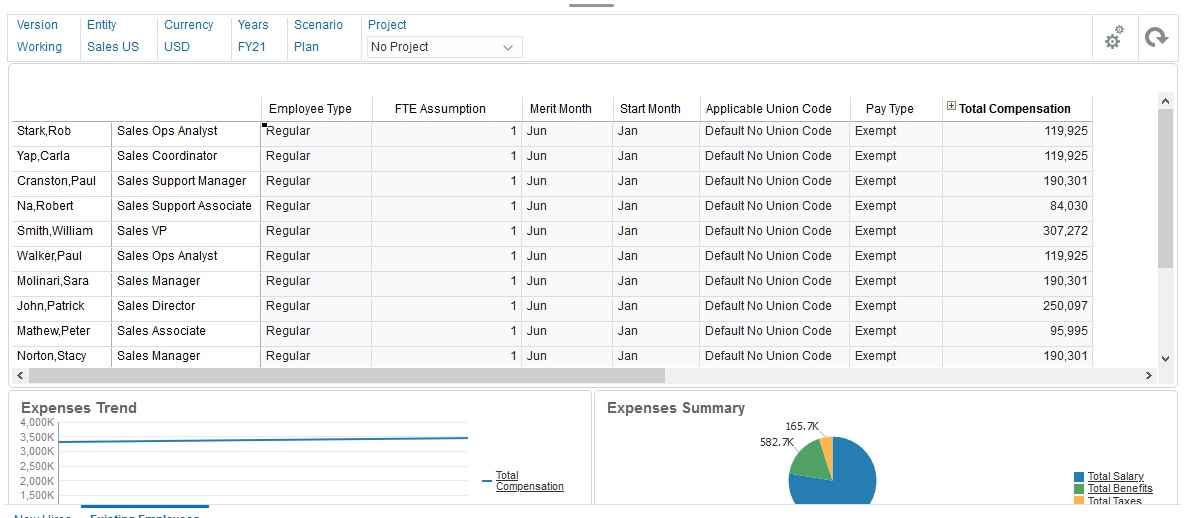
Click (Navigator), and under Workforce, click Compensation Planning.
From the vertical tabs on the left, click (Manage Employees).
Click the Existing Employees horizontal tab at the bottom.
Verify or set the POV to the following values:
Dimension
Member
Scenario
Plan
Version
Working
Entity
Sales US
Currency
USD
Years
FY25
Project
No Project
Review the data on the form.
Notice that there are only sixteen (16) employees on the form. We will be loading more employees from the data source files.
Running the Incremental File Integration
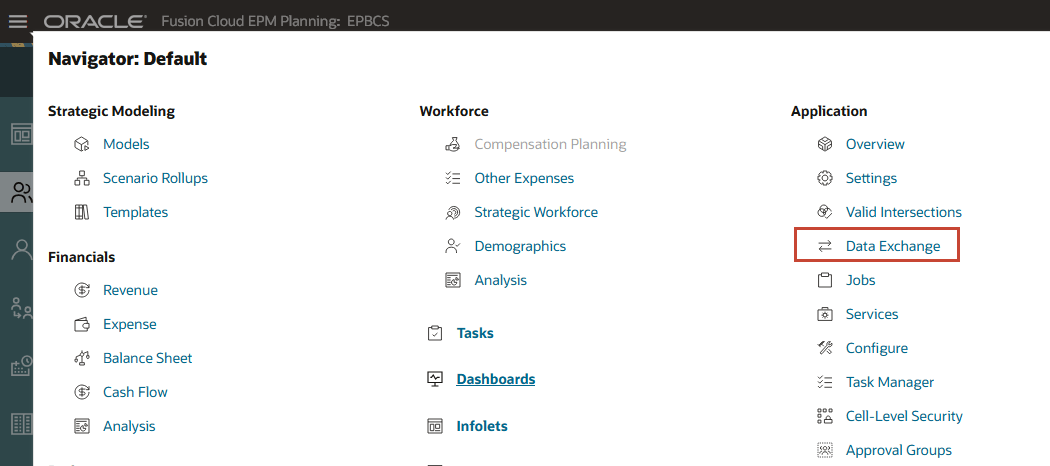
Click (Navigator), then under Application, click Data Exchange.
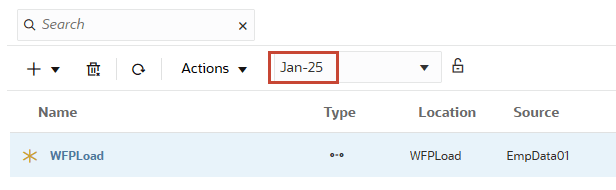
In Data Integration, change the POV Period to Jan-25.
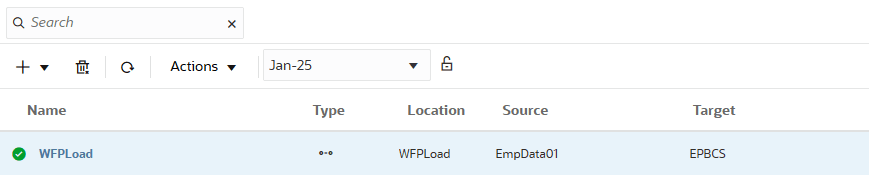
In Data Integration, for WFPLoad, click (Run).
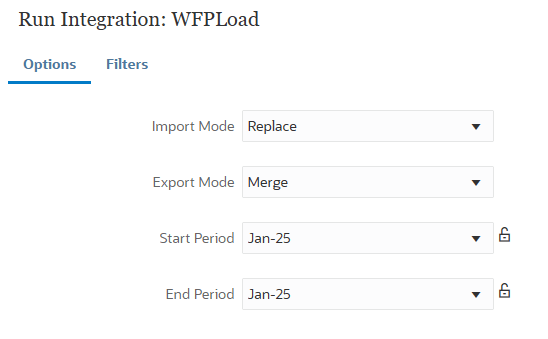
In Run Integration: WFPLoad, for Options, set or verify:
Import Mode: Replace
Setting the import mode to Replace clears all the data for the data point-of-view in the Workbench.
Export Mode: Merge
Setting the export mode to Merge overwrites existing data with the data in the load file. If data does not exist, it loads the new data.
Start Period: Jan-25
The End Period is typically updated to match the Start Period.
End Period: Jan-25
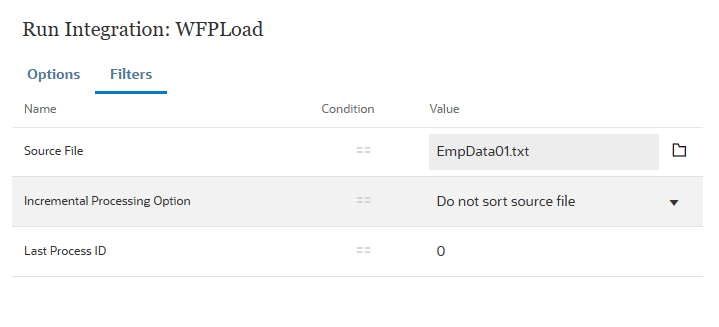
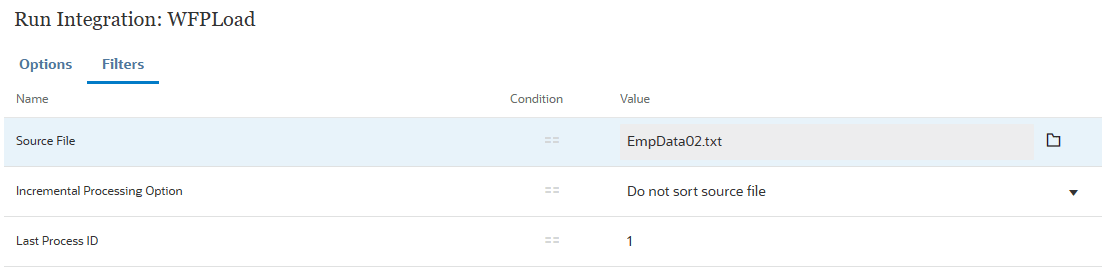
Click Filters.
In Filters, set or verify:
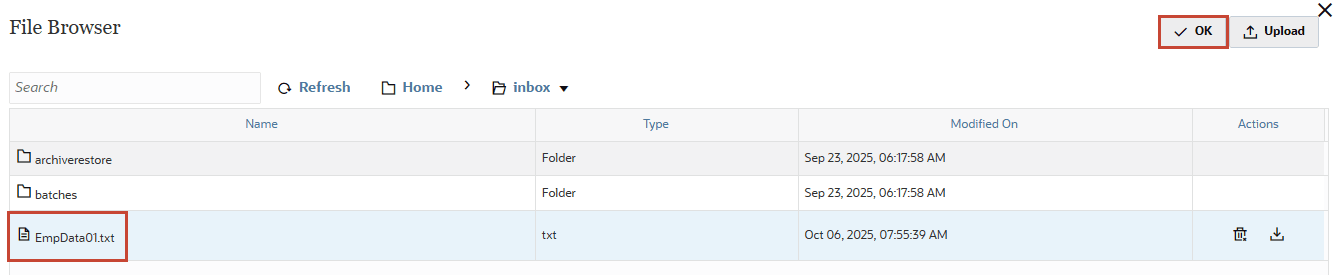
Source File: EmpData01.txt
Tip:
EmpData01.txt was uploaded to the inbox folder.
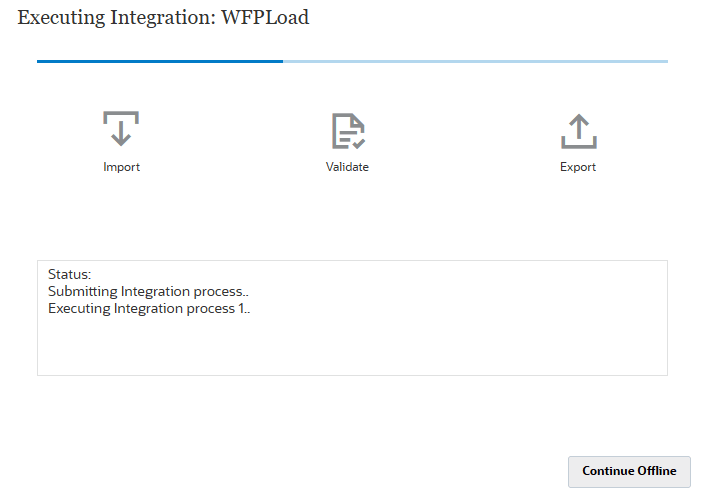
Verify your selections and click Run.
The integration execution status message is displayed.
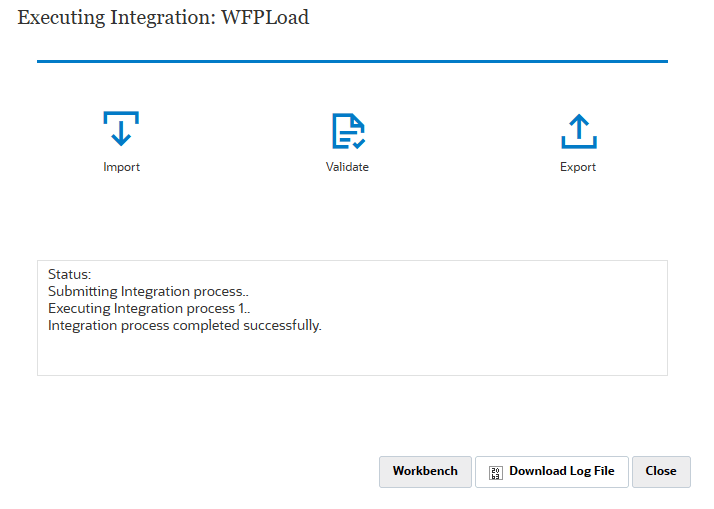
When completed, the Import, Validate, and Export icons change in color. The Status section states that the Integration process completed successfully.
Viewing Results in the Workbench
In Executing Integration: WFPLoad, click Workbench.
In the Workbench, review the imported data.
Tip:
Check the POV. If the POV in Workbench does not match for your data load, you may not see the results inspite of the successful load.
On the top right, click X (Close).
In Data Integration, notice that the icon next to WFPLoad has changed to a green checkmark, indicating that the integration completed successfully.
Verifying the Data Load on the Existing Employees Form
Click (Navigator), and under Workforce, click Compensation Planning.
From the vertical tabs on the left, click (Manage Employees).
Click the Existing Employees horizontal tab at the bottom.
Verify or set the POV to the following values:
Dimension
Member
Scenario
Plan
Version
Working
Entity
Sales US
Currency
USD
Years
FY25
Project
No Project
Review the data on the form.
There are now 33 existing employees displayed on the form. We had only 16 initial employees.
Running the Data Load using a Second Source File
In this section, you load updated and new employee data using a second source file.
Upload EmpData02.txt file to inbox before you can select it.
Verify your selections and click Run.
The integration execution status message is displayed.
When completed, the Import, Validate, and Export icons change in color. The Status section states that the Integration process completed successfully.
Viewing Results in the Workbench
In Executing Integration: WFPLoad, click Workbench.
In the Workbench, review the imported data.
Tip:
Check the POV. If the POV in Workbench does not match for your data load, you may not see the results inspite of the successful load.
On the top right, click X (Close).
In Data Integration, notice that the icon next to WFPLoad has a green checkmark, indicating that the integration completed successfully.
Verifying the Second Data Load on the Existing Employees Form
Click (Navigator), and under Workforce, click Compensation Planning.
From the vertical tabs on the left, click (Manage Employees).
Click the Existing Employees horizontal tab at the bottom.
Verify or set the POV to the following values:
Dimension
Member
Scenario
Plan
Version
Working
Entity
Sales US
Currency
USD
Years
FY25
Project
No Project
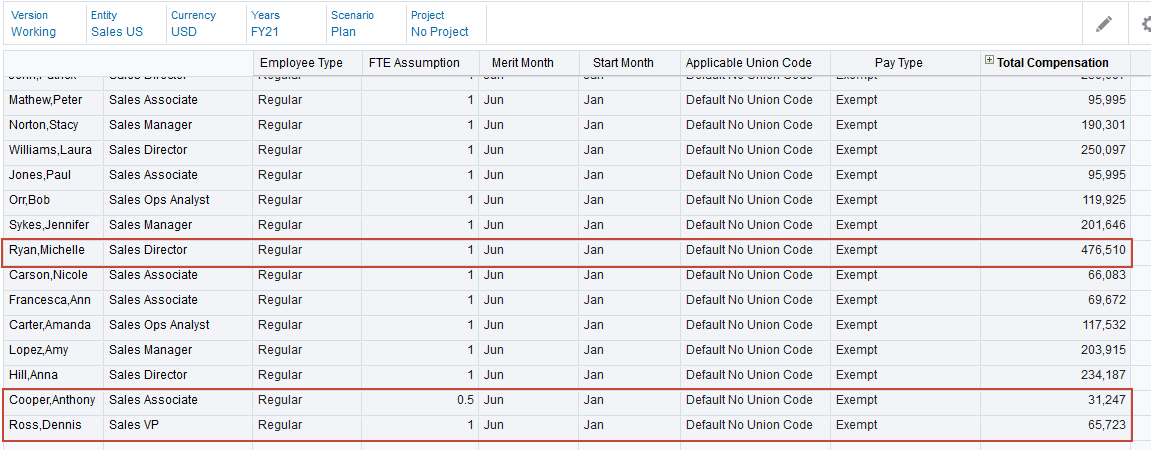
Review the data on the form:
New employee data for Dennis Ross was loaded
Anthony Cooper's FTE value changed from 1.0 to 0.5
Michelle Ryan's salary rate changed from $198,000 to $398,000
Tip:
Expand Total Compensation to see change in salary rate.
There are now 34 existing employees displayed on the form.
Reviewing Job Details
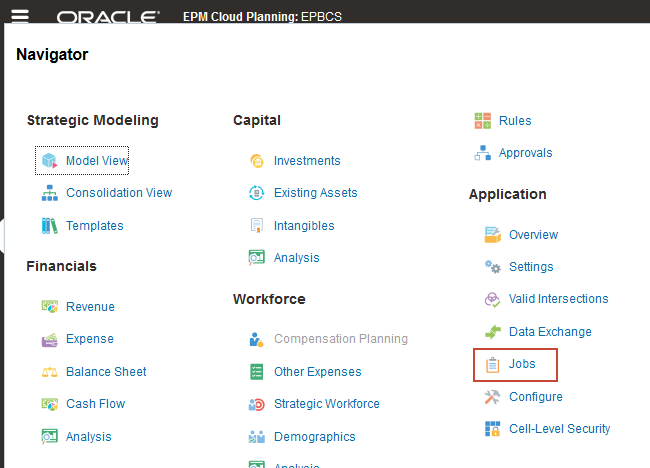
Click (Navigator), and under Application, click Jobs.
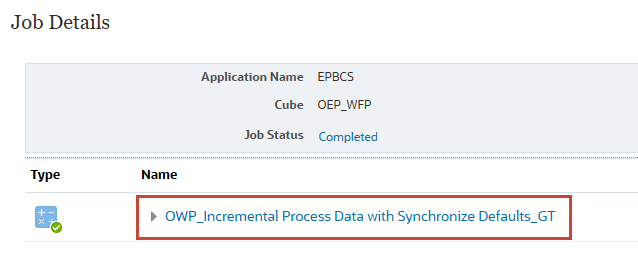
In Jobs, under Recent Activity, locate the last two Incremental Process Data with Synchronize Defaults jobs.
Click the most recent job to display Job Details.
In Job Details, click OWP_Incremental Process Data with Synchronize Defaults_GT.
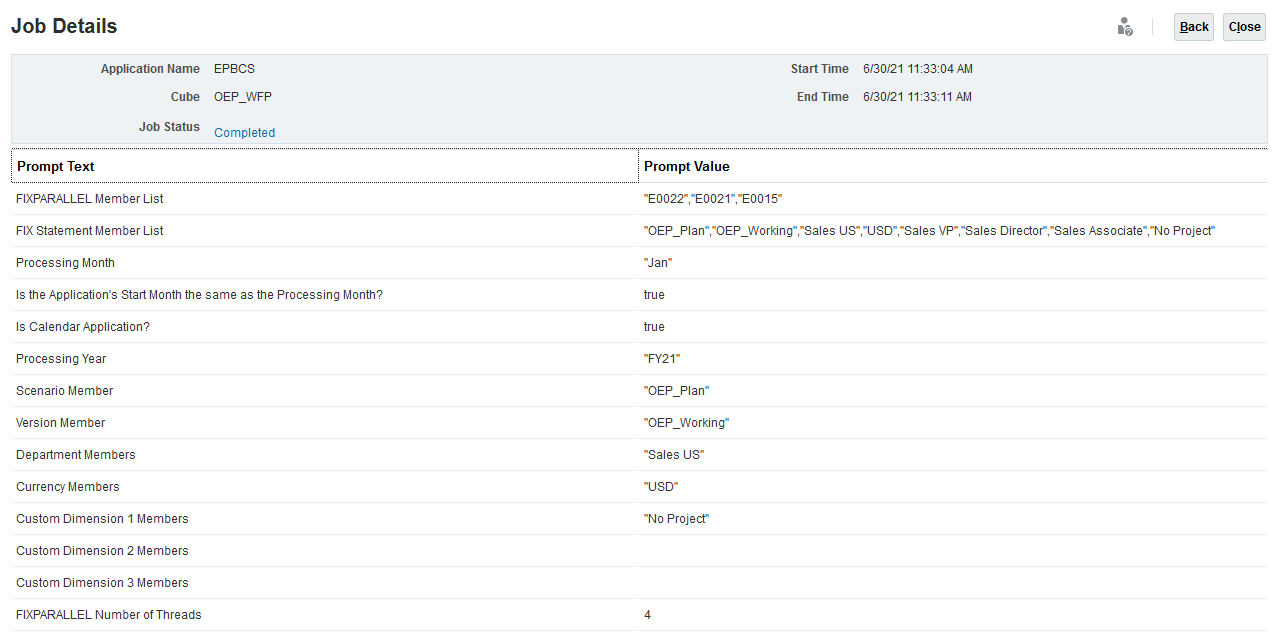
Notice the Start Time and End Time. It took a few seconds to complete the process.
When the Workforce rule executed, it dynamically generated FIX statements and ran them as separate processes to leverage parallelization. This type of optimized processing helps execute calculations and processes much faster than executing processes in serial.
Click Close.
Optionally, review the job details for the first incremental load.
 (Navigator), and under Tools, click User Preferences.
 (Member Selector) to select a member as the variable's value:


 .
.  (Return).
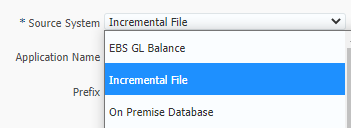


 (Manage Employees).
 (Run).